

Sourdough Starter Not Rising? 9 Ways to Strengthen Starter
Last Updated on December 22, 2024
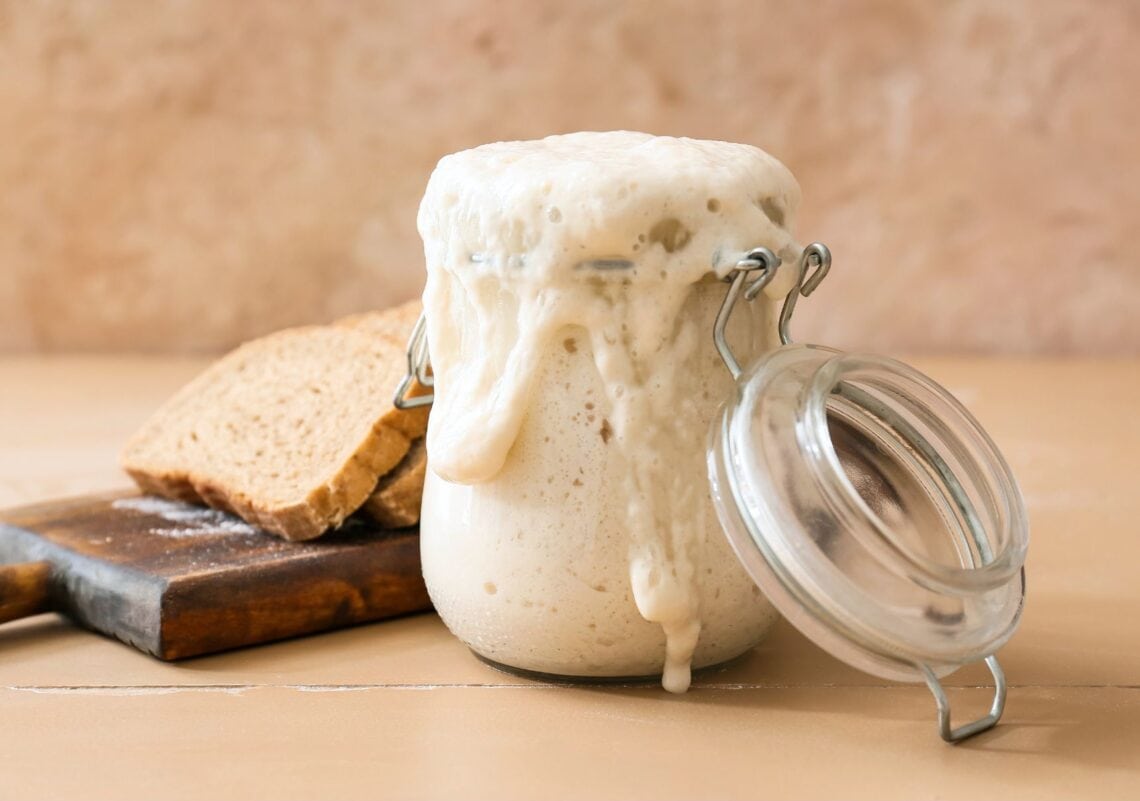
Is your sourdough starter not rising well? Let’s fix that! Come learn how to make sourdough starter more active. From the best flour type to feeding schedules, this article explores nine ways to build a stronger sourdough starter – one that rises faster and taller than before. I’ve been baking sourdough for nearly a decade, and these tips can help strengthen a sourdough starter that won’t rise, or one that simply isn’t as bubbly as you’d hope.
If you’re working with a severely neglected sourdough starter, one that hasn’t been fed in many months or longer, please also refer to this guide: Is My Starter Bad? How to Revive an Old Inactive Starter. The revival process is slightly different from strengthening a maintained starter.
Starter Rise vs. Leavening Power
It’s important to note that starter rise does NOT always directly correlate to bread rise. Meaning, just because a starter isn’t overflowing from its jar, doesn’t mean it lacks leavening power in the dough! Of course, a healthy active starter should rise some, but a taller starter doesn’t always mean a stronger culture or better loaf of bread.
Also, a sourdough starter that rises slowly isn’t necessarily bad either. Sure, it can be frustrating to wait forever when you’re trying to bake… but a starter that is slow to rise usually stays at peak activity for a longer time too. This gives you a longer window to use it, and added flexibility in your baking schedule.

Would you like to save this?
Disclosure: Homestead and Chill is reader-supported. When you purchase through links on our site, we may earn an affiliate commission.
Understanding the Science: Why Does Sourdough Starter Rise and Fall?
Before we dive into how to make sourdough starter more active and bubbly, it’s important to understand WHY it rises first. Then you’ll have a better idea of how to manipulate the factors that influence sourdough starter strength and activity!
A sourdough starter is made up of flour, wild yeasts, and beneficial bacteria. When those yeasts and bacteria are dormant (such as while it’s stored in the refrigerator, or when a starter hasn’t been fed in a while) the starter is said to be “inactive”. It’s likely still alive, but not rising or bubbling at this time.
To make an inactive starter rise, it must be fed fresh flour and water. The flour provides new “food” for the yeast and bacteria to consume, which increases their activity and population. Carbon dioxide is produced in this fermentation process, making the sourdough starter bubble and rise – reaching peak activity. Once the colony of yeast and bacteria run out of available food, their activity decreases and the starter deflates or falls back down once again.
Typically, it’s best to “discard” a portion of the inactive starter before feeding it – both to make more room in the jar for the rise, and to get the desired ratio of starter-to-flour and water.
RELATED: How to Feed, Store, and Maintain Sourdough Starter.

How to Strengthen Sourdough Starter
There are a number of reasons that your sourdough starter may not be rising well – including temperature, feeding schedule, the type of flour and water used, hydration ratio, and more. Let’s discuss!
1) Keep Starter Warm
Sourdough starter is most active and happy when it’s about 75 to 85 degrees Fahrenheit after feeding. If you aren’t sure how warm your starter is, use a simple stick-on thermometer to easily monitor the temperature.
Colder temperatures will result in a slower, sluggish ferment for both sourdough starter and dough. This can make baking a challenge during the cool winter months. Warm conditions make starter rise faster, taller, and be more flavorful. However, a warm starter also stays in peak activity for less time (starts to deflate more quickly) so be ready to use it!
How to keep sourdough starter warm:
- Find a warm spot in your house, such as next to or on top of a warm appliance. For example, our kitchen has under-cabinet lights that put off heat when they’re on, making the cabinets above quite warm and cozy.
- Use a starter heating pad. Consider using a specialized heating pad to keep your sourdough starter warm, such as this wrap-around heat mat (thermometer included). It has precise temperature controls to keep the starter at the ideal temperature. My gardener friends use seedling heat mats too – just be sure it doesn’t get TOO hot! You may need to keep a towel or plate between the heat mat and starter jar.
- Oven light trick. Most oven light bulbs emit warmth, so turning on the oven light (but keeping the oven itself OFF) can create a nice warm spot in the back of the oven for your starter or proofing dough. However, I’ve heard horror stories when folks accidentally pre-heat or bake their starter! So if you try this, be sure to create some sort of system to remember it’s in there – including for other members of the household.
- Proofing box. If you’re a regular baker with a chronically cool home, it may be worth investing in a proofing box – which can keep both your sourdough starter warm and your proofing bread dough at the perfect temperature!
- Use warm water. One easy way to quickly warm up your sourdough starter and get it moving in the right direction is to use warm water (not hot) when you feed it.
- Let it warm up before feeding. If you store your sourdough starter in the fridge, it’s best to let it warm to room temperature before feeding if your schedule allows. We usually take ours out of the fridge in the evening, let it sit out overnight, then feed it the following morning.

2) Feed Starter with Different Flour
If your sourdough starter is not rising well, try feeding it with different flour. Various types of flours make sourdough starter more or less active depending on their nutritional value.
For instance, bread flour contains more gluten protein (12-14%) compared to unbleached all purpose flour (9-12%), which can help strengthen sourdough starter. The added gluten content in bread flour enables the starter to stretch and rise even taller, and trap more air and gas inside. Rye and whole wheat flour offer even more nutrients, acting like superfood for the bacteria and yeast to help the sourdough starter ferment and rise more vigorously.
It’s important to note that using too much whole wheat or rye could impact the results of your finished sourdough bread. So, you could also experiment using a blend of flours such as half all-purpose and half whole wheat, or ¾ bread flour and ¼ rye flour.

3) Thicken it Up (Lower Hydration)
Making your starter more thick and stiff (using a lower hydration ratio) can make it more strong. A thin, runny sourdough starter may be active but not rise well. In fact, if it’s too watery, it may not rise AT ALL! That’s because it lacks the thickness and structure to hold itself up. The gasses and bubbles will simply travel up through and out of the starter, rather than being trapped inside of it. So, if you see bubbles form after feeding but little-to-no rise, try to add more flour to thicken it up.
- A regular starter is typically kept at 100% hydration, where it is fed using a 1:1:1 ratio, or equal parts starter, flour, and water by weight – such as 100 grams of each.
- To make a stiff starter, use only about half to 60% of the water instead, or a 2:2:1 ratio of starter, flour, and water by weight (e.g. 100 grams starter, 100 grams flour, and 50 or 60 grams water). This is known as a 50% or 60% hydration starter.
- You can also thicken up an already-fed starter by adding more flour, slowly mixing in one tablespoon at a time until it reaches the desired thickness.
- A stiff starter should still be fairly smooth and easy to mix (similar to a wet bread dough) but not runny and pourable like pancake batter.
Note that a stiff starter will sometimes take longer to rise, but will be strong and stay at peak activity longer (up to several hours), leading to more flexibility in your baking schedule. I often like to make a semi-stiff starter, using a 75 to 80% hydration ratio instead. It rises faster than a super-stiff starter, but still stays strong in peak ripeness for a good while.

4) Add Oxygen
Yeast loves oxygen! So adding air to your sourdough starter can make it more active. One easy way to add oxygen is to stir your starter occasionally between feedings, especially if you store your starter in the refrigerator and go several weeks between feeding it. Also, try stirring the starter vigorously to introduce more oxygen at the time of feeding. Finally, try covering the starter jar only loosely after feeding, rather than using an air-tight lid.
5) Feed Several Times Before Baking
When sourdough starter has been stored in the refrigerator, it tends to be pretty sluggish on the first feed out of the fridge (especially if it’s been a few weeks since it was last fed). Therefore, it can be a good idea to feed the starter several times to get it nice and active before baking with it. We typically do at least two feedings, sometimes three if it’s been more than a month since we fed it.
However, do NOT repeatedly feed your starter too quickly! Once fed, it is important to let the starter fully rise and even start to deflate before feeding it again. If it’s very neglected, this may take up to 24 hours between feedings.
If you feed and discard too many times back-to-back, it’s not allowing the colony of bacteria and yeast enough time to properly grow in number each feeding. Instead, you’d actually be diluting (and discarding) your starter culture with too much flour and water (making it weaker) before the colony has a chance to repopulate.

6) Feed It More Often
When life gets busy and we aren’t baking regularly, we often go several months between feeding our starter, contrary to “best practice”. Over time, infrequent feedings can lead to a weak starter. Ours always perks back up after a few feedings, but that also means we have to plan a couple days in advance when we do want to bake.
Feeding a starter on a regular basis will help keep the culture nice and strong, making it rise faster and taller when it does come time to feed and bake. To maintain a readily-active starter, it’s best to feed it at least once per week if stored in the refrigerator and daily (if not 2 or 3 times daily) if stored at room temperature.
7) Store Starter At Room Temperature
It’s a known fact that sourdough starter regularly stored at room temperature is more readily active and bubbly than starter stored in the refrigerator. It will reach peak activity very quickly, often rising more than halfway (tripling in size instead of doubling). That’s because the bacteria and yeast are maintained in a constant state of activity, rather than going through cycles of dormancy in the fridge.
Yet this option takes commitment! You’ll need to feed a room temp starter every day, if not two or three times per day. That also generates a lot of discard or waste, so be sure to visit our top 15 sourdough discard recipes or 7 ways to use sourdough discard – besides baking.

8) Use Filtered Water, Not Distilled
Filtered water is the best to maintain a healthy active sourdough starter. Most experts say that using chlorinated tap water can lead to sourdough starter not rising well, as chlorine may kill or stifle the colony of bacteria and yeast. A basic carbon water filter will remove almost all chlorine, including a built-in refrigerator filter, pitcher filter, or countertop filter.
However, don’t be tempted to reach for distilled water instead! It turns out distilled water isn’t great for sourdough starter health either. It’s “too pure”, lacking important minerals and electrolytes that help keep a sourdough starter active.

9) Start Fresh
If you’ve tried all of these suggestions to make your sourdough starter more active and it still isn’t rising well, perhaps it’s time to try a new starter culture altogether! It is possible for a starter to simply lose its vigor over time.
One of our friends (an experienced sourdough baker) recently couldn’t get her old trusty starter to rise well, no matter what she tried. She bought a new organic sourdough starter from our shop and was absolutely raving excited at how bubbly and active it was! Our starter comes dehydrated, lasts for over a year dry, and is easy to reactivate in just a few simple steps. It’s vigorous, hardy, and foolproof. See our 5-star reviews and customer testimonials here.
You can also try to make a new sourdough starter from scratch, though starting with an established culture may be a better option if you’ve already been struggling.

Just wait, you’ll have an impressively bubbly starter in no time!
I hope these tips help you to build and strengthen a more active sourdough starter than ever before. Please let me know if you have any questions in the comments below. If you found this post useful, please also consider pinning or sharing this post – and leave a review below, Happy baking!
You may also enjoy:
- Simple Sourdough Focaccia Bread Recipe
- Sourdough Granola Recipe (Discard or Active Starter) with Fermented Option
- Healthy Sourdough Pumpkin Spice Bread Recipe (or Muffins)
- Best Sourdough Starter Names: 60 Punny Ideas
- 20 Best Sourdough Add-Ins and Topping Ideas

Sourdough Starter Not Rising? 9 Ways to Strengthen Starter
Equipment
- heating pad or proofing box (optional)
Ingredients
- existing sourdough starter
- whole wheat flour, bread flour, or rye flour
Instructions
- Keep sourdough starter warm. Starter is most active at 75-85F. Find a warm location in your kitchen/house, use warm water during feeding, consider using a heating pad or proofing box, and monitor the temperature with a thermometer. If your schedule allows, let refrigerated starter warm up to room temp before feeding.
- Feed with different flour. Flour with more protein and nutrients make sourdough starter more active, so consider feeding your starter with bread flour, whole wheat flour, rye flour (or a combination of these) to increase fermentation activity and rise.
- Thicken the starter (lower hydration ratio). A very runny starter may bubble but not rise at all. Try adding more flour, stirring in one tablespoon or two at a time until the desired thicker consistency is reached. (It should be smooth and easy to stir like a wet dough, but not runny and pourable like pancake batter). Or, make a proper "stiff starter" by feeding with a 2:2:1 ratio of flour, starter and water (e.g. 100 grams flour, 100 grams stater, 50-60 grams water) – which is a 50 to 60% hydration. Standard starter is usually fed a 1:1:1 ratio (100 grams of each) and is 100% hydration.
- Add oxygen. Occasionally stir refrigerated starter between feedings, and stir more vigorously during feeding/mixing to introduce air. Loosely cover the starter container after feeding rather than using an air-tight lid.
- Feed several times before baking. If your starter has been in the fridge, try feeding it at least 2 or 3 times before baking with it. However, allow it to fully rise and start to deflate again between feedings.
- Feed more often. To maintain a readily-active starter, it’s best to feed it at least once per week if stored in the refrigerator and daily (if not 2 or 3 times daily) if stored at room temperature.
- 7) Store starter at room temperature. Room temp starter is often more active than refrigerated starter, but it must be fed daily.
- Use filtered water (unchlorinated water) to feed your sourdough starter, but also avoid distilled water.
- Start fresh. If all else fails, start with a new, healthy, established starter culture – like the 5-star organic sourdough starter we offer here!


Deanna Talerico
Deanna Talerico (aka DeannaCat) is a garden educator and writer with over 15 years experience in organic gardening. She is a retired Senior Environmental Health Specialist, and holds a M.A. in Environmental Studies and B.S. in Sustainability and Natural Resources.


8 Comments
Amy
All good points to revive a starter. I had mine in the fridge for about 2-3mos with a healthy layer of hooch (that I poured off). First feeding didn’t result in bubbly/rise effect so I switched my feed flour to a higher protein content and had my jar in (off) oven with the light on to create a bit of warmth and this worked like a charm. I ended up doing a third feeding and have now just taken out my no-knead sourdough loaf from the oven. Also- huge THANK YOU to DeannaCat for the site. Her writeups and videos are detailed, easy and clear to understand. I’ve learned so much about sourdough from Homesteadandchill.
Amy
Aaron (Mr. DeannaCat)
Thanks for sharing Amy and it’s so great to hear you enjoy our website, have fun baking!
Jes
Hi there! Celiac here using brown rice flour. Should I still be seeing the same amount of fermentation and adhering to your same tips? I’m a super-newbie on day 6 of making starter and I just know I’m doing something wrong (although I am getting a little bit of fermentation) Thanks!
Aaron (Mr. DeannaCat)
Hi Jes, you likely won’t be seeing the same amount of activity using a GF flour compared to regular wheat flour but the tips in this article should still help. We have an article on how to make a GF sourdough starter which you can find here and it may prove helpful to you. We have found that GF starter don’t typically stay risen or active as long when compared to regular wheat starters but if you are still trying to make your own starter, it just takes some time for the beneficial bacteria and yeast to grow. Hope that helps and good luck!
Kathy
My starter is only 10 days old and I haven’t stuck in the refrigerator yet. But it rises up then falls a couple of hours later. DomI just need to feed it more ? The top does stay bubbly
Aaron (Mr. DeannaCat)
Hi Kathy, I am not exactly sure of your question as starter is supposed to rise and fall as it only stays risen for a few hours as you typically discard and use your sourdough starter at peak activity. If you aren’t using sourdough everyday or multiple times a week, you may be better off keeping it in the refrigerator as it slows the fermentation down and you typically only need to feed it when you want to use it in baking. Check out our article on how to feed and store sourdough starter here if you want to see more. Hope that helps and good luck!
Donna
Deanna what about sourdough discarding. If I feed every day, how often should I discard?
Thank you. Donna
Aaron (Mr. DeannaCat)
Hi Donna, you should discard starter before every feeding, check out our article on How to Feed Your Sourdough Starter + Storage & Care Tips, hope that helps and have fun baking!