

How to Plant and Grow Carrots from Seed: Tips for Success
Come learn everything you need to know to successfully grow big, beautiful carrots from seed. We’ll explore when and how to plant carrots, our favorite varieties to grow, and important tips for thinning, water, and soil needs. I’ll also cover tips for growing carrots in containers, when and how to harvest carrots, and the best ways to store or preserve them to make them last!
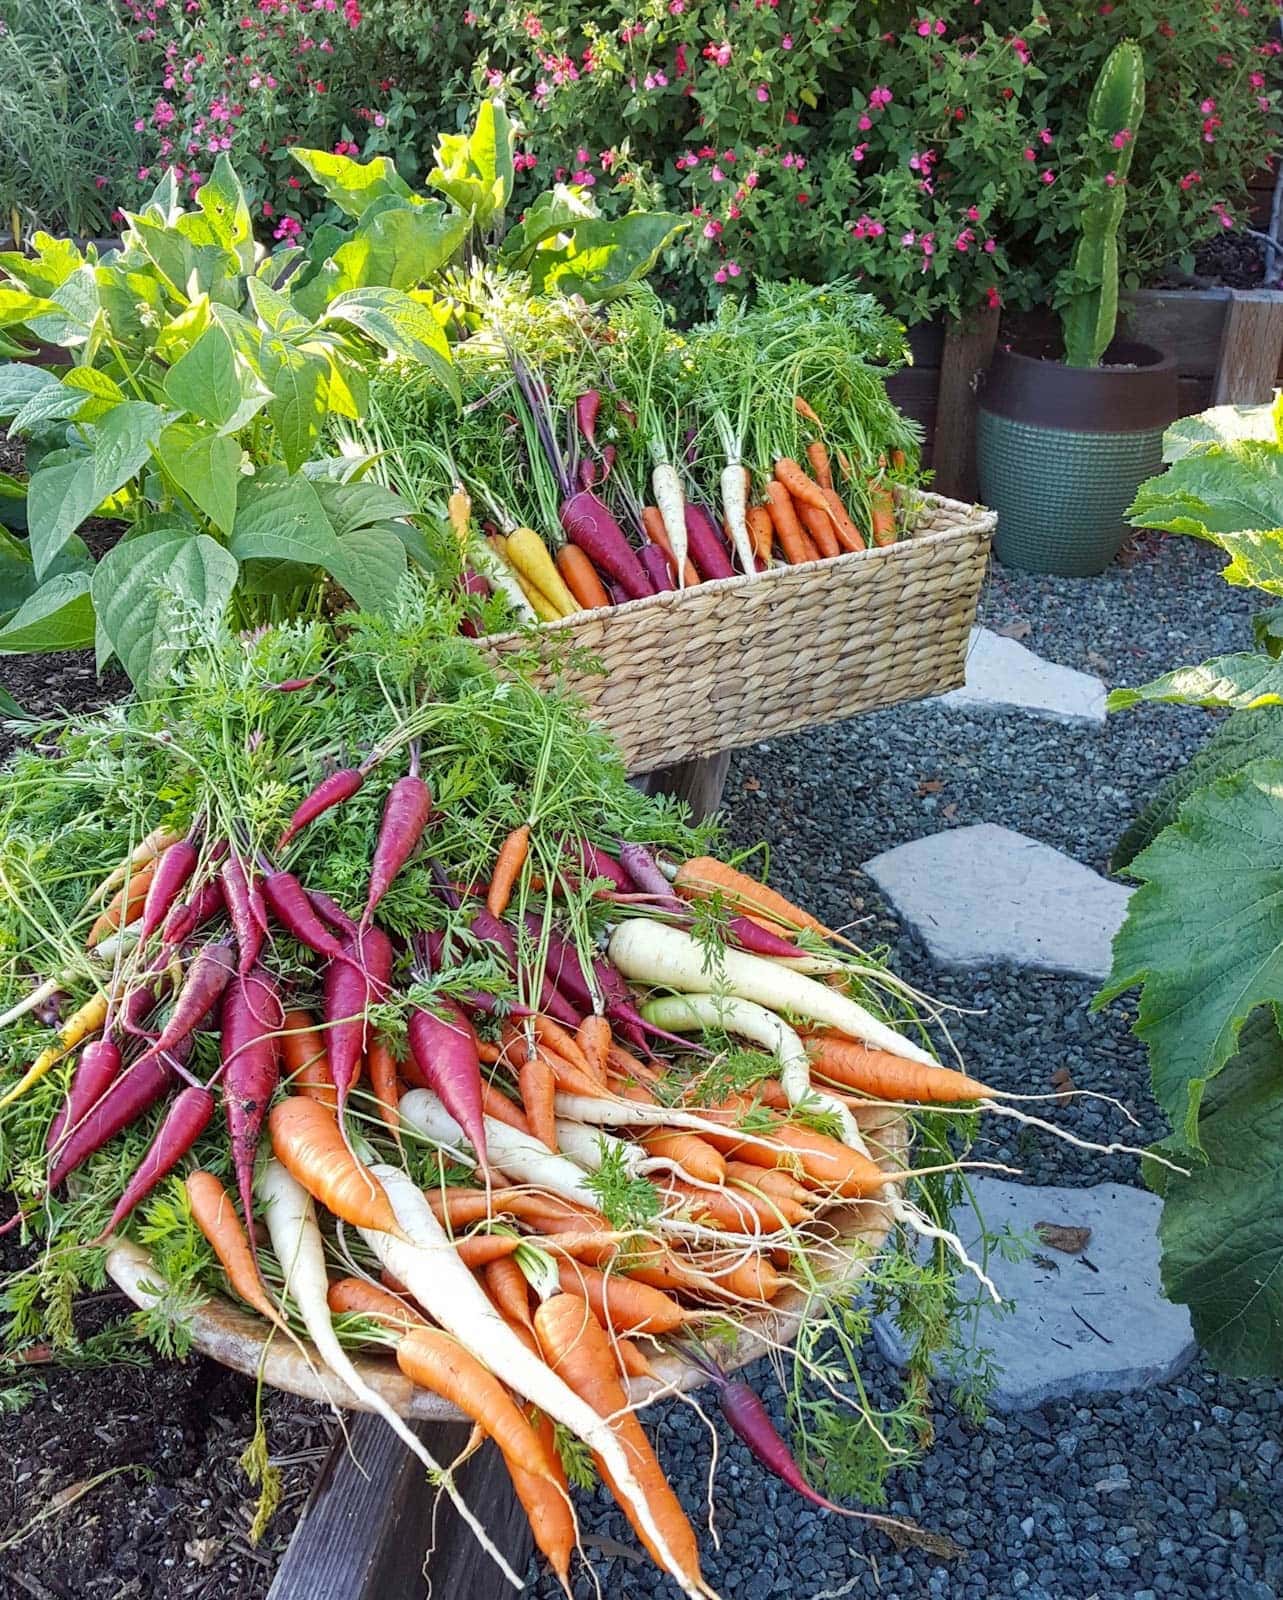
Carrots have always been one of my favorite things to grow in the garden. They’re beautiful, delicious, versatile in the kitchen, last a long time in storage, and are bothered by few pests. The flavor of homegrown carrots can’t be beat, and they’re possibly one of the most fun and rewarding things to harvest! With our tips for success, you’ll be unearthing and enjoying your own long, crunchy beauties in no time.
Note: This post was originally published in May 2019.
Would you like to save this?
Disclosure: Homestead and Chill is reader-supported. When you purchase through links on our site, we may earn an affiliate commission.
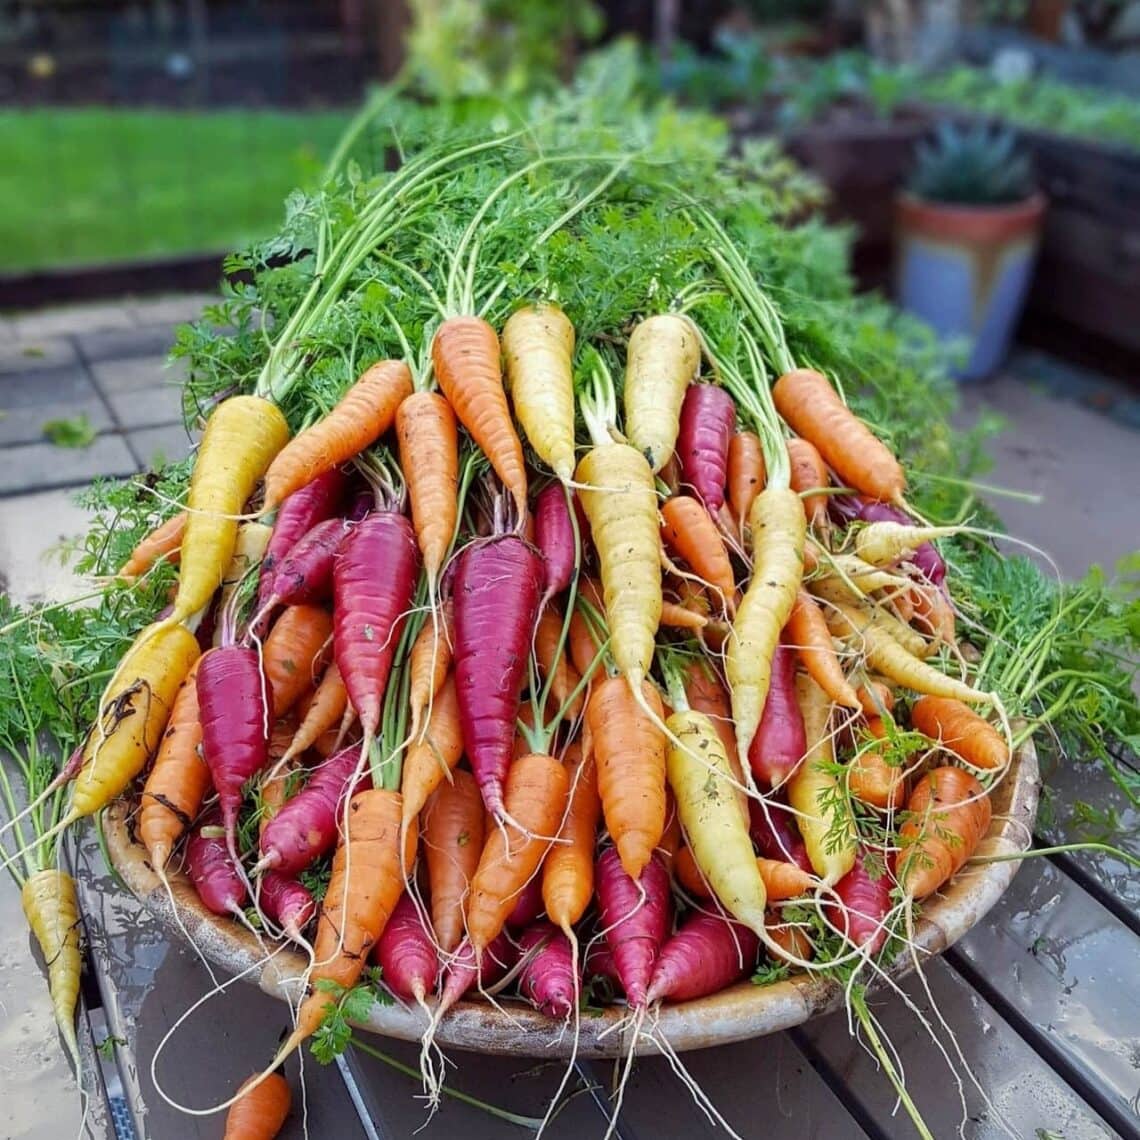
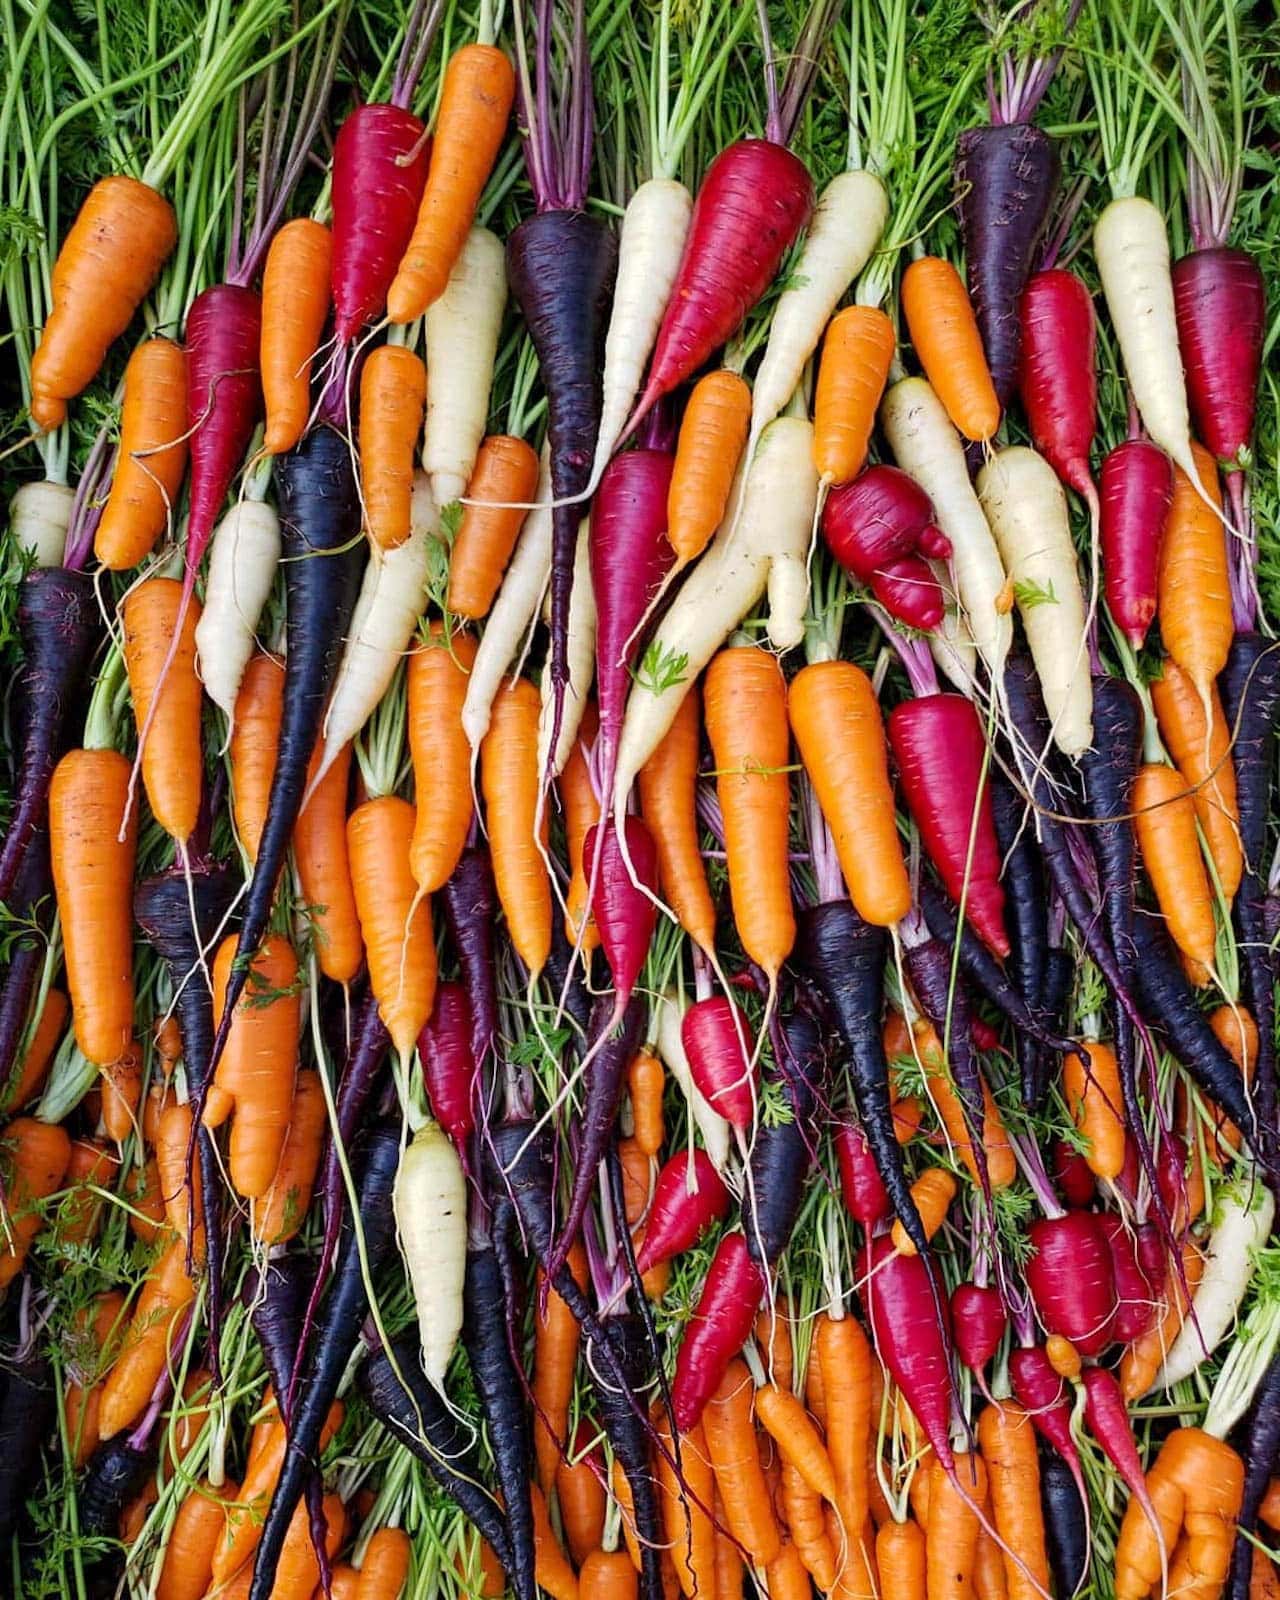
Carrot Varieties
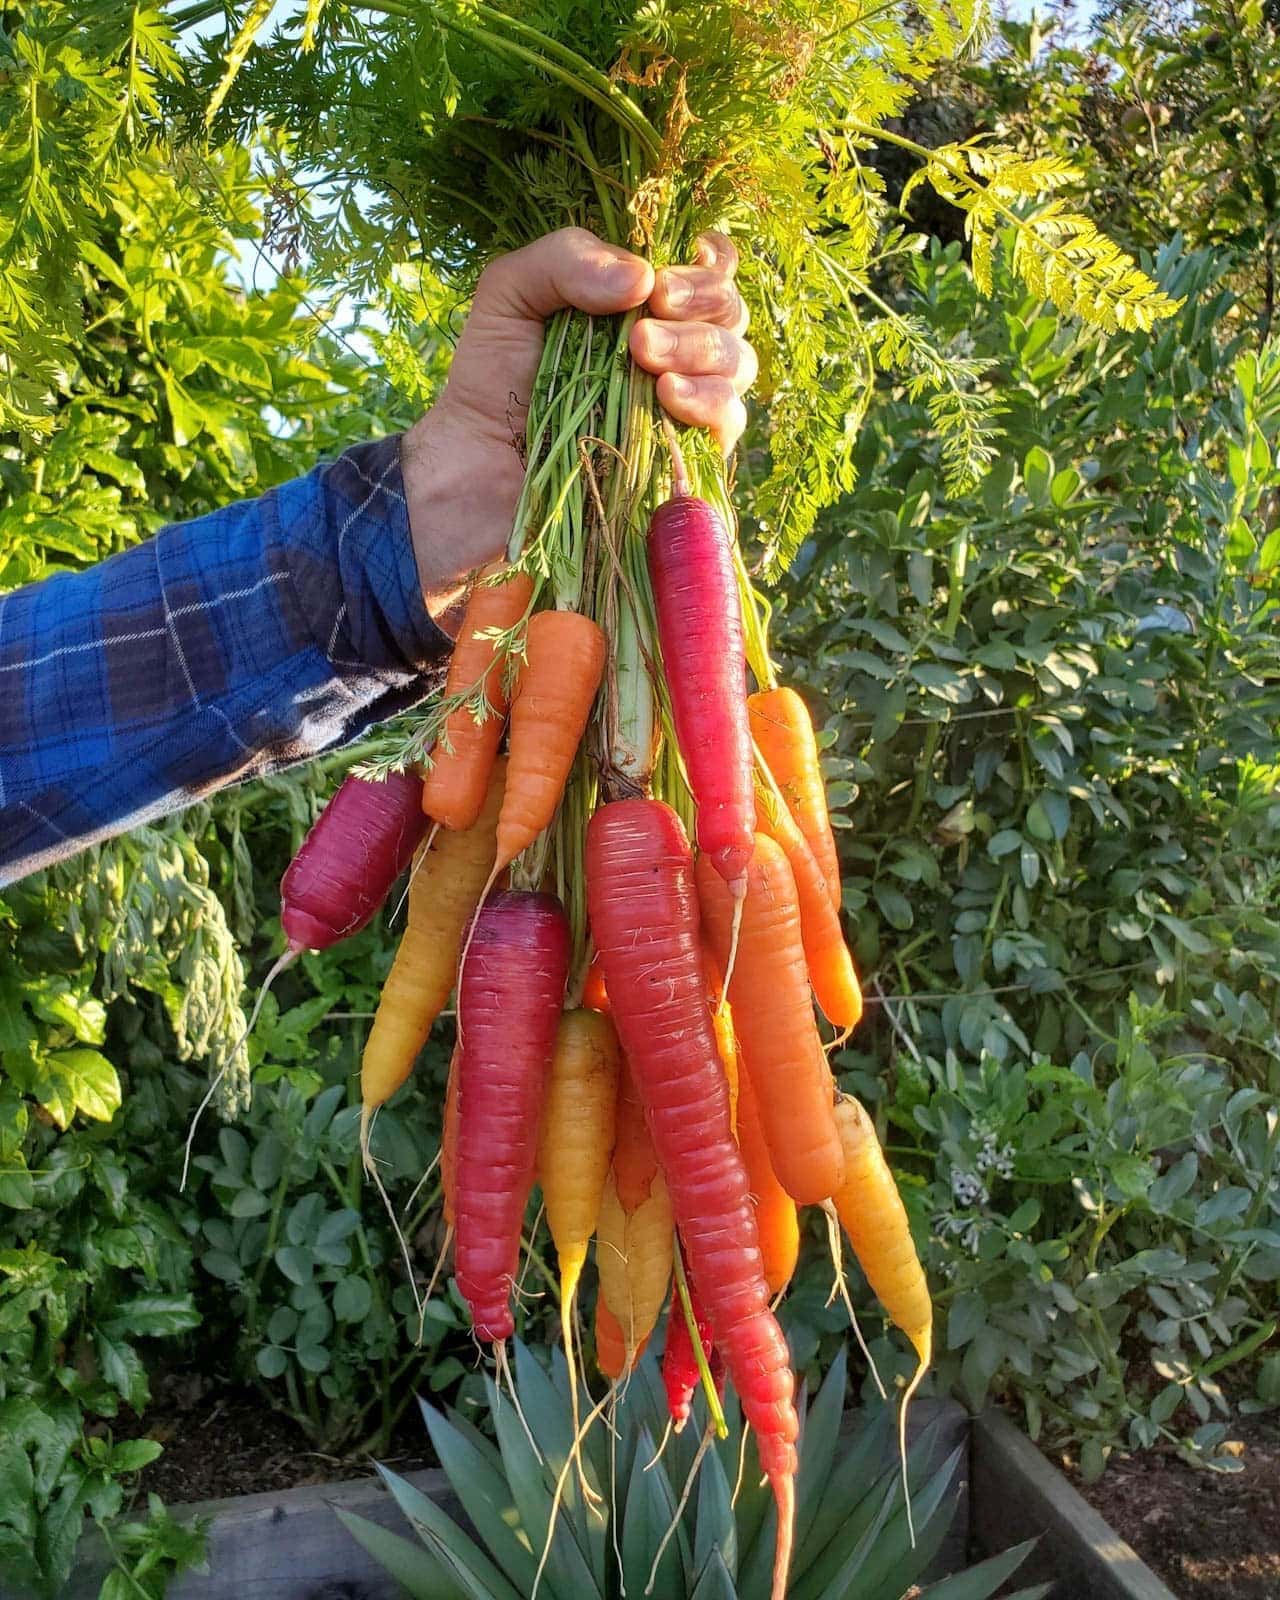
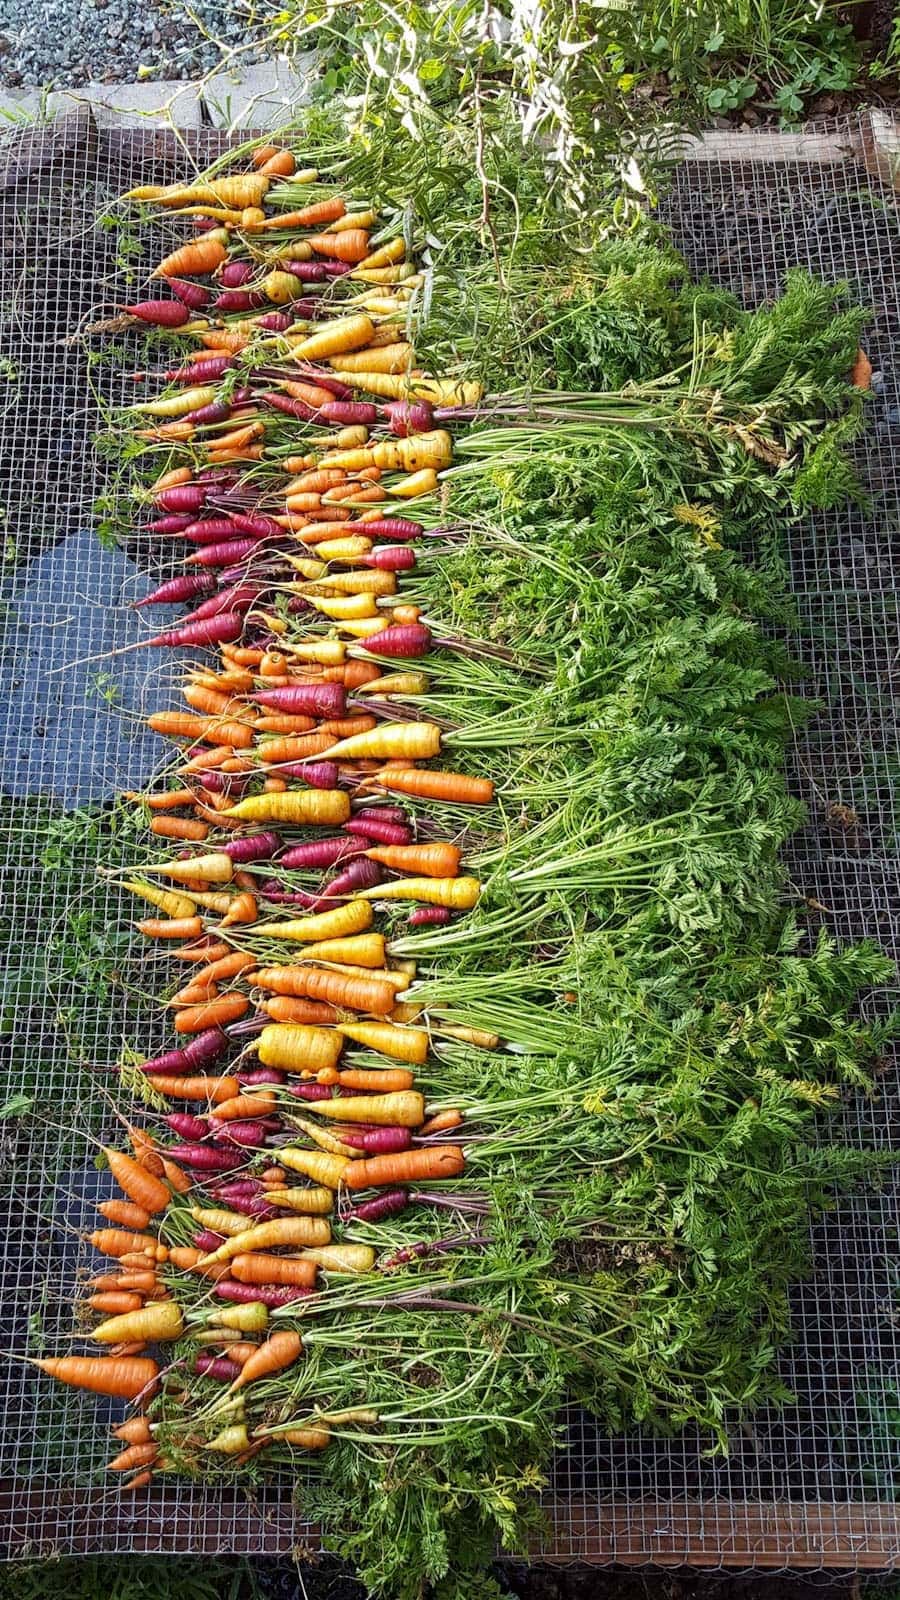
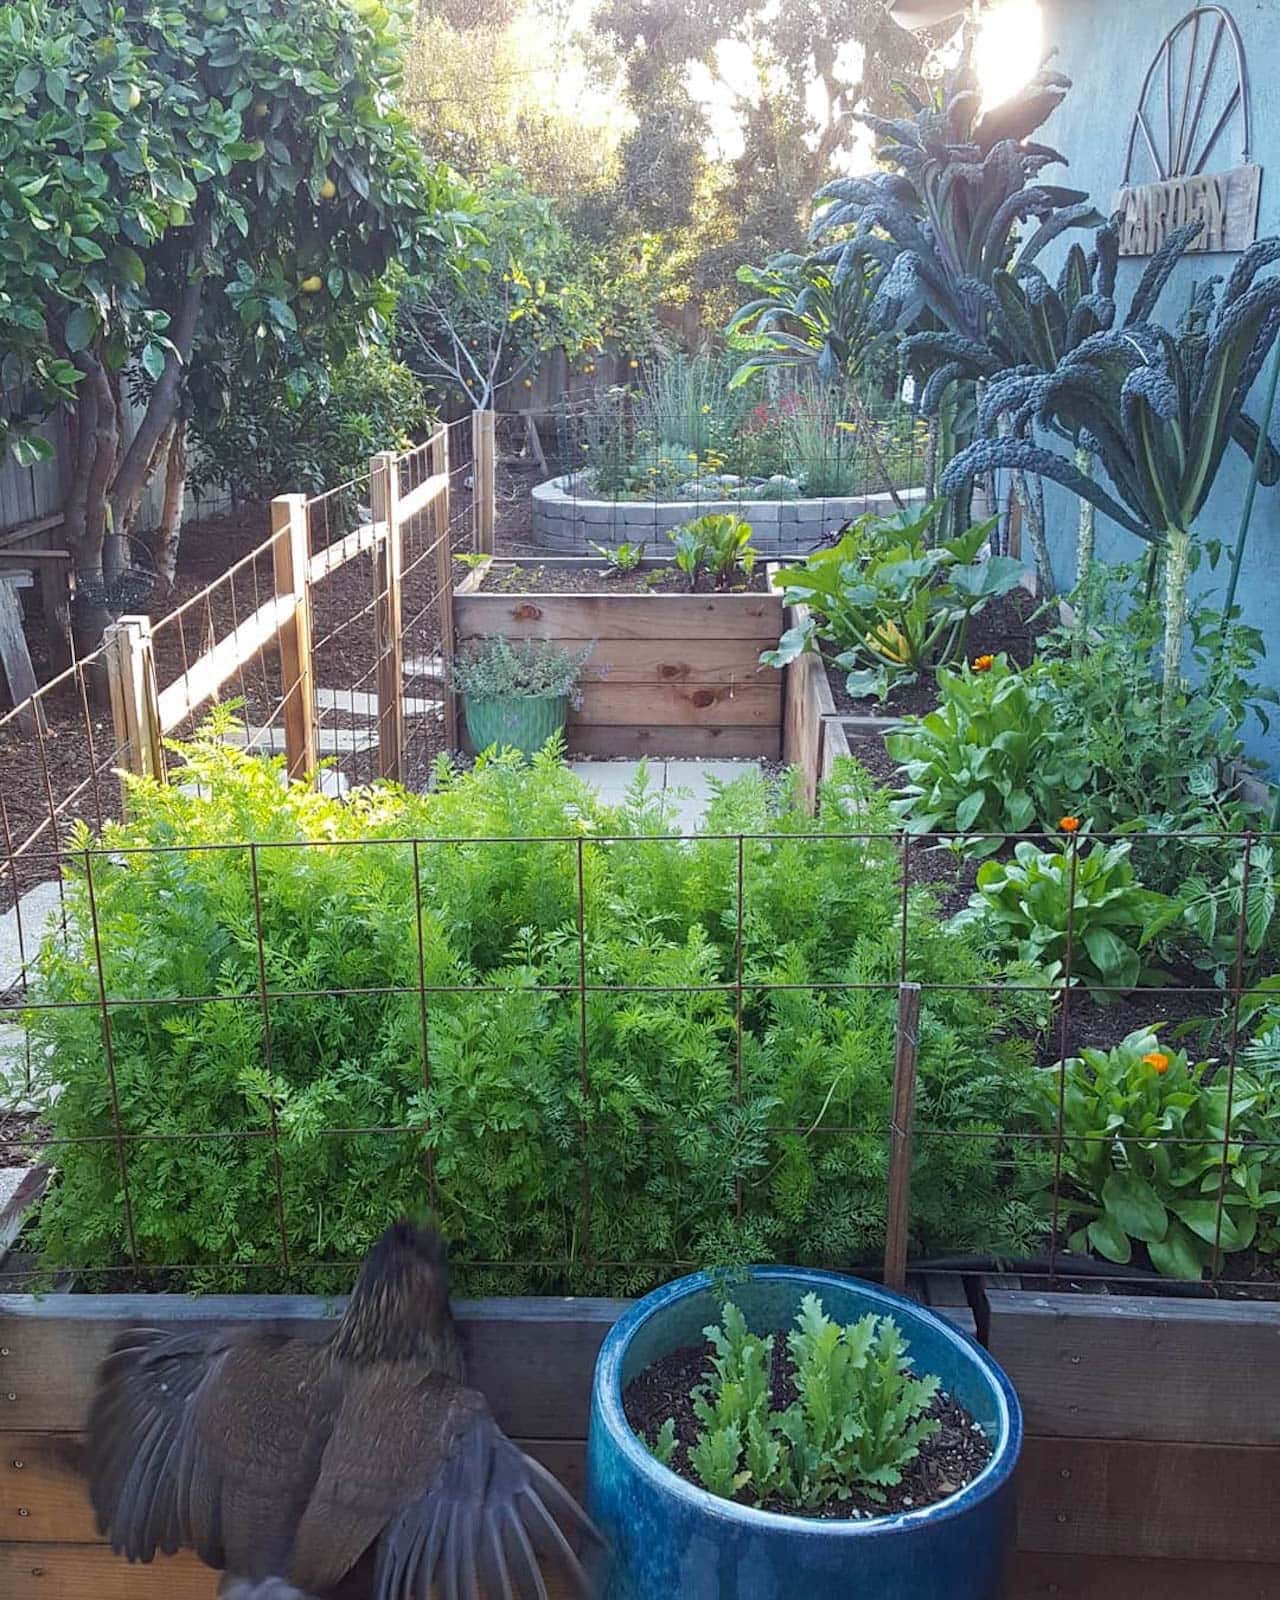
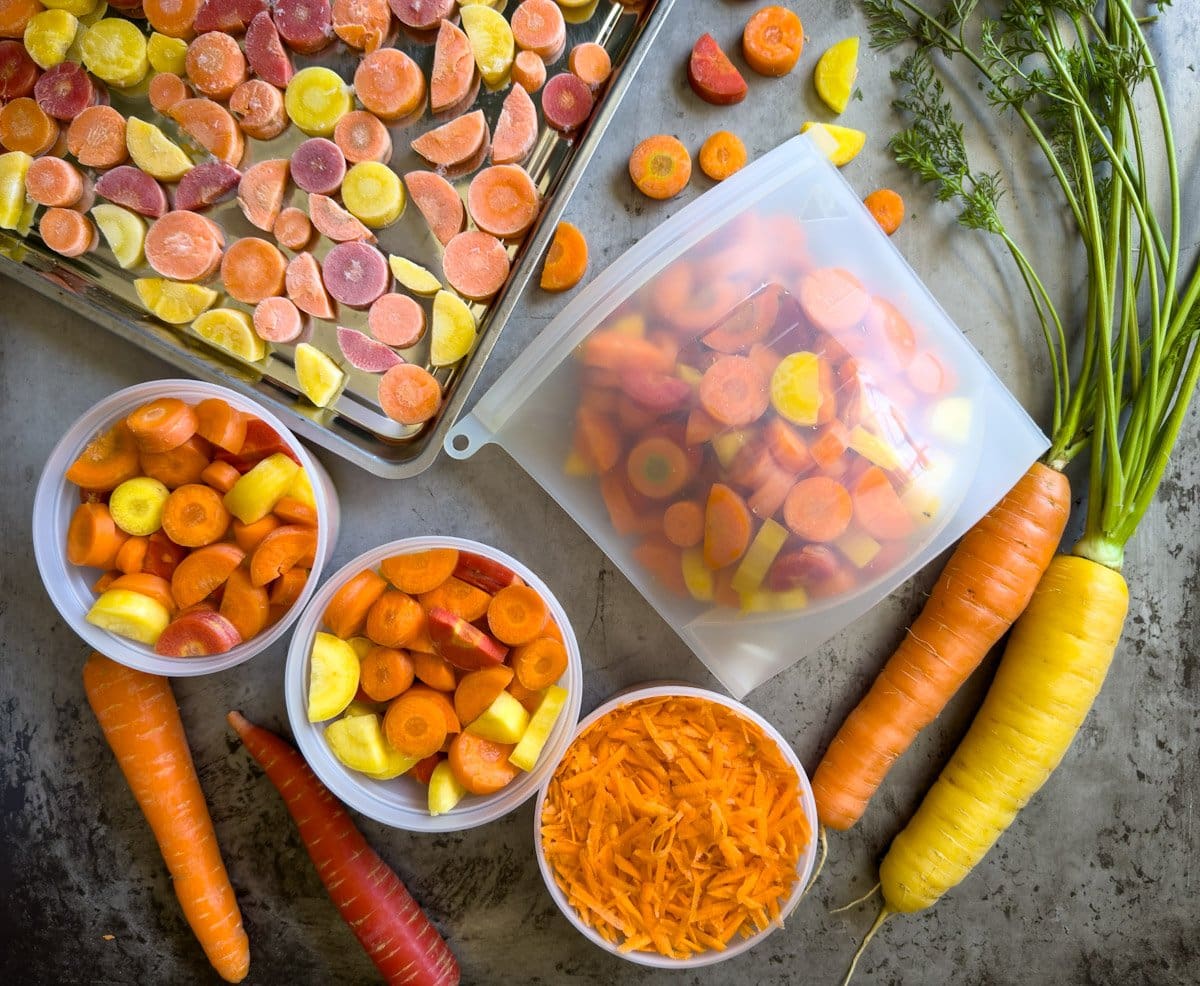
Orange, red, purple, yellow, white… We love to grow several varieties of carrots in one garden bed or plot for a fun colorful harvest!
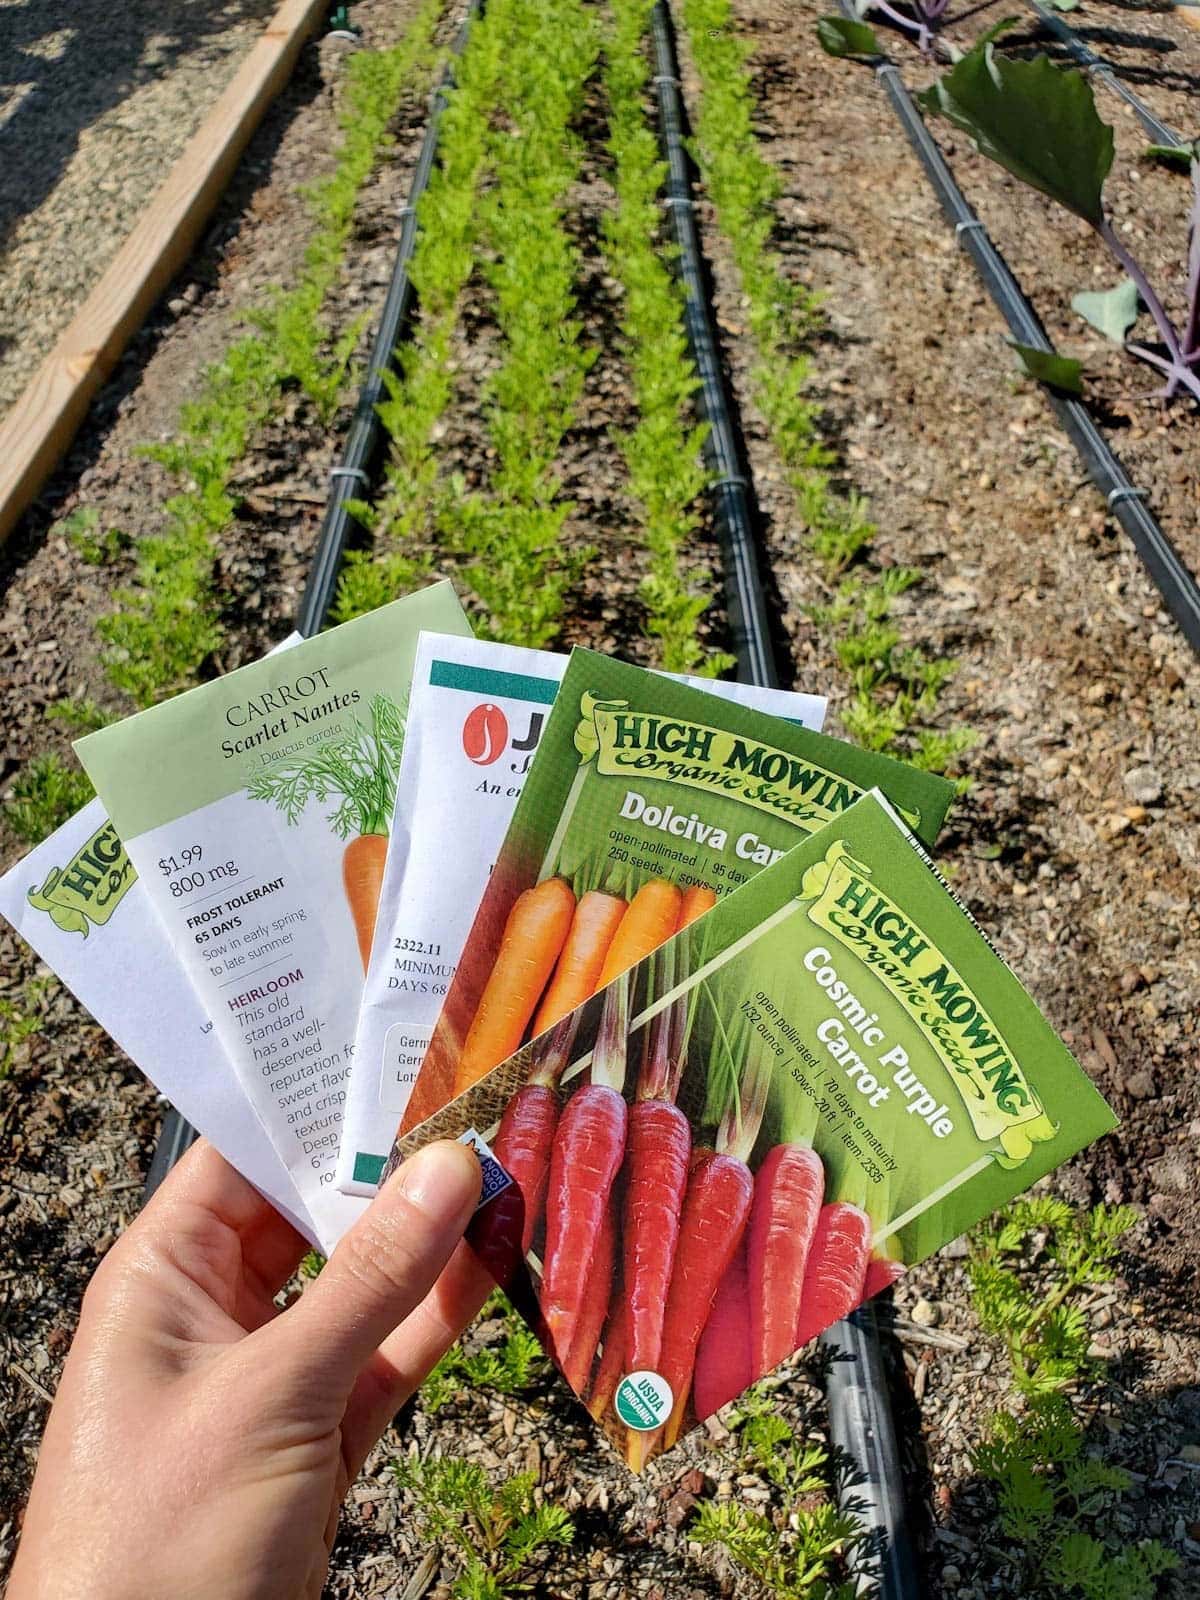
- Popular carrot varieties include Scarlet Nantes, Danvers, Imperator, and pretty Cosmic Purple.
- A few of our current favorites are Bangor, Bolero, Bollin, Sugarsnax, Rubypak and Yellow Moon.
- If you’re new to growing carrots and don’t want to buy several seed packs to start, consider something like this gorgeous rainbow Starburst blend.
- Growing a few varieties of carrots with different days to maturity enables you to have a staggered harvest instead of all at once.
- Folks with short growing seasons (or those getting a late start) could consider smaller, early-maturing varieties like Yaya or “Little Finger” baby carrots.
See a full list of the best places to buy heirloom, non-GMO and organic garden seeds here.
When to Plant Carrots
- Generally considered a cool-season crop, it’s best to plant carrots in early spring or fall in most climates. However, places with mild summers or temperate winters can potentially grow carrots year-round. That’s what we do here on the Central Coast of California!
- For an early summer harvest, plant carrot seeds outside in the spring about 2 to 3 weeks before the last frost date, ideally once the soil has warmed to at least 45°F.
- For a fall harvest, plant carrot seeds in the late summer to early fall – about 10 to 12 weeks before your average first frost date if possible.
- Here in zone 9, we often plant carrots in mid fall to harvest all winter long. They grow more slowly during the shorter days of winter, but can survive temperatures down to 20°F! They get even sweeter after a kiss of frost.
- The ideal soil temperature for carrot seed germination (and general growth) is 55 to 75°F, though they’ll sprout in soil as cool as 40°F, albeit more slowly. Temperatures over 80°F can inhibit sprouting or slow growth.
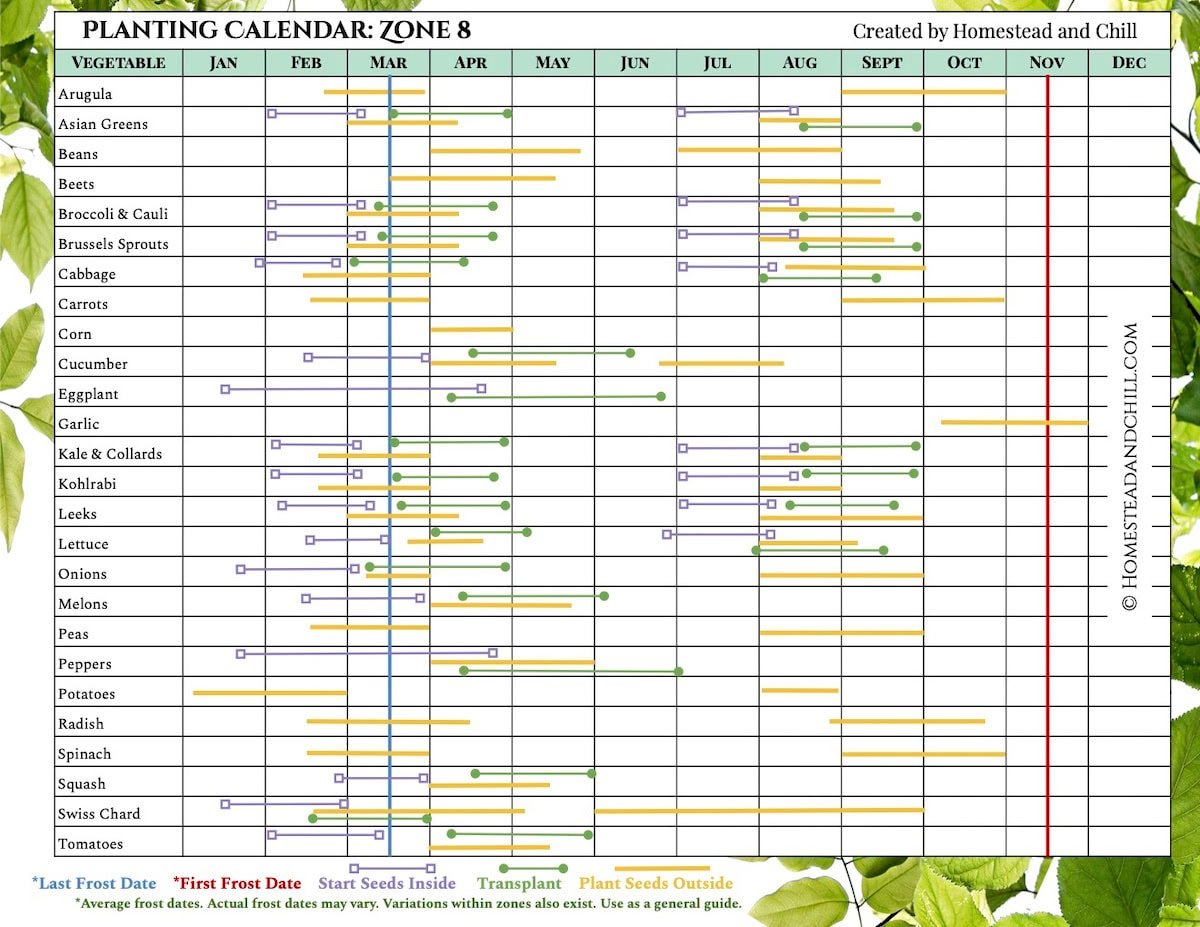
- Frost dates vary by location and growing zone (and year to year), so check out our free planting calendars for more details. They’re available for every USDA growing zone!
- Carrot seeds are best directly sown outside, and can take 3 to 4 months to mature before harvest. See tips on exactly how to plant carrot seeds below.
RELATED: Learn about the best fall garden vegetables to grow, plus tips on exactly when to plant a fall garden.
Preparing Soil Before Planting
The right soil consistency is arguably one of the most important factors to successfully grow carrots. Carrots grow best in a loose, fluffy, well-draining soil that allows their long roots to grow deeply with ease. If soil is too compact, chunky, or rocky, carrots will be short, twisted or otherwise stunted.
While we usually aren’t huge fans of tilling soil, it may be necessary for your carrot bed. If your soil isn’t already fairly loose, work the soil to at least one foot deep to loosen it, such as with a broad fork. Remove any large rocks and break up clumps. Amend clay or compact soil with potting soil, compost, and/or horticultural sand as needed.
After loosening the soil, water deeply (especially if the soil is dry). This reduces the amount you’ll need to water immediately after planting seeds.

Carrots and Fertilizer
Carrots do not need particularly rich soil to thrive. They prefer moderate levels of phosphorus (P), high potash (K) but low nitrogen (N) – so avoid high-nitrogen fertilizer when growing carrots! Using too much nitrogen or strong manure-based compost will promote tall leafy tops but make the carrots themselves grow funky and branch, split, or develop excess legs.
Instead, amend the soil with a well-balanced, mild slow-release organic fertilizer and/or well-aged compost, worked in the top few inches of soil and watered in before planting.
How to Plant Carrot Seeds
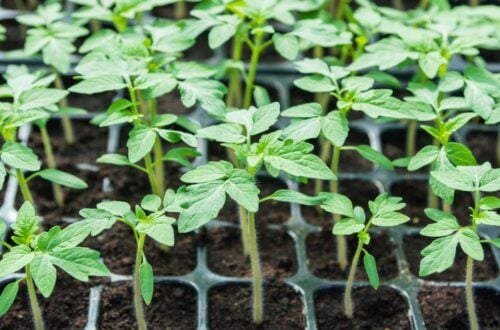
Carrots grow best when seeds are planted outside in the garden, aka direct sowed. Like most root crops, they do not transplant well. Therefore, it’s not recommended to start carrots indoors or in seedling trays.
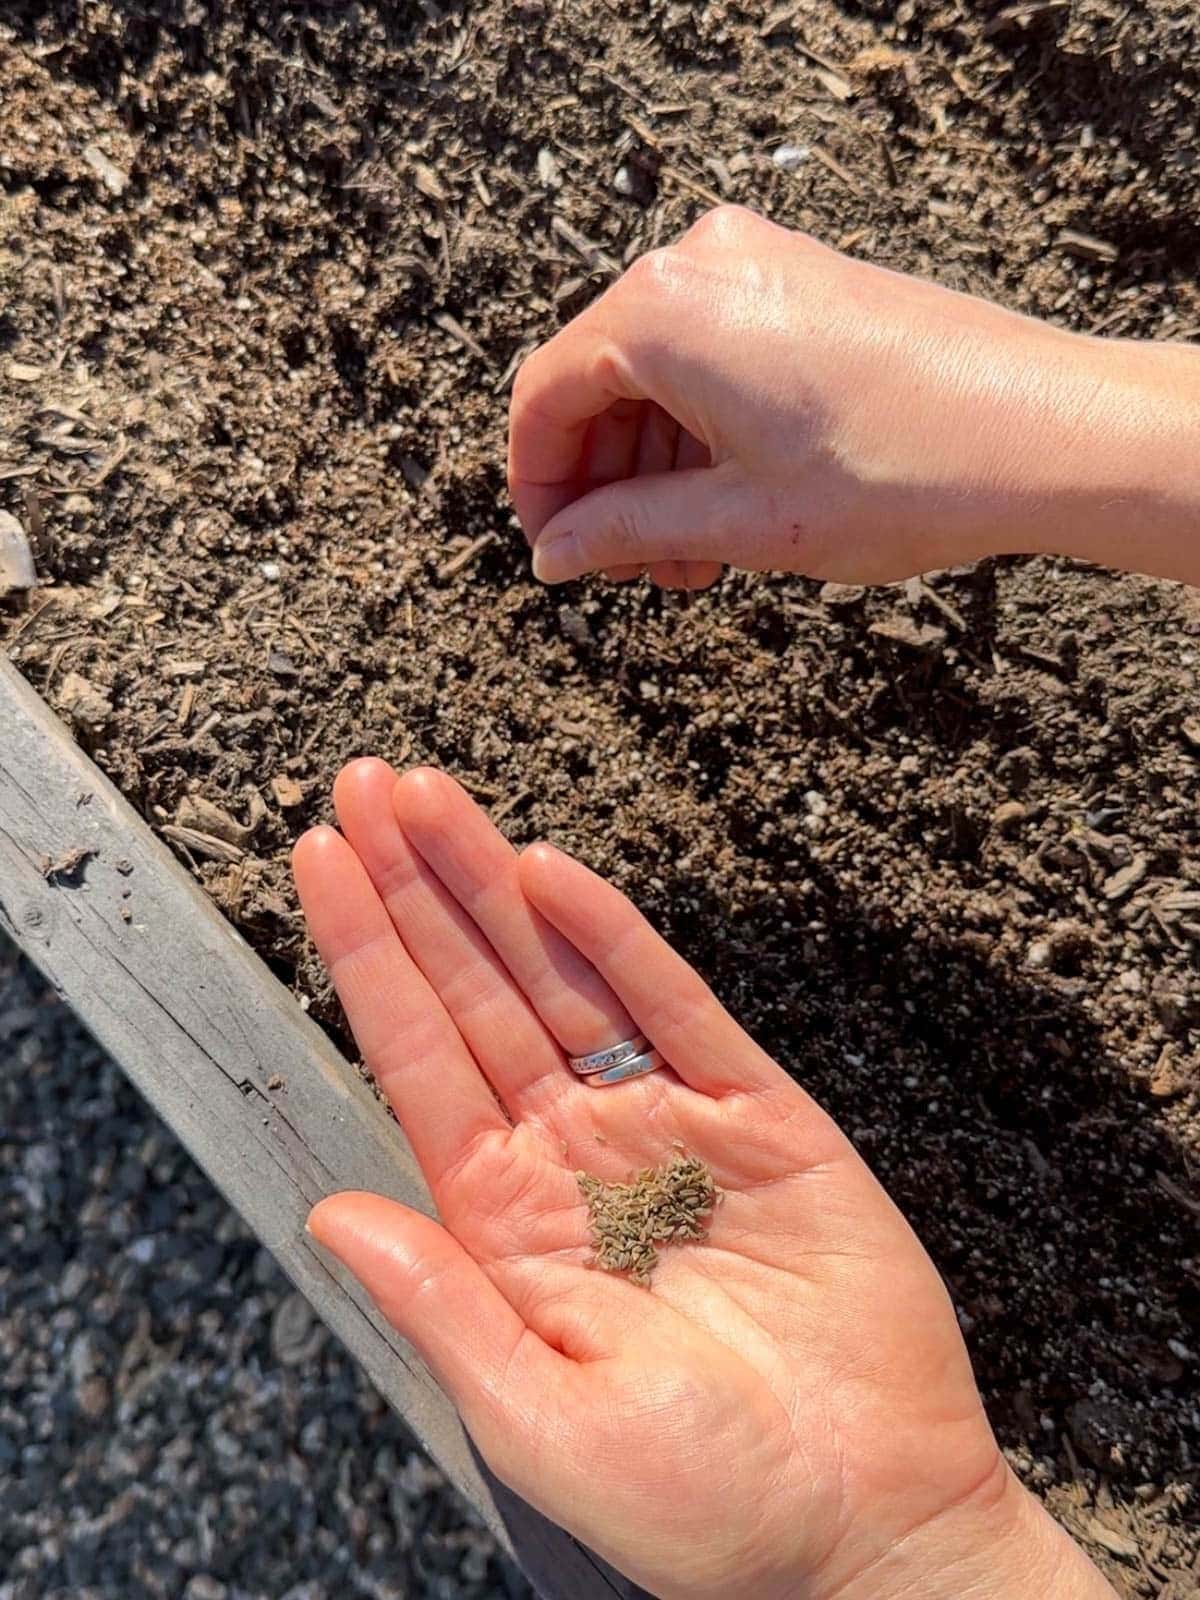
Tiny carrot seeds should be surface sown (meaning sprinkled or lightly pressed into the top of soil) or just barely covered with a very thin layer of soil (1/4” inch or less). I prefer to lightly cover carrot seeds to prevent them from drying out, blowing away, or moving around when watered. They will not sprout if they’re buried too deep
To plant carrots, you can either sow seeds in neat rows or use what I call the “scatter method” – by lightly scattering seeds across a wider surface area of soil. See tips for each option below.
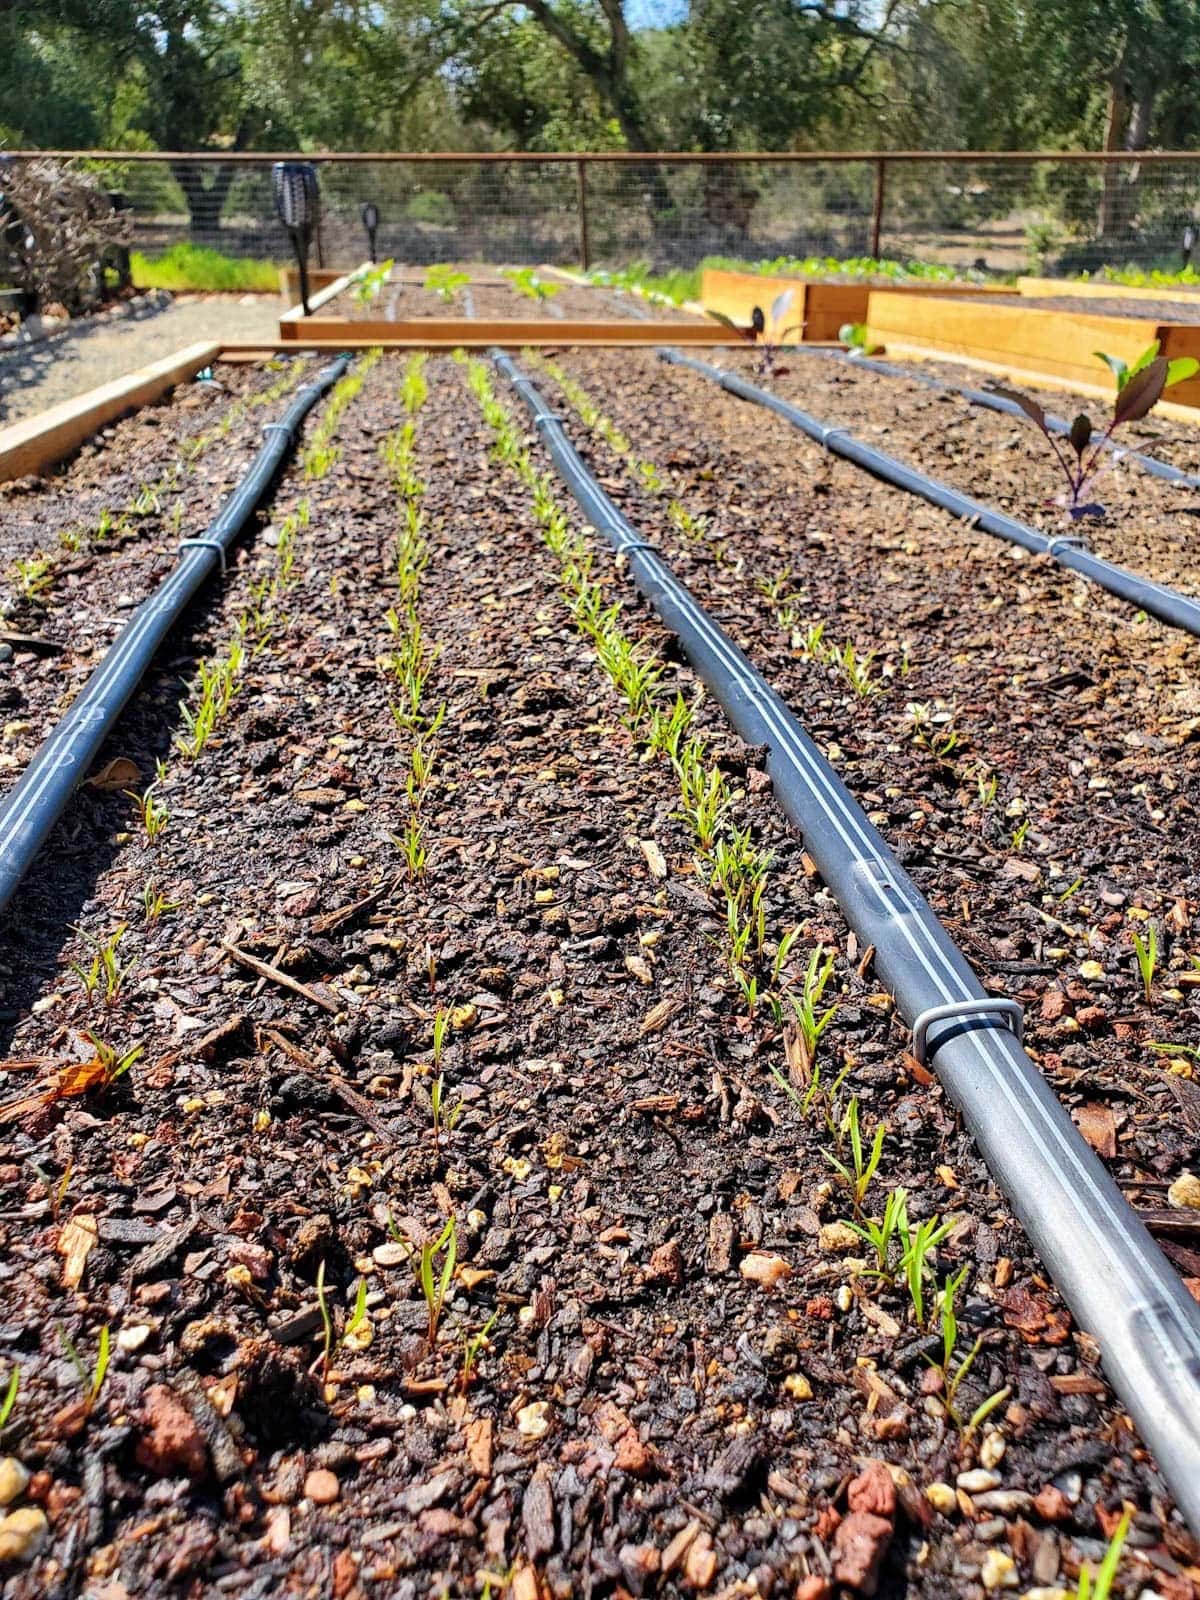
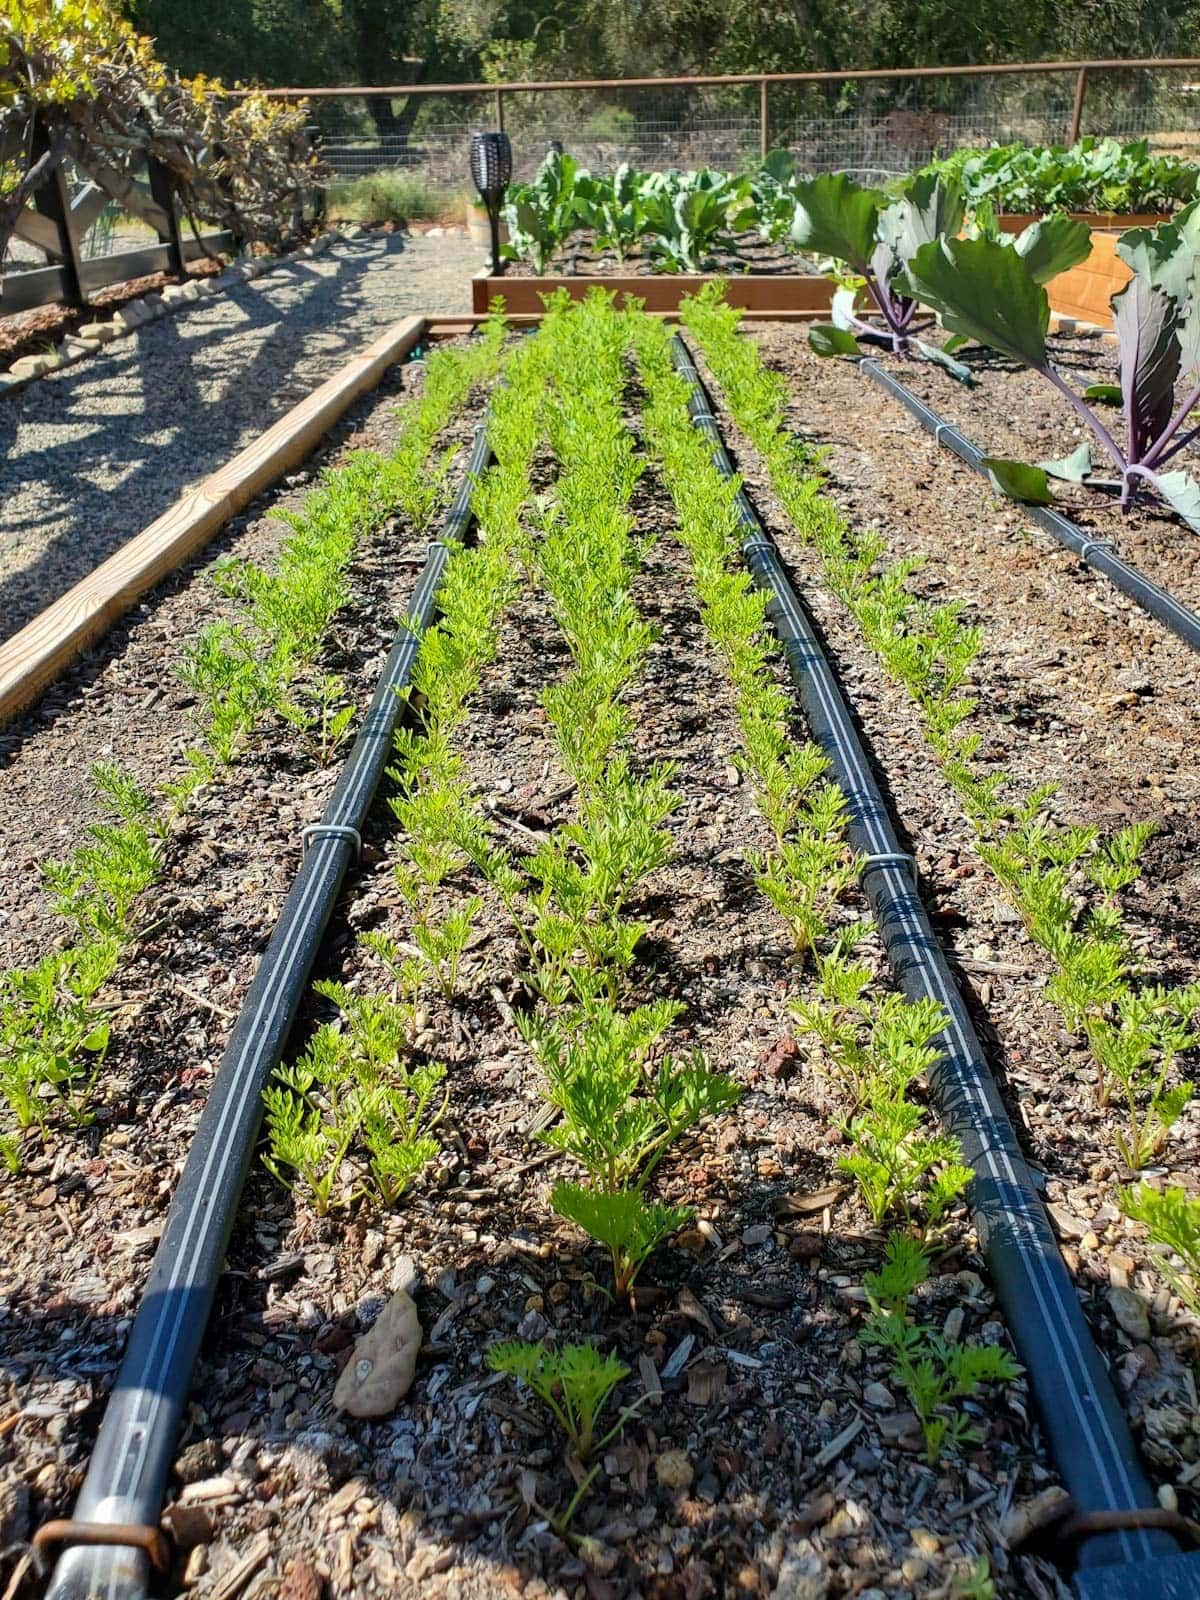
We’ve planted carrots both ways over the years with success. I tend to scatter seed when growing carrots in small raised beds, pots, or wine barrel planters, but prefer to plant them in rows in our larger raised beds along the drip irrigation lines.
After planting carrot seeds, it’s essential that the top of the soil (and seeds) stay consistently damp in order to sprout. Germination (sprouting) may take anywhere from 1 to 3 weeks, depending on the soil conditions, moisture, and temperature. See important tips about watering carrots to follow.
Planting Carrots in Rows
- To plant carrots in rows, mark row lines or create very shallow furrows in the soil spaced about 4 to 6 inches apart. You may also see recommendations to space rows of carrots up to 12 to 18 inches apart for traditional in-ground row crops, but they can be spaced much closer in home gardens and raised beds.
- I like to line each furrow with a sprinkle of seed starting mix or fluffy potting soil, which is much easier for the carrot seeds to sprout in compared to the chunky compost that’s otherwise on top of our raised beds.
- Lightly sprinkle the carrot seeds along each row, aiming for a couple seeds every inch or so. Avoid sowing too heavily since you’ll need to thin them out to one sprout every 2 inches later.
- Either leave the seeds uncovered, or lightly cover them with less than ⅛” to ¼” of soil. I gently pinch the seed starting mix in each furrow around the seeds after sowing. Do not compact.
Planting Carrots with the Scatter Method
- Rather than tidy rows, you can also scatter carrots seeds across a small garden bed, container or planter to maximize the full growing space. To do so, simply sprinkle the seeds on top of the soil.
- Again, don’t go too heavy with the seeds since you’ll want to thin them later to provide adequate spacing. Aim for a light even coverage with a couple seeds every inch or so.
- When planting several carrot varieties using the scatter method, I go fairly light with each variety, knowing the total amount of seeds will add up.
- After scattering carrot seeds, I like to follow up with a light sprinkle of potting soil or seed starting mix on top to barely cover them and then water gently.

Watering Carrots
After planting carrot seeds, gently water the soil surface. Avoid blasting them with a strong stream of water, or allowing the water to pool. Otherwise, the seeds will float or move around, causing them to cluster and ruin your nice even spacing.
During germination, keep the seeds moist at all times. You don’t need to water deeply or heavily at this point, just enough so the soil surface doesn’t dry out. I use a watering can or gentle hose sprayer to lightly water every day (or every few days, depending on conditions) for the first few weeks to encourage sprouting, then let the automated drip irrigation take over thereafter.
After sprouting, provide carrots with deep regular water. Carrots love water! The deeper they have access to water, the bigger and better they’ll grow. Watering time and needs will vary with climate, and will increase as they get larger in size. Rather than watering from above (which can mat down tall carrot greens and increase risk of fungal disease) we like to use drip irrigation in our raised beds to provide consistent water right at the soil level.
Have you ever harvested hairy carrots? That’s usually caused from lack of sufficient water! The carrot itself is a root, but if it’s starving for water, it will send out little feeder roots in search of more. Hairy carrots are still edible (albeit less crisp and juicy) and a good indicator that you’ve been under-watering.
TIP: Another way to keep carrot seeds damp during germination is to cover the carrot bed with a layer of cardboard or burlap to reduce evaporation, either laid across the bed frame or gently on top of the soil. Check under the cover every few days and remove at the first signs of sprouting.
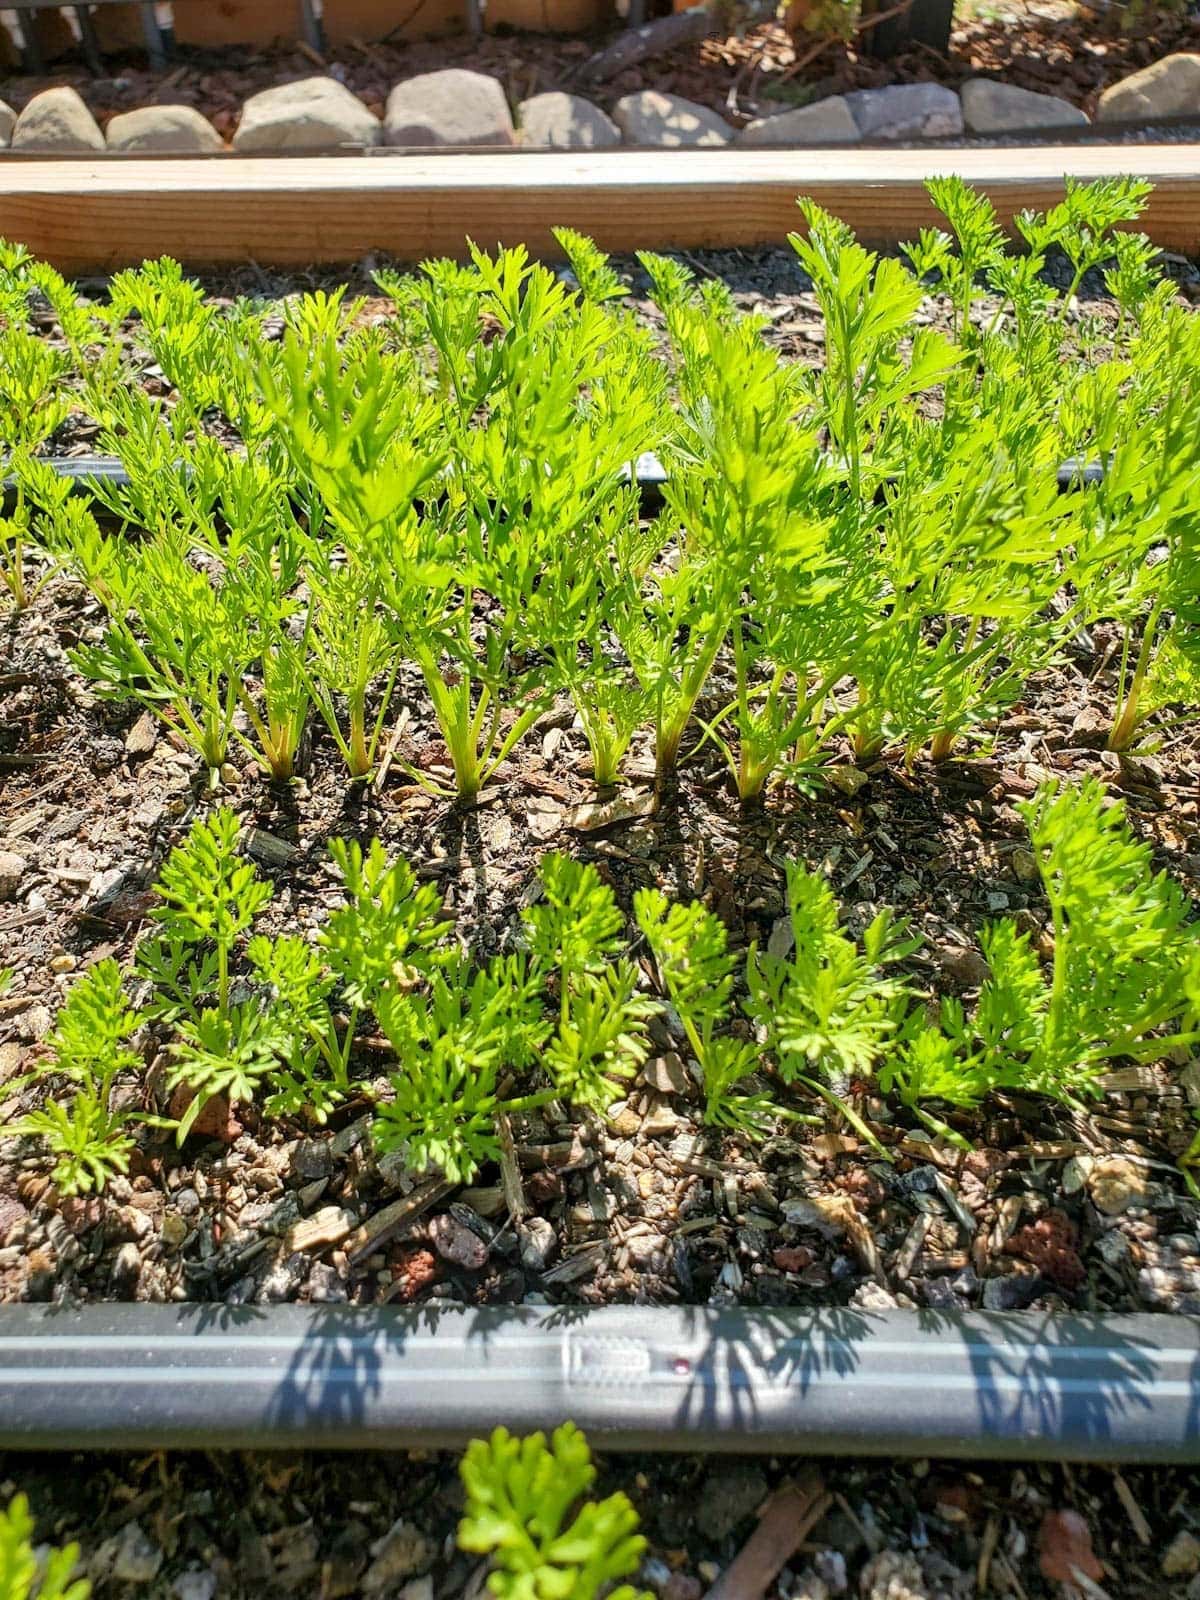
Thinning Carrots
The recommended spacing for carrots is about 2 inches apart. Once the greens are about 3 to 4 inches tall, gently pull or pluck out extra seedlings – leaving the largest, healthiest looking ones to grow. Don’t skip this step! While tedious, thinning is KEY to growing big healthy carrots.
The process of thinning ensures that the roots aren’t overly crowded, and instead, that each carrot has sufficient space to grow to its fullest potential. When left crowded, carrots compete for space, nutrients, and water, and will stay significantly smaller and sometimes twist around one another.
Protecting Carrots from Heat or Frost
Carrots thrive in a temperature range of 55 to 75°F. An occasional hot day isn’t a big deal, though sustained temperatures over 80°F can negatively impact the quality and production of carrots, resulting in bitter flavors and slower growth.
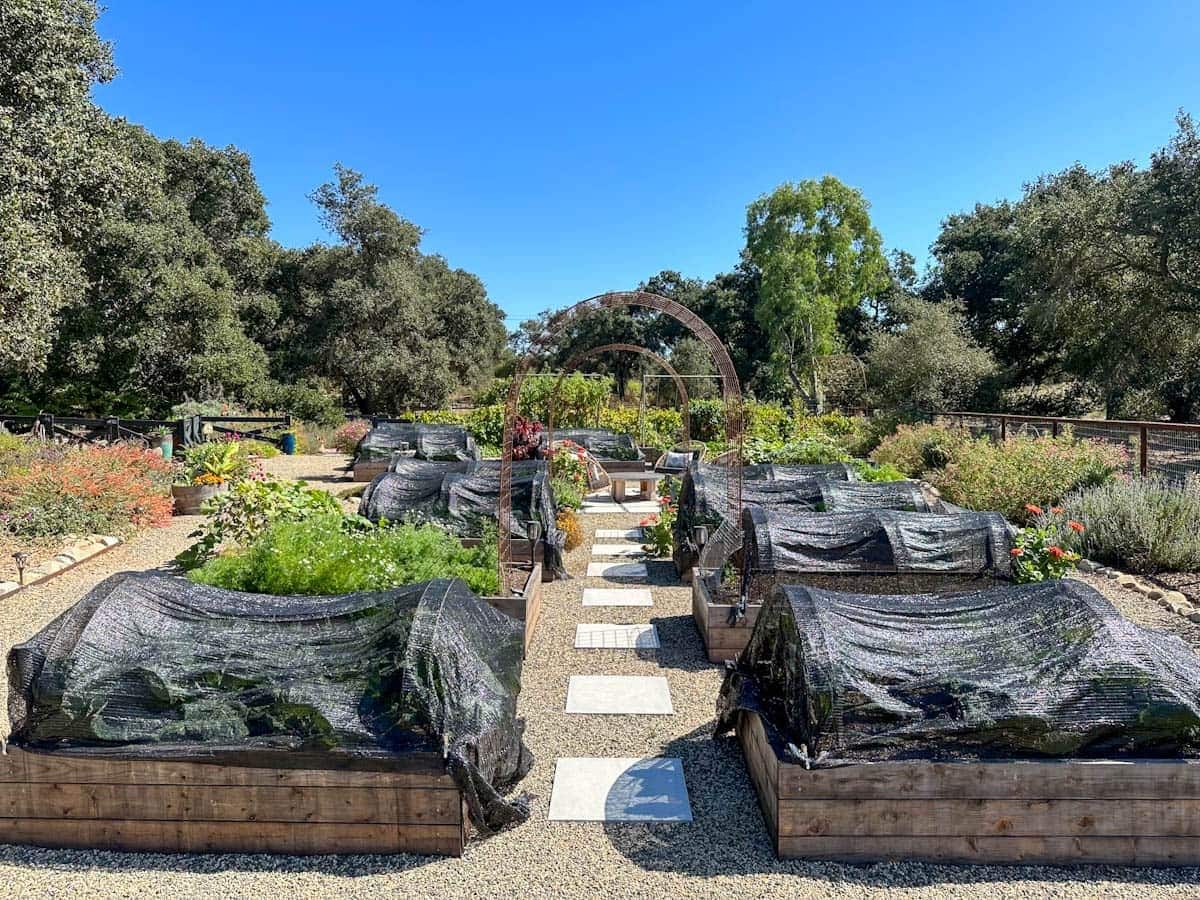
One way to keep carrots cool is to cover them with shade cloth as needed. In warmer climates, you could also plant carrots in a location that receives partial afternoon shade.
Carrots are generally frost-tolerant and can easily withstand a light frost (down to about 28°F) without protection. However, it’s best to cover carrots if temperatures are going to dip in the mid 20s or lower. Freezing weather will affect carrot tops the most, as the roots are much more protected in the soil.
We like to use these garden hoops over our raised beds, which we can use to support either shade cloth, frost cloth, or insect netting to protect our plants.
Carrot Pest and Disease Control
Thankfully, carrots are a fairly low-maintenance crop that aren’t bothered by too many pests or diseases.
A few common carrot pests include whitefly, aphids, carrot weevils, carrot rust flies, flea beetles, root-knot nematodes and cutworms. In our garden, we’ll often find aphids clustered on the base of the greens near the soil line, so check there on occasion. Treat with organic DIY aphid soap spray as needed, which is effective for all soft-bodied insects such as aphids, whitefly, spider mites and mealybugs.
Covering beds with hoops and insect netting is a great way to protect carrots from a wide variety of pests, including insects or larger critters like birds, squirrels, rabbits, or deer that may be attracted to the carrot tops or damage young sprouts.
A number of diseases can affect carrots, including blight, bacterial rot, and fungal diseases. Our carrot greens often get powdery mildew after a couple months of growth. The mildew is never bad enough to negatively impact the carrots themselves, but can make it impossible for us to use the carrot greens (bummer).

Growing Carrots in Containers
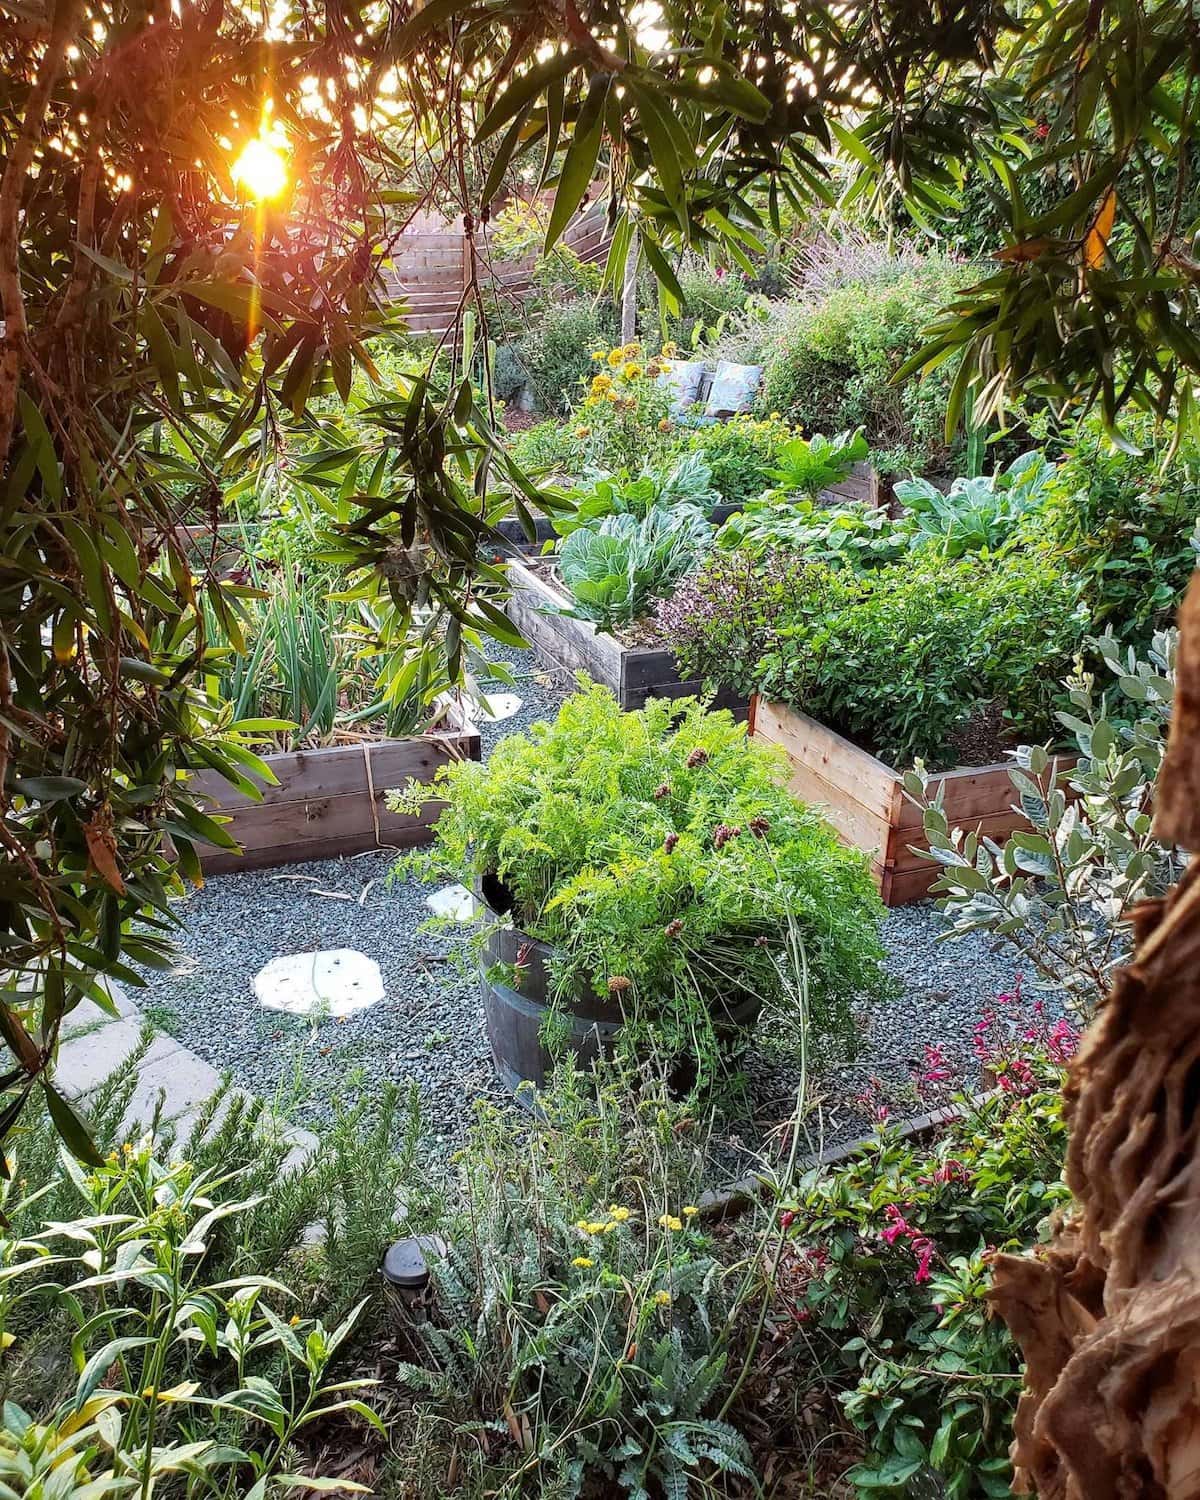
Yes, you can grow carrots in containers too! For the best results, choose a pot or container that is at least a foot deep and has adequate drainage. We like to plant carrots in half wine barrels, but something smaller than that would work too.
When growing carrots in containers, the same best practices for soil, planting, fertilizer, and other tips described in this article apply just the same. However, keep in mind that some containers will dry out more quickly than raised beds or in-ground gardens (especially fabric grow bags), so you may have to increase water frequency to keep the soil modestly damp at all times.
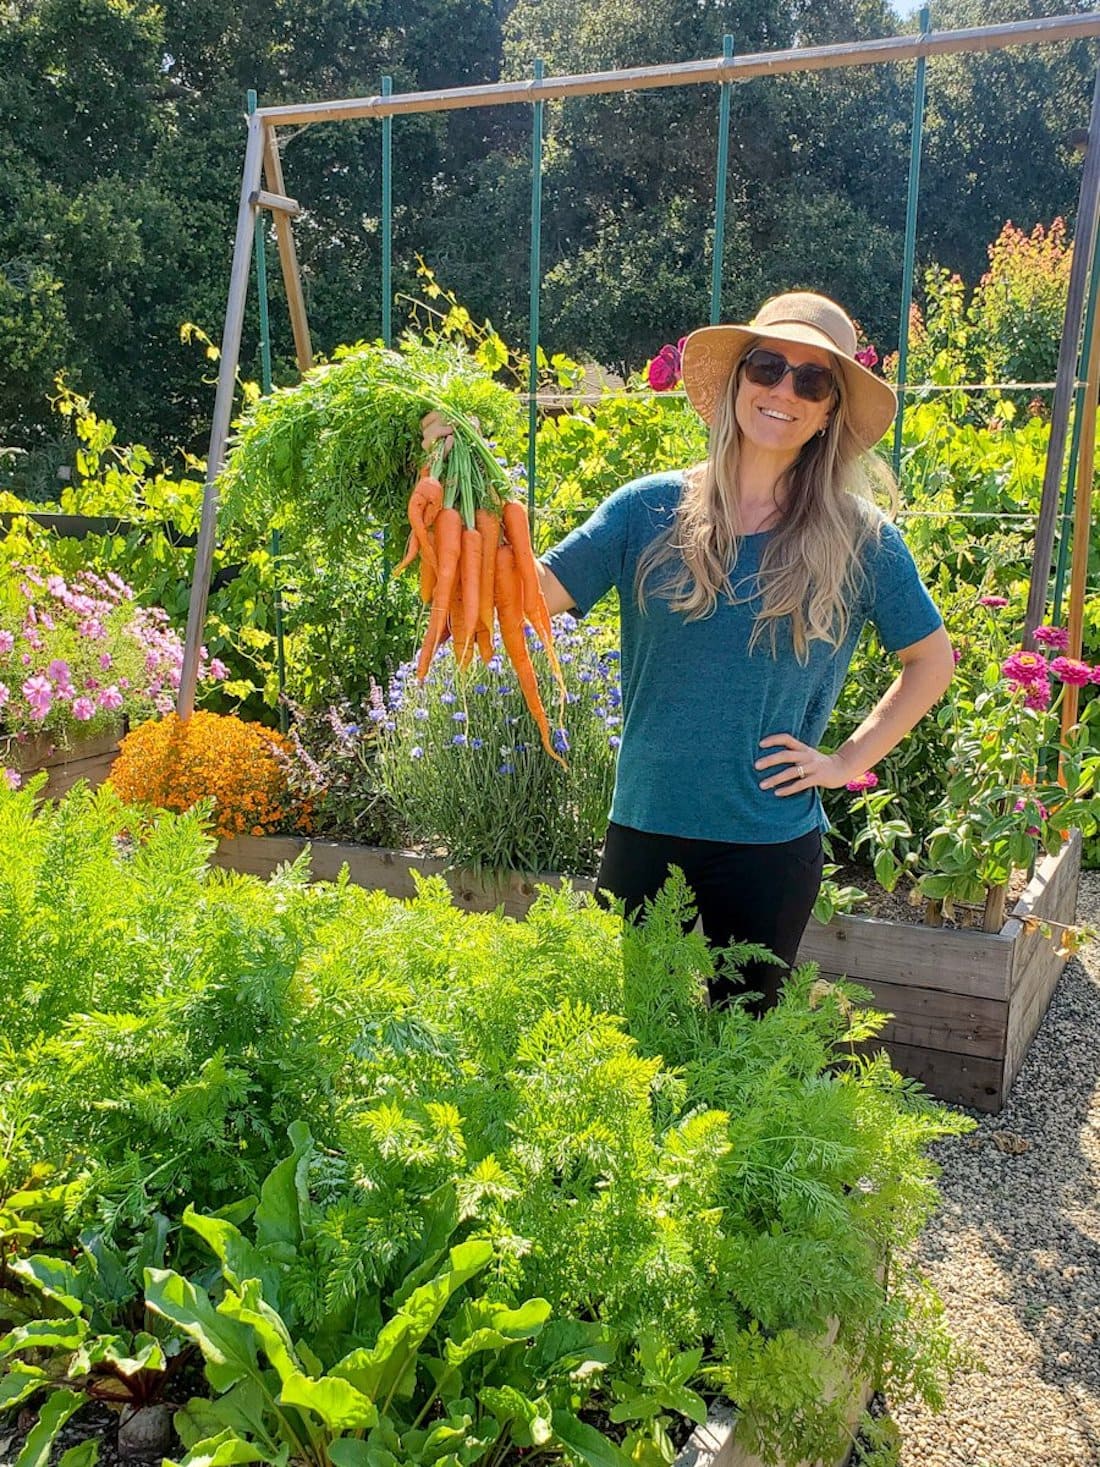
Harvesting Carrots
Now, for the best part! Carrots can take 2 to 4 months to grow from seed to harvest, but they’re well worth the wait. Time to maturity will depend on the variety, weather, soil conditions, and your watering practices. You can wait until carrots reach full size, or start harvesting some younger ones early as “baby carrots” for a staggered harvest.
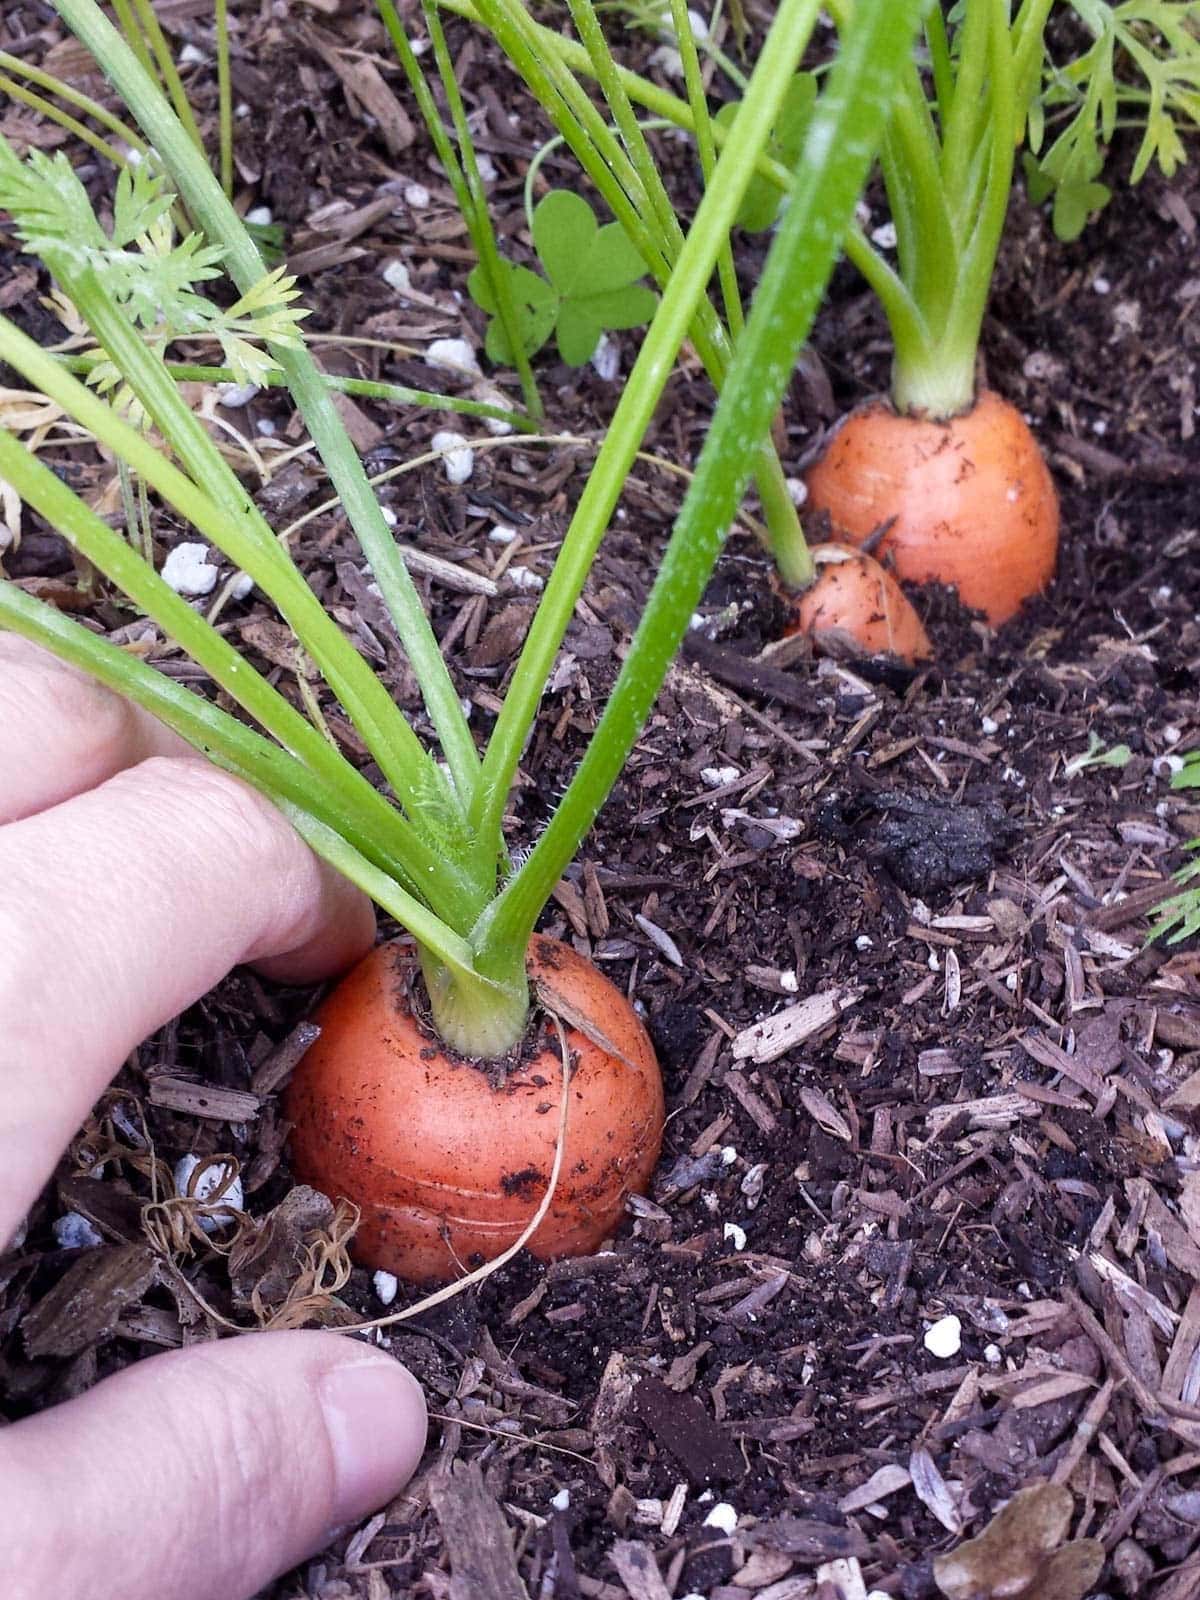
Sometimes, carrots make it quite obvious they’re ready ready for harvest, with thick orange tops poking up out of the soil! Other times, the carrots may stay more buried so gently explore around the top of the carrot at the soil line. If you see some nice round carrot tops forming, give a few test carrots a pull and see how they’re looking! If they’re all still fairly small, give them some more time.
To harvest carrots, you should be able to gently pull up on the greens with a little wiggle. Digging isn’t recommended since it could damage or break the carrots. Another trick is to first press downwards on the carrot by about an inch (which loosens the soil around it) and then pull it up with more ease.
How to Store Carrots After Harvest
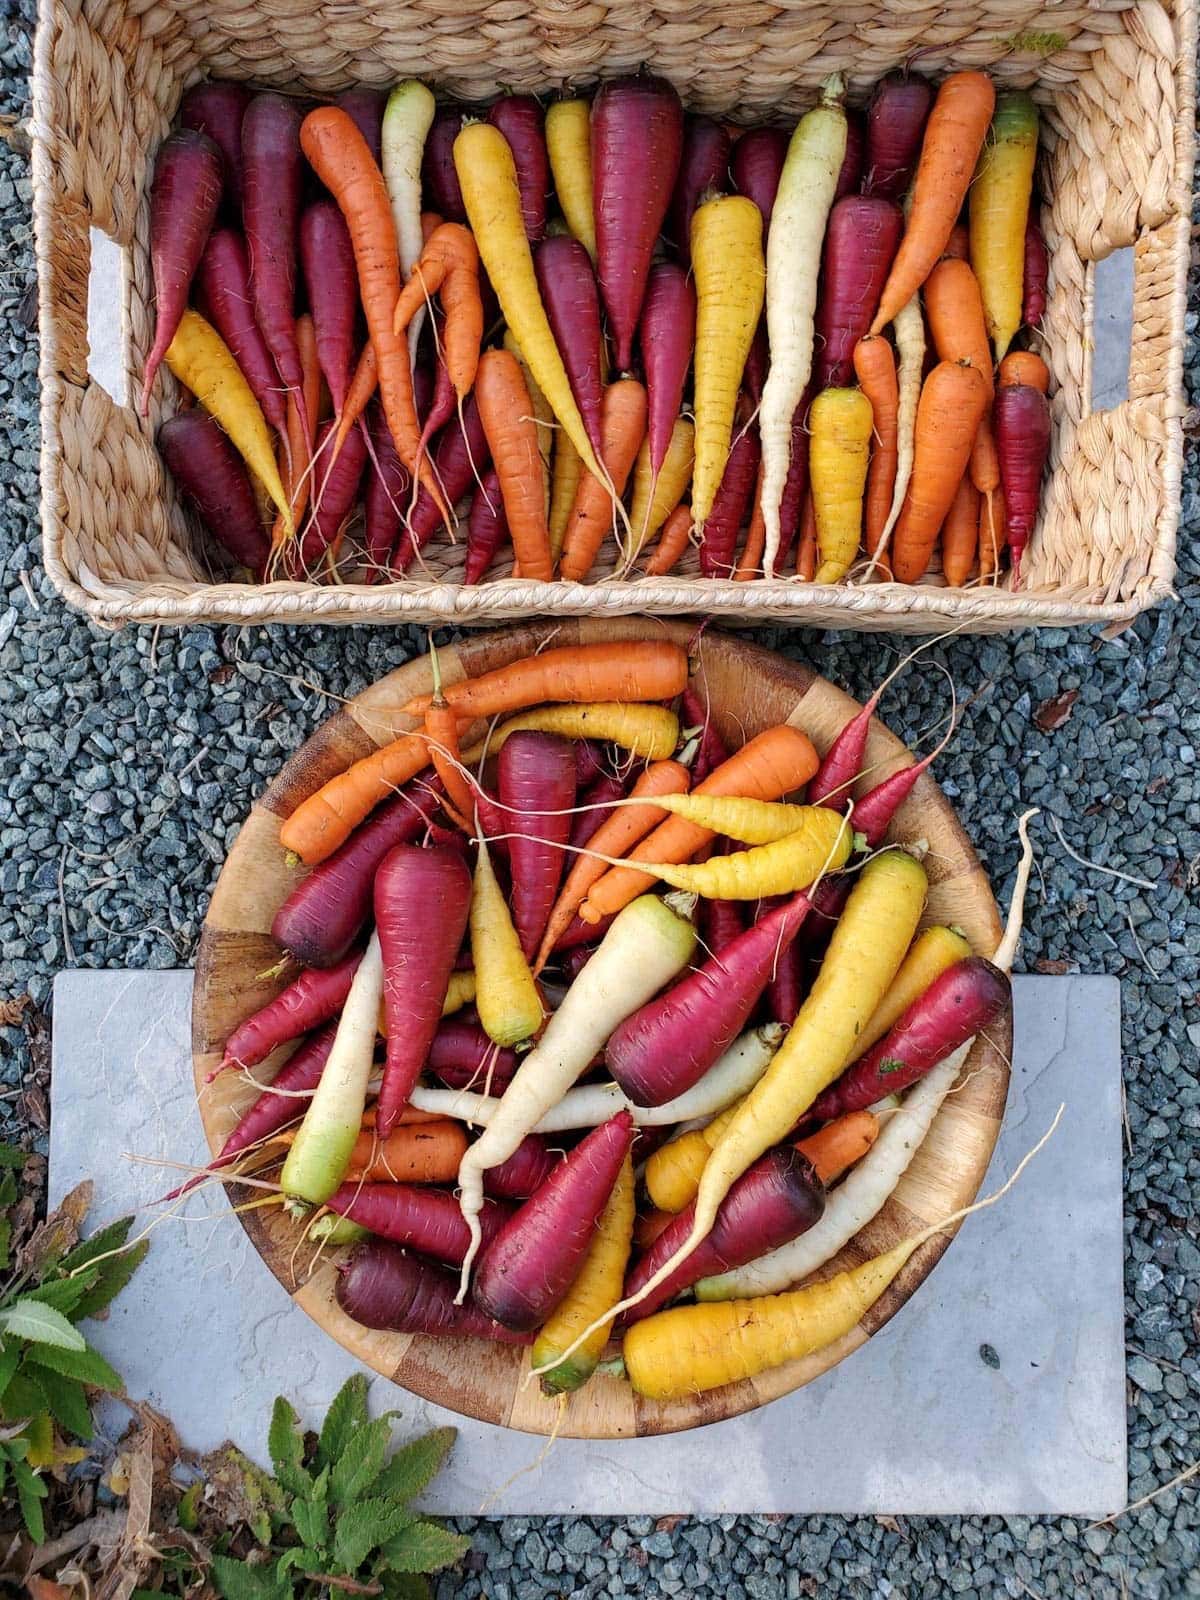
After harvesting carrots, it’s best to remove the green tops prior to storage. Otherwise, the greens will rot quickly and yuck everything up. It’s easy to simply twist them off. However, the greens are edible and need not go to waste! See ideas for how to use carrot greens below. If you don’t want to eat them, at least try to compost them.
While some resources advise against it, we find that rinsing carrots with water after harvest helps them stay more crisp and last far longer in storage.
The best way to store carrots is in a sealed plastic bag (or other fairly airtight containers) in the refrigerator. We add add just a little splash of water in the bag, and our carrots stay crisp and crunchy for MONTHS in the fridge.
It’s important to get them into the fridge soon after harvest to prevent them from going limp. Harvesting carrots during cooler weather also helps them stay firm, such as first thing in the morning.
Another option is to store carrots inside a root storage bin, covered in lightly damp sand and tucked away in a cool dark place. A cool basement or root cellar is perfect! They should also hold up well this way for months.
For even longer term storage, see ideas to preserve carrots in the section below.
Can You Eat Carrot Greens?
Yes, carrot greens are edible! In fact, carrot greens are full of vitamin A and C, dietary fiber, calcium, iron, potassium, chlorophyll, antioxidants, and other nutrients with health-promoting benefits. While their flavor is a bit earthy and strong, but there are plenty of tasty ways to utilize them:
- Juice them in your favorite juicer! Carrot tops are a great addition to green juice.
- Make carrot green pesto. You can use our delicious “besto pesto” recipe with carrot tops.
- Similarly, there are quite a few recipes for carrot green chimichurri out there.
- Use them along with other veggie scraps to create a pot of homemade vegetable broth.
- Chop them up fresh and use them sparingly as a garnish or seasoning, as you would with other fresh herbs. For example, a little carrot greens sprinkled over a bowl of soup or salad, incorporated into a chickpea or egg salad.
Unfortunately, we don’t always get to make use of our carrot greens since they often get a decent case of powdery mildew by harvest time.
Ways to Eat Carrots
- Of course, one of the best ways to enjoy carrots is fresh. Especially homegrown! The flavor and texture can’t be beat. We love to snack on carrots plain, dipped in hummus, on salad, sliced thin on sandwiches, or my personal favorite – dipped in peanut butter.
- Cooked carrots are also fantastic. We enjoy them cut into rounds or sticks, sautéed in a little olive oil or butter with salt, pepper, and other seasonings of choice. We also love oven-roasted carrots.
- Like their greens, carrots are great juiced as well. In addition to enjoying plain carrot juice, I like to add it to homemade kombucha with ginger and/or turmeric as a tasty second ferment flavor.
- Let’s not forget baked goods! Use homegrown grated carrots in carrot cake, carrot bread, muffins, and more.
- Carrots are also wonderful in homemade vegetable broth or soups, like our killer creamy roasted carrot and sweet potato soup recipe.

Ways to Preserve Carrots
If you grow more carrots than you can consume fresh in a timely manner, there are numerous ways to preserve them.
- Try fermenting carrots. See our easy fermented dilly carrot “pickles” recipe. You can also add shredded carrots to homemade sauerkraut, or even mixed into fermented hot sauce to mellow out the heat.
- You can also freeze carrots to preserve them, either in sticks, bite-size pieces, or grated – perfect to use in baked goods. Learn how to freeze carrots with or without balancing here.
- One of our personal favorite ways to preserve carrots is to make a big batch of creamy roasted carrot and sweet potato soup, and then freeze it in portions for future easy meals! We also often add extra carrots to our roasted tomato basil soup recipe. These durable quart-size BPA-free containers are perfect for freezing soup.
- Add thinly-sliced carrots to a food dehydrator to make dried carrot chips, or even grind them into carrot powder.
And that concludes this lesson on growing carrots.
All in all, carrots are a fun, beautiful, fairly easy crop to grow – especially now that you’re armed with all the best tips! If you have been struggling with growing carrots in the past, I hope this article helped. Please leave a comment with any questions you may have. Thanks for tuning in!
You may also like:
- How to Plant and Grow Onions From Seed, Sets, or Seedlings
- How to Grow Beets: Complete Guide with Photos
- Easy Raised Bed Drip Irrigation (from Faucet or Spigot)
- How to Amend and Fertilize Garden Bed Soil Between Seasons
- How to Plant and Grow Garlic: The Ultimate Guide


32 Comments
Melanie Diessel
My mom used to make us a carrot syrup (carrots cut up and sprinkled with sugar and then left to stand to draw out all the carrot juice and goodness. It was apparetly good for your lungs or to treat a cough, at least that was what she used to say. I’m not sure how much value or truth there is in this, but I do remember the syrup being truly yummy. Not sure if there are other healthier ways of making this, but since we only ever got a teaspoon or 2, I don’t think it was overly bad for us either 🙂
Aaron (Mr. DeannaCat)
Sounds delicious and I am sure it was just fine for you!
Nihan
Thank you for the detailed info! I grew them last year, but they turned out soo small. Do you know what may cause it? Thank you 🙂
Aaron (Mr. DeannaCat)
Hello Nihan, did you thin your carrot seedlings down to one sprout per .5 to 1 inch? The carrots will usually stay small if there are too many growing in a small area and they can also vary in size depending on their variety. Hope that helps and good luck!
Rajesh Pandya
Thank you for the detailed how-to for growing carrots. I have never tried growing them before but will certainly do so next year.
Cgfallz
Great article! Purchased a variety of carrot seeds from some of the company’s listed in your “12 places To buy organic, heirloom, and no GMO” article. Thank You
Liz
Excited to try again this winter (also 9b/10a) to achieve that fluffy soil. Thanks for the excellent advice.
Stephanie Reid
Thank you for all the information! You are so detailed and just give us so much info! THANK YOU!
Amber
I have had no luck with carrots. But as you always do, you have motivated me to try again. Thank you so much. I’ll be successful one these times. 😁
DeannaCat
You WILL succeed! I know it. It is spoken. Lol!
Maggie
Great read.. love the scatter method. Going to try for a late harvest!
Tracey McNamara
I’ve unsuccessfully grown carrots a couple times in our small 8×4′ garden, and then gave up to use the space for other veggies. This article was great and gave me the confidence to try again! Thanks!!
DeannaCat
Don’t give up! I wish you the best of luck!
sugarmitten
I grow most of my veggies in 20 gal Smart Pots but have never tried carrots because I didnt think the harvest size would be worth it. I thought I would need more space. After reading this I can’t wait to try it this fall. Thanks for all the info and inspiration.
Patrice Reynolds
This article is a must read for anyone who wants to grow carrots. The article is comprehensive, well written and very informative. It’s also beautifully illustrated with photographs to further enhance the learning process.