

How to Make Sauerkraut: Easy Step-by-Step Recipe with Photos
Come learn how to make homemade sauerkraut with our easy step-by-step recipe. It’s tangy, delicious, and full of gut-healthy probiotics! This simple method is perfect for beginners and only requires two ingredients: cabbage and salt. The result is a classic sauerkraut that compliments a wide variety of meals.
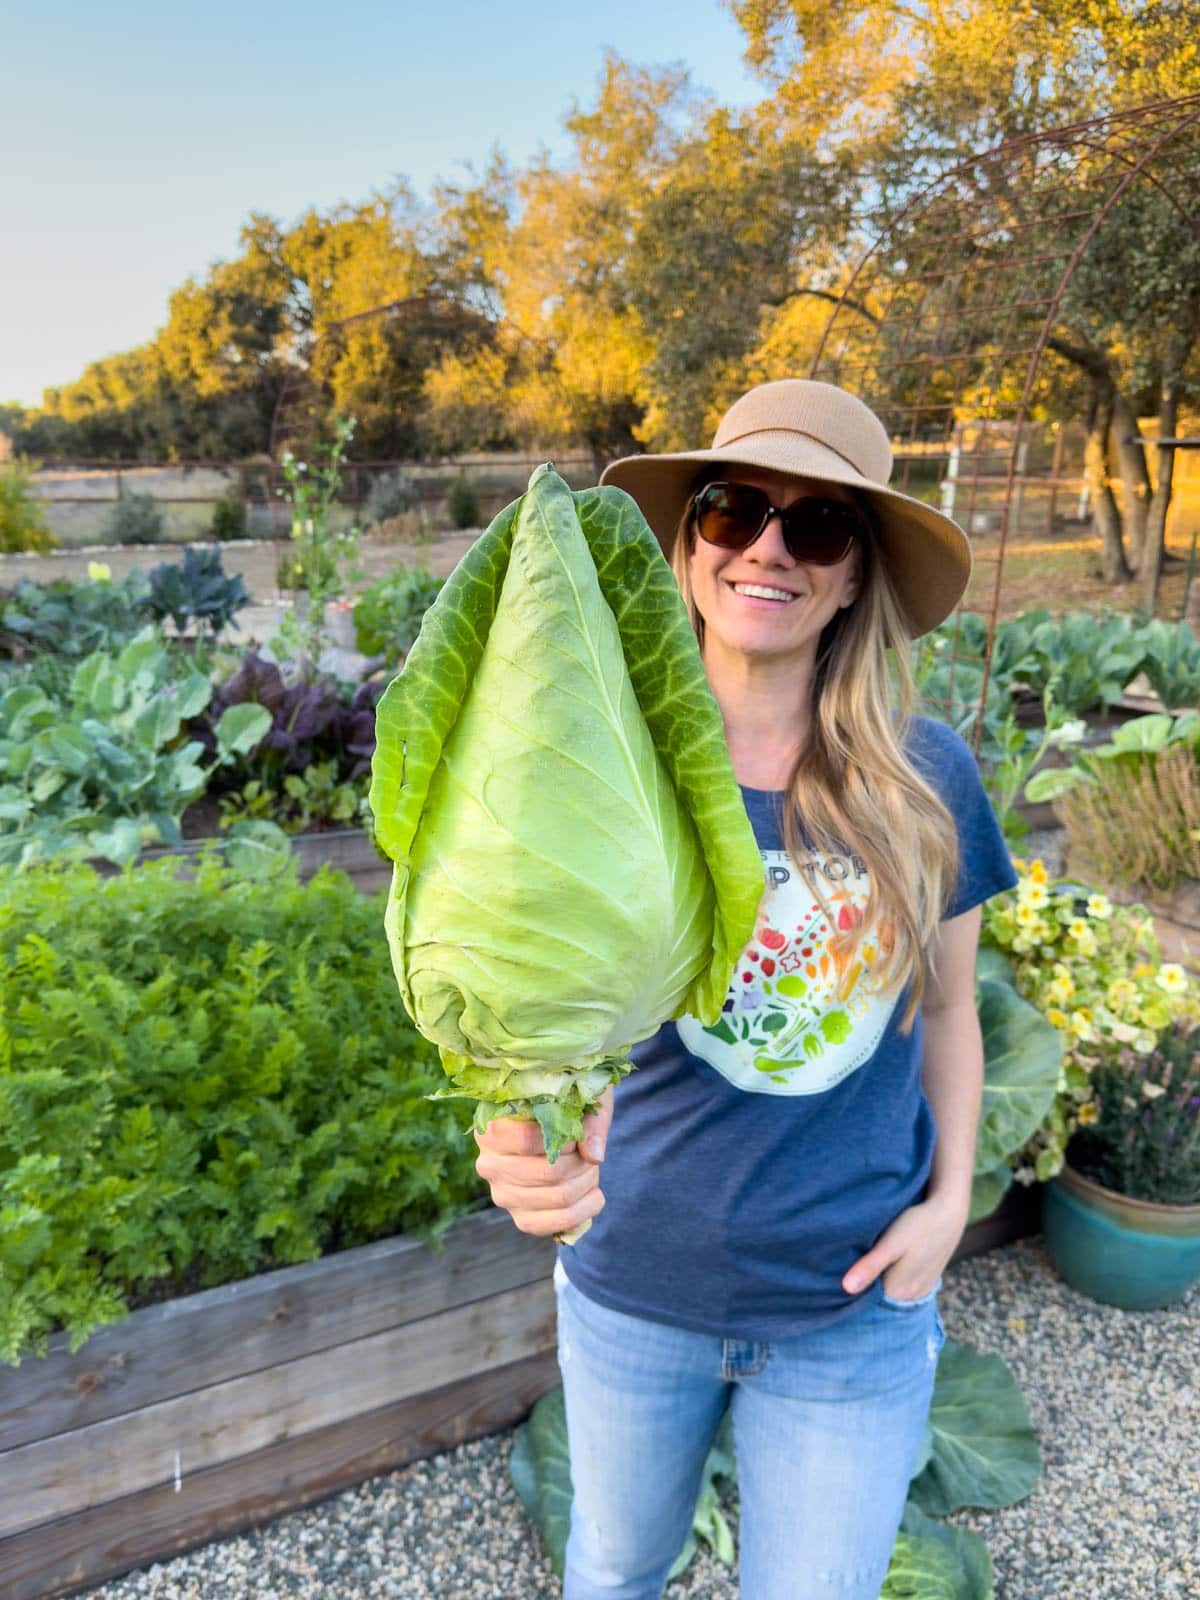
Sauerkraut is one of my favorite fermented foods (which is saying a lot) and an awesome way to preserve homegrown cabbage from the garden. We love to eat it alongside sandwiches, eggs, potatoes, sautéed veggies and more. I hope you enjoy this simple recipe as much as we do!
Note: This post was originally published in April 2019 but significantly updated since.
Would you like to save this?
What is Sauerkraut?
Sauerkraut is a German term that literally means “sour cabbage“. While popularized by Germany, fermented cabbage has been made around the world for centuries, originating in China over 2000 years ago.
When shredded cabbage is mixed with 1.5%-2.5% salt and allowed to ferment for many weeks (to months) at room temperature, it softens, releases its natural juices, and becomes increasingly sour in flavor. The combination of salt, beneficial bacteria, and acid produced during the lacto-fermentation process safely preserves it by lowering the pH.
In all my years making sauerkraut, I’ve experimented with numerous spices and flavors combinations: curry kraut with turmeric and ginger, pickle-style with dill and garlic… Heck, I even added apples to a batch once! But to be honest, nothing quite beats a traditional, simple salted cabbage sauerkraut like this recipe.
The Best Cabbage to Make Sauerkraut
You can make sauerkraut using either red or green cabbage, or even a mix of both. Either way, be sure to choose a cabbage that is fresh, tender, organic, and relatively blemish-free.
In my experience, green cabbage will yield a more tender and juicy sauerkraut while purple cabbage can stay more crunchy and crisp – which isn’t necessarily a bad or good thing, it just depends on your preference.
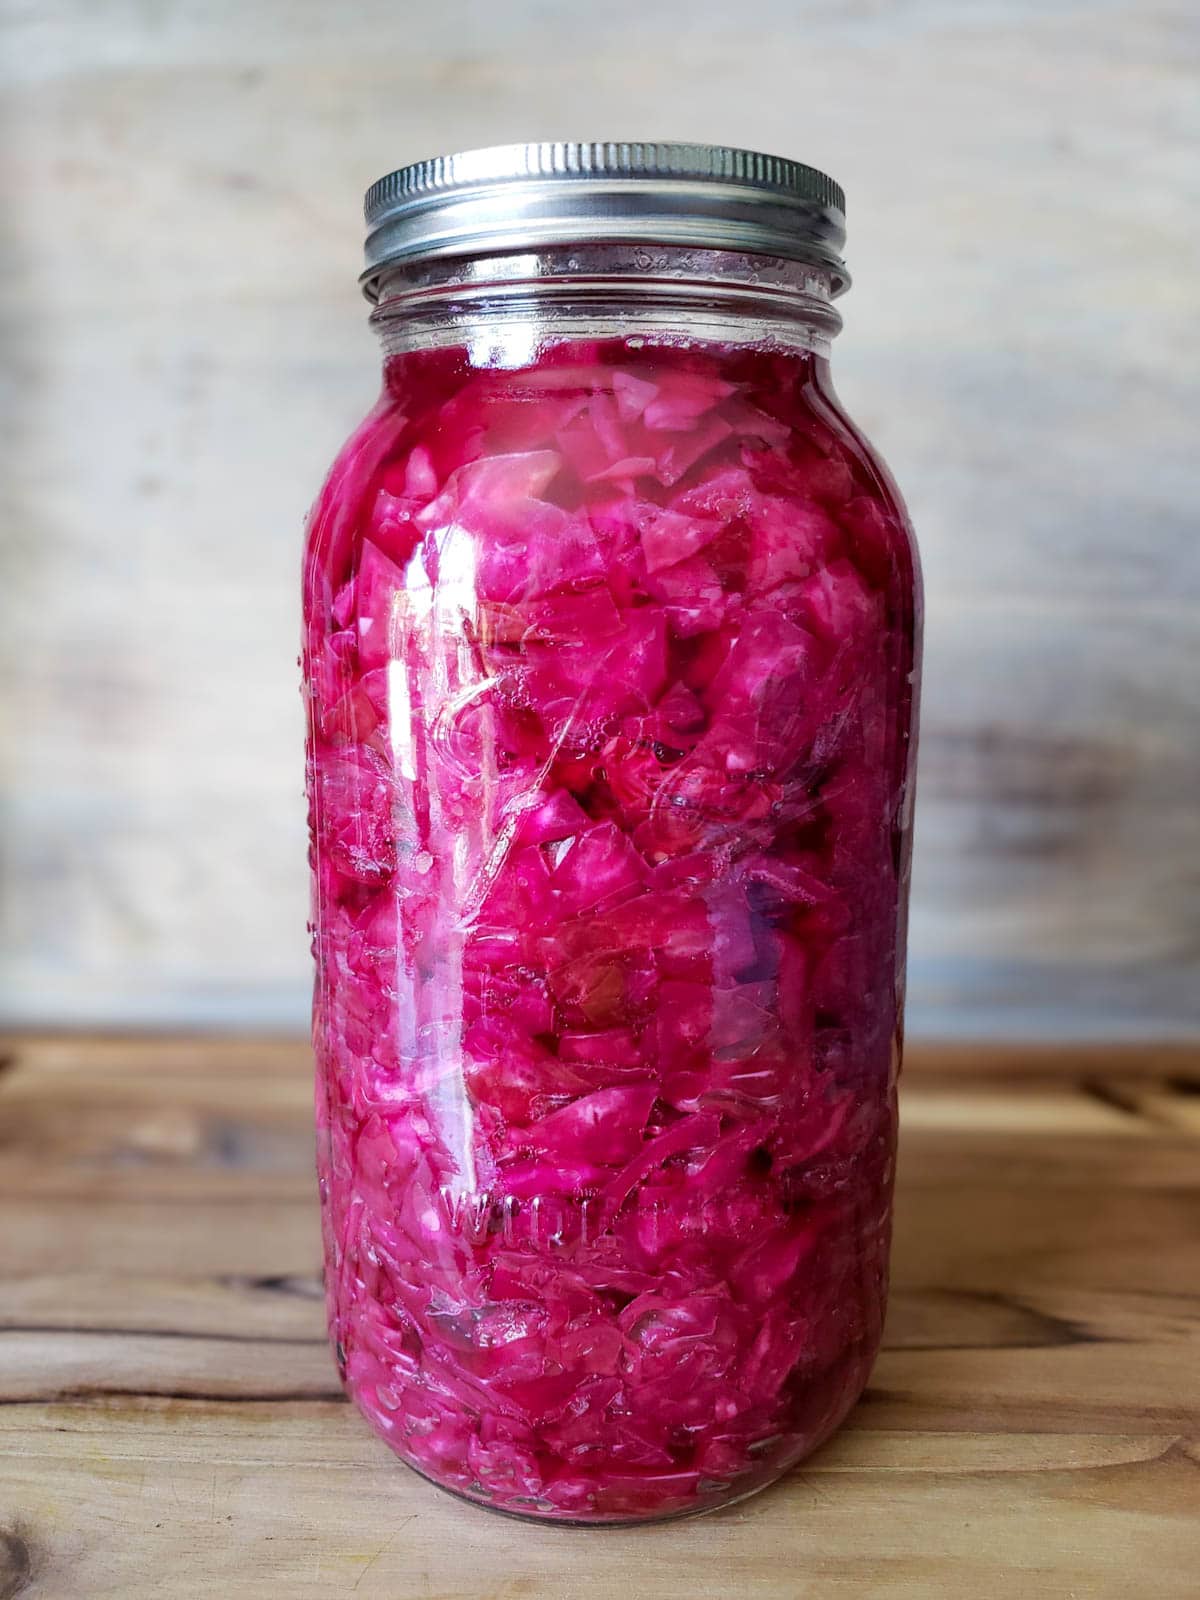
Personally, I like to make green sauerkraut the most, or at least half green cabbage and half red. But purple cabbage does create a super beautiful bright-pink colored sauerkraut that is also higher in antioxidants!
RELATED: If you enjoy this recipe, don’t miss our delicious tangy coleslaw recipe, fermented hot sauce recipe, lacto-fermented pickles (cucumbers) or this guide on how to grow cabbage!
Ingredients
- 2 pounds of fresh tender cabbage, weighed after shredding or finely chopping (so start with a cabbage that weighs slightly more). It’s best to make sauerkraut with organic cabbage since non-organic produce is treated with chemicals that can interfere with the fermentation process.
- 4 teaspoons of salt (1 Tbsp + 1 tsp). Sea salt, pickling salt or other kosher salt is best for fermenting vegetables. (Avoid using iodized table salt.) We like to use Redmond real salt or Celtic grey sea salt. To scale this recipe up or down, simply keep the same ratio of salt-to-cabbage (2 tsp of salt per 1 pound of cabbage, or about 2% salt vs the cabbage weight).
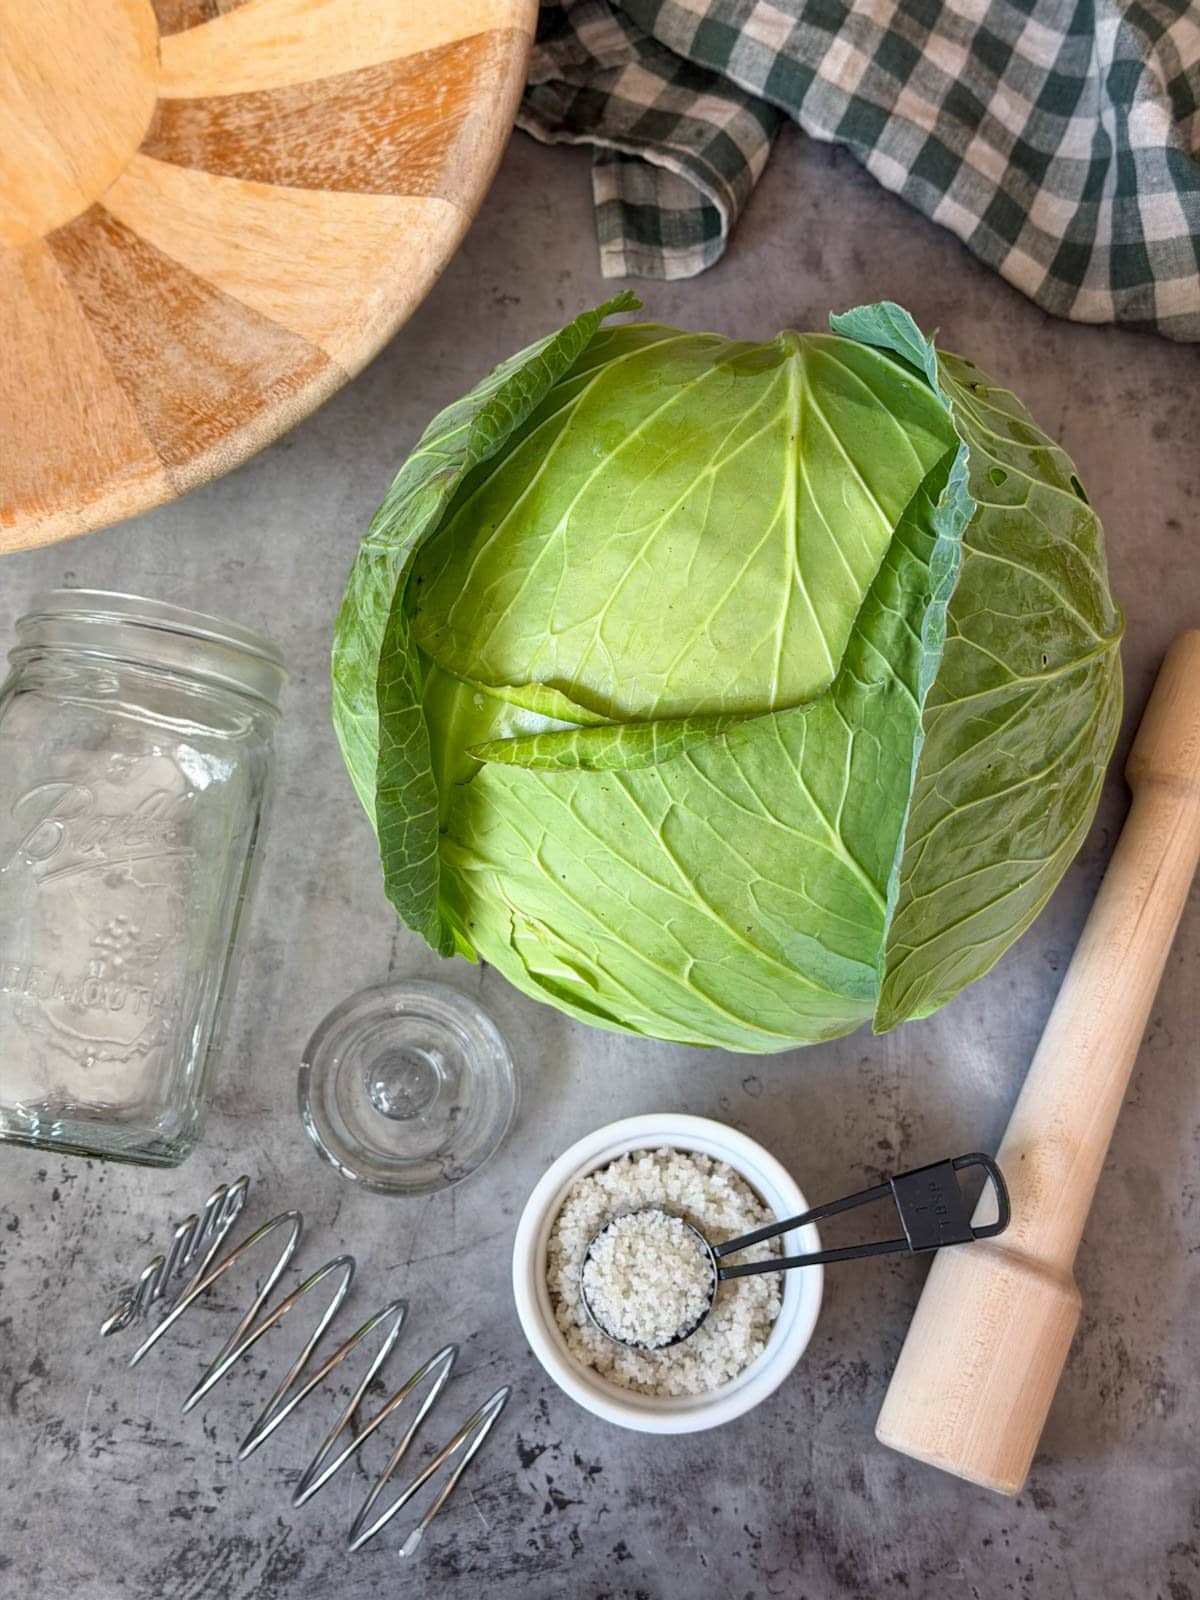
Supplies Needed
- A glass or ceramic fermenting vessel. This sauerkraut recipe fits best inside a wide-mouth quart jar (or liter size jar) though you can easily scale up or down. For example, we often double the recipe and use a half-gallon jar. Avoid plastic for fermenting.
- Cutting board and knife or mandolin slicer
- Large mixing bowl
- Kitchen scale
- Optional: Kraut pounder or tamper
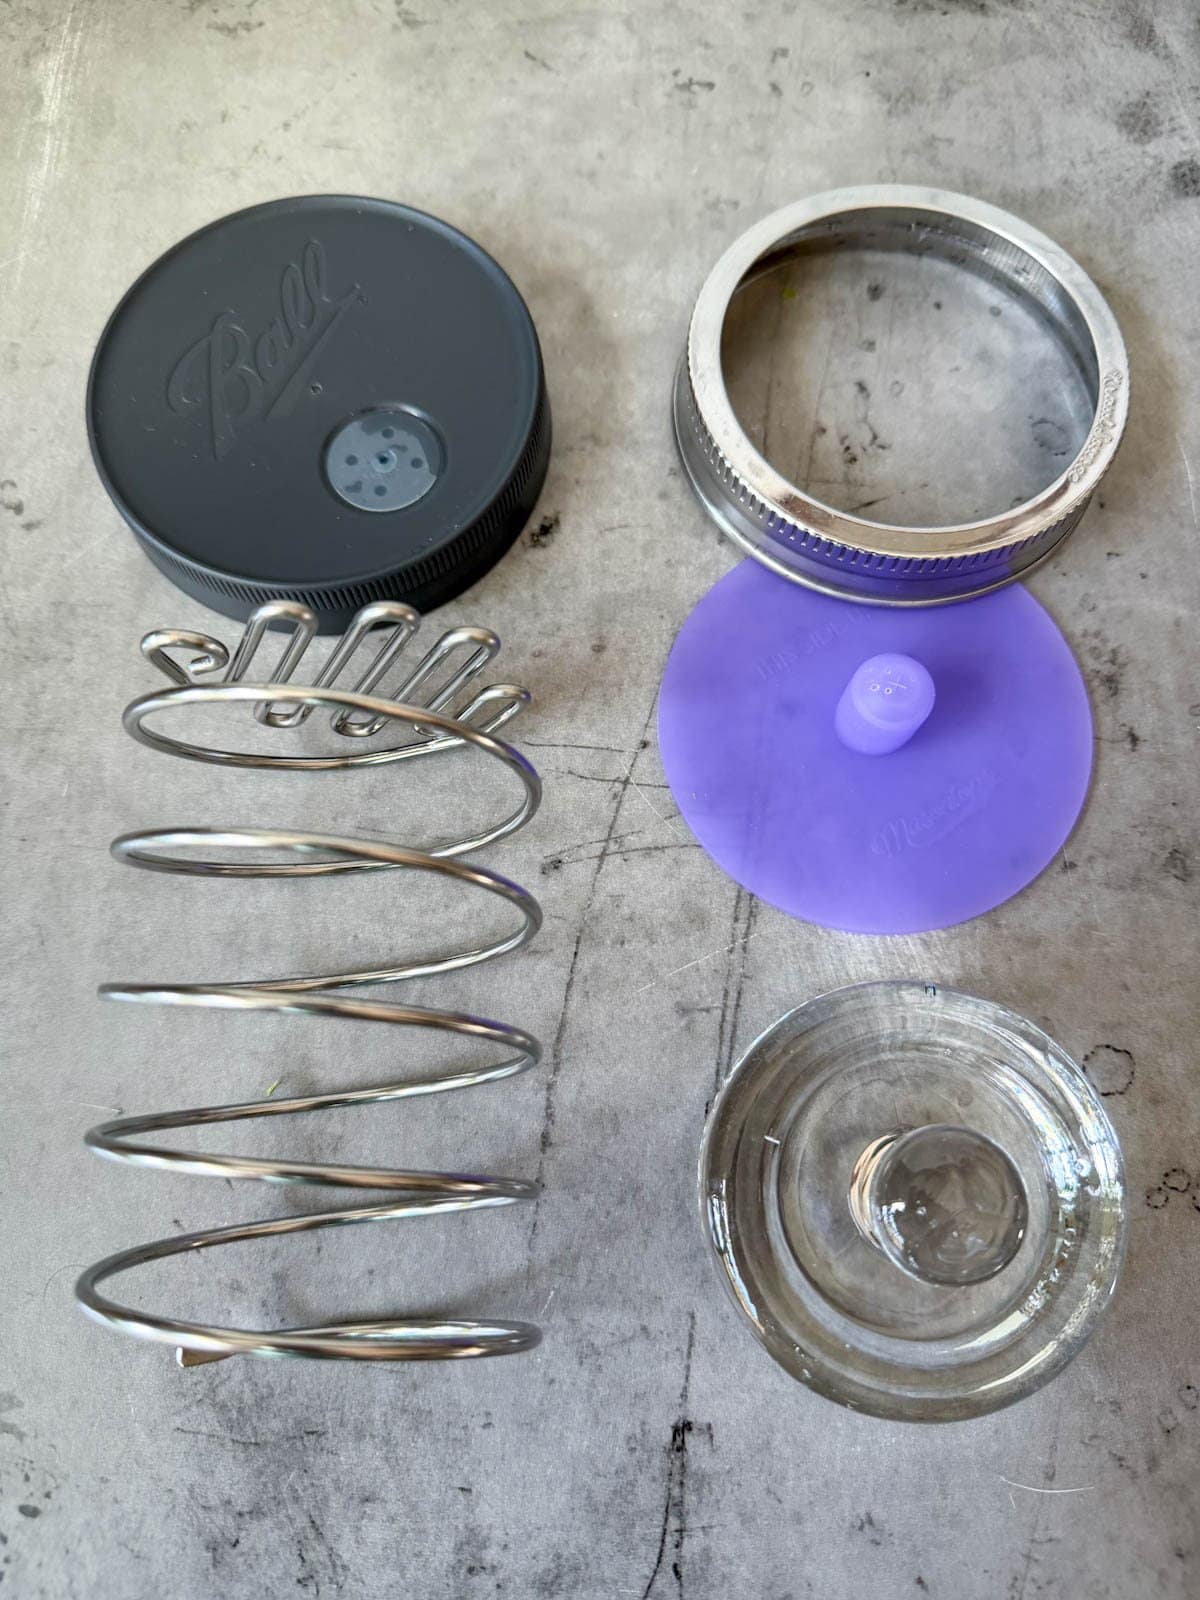
- Fermenting weight* such as these glass weights
- Recommended: an airlock fermentation lid that fits your jar like this one or this other option, which are designed to automatically release carbon dioxide gas as it forms inside the jar during fermentation. If you don’t have an air lock, you can lightly screw on a regular non-reactive lid instead (with a weight below), but make sure to “burp” (quickly open) your jars every day to release the built up gases. I recommend these BPA-free plastic lids as metal may corrode.
*NOTE: A separate weight isn’t needed if your fermentation lid includes a weight or springs, like these airlock lids that include both. For extra large batches, this awesome 1-gallon ceramic fermentation crock includes a lid and weights too.
Pro Tip: How to Clean Fermentation Supplies
It’s important to start with a clean jar and supplies when making sauerkraut (or other fermented foods), but they don’t need to be sterile as they do for canning. Also, it’s best to avoid bleach or scented dish soap to clean your fermentation supplies since leftover residue will negatively impact the flavor! Instead, we spray ours with plain white vinegar, and then rinse well with very hot water.
How to Make Sauerkraut
1) Prepare the Cabbage
- Tare and/or note the weight of your bowl before you start, so you can determine once you’ve added 2 pounds of shredded cabbage to the bowl.
- Wash the cabbage with warm water and remove any tattered or bruised outer leaves.
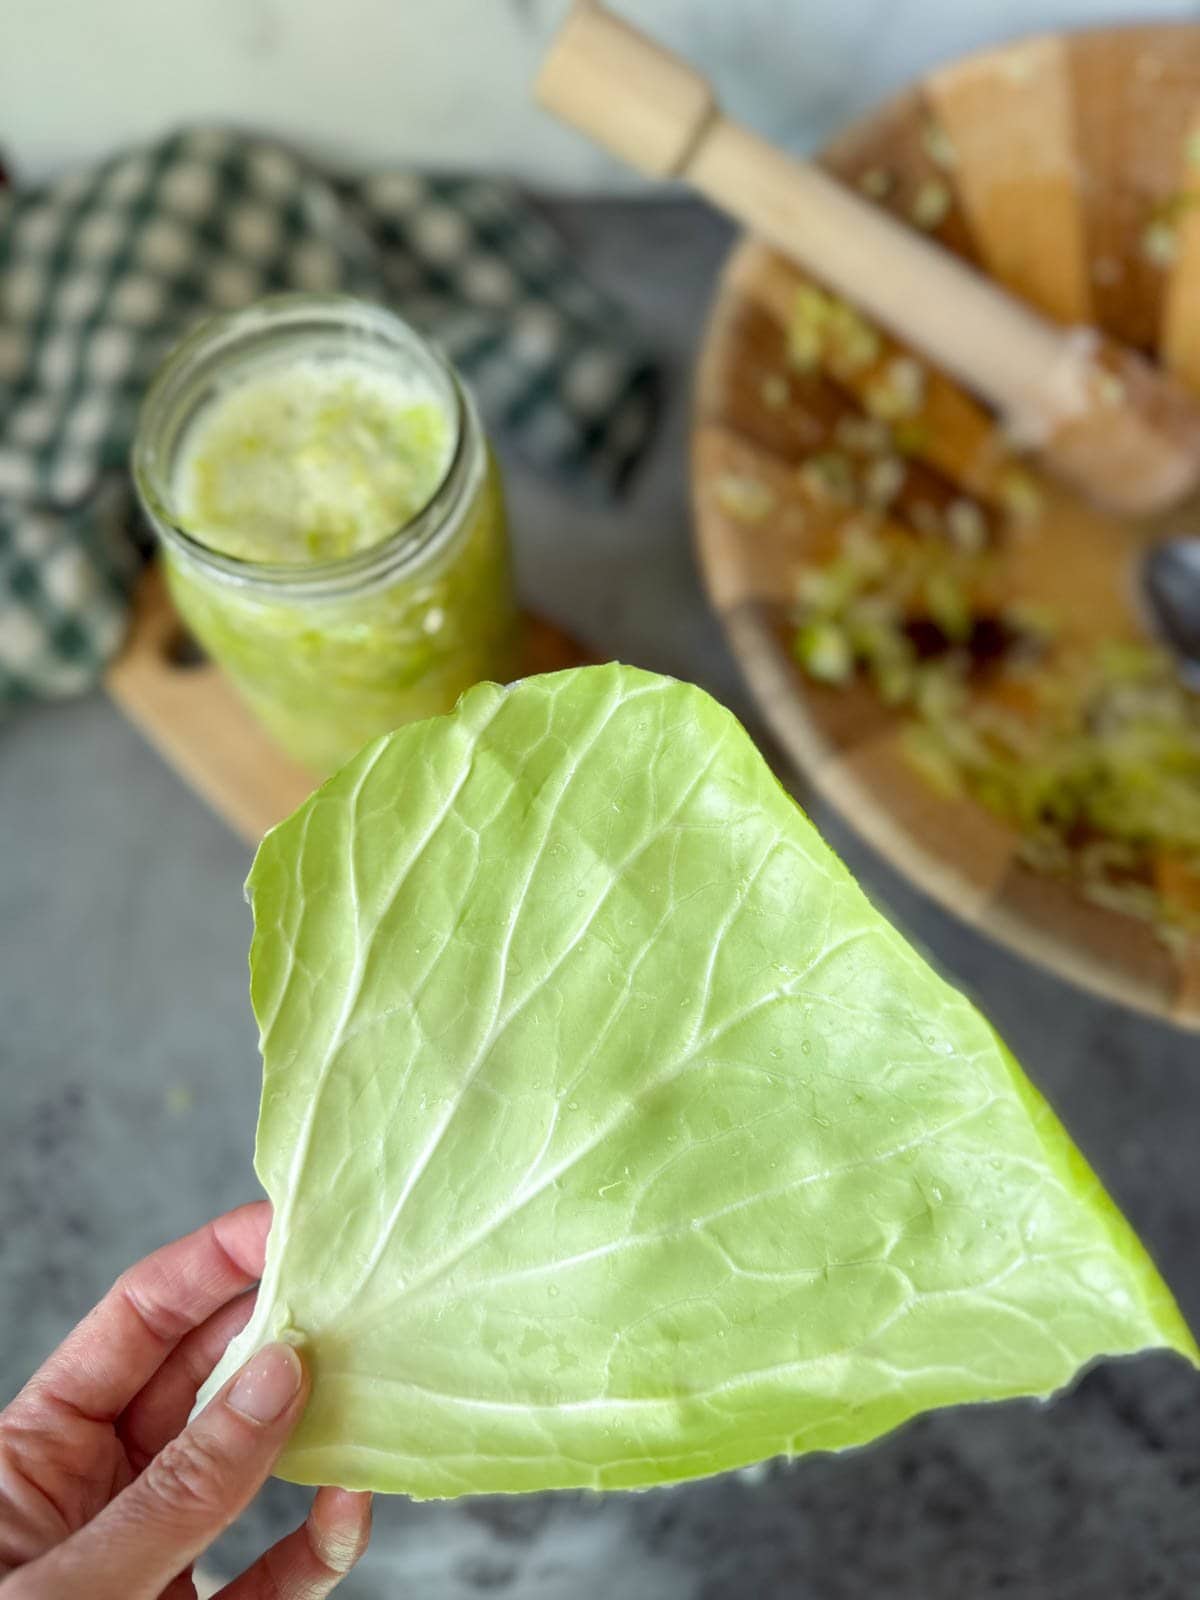
- Peel off and reserve a couple nice large outer leaves (kept whole). We’ll use these later under the fermentation weight.
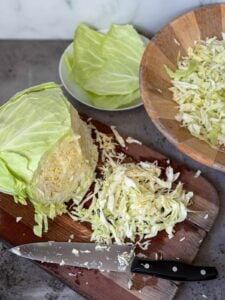
- Cut the cabbage in half (or quarters) and remove the tough center core – we don’t want to use that part.
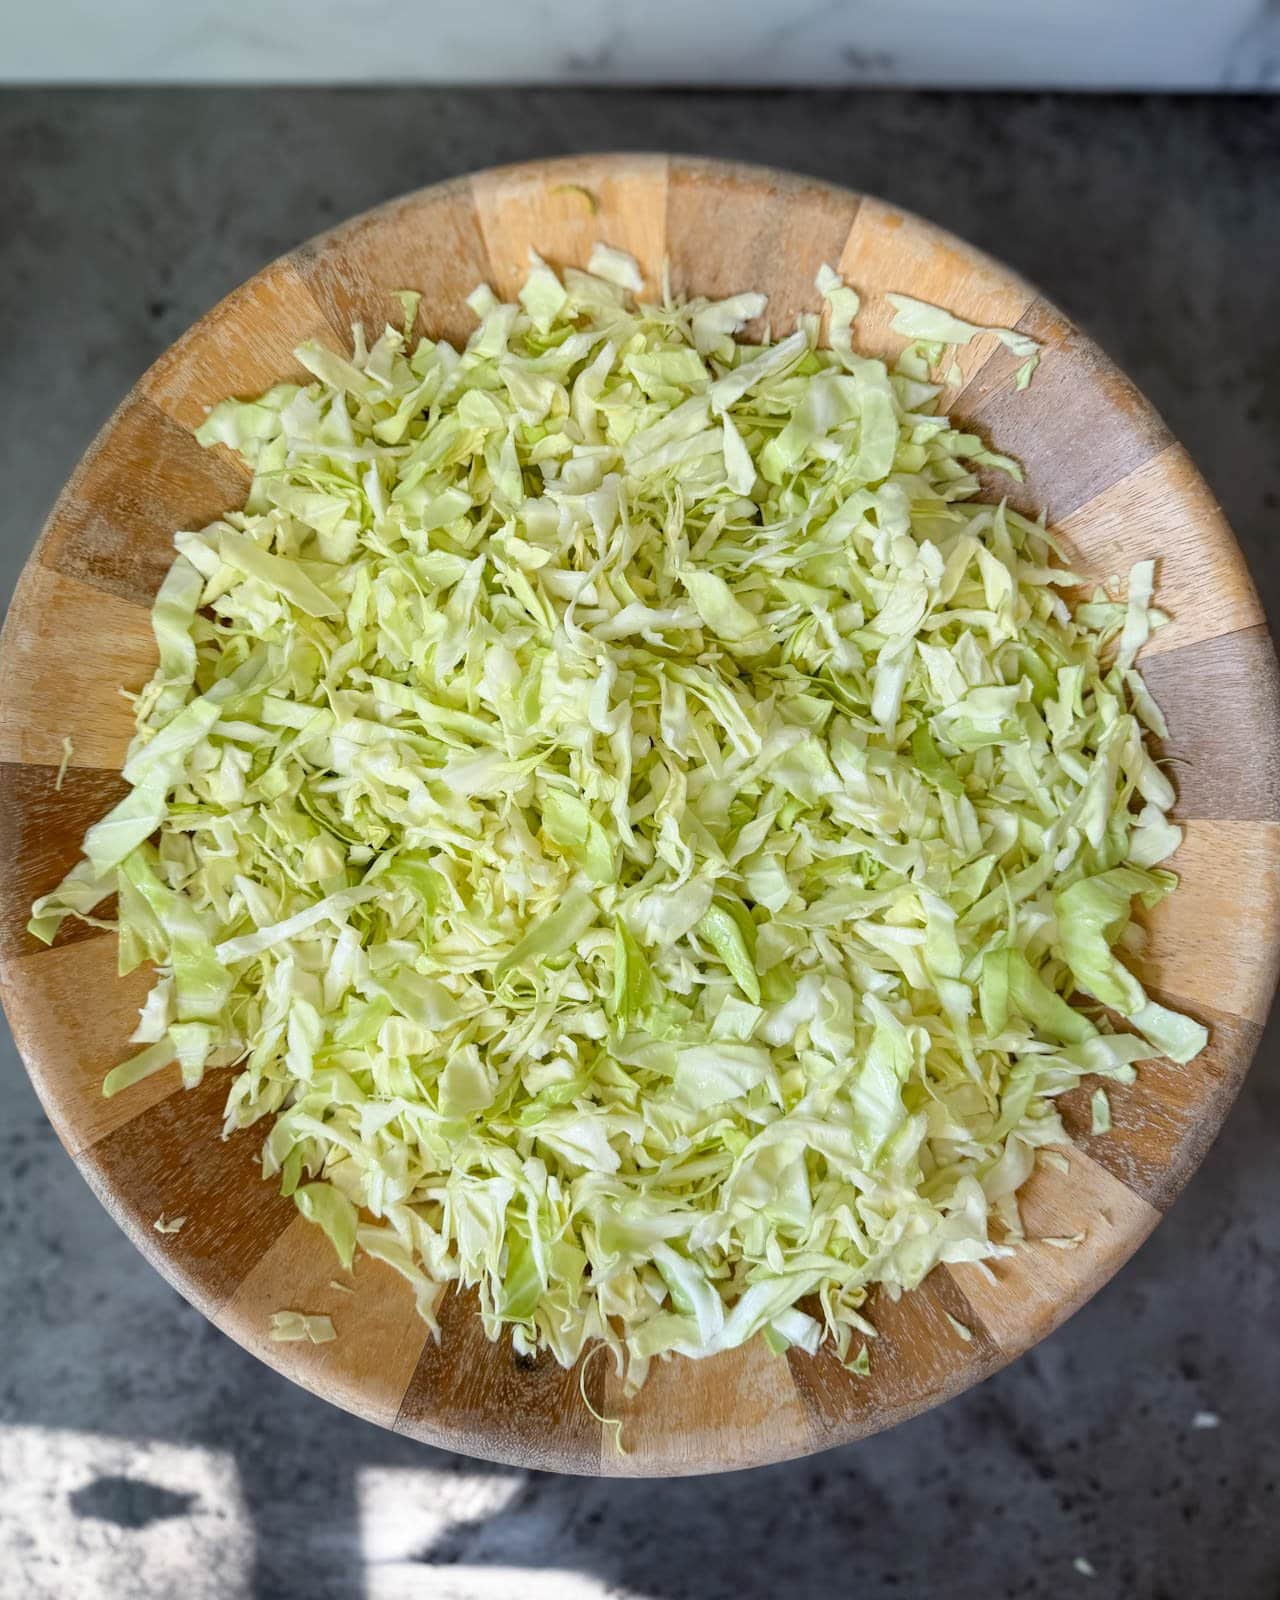
- Next, thinly slice the cabbage into fine shreds or 1/8-inch thick “ribbons”. For the best sauerkraut texture, I recommend cutting the cabbage by hand with a knife or mandolin slicer, but not a food processor.
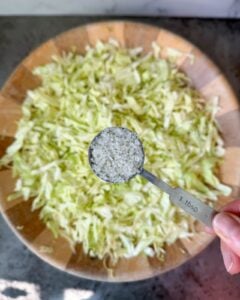
- Add the sliced cabbage into your bowl, weighing as you go until you reach 2 pounds (or other desired weight if you’re making more or less).

2) Salt and Massage
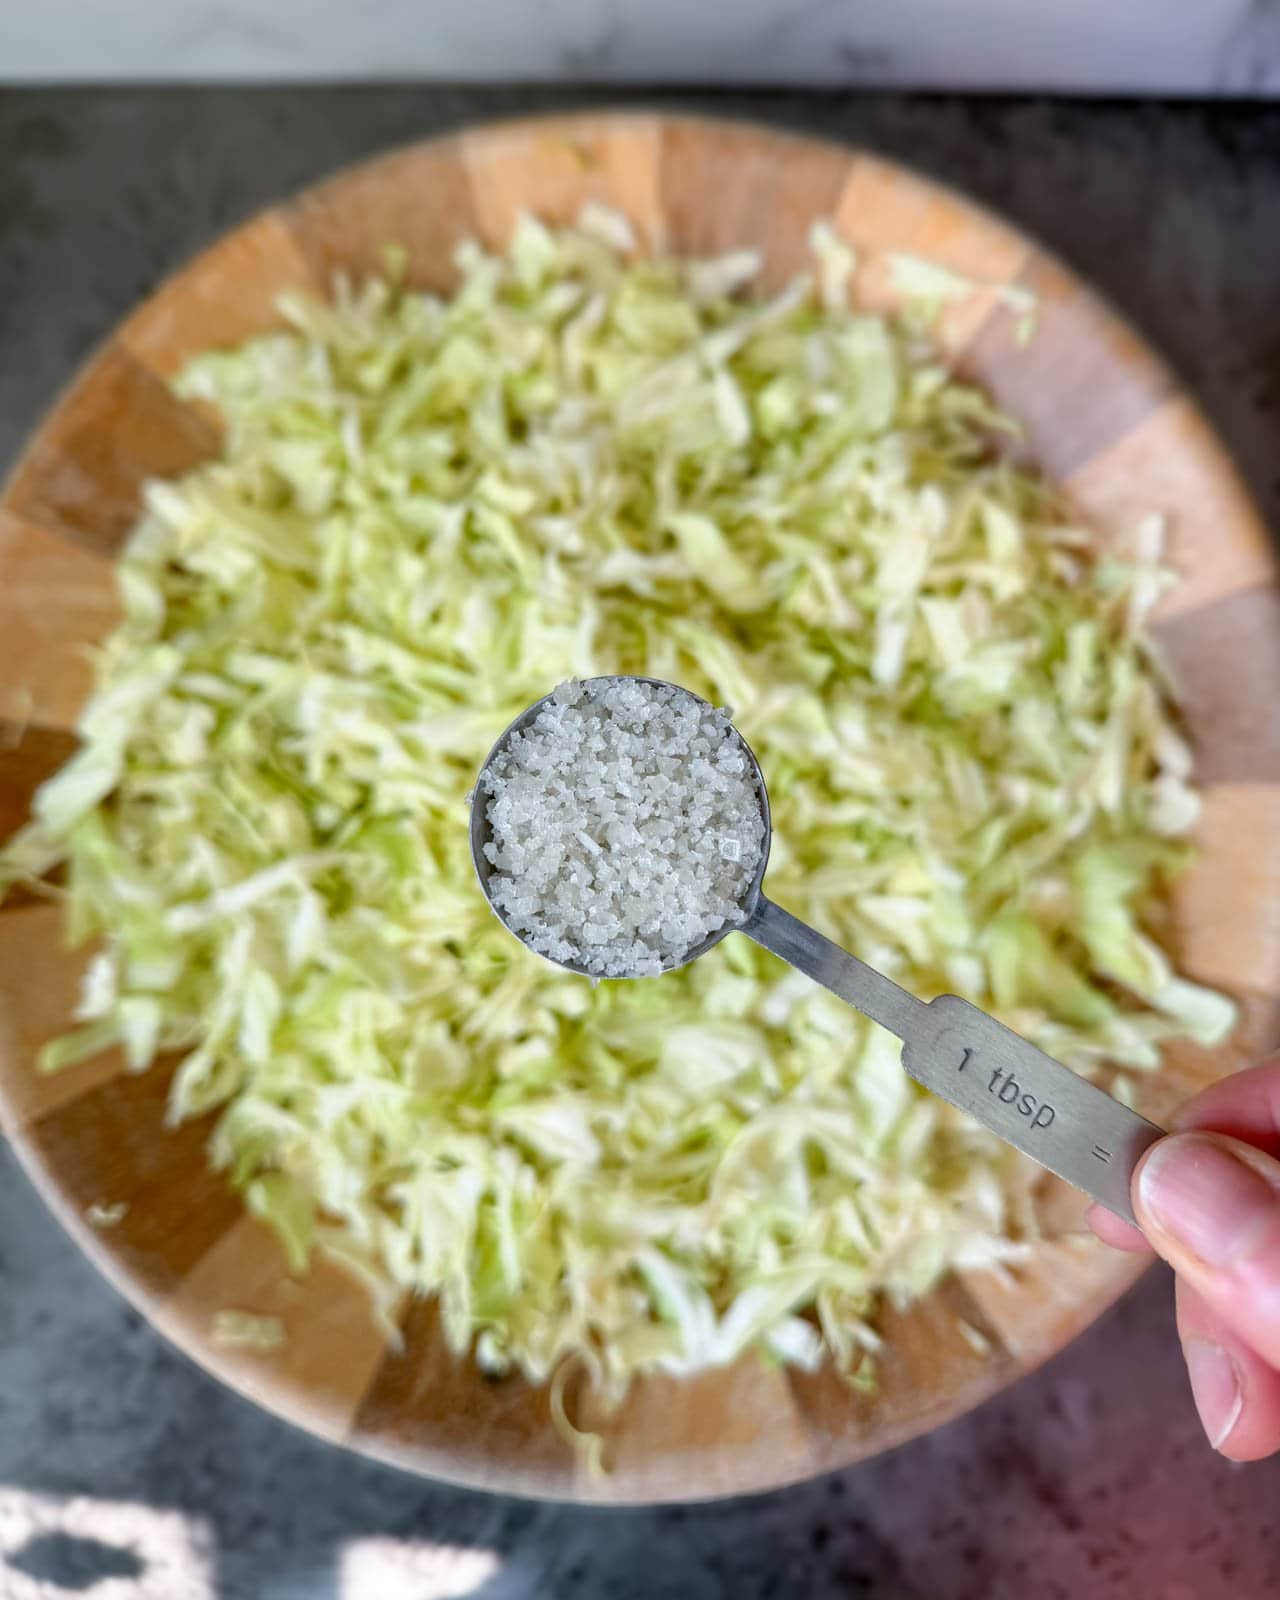
- Next, sprinkle 1 Tbsp + 1 tsp of sea salt over the 2 pounds of cabbage (or 2 tsp per 1 pound). Toss and mix well to combine.
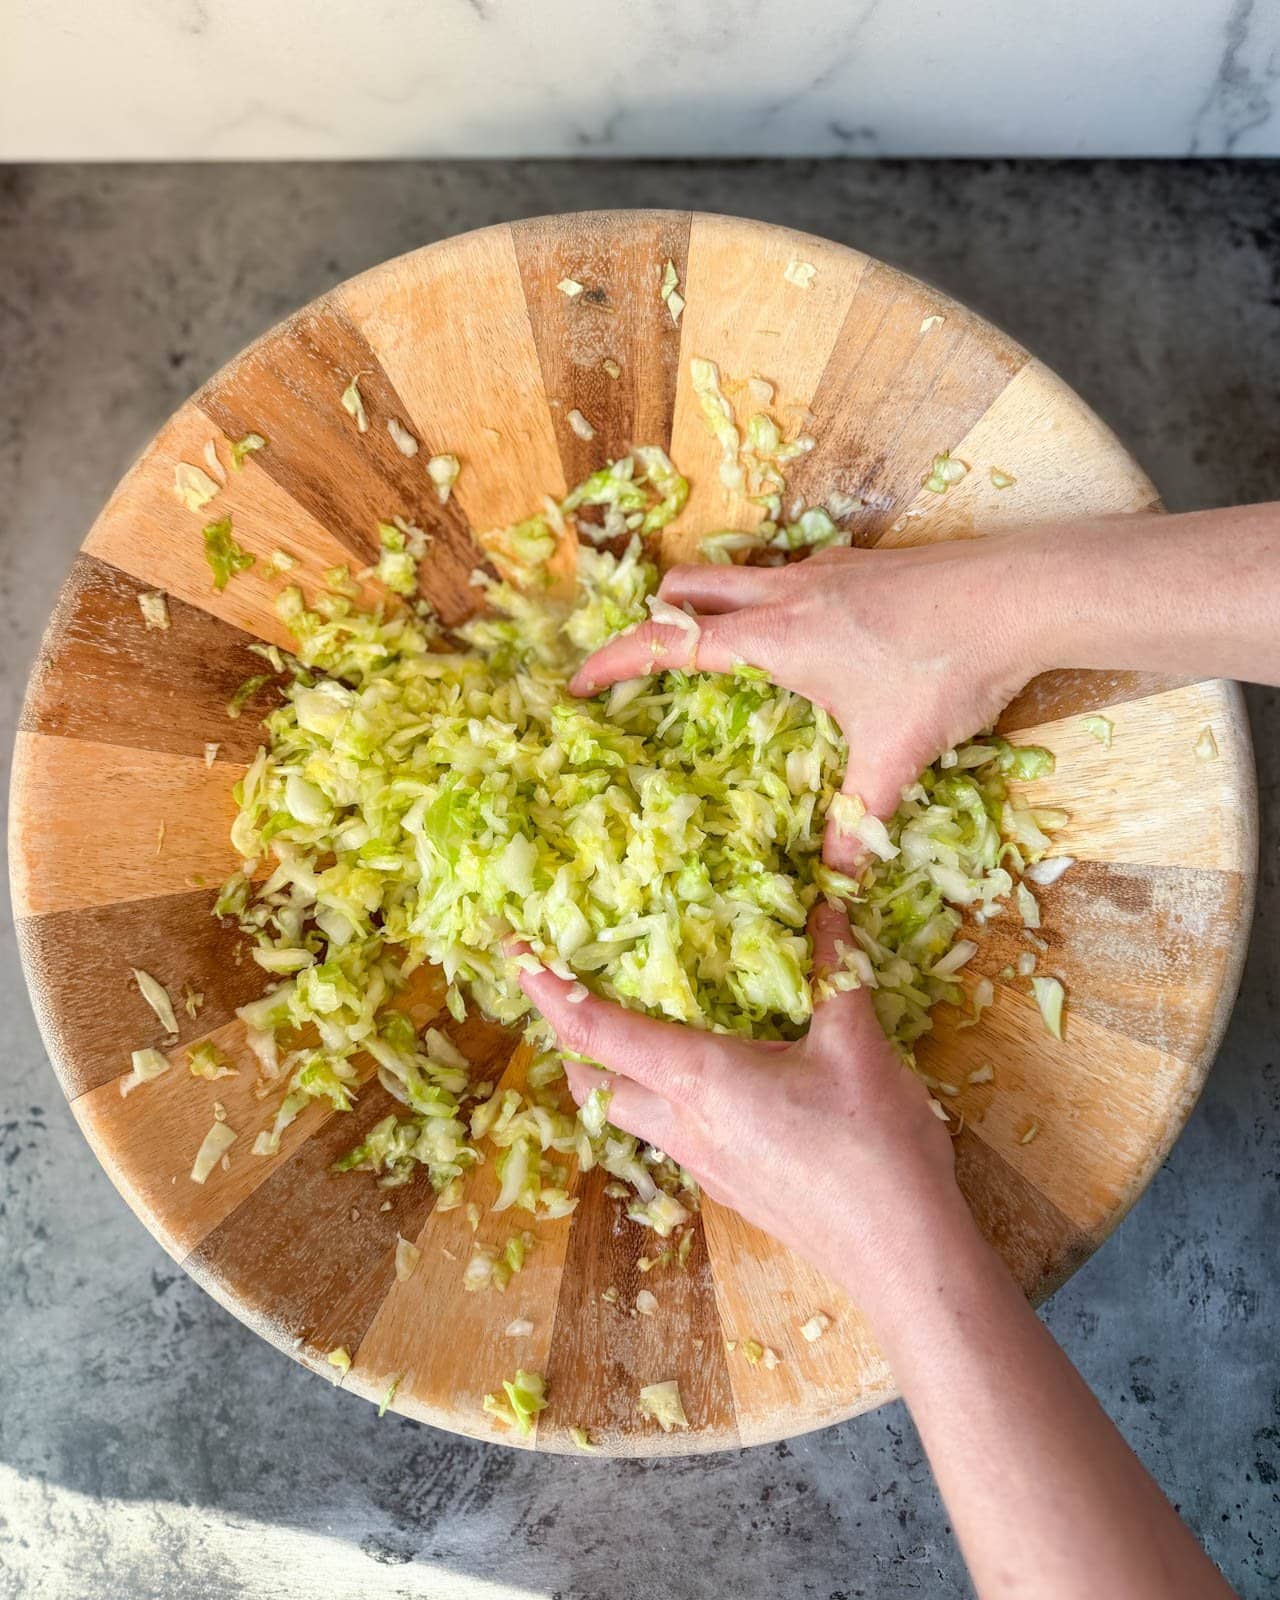
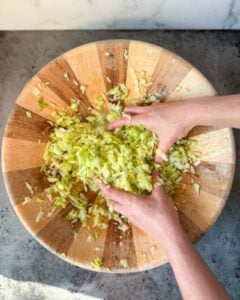
- Using very clean hands, squeeze and massage the cabbage for a few minutes to help it begin to soften.
- Allow the salted cabbage to rest for about 10 to 15 minutes, and then repeat the massaging process for several minutes. It should significantly soften, wilt, and reduce in volume by now – and release a lot of natural juices into the bowl.
- I usually like to let it rest for 5 more minutes before transferring to the jar.
- Alternatively (if you don’t want to massage by hand) you can salt the cabbage and let it sit for 30 minutes draw out moisture, then use a pounder/tamper to crush it further.
3) Pack the Jar
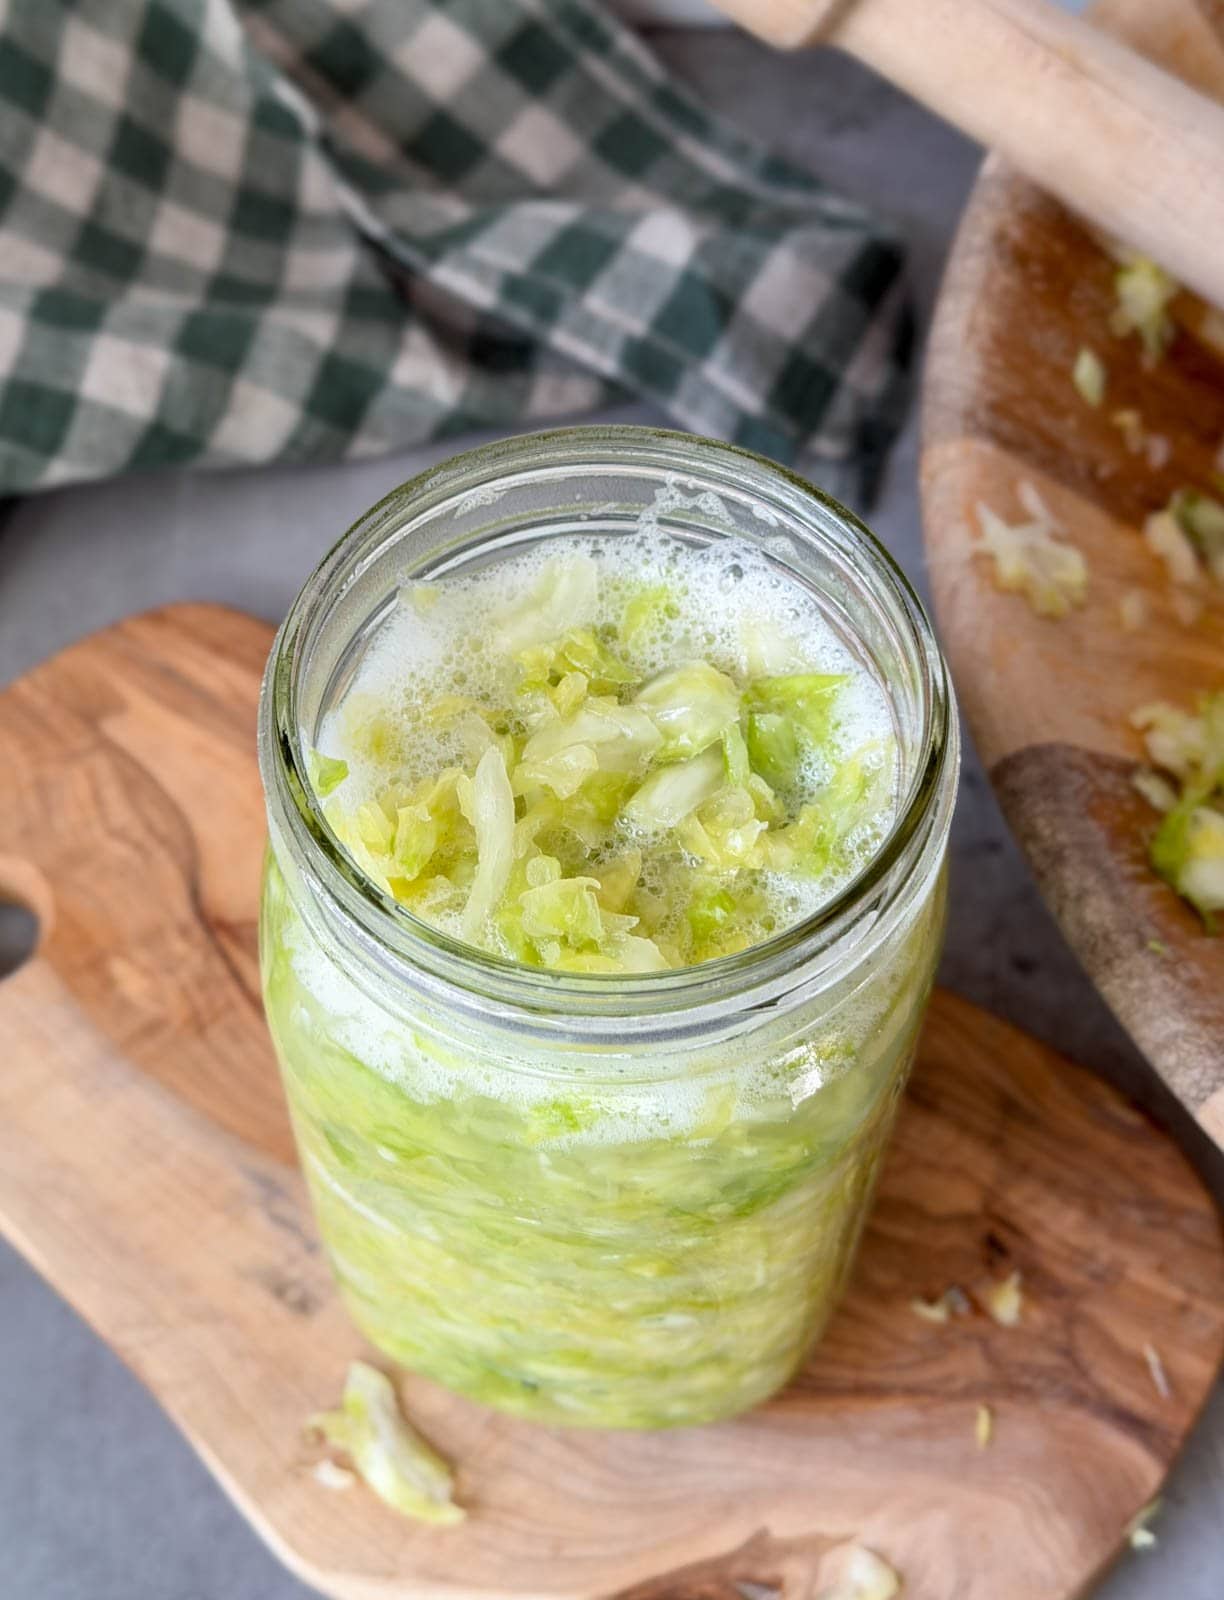
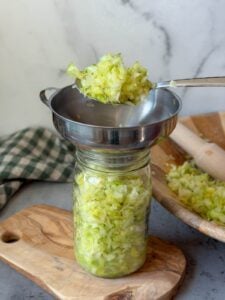
- Now it’s time to fill your jar with cabbage! In my experience, using a canning funnel helps make it much easier.
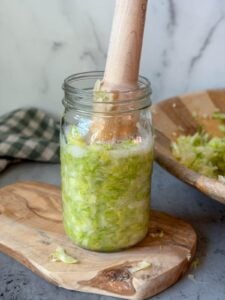
- Transfer all of the shredded cabbage (and its juices) into a clean jar, stopping several times as you go to tightly pack and press the cabbage down into the jar with a kraut pounder, tamper, the back of a large spoon, or similar tool. This helps to fit as much in the jar as possible, as well as release more juices and remove trapped air bubbles – which is important to prevent mold!
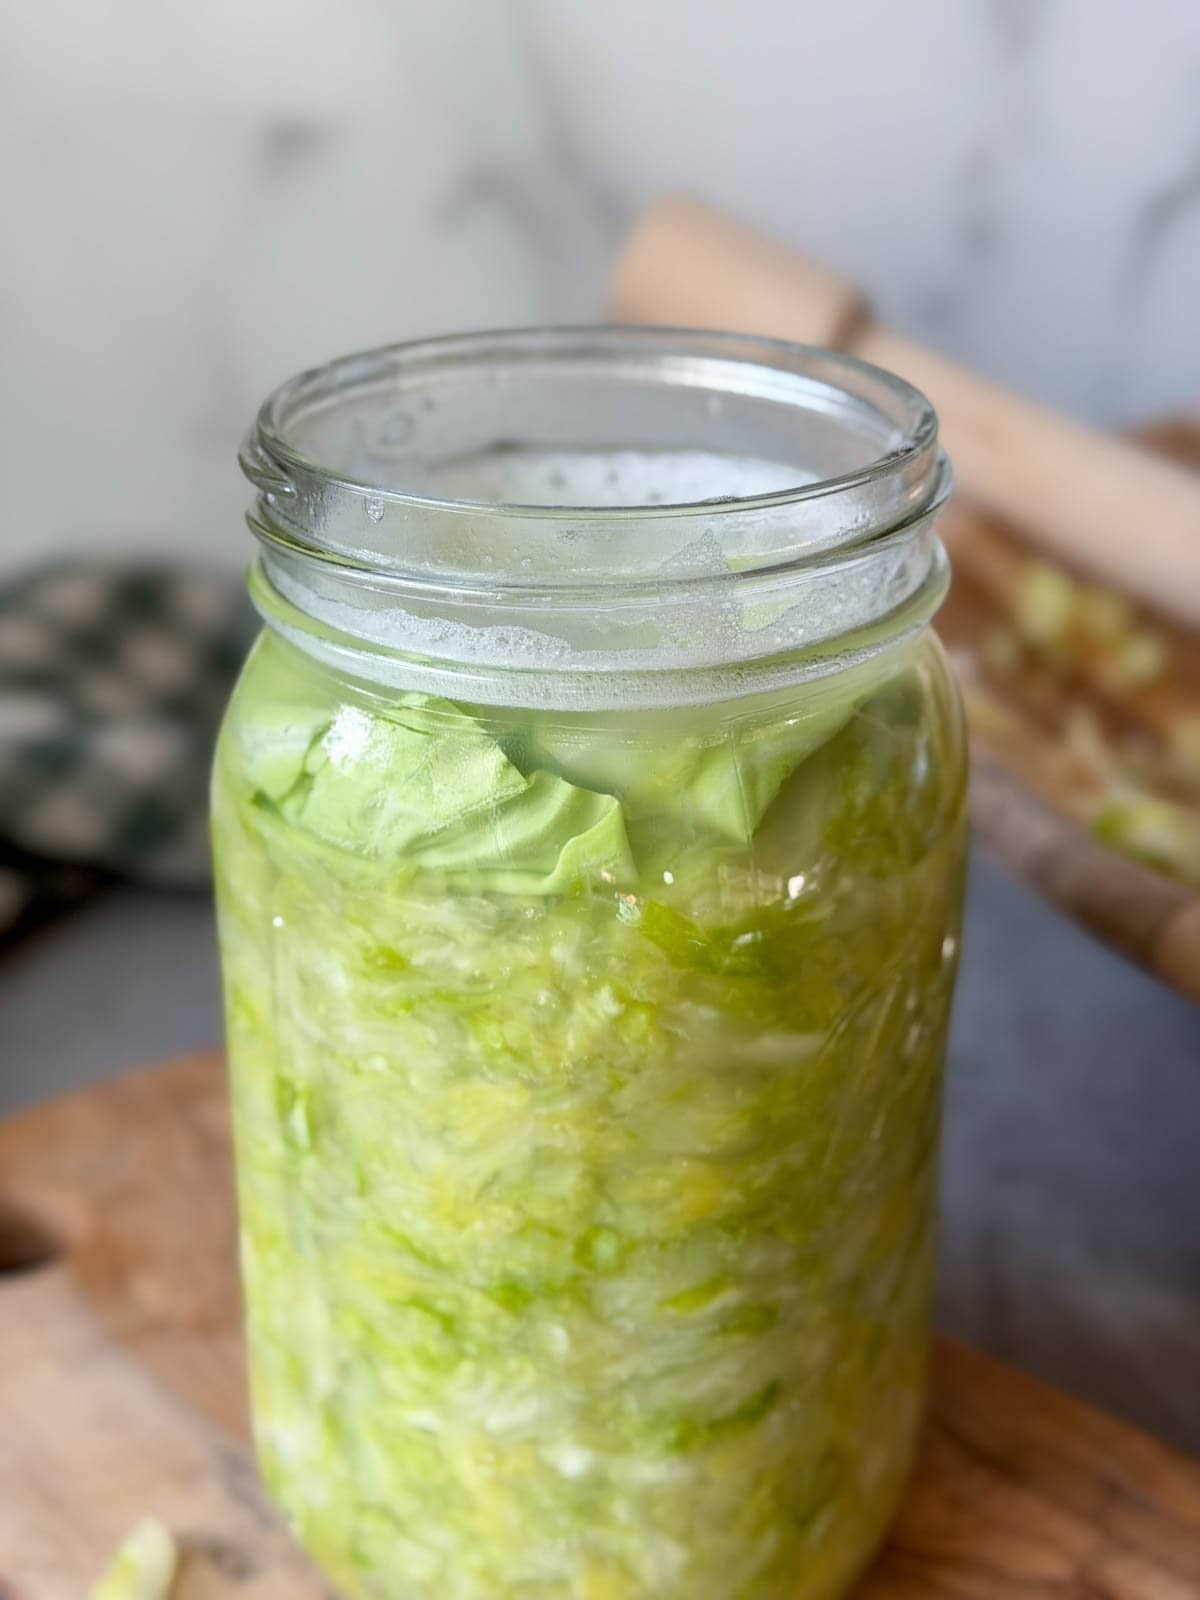
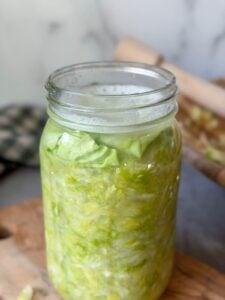
- Continue packing and pressing until the jar is nearly full, but leave enough head room (1 to 2 inches) for your fermentation weight.
- It’s essential that the cabbage is fully submerged in brine (salty juices), so pour any extra cabbage juice that’s left in the bowl on top of the cabbage as needed.
Expert Tip: You should have more than enough liquid to cover your cabbage, but if for some reason you don’t, first try packing and pressing the cabbage more to release its own juices. If that doesn’t work, you’ll need to make some supplemental brine by dissolving 1 tsp of salt in 1 cup of warm water (a 2% salt solution) to top off the jar.


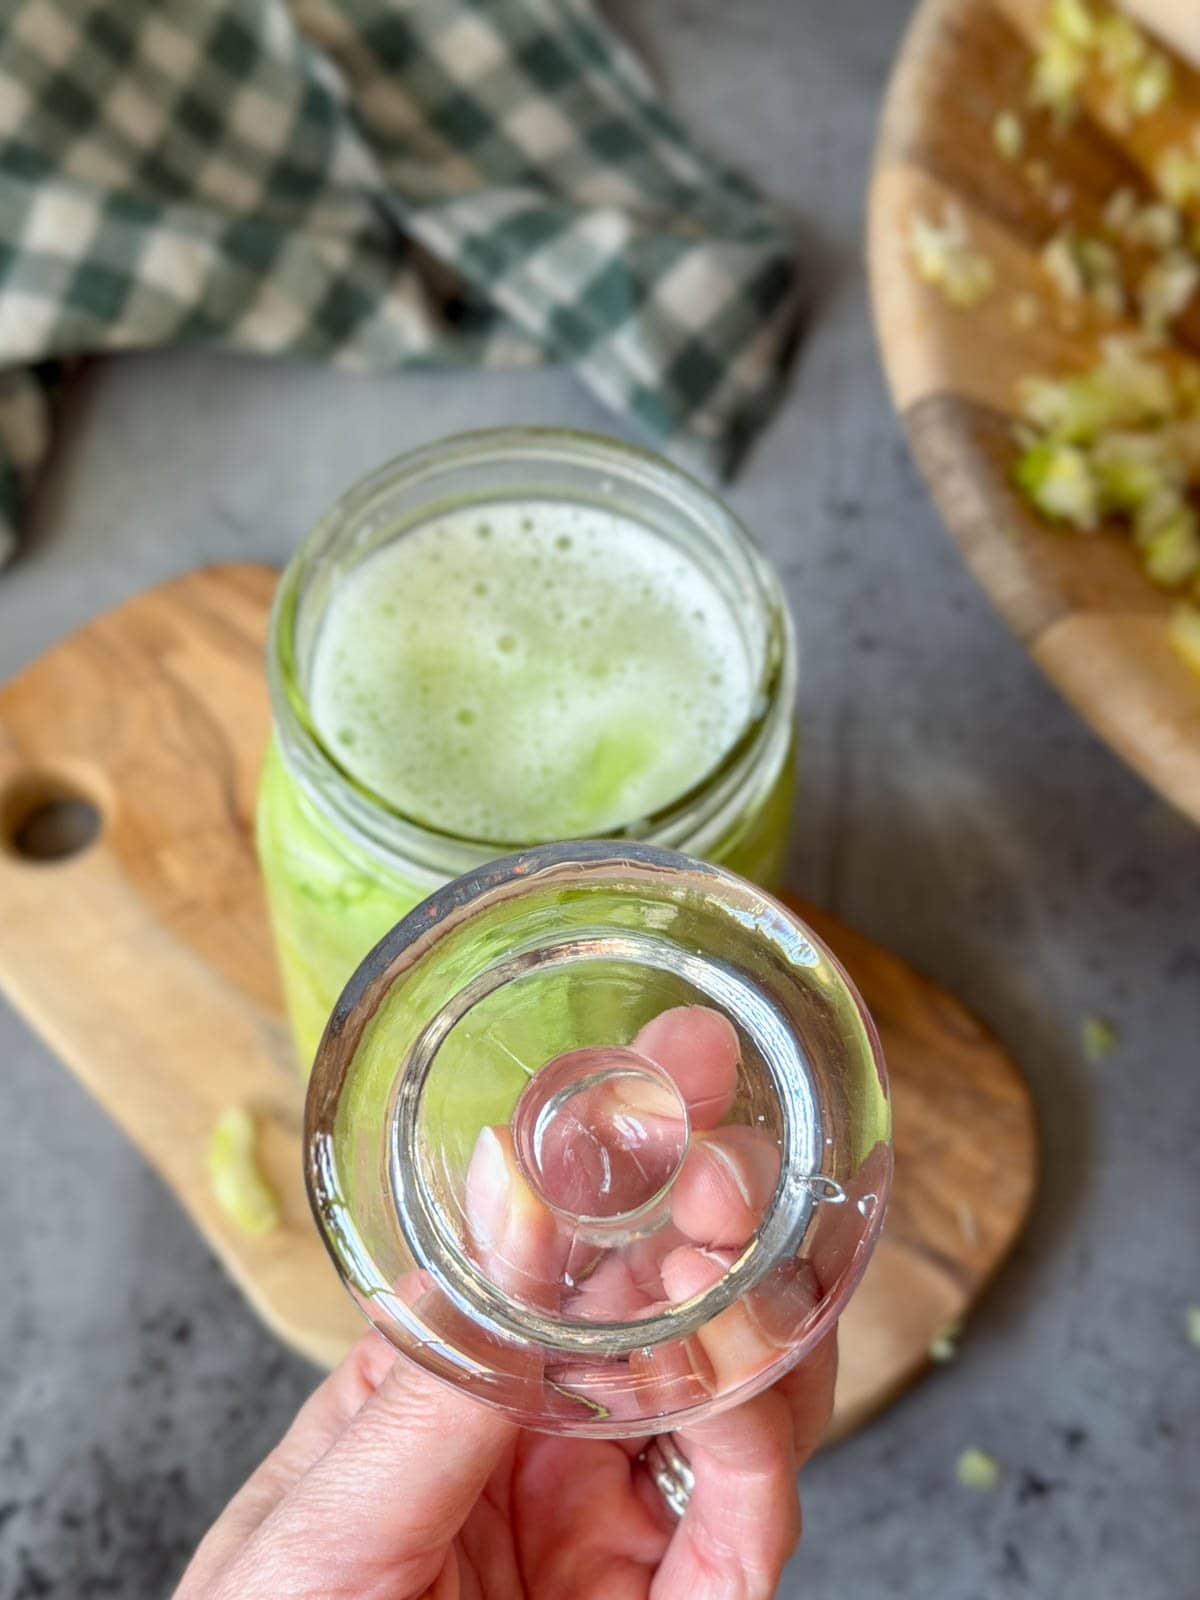
4) Add Weight and Lid
- To help prevent any floaties, place one or two whole reserved cabbage leaves in the jar on top of the shredded cabbage. I like to call this the “cabbage cap”.
- Next, place your weight (e.g. spring or glass weight) on top of the leaves to keep all of the cabbage submerged well below the liquid brine level. This is essential to prevent mold growth during fermentation!
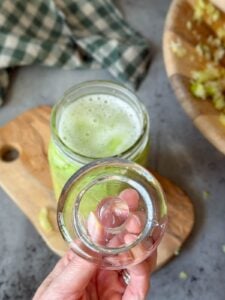
- Finally, add the airlock lid to the jar. Depending on your lid, the jar may overflow or leak when it starts to ferment and bubble, so I usually set our jar on a small plate to catch any runoff.
- If you’re using a standard jar lid, screw the lid on loosely but not completely tight, and “burp” the jar (open it briefly) once or twice daily to release gases.

5) Ferment
- Set the jar in a temperate location (65-75°F is ideal) such as the kitchen counter, or in a cool cabinet or spare room. Avoid temperatures below 60°F or above 80°F as it can result in spoilage or mold growth.
- Allow sauerkraut to ferment for 7 to 14 days minimum (up to several weeks or longer), depending on the desired level of sourness and temperature in your home. Warmer conditions make it ferment faster, while cooler conditions will slow it down.
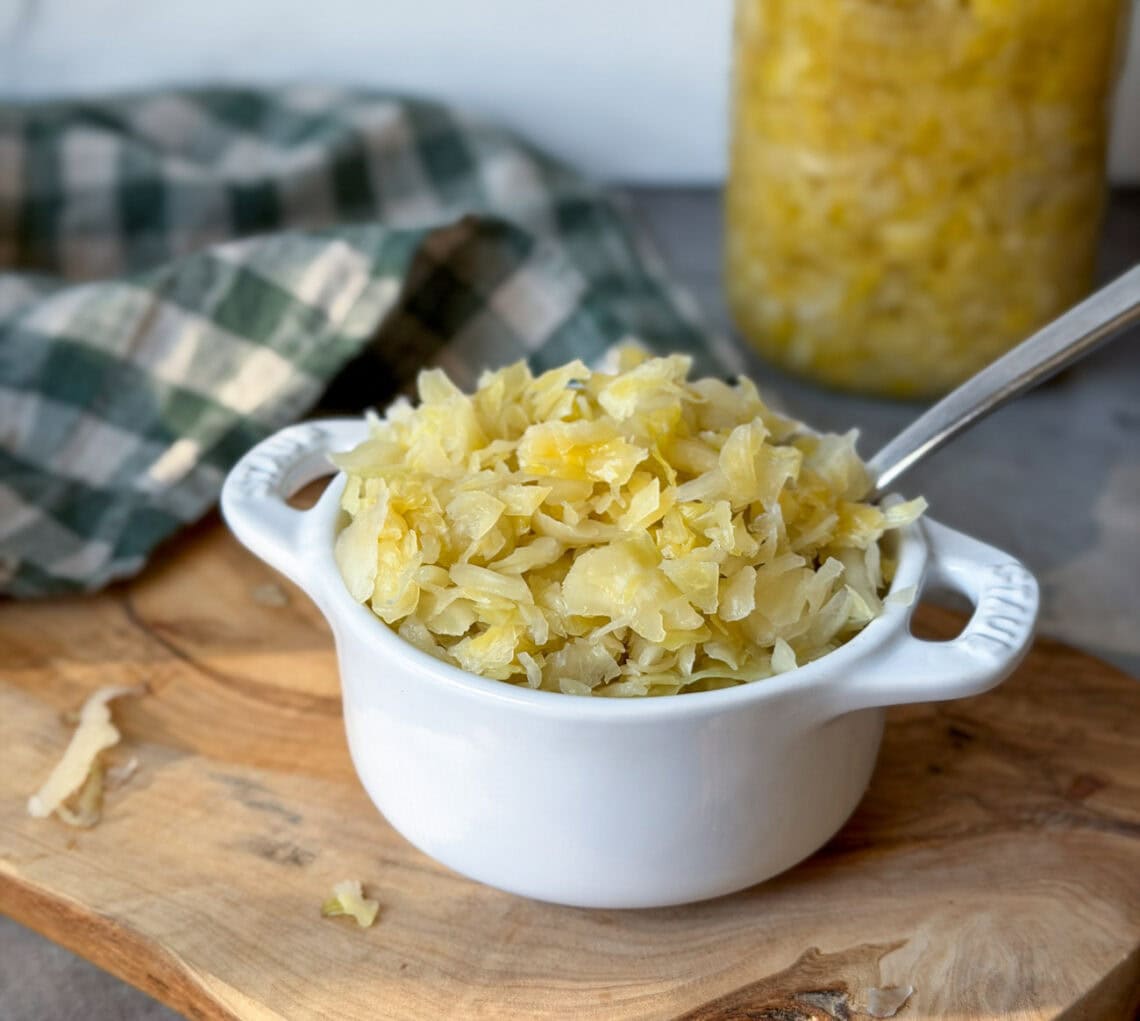
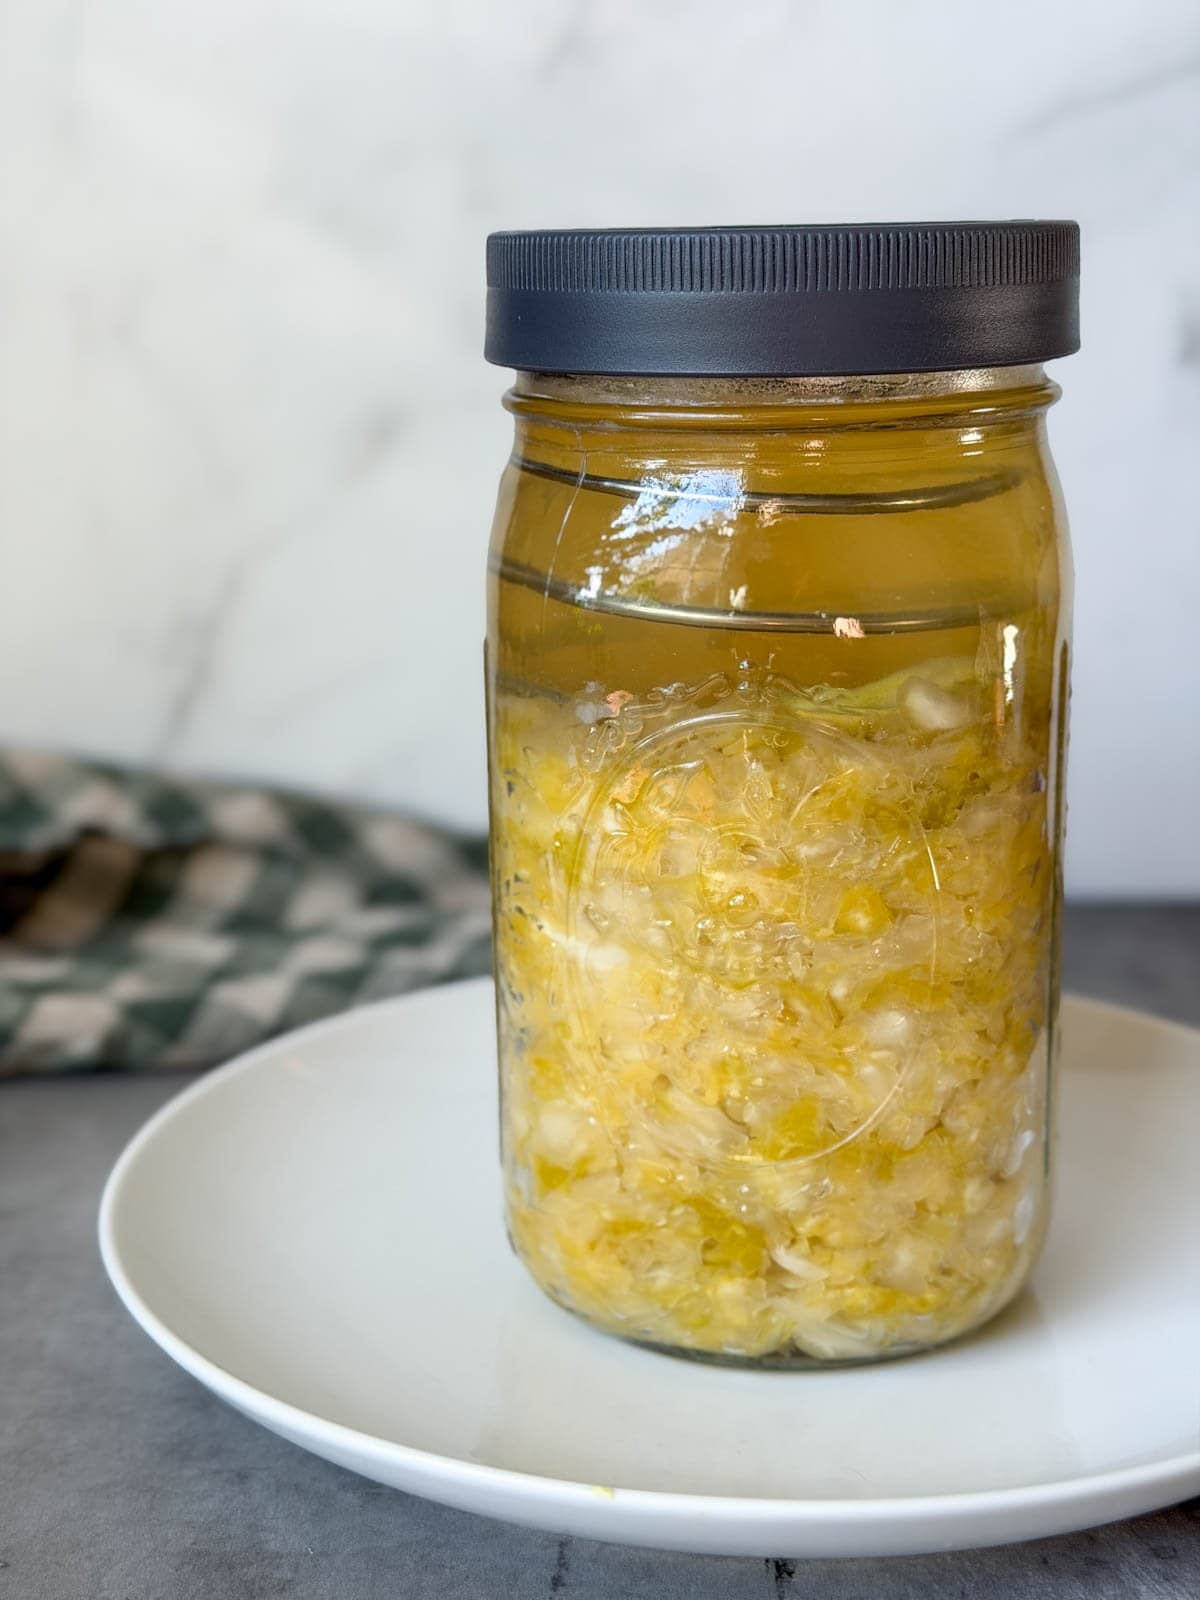
- During fermentation, you should start to notice small bubbles in the jar and the brine may start to get cloudy – which is all good and normal. The cabbage will slowly turn from bright green to pale yellow in color (or red cabbage will turn the whole jar bright prink).
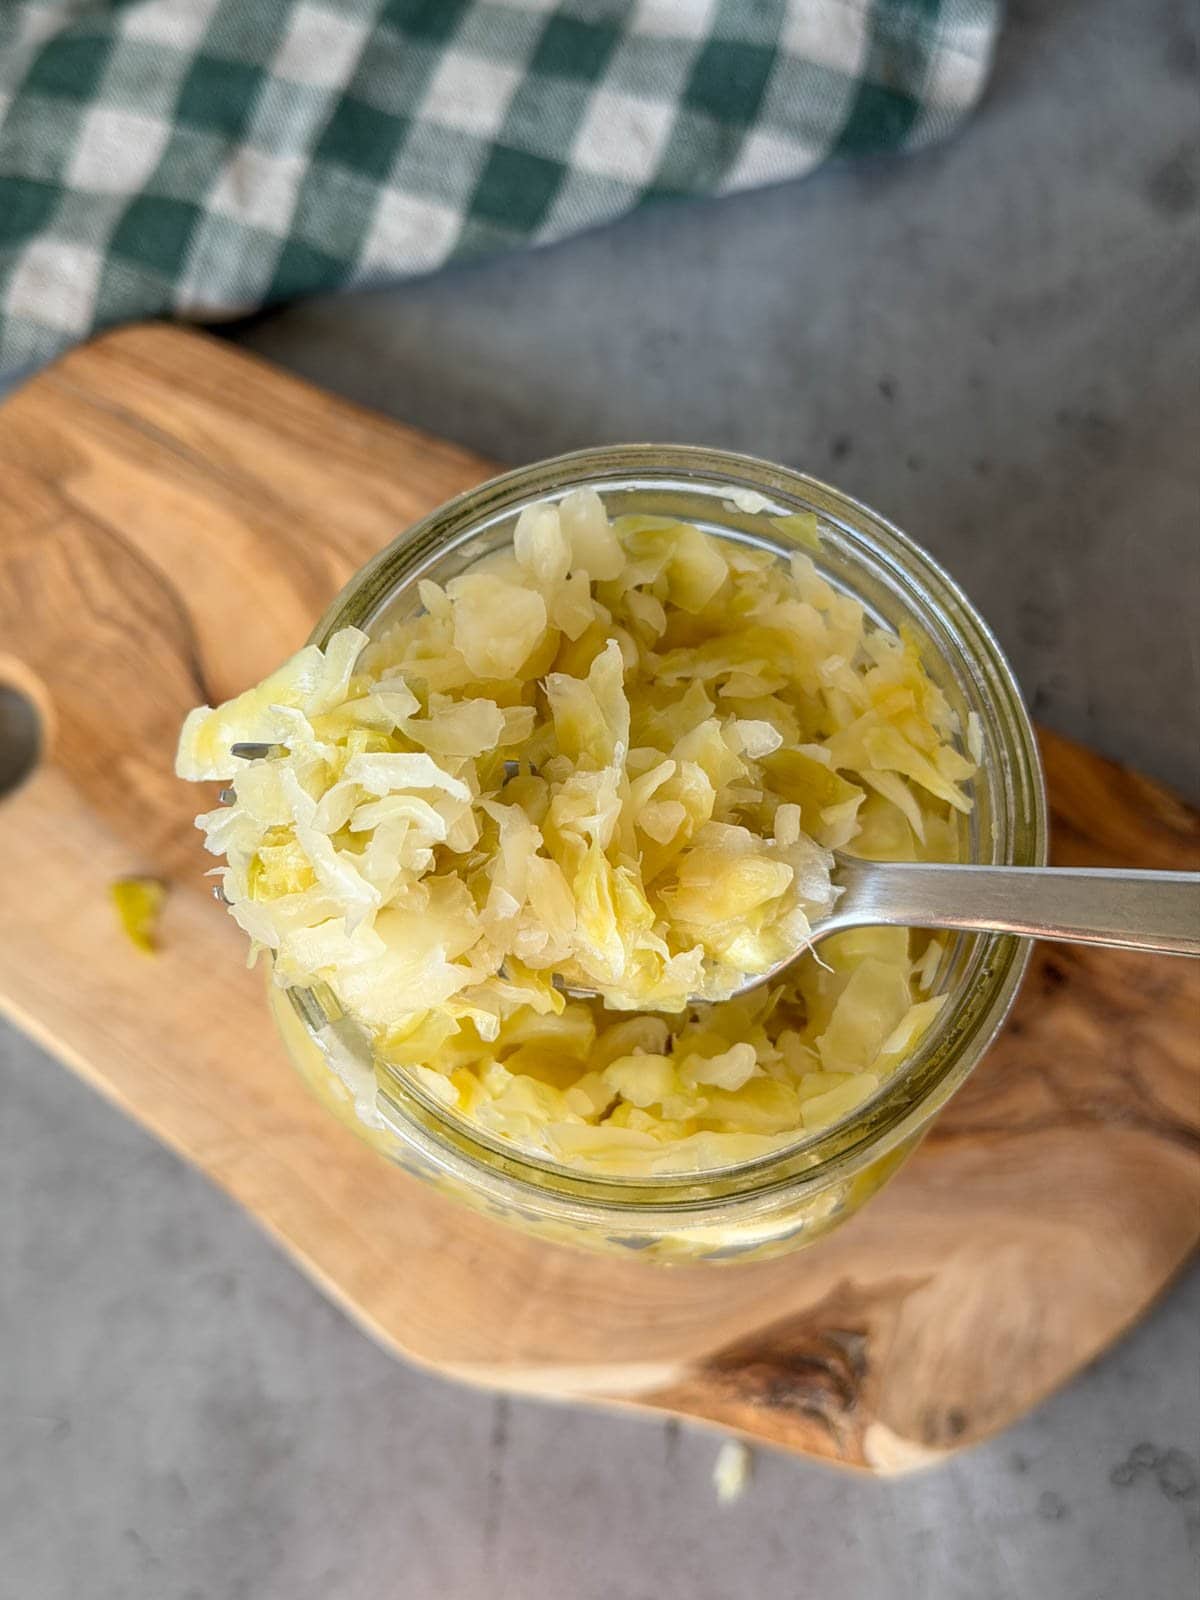
- You can do a taste-test after 6 or 7 days to see how it’s coming along. The longer sauerkraut ferments, the more tangy and sour it will become. Be sure to save and replace the cabbage cap and weight after you open the jar however.
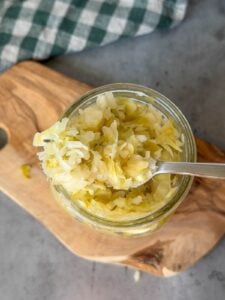
- Once it’s fermented to your liking, remove the cabbage cap, airlock lid, and weight (replace with a standard lid) and move the kraut the refrigerator. See more storage and shelf life tips below.
Storage and Shelf Life
Once it’s done fermenting, store your finished sauerkraut in the refrigerator where it will stay good for several months.
Homemade sauerkraut that has been properly fermented and preserved in a 2-2.5% salt concentration can potentially last up to a year or longer in the refrigerator, though the flavor and texture will change over time as it continues to slowly ferment. I usually like mine best within the first few months.
Since it’s slightly acidic, it’s best to store sauerkraut in a glass or ceramic container with a non-reactive lid, such as these BPA-free mason jar lids or rustproof stainless steel lids. Or you can place a piece of parchment paper below a standard metal lid to prevent corrosion.
Signs that is has gone bad include mold growth, off odors, or slimy textures; discard as needed.
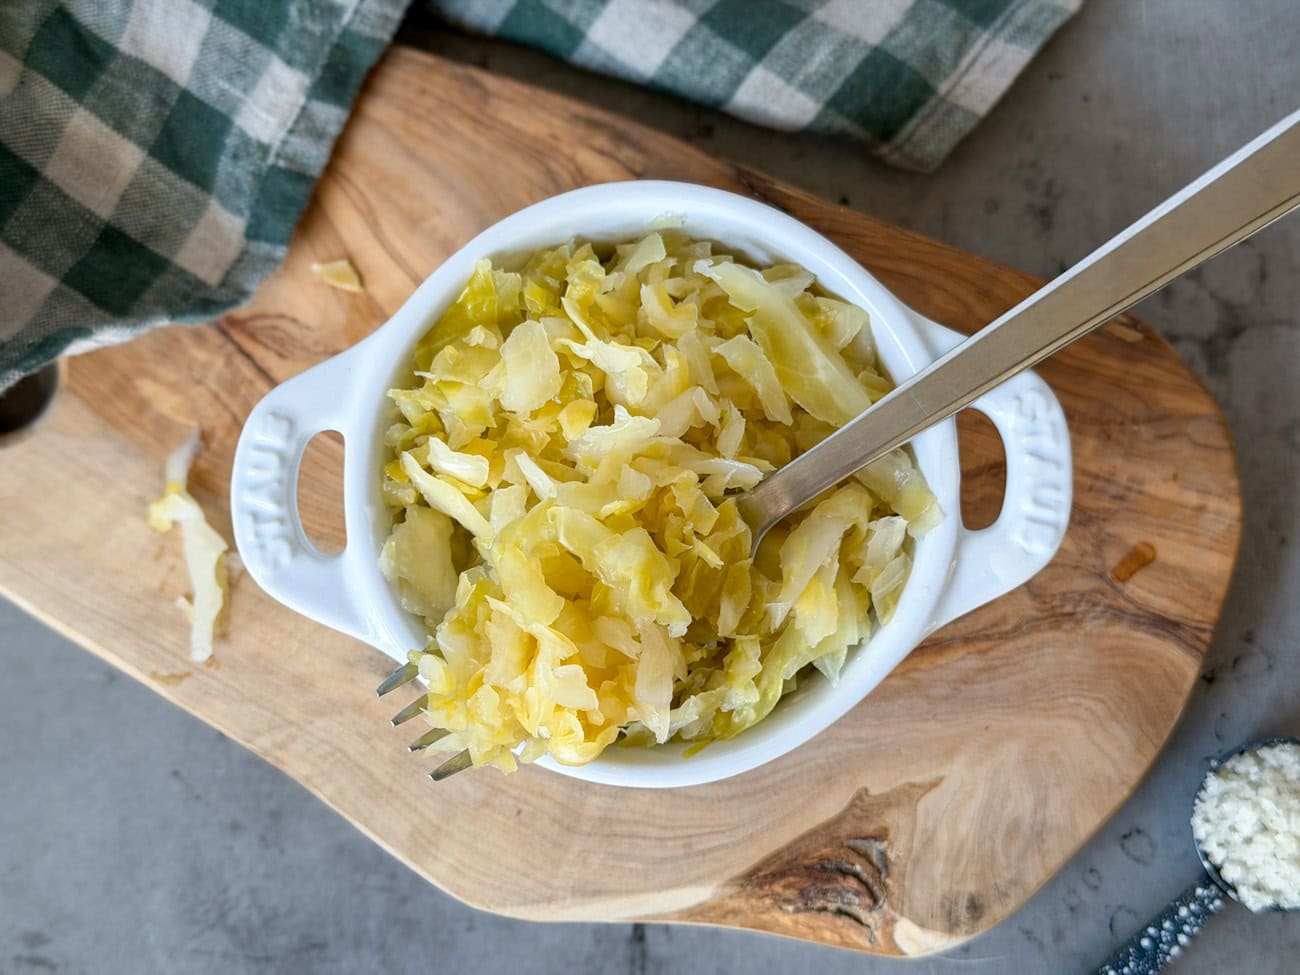
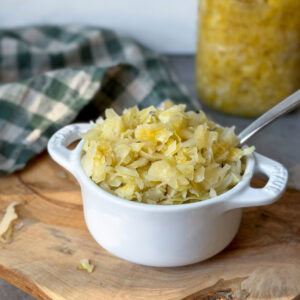
Ways to Eat Sauerkraut
Now it’s time to enjoy your delicious, gut-healthy kraut! Homemade sauerkraut adds a fantastic pop of flavor and probiotics to sandwiches, tacos, burgers, hot dogs, egg dishes, stir fry and more.
We often enjoy a little side of sauerkraut with a wide variety of dinners – served alongside brown rice and sautéed vegetables, lentils, scrambled eggs, salads, and veggie burgers. Even though we’re vegetarian now, some of my fondest childhood memories involve cooking and eating bratwurst and sauerkraut with my Dad (I’m half German).
Frequently Asked Questions
Absolutely! Low in calories and loaded with fiber, vitamin C, K, and B6, plain cabbage alone is considered a superfood. Once fermented, sauerkraut is rich in additional probiotics, beneficial enzymes, and antioxidants that enhance gut health and digestion, fight inflammation, and support overall health.
If you happen to see just a tiny bit of mold floating on the top of the brine during fermentation (not on the cabbage itself), you may be able to carefully scoop it out and save the rest of the sauerkraut. However, if the jar forms a dense layer of mold on top or if the cabbage itself appears moldy, it should be discarded. To prevent mold, ensure that you’re using the correct salt ratio, that all the cabbage is fully submerged well below the brine level, and that the kraut isn’t too cold while fermenting (aim for around 70F) – as cooler temperatures can slow fermentation and encourage mold growth.
Simple, right?
Now that you know how to make sauerkraut, I hope you give it a try. Feel free to ask any questions in the comments below, and please leave a review! Happy fermenting, and cheers to healthy bellies!
You may also enjoy:
- Easy Fermented Radishes Recipe with Dill and Garlic
- Preserving Apples: How to Make Homemade Apple Cider Vinegar
- Easy Fermented Garlic Honey Recipe + Benefits and Uses
- The Health Benefits of Fermented Foods, Explained
- Simple No-Knead Sourdough Bread Recipe
How to Make Sauerkraut: Easy Step-by-Step Recipe
Equipment
- A glass jar or fermentation vessel. This recipe best fits a quart-size mason jar (or liter) but can be scaled up or down as desired in another container of choice (e.g. a ceramic crock, do not use plastic)
- Large mixing bowl
- Kitchen scale
- Knife or mandolin slicer
- Optional: Kraut pounder
- Fermentation weight like glass block or springs (separate weight not needed if your airlock lid comes with a weight or spring)
- Recommended: an airlock fermentation lid that fits your chosen jar. If you don't have an airlock lid, you can lightly screw on a regular non-reactive lid like these BPA-free plastic lids instead (with a weight below), but you'll need to “burp” (quickly open) your jars every day to release built up gasses
Ingredients
- 2 pounds fresh tender cabbage, weighed after shredding or finely chopping (so start with a cabbage that weighs slightly more). You can use red or green cabbage though green yields the most tender sauerkraut. Organic cabbage is highly recommended for fermentation.
- 4 tsp sea salt, kosher salt, or pickling salt (not iodized table salt)
- *To scale this recipe up or down, simply maintain the same salt-to-cabbage ratio (2 tsp of salt 1 pound shredded cabbage)
Instructions
- Start with clean supplies (washed with hot water) but avoid using strong-smelling soap or bleach. We often use plain white vinegar.
- Tare and/or note the weight your bowl before you start
Prepare the Cabbage
- Wash the cabbage with warm water and remove any tattered or bruised outer leaves. Peel off and reserve a couple nice large outer leaves (kept whole) for later.
- Cut the cabbage in half (or quarters), remove the tough center core, then thinly slice the cabbage into fine shreds or 1/8-inch thick “ribbons” by hand or with a mandolin slicer (not a food processor)

- Add the sliced cabbage into your bowl, weighing as you go until you reach 2 pounds (or other desired weight if you’re making more or less).


Salt and Massage
- Sprinkle over 4 tsp of salt per 2 pounds of cabbage (or 2 tsp per 1 pound). Toss and mix well.
- Using very clean hands, massage the cabbage for a few minutes. Stop and let it rest for 10-15 minutes, then massage again for several minutes. The cabbage should significantly soften, reduce in volume, and release a lot liquid – the natural brine for the ferment.
- Alternatively (if you don’t want to massage by hand) you can salt the cabbage and let it sit for at least 30 minutes draw out moisture, then use a pounder/tamper to crush it further.
Pack the Jar
- Pack all cabbage into the fermenting vessel (jar).
- Use a kraut pounder or other utensil to firmly press down to compact and remove excess air. Repeat and add more cabbage, packing as you go until the jar is full to 1-2 inches from the top.
- Don't get rid of the excess liquid in the bowl! The cabbage should be fully submerged with brine. Add leftover liquid from the bowl as needed to cover top.


Add Weight and Lid
- To help prevent any floaties, place one or two whole reserved cabbage leaves in the jar on top of the shredded cabbage.
- Add a weight (e.g. spring or glass weight) to keep all of the cabbage submerged well below the liquid brine level. This is essential to prevent mold growth during fermentation!
- Finally, add the airlock lid to the jar. If you’re using a standard jar lid, screw the lid on loosely but not completely tight, and “burp” the jar (open it briefly) once or twice daily to release gases.

Ferment
- Allow the jar to sit at room temperature (65-75F is ideal) for 7-14 days (up to several weeks) depending on personal flavor preference and temperature. Cooler temps = slower ferment activity, warmer = faster.
- Your ferment should bubble slightly during this time, and the brine will become cloudy. Green cabbage will fade to pale yellow and red cabbage will turn bright pink.
- You can do a taste-test after 7 or 8 days to see how it’s coming along. The longer sauerkraut ferments, the more tangy and sour it will become. Be sure to save and replace the cabbage cap and weight after you open the jar however.
- Once it’s fermented to your liking, remove the cabbage cap, airlock lid, and weight (replace with a standard lid) and move the kraut the refrigerator.

Storage and Shelf Life
- Once it’s done fermenting, store your finished sauerkraut in the refrigerator where it will stay good for several months – up to a year or longer if properly preserved.
- Since it’s slightly acidic, it’s best to store sauerkraut in a glass or ceramic container with a non-reactive lid, such as these BPA-free mason jar lids or rustproof stainless steel lids. Or you can place a piece of parchment paper below a standard metal lid to prevent corrosion.
- Signs that is has gone bad include mold growth, off odors, or slimy textures; discard as needed.
- Enjoy homemade sauerkraut alongside sandwiches, tacos, burgers, hot dogs, egg dishes, stir fry, sautéed veggies, bratwurst, lentils and more.


26 Comments
Jack
I have always made sauerkraut by covering the shredded cabbage with a brine made of salt and distilled water. This was the first time I left out the water and just massaged the cabbage with the salt. It was easier, marginally, but it also tasted significantly better than the brined version. I’m convinced. Next project? Red-cabbage sauerkraut.
Aaron (Mr. DeannaCat)
Amazing to hear Jack and thank you for sharing your experience, enjoy your kraut!
Amy
Can I can or freeze sauerkraut?
Aaron (Mr. DeannaCat)
Hi Amy, you may can sauerkraut but you will lose the benefits that fermented foods provide and you may want to follow a different recipe as the process and salt ratios may differ. Check out this article from the National Center for Food Preservation. In regards to freezing the sauerkraut, we don’t find it necessary as the fermented kraut will last for quite a long time in the refrigerator alone (although it will slowly continue to ferment slightly). Freezing will also slow or destroy some of the benefits of fermented food and the kraut won’t be nearly as crunchy while the texture in general may not be as appealing overall. Hope that helps and good luck!
Scott
Hello, would you have any concerns doubling the recipe and fermenting in a 4 liter jar?
Aaron (Mr. DeannaCat)
Hi Scott, not at all, just be sure the veggies are below the brine level. Good luck!