

How to Feed and Maintain Sourdough Starter: Best Beginner’s Guide
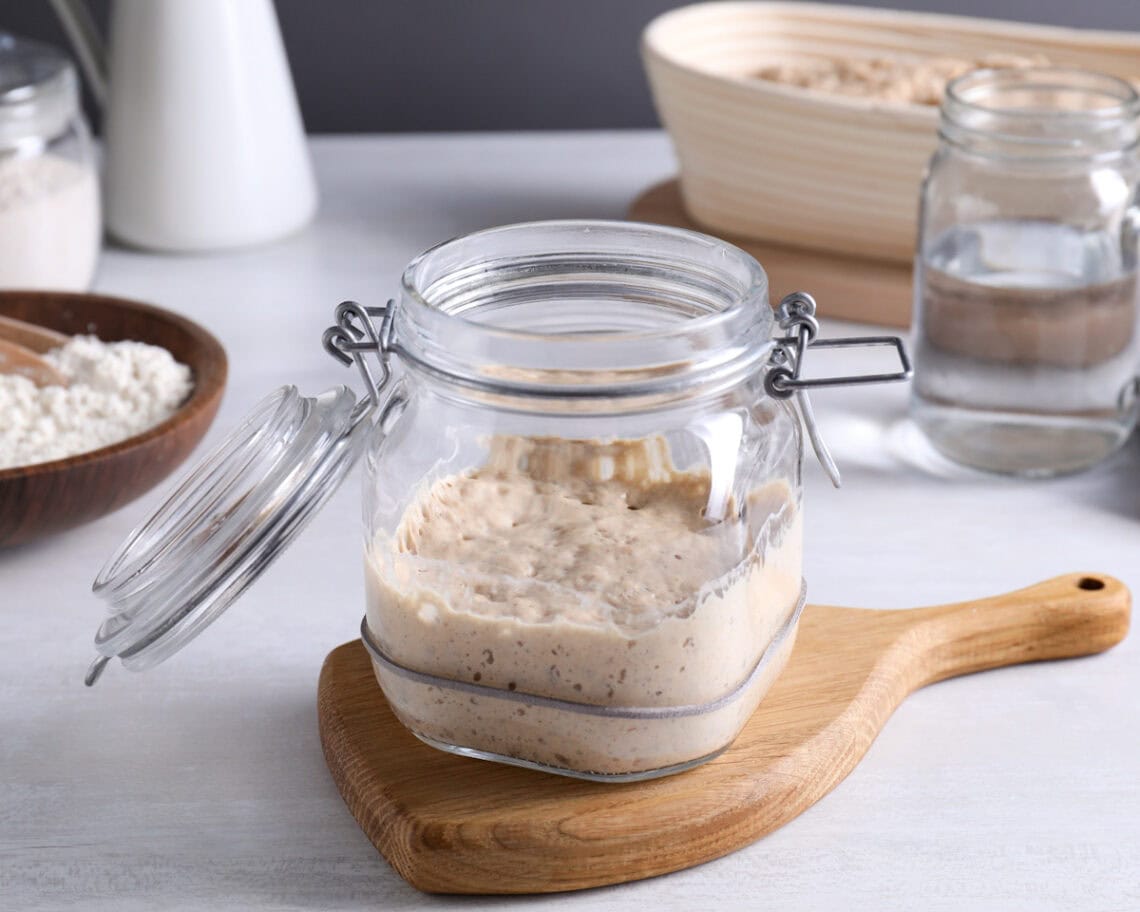
Come learn how to feed your sourdough starter to keep it healthy and happy! This beginner’s guide will cover the basics to maintain a sourdough starter: when and how often to feed it, where to store it, and how to feed starter by weight (grams) or by volume (cups) to get it active and ready for baking.
We’ll also explore some best practices and frequently asked questions – like the best type of flour to use, the meaning of “peak activity” or “hooch”, and troubleshooting tips. By the end, you’ll feel confident and comfortable caring for your sourdough starter.
Don’t worry, it’s easier than you imagine! I’ve been baking sourdough for over 10 years now, so I’ll share tons of tips to make it as simple as possible.
NOTE: This post was originally published in October 2019 but has been significantly updated since.
Want to save this?
Disclosure: Homestead and Chill is reader-supported. When you purchase through links on our site, we may earn an affiliate commission.
Need a starter? Learn how to make sourdough starter from scratch or how to make a gluten-free sourdough starter here. We also offer an easy organic dehydrated sourdough starter in our shop. It’s foolproof, reliable, and super active!
What is “Feeding” a Sourdough Starter?
Feeding a sourdough starter simply means adding fresh flour and water to the starter – typically in a 1:1:1 ratio or equal parts by weight, such as 100 grams of starter, flour, and water each. In doing so, it makes the starter get active, bubbly, and rise over the next several hours.
You need to feed a sourdough starter before making bread (unless you’re following a recipe that calls for “discard” or inactive starter) as well as occasional feedings to keep it alive, especially when you’re not regularly using it for baking.
Most times you’ll discard a portion of the existing starter before mixing in fresh flour and water, but sometimes you won’t (explained more below).
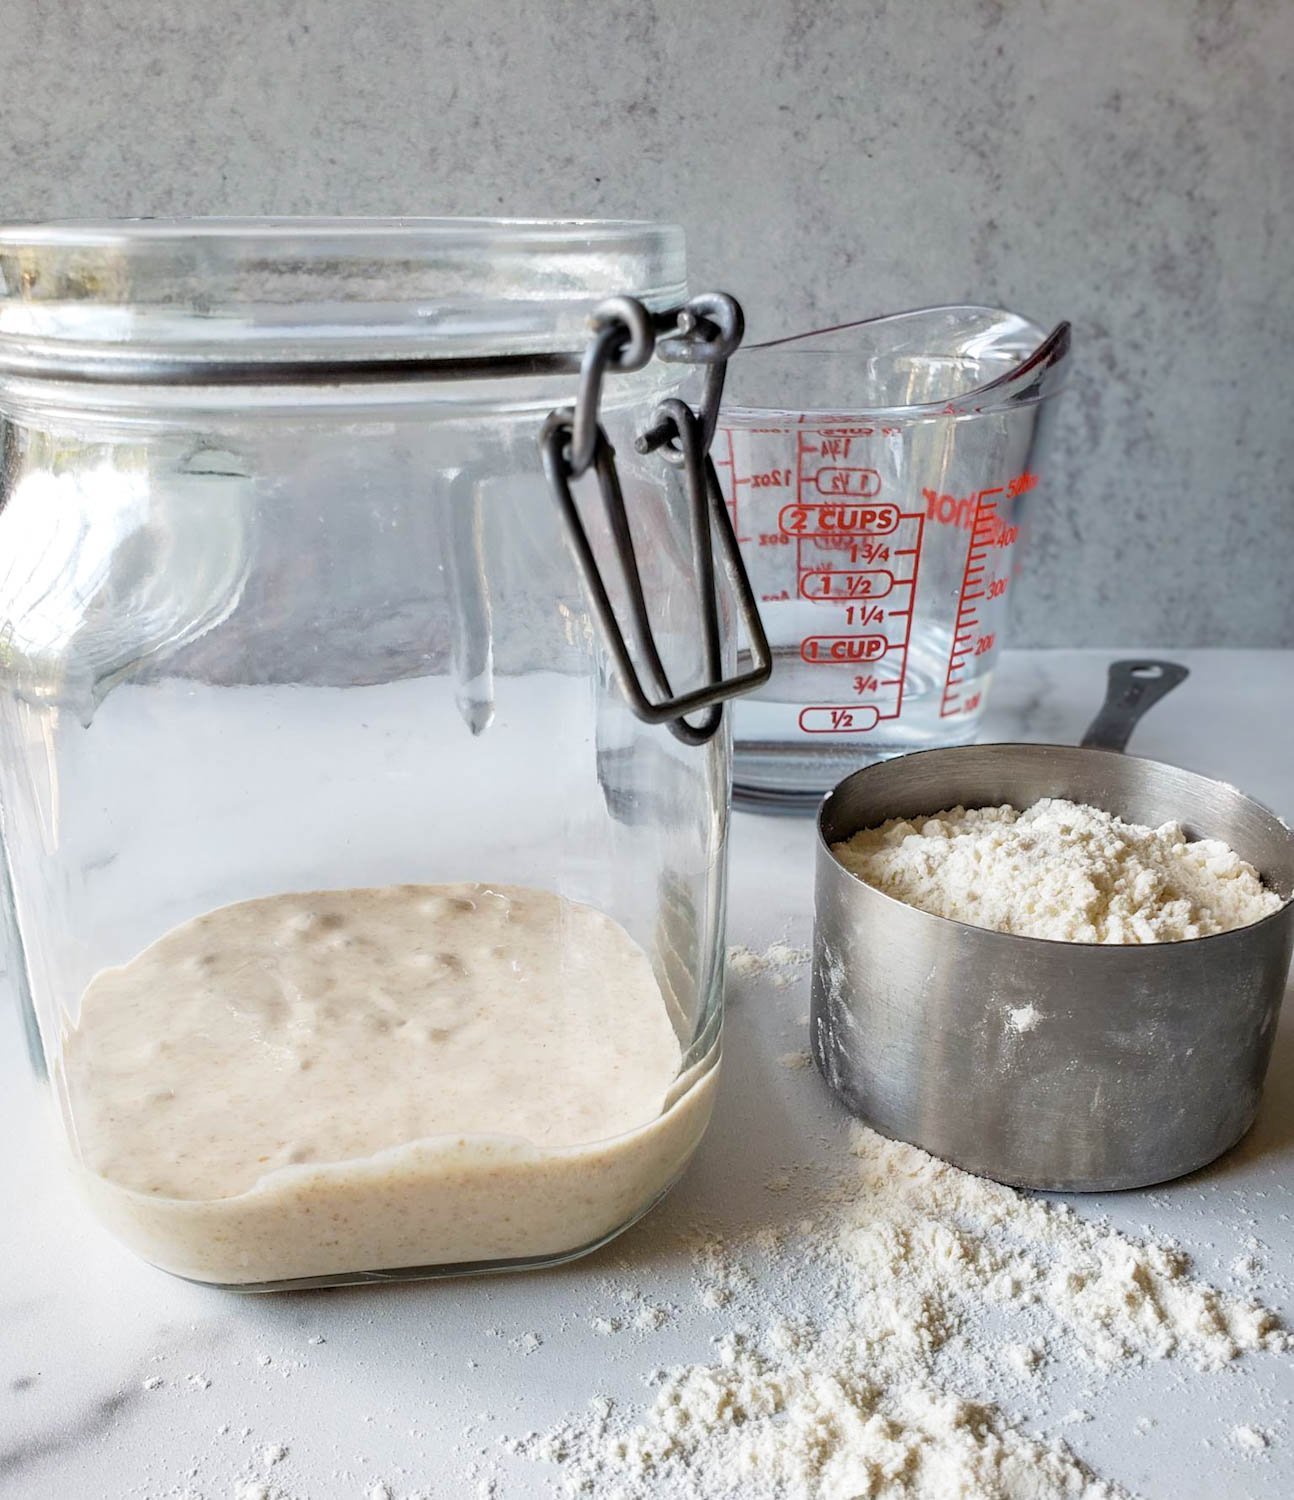
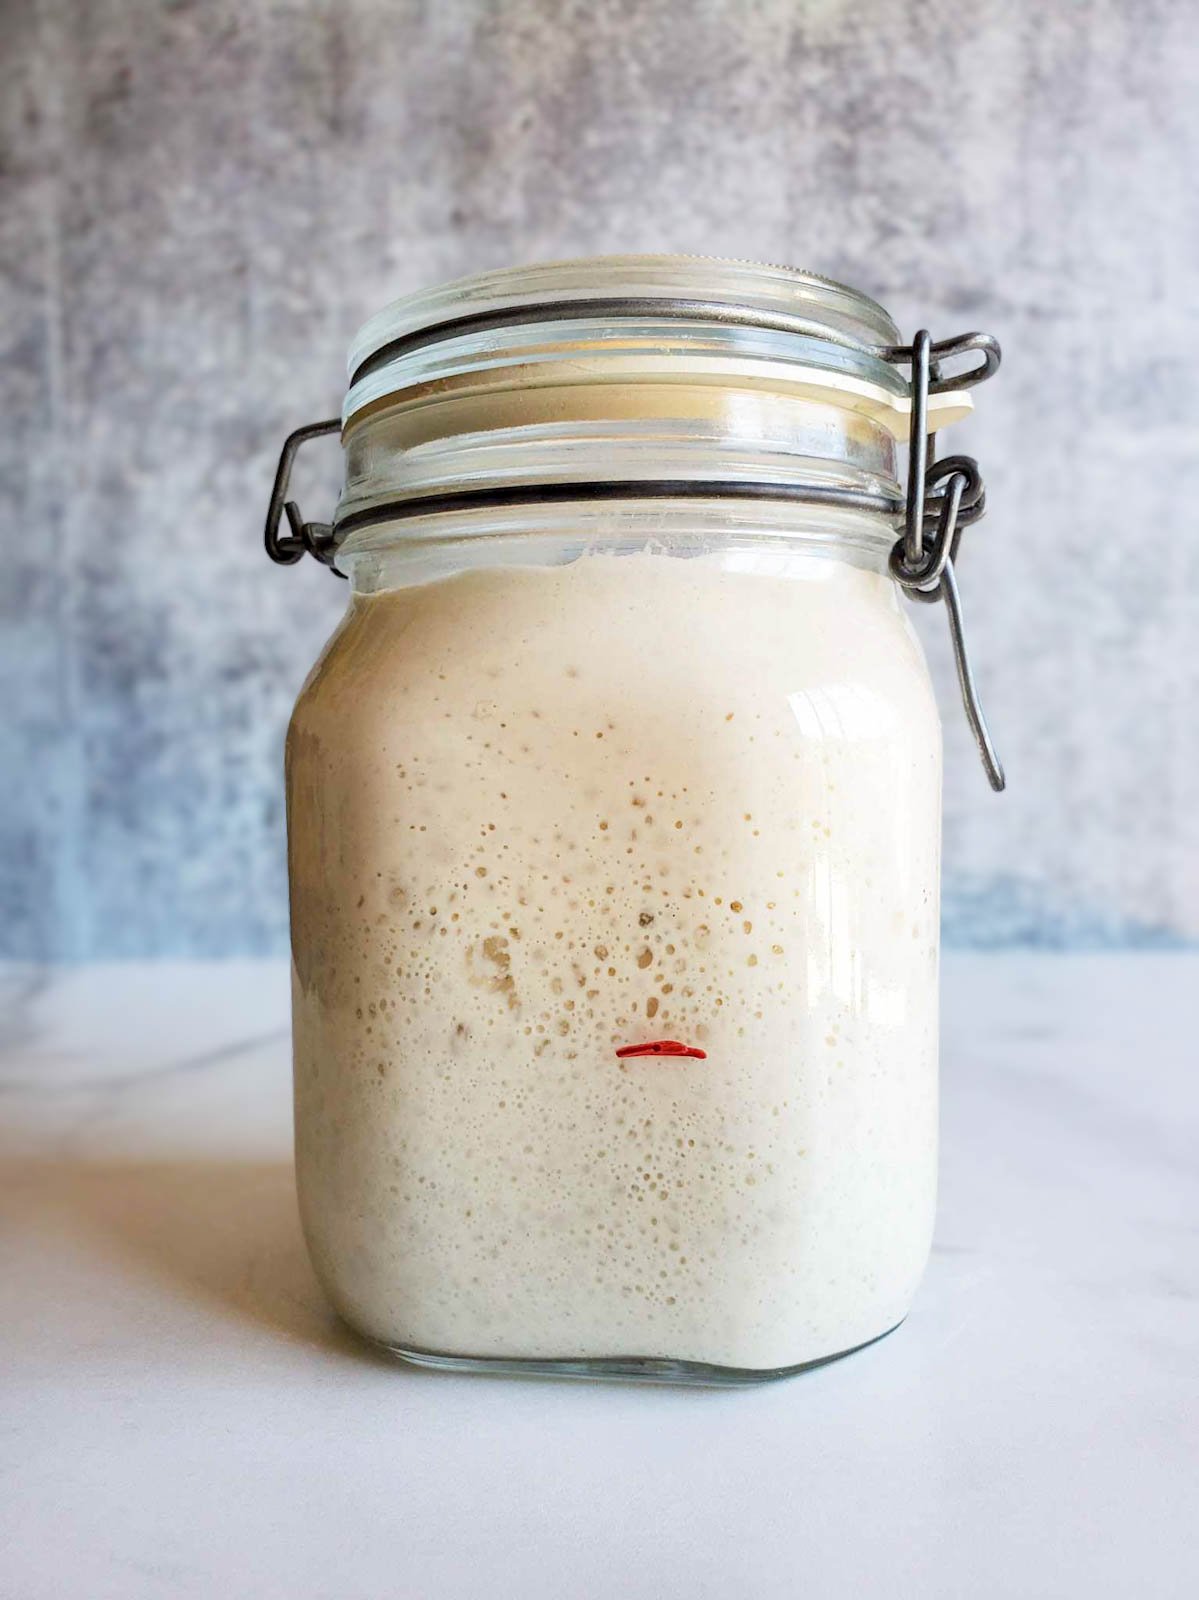
After feeding, your starter should have the consistency of thick pancake batter.
Why Sourdough Starter Rises And Falls
Here’s the quick science behind feeding a sourdough starter:
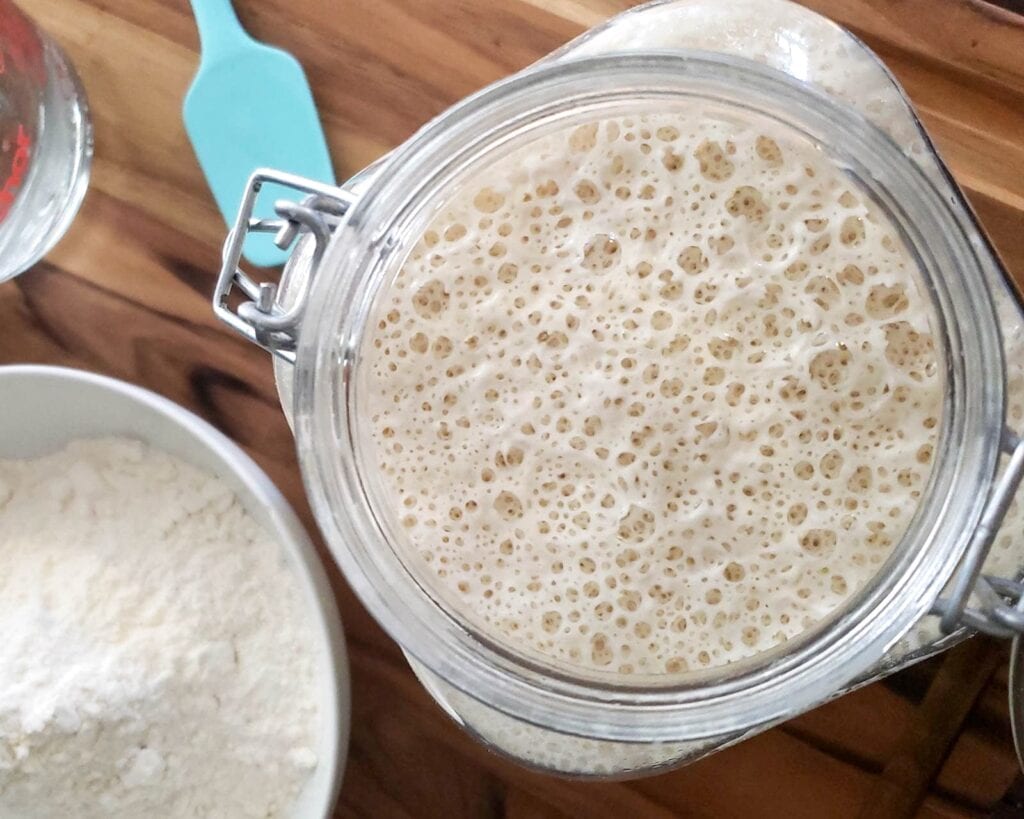
There are beneficial lactic acid bacteria and yeast living within a starter culture. When provided fresh flour and water, they consume and ferment the carbohydrates in the flour, creating acid and carbon dioxide in the process. This causes the starter to bubble and rise, and is what makes sourdough bread rise naturally too!
Yet when they run out of food, the microbes get hungry, decrease in activity (the starter deflates), and become ineffective at making bread rise. Yeast will also produce a dark liquid called “hooch”, which is harmless but a sign that your starter is hungry!
If left unfed for too long, the beneficial microbes may starve and die off completely.

Supplies Needed
- Sourdough starter
- Water: It’s best to feed sourdough starter using filtered, non-chlorinated water if possible. A basic carbon filter helps! I like to use warm water (not hot) to help increase activity.
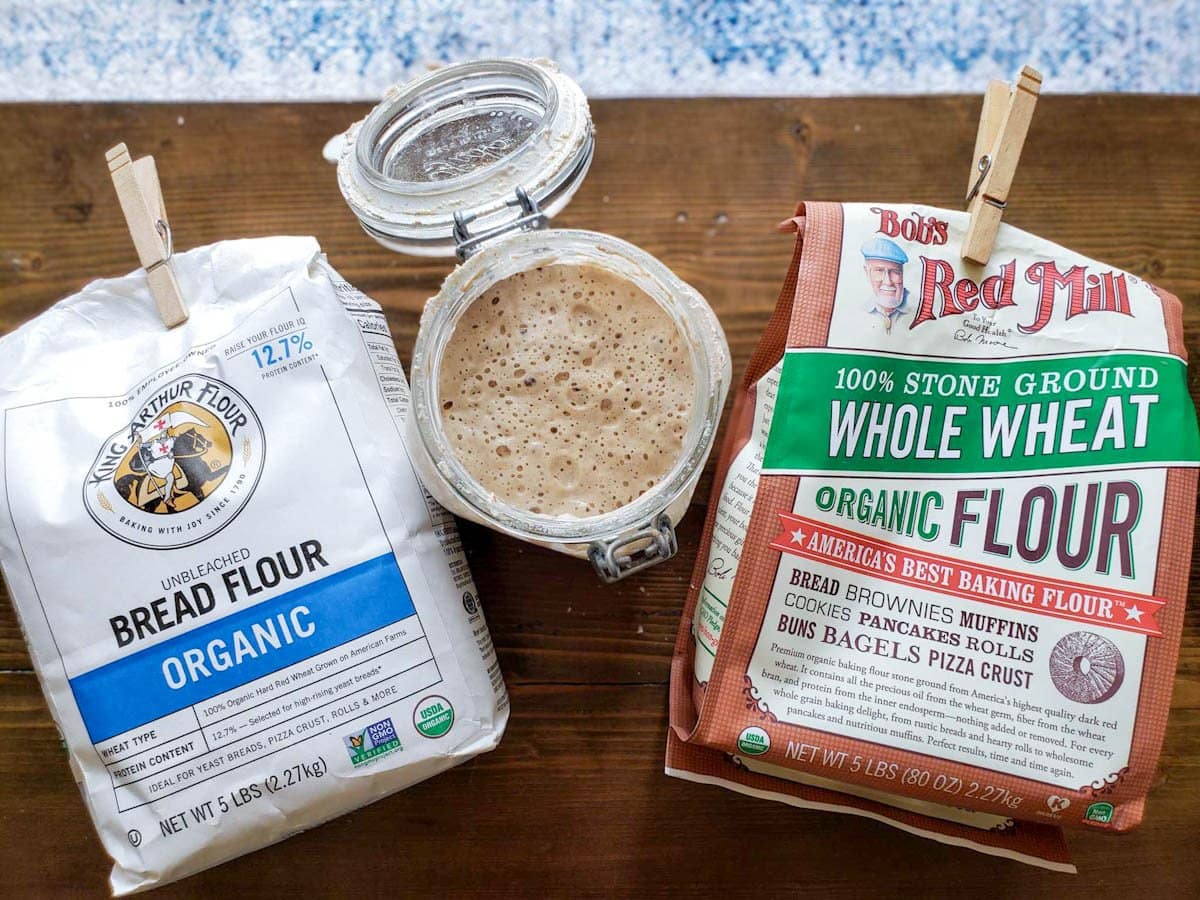
- Flour: Most bakers feed sourdough starter with bread flour or all-purpose flour, though using half whole wheat or rye flour can boost activity and rise! We primarily use bread flour with some whole wheat at times. It’s also possible to maintain a starter using einkorn flour, or certain GF flours like brown rice flour. (See gluten-free notes below.) However, I suggest gradually transitioning to a new flour to let the starter acclimate.
- A glass jar or container. Store sourdough starter in a container that’s large enough for it to double or triple in size after being fed. The jar should be covered with a loose-fitting lid (e.g. finger tight) but not completely air-tight so gasses can escape. We keep our starter in a modest 1 liter (quart) flip-top glass container (gasses escape even when the lid is closed). If you plan to bake several loaves at once, consider using a larger 2 liter or half-gallon container.
- A kitchen scale and/or measuring cups
- A small silicone spatula is handy, both for mixing the starter and for cleaning up the sides of the jar
Feeding a Gluten-Free Sourdough Starter
We’ve successfully made a gluten-free sourdough starter using brown rice flour – which is what we usually feed it with too. However, feel free to experiment with any combination of brown rice, white rice, sweet rice, or buckwheat flours. They all work to keep the starter active and happy!
However, I do not suggest feeding a gluten-free starter using a GF 1-1 baking or all-purpose flour. In my experience, the additives and gums found in those flour mixes make the starter a bit funky.
Before Feeding: Warm Up
Sourdough starter is most happy and active around 70-80°F.
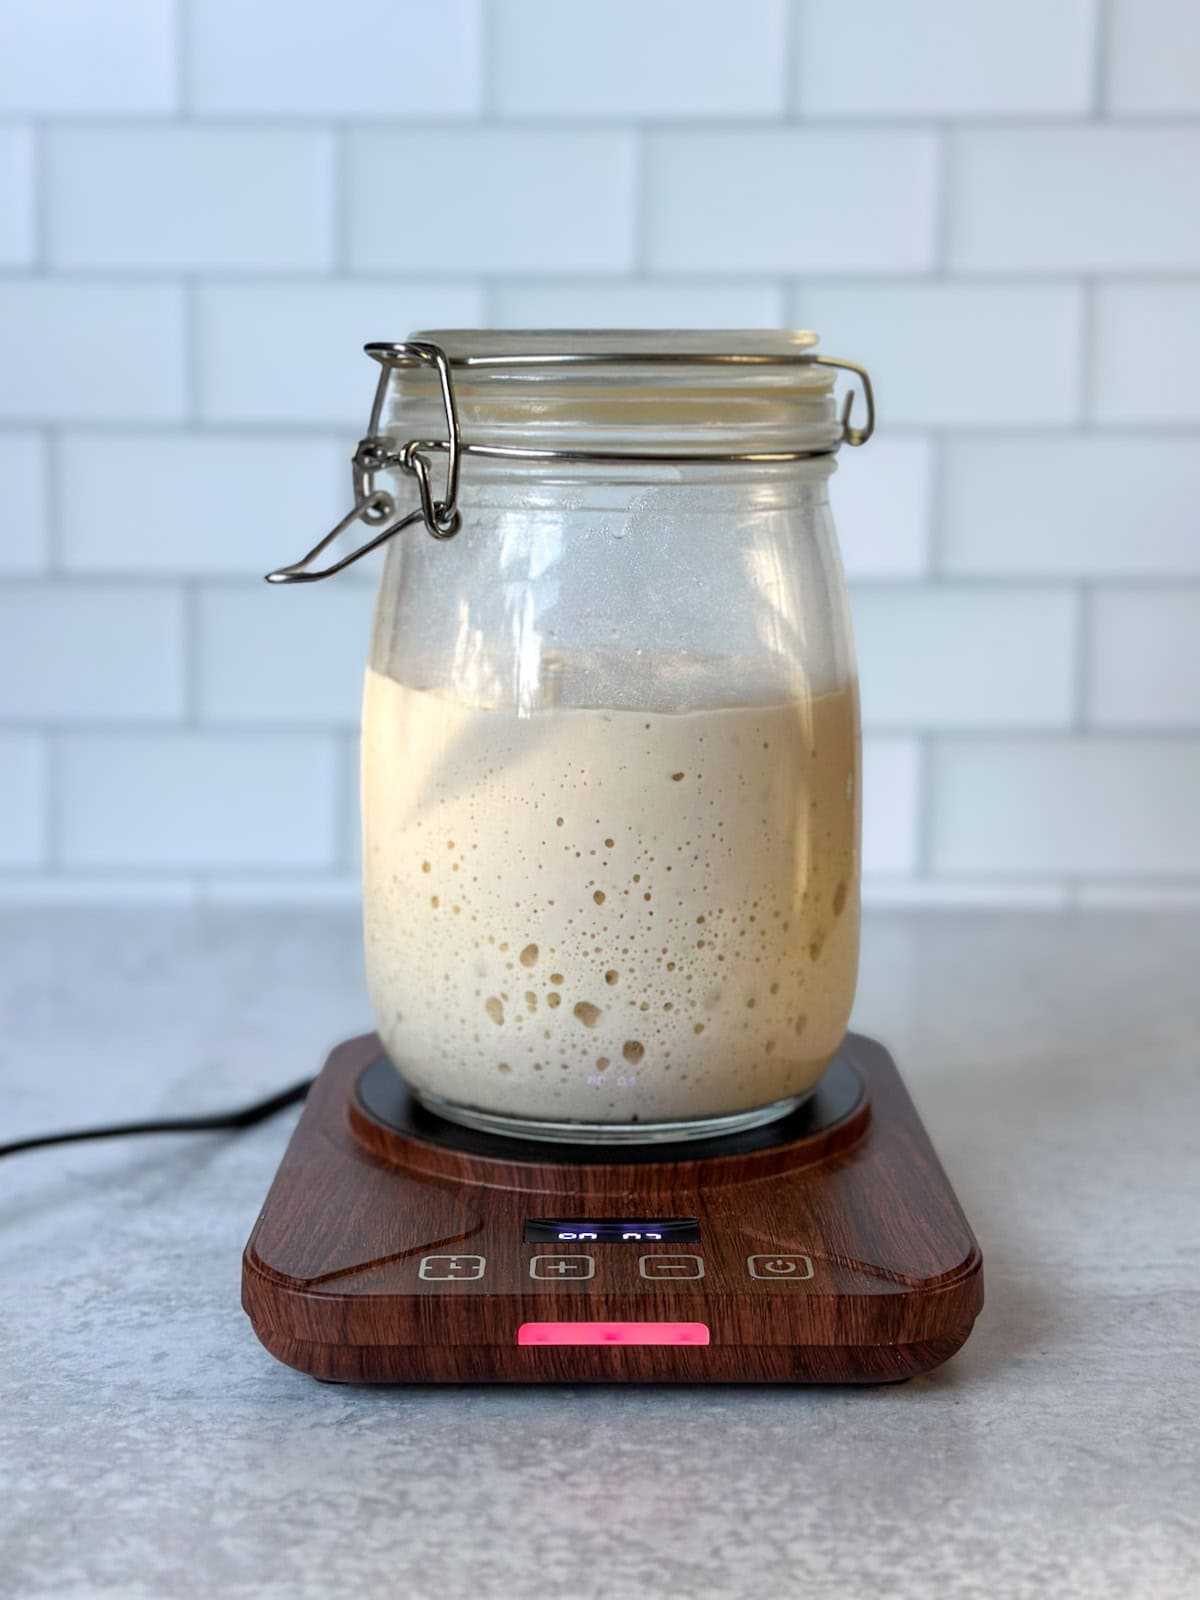
So, if you store your sourdough starter in the refrigerator like we do, you may want to let it warm up to room temperature before feeding it. It’s not required, but will help it get active and rise faster! I like to take my starter out of the fridge the night before I plan to make dough.
You can also help warm up a cold starter by feeding it with warm water (not hot) and/or using a starter warming plate – which are especially handy during the colder winter months! We use ours to keep our bowl of proofing dough warm too.
Before Feeding: Discard
In many cases, you’ll need to discard a portion of your original starter before feeding it. This helps you get the desired amount for feeding – such as 1/2 cup or 100 grams of starter, explained below.
Removing or discarding some of the “mother” culture also helps it maintain a healthy acid balance, and prevents your starter container from becoming overly full. The jar needs plenty of empty space for your starter to rise!
The only time you DON’T want to discard first is when there’s only a small amount of starter left in the jar already (like if you recently used most of it in a recipe).
Never get rid of your entire starter!
PRO TIP: To discard, simply scoop out and remove a portion of the starter until the desired amount remains in the jar. You can put discard in the compost or trash, use it in a discard recipe, or gift it to a friend – but do NOT put it down the sink! Sourdough starter can harden in drain pipes and cause serious plumbing issues.

RELATED: Don’t waste that discard! Come see the 15 Best Sourdough Discard Recipes including sourdough granola, discard crackers, our sourdough pancake recipe and more. Plus, here are 6 other clever ways to use discard – besides baking.
How to Feed Sourdough Starter by Weight
- To feed sourdough starter by weight, simply weigh and combine equal parts of starter, flour, and water – such as 100 grams of each (or 200 grams each for a larger starter/multiple loaves). Mix thoroughly until smooth.
- This is considered a 1:1:1 ratio which is a great starting point for beginner’s and to get a starter active for baking.
- You can also experiment with other ratios such as 1:2:2 (e.g. 50 grams starter, 100 grams flour, 100 grams water) which will result in a longer, slower fermentation time – ideal for long term refrigerator storage or when you don’t want your starter to peak too quickly (such as feeding it overnight).
- Weight is the most precise and consistent way to feed starter, especially since various flours have different weights.
Feeding Sourdough Starter by Volume (Cups)
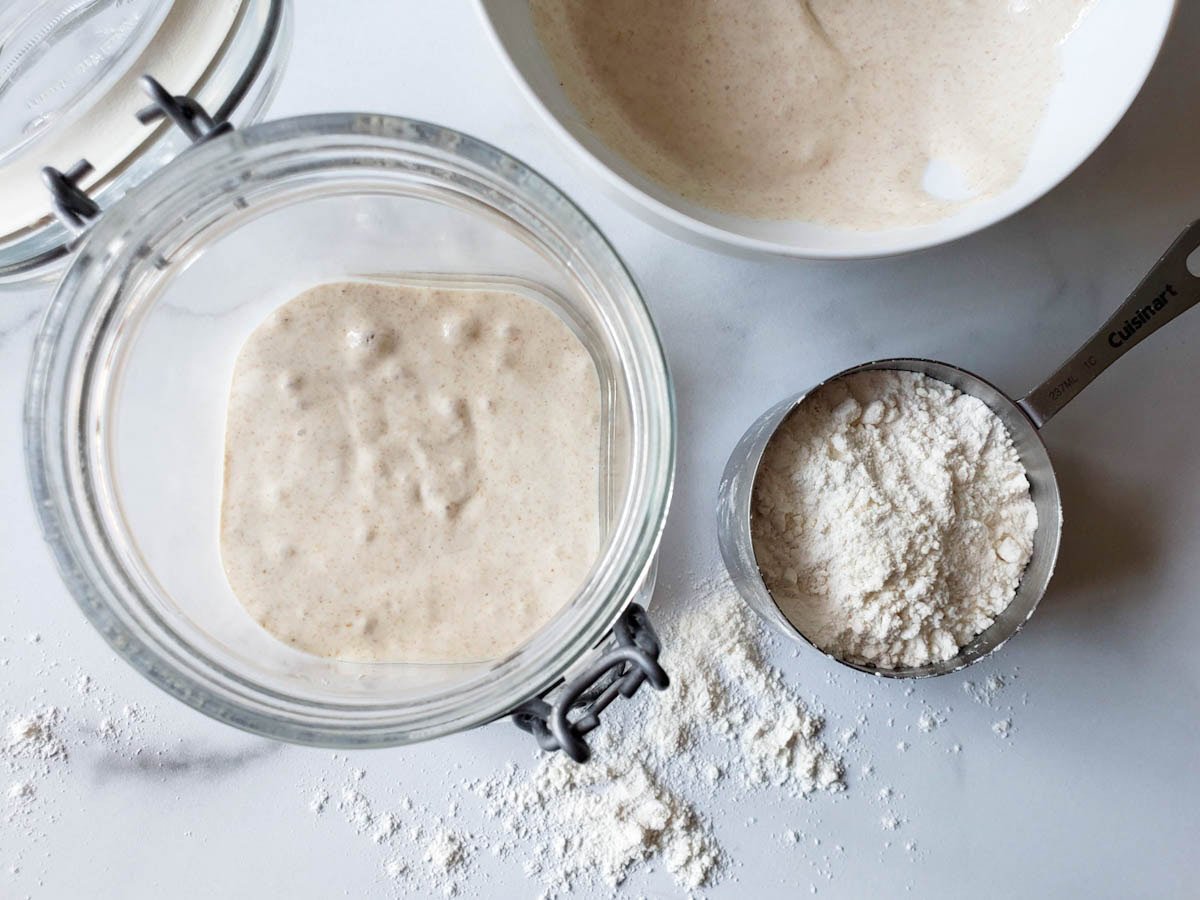
This is how I like to feed my starter. It’s quick and easy!
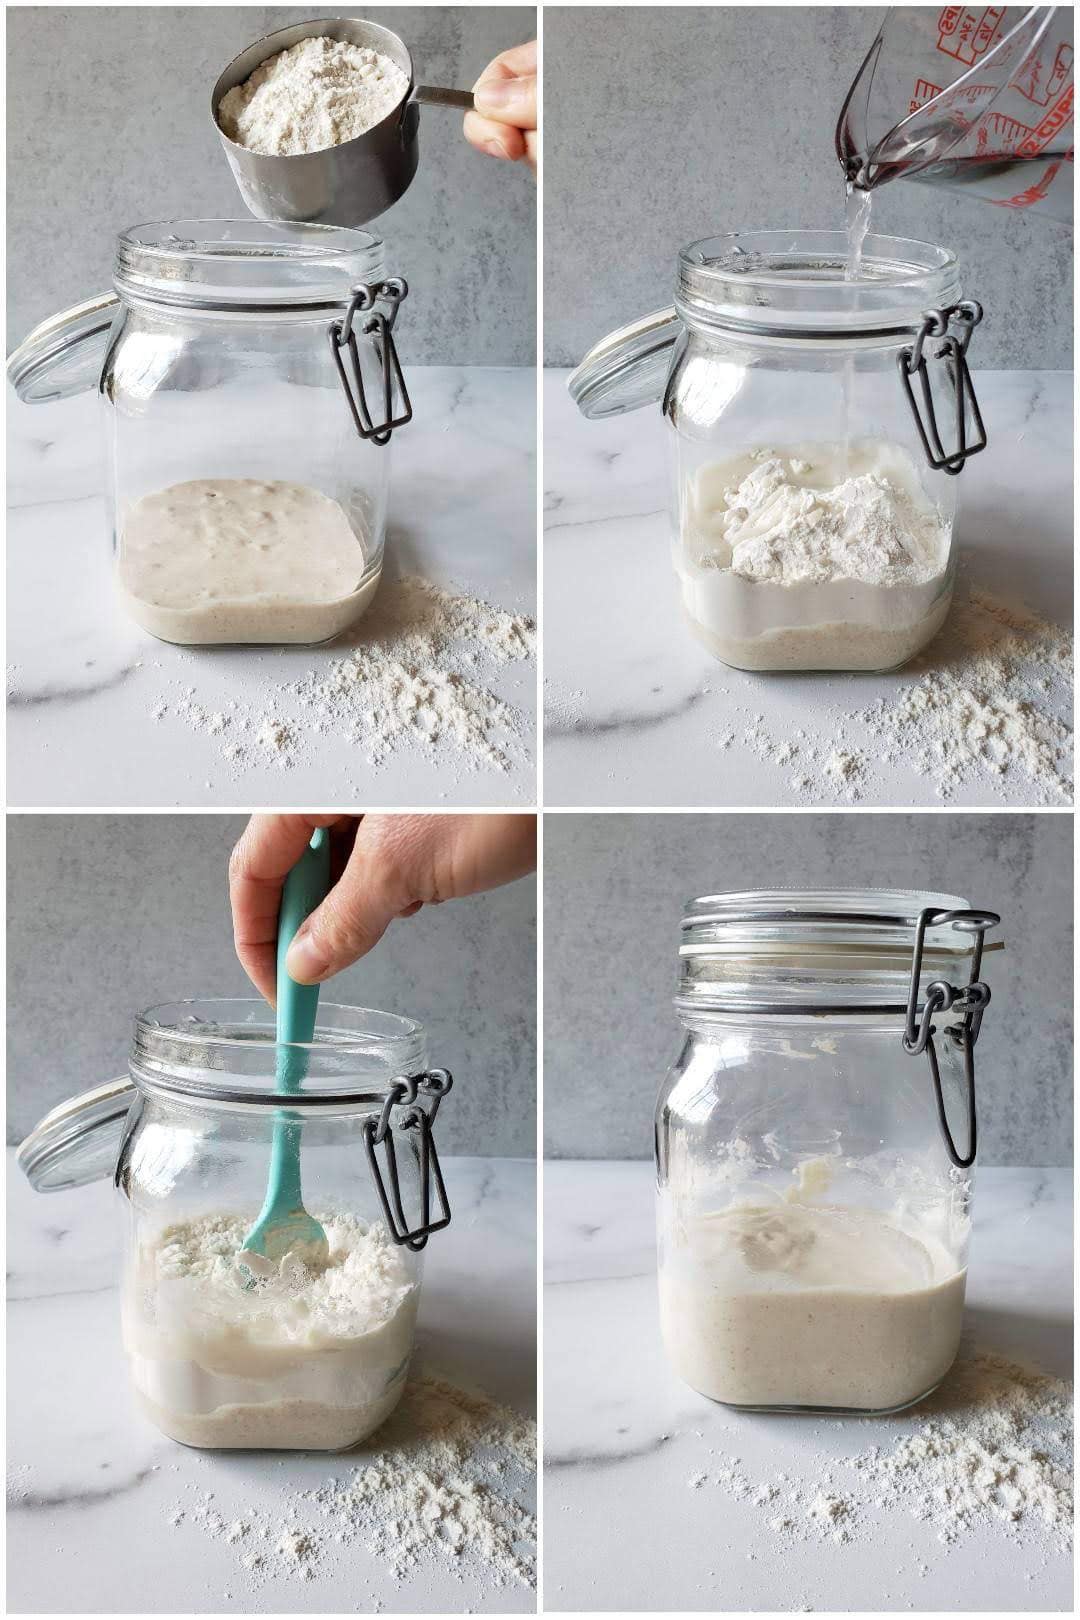
- To feed sourdough starter using volume measurements, mix together 1 part starter, 1 part water, and just under 2 parts flour (1:1:2). For example, 1/2 cup starter, 1/2 cup water, and a scant cup of flour. I’ve found that this is very close to a 1:1:1 ratio by weight.
- If you want to bake multiple loaves at once, simply scale up: such as 1 cup of starter, 1 cup of water, and just under 2 cups of flour.
- To feed, we typically mix it all up right in the starter jar. However, some bakers choose to measure everything out into a separate bowl, mix it together, and then put it back or into a fresh jar or container. Baker’s choice!
- Either way, I suggest to keep the sides of your starter container fairly clean (scrape with a spatula), and change it out or wash it on occasion. Built-up gunk on the sides of the jar can more easily lead to mold.
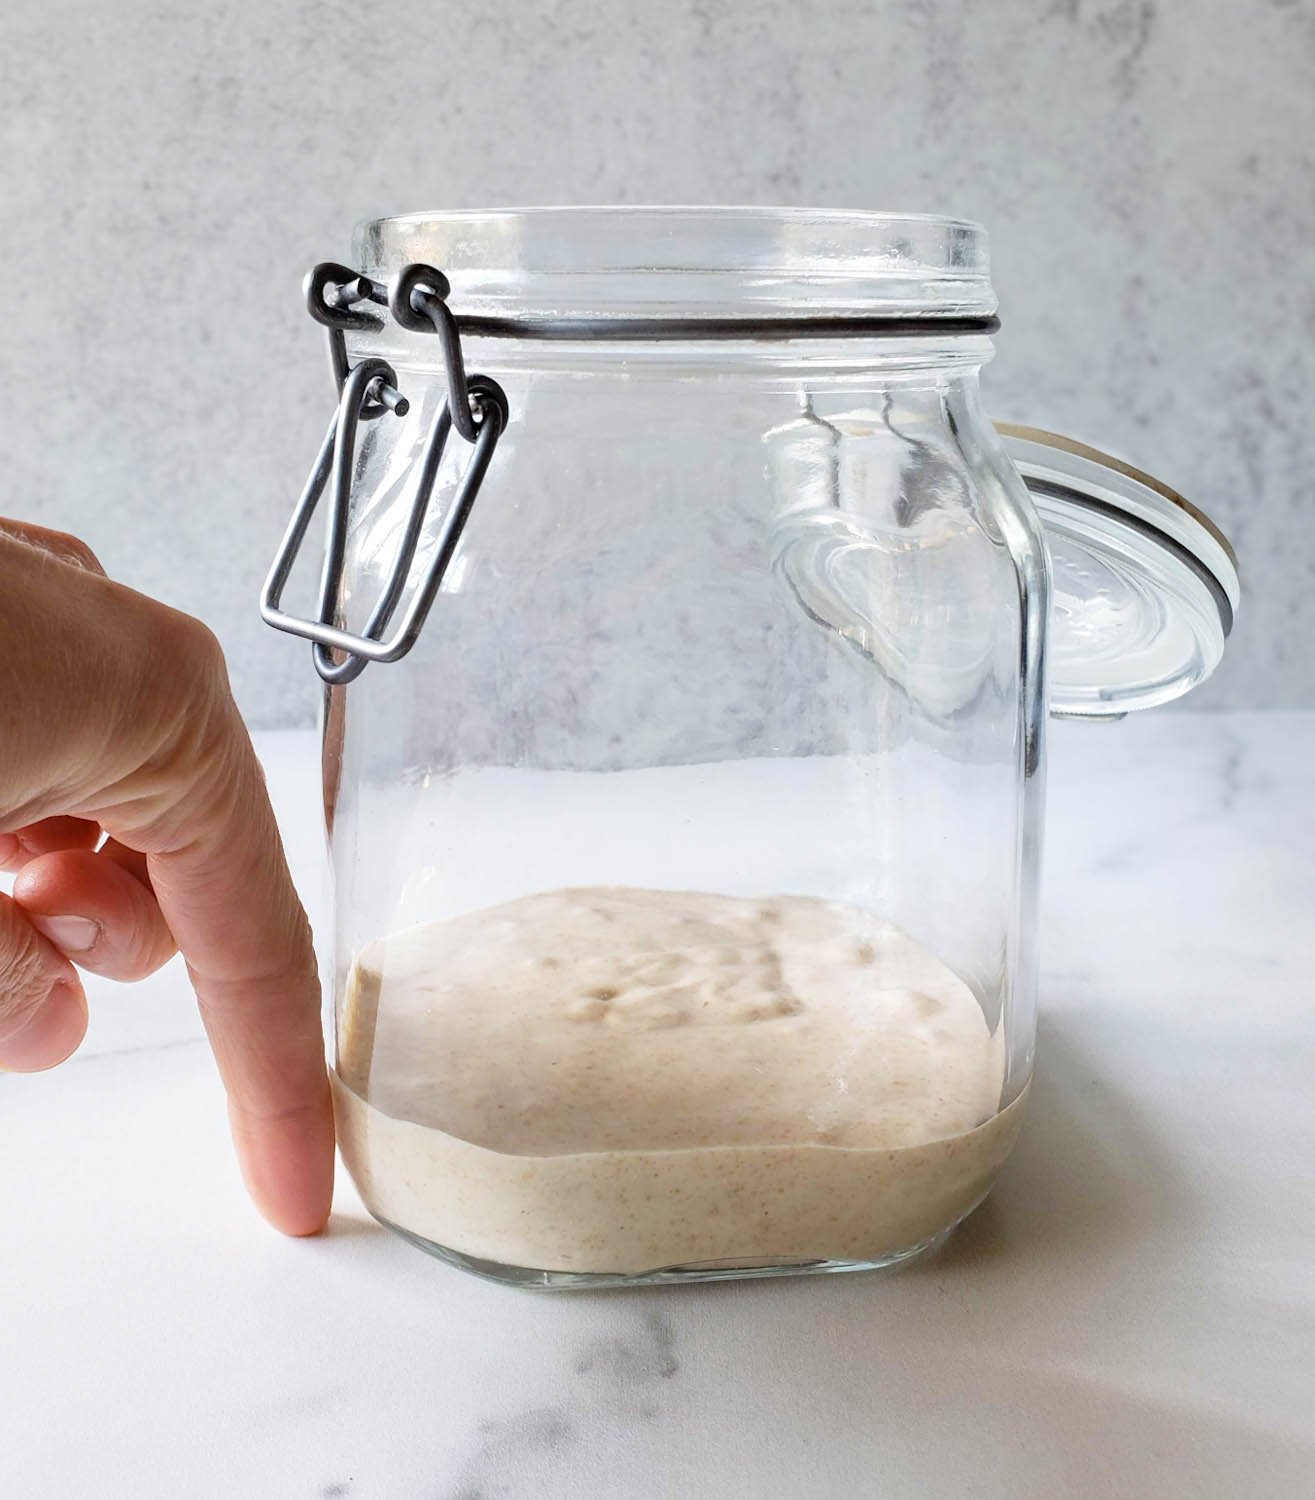
PRO TIP: Over time, I’ve learned what a 1/2 cup of starter looks like in the jar (about a knuckle or 3/4-inch deep in my particular container) so now instead of measuring every time, I simply eyeball the starter volume and only measure the flour and water. It doesn’t need to be precise! Measure once, observe, and save yourself one messy step.
When to Feed Sourdough Starter
There are two key times to feed sourdough starter: to get it ready and active to use in a sourdough bread recipe, or for general maintenance to keep it alive between bakes. Let’s explore both!
Feeding Starter Before Baking
- For baking, feed your sourdough starter about 4 to 8 hours before making dough and leave it at room temperature (70 to 80°F is ideal) to rise and reach peak activity before mixing it into your bread recipe. (In my experience, gluten-free sourdough starters peak and fall more quickly than traditional wheat starter.)
- Peak activity is when the starter has at least doubled or tripled in sized and is no longer rising, but before it starts to fall back down. Don’t rush this step! It’s best to use starter when it has reached full peak activity or even just after (when it starts to fall back down, but hasn’t fully deflated yet) instead of mixing it into your dough too early.
- Note that it can take anywhere from 4 to 12 hours for a starter to fully rise and reach peak activity. The exact time depends on numerous factors including the age and strength of your starter, when it was last fed, ambient temperature, and how you store it. Warmer temperatures increase activity, and cooler temperatures slow it.
- A slow, sluggish starter that hasn’t been fed recently (e.g. after several weeks or more in the fridge) will benefit from being fed twice before baking with it. To do so, let it warm to room temperature, feed it, and then let it fully rise and begin to fall again before discarding and feeding it a second time.
PRO TIP: If your starter has peaked but you aren’t quite ready to use it yet (life happens!), I’ve found that you can simply put it in the refrigerator at peak and then pull it back out when you want to use it (within 12 hours). This adds some nice flexibility in your baking schedule!
How Often to Feed Starter for Maintenance
How often you need to feed your sourdough starter depends on where you store it, and how often you bake. If you bake weekly, that’s all the feeding it may require! Yet if you go longer between bakes, you’ll want to do some maintenance feedings too.
Some serious bakers store their starter on the counter so it’s basically always ready to use. However, starter stored at room temperature must be fed daily (or even twice per day) to keep it alive!
On the the other hand, most beginners and casual bakers store their sourdough starter in the refrigerator. (That’s what we do!) When it’s cold, starter activity greatly slows and essentially goes dormant, so it only needs to be fed about once every week or two to keep it perky.
Truth be told, we often go several weeks (or even months) between feedings when we aren’t baking a lot… but I don’t necessarily recommend it, especially with a new starter! A healthy, established starter can tolerate a little neglect. Yet the longer you go between feedings, the more sluggish the starter will be when it comes time to bake, so you’ll need to feed it a couple times (as opposed to just once) before use.
PRO TIP: To do a maintenance feeding, simply take the starter out of the refrigerator, discard a portion, feed it, and then let it sit at room temperature for just a few hours to rise slightly before putting it back in the fridge. You don’t want it to fully peak and deflate however, or you’re basically putting it away hungry again!
Storing Starter in the Refrigerator vs Room Temperature
Here are a few notable differences between a storing sourdough starter in the refrigerator compared to room temperature:
- As we already explored, storing starter at room temperature is high-maintenance and requires daily feedings, more appropriate for serious and frequent bakers.
- Starter that is stored in the fridge will only need to be fed once every week or two (or even less frequently), ideal for casual bakers and also when you’re away from home on vacation.
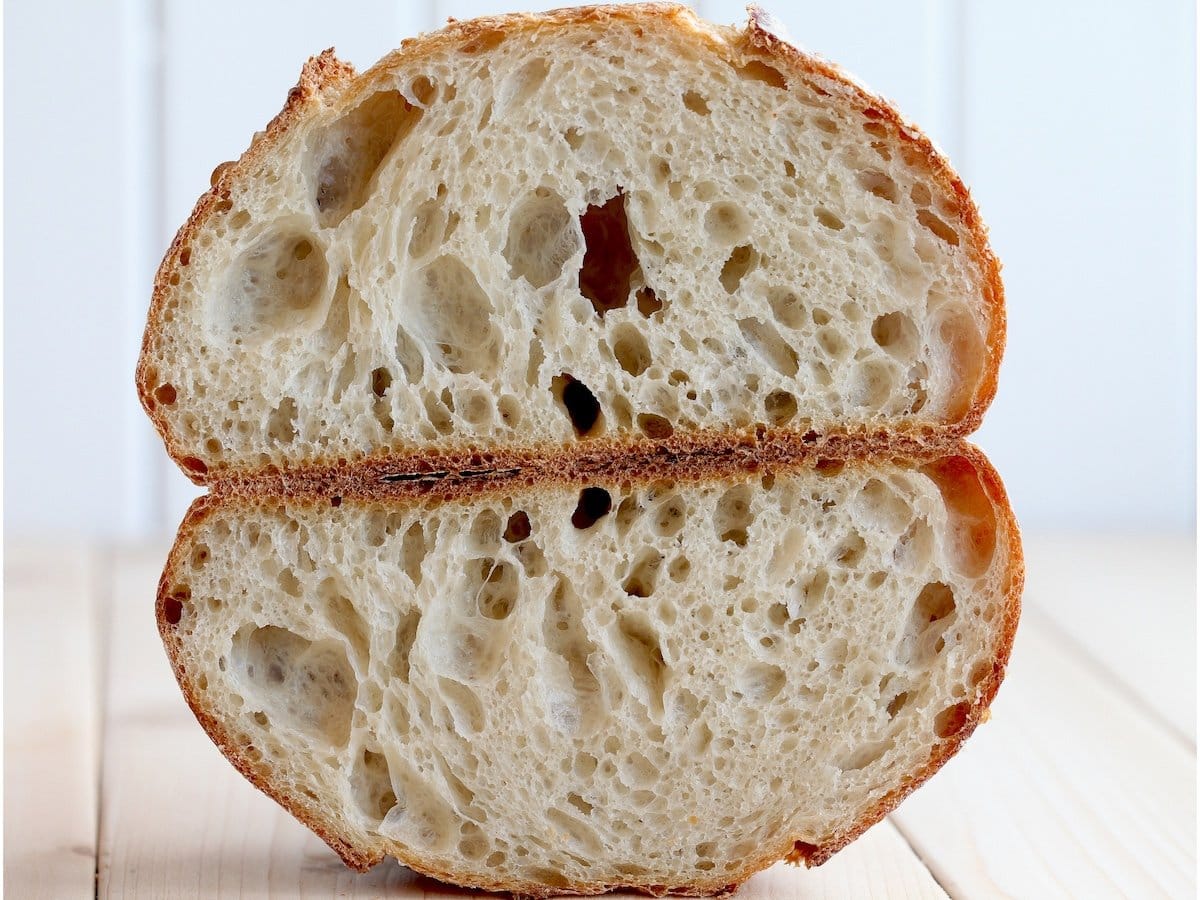
- Starters will develop a different flavor profile depending on where they’re stored. According to a sourdough expert I heard on NPR’s Science Friday, starter regularly stored at room temperature will have a more sweet, mild flavor while refrigerating starter encourages more complex sour and tangy notes due to increased acetic acid production.
- Refrigerated sourdough starter can also lead to more gut-healthy bread, as acetic acid is key in improving the digestibility of gluten and other nutrients.
Hooch: A Sign Your Starter Is Hungry
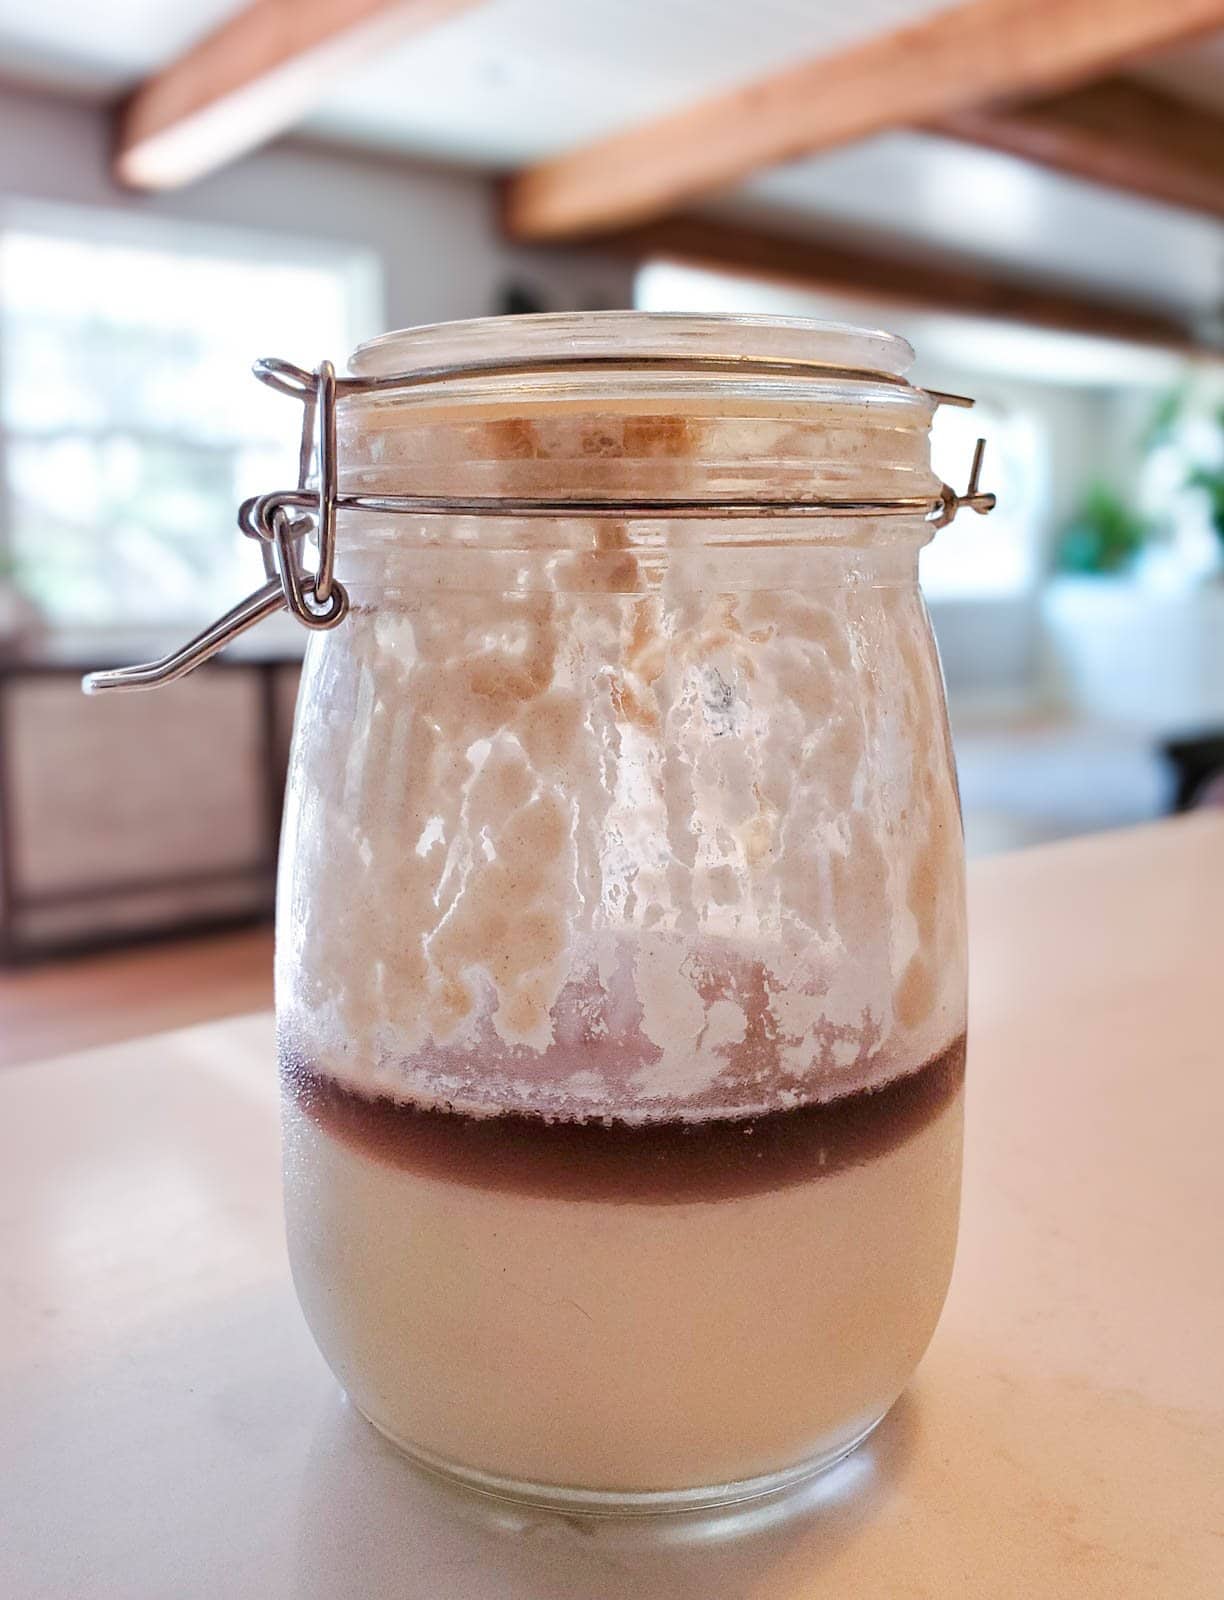
When a starter hasn’t been fed in a while, it will develop a layer of dark liquid called “hooch” on top. Hooch is a harmless, naturally-occurring fermentation byproduct (an alcohol) produced by yeast when it has consumed all of the available food.
Hooch is very acidic and smells like vinegar or nail polish remover. When encountered, you can either pour off the hooch or simply mix it back in (especially if you like your starter on the sour side), then discard and feed your starter as usual.
PRO TIP: If it’s been several months since you’ve last fed your starter, it may need to be fed differently for a few days to get back on track and rise again. Please see our guide: Is My Sourdough Starter Bad? How to Revive Old Inactive Starter to learn more! It also covers signs that a starter has gone “bad”, such as mold.

Example Feeding and Baking Schedule
I thought it may be helpful to share our usual baking routine. So, let’s assume we want to bake a loaf of bread on Sunday morning:
- Take the starter out of the refrigerator on Friday evening and let it come to room temperature overnight. (If it hasn’t been fed in several weeks, I’ll feed it once Friday night as an initial “wake up” feeding too.)
- Feed the starter on Saturday morning, allowing it to come to peak activity (usually 5-6 hours)
- Make dough using the starter on Saturday afternoon or evening – let it sit for 4 to 5 hours at room temperature to bulk ferment, stretch and fold, etc
- Transfer the dough to the refrigerator to cold-proof overnight, and bake on Sunday morning
You’ll develop your own feeding routine and baking schedule with time!
Frequently Asked Questions
A number of factors can influence rise. Ensure the starter has been fed, but don’t repeatedly feed it several times in one day – which can actually weaken it! Keep the stater in a warm location (70-80F). Try feeding half white and half whole wheat or rye flour to boost activity. Be patient.
If your sourdough starter is bubbling but doesn’t rise within a few hours of being fed, it may be too wet. When starter is too runny, the air bubbles easily rise up and OUT of the mixture instead of being trapped inside. To fix this, simply stir in more flour to thicken it up. Add just a couple tablespoons at a time until the desired consistency is reached: a thick pancake batter that isn’t easy to pour.
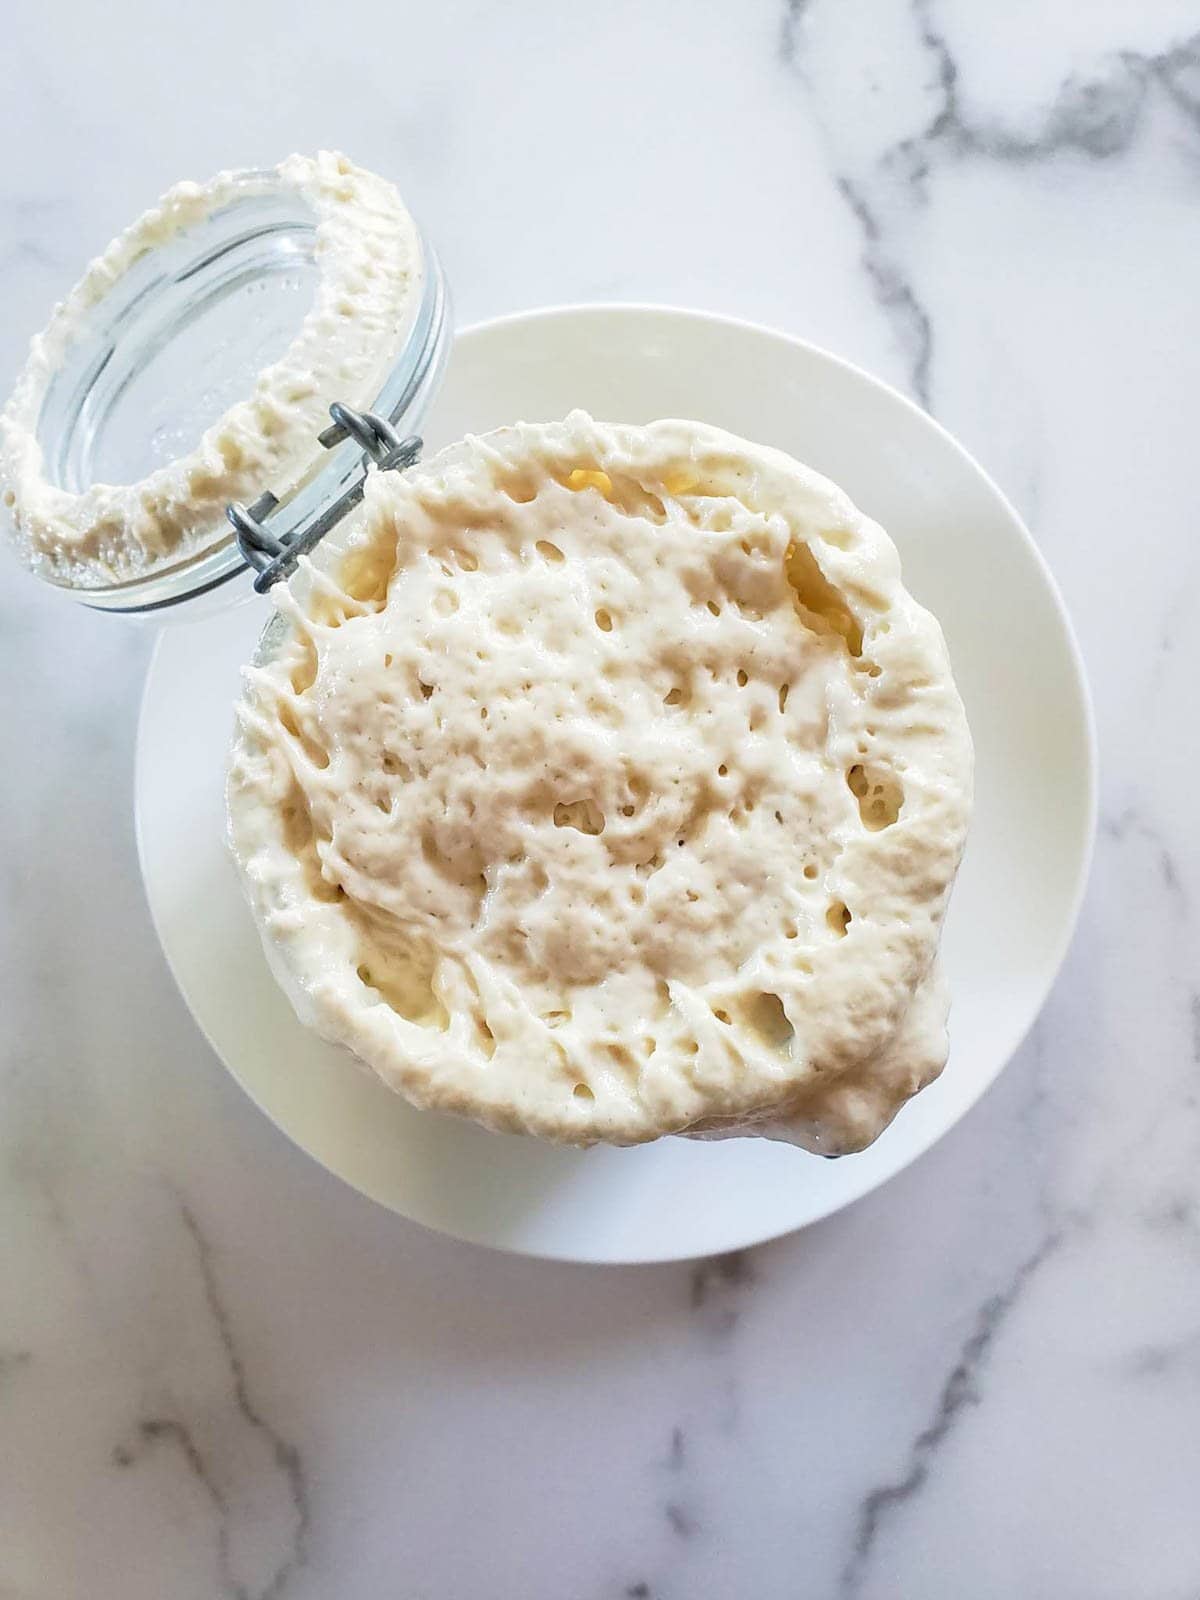
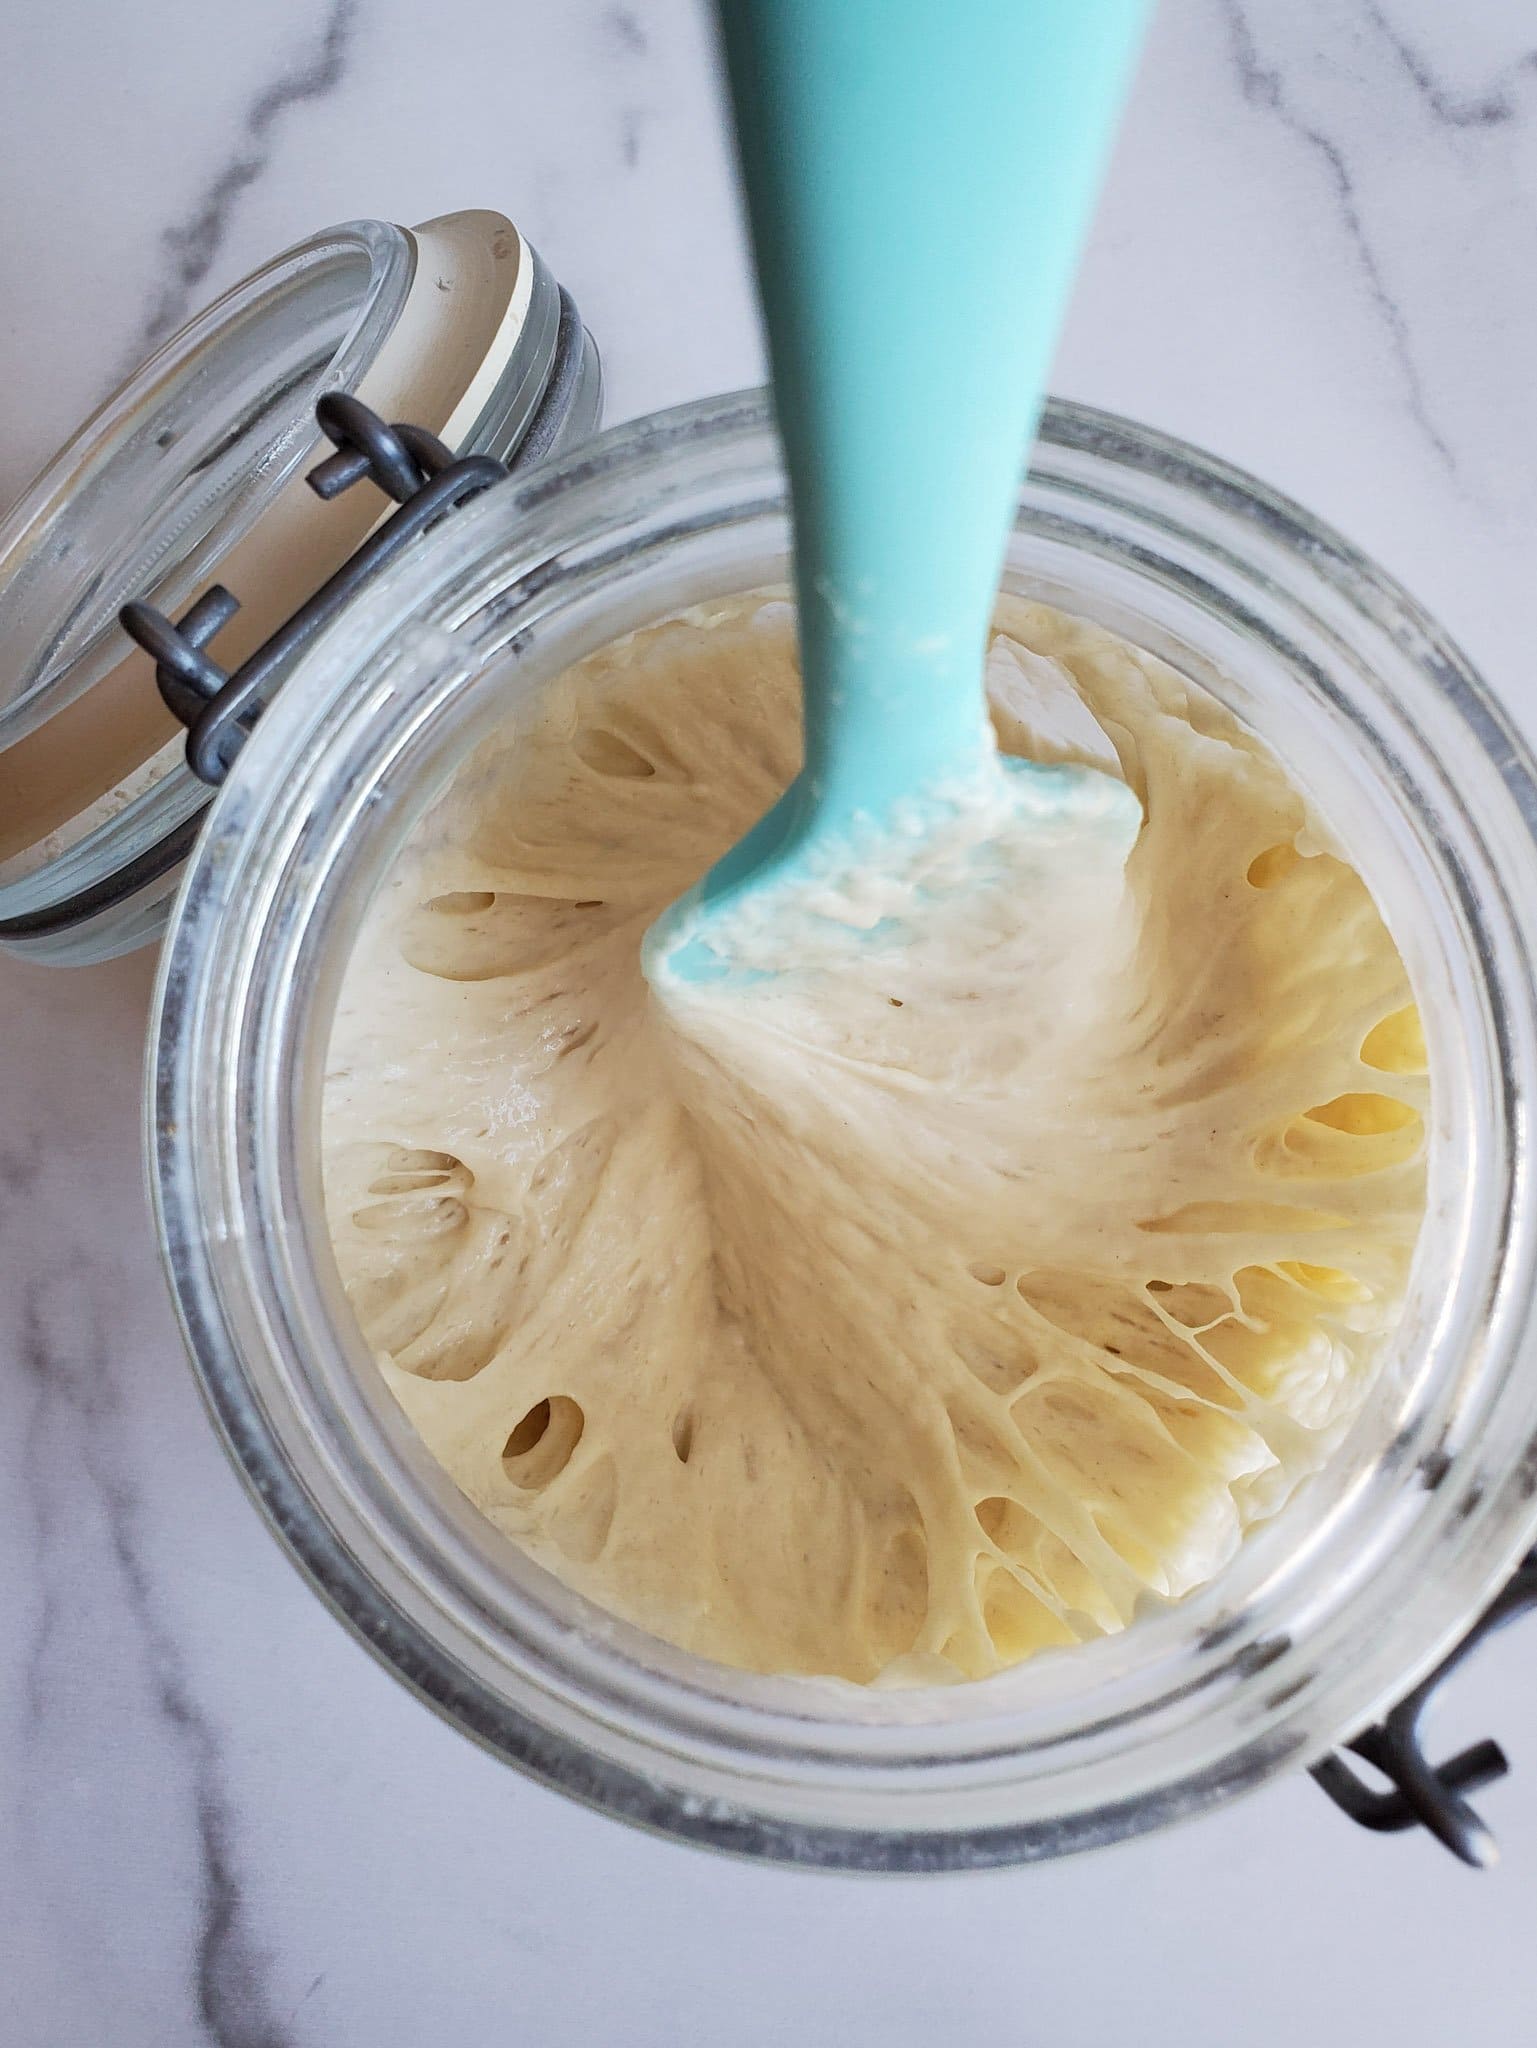
A strong, healthy sourdough starter will readily double in size within a few hours after being fed, smell pleasant and tangy (slightly acidic), and have a strong web-like gluten structure when it’s stirred at peak activity.
RELATED: If your sourdough starter still isn’t rising well, don’t give up! Pop over to this guide: 9 Ways to Make Sourdough Starter More Active.
That concludes this lesson on feeding sourdough starter.
I hope you found this article to be useful and interesting! Feel free to ask questions in the comments, and please leave a review below if you found this helpful. Now that you know how to maintain your sourdough stater, it’s time to get baking!
Don’t miss these related posts:
- Simple No-Knead Sourdough Bread Recipe
- Easy Sourdough Discard Cracker Recipe
- Sourdough Granola Recipe (Discard or Active Starter)
- Easy Sourdough Focaccia Recipe
- 20 Best Sourdough Add-Ins and Topping Ideas
- Best Sourdough Starter Names: 60 Punny Ideas
How to Feed Sourdough Starter
Want to save this?
Ingredients
Feeding Starter by Weight (1:1:1)
- 100 grams sourdough starter
- 100 grams water (room temperature or warm, and non-chlorinated filtered water recommended)
- 100 grams flour *Note that using whole wheat or rye flour (instead of white) can help increase starter activity.
Feeding Starter by Volume (1:1:2)
- 1/2 cup sourdough starter
- 1/2 cup water (room temperature or warm, and non-chlorinated filtered water recommended)
- 1 cup (scant, just under a cup) flour
- *Scale up as needed to maintain a larger starter with the same ratios
Instructions
Introduction
- "Feeding" sourdough starter is simply adding fresh flour and water to an existing starter. This may be after you use some starter in a recipe (to build its volume back up), to get a starter ready to bake with, or as a maintenance feeding between bakes.
- The frequency depends on how you store it. Starters stored in a refrigerator can be fed once every week or two (or even monthly, once mature and established). Starters stored at room temperature must be fed daily.
- Some bakers combine the starter, fresh flour, and water in a bowl and then transfer it into a clean container each time. Others simply mix fresh flour and water right into the starter jar. Either way, try to keep the sides of the starter jar fairly clean, and change it out or wash it on occasion. Built-up gunk in the jar can more easily lead to mold.

Before Feeding
- Warm up: Starter is most active at 70-80F. If store your starter in the refrigerator, allow it to warm to room temperature for several hours or overnight before feeding. You can also quickly warm up a starter by feeding with warm water (not hot) or using a warming plate.

- Discard a portion: scoop out and remove a portion of the starter until the desired amount remains in the jar. Compost, trash, or use it in a discard recipe – but do NOT put it down the sink! (If there's only a very small amount of starter in the jar, you don't HAVE to discard first – simply feed it.)
- Now, add more fresh flour and water to the remaining starter, either following the "weight" or "volume" instructions below
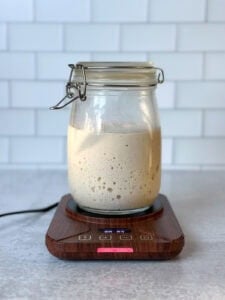
How to Feed Sourdough Starter by Weight
- To feed sourdough starter using weight, simply combine equal parts starter, flour, and water. For example, 100 grams of each. Or for a larger starter/multiple loaves, 200 grams of each. This is a 1:1:1 ratio, ideal for beginners or activating a starter to bake.
- You can also experiment with other ratios such as 1:2:2 (e.g. 50 grams starter, 100 grams flour, 100 grams water) which will result in a longer, slower fermentation time – ideal for long term refrigerator storage or if you don't want your starter to peak too quickly (such as feeding it overnight).
How to Feed Sourdough Starter by Volume (Cups)
- To feed sourdough starter using volume measurements, simply combine 1 part sourdough starter, 1 part part water, and just under 2 parts flour. For example, 1/2 cup starter, 1/2 cup water, and just under 1 cup of flour. (This is very close to a 1:1:1 ratio by weight).

- To scale up for a larger starter/multiple loaves, use 1 cup starter, 1 cup water, and just under 2 cups flour.
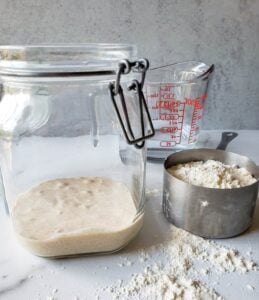
Preparing Starter to Bake
- For baking, feed your starter about 4 to 8 hours before making dough. Leave it out at room temperature (70 to 80°F is ideal) to rise and reach peak activity before mixing it into your bread recipe.
- Peak activity is when the starter has at least doubled or tripled in sized and is no longer rising, but before it starts to fall back down. Don’t rush this step! It’s best to use starter when it has reached full peak activity or even just after (when it starts to fall back down, but hasn’t fully deflated yet) instead of mixing it into your dough too early.
- Note that it can take anywhere from 4 to 12 hours for a starter to reach peak activity depending on the age/strength of your starter, when it was last fed, ambient temperature, and how you store it. Warmer temperatures increase activity, cooler temperatures slow it down.
- A slow, sluggish starter that hasn’t been fed recently (e.g. after several weeks or longer in the fridge) will benefit from being fed twice before baking with it. To do so, let it warm to room temperature, feed it, and then let it fully rise and begin to fall again before feeding it a second time.
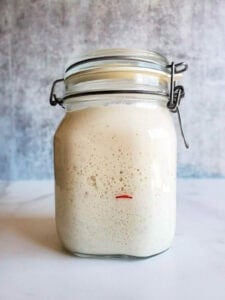
Maintenance Feedings
- Take the starter out of the refrigerator, discard a portion, feed it, and then let it sit at room temperature for just a few hours to rise slightly before putting it back in the fridge. You don’t want it to fully peak and deflate however, or you’re basically putting it away hungry again!





182 Comments
Donna
Love your website! Just starting this endeavor and very thankful for your instructions! Question… Can I make my sourdough bread with buckwheat flour using this white flour starter?
Aaron (Mr. DeannaCat)
Hi Donna, you are welcome to try and make a loaf with buckwheat flour but the results may vary from using regular wheat flour. We have found gluten free loaves we have made with partial buckwheat flour to be very strong in flavor and they didn’t always rise as well as we may have liked. Also, your sourdough starter may not feed on the gluten free flour as readily for optimal fermentation since it is used to feeding on wheat flour. Sounds like a fun experiment and you never know until you try, let us know how it turns out. Good luck!
Kristi Kallio
So so happy I got some dehydrated sourdough starter from you! It’s so much fun to learn as you go and make new recipes! My daughter also loves to help and watch the starter rise!
All of your blog posts are so educational and helpful in so many ways! Definitely happy that I came across your Instagram! 🥰
Riley Bianchi
Such great tips! I was afraid of doing sourdough for the maintenance of the starter, but got one from a friend during the pandemic and this helped put me at ease with worrying about the care. Sourdough is delicious, but is it bad that I like the focaccia better and love making discard recipes?
Wendy
Thank you for this easy to follow, well-explained-photo-included, tutorial! I will follow your step by step and hope to have better results than my previous attempts.
Sara
Wouldn’t 1/2 cup of water and 1 scant cup of flour to feed be around 50% hydration? I’ve read a lot of suggestions elsewhere to feed with equal parts for 100% hydration… Aiming for 65-75% max, when factoring in whatever recipe I will be using (unless I want to do a lot more work with an even higher hydration). I’m admittedly a little confused at how the whole hydration aspect works. Perhaps I am over complicating it, but I guess I just want to know what % hydration you are using when feeding to confirm I am calculating my recipes properly.
DeannaCat
Hi Sara – 1/2 cup water and 1 scant cup flour is relatively equal amounts by weight. Water weighs more than flour. I tried to make it more simple for folks by including both weight and volume measurements in this article. I hope that makes sense. And yes, don’t worry too much about – I do not personally pay attention to hydration ratios in any of our sourdough recipes, nor do I measure incredibly precisely. I generally follow the guidance I’ve provided here (and that given in the recipes I share) but also go by look of the starter and feel of the dough. The starter should always be thick, puffy and gooey at peak activity (like marshmallow fluff), but not runny or pourable like pancake batter. Every climate/home has to slightly adjust their recipes by a splash less water or sprinkle more flour with varying humidity levels anyways. Don’t over think it. Just experiment, get to know your dough, and have fun!
Beth
Hi,
I’ve had some great success with your overnight fridge proofing method. However, I’m often not getting nearly as much rise in the bread as I’d like. Sometimes, while pretty and tasty, it is more of a flattish disc than a nice high loaf like I would prefer. Any tips on increasing the rise when it bakes? The dough is usually very flat when I get it out of the fridge in the morning.
Thank you!
DeannaCat
Hi Beth! It’s hard to say exactly without knowing your whole process, since there are a lot of variables! The type of flour used, the temperature and time during proofing, how active your starter is, etc… Are you following our simple no-knead bread recipe and process exactly, including doing the several rounds of stretch and fold and leaving at room temperature to bulk ferment for several hours before the cold proof? We found using bread flour provides a fluffier rise than AP. If you dough spreads out too much and seems overly wet, you could add a sprinkle more flour or splash less water (sometimes people need to adjust for more humid climates than ours). Finally, are you baking in an enclosed combo cooker or dutch oven? That helps volumes! I hope you find an “ah ha” moment in here somewhere!
lauren smallwood
Deanna, I just started my second starter using your recipe and it’s going awesome. Someone sent me this museum in Belgium of nothing but starters! Thought of you: https://www.smithsonianmag.com/smart-news/take-virtual-tour-belgian-sourdough-library-180974668/
Amy
So when you’re getting the starter ready for baking and feeding it (like your example: feed Friday morning, afternoon, 3-4 hours before bake) are you discarding it to the knuckle amount each feed or are you just adding the flour and water on top of what you already have?
DeannaCat
Hi Amy – We discard every time we feed more flour/water, though I’ll admit maybe not alll the way down to a knuckle deep. As I think I mentioned in the post, we are fairly loose with our starter “measurement” (and usually leave more than an equal part left behind) but do measure consistently when adding the scant 1 cup flour and 1/2 cup water. However, if you are baking a double batch of bread or a recipe that calls for quite a bit of starter, you could choose to not discard any and simply add equal parts water and flour on top – to build up more volume of stater to keep and use. I hope that makes sense!
Francesca
Hi! These tips are great! I have a very active starter that keeps bubbling out of its jar so I want to store it in the fridge. Do you pop it in after a feeding? Or do you wait til it shows activity?
DeannaCat
Hi Francesca! We typically feed it, let it sit out for about an hour or two, then put it away. That said, we only do that if we have time, e.g aren’t heading to bed or to work for the day, and often put it right in to the fridge after feeding with no issues too. Even more, sometimes we put it back in the fridge right after taking what we need for a recipe (so at peak activity or just after) and that has been fine. It is pretty forgiving! Keep in mind the final way I mentioned may leave you a little short in volume the next time you take it out to use though – and you’d want to feed (add flour and water) but not discard any the following baking session when waking it up. I hope that helps!
Katie
Hi Deanna,
Referencing here:
“If your starter has been stored at room temperature, reaching peak activity should be a breeze. It peaks every day. For those of us that store our starters in the refrigerator, it takes some planning in advance to get ready for baking.”
I’m using the GF starter with brown rice flour. I pulled the starter out of the fridge yesterday evening and fed it around 10am this morning. It’s 4pm and no activity so far. When you say you usually feed it twice before baking, does that mean you do the whole discard process again, too within one day?
Thanks for your help! I’m hoping I didn’t kill it as I’d like to try making a GF pizza dough out of it, but figured I’ll just use the cracker recipe and throw toppings on it if if I did =D
Katie
Kelly Bowland
What if my sourdough starter rose really high in the first 24hrs and then deflated over night? Is it still okay?
DeannaCat
Hi Kelly! If it rose and fell that quickly, you could feed it a day early if you’d like, but I wouldn’t feed it a full 2 days early! Good luck!
Lena Haydel
Hi
My first starter and I took it out the frig last night and feed it first thing this morning, it is now 7:33 pm and it has only risen a half inch! Help
Lena
DeannaCat
Hi Lena – Did you read the troubleshooting tips, like about consistency and temperature? It may be too thin/watery?