

Easy Gluten-Free Sourdough Bread Loaf Recipe
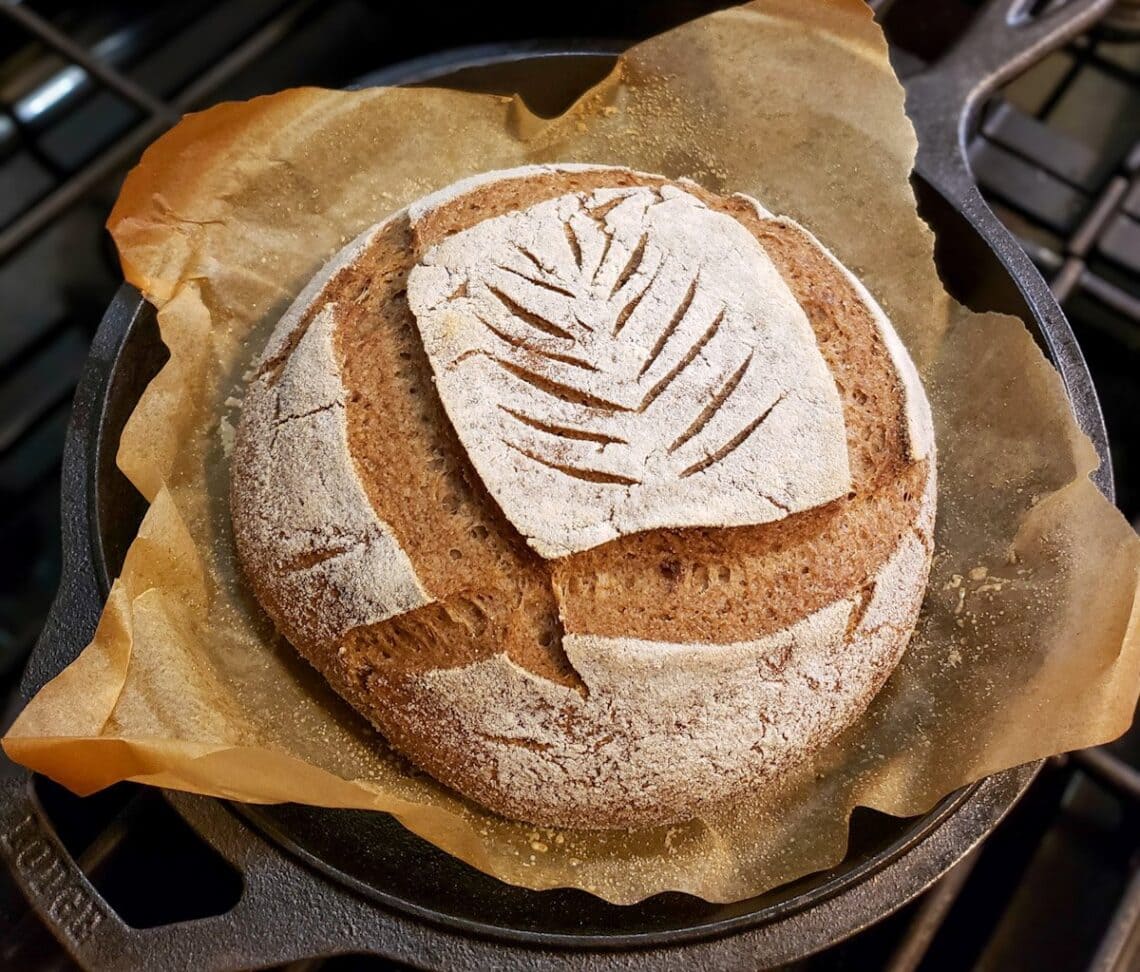
No gluten? No problem. Come learn how to make your own delicious and nutritious gluten-free sourdough bread at home. Without kneading or “stretch and folds”, this recipe is even easier to make than traditional wheat sourdough!
This recipe makes a wholesome, gut-healthy GF loaf that’s perfectly soft and spongy, and can be enjoyed fresh from the oven or toasted for a crisp crust. I’ve included tips for baking either in a Dutch oven or a regular bread pan.
If you need a starter, come learn how to make a gluten free sourdough starter from scratch here.
Note: This post was originally published in March 2018 but has been significantly updated since.

Would you like to save this?
Disclosure: Homestead and Chill is reader-supported. When you purchase through links on our site, we may earn an affiliate commission.
What to Expect from Gluten-Free Sourdough
Gluten free sourdough will never get quite as fluffy or airy as traditional wheat bread, but that doesn’t mean it needs to be a gummy “dense brick” like I too-often hear GF bread described.
After many months of tweaking and perfecting this recipe, I’ve found a way to make homemade gluten-free sourdough that is moist, soft and spongy in texture, full of small even air bubbles, has a nice mild earthy flavor, slices beautifully, and toasts to superb crunch.
Temperature Tips
Sourdough is happiest in warm conditions; around 70 to 75°F is ideal. In this range, both your sourdough starter and dough will readily get active, ferment, and rise the best. Try not to overheat it though! Temperatures over 85°F can quickly lead to over-proofing.
If your home is on the cool side, do your best to find a warm spot for your sourdough. Some bakers put theirs inside the oven with the light on to create warmth – but be careful not to turn the oven on!
Instead, I now like to use this handy warming plate for both our starter and bowl of proofing dough, or use a seedling heat mat if you have one. I’ve also found that using warm water in the starter and dough will help boost activity.
To help assess temperature, you can use a food probe thermometer to check the dough or use an ambient thermometer nearby.

Supplies
- large mixing bowl and/or dough tub
- kitchen scale
- liquid measuring cup
- proofing basket aka banneton, which helps the loaf keep its shape while rising. Choose between a round “boule” shape or an oval “batard” shape.
- Dutch oven or cast iron combo cooker. We love our Lodge combo cooker! Baking bread inside an enclosed container traps in steam, which helps the bread rise and get a nice blistered, crisp, chewy crust.
- dough scraper
- lint-free tea towel, plastic wrap, or other bowl cover
- parchment paper or reusable silicone bread mat with handles
- high-heat oven mitts
- optional: probe thermometer or an ambient room thermometer
Using a Bread Pan
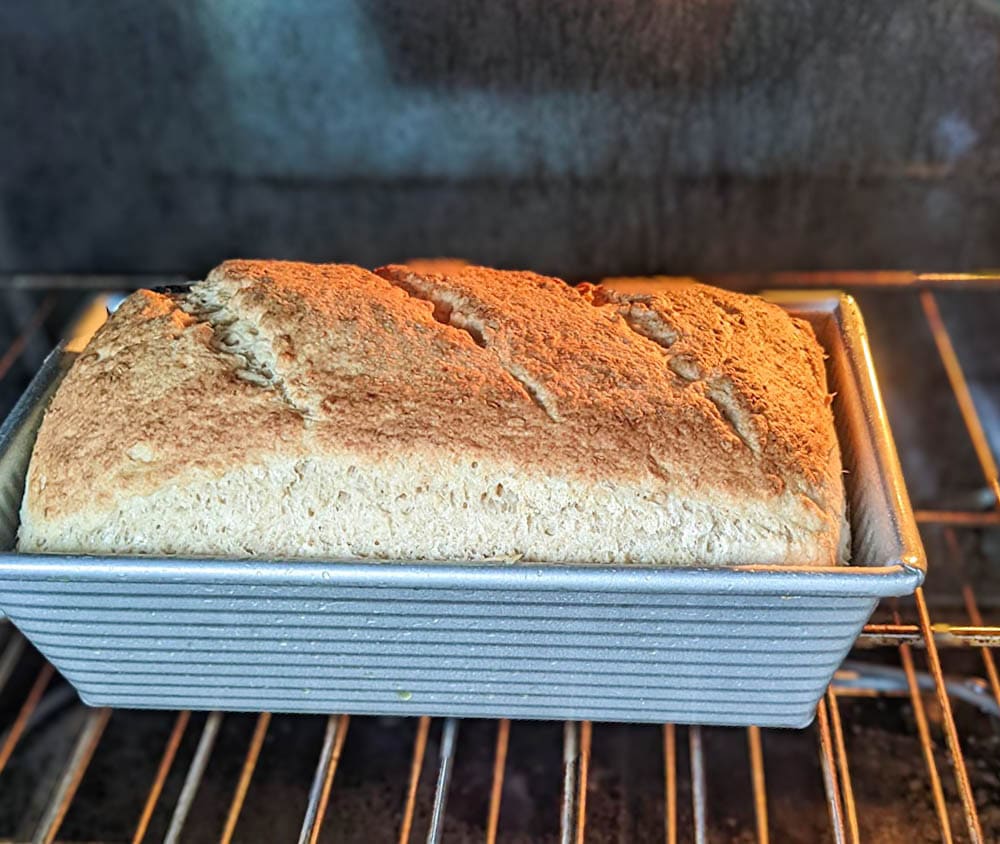
Wheat sourdough is most often baked in a Dutch oven, and I usually get satisfactory results baking my gluten-free sourdough in one too. However, since GF dough has a tendency to spread out a bit more, you can also bake it in a classic bread pan for more structure and a taller loaf. (You’ll still want to cover it while it bakes, such as with foil or a second bread pan placed upside down on top.)
Ingredients
- 110 grams of gluten-free sourdough starter, added at peak activity
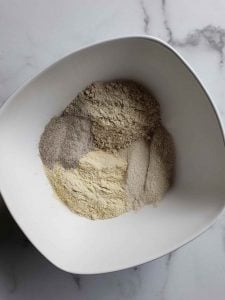
- 450 grams total of gluten-free flour. I recommend 150 grams brown rice flour, 150 grams millet flour, 125 grams sorghum flour, and 25 grams buckwheat flour for this recipe. See flour notes below for other options and variations.
- 3 tbsp psyllium husk
- 10 grams salt (sea salt, kosher salt, or Himalayan salt is preferred over iodized table salt)
- 1.5 to 2 cups of lukewarm warm (2 cups of water works well for the brands and types of flour I used, and in my climate. However, some people have commented that the dough was too wet. Start on the lower end of the called-for water, and work your way up as necessary to achieve the desired dough consistency.)
- Optional: 1 tbsp honey, for a hint of sweetness and more “food” for the starter to feed on.
Gluten-Free Sourdough Flour Options
When it comes making GF bread, there are dozens of flour options: millet, potato, brown rice, sweet rice, buckwheat, tapioca, oat, sorghum and more. Most recipes call for a combination of several types of flours – plus psyllium husk and/or xanthan gum to help everything bind well in the absence of gluten.
I’ve tried our gluten-free sourdough bread recipe with several different flour combinations, and I prefer a mix of brown rice, sorghum, millet* and buckwheat flours (amounts listed above). To use only three types, I suggest 175 grams brown rice, 150 grams of millet, and 125 grams sorghum. Too much sorghum may make your loaf more dense.
I’ve seen other gluten-free sourdough bread recipes use a lot more buckwheat flour than we do, but I personally find the flavor too overpowering. I’ve also tried this recipe with a 1-1 gluten-free baking flour and did not love the results. The finished loaf was far more dense and gummy than the loaves I made with our own GF flour blend.
Feel free to experiment and let us know what works well in the comments!
*If you’re avoiding millet flour for thyroid issues, try substituting with potato flour or oat flour instead.

Example Baking Schedule
Before we get into the step-by-step, keep in mind that making sourdough is generally a two-day process. Don’t worry, the dough is just sitting there proofing or in the refrigerator most of that time! Your active time is only a couple of hours.
Here is my usual baking routine if I want to bake a loaf of bread on Sunday morning:
- I take the starter out of the refrigerator on Friday evening and let it come to room temperature overnight. (If it hasn’t been fed in several weeks, I’ll feed it once Friday night as an initial “wake up” feeding too.)
- Feed the starter on Saturday morning, allowing it to reach peak activity (usually 5-6 hours)
- Make dough on Saturday afternoon or evening, and let it rest for 3 to 4 hours at room temperature to bulk ferment.
- Transfer the dough into a banneton (or bread pan) and put in the refrigerator to cold-proof overnight.
- Bake on Sunday morning
Don’t worry, this will all make sense once you do it a couple times!

Instructions
1) Feed Sourdough Starter
- Feed your sourdough starter about 4 to 8 hours before making dough. Leave it at room temperature (70 to 80°F is ideal) to rise and reach peak activity before mixing it into the dough.
- Peak activity is when the starter has at least doubled in size and is no longer rising, but before it starts to fall back down. Don’t rush it! It’s best to use starter once it has reached full peak activity or even just after (when it starts to fall back down, but hasn’t fully deflated yet) instead of using it too early. The exact time it takes to reach peak activity will vary depending on starter vigor, temperature, flour type and more.
- A slow, sluggish starter that hasn’t been fed recently (e.g. after several weeks or more in the fridge) will benefit from being fed twice before baking with it – such as the day before. To do so, let it warm to room temperature, feed it, and then let it fully rise and begin to fall again before discarding and feeding it a second time.
RELATED: Please visit our guide on how to feed sourdough starter for more tips and information if needed.

2) Mix Dough
- In a large mixing bowl, first combine and mix all of the dry ingredients – including flours, salt, and psyllium husk.
- Next, add the wet ingredients: the active starter, water, and optional honey. The recipe calls for lukewarm water because cold water will lower the temperature of the dough and slow the activity of the starter.
- If you want to add a sprinkle of fresh or dried herbs, nuts or seeds, special seasonings, sun dried tomatoes, olives, grated cheese, or other goodies to your loaf, do so now. (I don’t recommend adding juicy ingredients like fresh tomatoes since it will throw off the moisture balance).
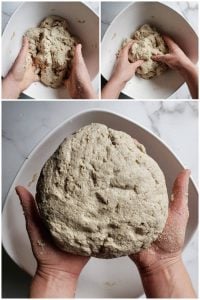
- I typically pre-mix everything fairly well with a wooden spoon, then dig in with clean hands to mix it further. You could also use a stand mixer, which will help aerate the dough. However, you don’t need to knead the dough for any period of time.
- Once everything is thoroughly combined, form the dough into a large smooth ball. I like to use wet hands to make it less sticky. I also use a dough scraper to clean up the sides of the bowl if needed.

3) Rest (Bulk Ferment)
Here’s the easy part: let it sit! Unlike wheat dough, gluten-free sourdough doesn’t require stretching and folding, slapping, or other fussing. In fact, the less you touch it, the better. Just sit back and let it go through a long, slow rise – aka bulk fermentation.
- Place the formed dough ball in the bottom of the bowl. Cover the bowl with a damp lint-free towel, plastic wrap or a beeswax wrap to prevent the dough from drying out.
- Let it sit for 3 to 5 hours at room temperature (70F is ideal), until the dough looks like its puffed up and risen some. If your home is really warm (80F or above), reduce the bulk fermentation time to only 2 to 3 hours. I’ve found that gluten-free sourdough is more prone to over-proofing.

4) Cold Proof Overnight
- Next, the dough will cold proof (continue to ferment and rise) in the refrigerator overnight.
- In my experience, it’s best to cold proof gluten free sourdough for about 7 to 12 hours before baking. Regular wheat sourdough is more forgiving and can be cold-proofed for 24 hours or longer, but I’ve found that GF dough tends to rise and fall faster (or overproof) with extended proofing times.
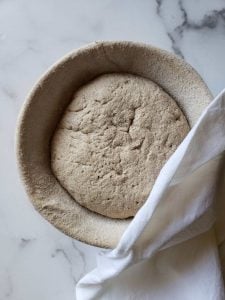
- If you plan to bake your bread in a Dutch oven or combo cooker, gently transfer the dough ball into a lined, flour-dusted proofing basket or banneton. This helps the dough rise and form in a nice round shape.
- If you’re going to bake in a classic bread pan (instead of a Dutch oven), transfer the dough right into a greased or lined bread pan to proof overnight instead of a banneton.
- Cover the banneton or bread pan to prevent the dough from drying out.

5) Preheat Dutch Oven
It may seem silly for “preheat the oven” to be its own step, but it’s an important one! When baking sourdough, we preheat the oven with the combo cooker or Dutch oven inside for an hour before the dough even goes in. When you add cold dough to a piping-hot pan it begins to cook and rise immediately, rather than having time to fall flat.
So, before you take the cold dough out of the refrigerator, turn the oven on to 475°F, stick your empty baking pan inside, and set the timer for an hour. Leave the dough in the fridge until right before it goes in to the oven.
(This step only applies if you are using a dutch oven, cast-iron combo cooker, or pizza stone. Otherwise, pre-heat the empty oven as you usually would when baking.)
6) Transfer and Score
- Once the oven is fully pre-heated, take your dough out of the refrigerator. Scoring is much easier when the dough is cold, so have your supplies ready and work quickly!
- To get the dough out of the proofing basket, place a piece of parchment paper (cut just larger than the basket) and a cutting board on top. Holding it all together, quickly flip the banneton and cutting board upside down. The dough should now be sitting on top of the cutting board and parchment paper. Gently lift the basket away.
- Though not required, I usually use a small stainless steel sifter to lightly dust the top of the dough with flour, and then rub it smooth with my hand.
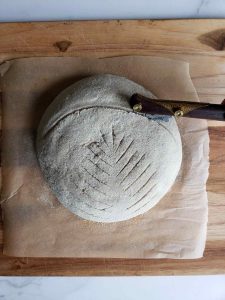
- Next, use a bread lame (razor blade) to add one long deep score (or several) across the top of the bread. Deeper scores control the direction of expansion as the bread rises as well as create a nice crisp ridge or “ear” in the crust. Try to score at a 45 degree angle, and about 1/4 to 1/2 inch deep.
- You can also use your bread lame to make smaller, shallow cuts to create pretty designs. I usually like to score little leaves or wheat stalks into mine, but you can make all sorts of creative patterns, flowers, words, and more!


7) Bake
- After scoring, try to get the dough into the oven as quickly as possible so it doesn’t have time to spread!
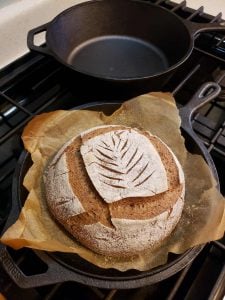
- Use the parchment paper (or bread mat with handles) to carefully transfer the dough into your pre-heated (very hot!) Dutch oven/combo cooker. I like to poise my cutting board near the edge of the pan and then carefully slide the whole thing into the combo cooker.
- Add the lid to your baking vessel and put it in the oven.
- Bake covered for 55-60 minutes on 475°F, and then carefully remove the lid and bake uncovered for a final 5 to 10 minutes to finish browning the top. (I’ve found that 55 minutes covered and 6 to 7 minutes uncovered works best in our current oven – you’ll learn what works best for yours!)
- If you’re using a regular bread pan, create a loose cover with tin foil or a second bread pan placed upside down on top.
- Once it’s finished baking, immediately transfer the loaf on to a cooling rack.
- Wait at least 2 to 3 hours for the bread to fully cool before cutting into it! I know it’s hard, but it’s worth the wait! Cutting into fresh bread while it’s still hot will release precious moisture (steam), make the texture more gummy, and make your bread dry out faster.
PRO TIP: To prevent burning the bottom of the loaf, I like to place an empty baking sheet on the empty oven rack or shelf below the bread pan. It absorbs and blocks extra heat from the bottom of the bread.


Storage and Shelf Life
I’ve found the best way to store gluten free sourdough bread is to wrap the loaf in a clean tea towel and then place that inside a brown paper bag. In a paper bag alone, the bread dries out quickly. In a sealed container or plastic bag, it tends to get soft, stale, and mold faster in my experience.
Fresh gluten free sourdough is best consumed within 3 to 4 days, though it can stay good for up to a week. Since it doesn’t have any preservatives (yay!) homemade bread will inevitably get a bit stale after a few days. Simply toast it to get crisp and delicious again.
Freezing Gluten-Free Sourdough
If you don’t think you can eat a whole loaf within 3-4 days, try freezing some! For maximum freshness, it’s best to freeze it within a day or two after baking.
You can freeze a whole loaf, half loaf, or slices of gluten free sourdough in an airtight freezer container, where it will stay good for several months.
When freezing slices, I recommend adding a piece of parchment or wax paper between each slice. It prevents them from sticking together, making it extra easy to pull out just a piece or two as needed.
Toast to defrost and enjoy!

Enjoy!
Now it’s time to enjoy your very own homemade gluten-free sourdough bread! Please leave a review, feel free to ask questions, and/or leave a comment to share how your personal tweaks to the recipe go. Happy baking!
You may also like:
- Gluten-Free Sourdough Discard Crackers Recipe w/ Optional Herbs & Cheese
- Sourdough Cornbread Recipe (Vegan & GF Options)
- How to Feed and Maintain Sourdough Starter: Best Beginner’s Guide
- Sourdough Granola Recipe (Discard or Active Starter)
Easy Gluten-Free Sourdough Bread
Equipment
- Large mixing bowl
- Kitchen scale
- Measuring cups
- Cast iron combo cooker or dutch oven (you can also use a regular bread loaf pan)
- Lined banneton bread basket, for shaping and proofing dough (not required if baking in a classic bread pan)
- Bread lame for scoring optional)
Ingredients
- 110 grams active gluten-free sourdough starter
- 450 grams total GF flour – we use 175 grams of organic brown rice flour, 150 grams of millet flour, 100 grams of sorghum flour, and 25 grams of buckwheat flour
- 3 tbsp psyllium husk
- 10 grams salt – sea salt, kosher salt, or Himalayan salt is preferred over iodized table salt
- 1.5 to 2 cups filtered water, room temperature and filtered/non-chlorinated (*see water notes below)
- 1 tbsp honey (optional)
Instructions
- Several hours before making the dough, feed your starter and allow it to reach peak activity level.
- Combine all dry ingredients (flours, salt and psyllium husk) in a mixing bowl.

- Add wet ingredients (starter, water, and optional honey). Mix with a utensil first, and then you may want to use clean hands to thoroughly mix further. Or, use a stand mixer.
- Form the dough into a fairly smooth ball, and set it in the bottom of a bowl. (You don't need to knead the dough, or perform "stretch and folds" as you would with gluten-based sourdough.)

- Cover the bowl with a damp cloth. Set it aside in a location that is as close to 75F as possible to "bulk ferment" for 3-5 hours.
- After an average of 4 hours of bulk fermentation at room temperature, gently transfer the dough into a flour-dusted banneton proofing basket. (Or if you're not baking in a Dutch oven, transfer the dough into a parchment-lined or greased bread loaf pan at this time.)
- Cover the banneton (or pan) with a damp lint-free towel. You can leave it at room temperature for another hour (optional) and then move it to the refrigerator, or just refrigerate immediately after transfer.
- Allow the dough to cold-proof the dough overnight (7 to 12 hours). Leave it in the fridge until immediately before transferring to hot pre-heated baking pan.
- Preheat the oven to 475 degrees F. If you’re using a dutch oven or combo cooker, place it in the oven to preheat for one hour as well.
- After an hour of preheating the baking pan, use the cutting board trick (see Note 2 below) to carefully transfer the cold dough out of the banneton and into the hot combo cooker or dutch oven. Score the top of the loaf with a bread lame if desired.
- Bake the loaf covered for 55-60 minutes, and then remove the lid and bake for an additional 5-10 minutes uncovered. (See Note 3 below)
- After baking, immediately transfer to a wire rack to cool.
- Let the sourdough bread loaf cool at room temperature for several hours before cutting. If it's cut while still hot, moisture (steam) will escape and can make the bread more gummy, dry out, and get stale faster.
- Store the finished gluten-free sourdough bread wrapped in a dry lint-free cloth towel, and then inside a brown paper bag for up to a week. Toasting or lightly broiling the bread helps revive stale bread. Freeze some while still fresh (the first day) if you think you won't be able to finish the loaf within 3-4 days.
Notes
- WATER RANGE: 2 cups of water works well for the brands and types of flour we used, and for our climate. However, some people have commented that the dough was too wet. Start on the lower end of the called-for water and work your way up as necessary to achieve the desired consistency.
- To get the dough out of the proofing basket, place a piece of parchment paper (cut just larger than the basket) and a cutting board on top. Holding it all together, quickly flip the banneton and cutting board upside down. The dough should now be sitting on top of the cutting board and parchment paper. Gently lift the basket away.
- If the bottom of your loaf seems to brown more than you’d like, try adding an empty baking or cookie sheet to the empty oven rack directly below your combo cooker or dutch oven. It deflects some of the heat away from the bottom of the loaf, reducing burning or browning.





277 Comments
Lisa
Thanks for the fantastic recipe! I have tried a few different recipes in the past and was about to give up on getting a decent GF sourdough with a nice brown crispy crust but then I stumbled on your recipe and gave it a try. So glad I did! Yes, the loaf is still quite dense and is a bit more like a rye bread in texture than a light, airy wheat sourdough but the loaf had a nice hollow sound when tapped, a beautiful crust and lovely flavor. 5 stars!
Peter Sorantin
Great recipe / ingredient choices.
Making this for a friend who is gluten allergic.
But why is there no yeast in the recipe? In the gluten-containing regular sourdough recipe from eg Bon Appetit, one uses both starter *and* yeast …
Aaron (Mr. DeannaCat)
Hello Peter, we don’t use yeast in our GF recipes or regular wheat sourdough recipes as it is just an extra ingredient for us to have on hand and we enjoy the results we have gotten thus far. Yet using yeast could be an option to possibly help your gluten free loaf have a bit more rise as they have a tendency to be more squat and dense. Good luck!
Ben Wrigley
This recipe looks so delicious but I just can’t get it right!
The starter is lovely and bubbly and double size when I add it to the bread mix, and the “kneaded” dough looks just like yours. However after that nothing much happens in my 5 hour rise and I end up adding a “lump” to my basket, which then looks exactly the same after an hour. I’m in the Uk and it’s not warm at the moment, so I leave it to rise above the radiator.
Sadly my finished loaf is dense and gummy 🙁
I’m a keen wheat sour-dough maker and the same weight loaf is usually 3 times bigger than the GF sourdough.
Any tips? Thank you so much.
Aaron (Mr. DeannaCat)
Hello Ben, it really just takes experimentation to see what works best for you. Our GF sourdough loaves don’t rise as much or taste as good as our traditional sourdough bread either but I have yet to find GF bread of any kind that can rival traditional wheat bread. You can try adjusting flour ratios and types, maybe try potato flour or oat bran to make it less dense? Good luck!
Sophie
Hi I’m so excited to make this loaf! My starter never doubles and I don’t know if that is normal or not, it has bubbles but it never seems to rise enough to a double point. I feed it every 24 hours with a 1:1:1 ratio. Does this mean it’s not active enough to use in a recipe?
Thanks
Aaron (Mr. DeannaCat)
Even if your starter doesn’t double in height, it doesn’t mean that it isn’t active enough. Once it reaches its peak, discard some for your recipe and see how it turns out. Let us know how it turns out for you and happy baking!
Sophie
I’m so excited to try this recipe! Is my sourdough starter supposed to double as mine never doubles so I don’t know if it’s active enough and if it’s not active enough how do I make it more active? I feed every 24 hours at a 1:1:1 ratio.
All the help would be great!!
Aaron (Mr. DeannaCat)
Hello Sophie, some GF starters don’t rise as much as traditional wheat sourdough starters do. We found that feeding with buckwheat flour really helped to activate the starter, it may be an option for you? Depending on how often you bake, you could opt to store your starer in the refrigerator and only feed it once a week or whenever you want to bake with it as opposed to having to feed it daily. We usually feed a scant cup flour to 1/2 cup water when our starter sits about 1.5 to 2 inches tall in a quart or liter sized jar. Hope that helps, good luck, and happy baking!
Marlene
Just wondering why there is no starch in this recipe? Any of the GF recipes I have used have had potato starch, tapioca, arrowroot, or a combination of starches. Thanks!
Aaron (Mr. DeannaCat)
Hello Marlene, we use psyllium husk in the recipe as the binding agent instead of corn starch or arrowroot powder as it helps to improve the breads texture. Good luck!
Lisa
Thanks for the detailed instructions! Maybe I missed it but do you put a tray of water or throw ice cubes in the oven to create steam?
Aaron (Mr. DeannaCat)
Hello Lisa, we bake inside a cast iron combo cooker which helps create steam. We can see it escape when we take off the top to finish a loaf for the last few minutes without a lid. If you use a combo cooker or dutch oven, it will create its own steam. If you aren’t going to bake using one of these two pans, it seems spraying the loaf with warm water before it goes into the oven, as you place it in the oven, and about 5 or 10 minutes after it goes into the oven is one of the easiest alternatives. Hope that helps and good luck!
Lauren Peter
Hi! What size Dutch oven would you recommend if we don’t have the combo?
Aaron (Mr. DeannaCat)
Hello Lauren, I believe our combo cooker is 3.2 quarts and it works just fine for our basic loaf though i wouldn’t go too much smaller than this. Hope that helps.
stacey
I can’t get husk. Can i use Xanthum Gum or flackseed instead? If so how much and how? Thank you i LOVE you!
Aaron (Mr. DeannaCat)
Hello Stacey, you can use xanthan at 1/3rd the ratio to psyllium husk, if the recipe calls for 1 Tablespoon psyllium husk, use 1 tsp. xanthan gum. Good luck!
Onno
This looks amazing! I definitely want to try it, but I just want to make sure the amount of water is correct.
The recipe says 2 cups of water, which according to google (I’m European) is 473ml , while the total flour weight is 450g.
Thats well over a 100% hydration. Most dough become very difficult to handle beyond 75-80%, and especially without gluten I imagine it would not hold together at all and be like batter (as someone has mentioned happened to them).
Is 2 cups correct? or are there different volumes of cups?
Aaron (Mr. DeannaCat)
Hello Onno, depending on what the elevation is where you live, the amounts of flour, water, and bake times can vary slightly. Our regular wheat sourdough loaf does use 1.5 cups of water so you can start with that as well. We have found that different gluten free flours vary in weight and react to water differently. It really just takes experimenting to find what works best for you. Good luck!