

Quick & Easy Refrigerator Pickled Peppers Recipe

Got peppers? Come learn how to make our favorite quick-and-easy refrigerator pickled peppers recipe. That’s right, no canning required! Though, you could can them – if you desire. These pickled peppers are delectably tangy, just a tad sweet, and as spicy as you make them. It’s one of our favorite ways to preserve peppers from the garden. I’ve also included tips on how to prevent pickled peppers from getting mushy – just like our popular Easy Crunchy Dill Cucumber Pickles recipe.
What kind of peppers can you pickle?
Truth be told, we grow banana peppers pretty much just to make this recipe! They’re excellent prepared other ways of course, but are exceptional when pickled – much like a classic pepperoncini. However, banana peppers aren’t the only type of pepper that you can use for this refrigerator pickled pepper recipe.
Banana peppers and pepperoncinis are the most popular option, but jalapeños, bell peppers, cayenne peppers, Thai chilis, Hungarian wax peppers, and others can make excellent pickled peppers too. Hot, mild, sweet, savory… pickle whatever variety of pepper your taste buds or garden dictate!
Personally, we like to save our hottest chili peppers to make homemade chili powder or fermented hot sauce instead. If you have a lot of jalapeños on hand, I HIGHLY recommend trying our cowboy candy recipe or hot pepper honey recipe too.
RELATED: Find our top tips to grow your own peppers here.

Would you like to save this?
Disclosure: Homestead and Chill is reader-supported. When you purchase through links on our site, we may earn an affiliate commission.
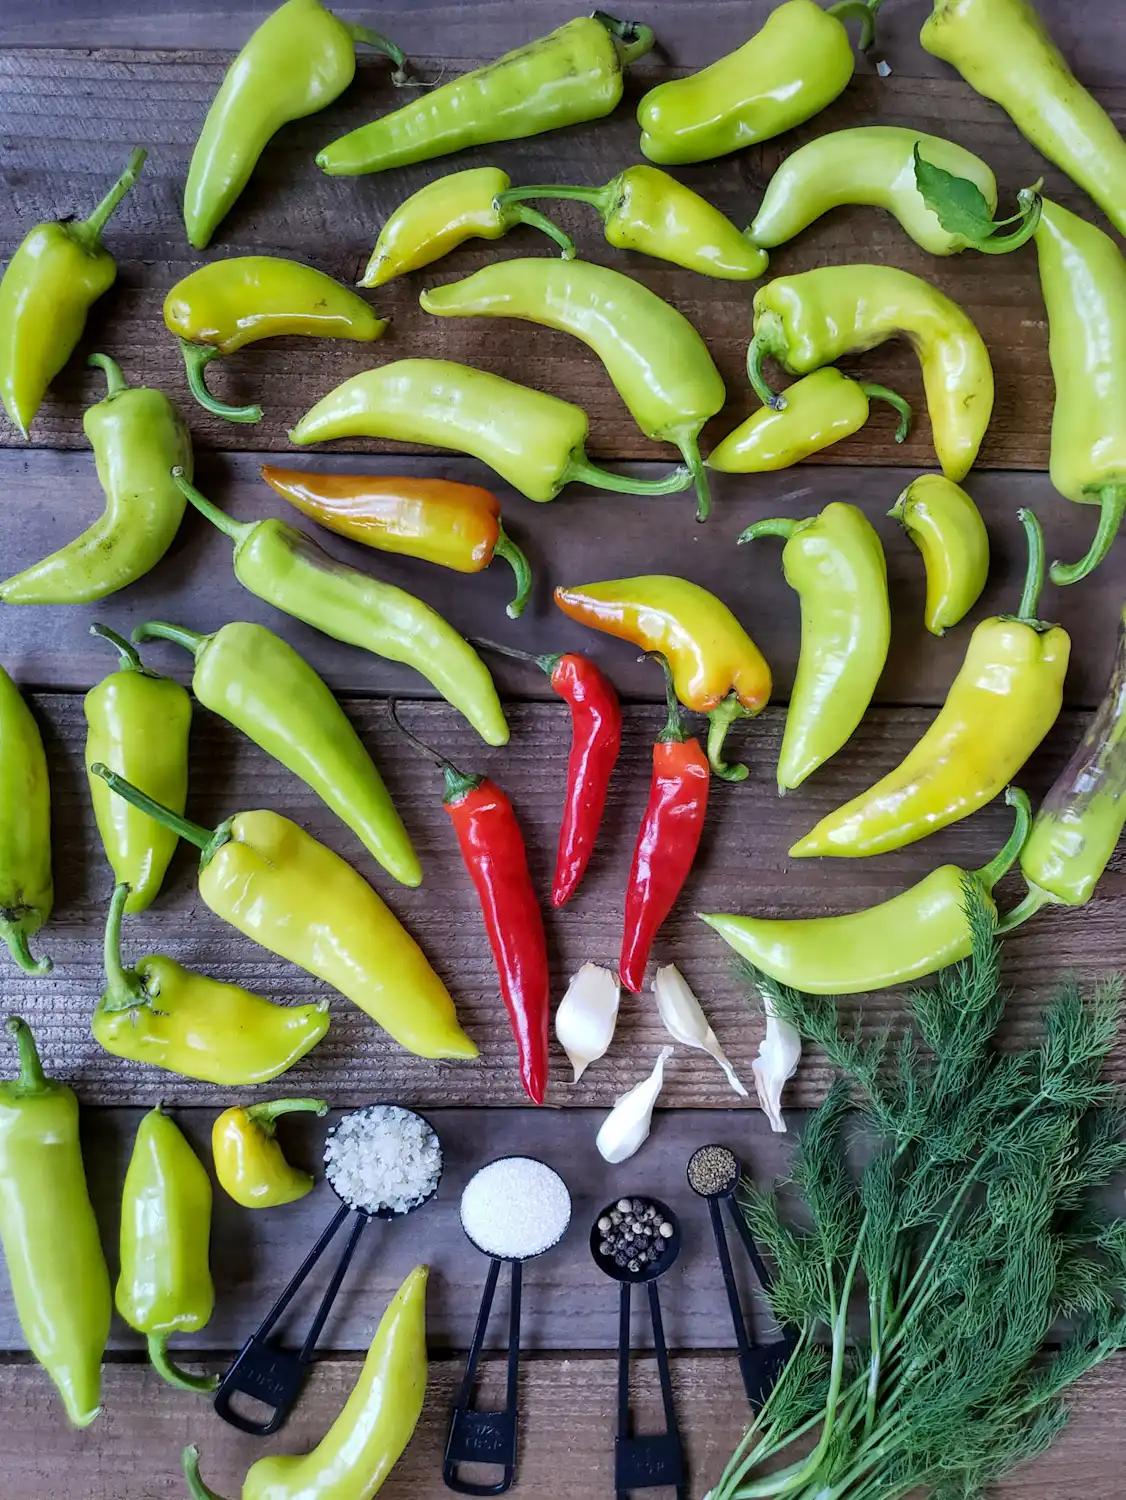
INGREDIENTS
Per quart jar, stuffed with peppers of your choice:
- Peppers of choice – the amount will vary, depending on pepper size
- 1 cup of filtered water
- 1 cup of white vinegar
- About a dozen peppercorns
- A few sprigs of fresh dill
- 2 to 3 cloves of garlic, lightly crushed
- 1 heaping tablespoon sea salt and sugar each
- A sprinkle of celery seed
We typically make several quart jars at once, or one large half-gallon jar, so we triple the recipe by combining 3 cups of vinegar, 3 cups of water, 4 tablespoons of salt and sugar each, and just under ½ teaspoon celery seed.
Optional: This pickling recipe can be used for a variety of other veggies too! Feel free to add a few slices of onion, carrots, green beans, or other garden goodies in there too. When we are making pepperoncinis, we like to use mostly all banana peppers, but add at least one hot pepper into each jar for an extra kick!
Vinegar ratio for canning
If you intend to hot-bath can this pickled pepper recipe, increase the vinegar-to-water ratio to a higher amount of vinegar than listed above. For food safety, adjust the recipe to be about 3 times the amount of vinegar to water. For example, 1.5 cups of vinegar and 1/2 cup of water, scaling both up as needed. Also ensure you’re using 5% acidity vinegar or stronger.
How do you make pickled peppers stay crisp?
To keep your refrigerator pickled peppers extra crunchy, you can add couple grape leaves, oak leaves, black tea leaves, blackberry leaves, or horseradish leaves to the jar. All of these leaves contain tannins that help the peppers stay more crisp naturally. I highly suggest adding them if you choose to hot-bath can pickled peppers. The heat will cause them to soften much more than when making refrigerator pickled peppers!
Whole pickled peppers will stay more crisp than cut slices. Also, the more fresh the pepper are, the more crunchy they will stay once pickled. That’s one reason homegrown, just-picked peppers make the best pickles. Peppers from the farmer’s market will also be more fresh and crips than those from the grocery store. Store peppers in the refrigerator immediately after harvesting to retain maximum firmness and freshness. Finally, some folks like to add “pickle crisp” to their homemade pickles peppers (especially when canning).
INSTRUCTIONS
Step 1: Prepare Jars
In the bottom of each glass mason jar (or similar container), add a few sprigs of fresh, washed dill. Peel 2 to 3 cloves of garlic, crush them lightly with the wide side of a knife, and throw them in the jar as well. Finally, add a pinch of peppercorns. We add about a dozen per quart. If you are using grape or oak leaves, add one or two to the bottom of each jar now. We’ve done it both ways, and simply didn’t have any available to use this time!

Step 2: Create A Pickling Brine
On the stovetop, combine equal parts white vinegar and water in a pot. Next, add equal parts sugar and sea salt, plus a sprinkle of celery seed – following the amounts list above. Stir, and lightly heat the mixture until the salt and sugar has dissolved.
We don’t want to add the brine to the peppers when it is piping hot though! “Cooking” the peppers in boiling brine will make them soften or get more mushy. Therefore, allow the brine to cool a bit while you are preparing and packing the peppers in jars. Lukewarm to room temp brine is good.
Step 3: Prepare & Poke Peppers
You have probably noticed that we leave our peppers whole for this refrigerator pickled pepper recipe. We have found that this helps maintain crispness. It also reduces the preparation effort upfront. Later, we can either snack on the pickled peppers whole, or slice them into rings as desired.
Wash your peppers. Keep the stems attached, but feel free to trim them down to a shorter length if they are extra lanky. Next, poke each pepper with a sharp knife in a couple of places. This allows the brine to adequately penetrate and engulf the peppers, seeping in through the small slits you’ve created.

Step 4: Pack Peppers
Now pack those jars! Rather than simply tossing them in there all willy-nilly, I try to carefully and methodically place, pack, and tuck the peppers into the jars in a manner to fit as many as possible, leaving little spare room. Packing them tight also reduces their ability to float, which helps them stay submerged in the brine.

Step 5: Add the Pickling Brine
Once your brine is no longer hot, pour it over each jar stuffed with peppers – until it is completely full and all of the peppers are submerged. You will see the peppers begin to bubble as the brine seeps into the slits you created. After adding a lid, tap and wiggle the jars side to side to encourage that seeping. This will also help knock loose any air bubbles.
If you have any leftover brine, keep it! It will take a couple days for the brine to completely penetrate and fill the peppers. As it does, the brine level in the jar will decrease and need to be topped off. If you do not have any brine leftover, no big deal! Simply top off the jars with plain white vinegar as needed.
Feel your jars. If they’re still rather warm, allow them to sit out at room temperature to cool down for a couple of hours before refrigerating.


Step 6: Refrigerate
After the jars of peppers are fairly cool, add a lid to each jar. The acidic nature of pickles can make standard mason jar lids corrode with time, so we opt to use these BPA-free plastic wide mouth jar lids, or these stainless steel ones.
Store your homemade pickled peppers in the refrigerator and let them sit to marinate. As mentioned above, keep an eye on them for the first couple of days to monitor the brine level! If it drops below the peppers, top them off with more reserved brine or vinegar as needed.
How long should pickled peppers sit before eating?
Now, allow pickled peppers to marinate in the fridge for at least a few days before consuming. There is no harm in tasting them early! Yet for the best flavor and results, let them sit for a week or so. The delicious pickle flavors will only get better with time.
How long do refrigerator pickled peppers last?
These easy refrigerator pickled peppers will stay good for up to 6 months (or longer) in the refrigerator. Technically, they’ll be safe to eat for well over a year – or as long as mold or strong off odors/flavors don’t develop. Yet refrigerator pickled peppers will be the most crisp and enjoyable if consumed within a few months, as the texture will degrade over time.
Are pickled peppers in vinegar shelf stable?
Simple refrigerator pickled peppers in vinegar are NOT shelf stable and should be refrigerated. That is, unless you used the safe vinegar ratio recommended for canning pickled peppers (previously discussed) AND processed them in a hot bath or pressure canner. Then they can be stored at room temperature after canning, but must be refrigerated after opening.

Step 7: Enjoy!
I have always been a pickle-lover, and find myself snacking on these straight from the jar! Pickled peppers make a great addition to any hors d’oeuvre plate, with cheese and crackers, on pizza, tacos, and on sandwiches of course. Because the peppers will be filled with brine, keep that in mind as you plate or bite into them! To easily drain the peppers, you can simply cut (or bite) off the tip.
How do you like to use your pickled peppers?
I hope you enjoy these easy refrigerator pickled peppers as much as we do! Please feel free to ask questions or provide a review in the comments below, and spread the love by pinning or sharing this article.
You may also like:
- Best Bread and Butter Pickles Recipe (Canning or Refrigerator)
- Quick Pickled Dilly Green Beans (Refrigerator or Canning)
- Sweet & Spicy Pepper Fermented Hot Sauce Recipe
- How to Make Homemade Chili Powder in 4 Simple Steps (Dried Chili Peppers)
- Easy Lacto-Fermented Dill Cucumber Pickles Recipe
- Quick Pickled Red Onions (Easy Refrigerator Pickled Onions)

Easy Refrigerator Pickled Pepper Recipe
Ingredients
- Peppers of choice
- 1 cup Filtered water
- 1 cup White vinegar
- 1 tbsp Sea salt, kosher or pickling
- 1 tbsp Sugar
- Fresh dill, a few sprigs (small handful)
- 2-3 cloves Fresh garlic, light crushed
- Peppercorns, to taste (about a dozen per jar)
- 1 pinch celery seed
- 1 grape, horseradish, oak or black tea leaf (optional, to preserve maximum pepper crunch)
Instructions
- Add the fresh dill, cloves of crushed garlic, celery seed and peppercorns to the bottom of a jar (and an optional grape, horseradish, black tea or oak leaves for extra crunch).
- Prepare the brine by adding the vinegar, water, sugar, and salt in a saucepan on the stovetop. Heat until the sugar and salt dissolve, but then allow the brine to cool slightly before adding to peppers.
- Wash the peppers. Poke each pepper with a sharp knife in a couple places to allow the brine to penetrate the peppers.
- Carefully pack the peppers into the jar, trying to fit as many as possible inside.
- Pour the brine over the top of the peppers until they are completely submerged. Top off with more brine or vinegar if settling occurs.
- Add a lid to the jar and refrigerate for 2 to 3 weeks before enjoying. Use within 6 months for best quality and flavor.
Notes
|


86 Comments
Rosie Tangorra
I make vinegar pepper for our Holiday Antipastos. They are hard to find already made without tons of sugar here in Michigan, so I make my own. I use the vinegar, water, salt, garlic clove, peppercorns and just a tiny bit of the sugar. They came out great for Thanksgiving and I am making more jars for Christmas right now! Thanks!
NormL
Good morning: I was given four bannana peppers from next door so I used your recipe – sort of. I used a dried dill seed head, a small amount of pickling spice ’cause we’re out of celery seed, about .5 tsp of dried chilli pepper, brown sugar ’cause we’re out of white and heaping 1.5 teaspoon each of the salt and sugar. My mantra has always been you can add but you can’t subtract, only dilute or start over! Another trick of mine is to heat only the water to disolve the salt and sugar. Once disolved, add the vinegar and the brine is ready to pour over the jared ingredients without waiting for it to cool. I like to use pickled bannana peppers in my pepper steak recipe along with some of the brine. This adds a great flavour to an already yummy dish.
Linda
Do you use grape leaves from a jar? Where do you purchase any of the other types of leaves you recommend?
Aaron (Mr. DeannaCat)
Hi Linda, the grape leaves that are only in water or vinegar could work although stay away from the ones that may come packed in oil. You can use fresh bay leaves which you can find in most produce departments or black tea leaves (either loose or a tea bag). Ball makes a product called pickle crisp which is linked in the article and can help the pickles stay more crisp. Hope that helps and good luck!
Chuck Powell powell
Just finished my Refrigerator Pickled Pepets following this recipe. I harvested an assortment of peppers from my raised garden. Also added a few small lemon cucumber to fill the spaces to prevent floating. Can wait to enjoy!
Aaron (Mr. DeannaCat)
Sounds good Chuck, hope you enjoy them!
Anne
Love pickled pepperoncini and now I can have my own thanks so much. Next pickled okra!!!!!
Margaret
Looks amazing, do you think one could use some Pickle Crisp in lieu of the leaves?
Aaron (Mr. DeannaCat)
Hi Margaret, that should work just fine and is a great idea for many other people as it is likely more available than grapes leaves. We will amend our article to include that as well, thank you and enjoy!
Liza
So good! How long will this recipe be good in my refrigerator?
Thank you!
Aaron (Mr. DeannaCat)
They will stay good for up to six months but we notice they lose some of their crunch as they get older. Enjoy!
Melissa Nance
I am trying this for the first time today and only have regular table salt. Will that be ok?
Aaron (Mr. DeannaCat)
Hi Melissa, regular table salt will work just fine for pickling. If you were to start fermenting you would want to avoid iodized table salt. Good luck and hope you enjoy the recipe!
MaryTheresa
This will be my first attempt at following your recipe. If I cannot acquire fresh dill, does dill weed work as a substitute?
Aaron (Mr. DeannaCat)
Hello MaryTheresa, we’re you looking into using dried dill weed? If so, yes you can use it as a substitute though the amount you use will differ than when using fresh. Good luck!
ash
Hi Deanna! I made this and it smells amazinggg, thanks for the recipe- but I have 2 Qs!
1. I maybe didnt wait long enough to cool- and the jar lids sealed (sucked in) in the fridge, is that ok?
2. I wasn’t great about leaving headspace, like, almost none. Thoughts?
Thanks so much! They smell and look fine but I’m new to this and want to make sure its ok.
Aaron (Mr. DeannaCat)
Hello Ash, you will be just fine on both accounts! Headspace is more of an issue if you are hot bath canning or freezing. Thanks for reading and enjoy those peppers!
Terry and Kelly
Amazing! We had no idea how easy it was to make such a great treat. I loved growing up in a family that canned every year especially dilly beans, but never had the time or skill to get the same results. Your recipe was so easy and we enjoyed taking local fresh produce and getting such great results.
Green beans, pickles, peppers and cauliflower.
We shared with our family and friends and they were so complimentary.
Thanks for sharing your recipe!
Liza Y
Thank you for a wonderful and easy recipe to follow!
Do you think it would be okay to use a clean Dill pickle jar and lid?
Thanks!
Aaron (Mr. DeannaCat)
Absolutely, hope you enjoy them!
Laura
Just put them in fridge! I used red bell peppers cut to fit the jars and bay leaves to keep crisp then followed recipe! my mom always pickled green peppers and I can’t remember the recipe, lol, always had it in my head! Thanks for this, hope they turn out (I also just made garlic sour pickles by fermenting)
Sharon R Gouge
How do you use black tea in place of picle crisp?
Aaron (Mr. DeannaCat)
Hi Sharon, just add a tea bag to your jar or a teaspoon or two of loose leaf black tea. You can also use bay, oak, or grape leaves. Hope that helps and good luck!