

How to Reactivate a Dry (Dehydrated) Sourdough Starter: Easy Step-By-Step Guide
Welcome to your step-by-step guide on how to reactivate a dry sourdough starter. The process takes just under a week but is very easy to do! By the end, a small bit of dry sourdough starter will transform into a voluminous, bubbly, active starter – ready to bake with for many years to come!
If you obtained your dehydrated organic sourdough starter from us here at Homestead and Chill, thank you for your support! If not, no worries! This tutorial will work to rehydrate any dry sourdough starter (perhaps with some minor tweaks, see the “texture” tips below).
A printable summary and video are provided at the end of this article. I’ve also included some troubleshooting tips, though I don’t think you’ll have any issues. Once your starter is reactivated, head over to guide on how to feed sourdough starter for ongoing maintenance and storage tips. Don’t worry, it’s easier than you think!

Would you like to save this?
What is a dry sourdough starter?
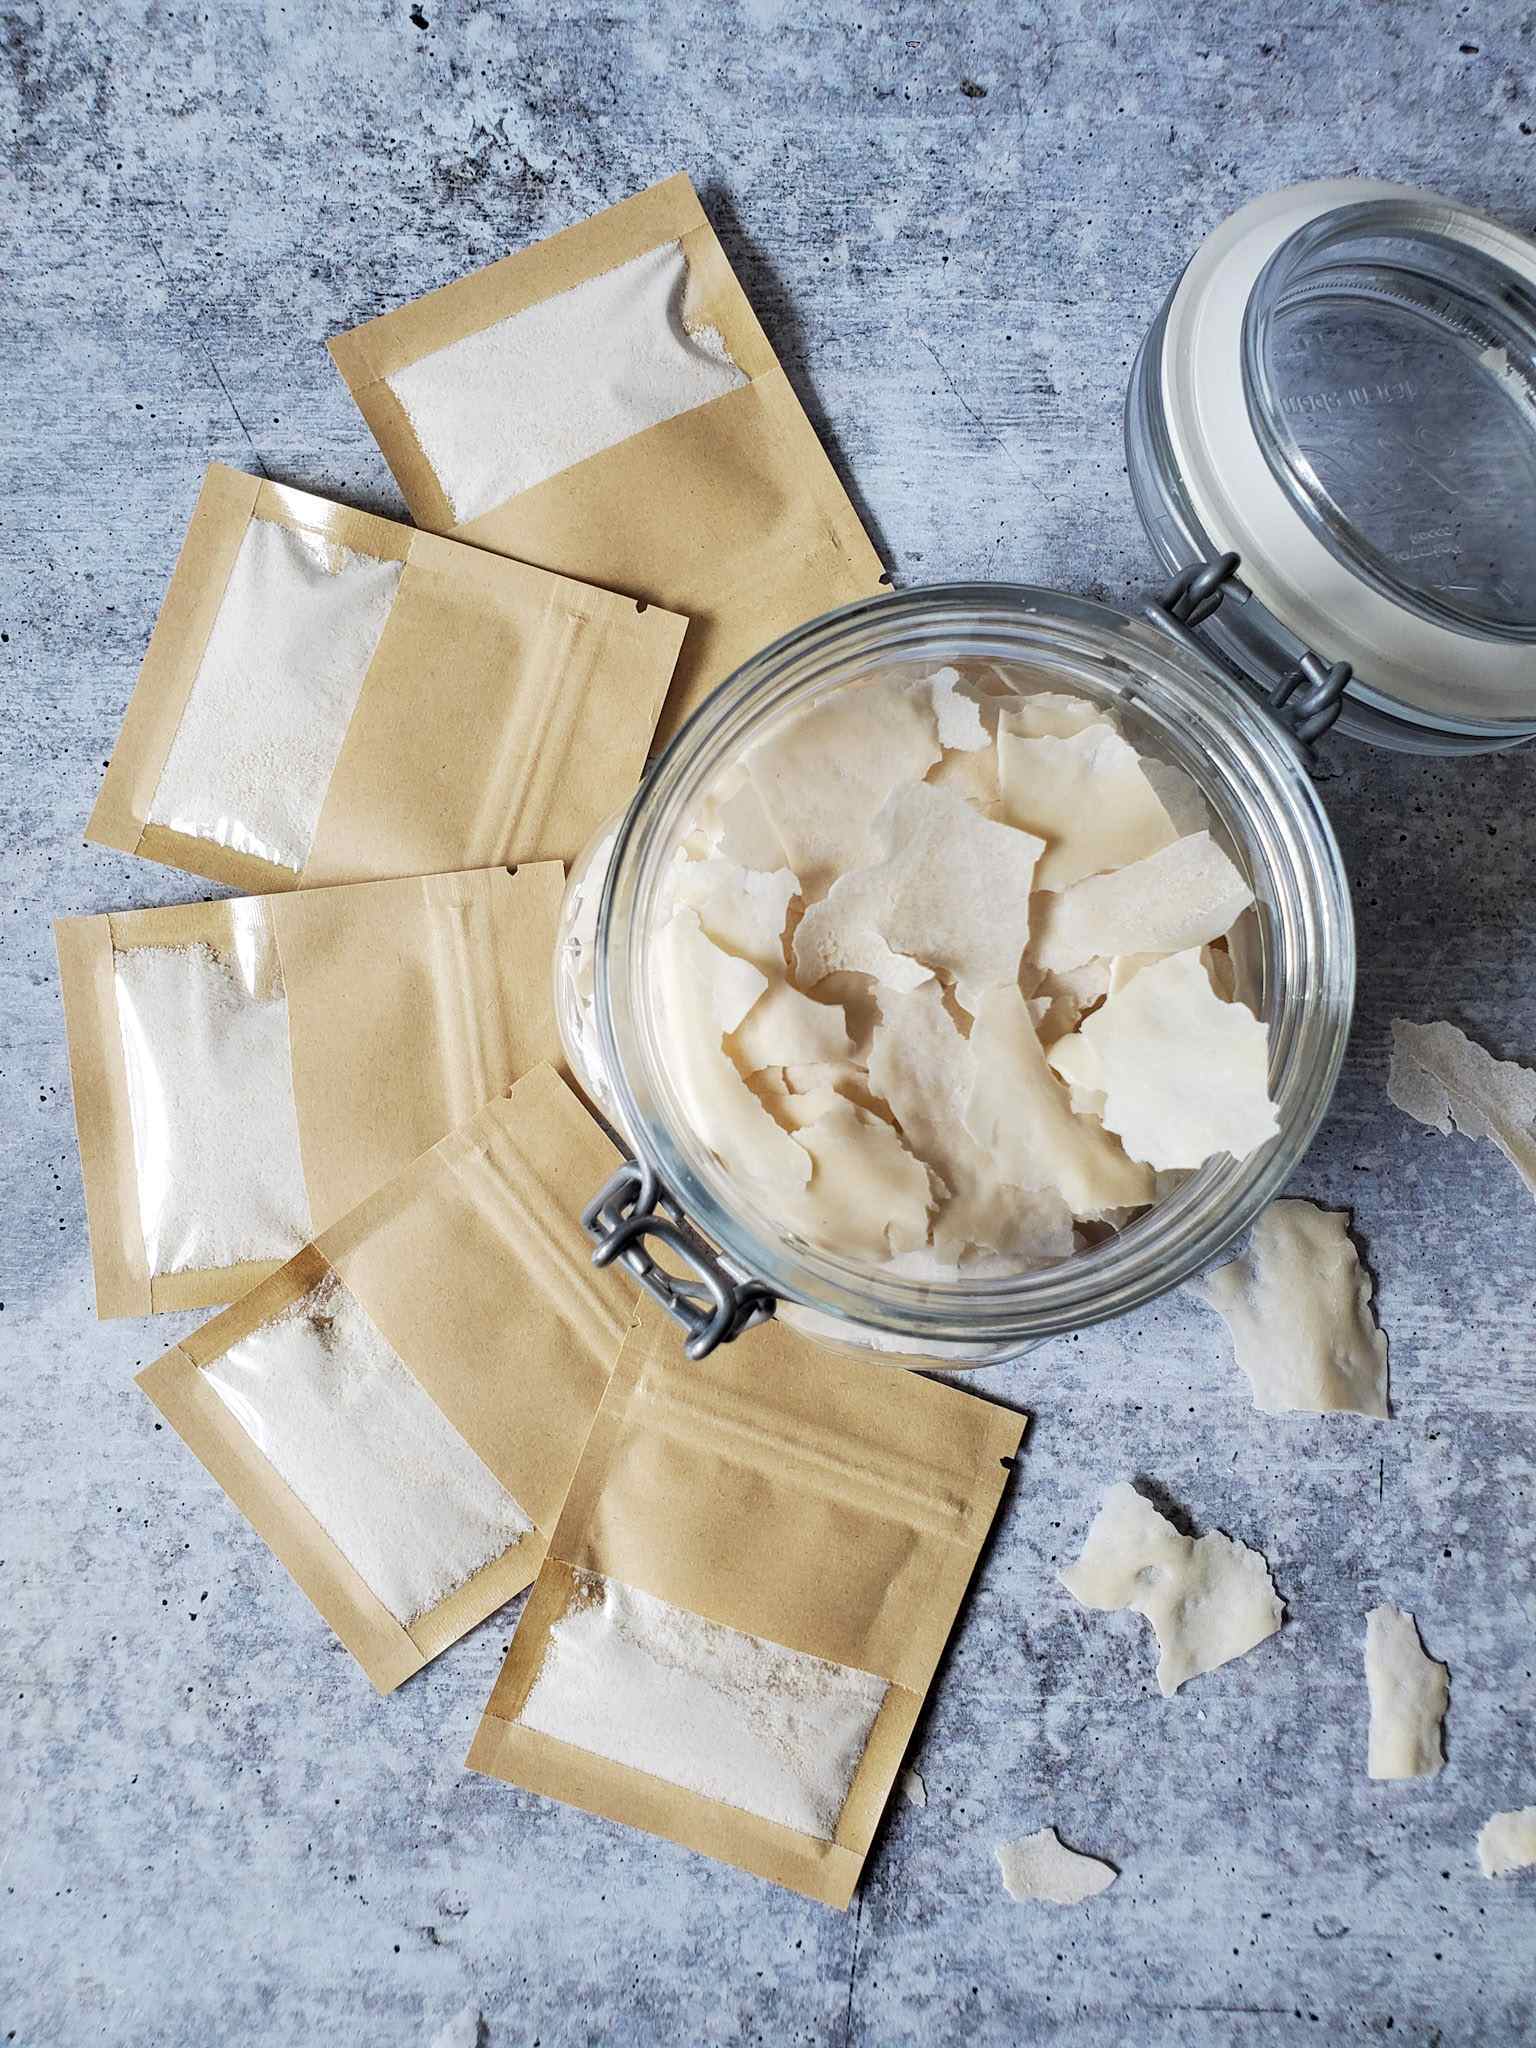
Dry sourdough starter is made by dehydrating a portion of an active, healthy sourdough starter. We dry our organic starter using a low heat “living foods” setting in a food dehydrator. This preserves the beneficial lactic acid bacteria and wild yeasts that are responsible for making a sourdough starter bubble, and sourdough bread rise.
A dry starter is alive but is in a dormant state, and needs to be reactivated (rehydrated) over the course of a few days to slowly wake it back up. To do so, we’ll gradually add increasing amounts of flour and water each day – so you’ll have several cups of active starter by day 5.
Using a dry sourdough starter is a great way to kick-start your sourdough baking journey. It’s basically fool-proof! Rather than making sourdough starter from scratch (which is possible but can be tricky) you’re working with a strong, established culture from the start.
Supplies Needed
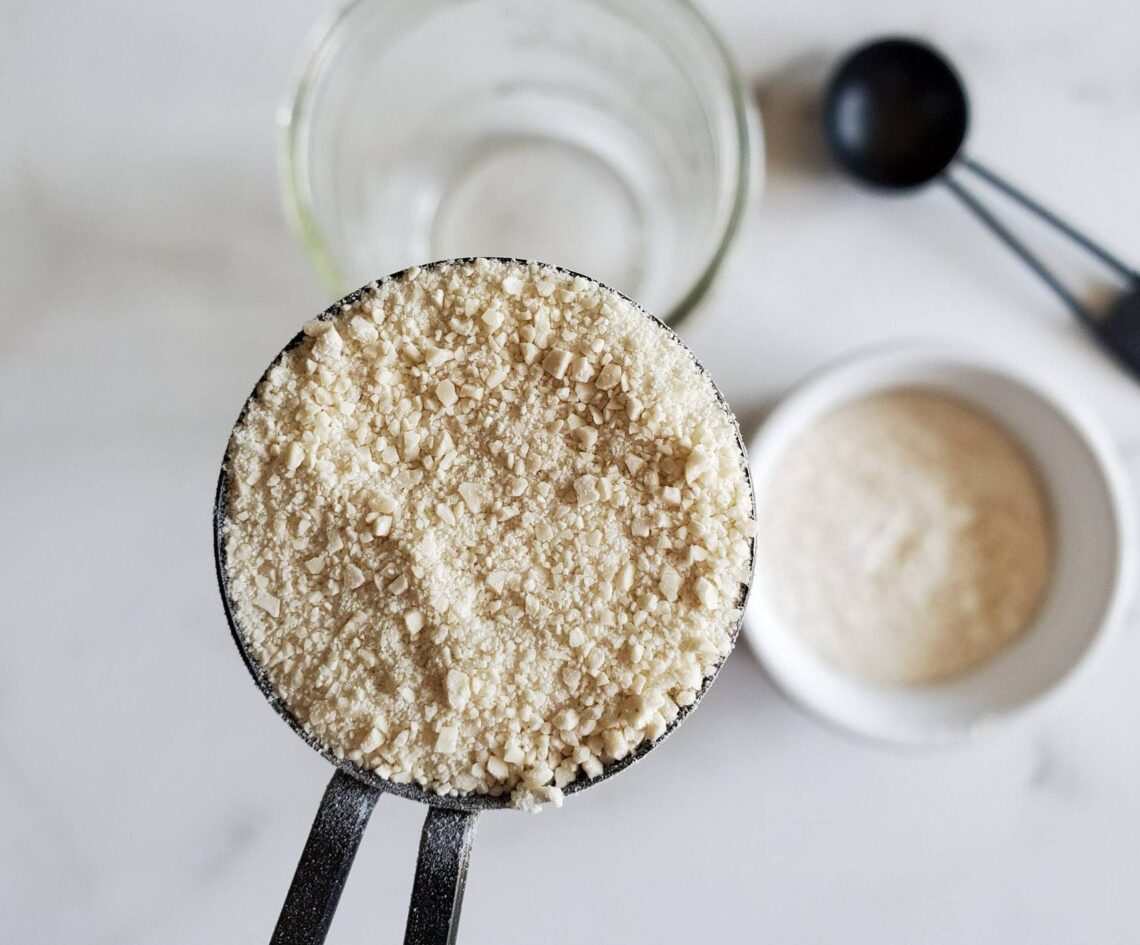
- 1 package of dry sourdough starter powder or flakes (or approximately 1 heaping half-tablespoon of ground powder)
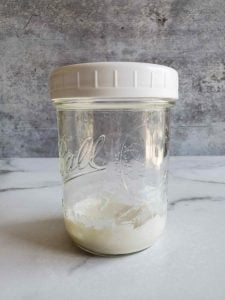
- A pint size mason jar (or similar). Given the small volume, it’s best to start rehydrating the dry sourdough starter in an average jar, glass, or other similar size container.
- A larger glass storage container (e.g. quart, liter, or larger). On day five, we’ll transfer the active sourdough starter into a larger container – its forever home! We use a flip-top 1-liter glass container like this one. See the discussion about using bigger containers to maintain a larger volume of starter in the “Day 5” section below.
- All purpose flour or bread flour. We have experimented with reactivating a dry sourdough starter with both types of flours, and it works perfectly with both. Note that we use certified organic flour, which the microbes generally prefer but isn’t absolutely necessary. If you’d like to transition your starter to whole wheat or rye in the future, you absolutely can! However, I suggest using simple white flour when first reactivating the dry sourdough starter.
- Filtered water or spring water. Ideally, the water used to activate and maintain a sourdough starter is free of chlorine.
Key Tips Before Reactivating
- TIME: You will slowly reactivate your dry sourdough starter over 5 days, but each step only takes a few minutes per day. It’s best to do the feedings about 24 hours apart, though it doesn’t need to be exact. So, choose a time of day to start that you’re usually available, such as first thing in the morning, around dinner time, or before bed. Set an alarm if you’re forgetful!
- TEMPERATURE: Your sourdough starter will be most happy, active and balanced in a temperature range of about 70 to 75°F. Cooler conditions will lead to slower activation and a generally less vigorous starter. (Though we activated the dry sourdough starter shown in this tutorial when the house was 63-70°F without issue!) Hot temperatures may make the process go faster.
- TEXTURE: The ideal consistency for your sourdough starter is thick and gooey, kind of like marshmallow fluff. It should settle smoothly into the bottom of the container (not clump together like cookie dough) but also shouldn’t be too runny or pourable like pancake batter or it won’t rise well. So if at any time your starter seems too thick or too thin (especially a dry starter purchased elsewhere), feel free to add a sprinkle more flour or splash of water until the desired consistency is reached. Do so in small quantities, such as a teaspoon at a time (especially in the first few days).

Instructions
Day 1
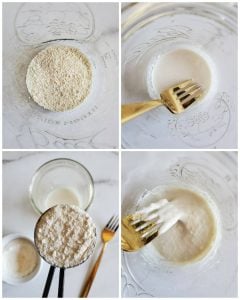
- In a clean pint-size mason jar or similar, combine one full H&C package of dry sourdough starter (approximately 1 heaping half-tablespoon) with 1.5 tablespoons of filtered lukewarm water. Avoid using cold water throughout this process, as it will slow down the activity of the starter. Allow the dry sourdough starter and water to sit for several minutes to soften and combine. Use a fork or spoon to stir it on occasion.
- Then, mix in 1 tablespoon of flour. Mix thoroughly. Try to avoid making a huge mess of the sides of your jar. Use the edge of your fork or a small spatula to clean up any major smears.
- Cover the jar with a lid. It doesn’t necessarily need to be air-tight; the purpose is to prevent it from drying out or allowing mold spores in. I only lightly screw on these BPA-free plastic jar lids. If you’re using a drinking glass or other container that doesn’t have a lid, simply set a plate on top, add plastic wrap, or a reusable beeswax wrap on top.
- Finally, set the container in a moderately warm location. Come back in about 24 hours.


Day 2
Into the same jar as yesterday, add 1 tablespoon of flour and 2 teaspoons of water to the starter. Mix well. Cover the jar or container again, and allow it to sit for another 24 hours.
Have you thought about a name for your sourdough starter yet? There is a tradition in the sourdough baking world to name your sourdough starter. In fact, it is considered bad luck if you don’t! Today sounds like a good day to pick a name. If you need any ideas, check out our list of the top 60 Punny Sourdough Starter Names.
Day 3
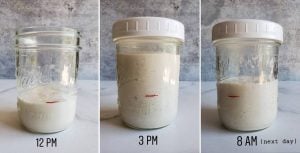
By day three, you may start to see fermentation bubbles in the starter! Repeat the same process as yesterday, adding 1 tablespoon of flour and 2 teaspoons of water. Mix, cover, and set aside.
During the next 24 hours, your starter may start to rise. Just for fun, mark the level of the starter on the side of the container after mixing (either with a washable glass marker or with a rubber band around the jar) and watch how much it rises.
Day 4
Today, we are going to increase the volume more than before. The growing sourdough starter should smell really nice by now, like sourdough and yeast – reminiscent of a brewery or bakery! That is an excellent sign she is getting stronger and can handle more food.
- This time, add 1/3 cup flour and 1/4 cup water.
- Mix well, until it looks like most of the flour clumps are broken up and the starter is fairly smooth.
- Cover the container, note the level of the starter on the side of the container, and set it aside again. If you’re using a pint jar, it should be about ⅓ full now.

Day 4 continued…
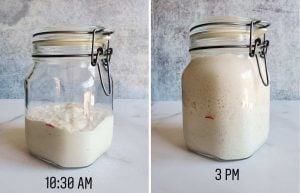
Within 12 to 24 hours, your starter should bubble, rise, and nearly double in size! If it doesn’t appear to rise at this stage, see the troubleshooting notes at the bottom of this article. You may need to adjust your consistency (e.g. make it slightly thicker), but it doesn’t mean the starter isn’t alive!
On the other hand, if your starter doubles in size and then quickly falls back down to the original starting point (a sign that it’s hungry) then you can move on to the next step sooner if you wish, instead of waiting a full 24 hours. (Smears on the side of the container are a sign that it rose and fell.)

Day 5
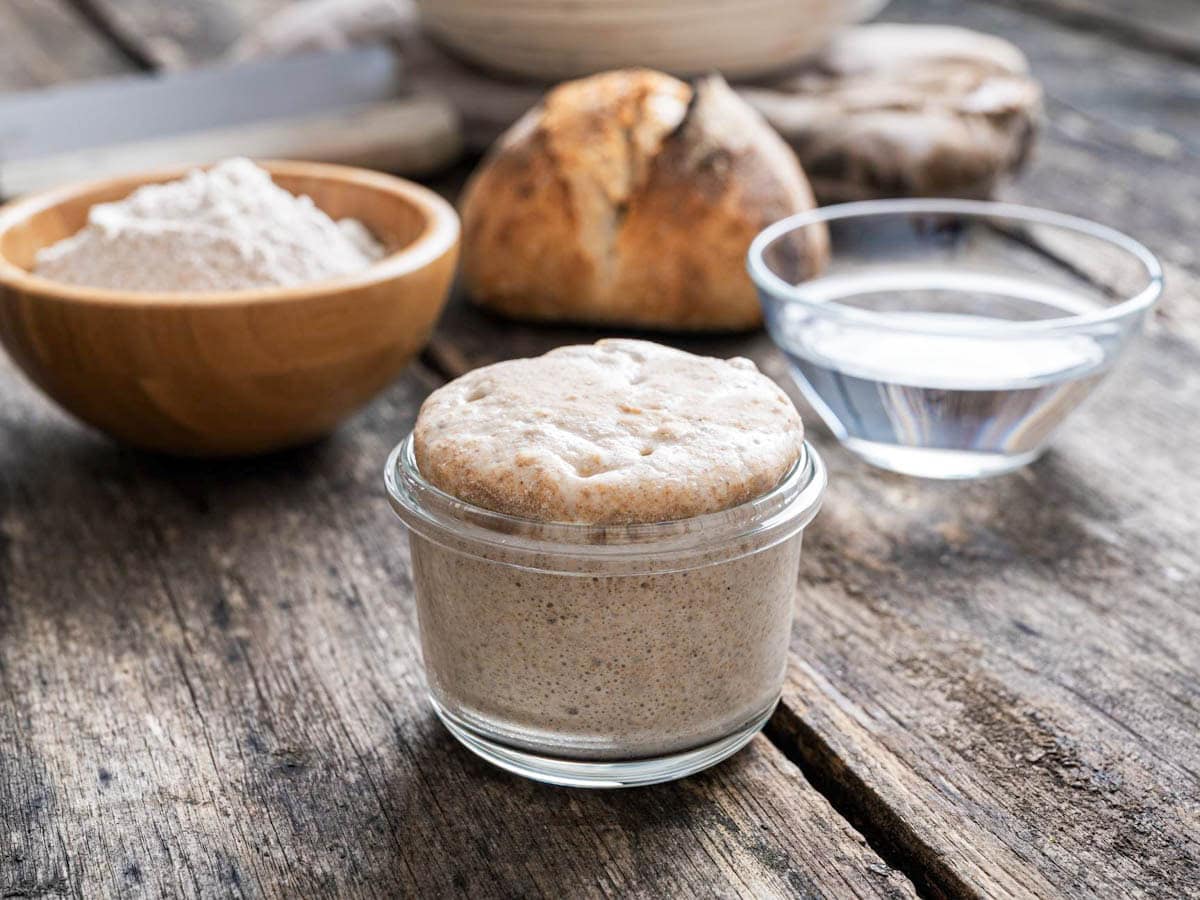
If your starter is now actively bubbling, rising and falling – congratulations! You have successfully reactivated the dry sourdough starter.
When a starter rises to double its size and then stays elevated, that is considered “peak activity”. Technically, it is ready to bake with at that point! However, at this stage in our reactivation journey, we don’t have quite enough volume for ongoing baking and maintenance. Every time you bake sourdough you must leave behind at least a half a cup of starter to feed and continue on. Therefore, we need to add more bulk to the starter, and also move it into a larger container – her forever home.
- Transfer your starter from the mason jar into a clean mixing bowl.
- Now, add 1 scant cup of fresh flour (just a hair shy of a cup!) and 1/2 cup of filtered lukewarm water. These measurements are approximately equal weights of flour and water in grams, which is the recommended flour-to-water ratio for ongoing starter maintenance.
- Mix well, and then transfer the starter into a new larger container of choice. Set it aside at room temperature once again.


Choosing a final storage container
We like to store our sourdough starter in a glass flip-top container that is at least 1 liter/quart (the very minimum) up to a 1.5 liter container. We are currently using this 1-liter glass container (34 ounces). It provides sufficient space for the starter to be fed and double in size, and it fits well in our fridge. We only ever bake one sourdough loaf or recipe at a time, and most of our sourdough recipes call for about 1/2 to 1 cup of active starter on average, so we don’t need to maintain a huge amount of starter.
However, if you plan to make several loaves of bread or other sourdough goodies at once, you’ll want to use at least a 1.5 liter to even a 2 liter container and maintain a larger volume of starter than we do. To make a larger starter, simply feed it again without discarding any.

My sourdough starter is active! Now what?
Please visit our guide on how to feed and maintain sourdough starter. There, I go over the various ways you can feed and store your starter. (“Feeding” is simply the act of adding more flour and water, and sometimes discarding a portion first.) For instance, some frequent bakers choose to leave their starter out at room temperature – but then it will need to be fed daily. Rather, most folks store their starter in the refrigerator, where it only needs to be fed once every week or two, or as little as once a month.
If you get to the final step and aren’t sure how to proceed, simply put the active starter in the refrigerator for now.
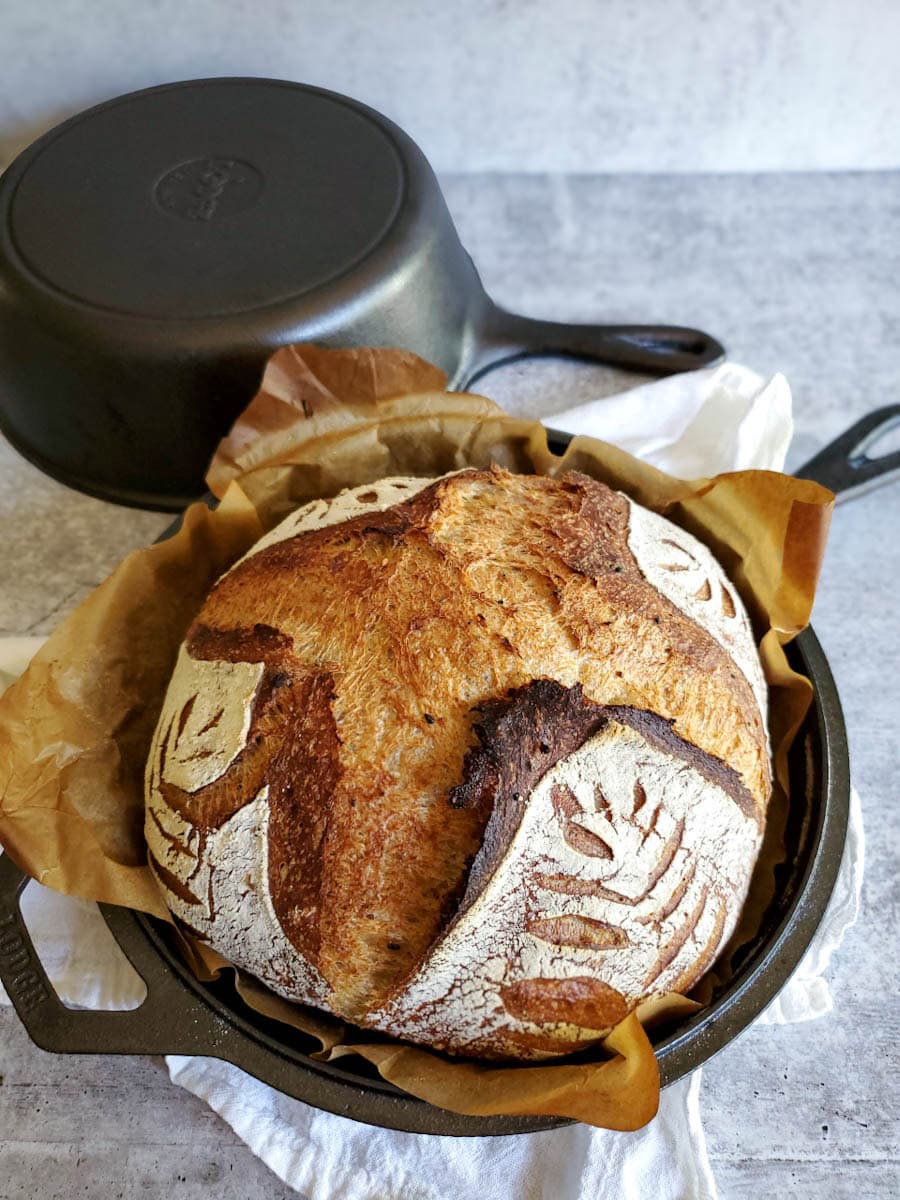
If you’re feeling ready to bake, pop over to our simple sourdough bread recipe – or give our easy sourdough focaccia recipe a try (which is even more beginner-friendly). Also feel free to browse this list of our favorite sourdough supplies including the cast iron combo cooker we bake bread in (it’s like an upside down Dutch oven).
Transitioning sourdough starter to a different kind of flour
If you want to feed your sourdough starter whole wheat, rye, or another type of flour, feel free to do so! In fact, many starters become even more vigorously active with wheat and rye flour. I suggest easing the starter into the change, by gradually adding the new flour type mixed with the original flour that it is accustomed to eating.
For example, if you’re currently feeding your starter all-purpose flour, try using 3/4 cup AP and 1/4 cup whole wheat for the first feeding, see how it responds, then increase to half and half, and so on with subsequent feedings. We often feed our personal starter half bread flour and either half whole wheat or half rye.

Troubleshooting Tips
If your starter isn’t rising, consider the following factors that may be causing issues. Or, learn even more in this guide: 9 Ways to Make Sluggish Sourdough Starter More Active.
- When a sourdough starter is too wet or runny, the fermentation bubbles will rise right through and out of the mixture, rather than being trapped inside and creating rise. So if your starter is easily pourable (like thin pancake batter), stir in more flour to stiffen it up. Add just a tablespoon or two at a time until it becomes more thick and gooey, but not a solid ball of dough.
- Cold temperatures lead to decreased starter activity. If your house in on the cool side, try to find a warmer spot to store your starter such as near or on top of a warm appliance. You could also use a handy starter warming plate – made specifically for this task! Another trick is to place the starter inside the oven – with the oven OFF, but the oven light ON. (But use caution not to accidentally pre-heat and cook your starter!)
- Your starter may simply be hungry. Once it rises and falls, it will not rise again until it’s fed more fresh flour and water. So, if it has been sitting out for a few days and it hasn’t risen yet, it won’t magically start doing so! Try discarding half of the contents in the container and then feeding it with a scant 1 cup of fresh flour plus 1/2 cup of lukewarm filtered water. It should perk back up!
What is that dark liquid on the top of my sourdough starter?
When a sourdough starter has run out of food, it produces a thin dark layer of alcohol-like liquid on top called “hooch” – a natural byproduct of yeast fermentation. Hooch is normal and harmless; it simply means your starter is hungry and needs more flour and water. You can either pour the hooch off the top, or mix it back in (which will make it more sour-tasting, some folks like that) and then discard and feed as usual.
RELATED: If you’re ever unsure about the looks of your starter, or, if you ever go many months without feeding your starter and it has a lot of hooch, please visit this guide: Is My Sourdough Starter Bad? How to Revive Old Inactive Starter.

And that is how you rehydrate a dry sourdough starter.
Please, do not be intimated by the process. It is incredibly easy! By starting with an established healthy colony of lactic acid bacteria and yeast, you’re already miles ahead of the game. You’ll be baking your first loaf of sourdough bread in no time.
Once your starter is active and ready, try some of our favorite sourdough recipes:
- Simple No-Knead Sourdough Bread Recipe
- Sourdough Discard Crackers Recipe
- Simple Sourdough Focaccia Bread Recipe
- Sourdough Granola Recipe (Discard or Active Starter) with Fermented Option
- Healthy Sourdough Spiced Pumpkin Bread (or muffins)
- Delicious Sourdough Zucchini Bread (or muffins) with optional nuts, seeds, chocolate or dried fruit
- Sourdough Chocolate Chip Cookies: Cinnamon Spiced & Salted
- Sourdough Ginger Molasses Cookies (Soft and Chewy)
Please let me know if you have any questions. We’d also love to hear your success stories with a review or comment. Thanks for tuning in, and happy baking!

How to Reactivate a Dry (Dehydrated) Sourdough Starter
Equipment
- Pint-size glass mason jar and lid or similar (for initial activation)
- Larger glass container, such as a 1 to 2 liter glass flip-top container (for ongoing starter storage)
Ingredients
- 1/2 Tbsp dried sourdough starter culture
- white bread flour or all-purpose flour (amount varies with each step)
- filtered lukewarm water (non-chlorinated, avoid using cold water)
Instructions
Day 1
- In a clean pint-size mason jar (or similar) combine 1/2 Tbsp of dried sourdough starter powder or flakes (one H&C package) with 1.5 Tbsp of filtered lukewarm water. Allow the dry sourdough starter and water to sit for several minutes to soften and combine. Use a fork or spoon to stir it on occasion.
- Add 1 Tbsp of flour. Mix thoroughly. (See consistency notes below)
- Cover the jar with a lid, beeswax wrap, plate, or other cover to prevent it from drying out. Set the container in a moderately warm location (70 to 75F is ideal). Come back in about 24 hours.

Day 2
- Into the same jar as yesterday, add 1 Tbsp of flour and 2 teaspoons of water to the starter. Mix well.
- Cover the jar or container again, and allow it to sit for another 24 hours.
Day 3
- Repeat the same feeding process as Day 2 (1 Tbsp flour and 2 teaspoons water).

Day 4
- This time, add 1/3 cup flour and 1/4 cup water to the starter. Mix well.
- Cover the container and set aside once again. Consider marking the level of the starter after feeding. It should rise quite a bit by this time!

Day 5
- Transfer your starter from the mason jar into a clean mixing bowl.
- Add 1 scant cup of fresh flour (just a hair shy of a cup!) and 1/2 cup of water. Mix thoroughly.
- Transfer the starter into a new larger container of choice (such as a 1 to 2 liter glass flip-top jar). This will be the starters "forever home". Set it aside at room temperature once again.
- If your starter is now actively bubbling, rising and falling – congratulations! You have successfully reactivated the dry sourdough starter. When a starter rises to double its size and then stays elevated, that is considered “peak activity” and is ready to bake with. It will deflate after a few hours and need to be fed or refrigerated.

Notes


129 Comments
Julia Arnold
I followed the instructions very well and my start just isn’t rising much. each day now after the initial five day process I’ve been feeding her about a tablespoon of organic flour (adding water if i feel she needs it) and i still am not seeing much rising. Im not sure now what to do as im now off on my days.
DeannaCat
Hi Julie – After the 5th day, you’ll need to move on to the feeding maintenance article to keep it alive and get it to rise. It needs much more than a tablespoon of flour at this stage. Also, once it eats all the “food” in the container it builds up waste product, so the ongoing feeding involves removing/discarding at least half the volume of starter in the container and then adding a good amount of flour and water back (at least 1 scant cup flour and 1/2 cup water) for it to feed on. Please read that article, and if you’re not sure how to proceed, store the starter in the fridge until then. Otherwise it will quickly run out of food. That should help get it on the right track!
LAURA Shaw
Hello – can I use gluten free flour to reactivate a dehydrated /dry sourdough starter? I usually use a Bob’s Red Mill 1:1 gluten free baking flour replacement in other recipes for my GF husband. Let me know!
Laura
Aaron (Mr. DeannaCat)
Hey Laura, I would avoid using the starter to make a GF starter because it does contain wheat, especially if your husband has any gluten allergies. The starter is also accustomed to feeding on gluten and the bacteria and yeast associated with it. I am not sure how it would transition to gluten free feedings. If you want to experiment, it could be worth a shot, allergies excluded. I would also avoid using the GF flour mixes because they contain other ingredients such as xanthan gum. We did make a GF starter once using a mix and the results were less than impressive, mainly, the starter smelled fairly repulsive. Anyway, hope that helps and good luck.
Izzy
I was totally intimidated by this process, but I did it! My starter looks amazing & my first loaf was incredible. Thank you!!!!
Yasmine
Just made (and finished) my first sourdough boule using this starter and it turned out amazing. This sourdough starter is so healthy and it is a breeze to set up and maintain. On day 1 it was rising and on day 2 there were bubbles and rise/fall. It was consistent doubling/tripling in sizing by day 3 and onwards. I can’t say enough good things about this starter. And it smells amazing!! Like a delicious bakery! I’m so glad I purchased and can’t wait to make more sourdough!
Melanie Nelson
I HATE to bake because measuring and weighing is SO annoying… but impulsively decided to try sourdough after reading the blog’s email. Talk about impulse purchase! Lol. I’m sitting here going HOLY CRAP, I can’t bake! I can’t do this! But the directions are so super simple and it bubbles up so easily. We made crepes this morning with the discard and am excited to try our first loaf tomorrow 🥰 Thanks Deanna!!
divinasil
I love your sourdough starter! My bread comes out perfect, I’ve already done 3 loaves! I’m really happy with the purchase, thank you Deanna 🙂
Jeremy Ladd
I loved how detailed this step by step guide is! I bought some of Deanna’s dehydrated sourdough starter and used it and this guide and after 5 days I‘ve already made her sourdough herb crackers recipe and I have some focaccia proofing. If you’ve ever wanted to make your own sourdough, but have been intimidated by the starter, you should definitely buy some of Deanna’s dehydrated starter and follow her guides and recipes!
Ang G.
I purchased some dehydrated starter from you and followed your instructions above. After only 24 hours, I already see bubbles forming at the top of the starter and it smells amazing! Can’t wait to see it in action after day 5. Thank you Deanna
Melissa
These instructions were so easy to follow and the starter turned out perfect! We just made our first loaf and it was AWESOME!!! Thanks Deanna for such thorough and easy to follow instructions. If I can do it… anyone can do it!!!
Jessica
I bought my starter from DeannaCat and followed the super easy step by step to reactivate. I was able to accomplish my 1st loaf of sourdough bread after 1 week and I am super excited to take on other recipes! Thanks for the starter and the helpful instructions!!
outi onorato
The reactivation of your dry starter went exactly as described in your very through instructions.
I used your recipe with the ratio of all- purpose/wholewheat/rye you suggested and am very proud of my first loaf.
Thank-you!
Outi
Sandra Valles
This recipe for reactivating sourdough starter works great.
I hadn’t had the best luck in starting my own and even bought some starter sourdough off of Etsy, but didn’t have luck getting it to thrive. So when I saw Deanna was selling sourdough starter I was about to buy some, but then realized I still had some from my Etsy buy. So I figured let’s follow her directions and see if it’ll work for all kinds of sourdough starter.
And on day five I had indeed made an active sourdough starter. Today is day six, and after feeding this morning, it rose over double in about 2 hours, and has stayed risen for quite some time. I’m excited to make some recipes now!
Thank you Deanna
DeannaCat
Awesome Sandra! I am so glad to hear that the process works just as well for other starters as it does for the H&C dry starter! Thank you for experimenting and confirming, and congrats on the new happy stater baby! I’m sure you’ve seen all of our sourdough recipes – I hope you give them a whirl! Happy baking