

How to Make Sourdough Starter From Scratch: Easy Step-by-Step Recipe
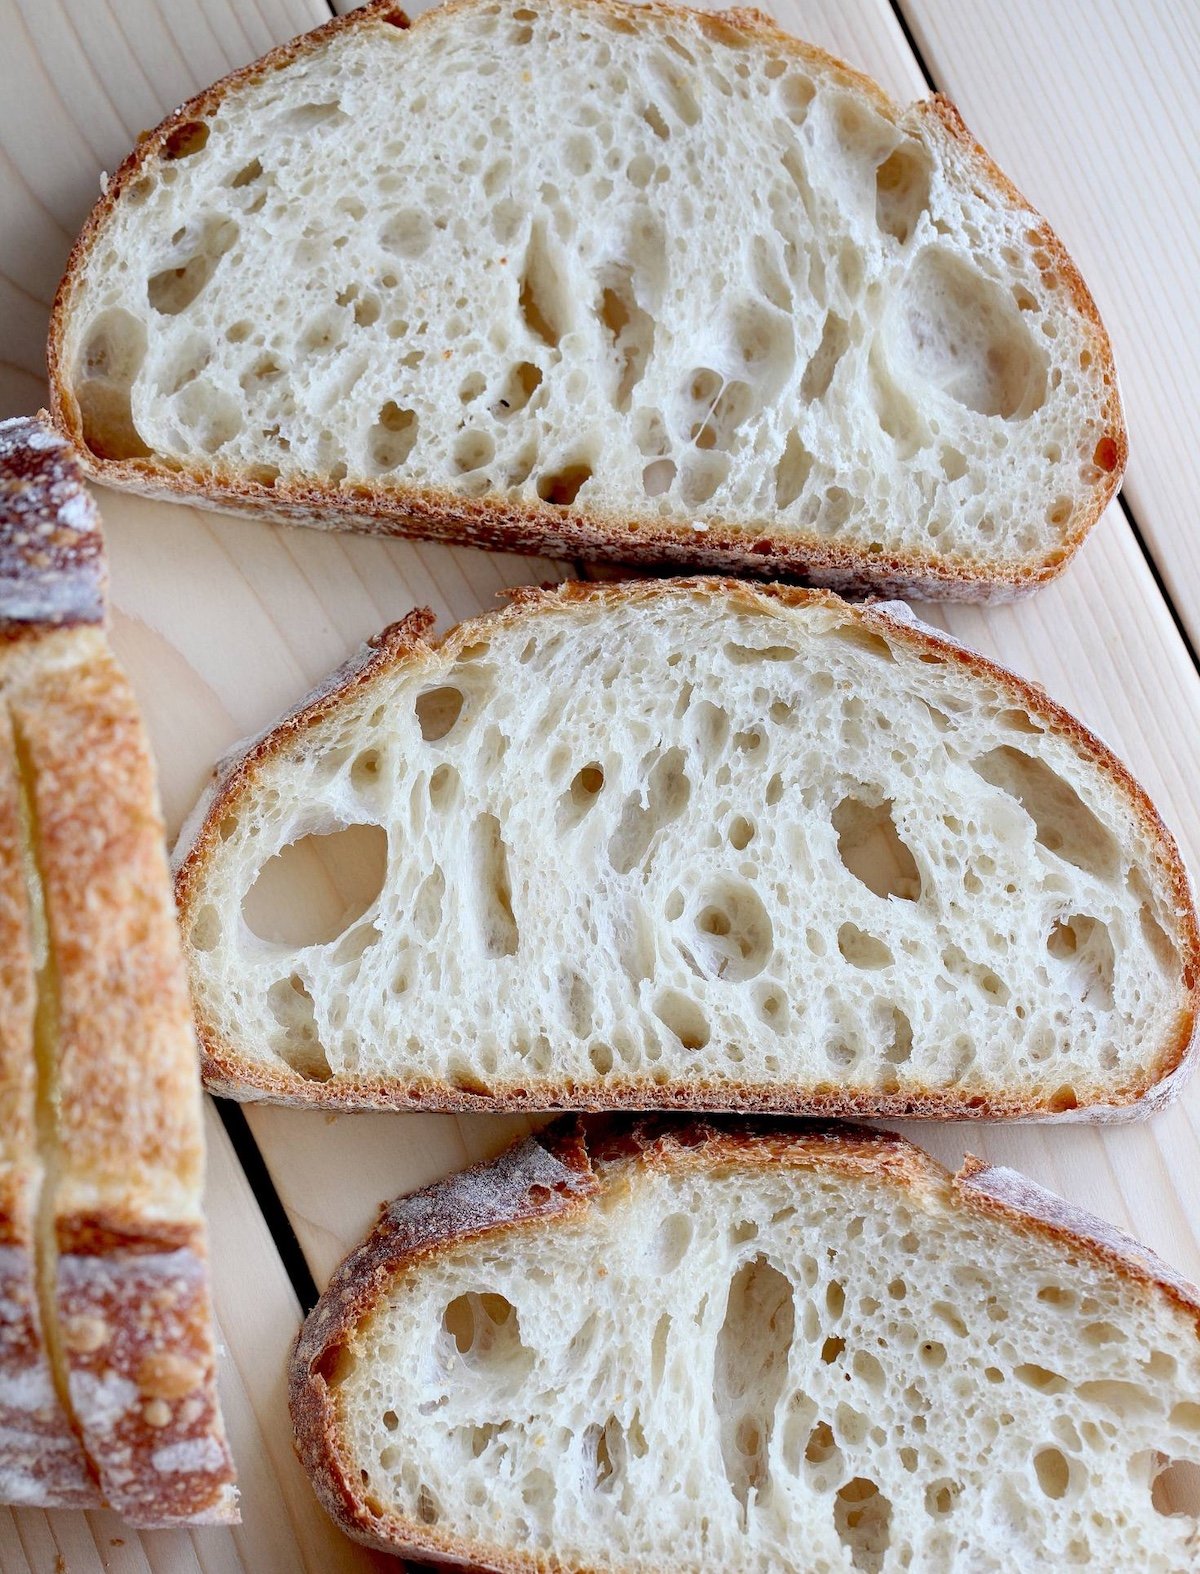
Have you been dreaming of fresh homemade sourdough bread, but aren’t sure where to begin? First, you need a sourdough starter! Then you can bake your own delicious gut-healthy bread, crackers, cookies, muffins and more.
Come follow our easy recipe to make a sourdough starter from scratch. This guide will show you how to transform three simple ingredients – water, flour, and apple – into an active and bubbly sourdough starter. The process takes 7 days from start-to-finish but involves very few steps or active time!
I’ve included everything you need to succeed: step-by-step photos, a video tutorial, troubleshooting tips, and resources on how to maintain and feed sourdough starter going forward. Don’t worry – it’s much easier than you think!
NOTE: This post was originally published in January 2019 and significantly updated in 2025.
Would you like to save this?
Disclosure: Homestead and Chill is reader-supported. When you purchase through links on our site, we may earn an affiliate commission.
What Is Sourdough Starter?
Sourdough starter is a mixture of flour and water that also contains a stable colony of wild yeast and beneficial bacteria, and is nurtured by routine “feedings” to keep it alive and happy. It’s what makes bread rise without the need for commercial yeast.
If kept alive, one starter can last a lifetime of baking. And don’t worry! An established, mature sourdough starter is very easy to maintain with only infrequent feedings required (when stored in the fridge).
You can make a sourdough starter from scratch, get some from a friend who bakes sourdough, or buy one online. Since starting from scratch can sometimes be tricky, we offer organic dehydrated sourdough starter too. It’s quick, easy, and foolproof to use!
Supplies Needed
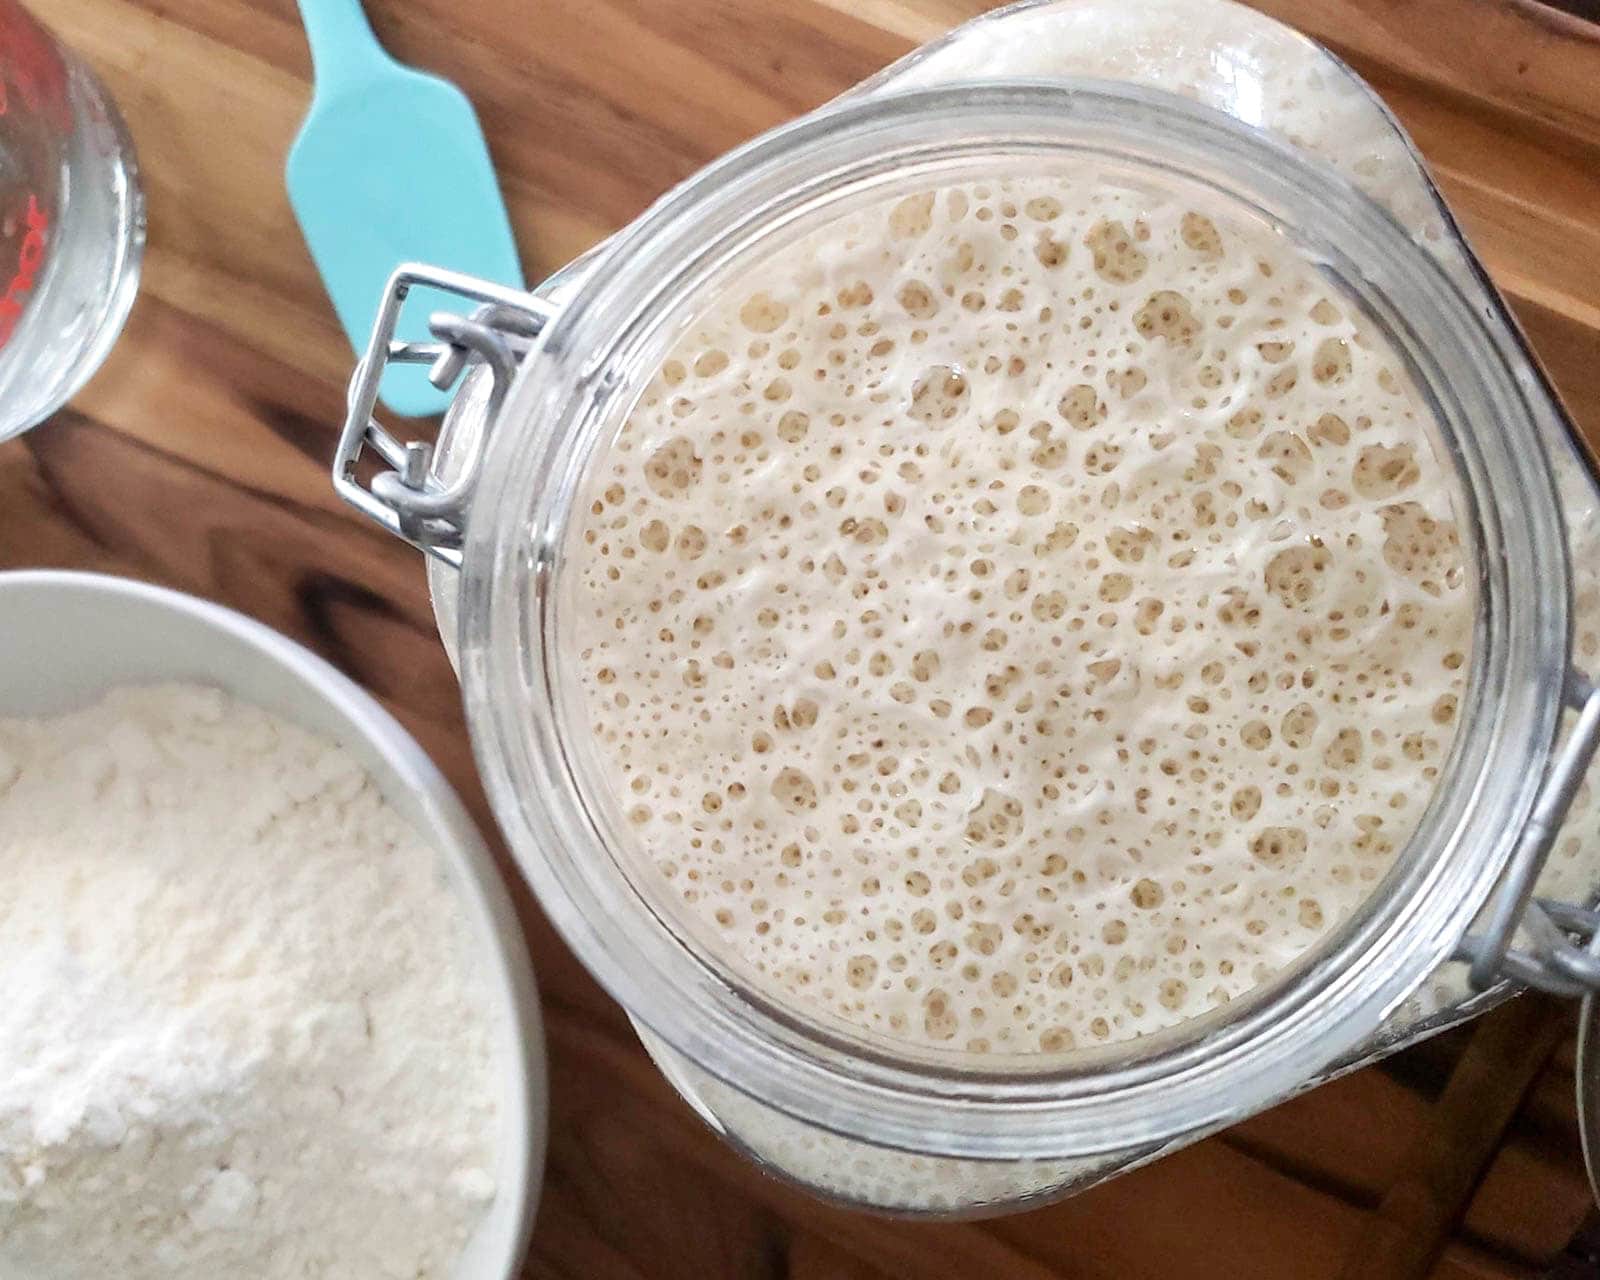
- A large, air-tight glass container. We used a 2-liter flip-top container, though a half-gallon mason jar works perfectly too.
- Organic white bread flour. You can also use organic whole wheat if you’d like.
- One large organic apple, or two small apples. See substitutions below.
- Filtered water
- A kitchen scale. Sourdough recipes are measured by weight instead of volume (cups) since different flours have varying densities or weights.
- A mixing bowl
- Liquid measuring cup
- A silicone spatula
- A cheese grater (for the apple)
- A moderately warm location
Why use apple to make sourdough starter?
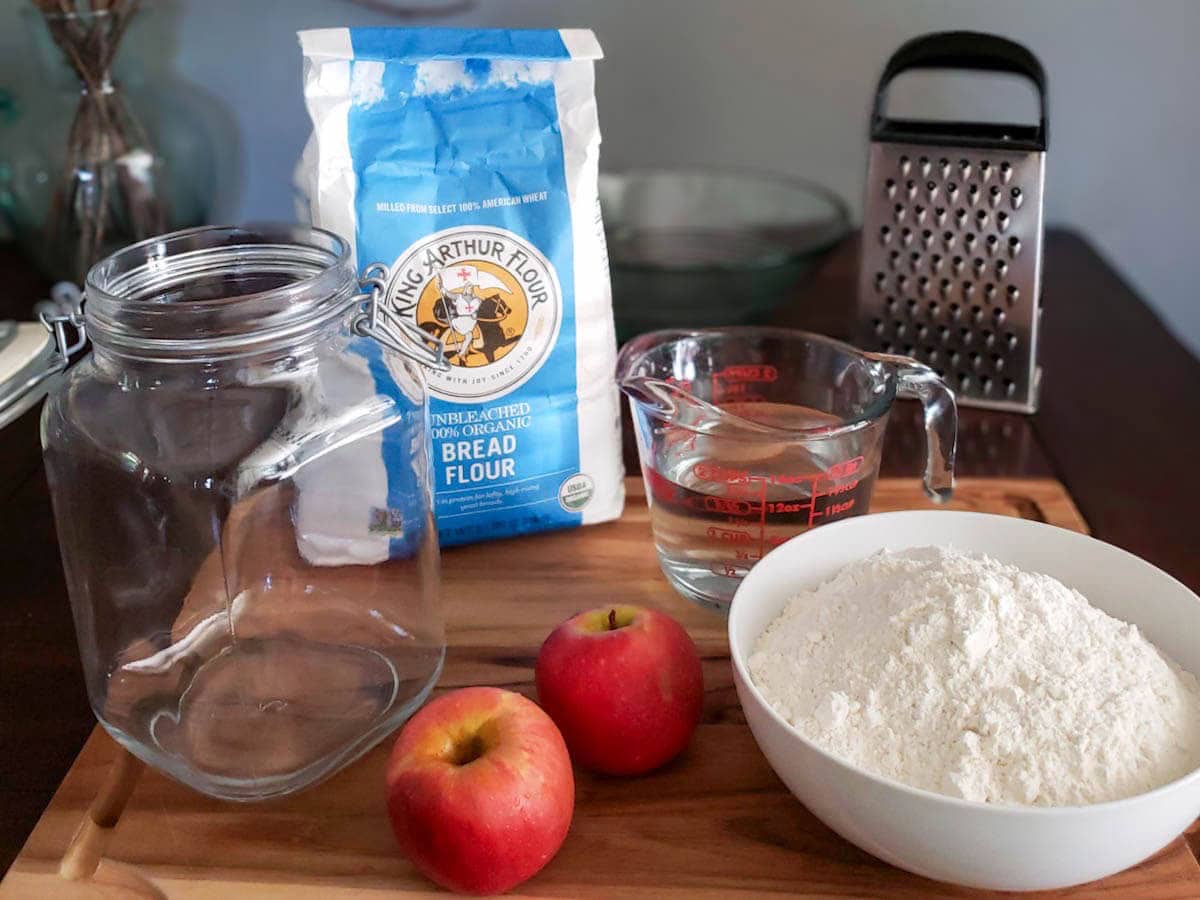
Our homemade sourdough starter recipe includes apple to increase your chances of success! Flour and water alone are fairly sterile, but organic fruit and vegetables contain natural wild yeasts and beneficial bacteria on them, which helps to kick start the activity of your starter. The shredded apple completely dissolves into the starter and isn’t noticeable by day 5.
It’s key to use organic apples since non-organic produce has been treated with chemicals that can inhibit beneficial bacteria growth or contaminate your starter. If you happen to be allergic to apples, you can substitute with 1 cup of smashed organic blueberries or seedless grapes instead.
How to Make Sourdough Starter
Day 1: Mix
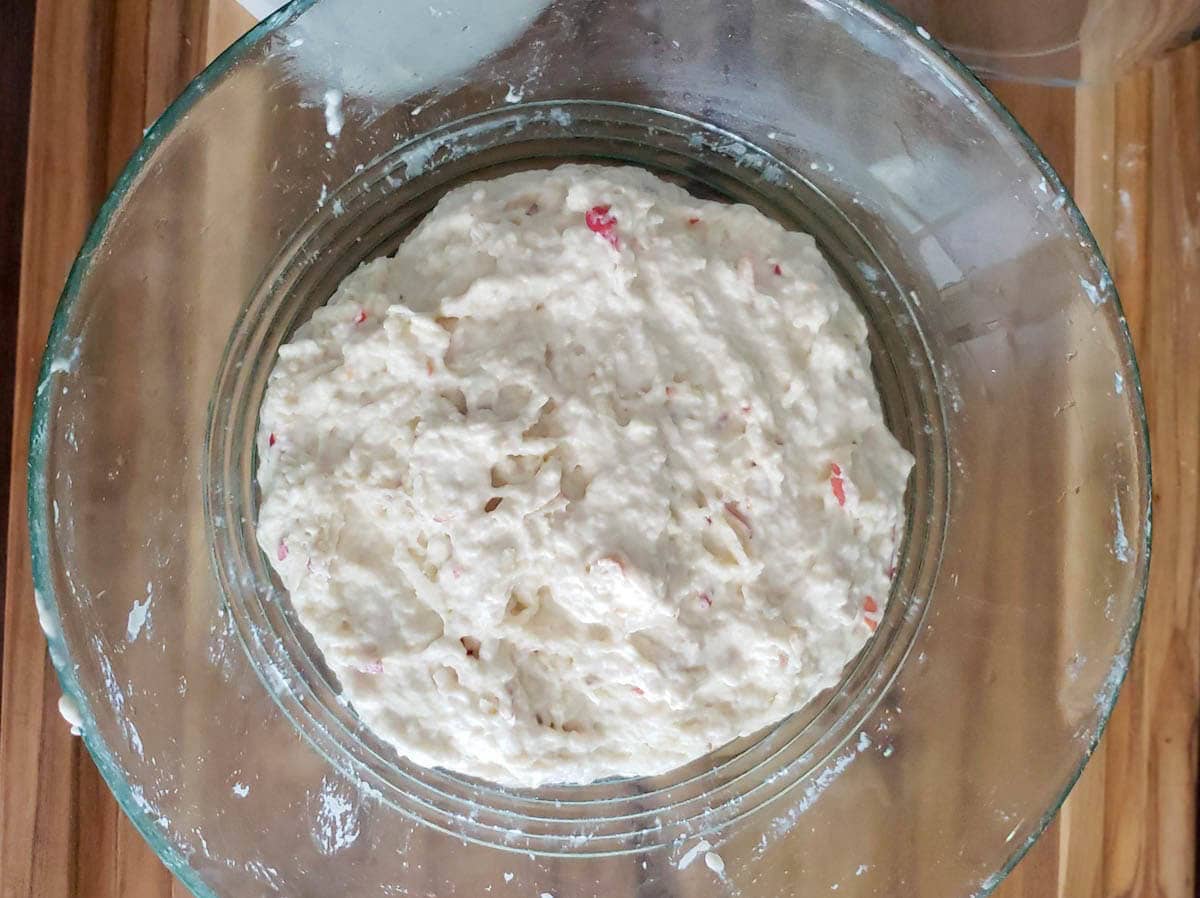
- In a large mixing bowl, weigh out 500 grams of organic white bread flour. Don’t forget to tare the bowl on the scale first, or add the weight of the bowl in to the total!
- Next, wash and grate the apple into fine shreds with a cheese grater. Use the peels but avoid the core, stem, and seeds. Add the apple to the bowl with the flour.
- Now add 360 mL of room temperature or warm filtered water to the bowl and mix thoroughly. It’s best to avoid chlorinated water when making sourdough if possible (but not distilled water) since chlorine can inhibit the growth of beneficial bacteria. The mixture will be quite thick and sticky at this point.
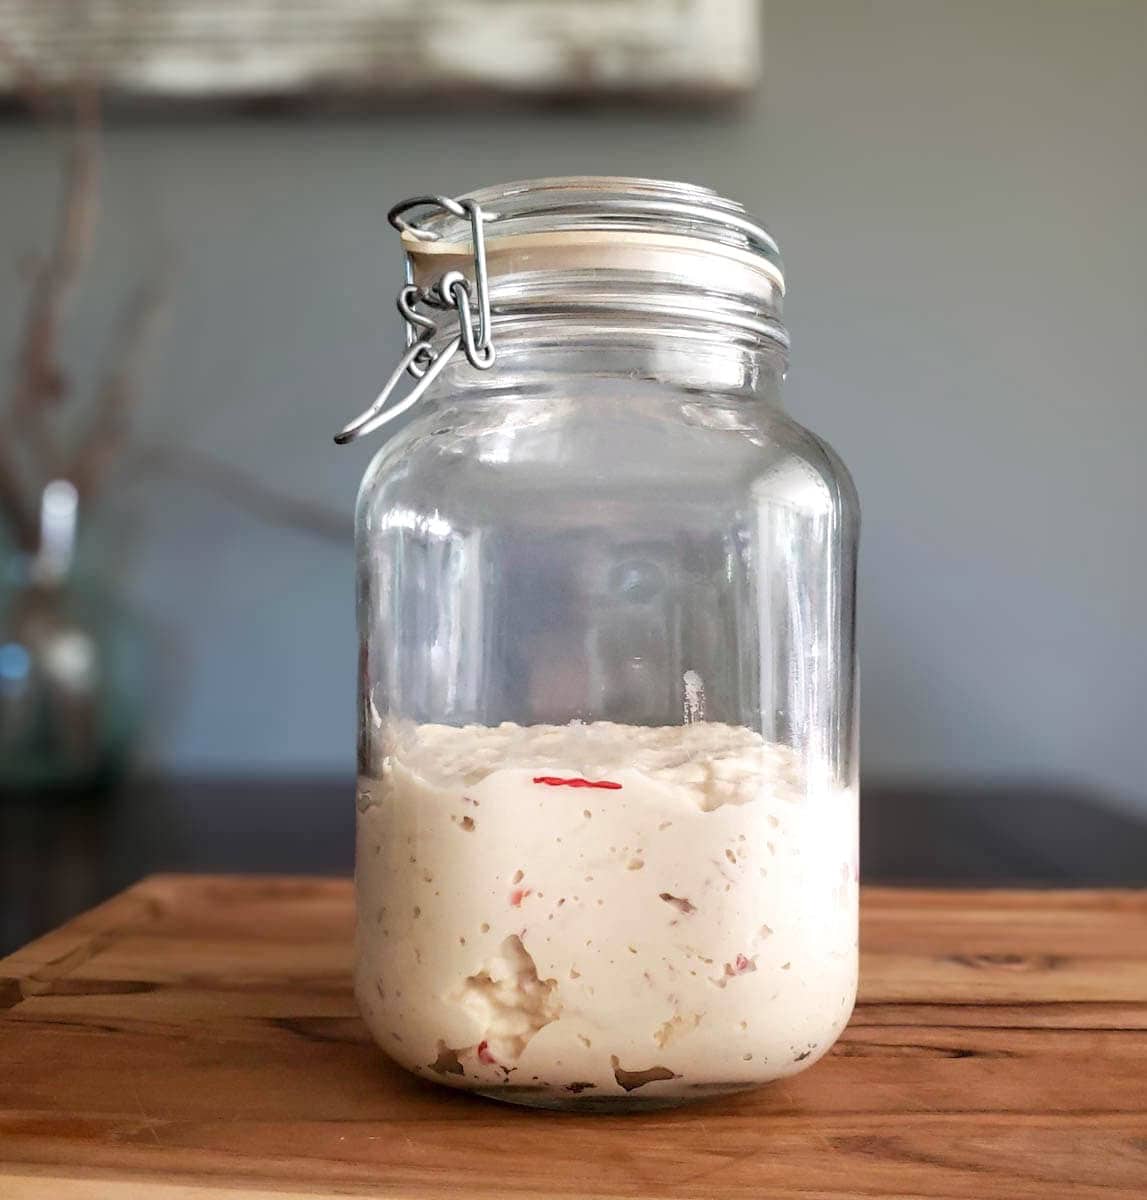
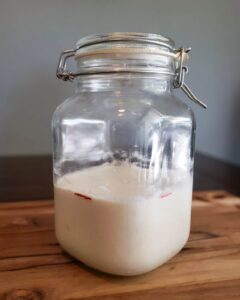
- Transfer the sourdough starter mixture into an air-tight container, pressed nicely into the bottom and with the lid closed. The container should have ample empty space to allow for the sourdough starter to at least double in size over the next few days, if not more.
- Finally, use a washable glass pen to mark the current level of the sourdough starter mixture in the container. (You could also use a large rubber band around the outside of the container.) This is to help monitor the rise!
Day 2 and 3: Sit and Wait
- Now let the mixture sit for 3 days or about 72 hours after first starting.
- To make a new sourdough starter from scratch, it’s important to keep it in a location that is about 70 to 75 degrees Fahrenheit (23 degrees Celsius) to encourage beneficial bacteria activity. Cooler temperatures can easily lead to inactivity and mold growth. A dark or light location is fine, but keep it out of direct sunlight.
- If your home is cold, see tips and ideas on how to keep a sourdough starter warm below. Use a simple stick-on thermometer to easily monitor the temperature.
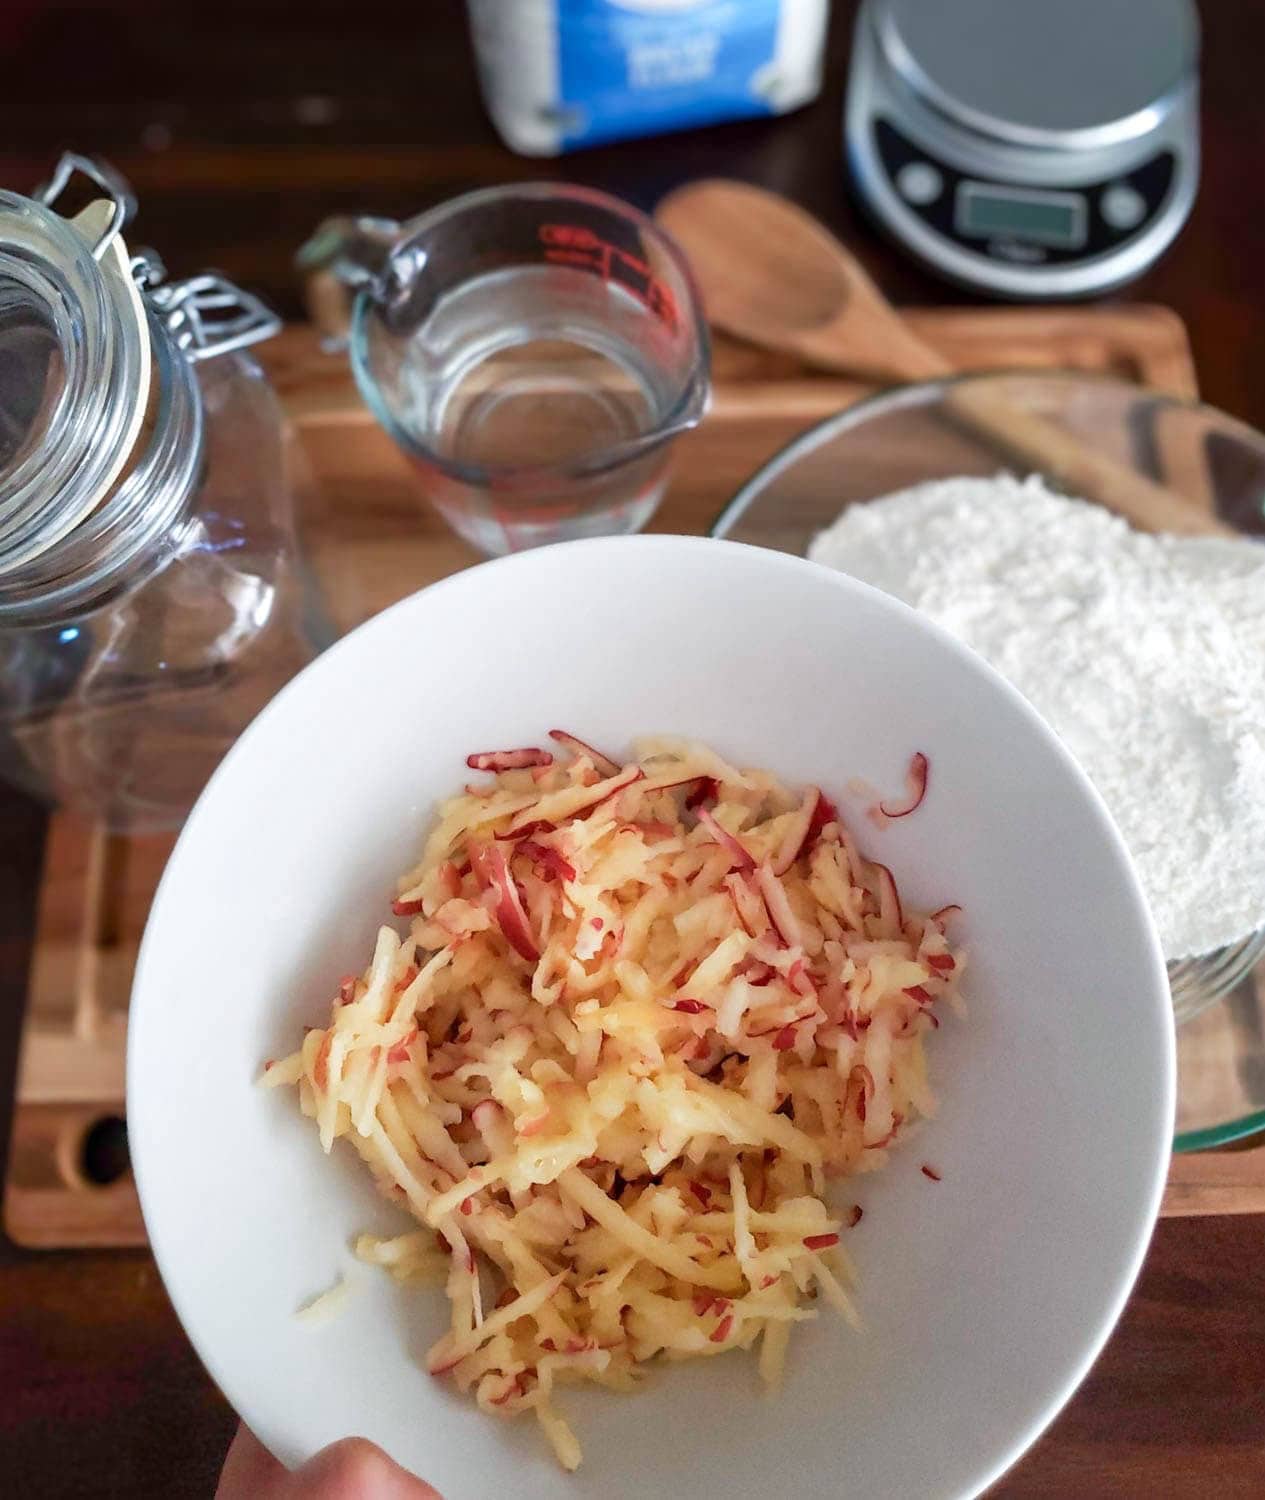
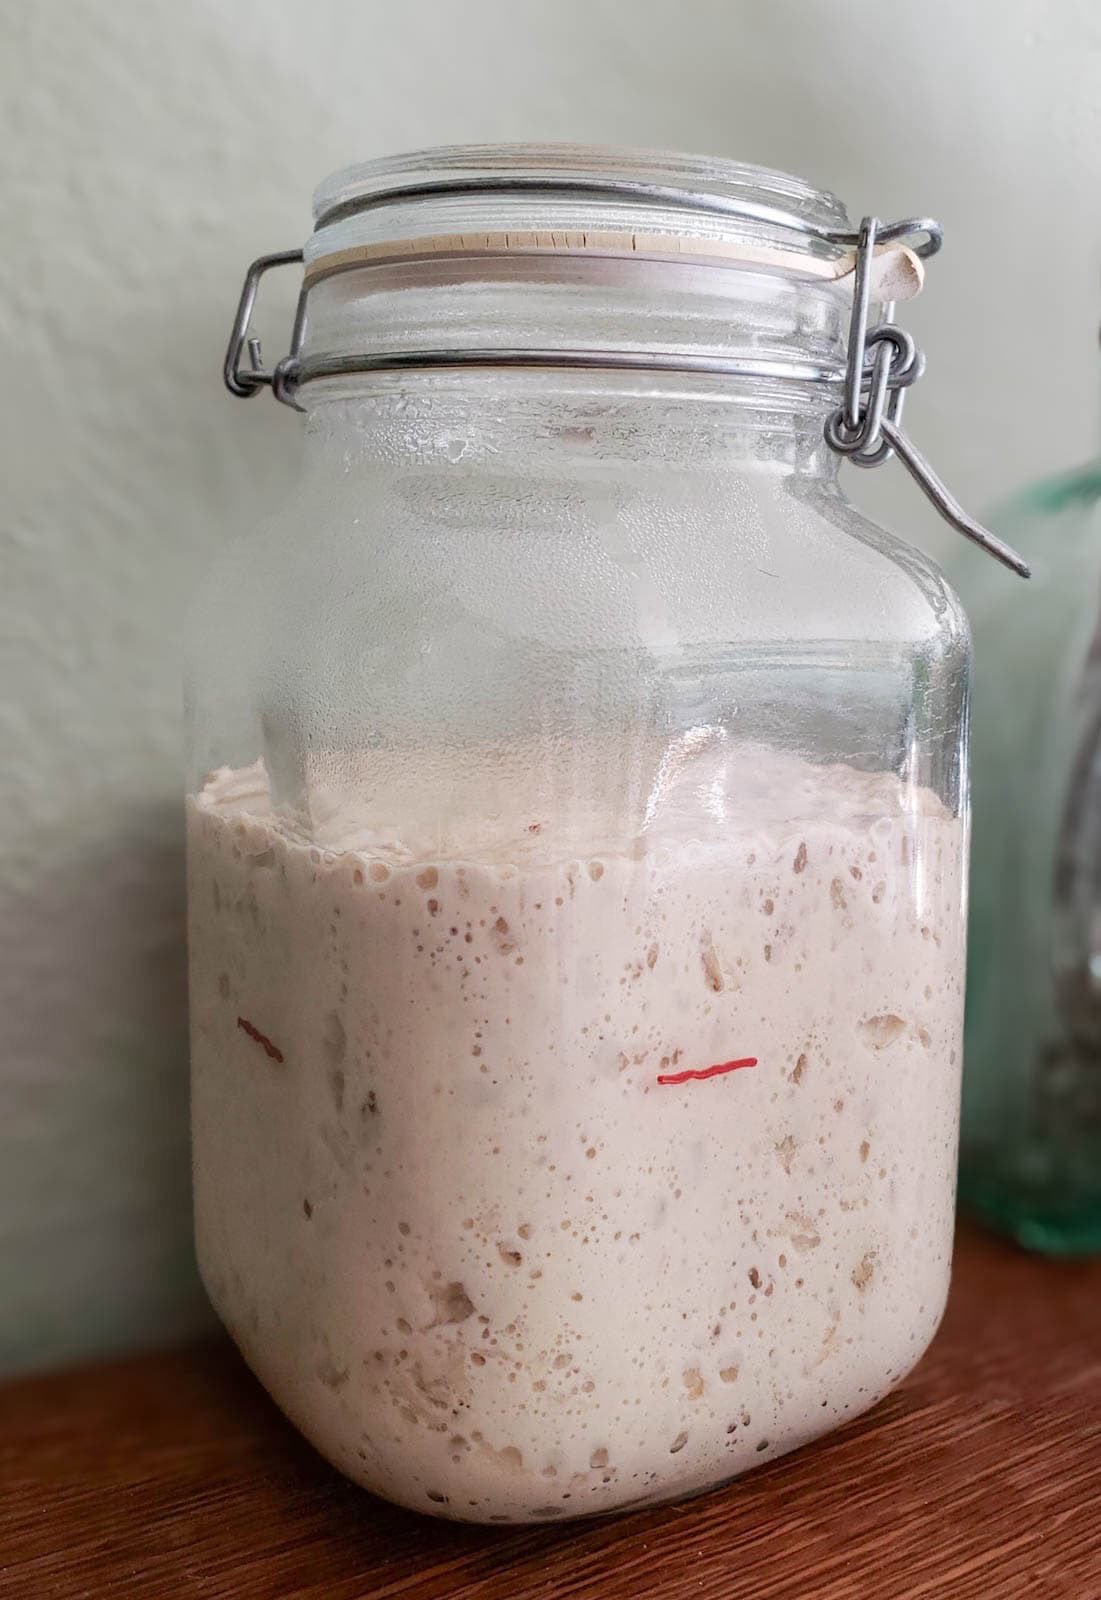
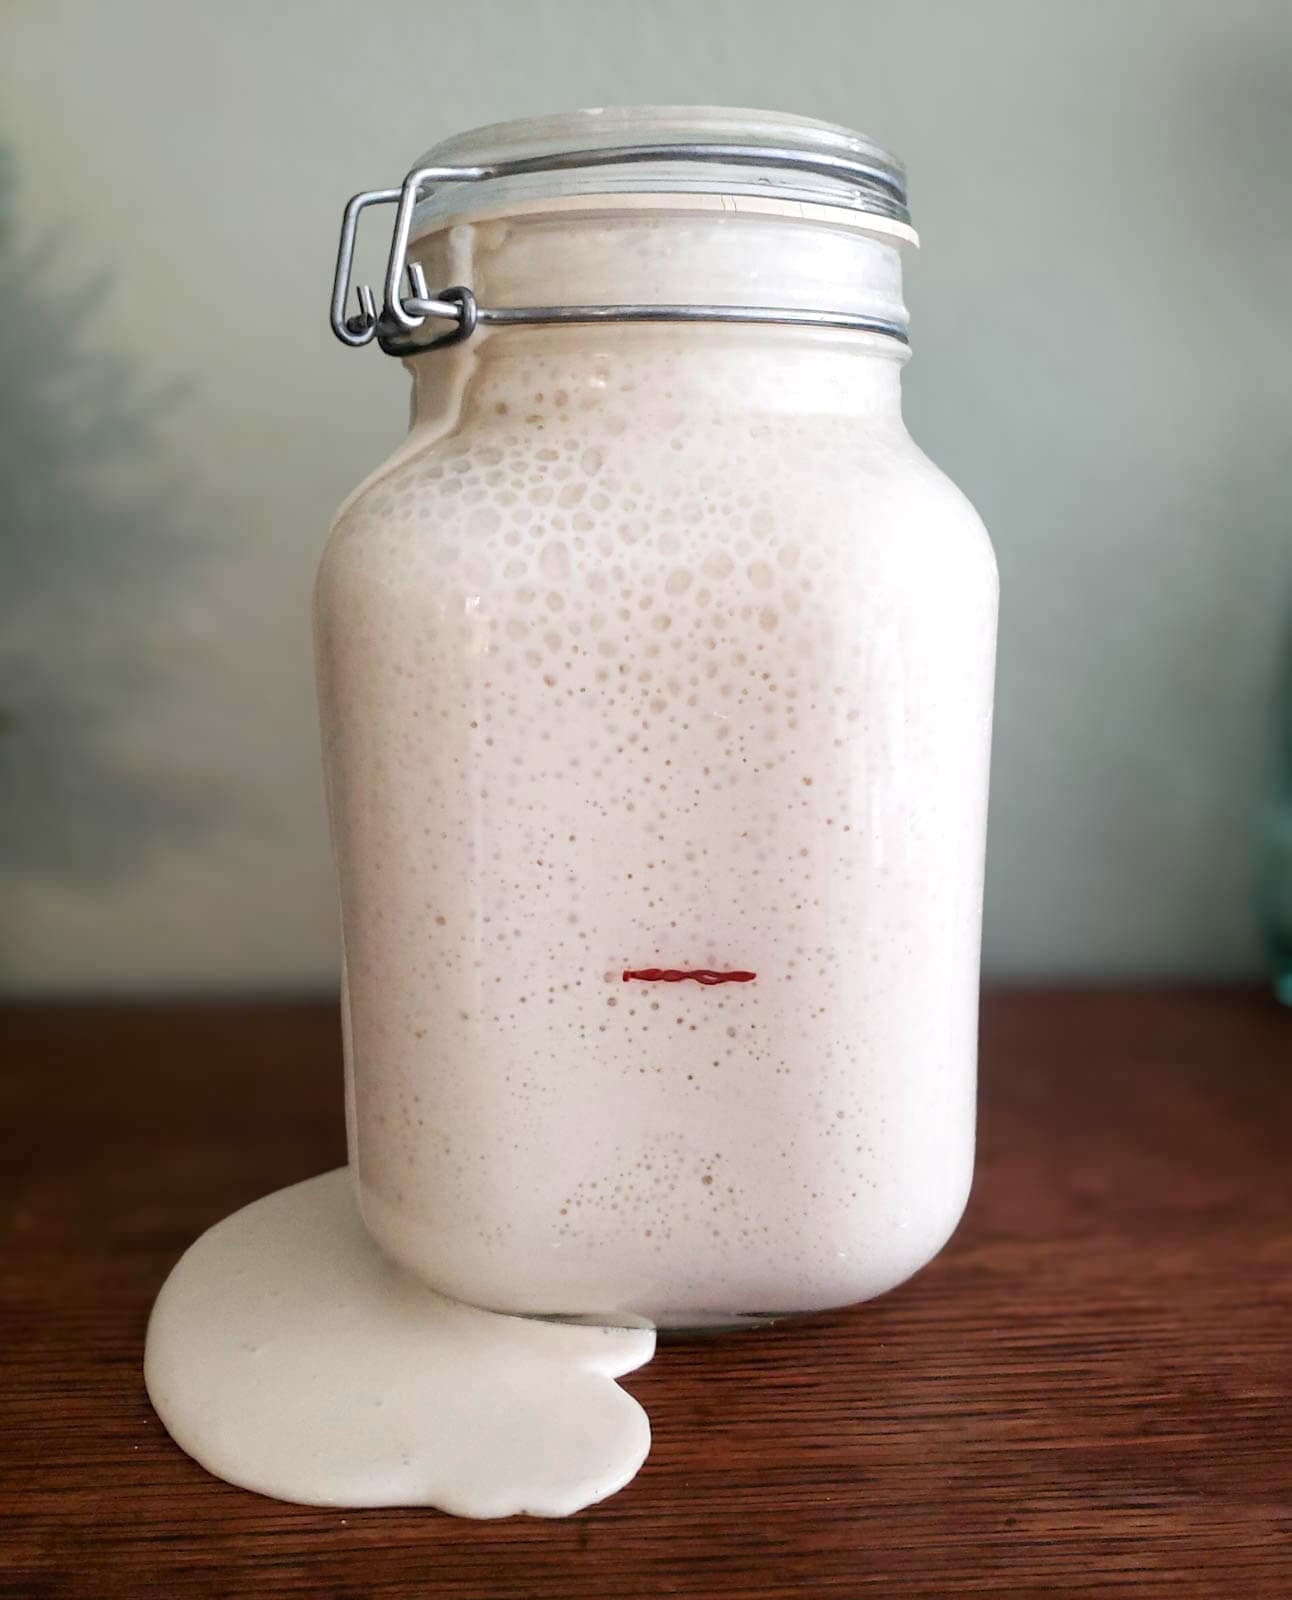
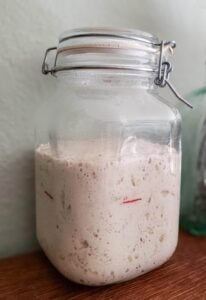
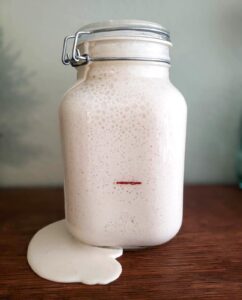
- During this time, the mixture may begin to form small bubbles and rise. In some cases, it may rise a lot! So you may want to keep the container on a plate to catch any overflow.
TIP: It’s possible for the sourdough starter to rise and then fall again before you notice (such as overnight) so look for smears on the sides of the container – not just the current level. However, it’s not essential to get a big rise at this stage!
Ways to keep sourdough starter warm:
- Find a warm spot in your house, such as next to or on top of a warm appliance. For example, our kitchen has under-cabinet lights that put off heat when they’re on, making the cabinets above quite warm and cozy. We’ve also placed it against a warm south-facing wall.
- Use a starter heating pad. Consider using a specialized heating pad to keep your sourdough starter warm, such as this wrap-around heat mat (thermometer included). It has precise temperature controls to keep the starter at the ideal temperature. My gardener friends use seedling heat mats too – just be sure it doesn’t get TOO hot! You may need to keep a towel or plate between the heat mat and starter jar.
- Oven light trick. Most oven light bulbs emit warmth, so turning on the oven light (but keeping the oven itself OFF) can create a nice warm spot in the back of the oven for your starter or proofing dough. However, I’ve heard horror stories when folks accidentally pre-heat or bake their starter! So if you try this, be sure to make a reminder that it’s in there – including for other members of the household.
- Proofing box. If you’re a regular baker with a chronically cool home, it may be worth investing in a proofing box – which can keep both your sourdough starter and proofing bread dough at the perfect temperature!

FAQ: What if my starter rises and falls before day 4? Can I move on to the next steps early? No, it’s best to wait. Sometimes, there is an initial burst of very vigorous activity on day 1-2, but that is usually caused by a different type of bacteria that quickly grows then dies off. Meanwhile, the main yeasts and bacteria (lactobacillus) that we want in the starter long-term grow a bit slower. So just be patient before proceeding to the next step!
Day 4: Discard and Feed
After 3 days or about 72 hours, it’s time to feed your sourdough starter for the first time! (This simply means adding fresh flour and water for it to “feed” on, so it can continue to get more active and strong.) By now, the mixture should smell sweet and tangy, sort of like apple cider vinegar. It may also be a bit darker in color.
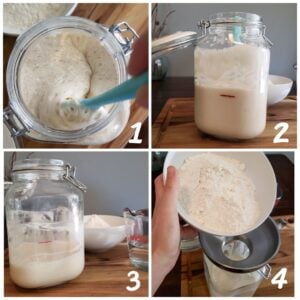
- First, stir the mixture to knock out any air to let it fall back down to a more condensed state.
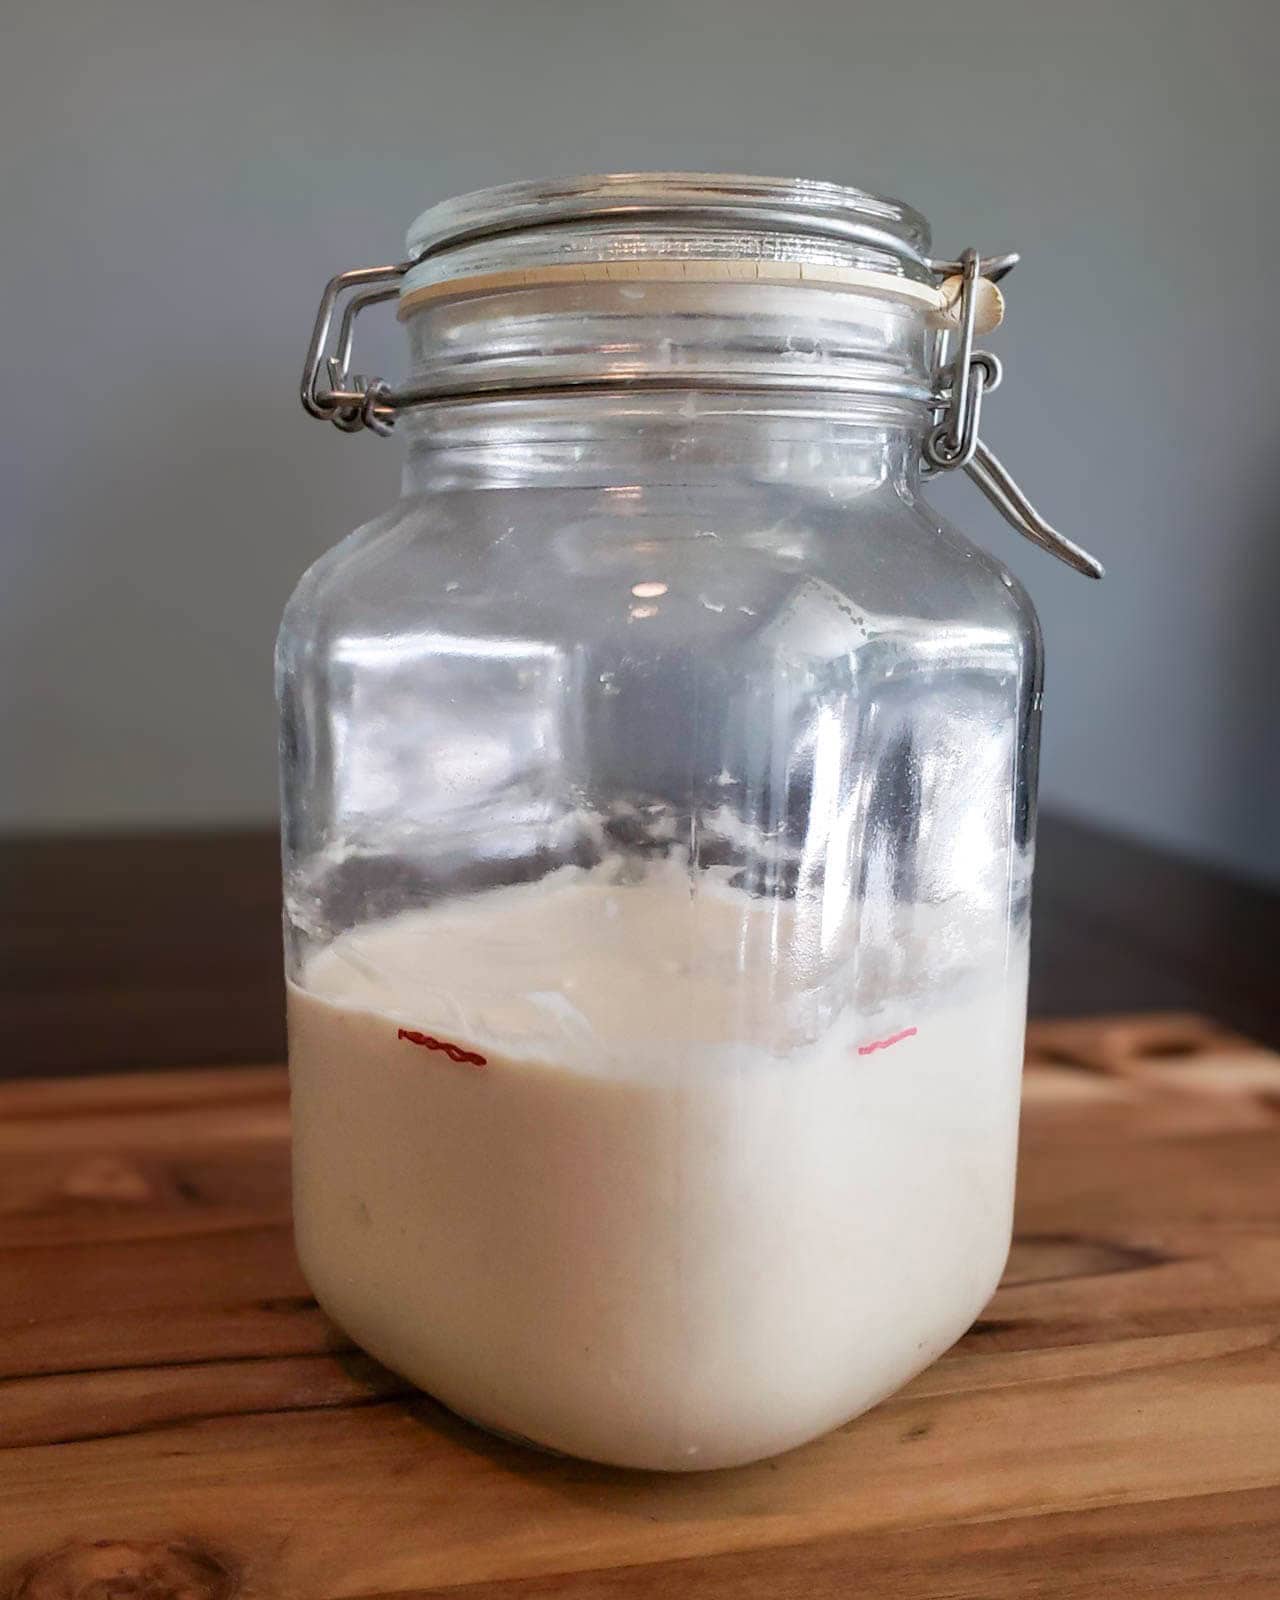
- Next, discard half of the amount in the container. This is to make more room in the jar for fresh flour, water, and to rise again! If you want to be exact, you can remove the mixture from its container, weigh it, and discard exactly half. Instead, I simply eyeball it by looking at the line marked on the jar.
- Now add 250 grams of of bread flour and 170 mL of lukewarm filtered water. Mix thoroughly. You can do this by either taking it all out of the jar, mixing it in a separate bowl, and then putting it back in – or simply mix everything right in the container itself.
- Clean up the sides of the jar a bit with a spatula so you can still monitor the rise and fall. (Also, gunky jar sides are more likely to mold.) Re-mark the level on your container if needed.
- Now, let your homemade sourdough starter sit for another 2 days or 48 hours in a warm location.
FAQ: What to do with the discard? Normally, you can use the discard from a mature sourdough starter in a variety of discard recipes like our fluffy sourdough pancakes, sourdough granola, or delicious sourdough discard crackers. However, the discard is still too young and won’t be a great addition to a recipe at this stage, so simply trash or compost it this time. Avoid putting it down your sink drain as it can cause clogs over time.
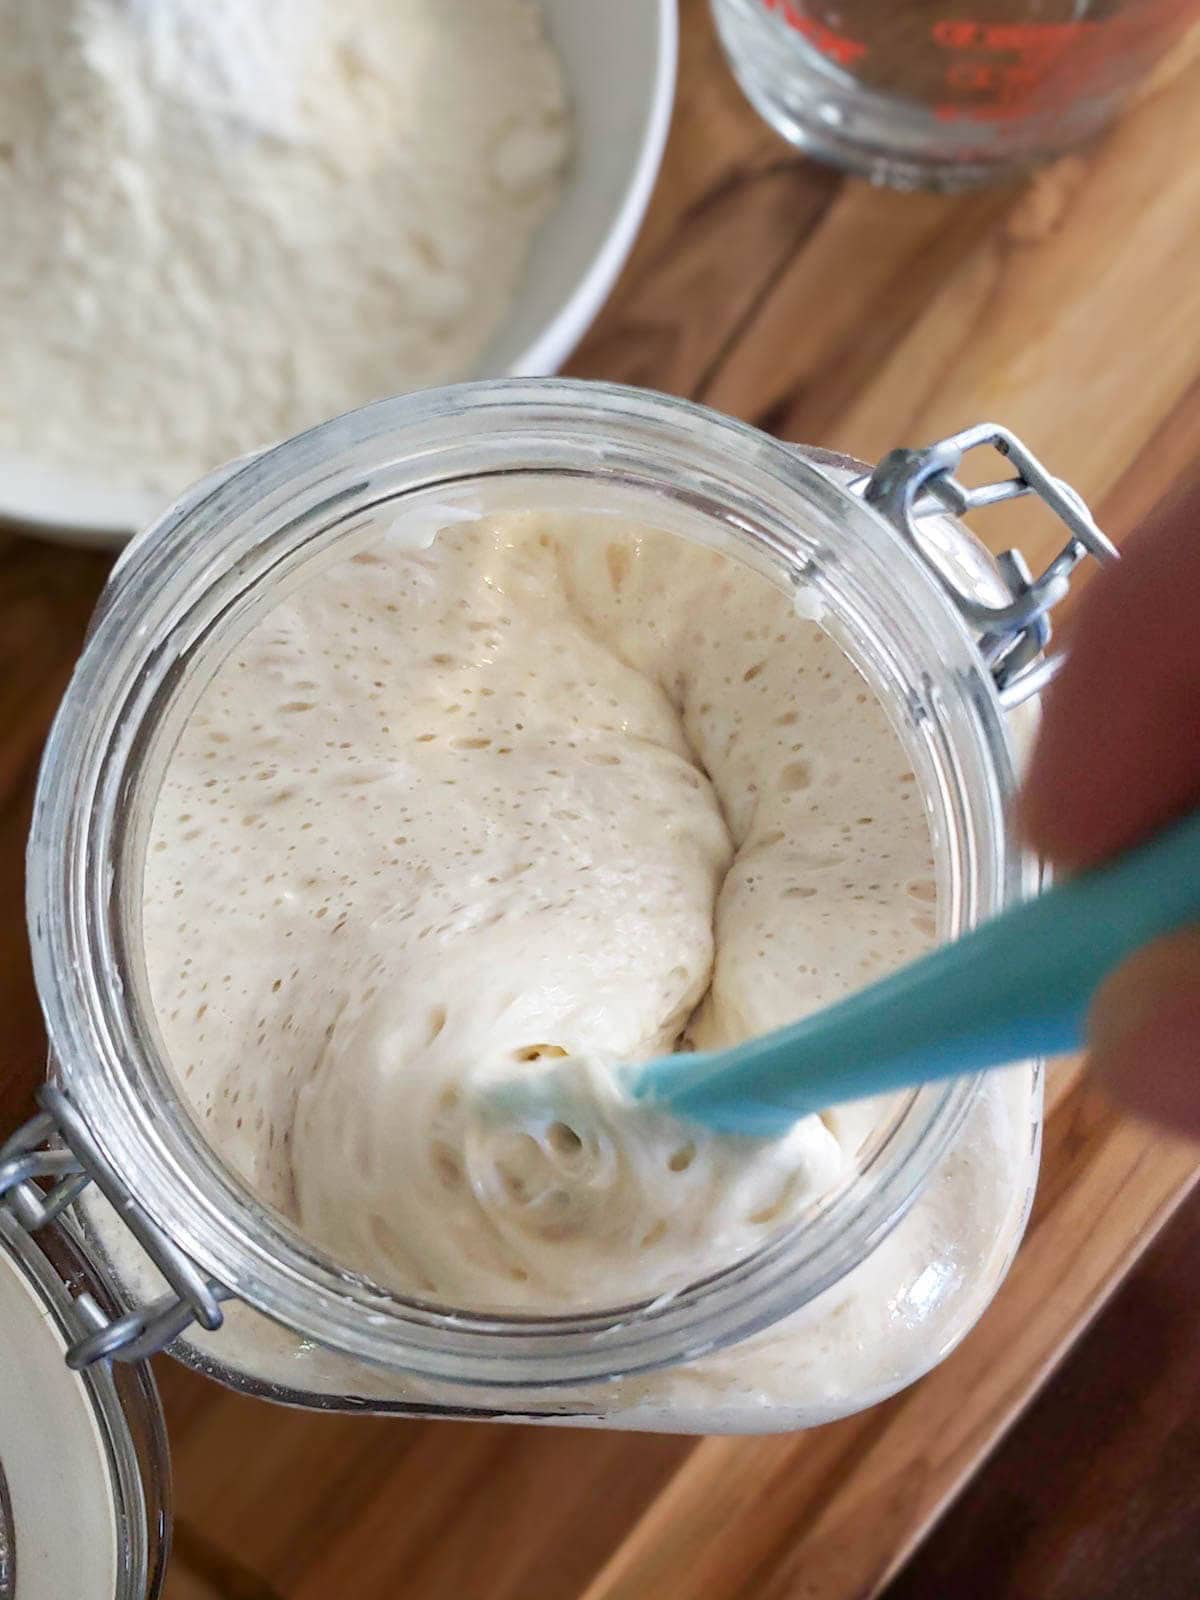
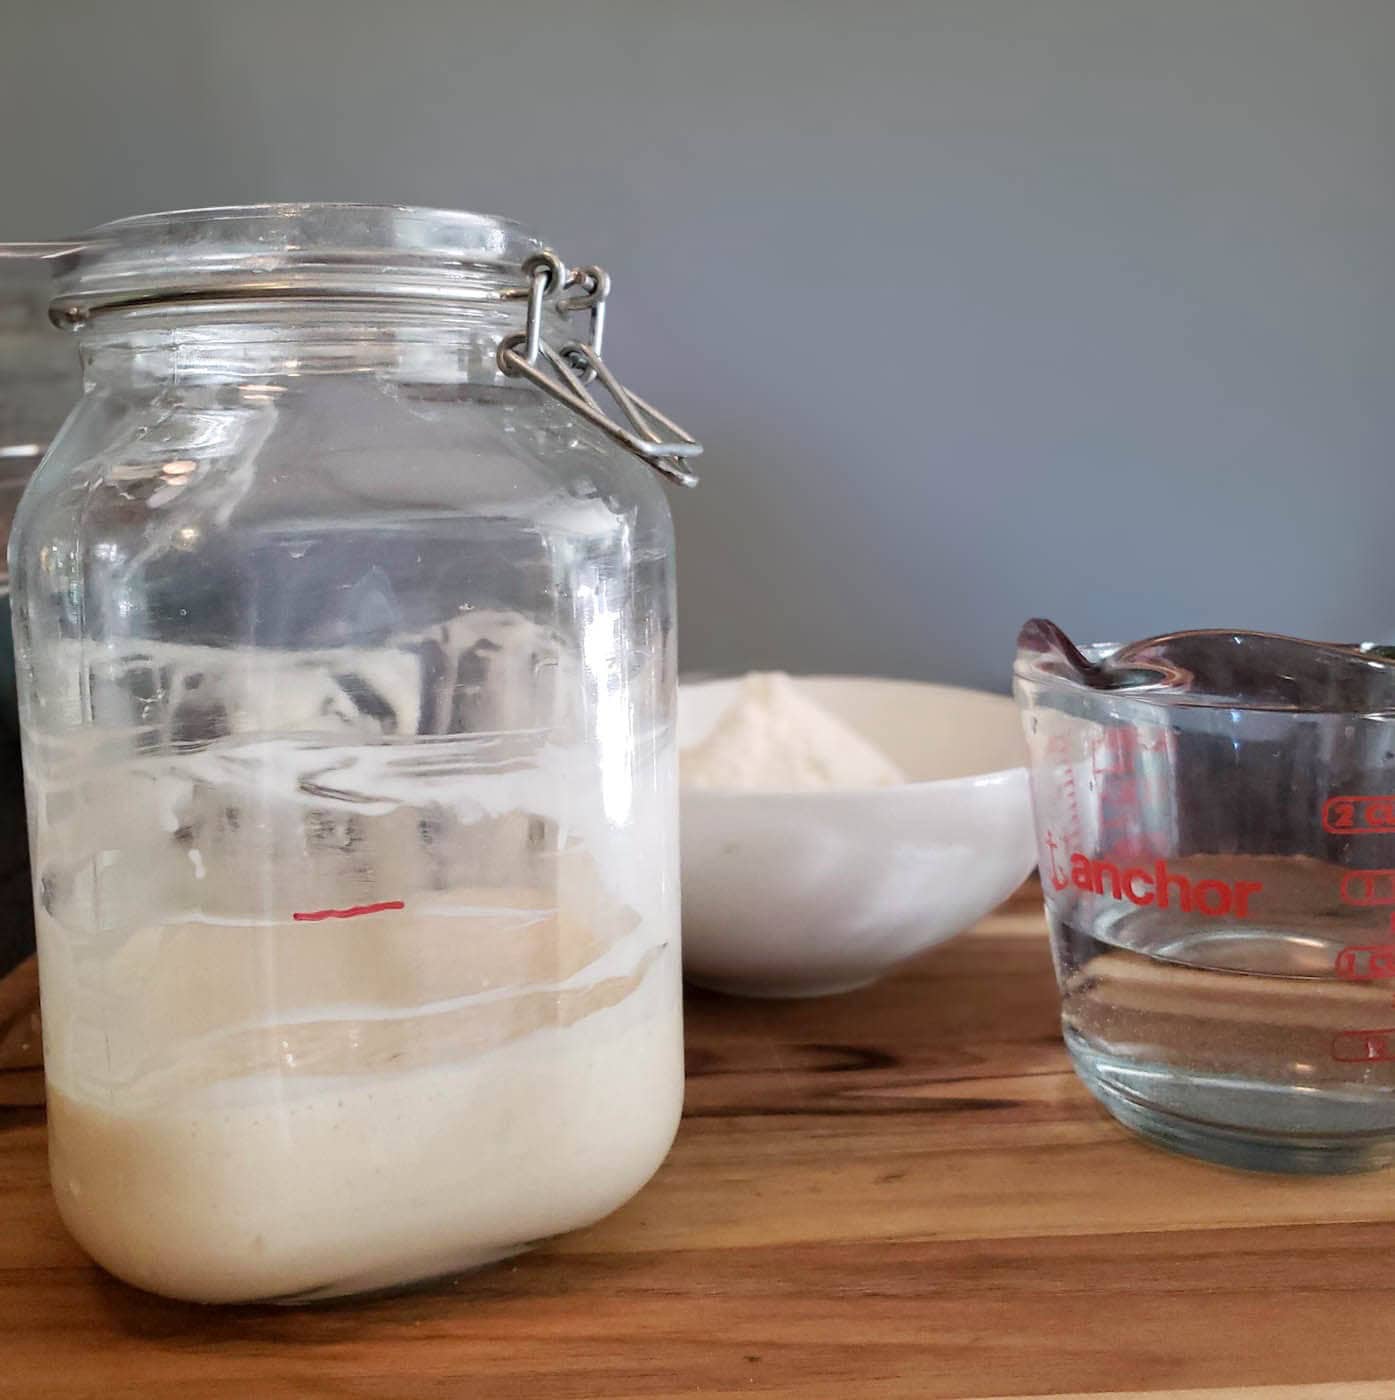
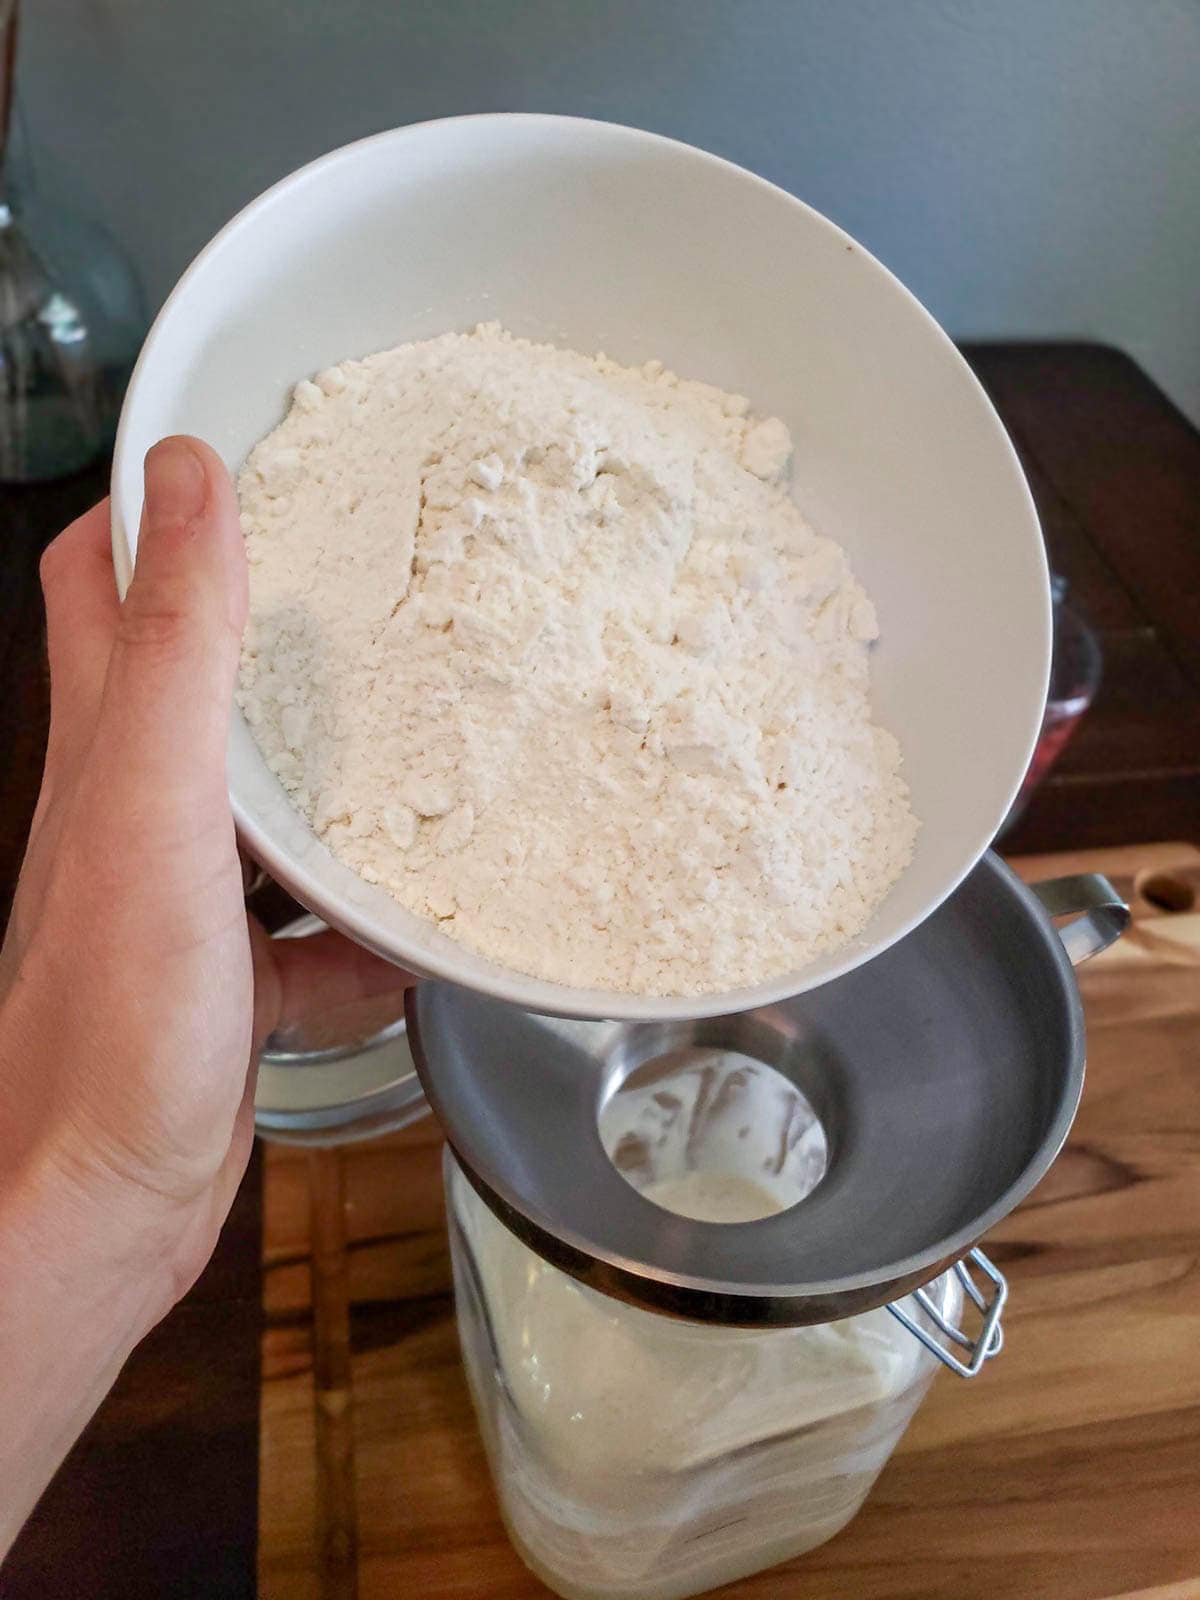
Day 5: Rest and Wait
Nothing to do today! Just let the new starter rest and rise. During this time, the colony of bacteria and yeast will happily feed on the fresh flour you provided, exponentially increasing their population as they do.
Day 6: Discard and Feed Again
Two days or about 48 hours after the first feeding, you should see a lot of activity and bubbles in your starter now! It also probably rose even higher than the first time. If so, it’s time to feed it again – just like you did on day 4.
However, if you’re not seeing much activity yet, let it sit for another day or two before discarding and feeding again. See more troubleshooting tips to increase activity below.
To feed, discard half the volume and then mix in another 250 grams flour and 170 mL of lukewarm water. It’s okay for the starter to be a tad more wet at this stage. It should be smooth and easy to stir, but not runny like pancake batter. If needed, add an extra splash of water (up to 30-40 mL more) until the desired consistency is reached.
Cover the sourdough starter and let it sit out one final time – for 24 hours this time.
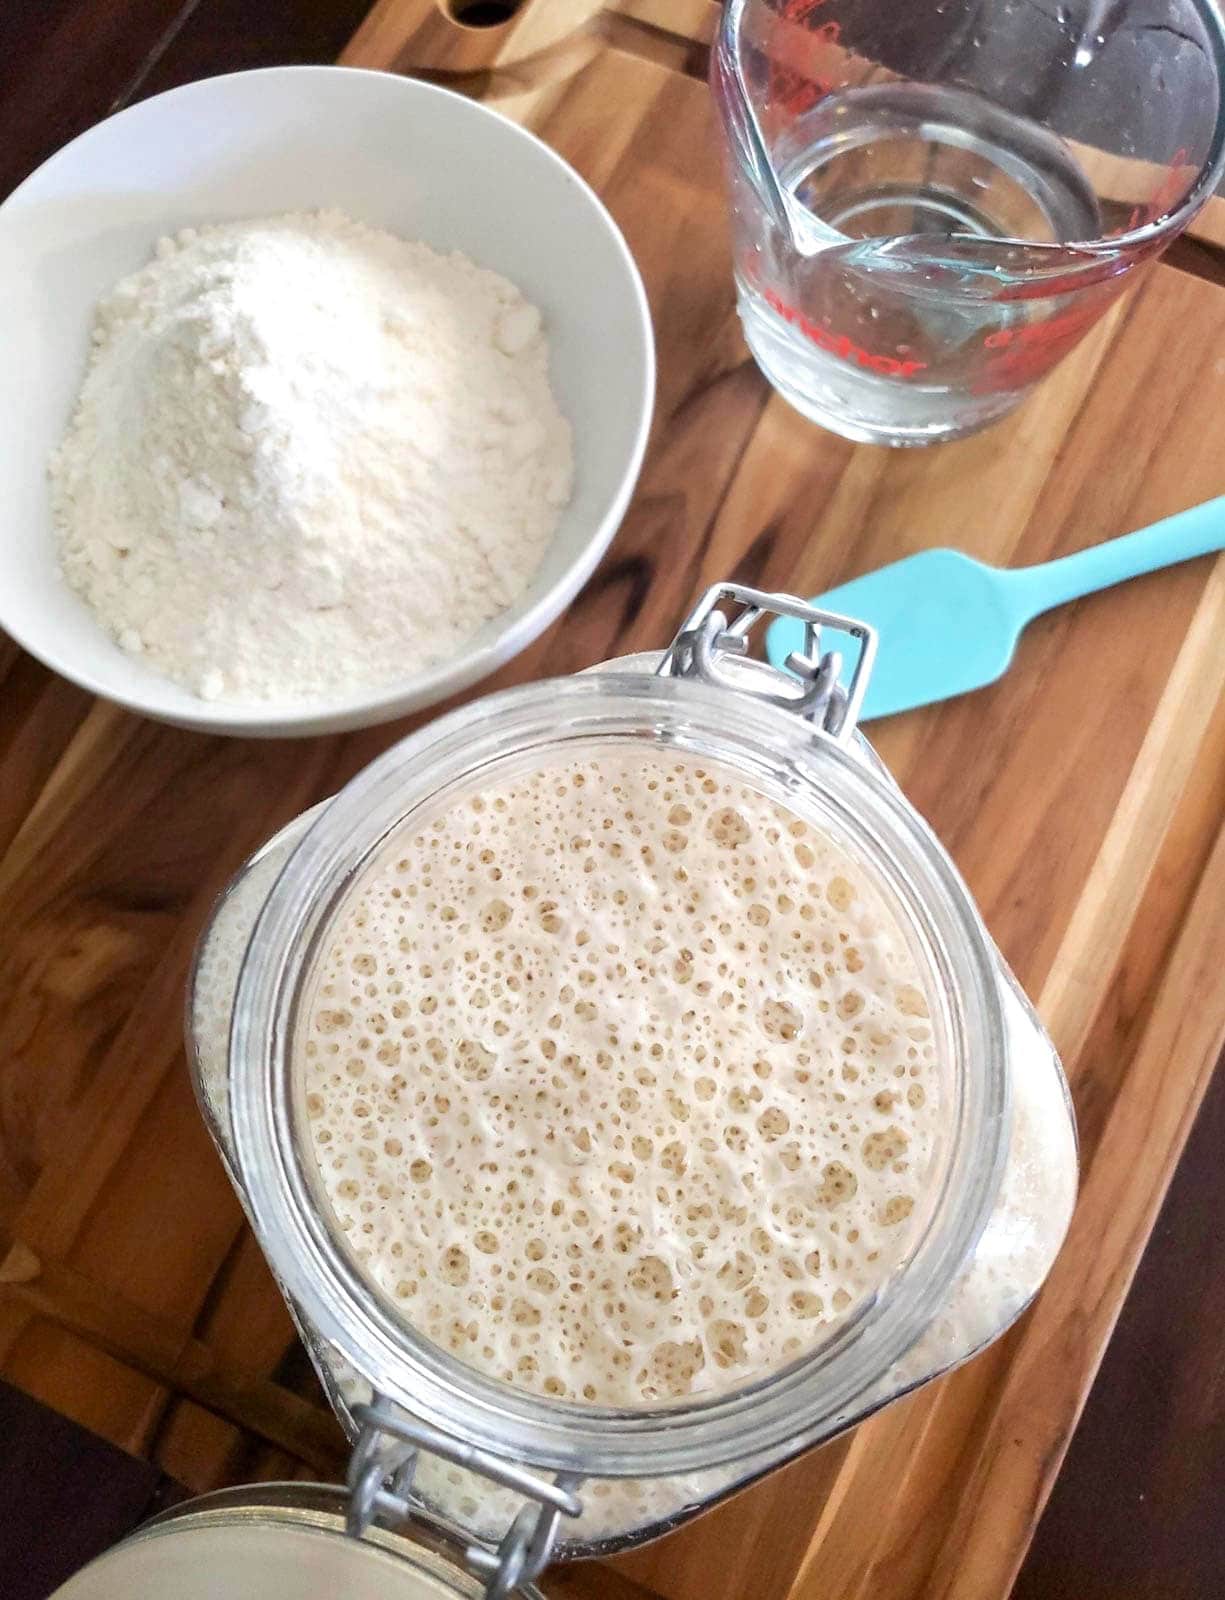
Troubleshooting
In most cases, a new sourdough starter should be bubbly and rising by day 6. However, if you are going to experience any issues, this seems to be the step where it may stall out.
- If there is no activity since the last feed, let it sit an additional day or two before feeding again.
- Is your home on the cool side? Try to find a warmer spot!
- If the starter has visible bubbles but doesn’t rise after feeding, the mixture may be too wet or runny (as varying home humidities and flour types can lead to different textures). When a starter is too wet, the bubbles rise right up and out of the mixture – rather than being trapped inside and causing the starter to puff up and become spongy. So, stir in more flour to thicken it up, adding just a few tablespoons at a time until it more closely resembles your original thick mixture from step 1 (a stiff dough).
- Another option is to try opening the lid of your jar. Cover it with a coffee filter or something else that will prevent fruit flies or other debris from getting inside.
- If your starter isn’t rising well and has a dark liquid formed on top, it may actually be overly active and hungry! Stir in a little more flour (and warm water as needed, if it becomes too thick and dry) and let it sit again. Wait a day or two to see if it perks up and begins to rise and bubble.
- Try to feed it with half whole wheat or rye flour, which usually enhances activity.
- If all else fails, it may be best to buy an established (dry) sourdough starter instead. Ours is foolproof to get going!
RELATED: Learn even more detailed troubleshooting tips in our guide on how to strengthen sourdough starter. Or, see this article on how to tell if a sourdough starter is bad.
Day 7: It’s Ready!
If it’s bubbly and active within 24 hours of the last feeding – congratulations – you just made a new sourdough starter from scratch! It’s now ready to bake with. (Keep reading below for tips on how to use and store it.)
But first, be sure to name your starter. It’s tradition among the sourdough community and considered bad baking luck if you don’t! Check out our round-up of the best 60 Punny Sourdough Starter Names for plenty of fun ideas.
Next Steps: How to Use and Maintain Starter
Now what? If you aren’t ready to bake yet, simply store your starter in the refrigerator and then head over to our guide on how to maintain and feed sourdough starter. It covers the pros and cons of storing it at room temperature vs the refrigerator, when and how to feed it, and how to ready a starter for baking.
Hint: it’s best to use sourdough starter for baking several hours after feeding, once it’s reached “peak activity” – which is when it’s at least doubled in size, is no longer actively rising, but before it deflates again. And remember, never use ALL your starter in a recipe! Always save at least a half cup to feed and keep going.
To make bread, try our go-to no-knead sourdough bread recipe with step-by-step instructions and video. Our simple sourdough focaccia recipe is even easier! You can make all kinds of fun and delicious things like sourdough pumpkin bread, sourdough pie crust, sourdough cornbread and more! Explore all of our sourdough recipes and tutorials here.

FAQ: What’s that dark liquid on the top of my sourdough starter?
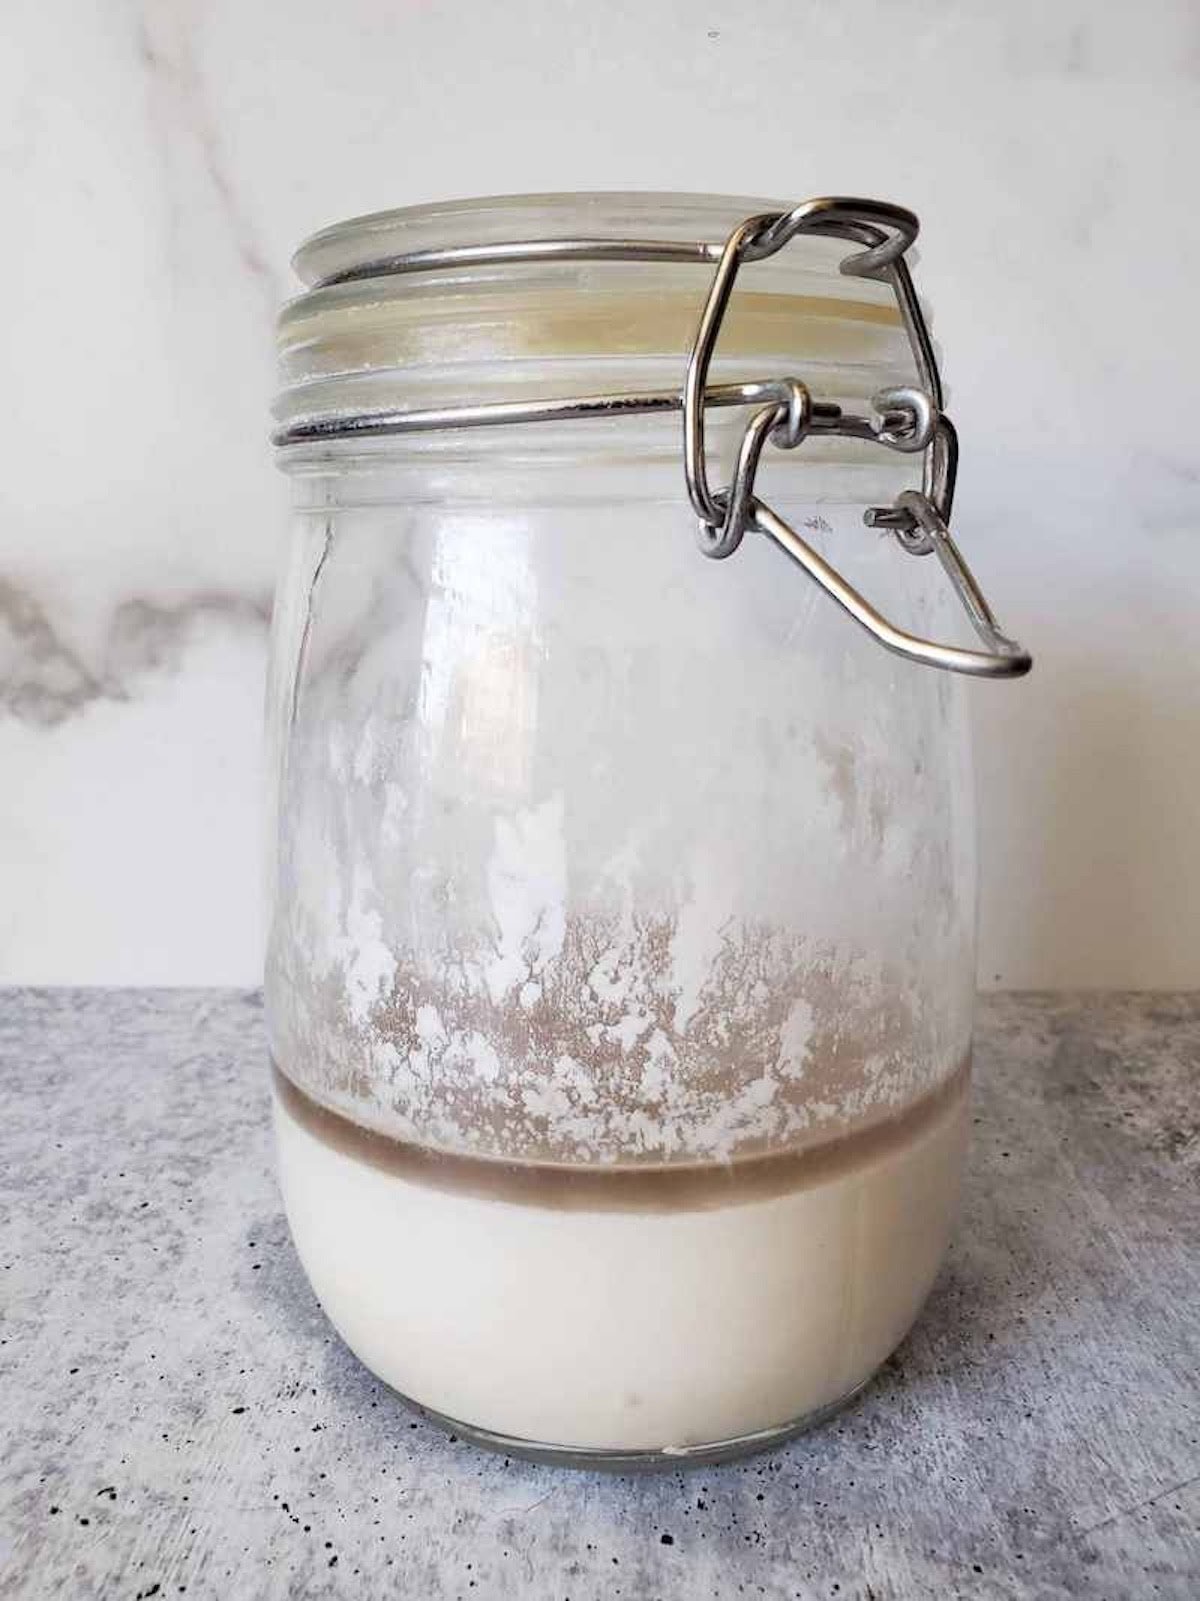
When a sourdough starter goes unfed for a while, it will form a layer of dark liquid on top called “hooch”. The yeast in starter produces hooch (an alcohol) as a natural byproduct of the fermentation process. Hooch is not harmful, but is an indication that your starter is hungry and needs to be fed.
When you see hooch, you can either pour it off the top or simply mix it back in, and then discard and feed as usual. However, mixing hooch into the starter will make it extra sour-tasting. Since we store our starter in the fridge and often go many weeks between baking/feeding, it almost always has a layer of hooch on top.
And that concludes this lesson on how to make sourdough starter from scratch. If you found this helpful, please leave a review in the printable recipe summary below! As always, feel free to ask questions in the comments below too. Have so much fun baking!
Video Tutorial

How to Make Sourdough Starter From Scratch
Equipment
- Large, glass, air-tight container (2 liter or half-gallon)
- Kitchen scale
- Mixing bowl
- Silicone spatula
Ingredients
- 500 grams organic bread flour or all-purpose flour
- 360 mL filtered water, room-temperature
- 1 large organic apple (or 2 small apples)
Instructions
- Wash your apple, but avoid using soaps or produce wash. Using a cheese grater, grate the organic apple into semi-fine shreds. Use the skins, but discard the core.

- Add the called-for flour, grated apple, and water to a mixing bowl and thoroughly combine.

- Transfer the mixture into a large glass airtight container that has enough room for it to at least double in size, minimum. (Ours usually quadruples while fermenting) Pack the mixture down into the bottom of the container. Close the lid.

- To monitor growth, mark the side of your container with a washable marker or rubber band at the top level of the mixture.
- Let the mixture sit for 3 days at a temperature of 70-75 degrees F. It should bubble and rise during this time.

- After approximately 72 hours, thoroughly stir the mixture and then discard half of the amount. Then, thoroughly mix in another 250 grams of flour and 170 mL of tepid filtered water to the remaining starter mixture. This is called "feeding" the sourdough starter. You can do this either in a separate bowl, and put it back into a now-clean ferment vessel, or like we do, mix it in place.

- Re-mark the container to note the height of the mixture. Let sit at 70-75 degrees, for 2 days or 48 hours this time.
- After 48 hours, repeat the same discard and feed process as done previously. Discard half, feed, mix, mark the level, and cover again.

- Allow the sourdough starter mixture to sit for a final 24 hours.
- Once complete, you now have a happy and active sourdough starter! Store it in the refrigerator when not in use, giving it a discard and feed weekly. OR if stored at room temperature, feed it daily to keep it alive.


Notes
- If there is no activity, let it sit another day or two.
- If your starter has risen and fallen, or, if seems to not rise after the first discard and feed, and instead it has a dark liquid formed on top (called hooch), it may actually be overly active and hungry! Stir in a little more flour (and warm water as needed, if it becomes too thick and dry) and let it sit again. Wait a day or two to see if it perks up and begins to rise and bubble.
- If your home is cold, try to find a warmer spot if possible!
- If the starter doesn’t rise at all after the first discard and feed, try opening the lid of your jar. Cover it with a coffee filter or something else that will prevent fruit flies or other debris from getting inside inside.
- Another troubleshooting tip is to feed with half whole wheat or rye flour, which usually enhances activity.
- Ensure that you use an organic apple.




305 Comments
nancy
Hi Deanna! I finished my starter today and since we are going to make 2 loaves at a time I kept 2 cups of the starter then added around 2 cups of flour and 1 cup of water. Then I put it in the fridge because we want to make it Sunday so I thought I’d take it out tomorrow night. Do I feed it again then? I’m not clear on the timing of taking out and feeding if we plan to make 2 loaves every Sunday! Please help!!
Bruna
Hi Deanna! (And anyone else that can help!
I’m about 40 hours into my starter and it’s already overflowing from a 2 liter container! Very exciting, but I have not been able to find any troubleshooting tips on how to manage it until I hit the 72 hour mark.
Do I just let it overflow? Open to relieve some air? Open and push it down to make some space? Put it in the fridge?
This beginner needs some help 🙂
Thanks in advance!
DeannaCat
Hi Bruna! You can let it overflow (over a plate!), and it should start to sink back down soon. But if it seems really, really frisk (like hissing out the jar), you can definitely burp the jar without harming anything! That may settle it down a bit too. I hope that helps! Report back! 🙂
Kari
I followed this recipe in June of this year and had no problems getting my sourdough starter going. My glass storage jar will never look as pretty and clean as your does (seriously, how is that possible!?!) but I’ve used it now for three loaves of bread and two batches of crackers and it’s performed beautifully. In conjunction with your great posts, it may also be because I named her Grace… knowing I’d need a little grace from her when it came time for baking and keeping her fed & happy. 🙂
DeannaCat
Aw, Grace has done you well it seems! Thank you for the feedback! And… I may or may not have given the glass an extra swipe or two with the rubber scraper for its photo shoot – but our jars are normally plenty messy! Don’t worry 🙂
Maggie
Thanks for the recipe! I tried 3 times unsuccessfully, but recently had some success. Originally, my starters would just sit inactive (no rise or fall, no hooch) after the first feeding. What finally worked was during the second phase (after the first discard) I noticed that the jar would pop when I opened it. I decided to leave the jar cracked open to increase air flow and activity quickly increased. Just a tip to anyone who experienced similar trouble.
DeannaCat
Maggie! GREAT tip! I had been wondering about that, but needed the confirmation! I just updated the article to include that in the troubleshooting section. 🙂 Thanks again! I am glad you found success!
Meg
Hi Deanna! Thank you so much for all the work you’ve been putting into the blog. I’ve been wanting to try making my own sourdough for ages, and earlier this summer I tried your method. My starter rose and fell rapidly during the first 2 days, and when I discarded and fed it again on the 3rd day, it did not get active again. Now I’m trying again, and I’m wondering if I should discard and feed sooner than 3 days if I notice it falling back down significantly…?
DeannaCat
If that does happen, give you can certainly try feeding it earlier and see what happens. Did you see my other troubleshooting tips on that step… like if it doesn’t rise again right away, to give it extra time? Or that you can also try feeding with half whole wheat or rye flour. Please do report back to let us know how it goes!
Barbara Steward
I’ve been hesitant to try this because although I’m all for experimention, I’m wondering whether you have any idea if this will be as successful with a gluten-free flour?
Barbara Steward
I’ve been hesitant to try this because although I’m all for experimention, I’m wondering whether you have any idea if this will be as successful with a gluten-free flour?
Shae
When you pull your starter out of the fridge 1-2 days prior to using it and you say feed it at least twice before using it in a recipe, are you discarding + feeding at this time? Or just feeding? Not sure if I’m supposed to discard before feeding every time or not at this stage. Thank you!
DeannaCat
Yep! Sorry about the confusion. In the sourdough world “feeding” always means both discarding and feeding – the whole process 😉
Jenn
Can you specify how you cover it during the feedings before baking? I usually just cover mine with plastic wrap but you seem to completely close the lid of the jar? While my starter works when I make a loaf, it never overflows like yours does when I see in on instagram and I’m wondering if that’s because you close the lid completely?
DeannaCat
We always keep our lid clamped closed. Without it, the gases escape rather than being trapped inside to create bubbles and rise 🙂
Amanda Jaramillo
My first discard and feed the mixture definitely smelled… Interesting. Not rancid per se and no mold but intense. Is that bad?
DeannaCat
Haha! Well, it if looks okay, I think it should be alright! It should smell more like apple cider vinegar and maybe even a tiny alcoholic and spunky, but not BAD? Then again, I like the smell of apple cider vinegar?