

Pressing Flowers for Beginners: How to Press Flowers 4 Ways (Pros and Cons)
Come learn how to create the most beautiful, colorful, long-lasting preserved flowers! This beginner’s guide will explore how to press flowers four different ways – in a book, traditional wood press, microwave press, or using an iron – along with honest pros and cons of each method based on my experience pressing flowers for many years.
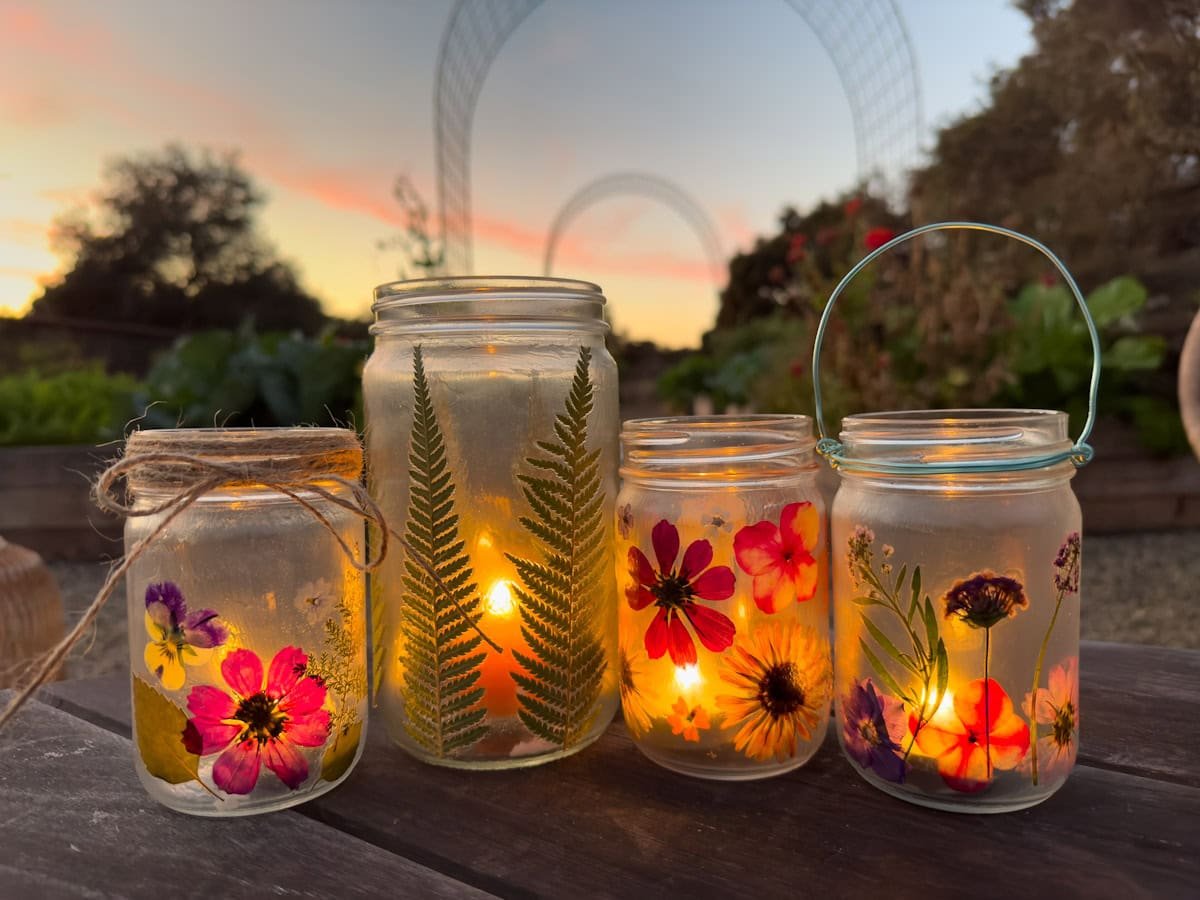
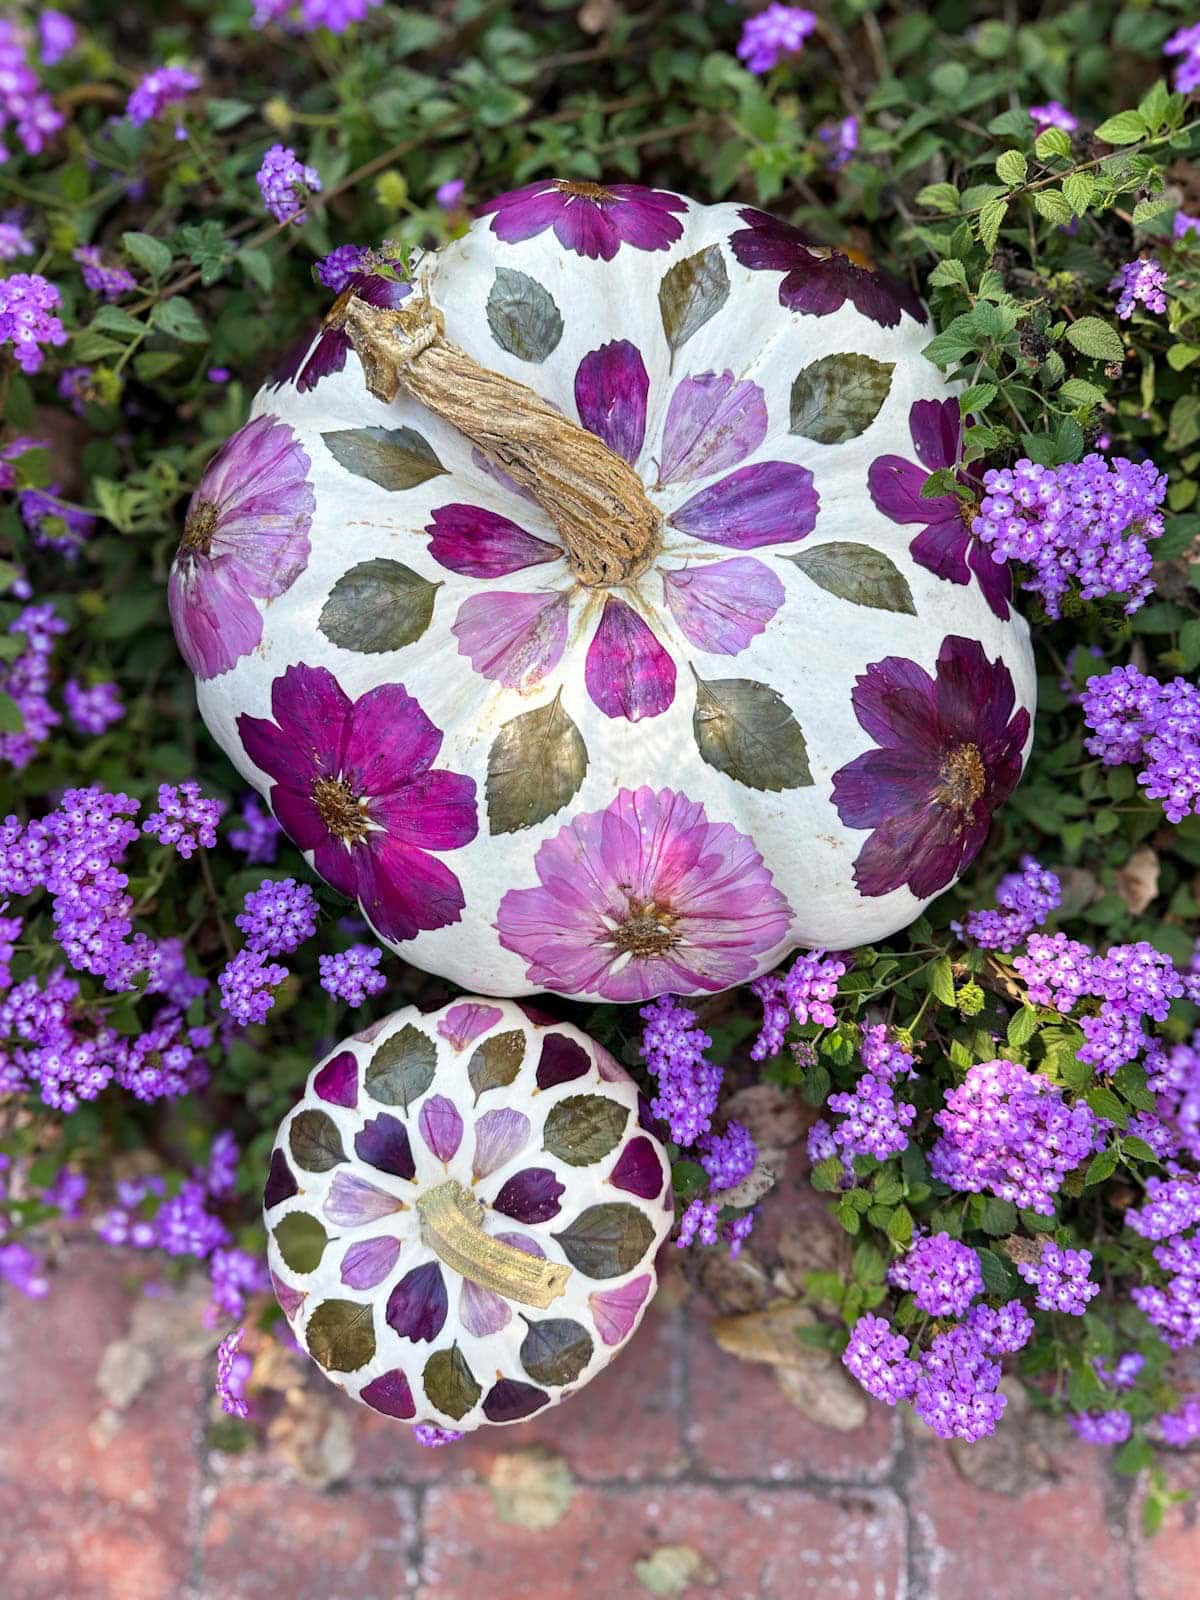
We’ll also talk about the best types of flowers to use, how to store them, and other tips to get the best results possible. Then you can use your collection of dried flowers for creative craft projects, framed art, scrapbooking, and more. I especially love to make pressed flower candle lanterns (they’re super sweet DIY gifts!) and dried flower pumpkins in the fall.
Would you like to save this?
Disclosure: Homestead and Chill is reader-supported. When you purchase through links on our site, we may earn an affiliate commission.
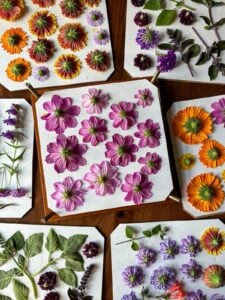
Choosing the Best Flowers to Press
Flowers that are naturally thin, flat and have a single row of petals are the easiest to press. On the other hand, thick fluffy flowers with several layers of petals tend to be more tricky (if not impossible) – especially those with large dense centers like zinnias or marigolds.
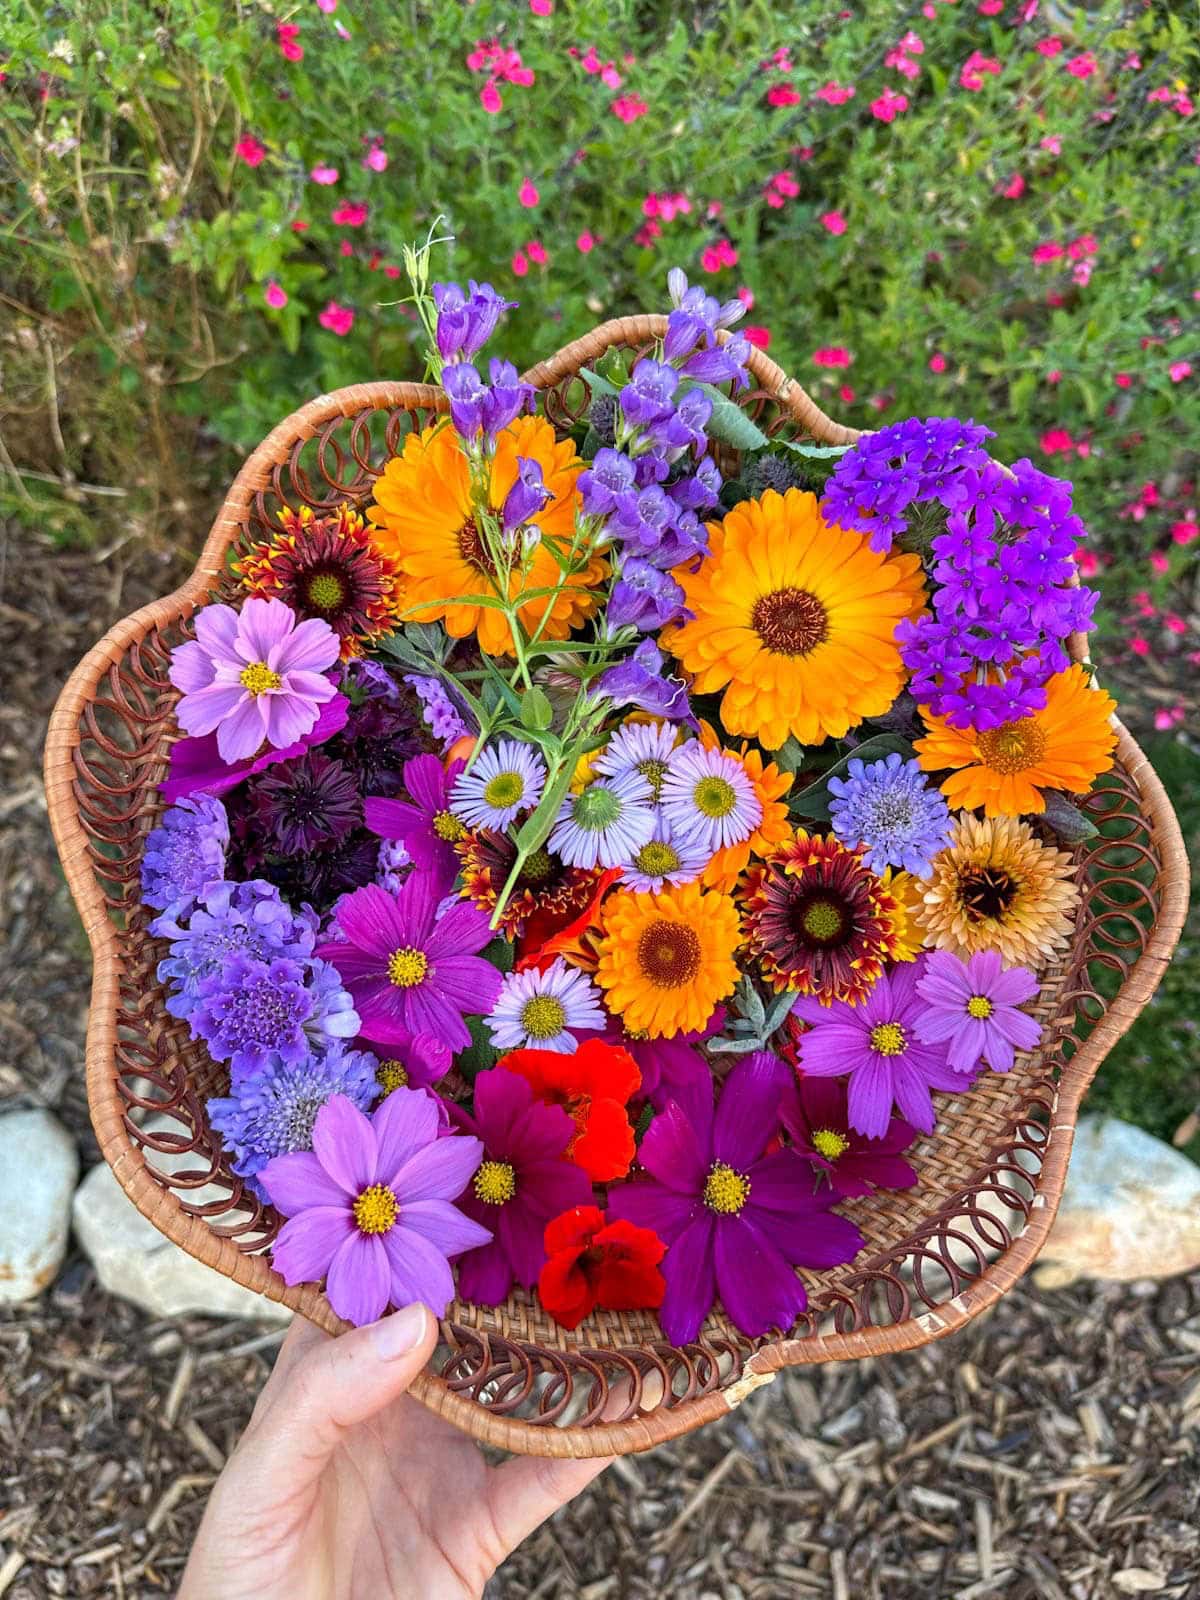
Choose flowers that are fully open and blemish-free. The more fresh and young the blooms are, the better they retain their color! Pick flowers while it’s still cool in the morning to use quickly thereafter. Here is a list of some of the best flowers to press:
- Cosmos – my personal favorite. This year I’m growing more cosmos varieties than ever, in part because I love to press them so much!
- Violas or pansies
- Daisies
- Asters
- Poppies
- Calendula
- Bougainvillea
- Delphinium and larkspur
- Buttercups
- Petite roses
- Forget-me-nots
- Scabiosa
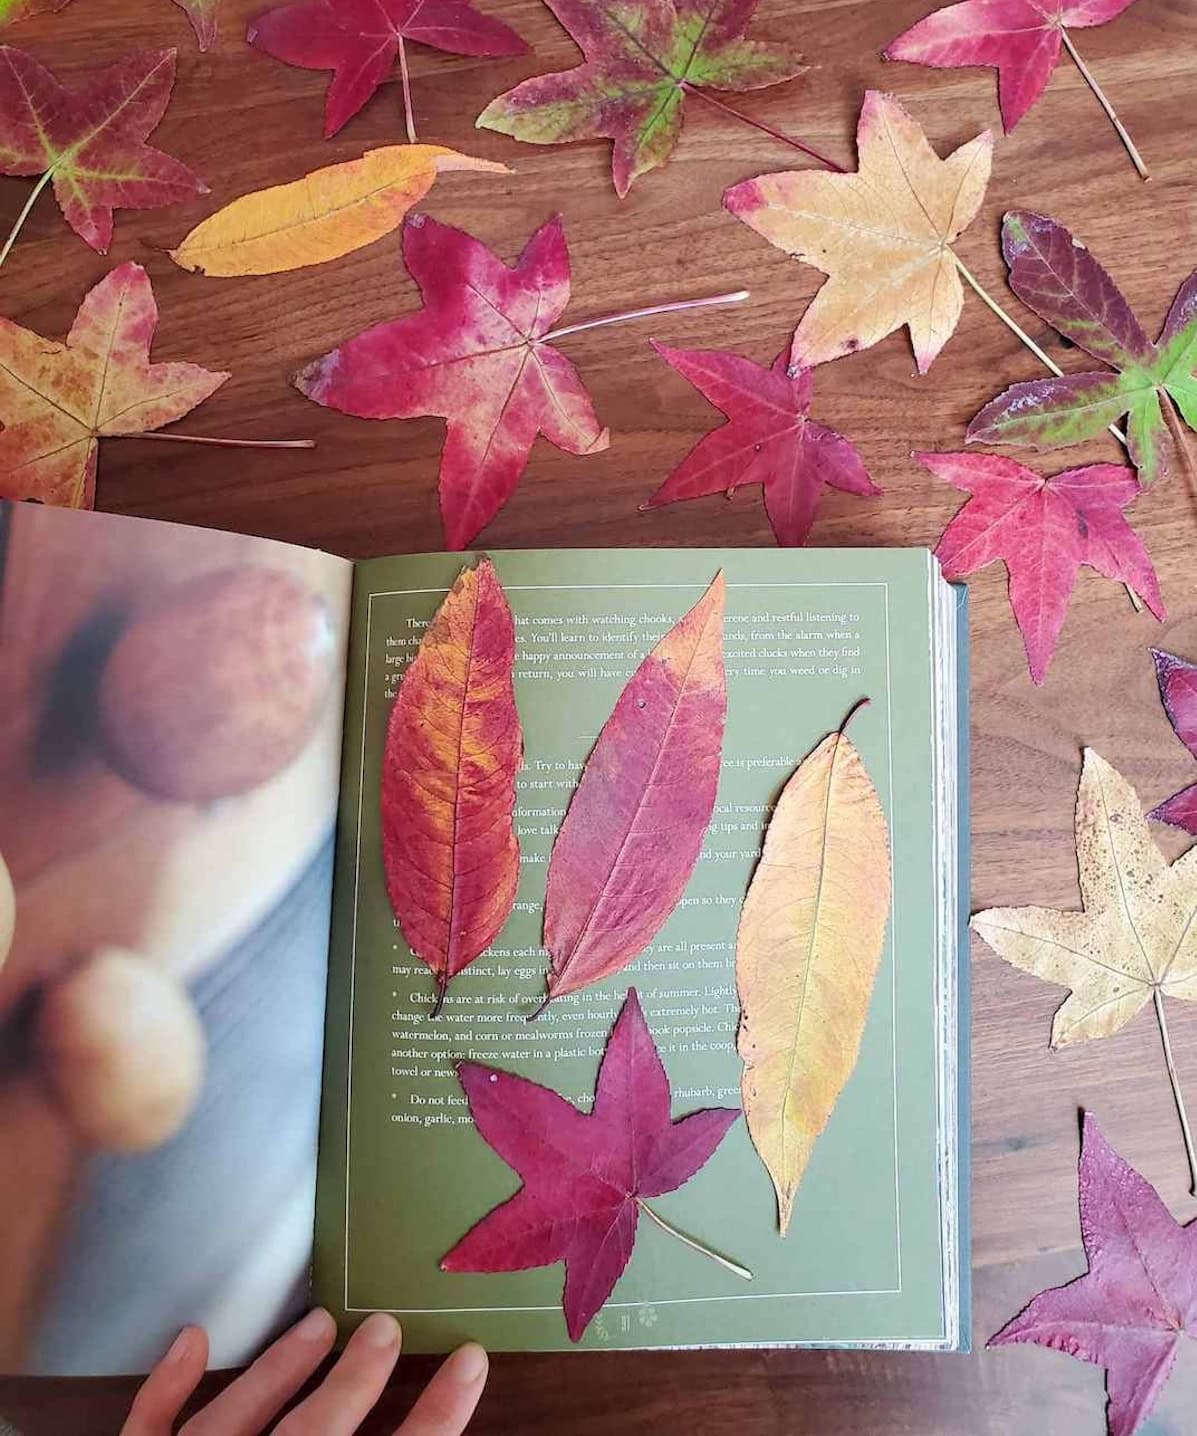
- Leaves, herbs, grasses and ferns can also be pressed and dried. Colorful fall leaves are especially gorgeous!
- Rather than preserving the whole bloom, you can also press single petals from larger flowers, such as individual peony, sunflower, or rose petals.
I also love pressing native wildflowers like clarkia, baby blue eyes, fuchsia and Indian blanket. I’ve had great results with ferns, colorful fall leaves, African blue basil, lemon verbena, tulsi, and other herbs. Have fun experimenting! Art is all about trial and error.
TIP: The more flowers you pick, the more will grow! Regularly deadheading flowers promotes new fresh blooms and larger, bushier, healthier plants overall.
How to Press Flowers: Tips for Success
Whether you’re pressing flowers in a book, wooden press, microwave or with an iron – follow these tips for success! (See specific instructions for each method to follow.)
- Place the flowers face-down for pressing. They tend to stay put better that way.
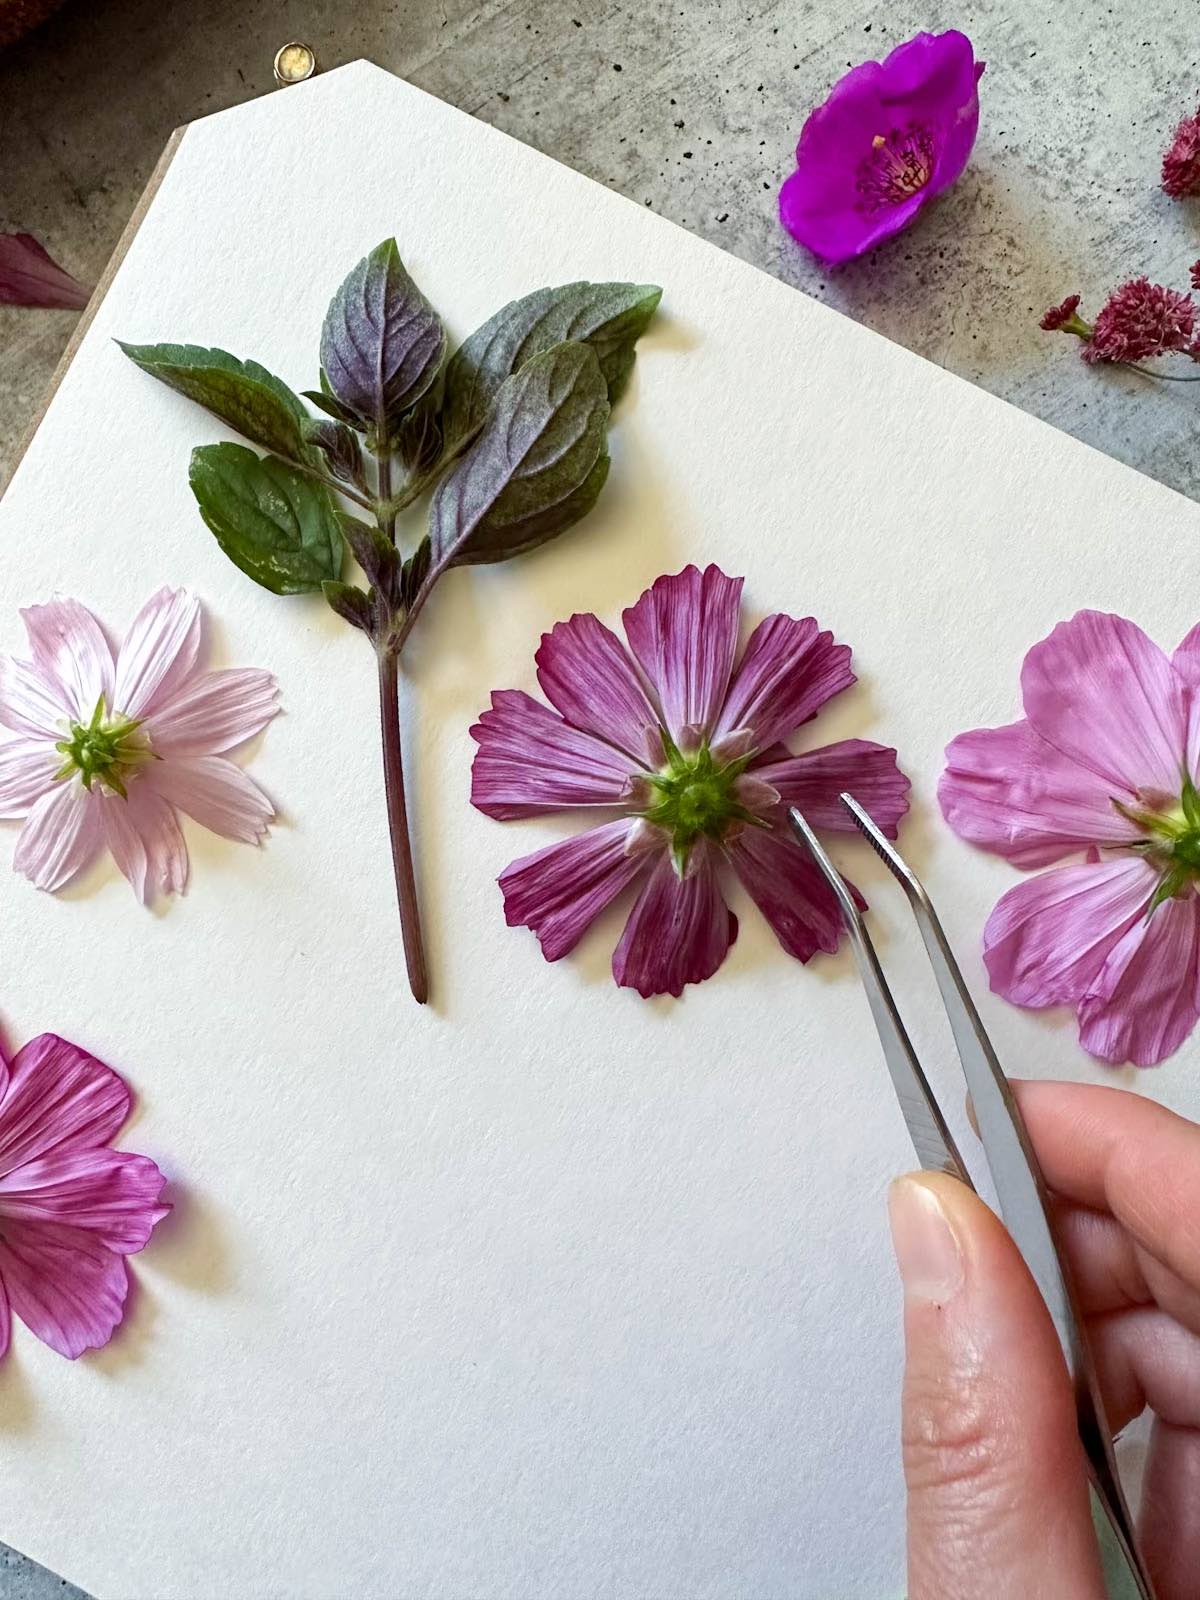
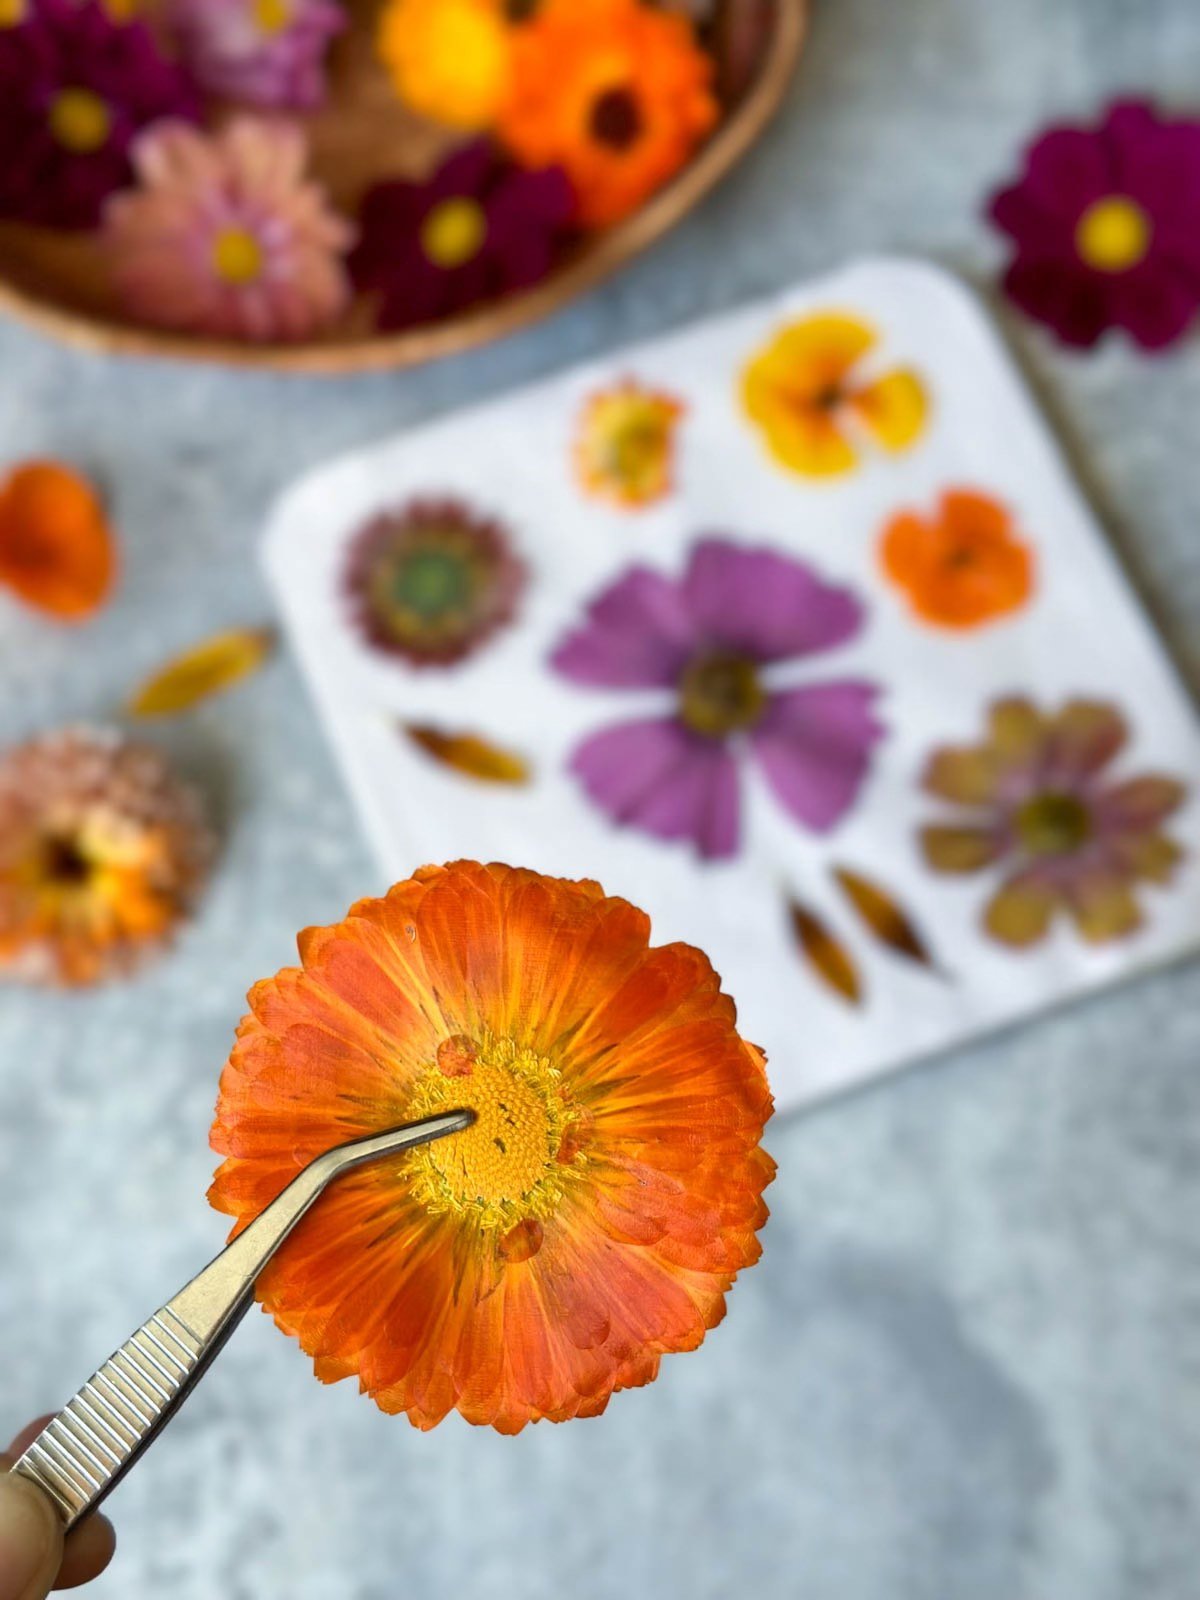
- Gently spread the petals open evenly around the center. Take care to flatten the flower in the shape you want it to look like once it’s dry. Use craft tweezers to adjust their positioning as needed.
- Or, capture a “side profile” by flattening the flower closed, which I like to do for tubular or bell-shaped flowers, or buds that aren’t fully open yet.
- Do not overlap flowers; they’ll stick together as they dry! Provide at least 1/2 to 1 inch of space between them since some blooms may spread out more as they’re squished down.
- If it’s damp or dewy outside, allow just-picked flowers to air dry inside for a few hours before putting them in the press. Extra moisture can easily lead to mold! To prevent wilting, I place the stems in a glass of water before setting them in front of a fan to dry for a bit.
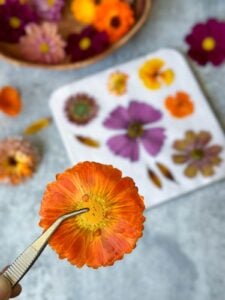
- Once they’re dry, handle your pressed flowers with care. They’re very delicate and often stick to the paper. Use tweezers to help gently peel them away from the pressing paper, to pick them up, or to arrange them for your craft projects.
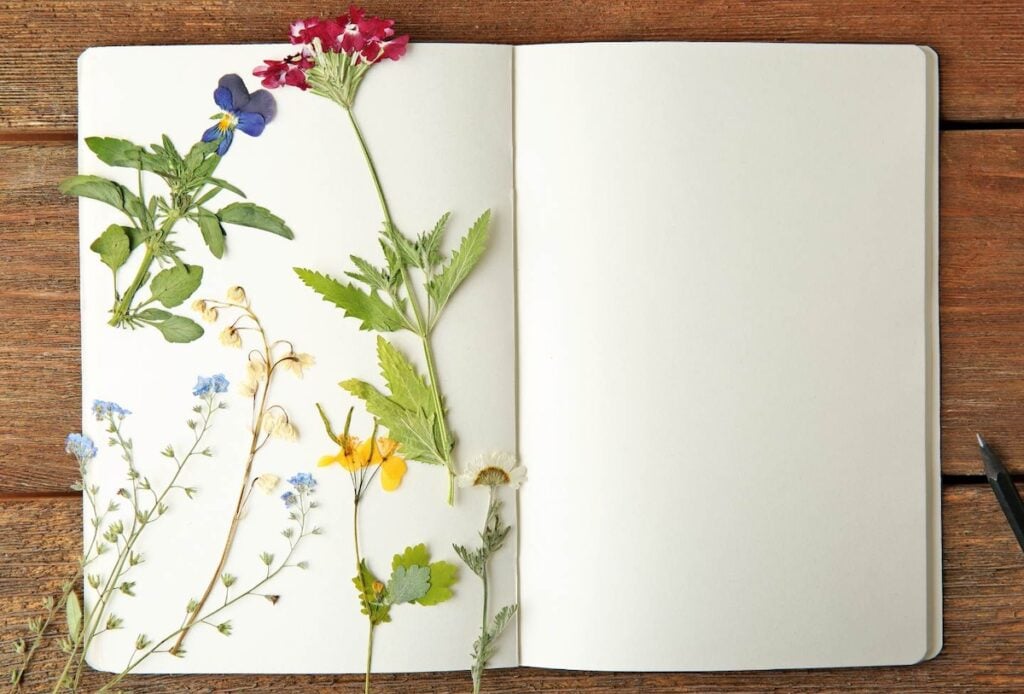
Pressing Flowers in a Book
It’s very simple to press flowers between the pages of a large book – and you likely have everything you need already at home! However, keep in mind that book-pressed flowers take several weeks to dry and are at a higher risk of browning (losing color) or molding compared to other methods.
How To:
- For the best results, add layers of absorbent paper between the book pages first – such as parchment paper, newspaper, or reusable blotting paper.
- Arrange flowers face-down (not overlapping) and try to group ones of similar thickness together.
- Once the flowers are tucked flat within the book, set additional heavy objects on top of the book to provide extra weight. I often use a stack of heavy books, hand weights, or other bulky decorative items from around the house.
- Alternately, you can place flowers between pieces of paper and then stack large books on top (rather than putting them within the pages of the book itself).
- Keep the flowers in the book for at least 2 to 3 weeks until fully dry. Larger, thicker flowers may take up to 4 weeks.
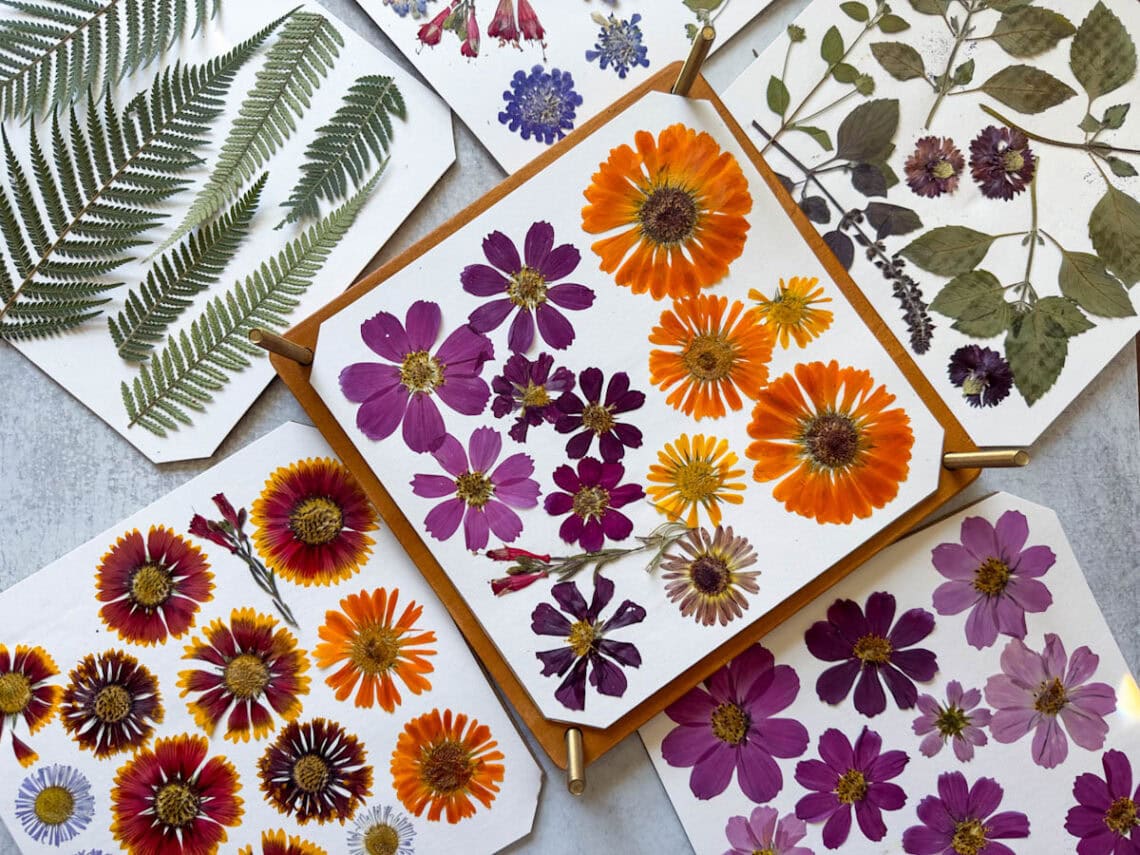
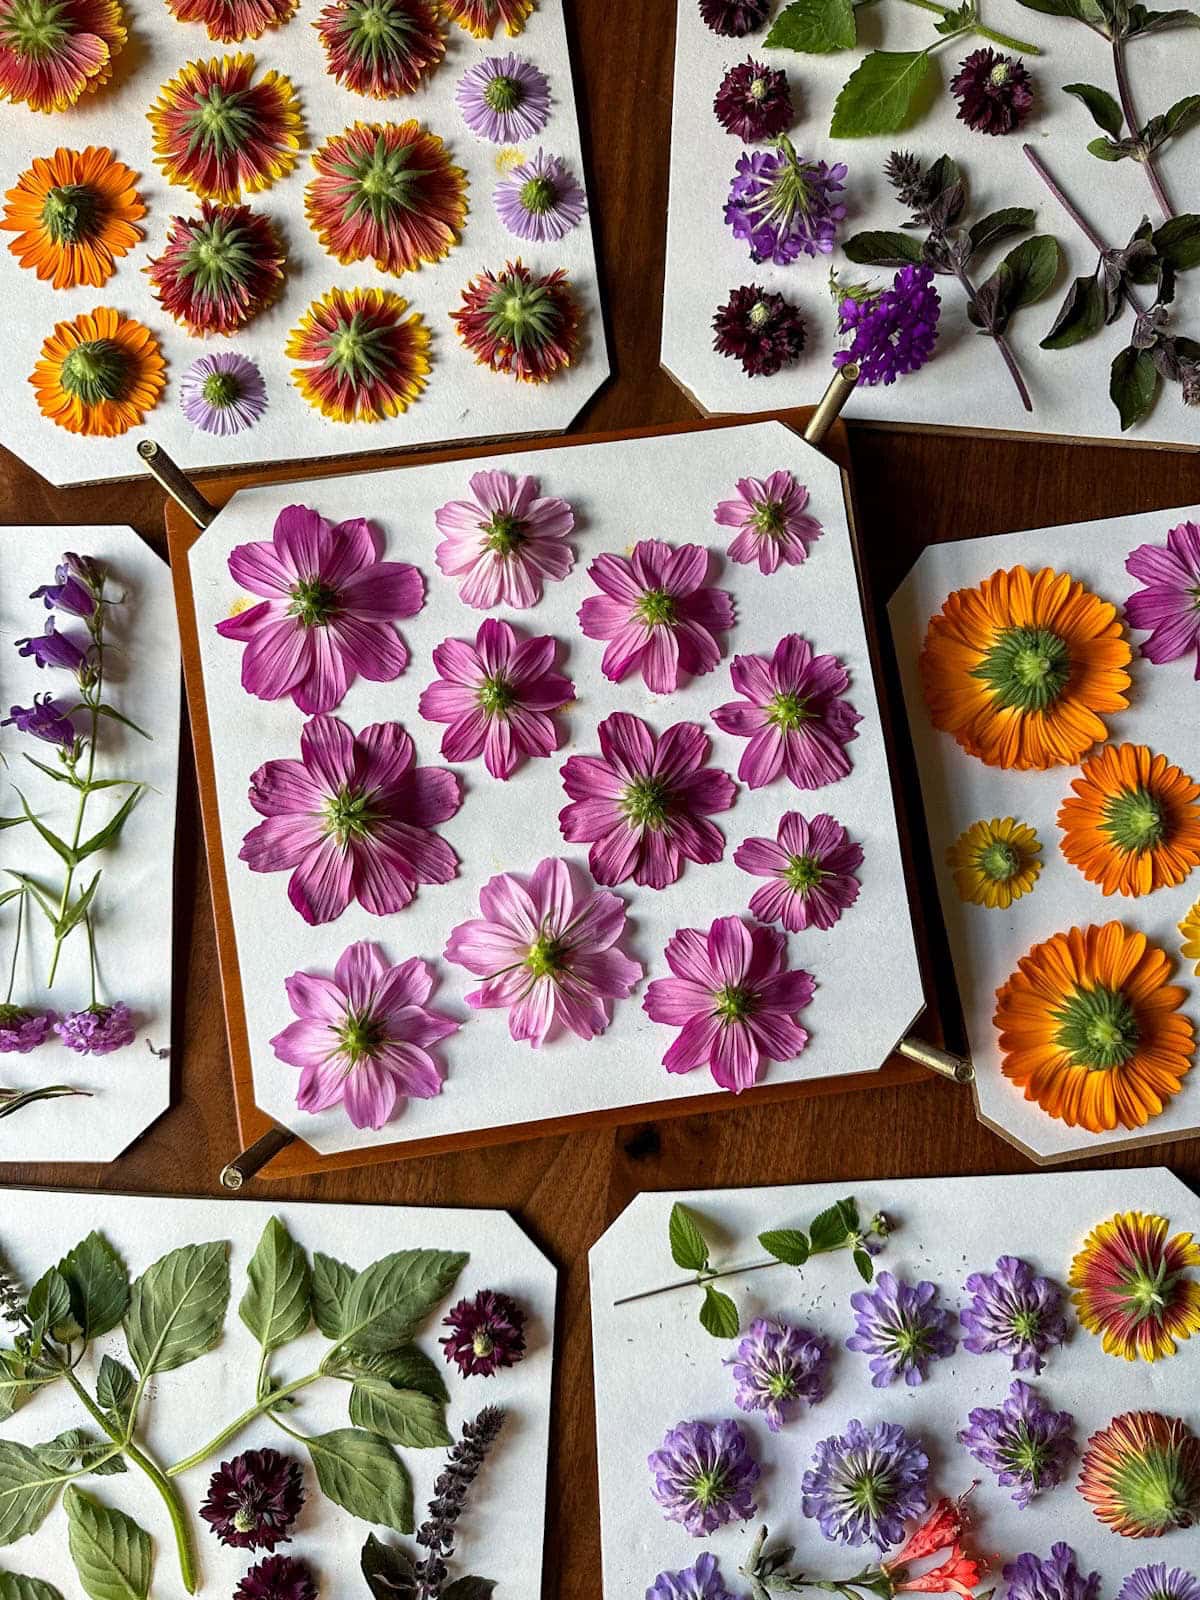
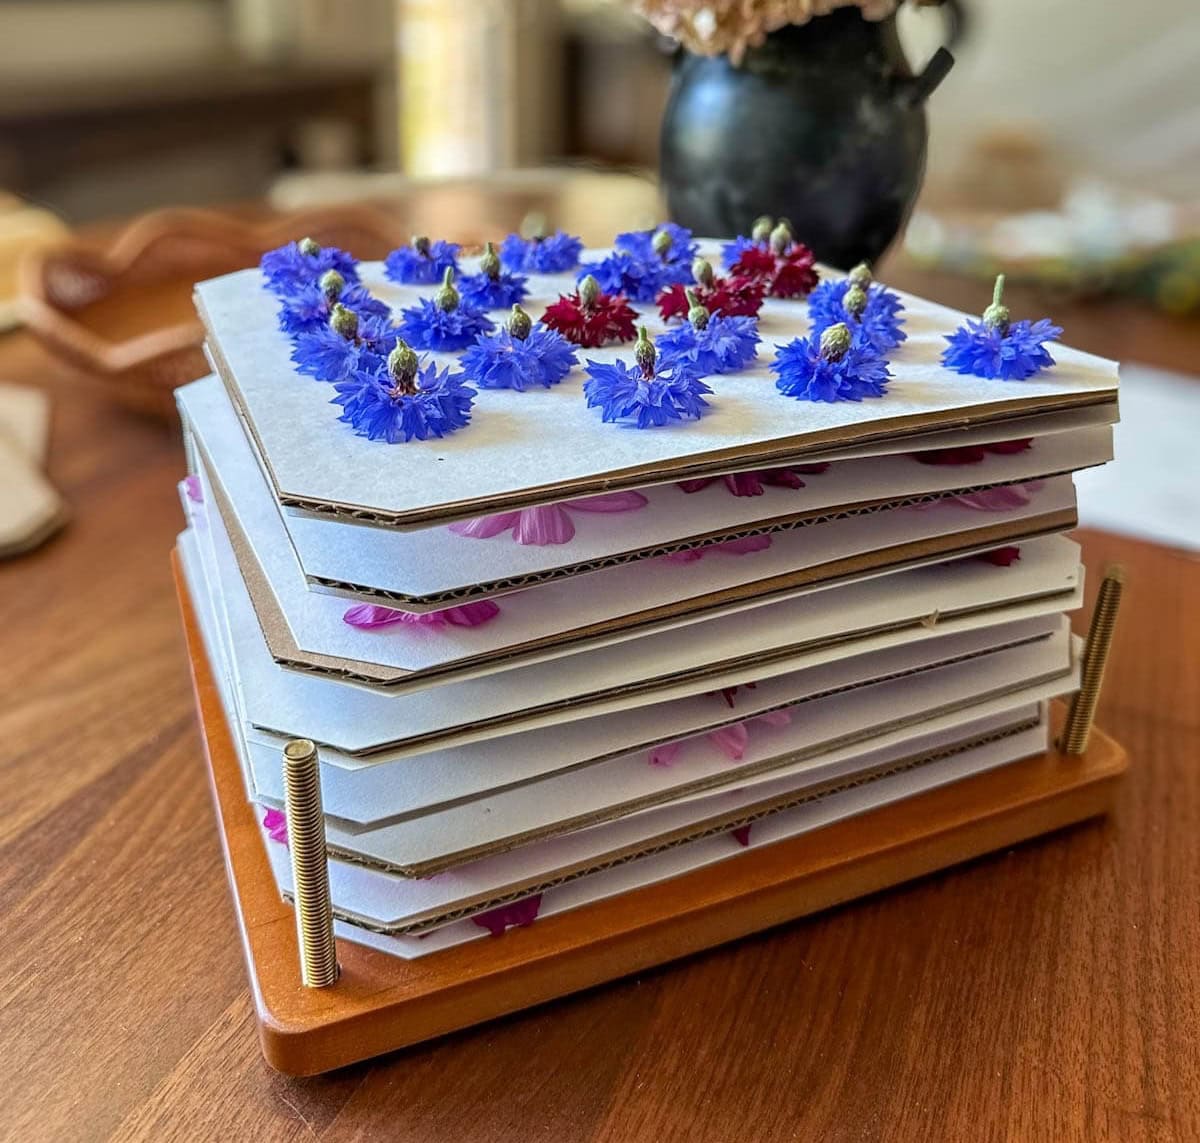
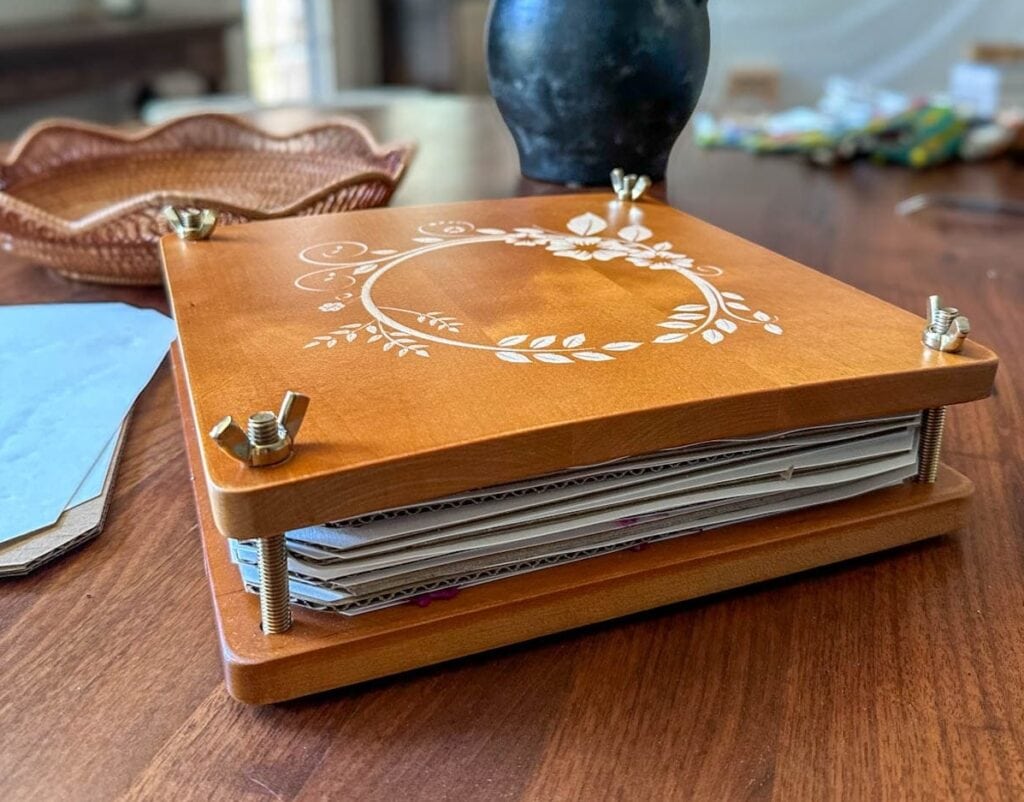
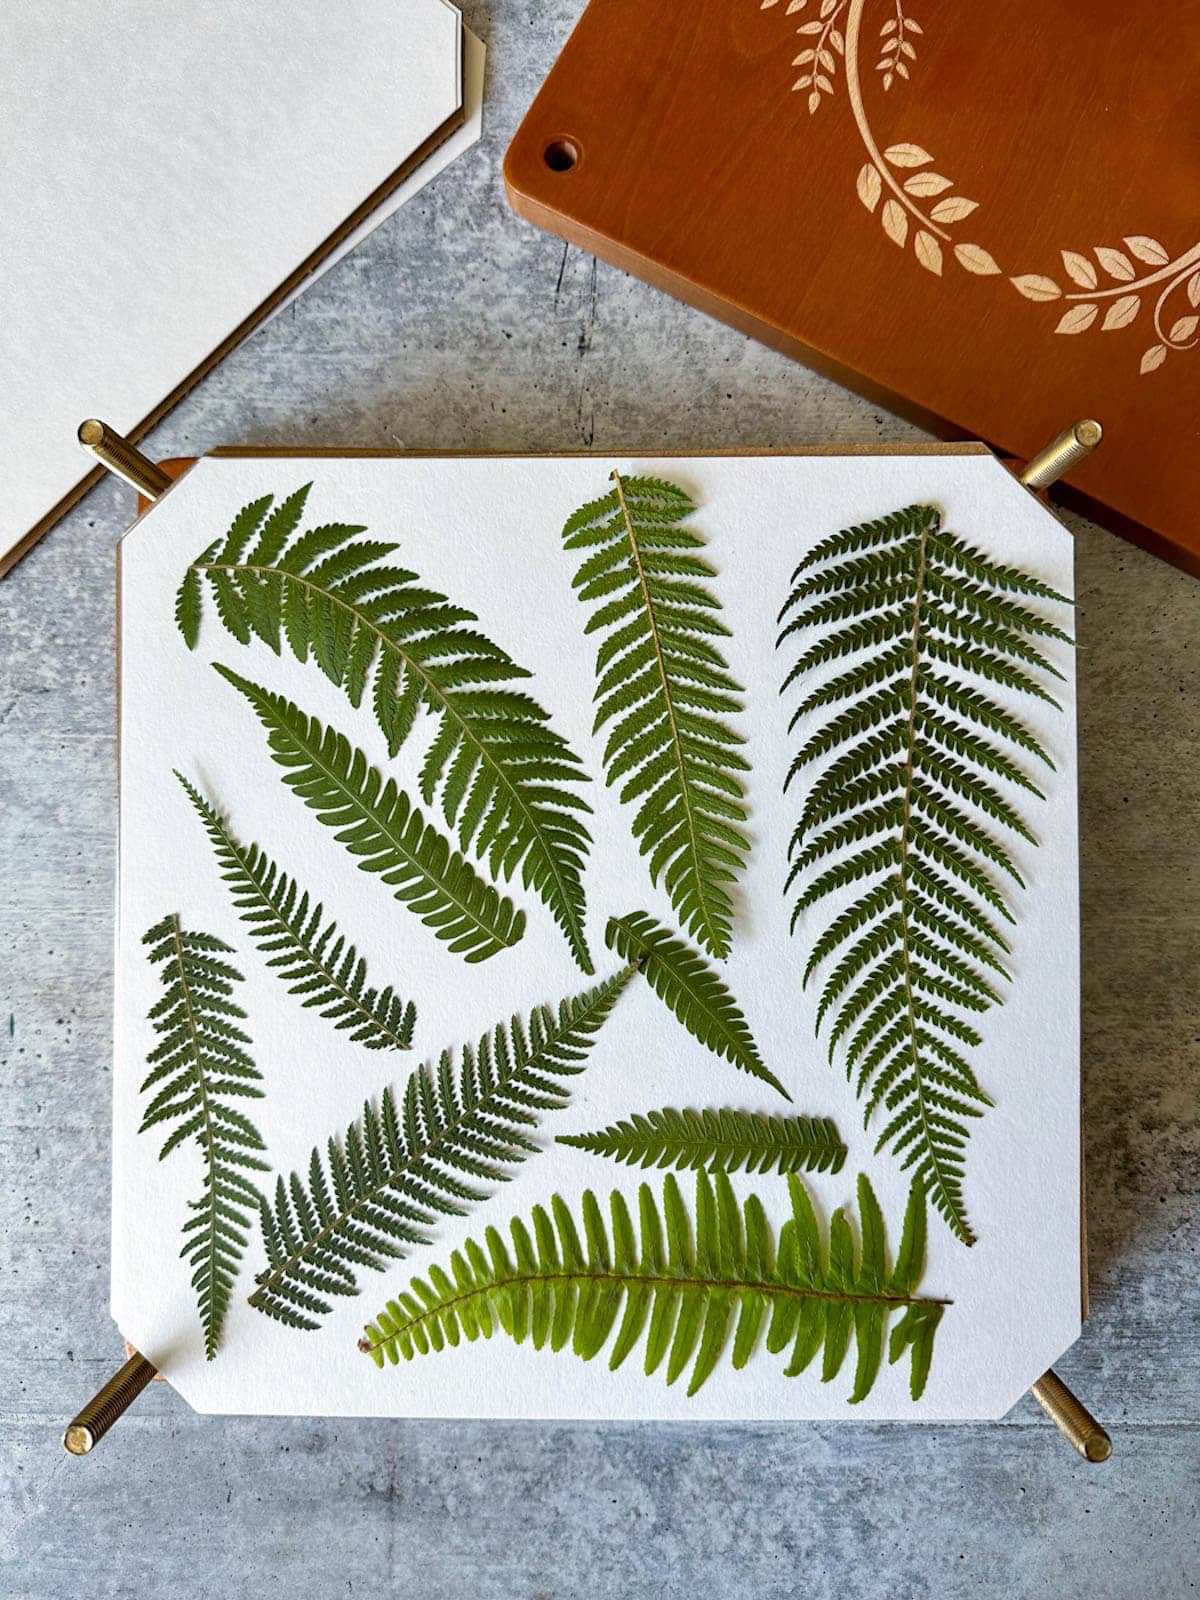
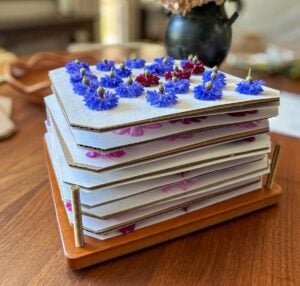
Using a Traditional Wooden Press
Dry even more flowers with ease by using a device that’s made for pressing flowers – like my favorite large wooden press! With adjustable clamps and specialized wicking paper, using a classic flower press can yield better results than the book method since you can compress the flowers more tightly, eliminating air and moisture that can cause color loss or mold. You can also create your own DIY wooden press with clamps and plywood or other wood.
Traditional passive presses slowly dry flowers over a couple of weeks, so this option still requires some patience. Even so, this is my preferred method of them all! I love that I can load up a ton of flowers at once, and then set it and forget it – especially when I’m in no rush. I also find I have the most success with the widest range of flower types in my wood press.
How To:
- Gently lay flowers face down on the reusable blotting paper, and add another piece of paper on top. Then add a section of thicker cardboard (both included in the press kit) on top, followed by another piece of blotting paper and more flowers. Continue stacking more layers as needed until the press is full.
- Set the wooden top of the press in place and then tighten the clamps to squish it all down. But avoid over tightening at first! Instead, I like to come back and tighten the screws a little more every couple of days as the flowers begin to dry and flatten.
- Keep the press in a warm dry location to expedite drying time, which could take anywhere from 1 to 3 weeks, depending on the thickness of the flowers and conditions in your home.
- Once the flowers are completely dry (they’ll be brittle instead of pliable), use tweezers to carefully peel them away from the paper. I also find it helpful to lightly bend the paper away from the flowers to help “pop” them up and off when they’re stuck.
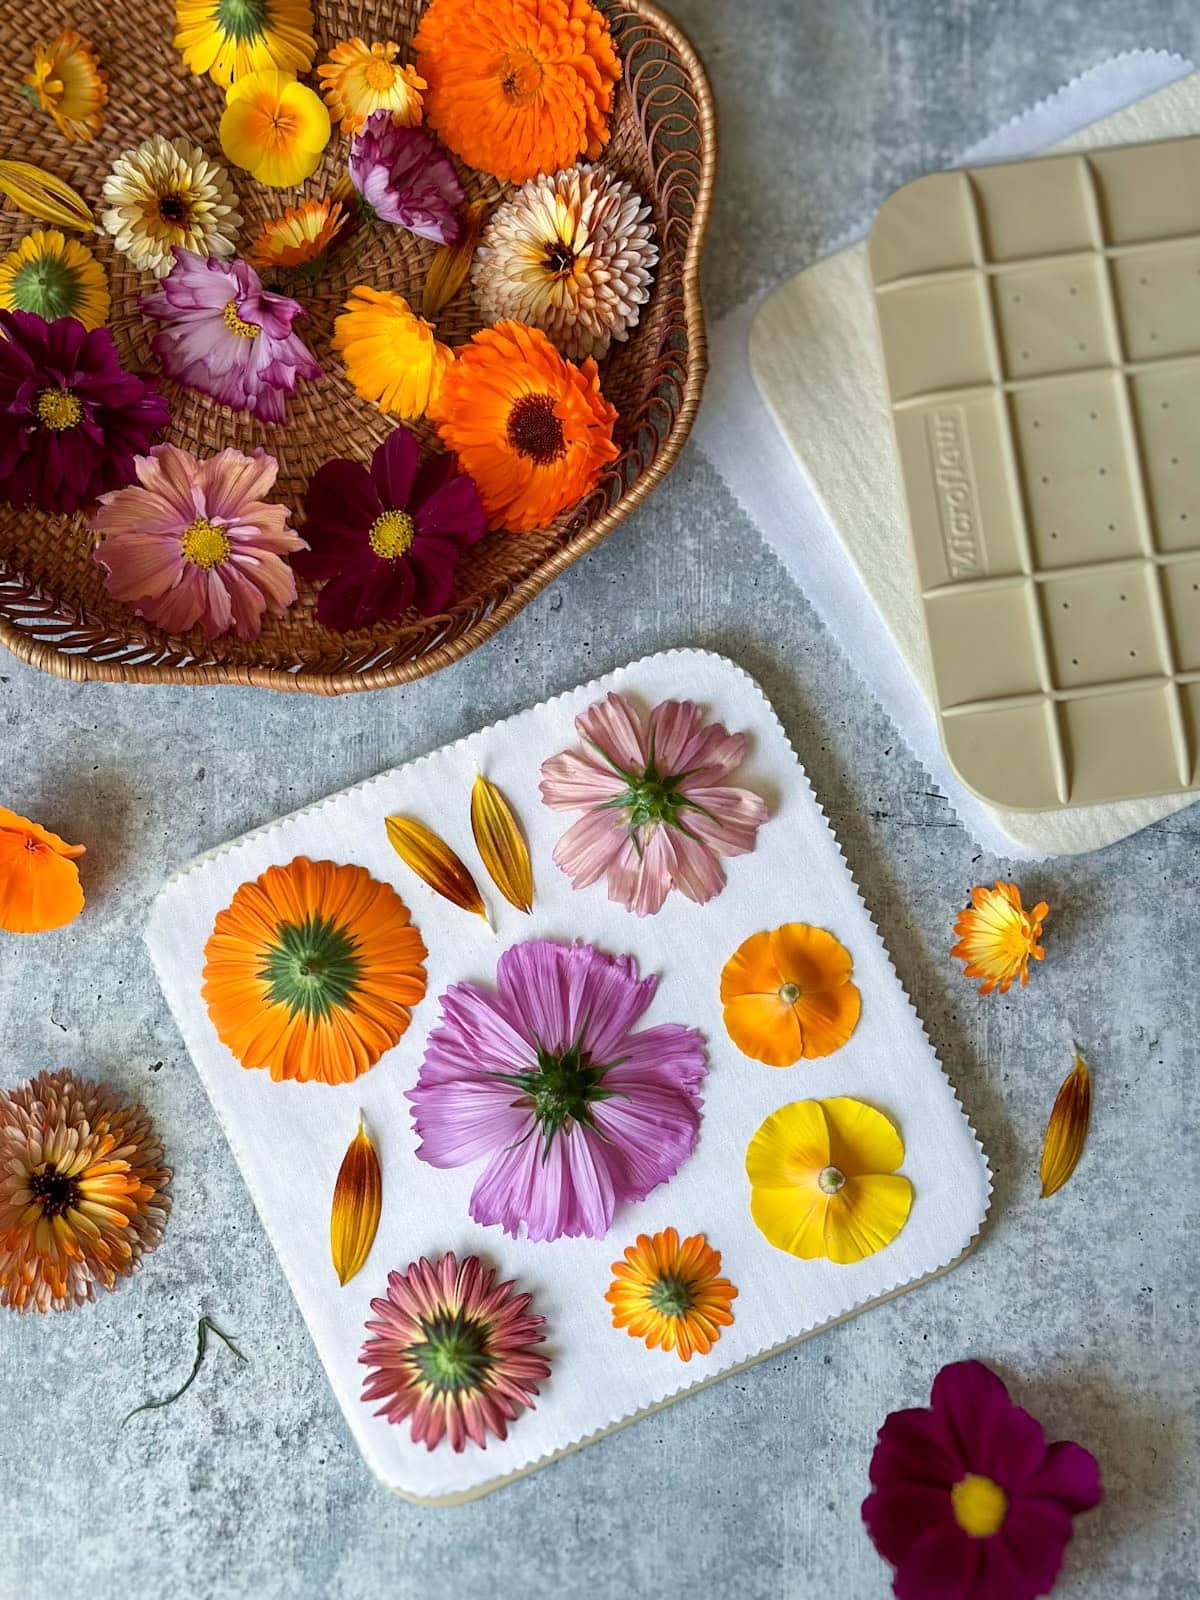
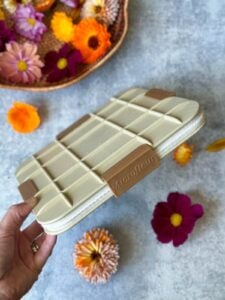
Microwave Flower Press
To instantly press flowers, consider using a modern microwave press. This convenient Microfleur kit will dry flowers, leaves, herbs or other botanicals from start-to-finish in just a few minutes. It also offers excellent color retention, making it an ideal choice for framing pressed flowers long-term. The theory is: the faster they dry, the better the color. However, it’s easy to accidentally burn flowers in the microwave too.
I love using our microwave press when I want fast results (hellooo impromptu craft night!) but also find it can be a tad more finicky and limited for the types of flowers I usually grow. For instance, I find that calendula and poppies retain their color perfectly while my lighter-colored cosmos tend to brown no matter how careful I am. You’ll figure out what works best with a little trial and error!

How To:
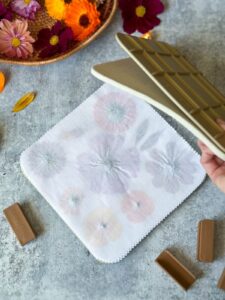
- To press flowers in the microwave, lay them out on the included inner fabric liner, gently positioned in a way you’d like the final dry blooms to look. Again, do not overlap them.
- Do a practice run with your least perfect specimens! The time and results can vary depending on the type of florals used. Try to group similar flowers together so they’ll dry evenly.
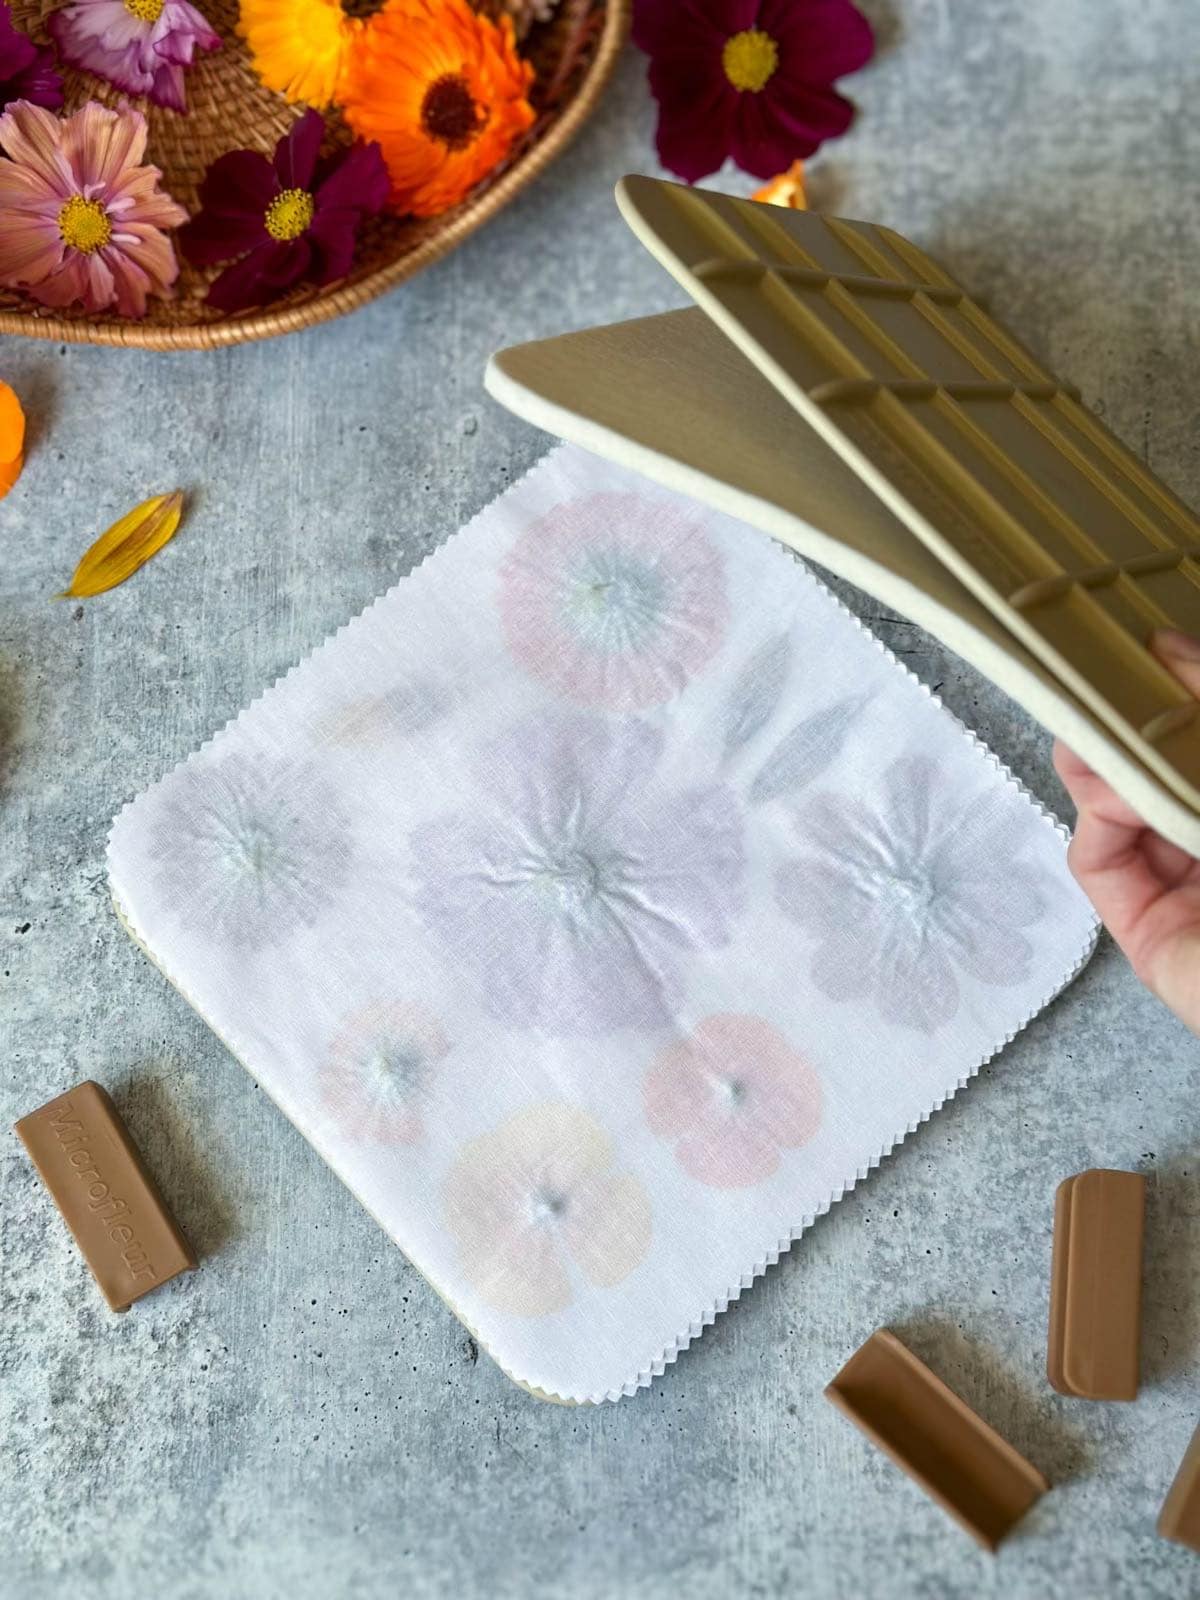
- Set the top of the press kit in place, followed by the side clamps.
- Start by microwaving the flowers on high heat for about 20 to 25 seconds, followed by several shorter 10-second bursts with breaks in between.
- To prevent burning and discoloration, stop and open the press to check and air out the flowers in between bursts before heating further. (Open the device and felt pads, but leave the two inner liners in place on top of the flowers.) If you happen to burn your liners, you can order replacements here. Continue off and on for several minutes as needed.
- The flowers are considered done when they feel papery, thin, and dry and do not have any obvious moisture left. For flowers with a larger base, I’ve found it helpful to use a paper towel to blot excess moisture from the felt pads and body area of the flower in between bouts of heating.
- Once they’re finished, gently remove the flowers from the press. In addition to using tweezers, I find it helps to lightly stretch and pull the liner in opposite directions to help the petals un-stick from the fabric.
Pressing Flowers with an Iron
Last but not least, you can also press flowers with a clothes iron. Like the microwave, ironing flowers is quick and easy (they press instantly) but some may need to continue to dry for a couple days after for the best results. I’ve found ironing especially effective for single petals or extra-thin, flat flowers with virtually no center body.
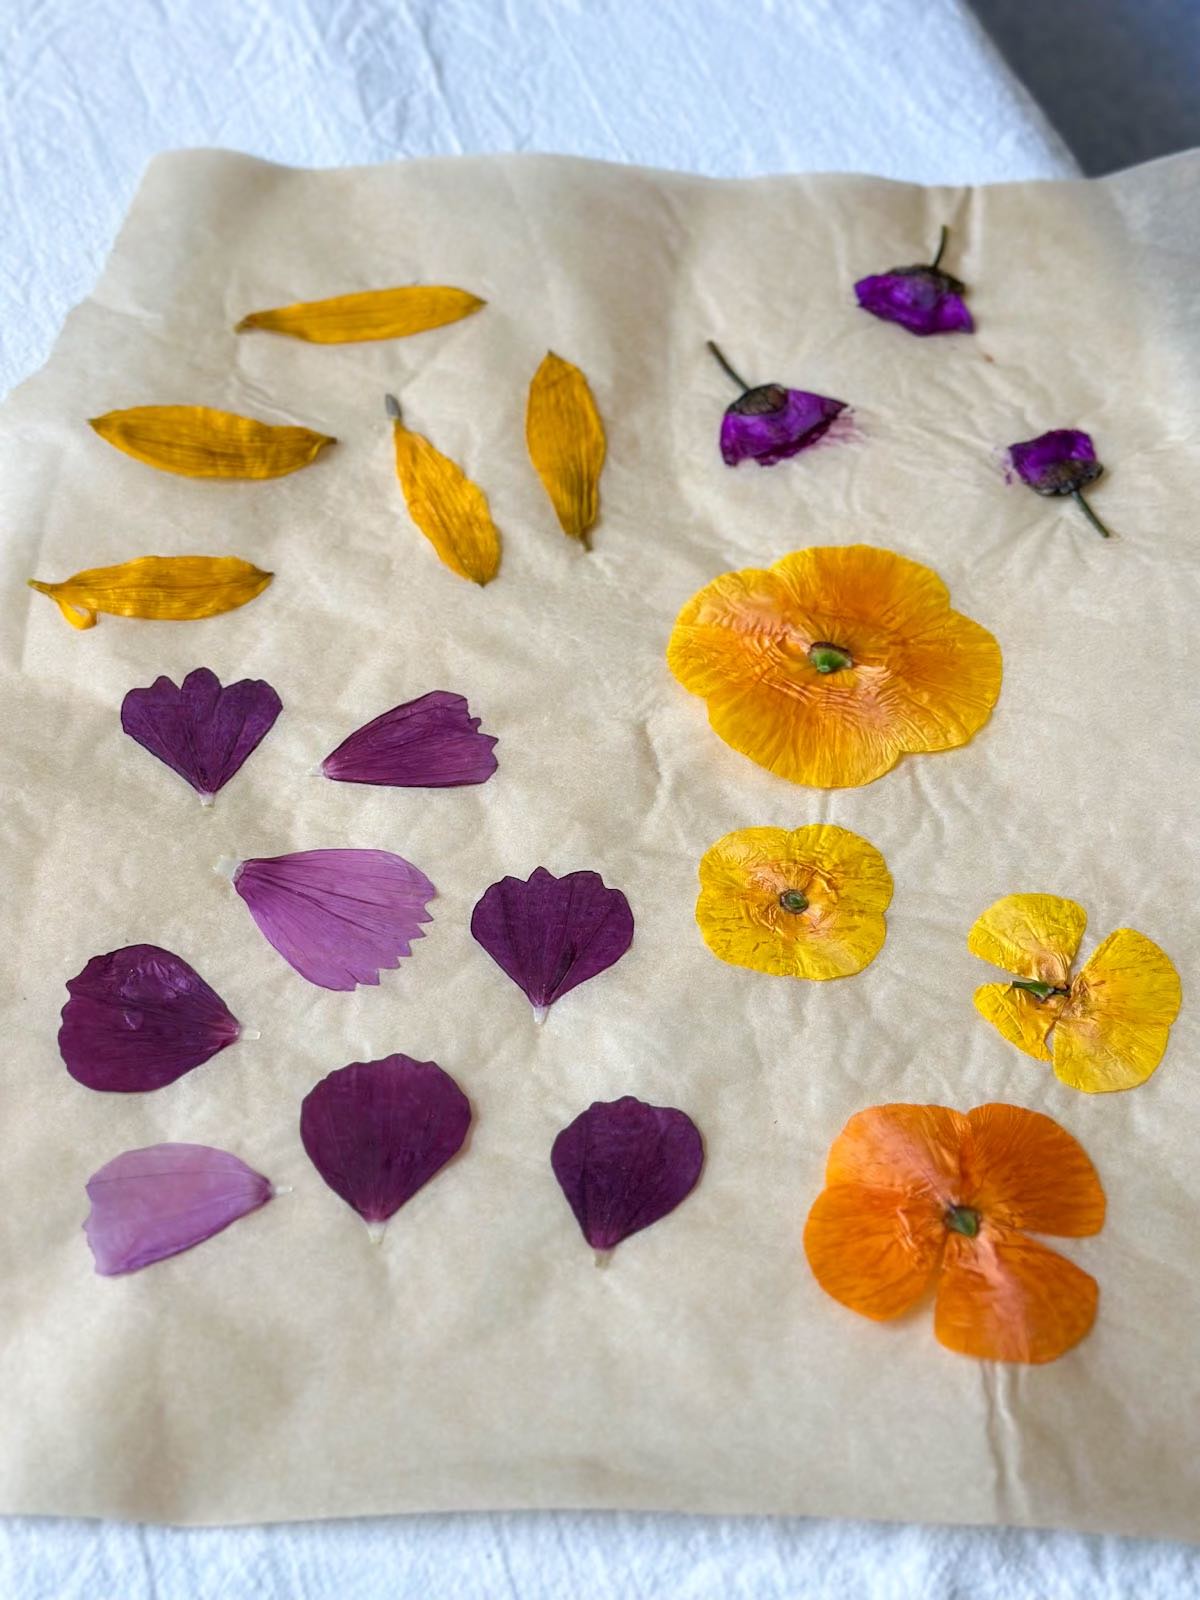
However, this method is the most likely to brown or burn your botanicals if you aren’t careful. Leafy greens are especially prone to turning brown under the heat of an iron. Iron-pressing doesn’t dry the flowers as evenly as other methods, which can lead to a splotchy appearance. The parchment paper also tends to cause wrinkles.
How To:
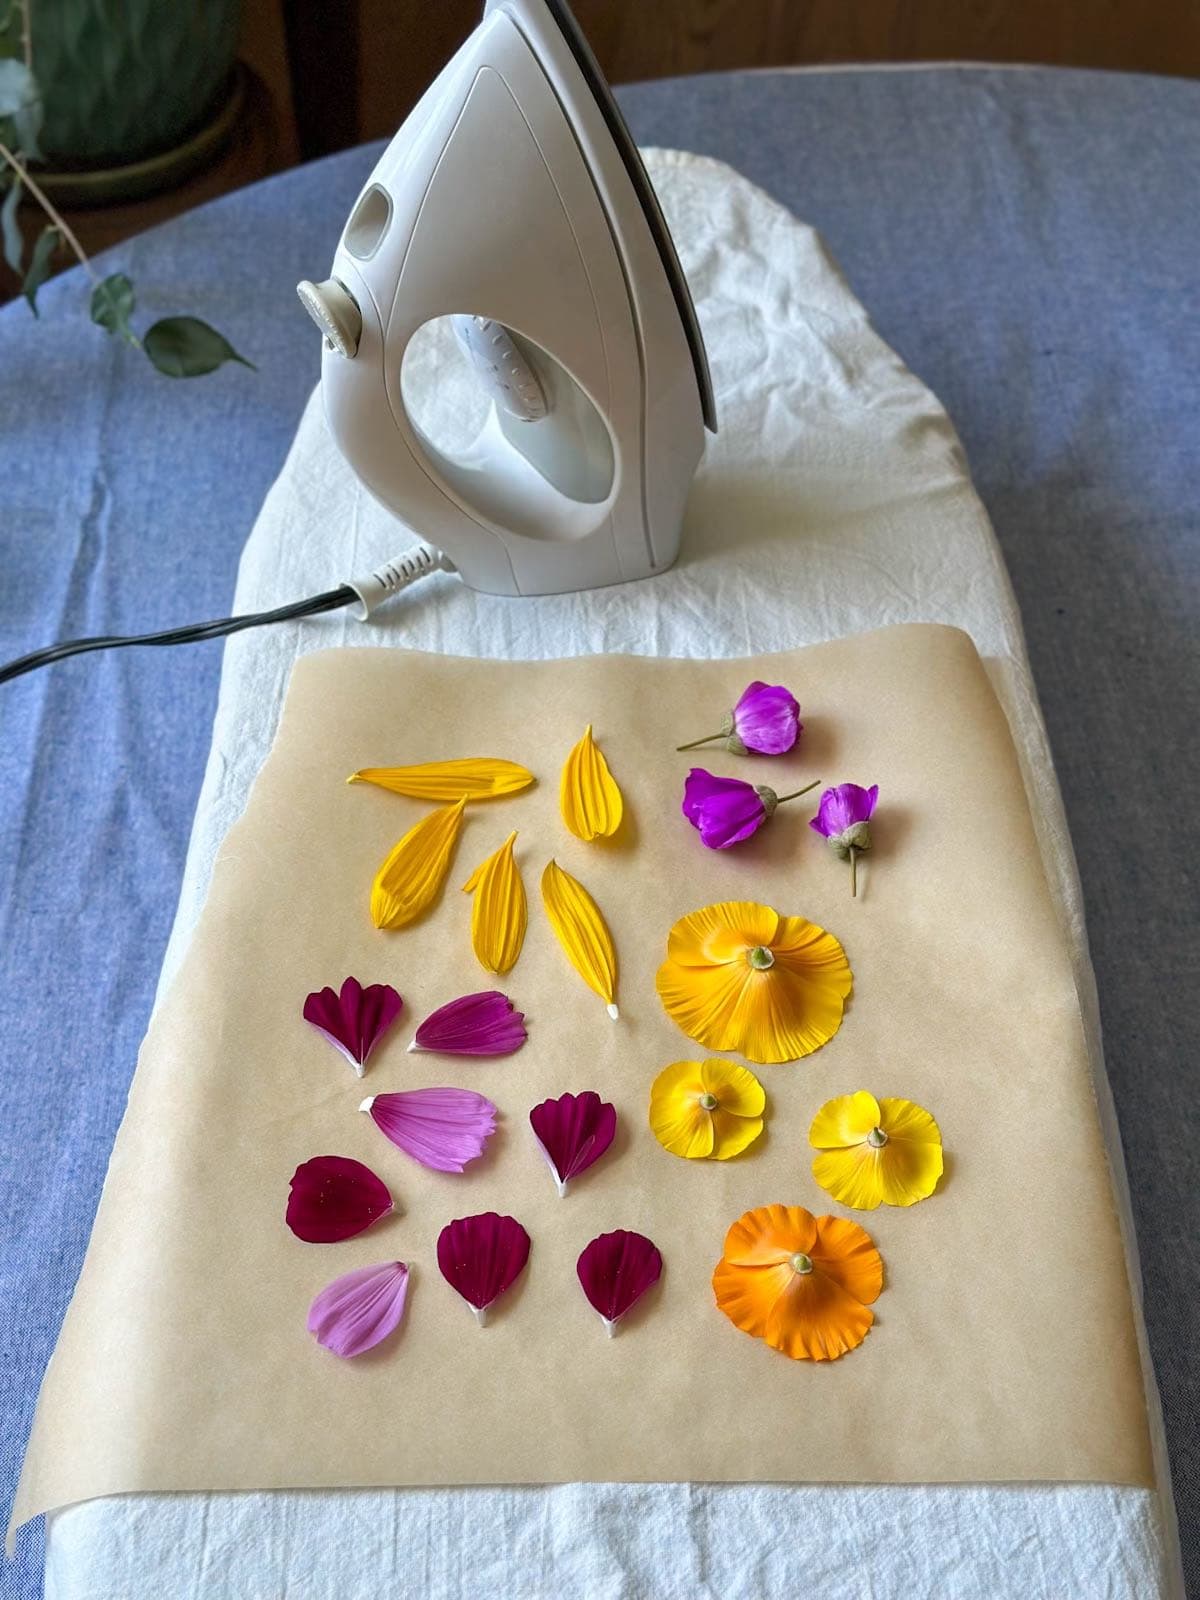
- Start by gently sandwiching your chosen flowers between two pieces of parchment paper or other absorbent paper (like blotting paper). Like microwaving, it may be best to do a quick test run with just a few of your least perfect florals first.
- Turn the iron on medium-low heat, and turn off any steam settings.
- Work on an ironing board or other firm surface covered with a thin absorbent towel.
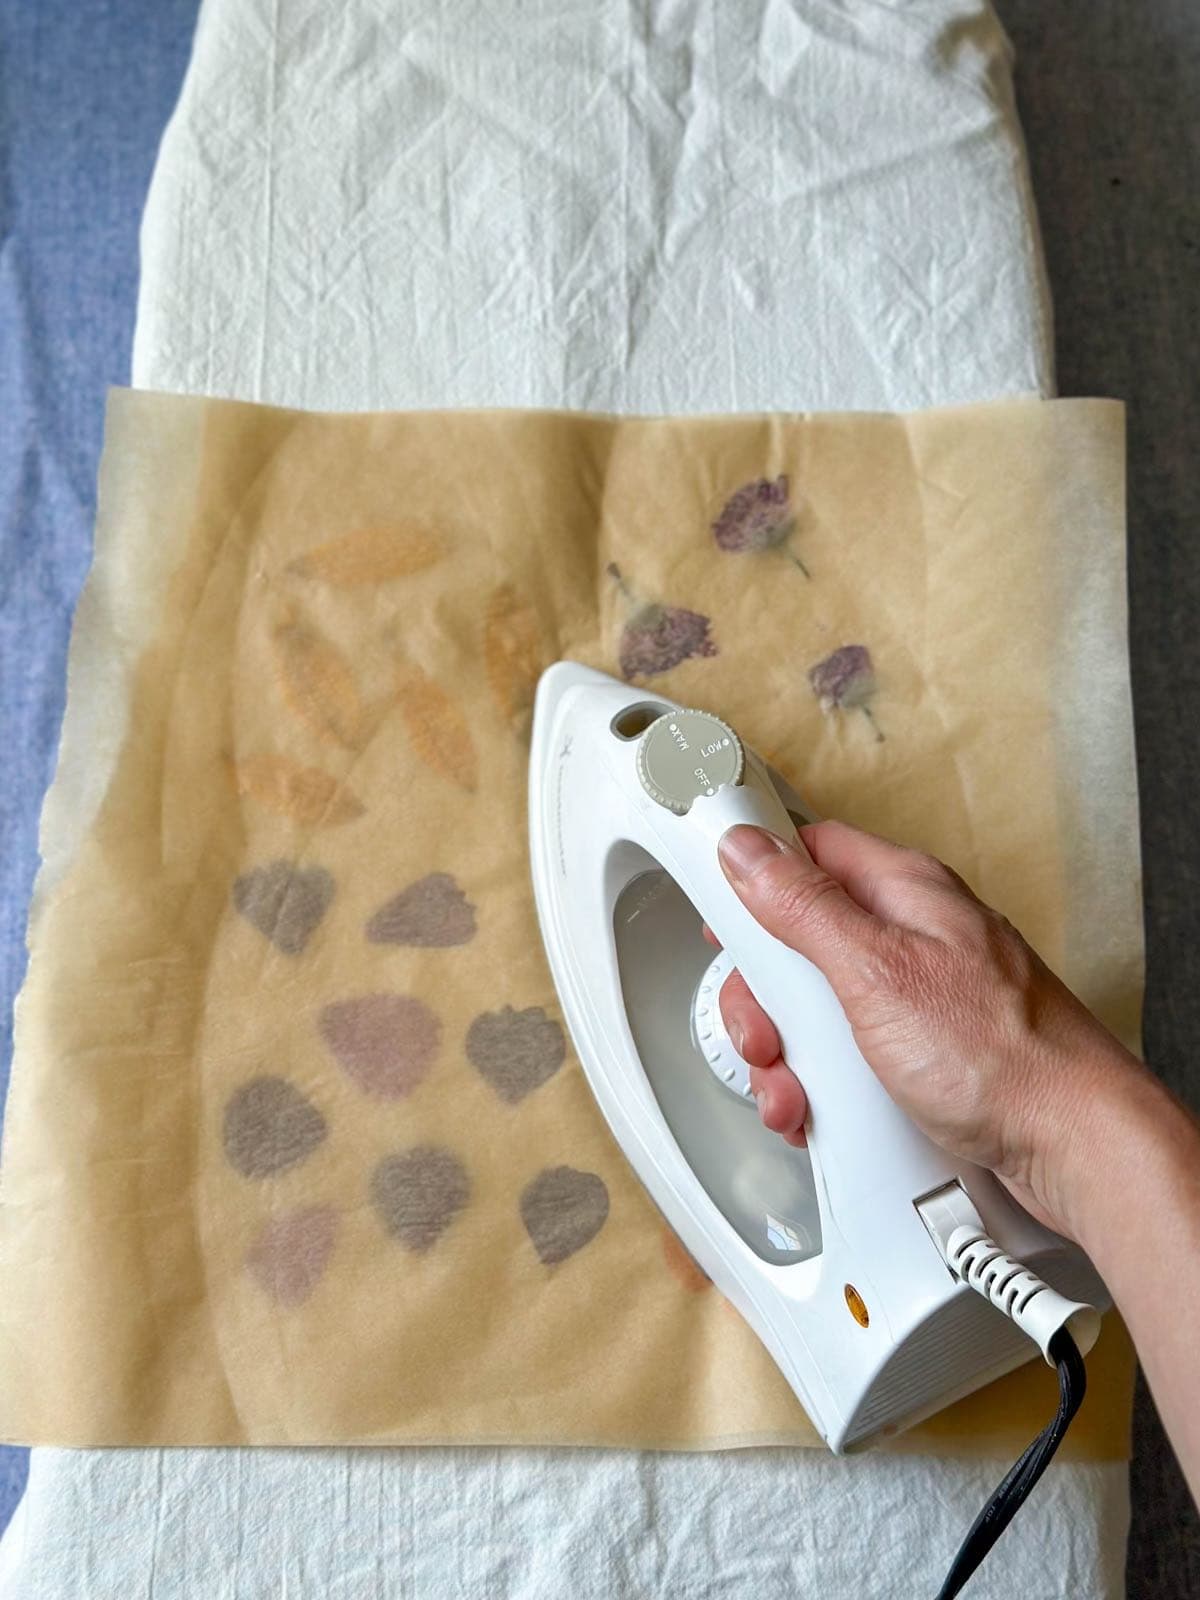
- Iron the flowers for about 10 to 15 seconds at a time, and then lift the iron to let the flowers cool for 10 to 15 seconds in between. Apply firm downward pressure, but do NOT glide the iron back and forth as you would ironing clothes.
- Continue alternating between bouts of pressing and cooling for a couple of minutes, until the flowers are sufficiently flattened, stiff, and dry.
- Let the flowers cool before carefully peeling the two sheets of paper apart. Work slowly and have a pair of tweezers ready to help release any stuck petals.
- For the best results, allow them to air dry for another day or two before storage or use. You can tuck them inside of a book to help keep them flat and protected too.
What’s the best way to press flowers?
After experimenting with all four methods, I can confidently say that using a traditional wooden press produces the best overall results. It offers superior color retention, and allows you to dry the widest variety of flowers with great success (and many of them at once). If you don’t want to invest in a proper press, using a book is a good alternative.
However, it does take time to passively dry flowers, so using a microwave press is an excellent option if you want fast results along with great color retention, and don’t mind the learning curve or tweaking that may be required. I would only recommend the iron method if you want to quickly dry a few very thin, flat flowers or petals.
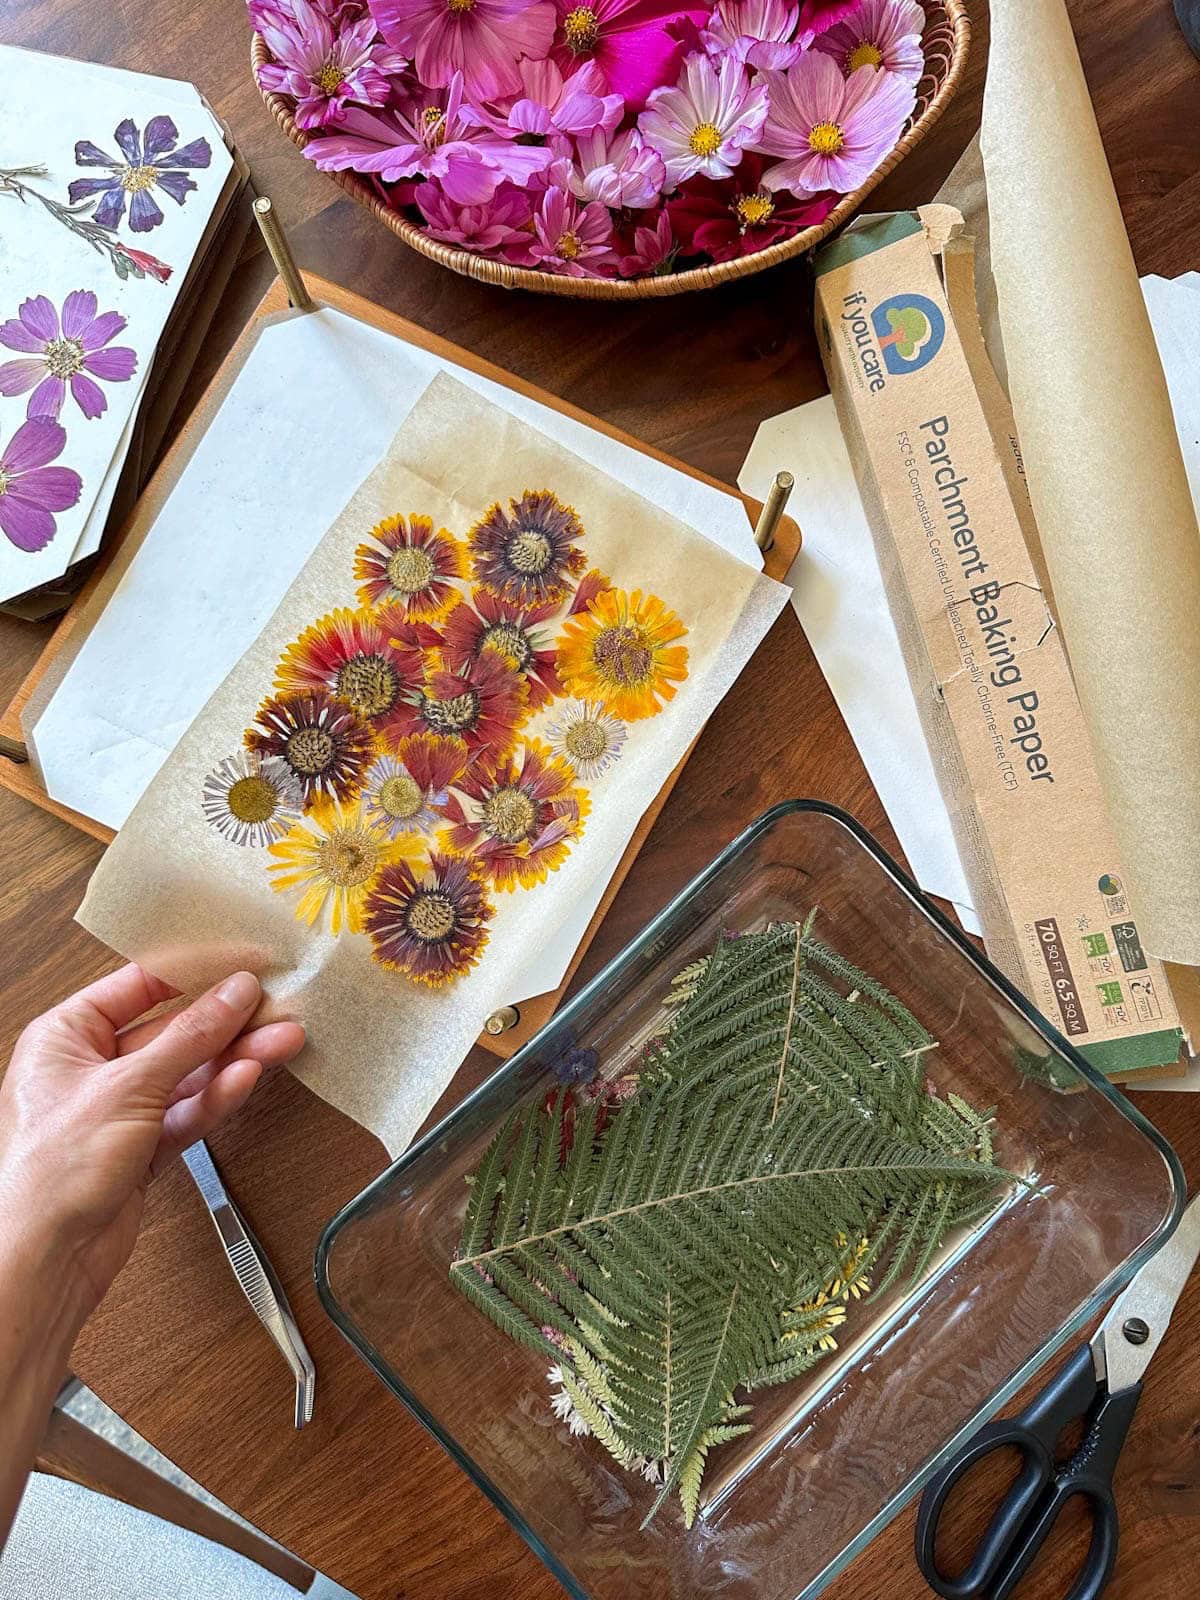
How to Store Pressed Flowers
Store pressed flowers in a fairly cool, dry, dark location for maximum color retention and shelf-life. Once fully dry, they shouldn’t stick together so they can touch or stack, though keep in mind they can be quite fragile.
I usually store mine in a large flat glass baking dish with a lid, layered between pieces of parchment paper for easy sorting and handling. Sometimes I just leave them in the press if I’m not planning to use it for a while! If you have a large collection of pressed flowers, consider using this neat wooden art storage box with small drawers for amazing organization.
Ways to Use Pressed Flowers
Now, have fun playing with your preserved blooms! Here’s a list of pressed flower craft ideas, though I’m sure there are tons of other creative ways to use them too.
- Frame pressed flowers, either in a regular frame with a back or between two clear pieces of glass to create floral “stained glass”. You can arrange them to look like a landscape, in the shape of an animal, or other creative layouts.
- Use them in scrapbooking, homemade cards, collages, or other paper crafts.
- Iron already-dry pressed flowers, leaves, or other foliage between two layers of wax paper to trap them inside – a fun way to make botanical bookmarks or sun catchers.
- Use clear mod podge to affix dried flowers to objects such as DIY candle jar lanterns, pressed flower pumpkins, and more.
- Pressed flowers can also be added to homemade bath salts, candles, soap, coasters, wreaths or resin jewelry.
- I also like to use pressed leaves to make beautiful DIY beeswax fall leaf garlands.
TIP: If they fall apart after drying, you can always use the single petals instead of full flowers, or reassemble them directly on your craft project.

And that concludes this lesson.
Well friends, I hope you have just as much fun preserving and playing with flowers as I do. If you give it a try or found this post to be helpful, please leave a review below- and feel free to ask any questions too! Now go get crafty. I can’t wait to see what you come up with!
You may also like:
- How to Dry Fresh Herbs: 4 Easy Ways + Storage Tips
- Harvesting Fresh Lavender: How to Harvest, Prune & Dry Lavender Flowers
- How to Make Medicinal Herb Infused Oil: Two Ways
- DIY Container Herb Garden Planter + The Best Herbs to Grow
- All About Calendula: How to Grow, Harvest, Dry, & Use Calendula Flowers

How to Press Flowers 4 Ways
Equipment
- A flower press. You can either use several large heavy books, a traditional wooden press, microwave press, or a clothes iron
- craft tweezers (optional but recommended)
Ingredients
- Fresh flowers of choice. See tips on choosing the best flowers in the instructions below.
- parchment paper or blotting paper
Instructions
How to Press Flowers (Tips for All Methods)
- Choose blooms that are fresh, fully open, and blemish-free. The best flowers to press are fairly thin, flat, and with a single layer of petals such as violas, pansies, cosmos, calendula, daisies, poppies, or asters. You can also press and dry herbs, leaves, or single petals from larger flowers like roses and peonies.
- Place the flowers face-down for pressing. They tend to stay put better that way.
- Gently spread the petals open evenly around the center. Or, capture a “side profile” by flattening the flower closed. Try to arrange the flower in the shape you want it to look like once it’s dry.
- Do not overlap flowers – provide at least 1/2 to 1 inch of space between them.

- Handle pressed flowers with care. They're very delicate once dry! Use craft tweezers to help gently move or un-stick them as needed.
- Do not add damp or dewy flowers to your press. Allow them to air dry for a couple hours if needed (with the stems in water to prevent wilting).
Using a Wooden Press (Best Overall Method + Results)
- Gently lay flowers face down on the reusable blotting paper, and add another piece of paper on top. Then add a section of thicker cardboard (both included in the press kit) on top. Continue stacking more layers as needed until the press is full.

- Set the wooden top of the press in place and then tighten the clamps – but avoid over tightening at first. Instead, come back and tighten the screws a little more every couple of days as the flowers dry and flatten.

- Keep the press in a warm dry location to expedite drying time, which could take anywhere from 1 to 3 weeks, depending on the thickness of the flowers and conditions in your home.
- Once the flowers are completely dry (they’ll be brittle instead of pliable), use tweezers to carefully peel them away from the paper. I also find it helpful to lightly bend the paper away from the flowers to help “pop” them up and off when they’re stuck.

Using a Book (Good Alternative)
- For the best results, add layers of absorbent paper between the book pages first – such as parchment paper, newspaper, or reusable blotting paper.
- Arrange flowers face-down (not overlapping) and try to group ones of similar thickness together.
- Once the flowers are tucked flat within the book, set additional heavy objects on top of the book to keep it tightly closed.

- Alternately, you can place flowers between pieces of paper and then stack large books on top (rather than putting them within the pages of the book itself).
- Keep the flowers in the book for at least 2 to 3 weeks until fully dry. Larger, thicker flowers may take up to 4 weeks.


Microwave Press (Best for Fast Results)
- Do a practice run with your least perfect specimens! The time and results can vary depending on the type of florals used. Try to group similar flowers together so they’ll dry evenly.
- Lay flowers on the included inner fabric liner, gently positioned in a way you’d like the final dry blooms to look. Do not overlap. Add top and side clamps.
- Start by microwaving the flowers on high heat for about 20 to 25 seconds, followed by several shorter 10-second bursts with breaks in between.
- To prevent burning and discoloration, stop and open the press to air out the flowers in between bursts of heating. (Open the device and felt pads, but leave the two inner liners in place on top of the flowers.) Continue off and on for several minutes as needed.
- The flowers are considered done when they feel papery, thin, and dry and do not have any obvious moisture left.
- Gently remove the flowers using tweezers and/or by lightly stretching the fabric to help them un-stick.

Using an Iron (Quick but Uneven Results)
- Start by gently sandwiching your chosen flowers between two pieces of parchment paper or other absorbent paper (like blotting paper). This method works best with extra thin, flat flowers with little-to-no "body".
- Turn the iron on medium-low heat, and turn off any steam settings, and work on an ironing board or other firm surface covered with a thin absorbent towel.
- Iron the flowers for about 10 to 15 seconds at a time, and then lift the iron to let the flowers cool for 10 to 15 seconds in between. Apply firm downward pressure, but do NOT glide the iron back and forth.
- Continue alternating between bouts of pressing and cooling for a couple of minutes, until the flowers are sufficiently flattened, stiff, and dry. Let the flowers cool before carefully peeling the two sheets of paper apart.
- For the best results, allow them to air dry for another day or two before storage or use. You can tuck them inside of a book to help keep them flat and protected too.


Deanna Talerico
Deanna Talerico (aka DeannaCat) is a garden educator and writer with over 15 years experience in organic gardening. She is a retired Senior Environmental Health Specialist, and holds a M.A. in Environmental Studies and B.S. in Sustainability and Natural Resources.


2 Comments
Amber
Wonderful article, thank you!
Aaron (Mr. DeannaCat)
Thank you so much Amber!