

How to Make Pressed Flower Pumpkins (No-Carve Pumpkin Decorating Idea)

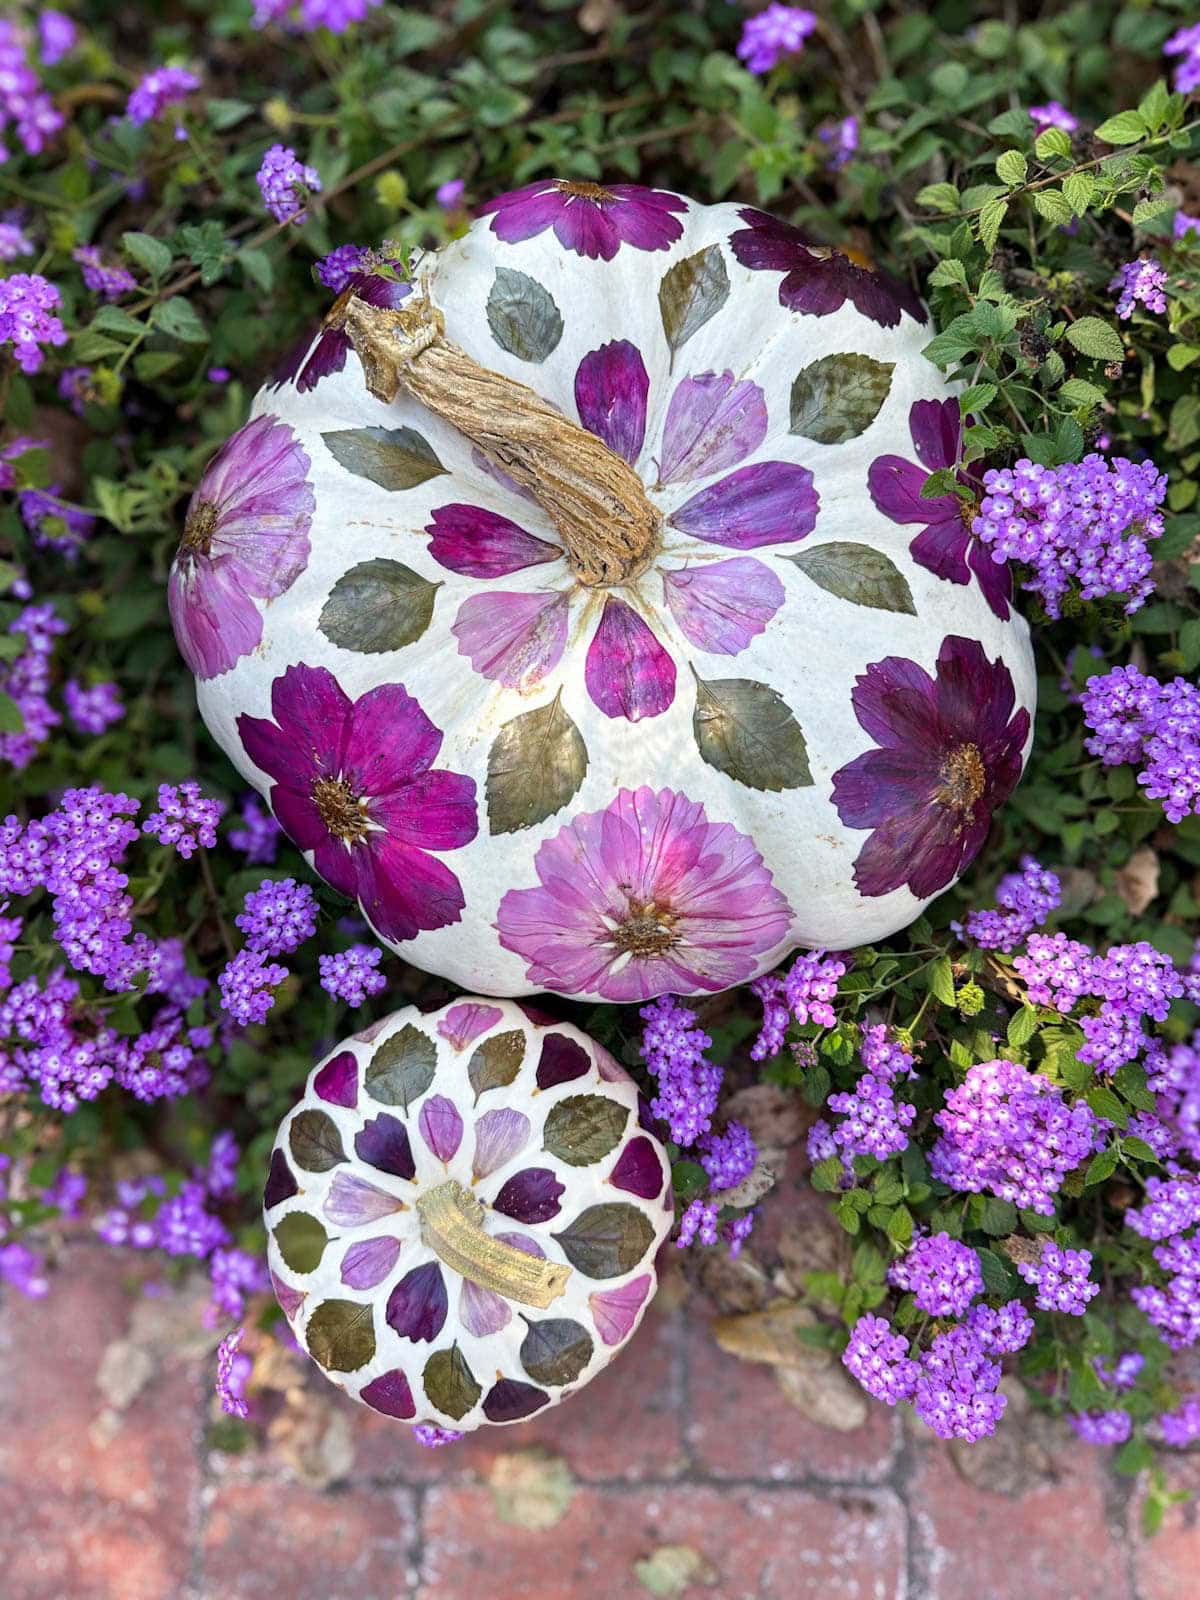
Come learn how to make beautiful pressed flower pumpkins – a fun, sustainable and kid-friendly fall craft project. Since they aren’t carved, these decorated pumpkins can last for months! I often enjoy ours through November.
This easy step-by-step guide will cover the supplies you need, a couple different ways to press flowers and leaves, and other tips for success. I like to use dry flowers, leaves, ferns, herbs, or other foliage from my garden, though you can buy pressed flowers online too.
Even better, I’ve included a recipe for homemade food-safe biodegradable glue so you can compost or eat your botanical pumpkins once you’re done using them as decor!
Want to save this?
Disclosure: Homestead and Chill is reader-supported. When you purchase through links on our site, we may earn an affiliate commission.

RELATED: Learn how to press flowers using 4 different methods in our detailed beginner’s guide, or buy pressed flowers here.
Supplies Needed
- Pumpkins. I love to use white pumpkins to make pressed flower pumpkins. The flowers and leaves stand out beautifully against a white background! White also hides the glue or mod podge residue nicely after it dries. You could also use faux white pumpkins (which could last for many years!) or paint an orange pumpkin white, but then it won’t be compostable. Or, go ahead and give decorating orange pumpkins a try! I think a light tan-orange pumpkin with dried leaves or green foliage accents would be beautiful.
- Pressed flowers, leaves, herbs, or other botanical pumpkin decorations. See my tips to press your own flowers or leaves below, or consider buying a set of already-pressed dried flowers. This popular pressed flower kit comes with many different flowers, color options, and handy tweezers!
- Craft glue. You can make pressed flower pumpkins with classic Mod Podge (recommended if you use faux pumpkins so they’ll last longer) or make your own homemade non-toxic, biodegradable cornstarch glue using edible ingredients. See DIY glue ingredients and instructions below. Note that homemade glue will not be water resistant. For an outdoor display where rain is a concern, consider using waterproof Mod Podge.
- Paint brush (small craft size) to apply the glue to the decorated pumpkin.
PRO TIP: While I love a good lumpy pumpkin, I’ve found that smoother pumpkins with less ridges and lobes are easiest to decorate as pressed flower pumpkins since the flowers or leaves won’t have to bend as much.

How to Press Flowers to Decorate Pumpkins
Over the summer, I collect and press flowers and herbs from the garden in my wood and paper flower press, so I have them dried and ready to use on my botanical pumpkins come fall. Flowers and leaves take a couple weeks to dry in a classic press, so this option will take some patience and planning in advance. We don’t have many colorful fall leaves in our area yet, or I would have used those too! (I also like to use pressed leaves to make beautiful DIY beeswax fall leaf garlands.)
To instantly press your own flowers, consider using a microwave press kit that presses and dries flowers, leaves, herbs or other plant material in minutes, and also offers superior color retention compared to traditional slow pressing. The quick turnaround time and bright colors is ideal for decorating pressed flower pumpkins!
LEARN MORE: Get more detailed instructions and explore the pros and cons of 4 different methods of pressing flowers here.
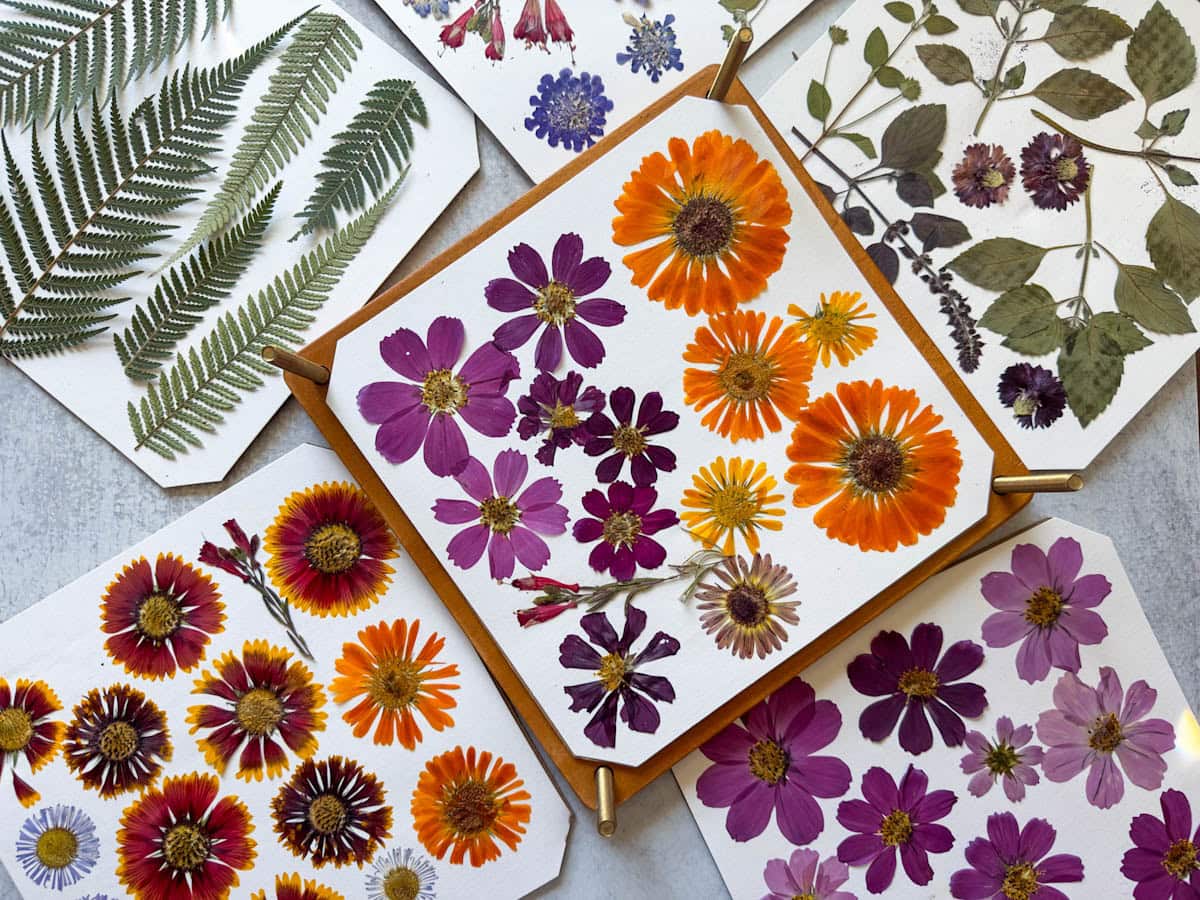
The best flowers to press for pumpkins
Since pumpkins are curved, fairly flat, thin, and pliable pressed flowers and leaves work best to decorate pumpkins.
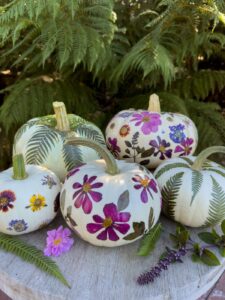
Cosmos, violas, pansies, daisies, asters, poppies, calendula, petite roses, and scabiosas dry really well, retain their color, and go onto the pumpkins like a dream! I also loved the result from pressing wildflowers like native Indian blanket. For herbs, I used African blue basil and Tulsi (with flowers).
I’ve found it’s more difficult to work with thicker, stiff, or brittle pressed flowers (or those with a thick base or long hard stem) since they wanted to stick out straight rather than conform to the natural curve of the pumpkin. Yet with a little patience and holding them in place, I was able to make most dried botanicals work.

Homemade Non-Toxic Glue Recipe
This recipe for homemade cornstarch glue is easy to make, and yields about 1 cup of finished non-toxic glue.
Ingredients
- 1.5 cups water
- 2 Tbsp corn syrup or honey
- 1 tsp vinegar or bottled lemon juice
- 2 Tbsp cornstarch
Instructions
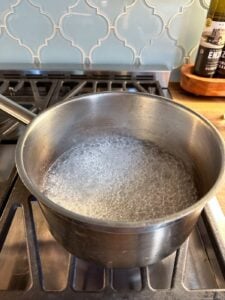
- In a saucepan on the stovetop, combine only half the water (¾ cup) along with the corn syrup (or honey) and vinegar. Bring the mixture to a boil.
- In a small separate bowl, thoroughly mix together the cornstarch and the remaining ¾ cup of water to create a paste.
- Next, add the cornstarch paste to the hot syrup on the stovetop. Stir well.
- Return the glue mixture to a rolling boil and boil for about one minute.
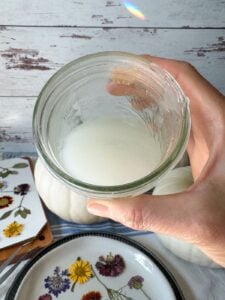
- Remove the glue from heat and allow it to cool before use. I usually transfer it into a mason jar and put it in the fridge for a bit to expedite cooling.
- Store homemade glue in an airtight container. Leftovers are best used within a few days (it starts to get clumpy thereafter) but can last several weeks if needed.
Since it’s made with edible ingredients, this food-safe DIY glue is ideal for decorating pumpkins as it can be washed off later – so you can still eat the pumpkins! Did you know that most ornamental heirloom “pumpkins” are actually delicious edible winter squash? We love to make homemade pumpkin puree to use in pumpkin 3-bean chili, sourdough pumpkin spice bread, butternut squash pie, or butternut squash soup (winter squash and pumpkin can be used interchangeably in recipes).
That said, this biodegradable cornstarch glue will also wash off in the rain. Therefore, plan to keep your pumpkins in a protected location.


Decorating Instructions
Now here’s the easy part!
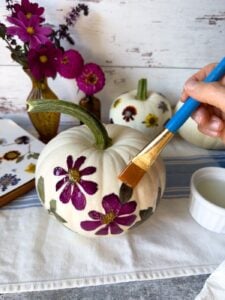
- Use a paintbrush to apply a layer of glue directly onto the bare pumpkin in the area that you wish to decorate first. TIP: I’ve found that the glue or mod podge starts to dry fairly quickly, so I apply it and decorate in small sections (rather than covering the whole pumpkin in glue from the start).
- Next, press the flowers or leaves onto the pumpkin, and then apply another layer of glue on top of the flowers.
- Use your finger or a pair of tweezers to gently hold the flowers in place flat against the pumpkin if they want to stick up or move around.
- Finally, let the floral pumpkins dry overnight. The following day, apply a final layer of glue to seal it all again or coat any exposed bits (optional, if needed).
- If your homemade glue seems too thick or clumpy, feel free to water it down with an additional splash of water if needed.
I had enough dried flowers to decorate one larger pumpkin all the way around to enjoy a 360 degree view on my kitchen counter, whereas I only decorated the front half of a couple smaller ones. Either way, they’re all gorgeous!


And it’s that easy!
Well friends, I sure hope you enjoy decorating your own pressed flower pumpkins as much as I do. I have one in every main living space in the house right now; they’re bringing me so much joy! As you can see, making floral pumpkins is simple, beautiful, and eco-friendly to boot.
If you enjoyed this project, you’ll probably love these dried flower candle jar lanterns too.
Please let me know if you have any questions in the comments below. If you enjoyed this tutorial, please spread the love and leave a review below!
Don’t miss these other seasonal craft ideas:
- How to Make a Fall Beeswax Leaf Garland
- Easy Salt Dough Ornaments Recipe for Handprints, Shapes and Keepsakes
- Holiday Stovetop Potpourri Mason Jar Recipes (Free Printable Gift Tag)
- How to Dry Orange Slices for Holiday Decor, Two Ways
- DIY Grapevine Wreath (or Other Vines) Tutorial + Decorating Ideas
- How to Make Blown Egg Ornaments
- How to Make Pumpkin Shaped Sourdough Bread Loaf

Pressed Flower Pumpkins (or Leaves) with DIY Compostable Glue
Equipment
- Pumpkins (white pumpkins are ideal)
- Pressed dried flowers, pressed fall leaves, herbs, ferns, or other dry botanicals
- Small paint brush
- Mod Podge or homemade compostable glue (recipe below)
Ingredients
- 1.5 cups water
- 2 Tbsp corn syrup or honey
- 1 tsp vinegar or bottled lemon juice
- 2 Tbsp cornstarch
Instructions
Homemade Biodegradable Glue
- In a saucepan on the stovetop, combine only half the water (¾ cup) along with the corn syrup (or honey) and vinegar. Bring the mixture to a boil.
- In a small separate bowl, thoroughly mix together the cornstarch and the remaining ¾ cup of water to create a paste.
- Next, add the cornstarch paste to the hot syrup on the stovetop. Stir well.
- Return the glue mixture to a rolling boil and boil for about one minute.

- Remove the glue from heat and allow it to cool before use. I usually transfer it into a mason jar and put it in the fridge for a bit to expedite cooling.
- Store homemade glue in an airtight container. Leftovers are best used within a few days (it starts to get clumpy thereafter) but can last several weeks if needed.
Decorating Botanical Pumpkins
- Use a paintbrush to apply a layer of glue to the area of the bare pumpkin in the area you wish to decorate first (I like to work in small sections instead of covering the whole pumpkin in glue, as it tends to dry fast)
- Next, press the flowers or leaves on, and then apply another layer of glue on top of the them. Use your finger or a pair of tweezers to gently hold the flowers in place flat against the pumpkin if they want to stick up or move around.
- Finally, let the floral pumpkins dry overnight. The following day, apply a final layer of glue to seal it all again or coat any exposed bits (optional, if needed).
- If your homemade glue seems too thick or clumpy, feel free to water it down with an additional splash of water if needed.
- The glue is non-toxic and compostable, so you can either compost the pumpkins or wash off the glue to eat the pumpkins later. It will also wash off in the rain, so keep your pumpkins in a protected location.




4 Comments
Miss Sue
I’m very anxious to try the compostable glue!! It’s kid safe, too, which is tops with me.
I have 50 mini pumpkins I am using for a Fall Fest Fundraiser for our early literacy program at the library.
I have small straw hats and a hula skirt I found at the second hand shop for a buck that I’ve cut up for scarecrow hair. I’ve been worried about attaching these elements to the scarecrow pumpkin craft. This may work.
Thank you,
Miss Sue
Aaron (Mr. DeannaCat)
Hi Miss Sue, hope the glue works well for you and good luck with your fundraiser!
Elaine
Deanna, I love getting your emails. I frequently use your gluten free recipes 😋, so yummy. The botanical pumpkin concept is brilliant! Bravo. I just happen to have dried flowers from my gardens in the press just waiting to be used. Today I will search for white pumpkins. Just one question. Will hodge podge glue withstand an outdoor New England display? Or is an indoor display best? Thanks for what you do.
Aaron (Mr. DeannaCat)
Hi Elaine, that’s so great to hear and it’s awesome you already have some dried flowers from your garden saved up! Great questions about the glue holding up to an outdoor display, we just updated the article to include a link to waterproof Mod Podge for outdoor use and should work out great for your situation. Sounds like you will be creating a really beautiful display, good luck and have fun!