
How to Press Flowers 4 Ways
Learn how to press flowers four ways - in a book, traditional wood press, microwave press, or using an iron - with tips on the best flowers to use and how to get the most colorful, long-lasting results possible.
Equipment
- A flower press. You can either use several large heavy books, a traditional wooden press, microwave press, or a clothes iron
- craft tweezers (optional but recommended)
Ingredients
- Fresh flowers of choice. See tips on choosing the best flowers in the instructions below.
- parchment paper or blotting paper
Instructions
How to Press Flowers (Tips for All Methods)
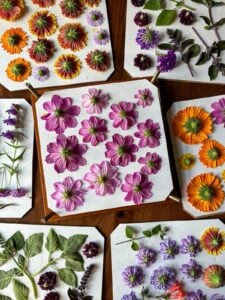
- Choose blooms that are fresh, fully open, and blemish-free. The best flowers to press are fairly thin, flat, and with a single layer of petals such as violas, pansies, cosmos, calendula, daisies, poppies, or asters. You can also press and dry herbs, leaves, or single petals from larger flowers like roses and peonies.
- Place the flowers face-down for pressing. They tend to stay put better that way.
- Gently spread the petals open evenly around the center. Or, capture a “side profile” by flattening the flower closed. Try to arrange the flower in the shape you want it to look like once it’s dry.
- Do not overlap flowers - provide at least 1/2 to 1 inch of space between them.
- Handle pressed flowers with care. They're very delicate once dry! Use craft tweezers to help gently move or un-stick them as needed.
- Do not add damp or dewy flowers to your press. Allow them to air dry for a couple hours if needed (with the stems in water to prevent wilting).
Using a Wooden Press (Best Overall Method + Results)
- Gently lay flowers face down on the reusable blotting paper, and add another piece of paper on top. Then add a section of thicker cardboard (both included in the press kit) on top. Continue stacking more layers as needed until the press is full.
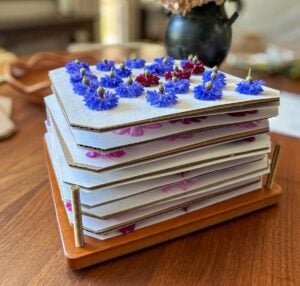
- Set the wooden top of the press in place and then tighten the clamps - but avoid over tightening at first. Instead, come back and tighten the screws a little more every couple of days as the flowers dry and flatten.
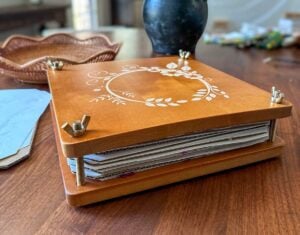
- Keep the press in a warm dry location to expedite drying time, which could take anywhere from 1 to 3 weeks, depending on the thickness of the flowers and conditions in your home.
- Once the flowers are completely dry (they’ll be brittle instead of pliable), use tweezers to carefully peel them away from the paper. I also find it helpful to lightly bend the paper away from the flowers to help “pop” them up and off when they’re stuck.
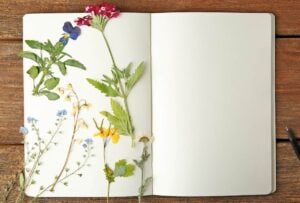
Using a Book (Good Alternative)
- For the best results, add layers of absorbent paper between the book pages first – such as parchment paper, newspaper, or reusable blotting paper.
- Arrange flowers face-down (not overlapping) and try to group ones of similar thickness together.
- Once the flowers are tucked flat within the book, set additional heavy objects on top of the book to keep it tightly closed.

- Alternately, you can place flowers between pieces of paper and then stack large books on top (rather than putting them within the pages of the book itself).
- Keep the flowers in the book for at least 2 to 3 weeks until fully dry. Larger, thicker flowers may take up to 4 weeks.
Microwave Press (Best for Fast Results)
- Do a practice run with your least perfect specimens! The time and results can vary depending on the type of florals used. Try to group similar flowers together so they’ll dry evenly.
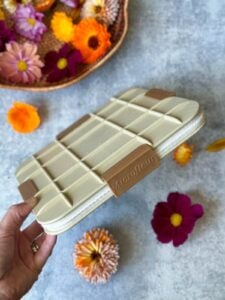
- Lay flowers on the included inner fabric liner, gently positioned in a way you’d like the final dry blooms to look. Do not overlap. Add top and side clamps.
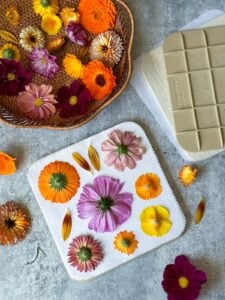
- Start by microwaving the flowers on high heat for about 20 to 25 seconds, followed by several shorter 10-second bursts with breaks in between.
- To prevent burning and discoloration, stop and open the press to air out the flowers in between bursts of heating. (Open the device and felt pads, but leave the two inner liners in place on top of the flowers.) Continue off and on for several minutes as needed.
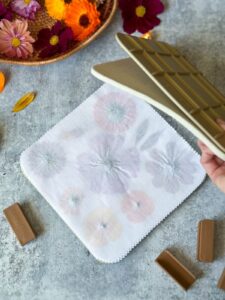
- The flowers are considered done when they feel papery, thin, and dry and do not have any obvious moisture left.
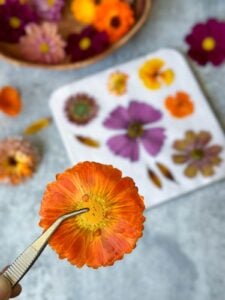
- Gently remove the flowers using tweezers and/or by lightly stretching the fabric to help them un-stick.
Using an Iron (Quick but Uneven Results)
- Start by gently sandwiching your chosen flowers between two pieces of parchment paper or other absorbent paper (like blotting paper). This method works best with extra thin, flat flowers with little-to-no "body".
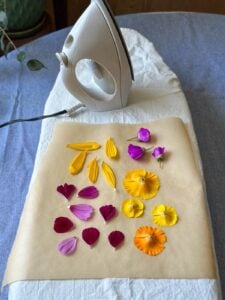
- Turn the iron on medium-low heat, and turn off any steam settings, and work on an ironing board or other firm surface covered with a thin absorbent towel.
- Iron the flowers for about 10 to 15 seconds at a time, and then lift the iron to let the flowers cool for 10 to 15 seconds in between. Apply firm downward pressure, but do NOT glide the iron back and forth.
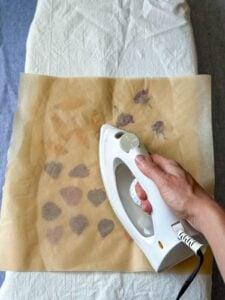
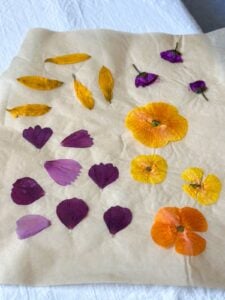
- Continue alternating between bouts of pressing and cooling for a couple of minutes, until the flowers are sufficiently flattened, stiff, and dry. Let the flowers cool before carefully peeling the two sheets of paper apart.
- For the best results, allow them to air dry for another day or two before storage or use. You can tuck them inside of a book to help keep them flat and protected too.
Tried this recipe?Let us know how it was!