

Simple Fermented “Pickled” Beets Recipe with Dill and Garlic
Whether you’re new to fermentation or an experienced ferment-a-holic, making fermented beets is a wonderful and delicious way to preserve beets when you’re blessed with a bounty. Follow the simple step-by-step directions below and learn how to make our easy lacto-fermented “pickled” beets recipe. They’re tangy, crunchy, and loaded with gut-healthy probiotics! They also add a beautiful pop of color to a wide variety of meals.
Make it garden-to-table, and learn how to grow beets from seed or seedling in our easy step-by-step guide!

Would you like to save this?
Disclosure: Homestead and Chill is reader-supported. When you purchase through links on our site, we may earn an affiliate commission.
Are pickled beets the same as fermented beets?
Not exactly. Traditional pickled beets are made with vinegar, while fermented beets do not contain vinegar. Pickled beet recipes may also call for added sugar. Instead, fermented beets are soaked for an extended period of time in a simple salt water brine at room temperature, where beneficial bacteria naturally lowers the pH of the beets to safely preserve them long-term. This process is called lacto-fermentation.
Since they’re exposed to high heat (reducing nutritional value), canned pickled beets often get soft. On the other hand, lacto-fermented beets are crisp and crunchy, and the perfect combination of tangy and sweet!
Are fermented beets good for you?
Full of probiotics, fermented beets are arguably more nutritious than pickled beets. Probiotics help support a healthy gut biome and digestion – which is inextricably linked to all sorts of positive health outcomes. In fact, research shows that gut health can impact the function of every other organ in our body!
Even more, fermented beets are not heated (like pickled beets often are) which helps retain all the awesome nutrients in the beets themselves. Beets are known to contain high levels of fiber, vitamin C, antioxidants, folate (vitamin B9), iron, manganese, and potassium – supporting heart, brain, and muscle health as well as lowering blood pressure. All in all, lacto-fermented beets are even more healthy than raw beets are!

Supplies Needed
- A fermenting vessel – Some folks use ceramic crocks, but many modern homesteaders and foodies these days simply use mason jars of varying sizes. For smaller batches, use a pint or quart jar. For larger batches, we use these half-gallon mason jars.
- Fermenting lid or air lock device – The use of a lid made for the fermentation process is ideal, which allows fermentation gases to escape the jar while keeping potential contaminants out. Examples of fermenting lids include an all-in-one device like this Ball fermentation lid, or a Kraut Source lid. If your air lock lid doesn’t include a weight or springs, you can add a separate ceramic or glass fermentation weight below the lid.
Ingredients
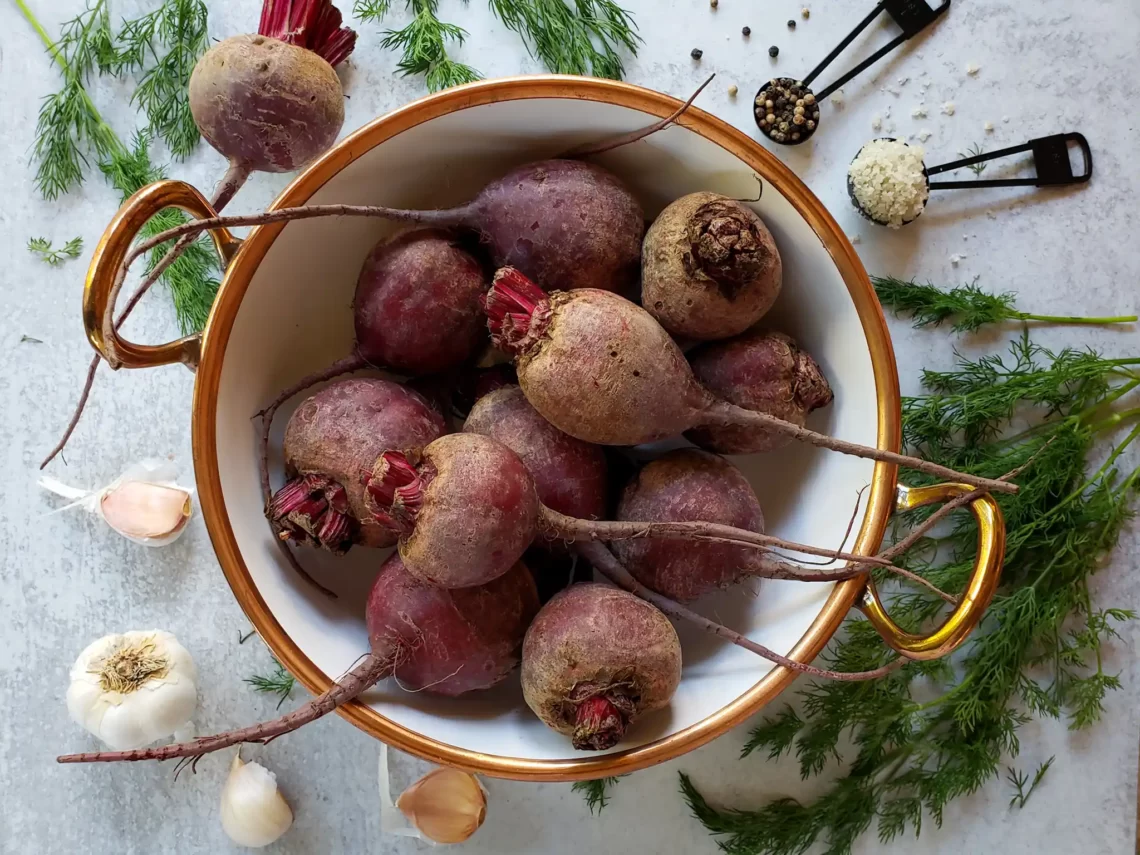
- Fresh Beets – As many needed to fill your vessel of choice. We found that a half-gallon jar takes just under 3 pounds of beets (about a dozen small-medium beets), and a quart size fits half of that. Personally, I prefer fermenting red beets or chioggia beets. We honestly have never tried using golden beets. If you do, be sure to report back!
- Salt – Sea salt or kosher pickling salt. Do not use iodized table salt! It messes with the flavor and process. We love this Celtic sea salt.
- Filtered water
- Fresh Dill – 1 bunch
- Garlic – I recommend 1 to 2 fresh cloves per quart jar, and 3 to 4 for a half gallon batch.
- Optional: Peppercorns, fresh chili peppers, or red chili flakes
Directions
1) Clean Your Supplies
It’s important to start with clean supplies, but they don’t need to be “sterile” as they do for canning. Avoid using bleach or fragrant dish soap to clean your fermentation supplies. Any leftover residue will negatively impact the flavor! Instead, we spray ours with plain white vinegar, and then rinse well with very hot water.
2) Prepare the Beets
Wash the beets, cut off the hard stem portion, and peel away the skin. Then, cut them into your desired size. We like to cut our beets into bite-size slices or chunks – about the size of a quarter, but twice as thick. Alternatively, you could cut them into long “sticks” like carrot sticks. Or, leave them in larger round slices. It all depends on how you intend to use them!
Since we most often use our fermented beets as a salad topping, creating bite-sized pieces from the start is most convenient. Also, please note that large chunks of raw beet will remain more firm and tough post-fermentation. Thinner cuts will soften nicely, but still retain a nice crisp texture!

3) Add Seasonings of Choice
In the bottom of your chosen fermenting vessel, add some washed fresh sprigs of dill. I suggest this simple “seasoning” at minimum. As long as you don’t dislike dill, it provides a very mild and delicious addition! The amount of fresh dill doesn’t need to be precise. I put a small handful in the bottom of the container, and another few sprigs in when I am halfway through filling the jar with beets.
We also usually add a couple cloves of fresh garlic and about a dozen peppercorns at the bottom of the container. If you don’t like dill or garlic, feel free to skip them! Or if you loooove garlic, you can add more (though fermented garlic can have a fairly overpowering flavor). We find about 1-2 cloves of garlic in a quart jar, and 3-4 cloves per half-gallon jar is our sweet spot for this fermented beet recipe.
Other optional seasonings
You can also get creative here and go beyond what this basic recipe is calling for. For example, add a sprinkle of celery seed or mustard seeds, a chunk of fresh ginger or turmeric, a dash of red chili flakes, or even a whole hot chili pepper or two – if you want some heat!
That’s the beauty of fermenting. The options for experimentation and creativity are endless. Keep in mind that flavors usually mellow out when fermented too. For example, hot chilis will become much less spicy than when eaten raw or even cooked once they’re fermented.
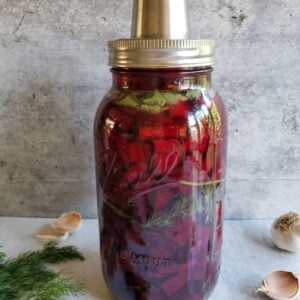
4) Pack the Fermentation Jar
Once you have your chosen seasonings at the bottom, start adding chopped beets to the jar. Try to fit as many beet slices in the container as possible. If you’re going through this process, you might as well maximize the amount of cultured food you get out of it in the end! This will also reduce the amount of brine needed, and the amount of air that can get trapped inside. Therefore, don’t just lightly toss them in there. Pack them in tightly!
I usually fill half the jar with the sliced veggies, then add another little layer of dill and a clove of garlic about halfway through, then continue layering with more beets until the jar is totally full.

5) Make a Salt Water Brine
The standard brine ratio for fermented vegetables is 1 tablespoon of sea salt or kosher salt per 2 cups of filtered water. With a fully-packed jar of veggies, we have found that 2 cups of brine is adequate per quart jar. Scale up or down as needed (e.g. 4 cups of water and 2 tbsp salt for this half-gallon batch).
On the stovetop, heat a pot with filtered water to just warm enough to dissolve the salt. You do not want to add hot brine, but lukewarm is okay. Too much heat will kill the beneficial bacteria (lactobacillus) needed to safely ferment your beets!
Once cooled to room temperature or lukewarm, slowly pour the brine into the jar until the beets are completely covered. Pockets of air are likely trapped in there, so carefully give the container a little tap and wiggle to help release them, and top off with more brine as it settles into the voids.
6) Add a Fermentation Weight and Lid
Next, add a fermentation weight to keep the beet pieces submerged below the brine. This part is essential, as any “floaters” will be more prone to mold! If your fermentation lid includes a weight or spring (as our Kraut Source does), you don’t need an additional weight. Another option is to use a ceramic or glass fermentation weight. Finally, add the airlock fermentation lid to the jar.
Helpful tip: Even if you use a weight or Kraut Source device, sometimes pieces of chopped radish can still slip around them. To keep the floaters at bay, we often use a large leaf of cabbage, collard green, or other hearty green to make a “cap”. This is placed on top of the veggies, below the weight, and keeps them trapped below. It should also be submerged as much as possible.

7) Let it Ferment
Once it’s all put together, let the beets sit out at room temperature for 7-14 days to ferment. The total time depends on your personal flavor preference, and the temperature of your house. We usually let ours sit about 10-14 days.
Warmer conditions will ferment things more quickly, and cooler does just the opposite. The ideal fermentation temperature is around 70 to 75 degrees Fahrenheit. If it’s summer and your house is warmer than this, try to find a slightly cooler location for your vessel to hang out. Too hot of conditions can encourage the development of white Kahm yeast. It is not dangerous, but rather stinky and off-putting.
Notes during fermentation:
While they are fermenting, you will notice the beets start to undergo change. The lactobacillus is working away to convert the starches in the food into lactic acid, which preserves it. In the process, carbon dioxide is formed, so you’ll probably see some bubbling activity in there! If red beets were used, the brine will turn very red and also get a tad cloudy, which is totally normal! Fermented foods can often give off a bit of a funky odor, but taste better than they smell!
If you are using a Kraut Source, keep an eye on its little water-filled moat, making sure it always has some clean water in there. Refill with water if needed. Also, carefully remove the top cap of the lid and press the spring down to remove more air halfway through fermentation.
Our vessels usually overflow from the lid for the first several days of fermentation. Be forewarned that yours may do the same! So we always set eve on a plate or in a bowl to catch the overflow. Once that initial burst of activity subsides (about 5 days later), the moat can dry up and you’ll want to add more water into it.

9) Refrigerate
When the time is up, remove the air-lock, replace it with a regular lid, and move your finished fermented beets to the fridge. Because of their acidic nature, standard mason jar lids have the tendency to rust. To avoid this, we store our finished ferments with either these stainless steel lids or these BPA-free plastic ones.
Lacto-fermented beets are good for several months in the fridge, if not longer. We have enjoyed some almost a year after they were made – though we always eat them up quicker than that!
Ways to Eat Fermented Beets
Now it is time to feed your belly with probiotic-rich home-fermented food! We love to use these fermented beets as a salad topping, or on top of sautéed veggies, brown rice, or madras curry lentils. They could also be used on sandwiches, like a pickle on an hor d’oeuvre plate with cheese and crackers, or just snacked on plain!
Don’t throw out that brine either! The liquid is also chock full of probiotics and beneficial enzymes, just waiting to make your belly happy. Did you know they actually sell leftover brine, marketed as “gut shots”, at natural food stores? And they aren’t cheap! We like to drizzle some on top of salads with olive oil as a dressing, or even take little shots of it straight!

Ready to try?
Go make some insanely healthy, tasty fermented beets of your own. If you are new to the process, do not be nervous! If you follow these steps, it is really quite difficult to “mess up”. In all our years fermenting, we have NEVER had mold or anything dangerous form in our vessels. Be sure to leave a review after you give them a try!
Curious to learn more about why fermented foods are so great for your health? Learn about the health benefits of fermented foods here. If you have more beets on hand, also be sure to try our easy beet pickled eggs or delicious balsamic and orange roasted beets recipe. Thank you for tuning in today!
You may also like:
- Sweet & Spicy Pepper Fermented Hot Sauce Recipe
- Fermented Dilly Radish Recipe
- Probiotic-Packed “Pickled” Fermented Green Beans
- Super Simple Sauerkraut Recipe
- How to Make Homemade Apple Cider Vinegar
Simple Fermented “Pickled” Beets with Garlic & Dill
Equipment
- Fermenting vessel, such as a mason jar (pint, quart, or half-gallon)
- An all-in-one fermentation lid, or fermenting weights and an air lock device
Ingredients
- 1.5 pounds organic beets (for a quart jar batch) OR just under 3 pounds for a half-gallon jar
- 1 tbsp kosher or pickling sea salt (not iodized table salt) per 2 cups of water used
- 2 cups filtered water (per quart jar)
- 1 bunch fresh dill
- 1-2 cloves fresh garlic, peeled and lightly crushed (per quart jar)
- Optional: black peppercorns, red chili flakes, fresh hot chili peppers – if you like it spicy!
Instructions
- Wash and peel the beets. Cut away the tough portion near the stem.
- Cut beets into desired size and shape (bite size chunks, sticks, slices, etc.) Thinner pieces make for more tender (but still crisp!) finished fermented beets. Large chunks may remain more tough.
- In a clean jar or ferment vessel, place a few sprigs of washed fresh dill and a clove of garlic in the bottom of the container. Add optional pinch of peppercorns or chili flakes.
- Next, pack the chopped beets into the container until halfway full – minimizing empty air space as you go.
- Add another small handful of dill and clove of garlic.
- Continue adding the chopped beets until the container is full.
- On the stovetop on low heat, combine the called-for salt and filtered water to create a salt water brine. Heat only until salt dissolves. Do not add hot brine to the beets! Allow to cool to room temperature/lukewarm as needed.
- Pour the brine into the ferment vessel or jar until the beets are fully submerged. Carefully tap and wiggle the jar side to side to release any trapped air pockets.
- Next put a Kraut Source lid, or other fermentation weight and air lock lid on top of the jar.
- Allow the beets to sit at room temperature to ferment for Fahrenheit for 7 to 14 days. The ideal fermentation temperature is between 70 and 75 degrees.
- If you are using a Kraut Source lid, watch the air-lock water "moat" in the lid to ensure it doesn't dry up. Refill with water if needed. Also, carefully remove the top cap of the lid and press the spring down to remove more air halfway through fermentation. Keep the container on a plate to catch overflowing brine.
- When the time is up, remove air lock lid and weights, cover the container with a standard lid, and store the finished fermented vegetables in the refrigerator.
- Use within several months, or possibly up to a year! As long as they aren't moldy or obviously putrid, they're still good!


59 Comments
Josie Appleby
Hi I have made this recipe, it’s about the right time to take them out. We used a Kilner fermentation jar and air lock lid. There is a rim of green/brown scum around the top, the beets are fully submerged. This is my first time fermenting so just a little unsure if this is normal or not?
Aaron (Mr. DeannaCat)
Hi Josie, that is strange but it could just be the juices from your beets that made the discoloration. As long as the beets stayed submerged and you don’t see any signs of mold, I would just skim off the film and remove it although it is probably more unsightly than anything else. Hope that helps and good luck!
Patricia Farren
Can I ferment cooked beets?
Aaron (Mr. DeannaCat)
Hi Patricia, yes you can cook the beets prior to fermenting but we never have, the beets do soften up some as they ferment however. Just be sure to not cook the beets after fermentation or else the probiotic bacteria will be killed off. Let us know how they turn out for you and good luck!
Sandy
I love traditional pickled beets, but would like to try fermenting them instead. My only issue is that I do not care for the texture of the raw beets, I prefer them cooked/tender. Any suggestions?
Aaron (Mr. DeannaCat)
Hi Sandy, do you like grated beets? Maybe grating the beets before or after will help with their crunchy texture? Unfortunately when it comes to fermenting, you can’t heat/cook any of the vegetables beforehand as that kills the good bacteria that is needed for a proper fermentation. Hope that helps and good luck!
Susan
Hi. I just used your recipe for fermented beets and afterwards noticed my himalayan salt is iodized! Why would they do that? Are they wasted? What can i do?
Aaron (Mr. DeannaCat)
Hi Susan, I think your ferment should be fine as Himalayan salt may naturally contain small amounts of iodine but it won’t be enough to have a negative effect on your ferment, I don’t believe Himalayan salt is typically iodized though? I would just double check the product label but I think your ferment should be safe, hope that helps and good luck!
Natalia Granella
Hi! I made this recipe last week.
On day 3 it started to bubble, a white foam formed, then it turned brownish… and the liquid was with kind of viscosity… the taste is ok. But I am not sure about it. Is the brine ok to be like that?
Aaron (Mr. DeannaCat)
Hi Natalie, how long did you ferment the beets for? What type of ferment lid did you use? As long as the beets were submerged in the brine, your fermented beets should be fine to eat. If it was warmer in your house during the ferment, the viscosity of the brine could be due to kahm yeast which can form if the temperature of the ferment is on the warm side (over 70 F). Kahm yeast is harmless but it can produce a slightly different flavor in the ferment and the brine can turn more white in color and be slightly thicker in our experience. Hope that helps and reach out with any other questions.
Steve Schechter, N.P., H.H.P.
i, and my family, do not like the vinegar taste… Can i use your recipe vinegar free and not pasteurizing the roots?! We do like Celtic salt, Himalyan Pink Salt, and other full, natural salts. Mahalo & Blessings, Steve
Aaron (Mr. DeannaCat)
Hi Steve, this recipe is for fermented beets so there is no need for vinegar and you don’t need to heat up the beets ahead of time either. Using fresh fresh produce in fermentation leaves all the good bacteria on the vegetables that is needed for a healthy ferment. Hope that helps and enjoy your fermented beets!
jennifer
I have made the beets a couple of times. First time, I chunked them, as suggested and they turned out just fine. Second time I shredded them and they turned brown towards the top of the jar. I had a cabbage cap and when I opened the jar there was still liquid at the top but the brown beets underneath seemed dry. Everything smelled good and I didn’t see any mold but I was freaked out so I tossed them. I made another batch recently and the same thing happened. May I add some more brine or water now that fermentation is finished? Are the beets ok if there is no odor or mold showing? Thanks in advance for your help!
Aaron (Mr. DeannaCat)
Hi Jennifer, yes you can add more brine during or after the ferment. Since you shredded your beets, they likely absorbed a lot of the brine/moisture, similar to what a sauerkraut would do. If there is no mold or off smells or flavors, I would just remove the discolored portion of the ferment and possibly add a little brine to that, however, once you refrigerate the ferment, it should be fine, even if there isn’t much brine at the top. Hope that helps and good luck!
vince
I have leftover brine from the wonderful spicy sweet sauce recipe, can I use it for this beet recipe? It seems such a waste to toss out as it tastes awesome
Aaron (Mr. DeannaCat)
Hi Vince, yes you can absolutely use your extra brine from your chili ferment to kick start a batch of lacto fermented beets, sounds tasty!
Jim Saltsman
I’ve made hot sauce many times using fermenting. I’ve been advised by Chille Chump on you tube not to remove all of the stem bases as this is where the Lacto Bacillis lives, maninly. How do you get fermentation if you peel the beets like you do. (really want to try this) The LactoB lives on the skin. From the dill or garlic? I ferment in vacum bags, works great. Not as pretty but no need for weights valves etc..
Thanks,
Jim
Aaron (Mr. DeannaCat)
Hello Jim, while there is a fair amount of bacteria on the skin there is more than enough on the inside of the beets to make a successful ferment as we have done so on numerous occasions. You don’t need to peel the beets, it just makes for a slightly cleaner appearance. Also in regards to the fermented hot sauce, we have also made numerous batches and we generally remove the top stem portion of the chile, leaving much of the membrane and seeds and it ferments well with no issues whatsoever. Hope that helps and have fun fermenting.
Carolina
so my beets that were closer to the top, still fully submerged, came out a little on the brown side. is that normal?
Aaron (Mr. DeannaCat)
Hi Carolina, can’t say for sure that I have seen this occur but the vegetables in general will often turn a different color once it has been fermented. If the vegetables were submerged below the brine and there is no mold or off putting odors (aside from the ferment in general) then you should be good to go.
Sharon
Sorry to bug you agian. But how do I know when they are done?
Especially the beet greens because they will be faster right?
Do I open it? Will opening mess it up? I did she with my beets they overflowed and som of the dill is in the little opening I can’t remember what it is called. But it adjusts the pressure.
Aaron (Mr. DeannaCat)
Hi Sharon, it isn’t necessary to open the ferment jar as it is normal for the ferment to overflow in the first few to five or so days. It sounds like you are using a ferment lid which is great! We usually place our ferments on a plate in anticipation of it overflowing. We usually let most of our ferments go for at least 10 days but we recommend at least 7 days for recipes such as this. When active fermentation is taking place, the ferment will usually bubble a lot more and as the ferment ages, it will become less active with fewer bubbles. You may also have to refill the moat on your ferment lid in time as the opposite usually occurs later in fermentation and the moat will dry up altogether as opposed to overflowing. Everything should be just fine as it seems you are on the right track!
Sharon
I used dry dill it’s all I had. They floated in the brine on top. Will that be a problem?
Aaron (Mr. DeannaCat)
I think you should be fine, maybe slightly swirl the container every other day so any dill floating will get washed in the brine reducing the chance of mold.
Sharon
Ok thank you I will try that. I am so excited and nervous my first ferments of veggies. I did this one and I did a beet green one. Both the dill is floating just a little.
I did use your trick of a cabbage leaf for both. Hope they both come out good. And no mold
Thank you so much!
Heidi Kearns
I ended up with a white fluffy mold on top of my beets. Do I need to throw them out?
Aaron (Mr. DeannaCat)
Hi Heidi, if you made the brine strong enough and the beets were submerged below the brine level, there shouldn’t be any mold. If parts of the beets were left above the brine level, oxygen will contribute to mold growth. You may be able to remove the beets that have the mold but do your best to keep the mold out of your ferment and brine but you will have to use your best judgement. Good luck!
Thomas
I have recently joined the homesteading revolution.. That being said, I don’t have refrigeration… can I still make ferments, and what would I need to watch out for??
Aaron (Mr. DeannaCat)
Hi Thomas, yes you can make and store ferments without refrigeration, although how long they will last will vary depending on a few factors. If you have a basement or root cellar, that is the most optimal way to store the ferments compared to on your countertop at room temperature. 45-65 degrees F is likely a good temperature range for optimal ferment storage shelf life, a water sealed crock may be a good vessel to use in this instance compared to jar ferments (like we do) which are said to not store as well nor as long at room temperature (maybe 1-2 months). Be sure to keep your ferment below the brine level for optimal shelf life. Also, starting off with clean containers and utensils when you initially prepare the ferment will help in making sure no bad bacteria is introduced to your ferment which may affect the shelf life. As you continue to eat through your ferments, be aware of the difference between what mold looks like compared to what yeast looks like. Hope that helps and good luck!
Kathy
I would like to try this recipe using garden beets and green beans, as well as organic carrots. Have you ever mixed it up in one batch? I have a Gurtopf crock.
Aaron (Mr. DeannaCat)
That sounds like a good idea Kathy, we don’t typically mix roots with green beans but it should work out just fine. We have done combinations of beets, radishes, and carrots before and they are delicious on top of salads. Hope that helps and good luck!