

Easy Fermented Hot Sauce Recipe: How to Ferment Peppers

Need a little extra spice in your life, or a fun way to preserve homegrown peppers? Come learn how to make fermented hot sauce with this simple step-by-step guide!
Even if you aren’t a huge fan of hot sauce or spicy foods, or haven’t dabbled with fermentation much in the past, don’t worry. This fermented pepper hot sauce recipe is easy make, and easy to tailor to your taste buds using any variety of peppers you wish to use. We often combine a mix of both hot chilis and sweet peppers to create a nice balance of flavors.
Honestly, I never liked hot sauce before… or spicy foods for that matter. Now, homemade fermented hot sauce is one of my go-to condiments. It’s fantastic with tacos, tostadas, eggs, veggie burgers and more. It makes also makes a fun gift for the hot sauce lovers in your life!

Would you like to save this?
Disclosure: Homestead and Chill is reader-supported. When you purchase through links on our site, we may earn an affiliate commission.
RELATED: Looking for more ways to use and preserve peppers? Don’t miss our popular cowboy candy recipe (aka candied jalapeños), easy refrigerator pickled peppers, homemade chili powder recipe, or this fermented jalapeño hot honey.
What’s the difference between fermented hot sauce and regular hot sauce?
Fermented hot sauce is made by combining peppers, onions, and spices in a mild salt water brine – not vinegar. As the peppers soak in salt water for a week or longer, beneficial lactic acid bacteria naturally present on the peppers multiply and lower the pH of the brine. Thus, the lacto-fermentation process effectively preserves the hot sauce AND introduces gut-healthy probiotics, making this fermented hot sauce recipe more nutritious than regular hot sauce.
In contrast, traditional (unfermented) hot sauce that is preserved with vinegar is devoid of probiotics. It also tends to have an overwhelmingly hot and single-note vinegary flavor. Instead, the fermentation process transforms the sharp, hot, often overpowering flavor profile of chili peppers into something far more mild, complex, flavorful, tangy and tasty than any other hot sauce you’ve ever tried!

Should I add vinegar to fermented hot sauce?
Some folks wonder if they should add vinegar to homemade fermented hot sauce once it’s done fermenting, as some recipes suggest to do this to potentially extend the shelf life. However, I don’t find it necessary. Naturally lacto-fermented hot sauce without vinegar already has an incredibly long shelf life: well over a year when stored in the refrigerator.
Plus, adding too much vinegar will halt the fermentation process and kill the beneficial probiotics you worked so hard to create! That defeats much of the purpose, if you ask me. Instead, we add a small splash of fresh lime juice at the end of our fermented hot sauce recipe – which gives it a nice tart little zing, but isn’t strong enough to kill the beneficial bacteria.

Ingredients
The following ingredient list fills a one-quart mason jar for fermenting, and makes about 16 ounces of finished hot sauce at the end. Scale up or down as needed, keeping the proportions similar. We routinely double the recipe and make a half-gallon!
- Peppers of choice – approximately 1 pound. We like to use about half (or just over) hot chilies such as serranos, jalapeños, gochugaru, Hungarian wax peppers, habaneros, or cayenne peppers, along with half sweet or mild peppers such as banana peppers or bell peppers.
- Fresh cilantro (optional) – 1/3 to 1/2 cup, loosely packed
- One small onion, or 1/2 medium to large onion. We prefer to use sweet yellow onions for our fermented hot sauce, though white or red can also be used.
- 2-3 cloves of garlic
- 1 tbsp fresh-squeezed lime juice – which you won’t need until the end of the fermentation process, a week later.
- Sea salt, pickling salt, or kosher salt – not iodized table salt!
- Filtered water – chlorinated water may interfere with the fermentation process
Adding other vegetables to fermented hot sauce
We’ve made many fun variations of this fermented hot sauce recipe over the years, using other vegetables in addition to peppers. Adding different vegetables creates even more complex and interesting flavors, so feel free to experiment! For example, we have added carrots or tomatillos from the garden.
To do so, simply stick with the same ratio (1 pound of veggies/peppers) per the other listed ingredients. For example, half a pound of hot peppers plus half a pound of chopped carrots. I suggest cutting tomatillos in half or quarters. Everything will get blended together later.

Supplies Needed
- A container for fermenting, such as a pint, quart, or even half-gallon mason jar
- Fermentation air-lock lid and weight. We use an all-in-one Kraut Source fermentation device, or this all-in-one ferment lid from Ball. Another option is to use a ceramic or glass ferment weight plus a separate airlock lid.
- Fine strainer (or cheese cloth) & bowl, used after fermentation
- Blender, used after fermentation
- Glass bottles or jars for storage of the finished fermented hot sauce
Instructions
Step 1: Prepare Peppers and Onions
Wash your peppers of choice. When preparing them, keep in mind that the goal is to fit as much vegetable matter into the jar as possible, so I suggest to cut the peppers into pieces or rings (depending on the size/shape of your peppers) instead of leaving them whole. Next, peel and dice the onion into small pieces as well.
To make your fermented hot sauce more mild, you can also core the peppers to remove most of the seeds and white inner membrane. I also highly suggest wearing gloves while working with hot chili peppers!
Step 2: Pack the Jar
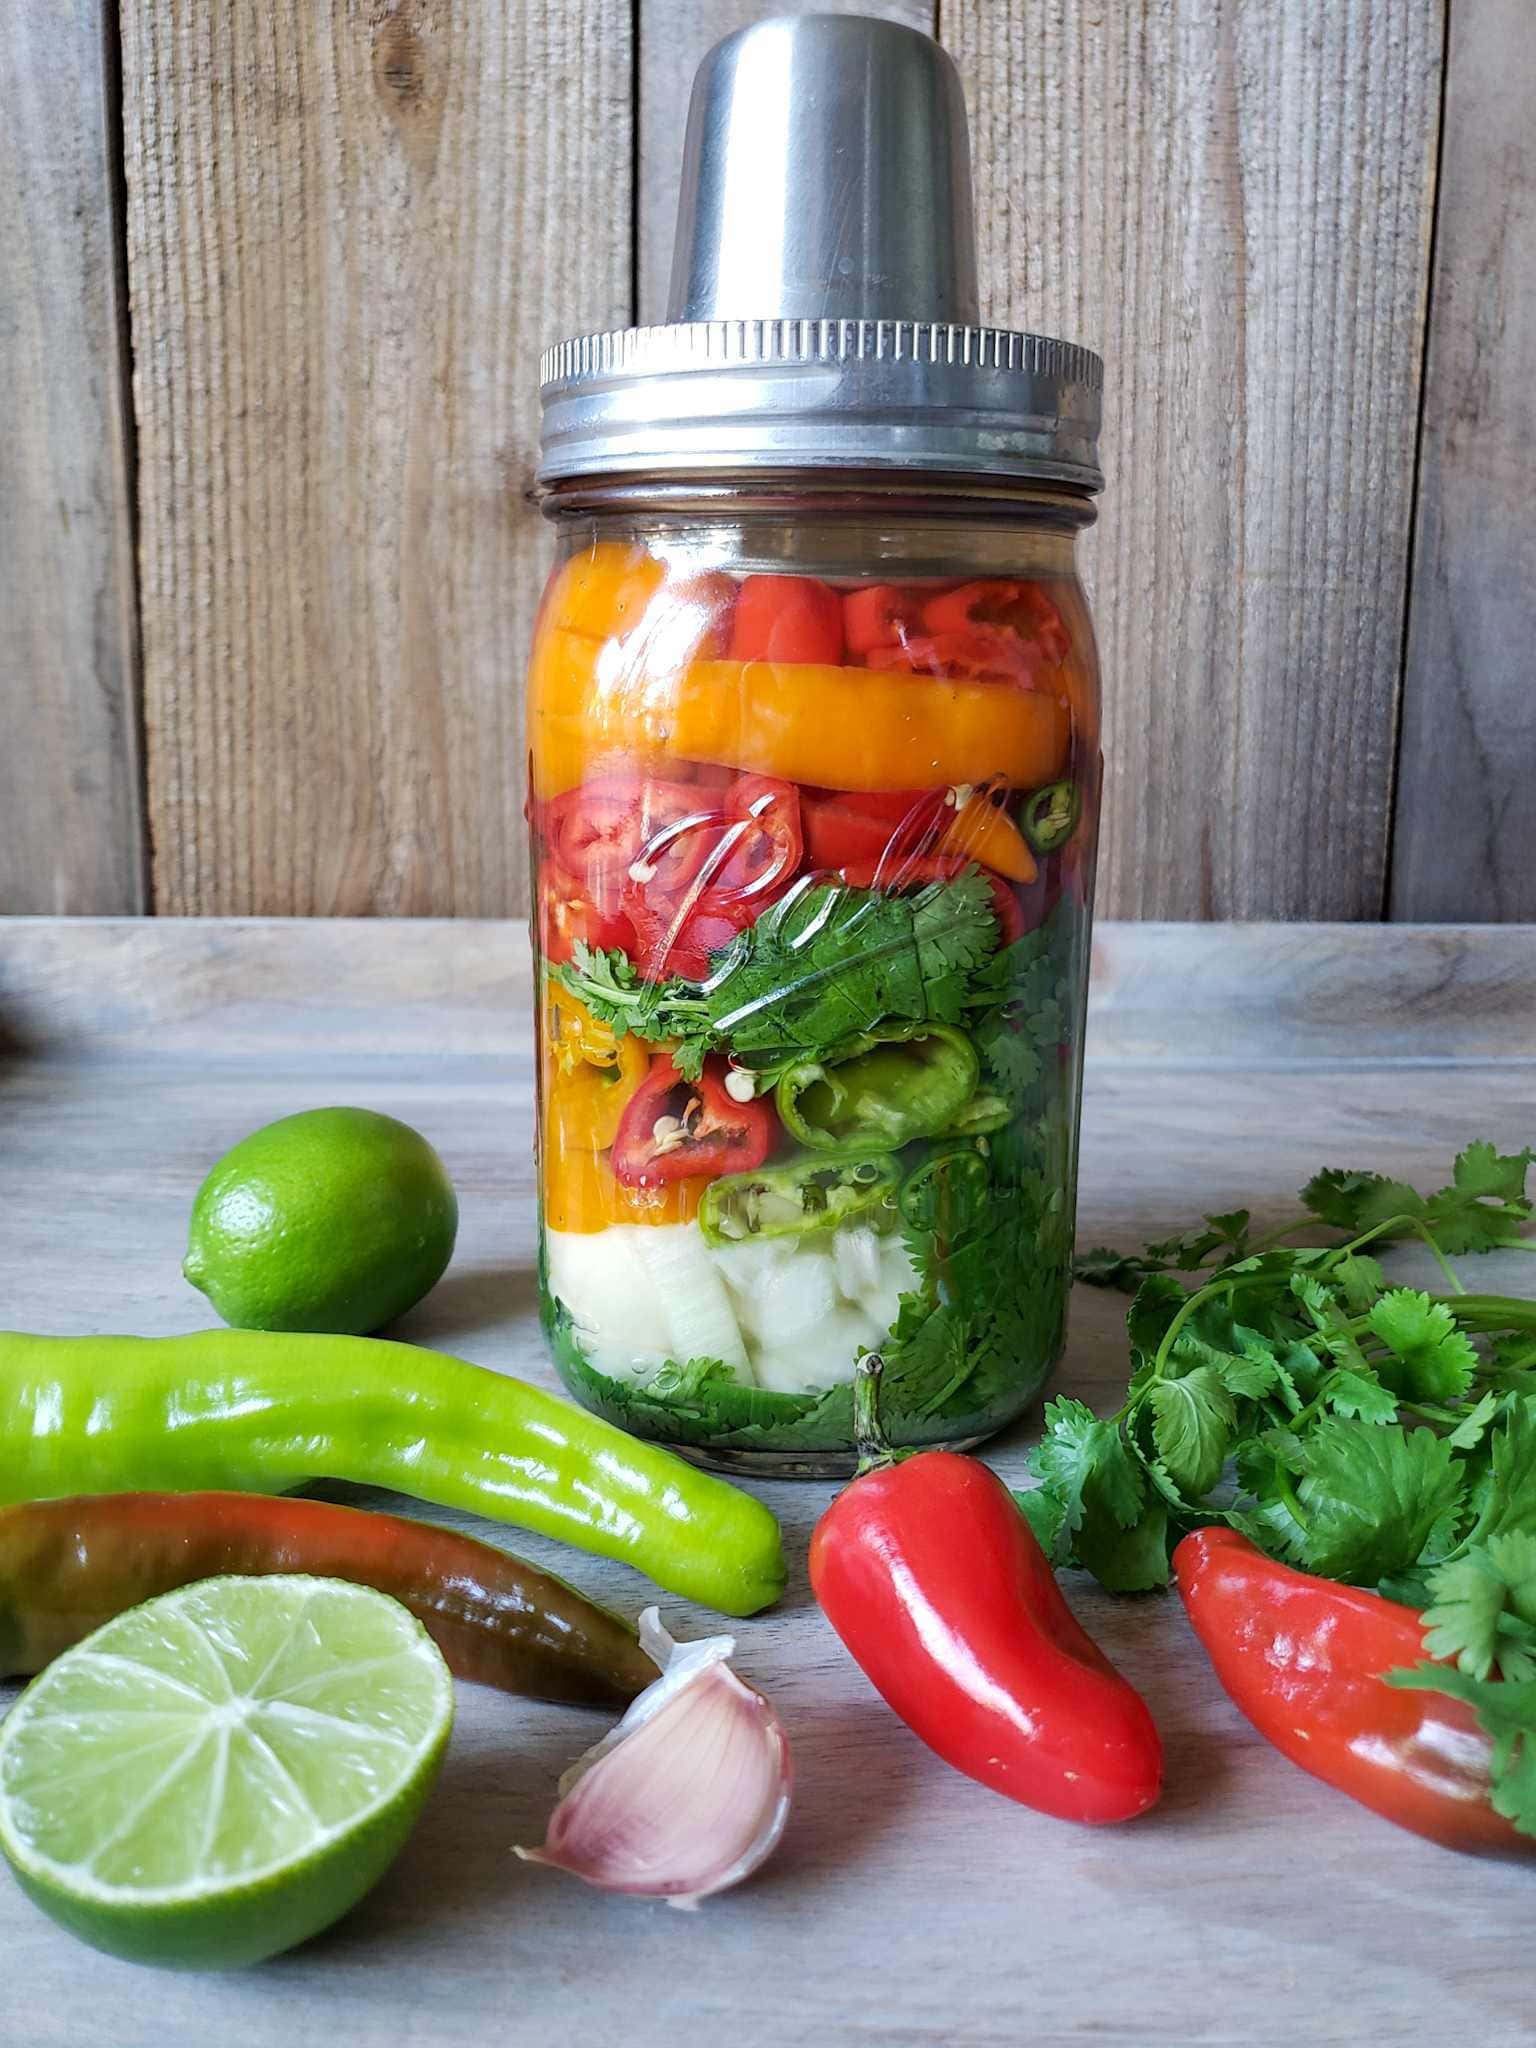
- In the bottom of a clean jar (or other fermentation vessel of choice) add a small handful of cilantro – about ¼ cup loose. Wash it first, but it does not need to be cut up or de-stemmed. Save a similar small handful of cilantro to layer into the jar later.
- Next, add 2 to 3 lightly crushed peeled cloves of garlic to the jar, followed by the diced onion. Lightly press the contents down to pack. The jar should only be about a quarter full or less at this time. The remaining space is for peppers!
- Now start adding cut pepper pieces to the jar, lightly packing them down as you go – reducing empty air space. I generally mix hot and sweet peppers together in layers.
- Once the jar is one-half to two-thirds full, add that last little bit of cilantro.
- Continue layering and packing peppers until the jar is nearly full, about an inch below the rim. (Note: You may need a little extra space at the top of the jar if you’re using a thick glass fermentation weight.)

Step 3: Make and Add Salt Water Brine
On the stove top, combine 2 cups of filtered water with 1 tablespoon of sea salt in a pot to create a simple salt water brine. The salt is what encourages a safe fermentation process and beneficial bacteria, while inhibiting the growth of harmful pathogens.
Gently heat the water until the salt dissolves, but avoid overheating it. The brine needs to be room temperature or barely lukewarm by the time you add it to the jar. (That said, you could also do this step prior to the veggie prep, allowing extra time for it to cool.)
Once the brine has cooled to the desired temperature, pour it into the fermenting vessel until the peppers are completely covered with liquid. Gently tap and wiggle the jar or push down on the peppers to release air pockets. Top off with more brine as needed after settling occurs.

Step 4: Cover with an Airlock Lid
When fermenting foods, it is important to keep the veggies (peppers, in this case) submerged below the brine. This helps prevent the development of mold. As the peppers ferment, they will release gasses that need to escape from the jar. Ideally, those gases should be allowed to escape without disrupting the fermentation process or introducing new air. This is where your weight and airlock lid comes in handy!
Cover the fermentation vessel with your weight and airlock lid system of choice. The stainless steel Kraut Source ferment device we use has a spring and plate that serve as a weight to keep the peppers submerged, along with a moat system on the top of the lid that creates an airlock. This all-in-one ferment lid from Ball accomplishes the same.
Alternatively, you can use a separate fermentation weight like these glass weights made for wide-mouth jars, ceramic versions, or even boiled stones. Then, add a separate airlock lid on top.

Step 5: Ferment
How long should hot sauce ferment? How do I tell when it’s done?
Now it’s time to let the peppers and lactobacillus do their thing! Set the fermentation vessel in a temperate location to ferment for 7 to 14 days. (See more temperature notes below.) Dark or light – doesn’t matter! Ours usually lives on the kitchen counter.
The shorter the ferment, the less “developed” and complex the flavor profile will be. However, the longer the ferment – the more chance there is to develop kahm yeast (also explained below) and get a little funky, especially in warmer conditions.
As the peppers ferment, the brine will change from clear to cloudy, the peppers colors will become more muted, things will compact under your weight, and will likely produce bubbles.
Some fermentation vessels bubble so much that they overflow from the container. Therefore, we always set ours on a plate to catch any runoff. Also note that ferments usually smell a bit funky, but don’t worry – they taste better than they smell! I promise.
What temperature should I ferment my hot sauce?
The ideal fermentation temperature for peppers and fermented hot sauce is about 68 to 73°F. Other ferments do okay with temperatures slightly warmer, up to the 80 to 85 degree range, but peppers are more finicky and prone to growing kahm yeast. Therefore, do your best to find a location in the preferred range.
A note about kahm yeast
In too warm of conditions, the peppers in fermented hot sauce are prone to developing something called kahm yeast. Though not harmful, kahm yeast can create an off-putting odor and flavor. It will appear as a thick white layer of sediment on the bottom of the jar, on the peppers themselves, or floating on the surface. A small amount of white sediment or film in totally normal in any ferment. In contrast, too cold of temperatures can lead to improper fermentation and mold development.

Step 6: Strain and Blend into Hot Sauce
After 7-14 days have passed, it is time to turn those fermented veggie chunks into fermented hot sauce! To do so, place a fine-mesh strainer over a bowl. Yes, over a bowl – not the sink! Next, open and remove the lid and weight from your ferment vessel and dump the contents of the container into the strainer. Keep the collected brine that is in the bowl below!
Transfer the fermented peppers, onions, garlic and cilantro into a blender. Next, add one tablespoon of fresh-squeezed lime juice, along with ¼ cup of the reserved ferment brine. Blend, and check the consistency.
Continue to add small amounts of the brine, little by little and blending as you go, until the fermented hot sauce has reached your desired thickness. Some like it thin, some like it thick! That is totally up to you. Give it a little taste-test too, and add another squeeze of lime if you’d like.

Step 7: Bottle and Enjoy
Once blended, transfer the finished fermented hot sauce into a storage container. Ideally, something that is glass and has an airtight lid. We like to store ours in these classic 5-ounce hot sauce bottles (especially for gifting), fun swing top bottles, or in small mason jars.
Now you get to enjoy your very own tangy, sweet and spicy fermented hot sauce! We enjoy drizzling this sauce over, eggs, frittata, veggies with rice and beans, fiesta-style stuffed squash, lentils… the list goes on. Aaron likes to eat it with chips like salsa, or even add a dash to his soup!


How long does fermented hot sauce last?
Fermented hot sauce stays good for up to a year in the refrigerator (or longer) which is where it should be stored. We’ve eaten fermented hot sauce that was over two years old before! Shake to mix before use, because some separation is normal. Discard if mold or off-flavors develop.

In all, I hope you love this recipe as much as we do! If you need any tips on growing your own peppers and chilis, learn more here. Please feel free to ask questions in the comments, share this post, and if you do make it – report back with a review!
Don’t miss these tasty recipes!
- Crunchy Refrigerator Pickles: Quick & Easy Homemade Dill Pickles
- Simple Low Sugar Apricot Jam with Lemon Juice (No Pectin)
- How to Make Sauerkraut: Easy Step-by-Step Recipe with Photos
- Fermented Pickles Recipe: Crunchy Brined Dill Cucumber Pickles
- How to Make Homemade Chili Powder, in 4 Simple Steps

Easy Fermented Hot Pepper Sauce Recipe
Equipment
- Fermentation vessel, such as a glass jar.
- Ferment weight and airlock lid (or all-in-one ferment lid)
- Strainer
- Blender
- Bottles or jars, for storage
Ingredients
- 1 lb peppers of choice, both hot chili peppers and some sweeter peppers recommended
- 1/2 cup fresh cilantro, loosely packed
- 1 whole small onion, or 1/2 medium to large onion
- 2-3 cloves garlic
- 1 tbsp sea salt, pickling salt, or kosher salt (no table salt)
- 2 cups filtered water, to combine with salt for brine
Instructions
- Wash and chop peppers and onions. Wear gloves is suggested. For a more mild hot sauce, core the peppers first to remove most of the seeds and white membrane.
- In the bottom of a clean quart jar, add a small handful (1/4 cup loose) of fresh cilantro and 2-3 crushed cloves of garlic.
- Next add the diced onion, and some peppers on top. Lightly press to compact and reduce air space as you go.
- When the jar is halfway to 2/3 full, add the remaining 1/4 cup of cilantro and then continue filling the jar with peppers, until completely packed full (within top inch of the jar).
- On the stovetop, combine 2 cups filtered water with 1 tbsp sea salt. Lightly heat until salt dissolves, but avoid over heating.
- Allow brine to cool to room temperature or lukewarm, and then pour over the peppers in the jar until the jar is full and they are fully submerged. Tap and wiggle jar to remove air pockets.
- Cover with fermentation weight and airlock lid, to keep veggies submerged below the brine during fermentation.
- Set jar in a temperate location (68-73°F) to ferment for 7-14 days.
- After 7-14 days, open jar and pour contents through a strainer that is positioned over a bowl to catch the liquid. KEEP the strained brine liquid.
- Add all solid contents (peppers, onions, garlic, and cilantro) to a blender. Add 1 tablespoon of fresh squeezed lime juice, and 1/4 cup of the reserved brine liquid. Blend.
- Assess the consistency of the fermented hot sauce. Continue to add reserved brine little by little, blending as you go, until the desired consistency of sauce is reached.
- Store finished fermented hot sauce in an air-tight bottle or jar in the refrigerator. Shake before use. It should stay good for up to one year in the refrigerator (or longer).


138 Comments
Martha
1) Why layer? Why not just chop everything up and mix for the ferment? 2). After blending, two weeks in the fridge and it started to go bad; that is, a layer of white mold began to grow on the surface. Any ideas what went wrong? It did taste good, although a little sour.
Aaron (Mr. DeannaCat)
Hi Martha, we layer the ingredients because we were prepping one item at a time before adding it to the jar and it looks more interesting for our photos. Are you sure the white mold wasn’t just kahm yeast? If it wasn’t kahm yeast and white mold did form on your ferment at any point in the process, it likely wasn’t fermented enough or the salt brine wasn’t strong enough for the amount of ingredients that was used. We have had fermented hot sauce in the refrigerator for close to two years without any mold issues whatsoever. Hope that helps and good luck!
Sarah Katz
I made this and it was wonderful!
I was wondering if I could add a layer of mango along with the sweet peppers next time, or will the sugar in the fruit change the fermentation process?
Thanks!
Aaron (Mr. DeannaCat)
Hello Sarah, we haven’t fermented much fruit but you can add mango to your ferment at the beginning or some people and blend it up with their fermented hot sauce after the fermentation process. Although if adding the mango afterwards, I wouldn’t add too much volume of mango compared to fermented sauce as to keep its preservation qualities in tact. Hope that helps and enjoy your hot sauce!
Miranda
Could I use an old ketchup bottle for storage instead of a flip top bottle?
Aaron (Mr. DeannaCat)
Hi Miranda, that should be fine and enjoy your hot sauce!
alexandra
Should there be a little white layer on the top after 7 days ?
Aaron (Mr. DeannaCat)
Hi Alexandra, you are likely seeing kahm yeast forming on the top of your ferment. It is harmless to eat (as long as there is no mold present) but can slightly affect the flavor of the ferment (Deanna is a little more sensitive to the flavor than I) and it will typically show up in your ferment when the temperature of your ferment is warmer than optimal fermenting temperatures, there isn’t enough salt in your brine, or there is too much headspace in your ferment. We have found it most persistent when fermenting during warm periods, when our house temperature is in the high 70’s to low 80’s F. Hope that helps and good luck!
Lisa
I don’t typically comment on recipes but this is absolutely the best fermented food I’ve ever made. I love that I’m getting tons of thousands of healthy bacteria and this is tasty on almost everything! Sometimes I just put it on plain rice or in soup! I wait for the food to cool before putting it on as I don’t want to destroy any of the precious bacteria! I have fermented a batch for 21 days with this and out of the three jars one of them did have the white yeast stuff on the top. Although it probably would have been fine, i threw it in the compost pile but the other two were fantastic! I like this so well that I even drink the liquid that bubbles over in the first few days of ferment. Fermenting seems to make the hot peppers less hot. I prefer it blended in the end with the lime juice but have also just eaten the whole fermented vegetables! I will never make any other recipe for hot sauce!
Aaron (Mr. DeannaCat)
Glad you enjoy the hot sauce so much Lisa and we can’t wait to harvest fresh peppers this summer so we can make more!
Kayla
I’m wondering if you add a little bit of vinegar would that prevent the fermentation process?
Also, what is the reason behind a lunkeearm brine, and not heating it?
Thanks!
Aaron (Mr. DeannaCat)
Hello Kayla, heating the brine is fine but you want it to cool down before it is added to the ingredients as anything too hot can kill the good bacteria that is needed for a successful ferment. Adding vinegar can stop the fermentation process depending on how much you add and will kill a lot of the good bacteria and yeast that forms during the fermentation process, it isn’t really necessary from a storage stand point as a successfully fermented batch of hot sauce will last a long time as it is, even more so if it is stored in the refrigerator. Hope that helps and enjoy your hot sauce.
Henda
Hi there. Thanks for the recipe! I have two questions:
1: is it ok if some air bubbles remain at start? I can’t get them all out.
2: is it ok if some seeds and bits of cilantro float to the top of the water? I am using kraut source and the little bits come through the holes.
Thanks!!
Aaron (Mr. DeannaCat)
Hello Henda, it is fine if there are still some bubbles remaining as they will likely float to the top with time. You can always slide the jar back and forth a little and some of the bubbles might escape. The floating bits should be fine, they are likely small enough to be soaked in the brine anyway, again, sliding the jar back and forth a little will move stuff around so it isn’t exposed to air the entire time of the ferment. We find this to be most useful within the first 3 days or so once the ferment is just getting going. Hope that helps and enjoy your fermented hot sauce!
MELANIE DUNKELMAN
Hi there, for the sweet and spicy fermented peppers hot sauce, do you put a tight mason jar lid on it for the 14 days of fermentation? Or should the lid be screwed on loosely? Worried about exploding.
Aaron (Mr. DeannaCat)
Hi Melanie, we use a fermentation lid that keeps the oxygen out of your ferment (which can cause mold) while also releasing the gases that build up. If you are only using a mason jar lid, be sure to weigh down the ingredients so they are underneath the brine as any portion that is stick up out of the brine may mold. With this, the lid doesn’t need to be screwed on all the way or unscrew the lid a couple times a day to see how much gas gets released. Good luck!
mike thomas
So, I have reached day 14 but I am currently sick, how many days past 14 can this recipe go?
Aaron (Mr. DeannaCat)
Hi Mike, it can ferment for quite some time. The flavors will continue to develop and become more complex the longer it ferments so not to worry if you can’t blend your fermented hot sauce mixture for another few days or weeks. Hope that helps and enjoy the hot sauce!
Adrienne
I’ve seen other recipes say online not to use kosher salt because of the anti-caking ingredients. Do you use it and is it really that big of an issue? Thanks!
Aaron (Mr. DeannaCat)
Hi Adrienne, we typically use sea salt in most of our recipes, ferments included, although I don’t think the anti-caking ingredient will affect your ferment in a negative way. Hope that helps and good luck!
Paul Adare
Adrienne, not all kosher salts contain anti-caking ingredients (Diamond Crystal and Morton’s do not). When in doubt, look at the ingredients, you want a kosher salt that contains Salt, and nothing more.
SUSAN
Hi. I started my fermentatiom 3 days ago. the brine is cloudy but i do not see any bubbles. Should I be seeing bubbles? Cant wait to try the finished product!
Aaron (Mr. DeannaCat)
Hi Susan, it will usually take at least a few days in warm conditions before you start seeing bubbles, although that isn’t a tell tale sign that your ferment is working. If your veggies are submerged in the brine, you are good to go, you will see in time that it is fermenting. Good luck!