

Easy Fermented Radishes Recipe with Dill and Garlic
This easy, beginner-friendly fermented radishes recipe will help you turn regular boring radishes into a delicious, tangy, gut-healthy snack. With optional dill and garlic, they’re similar to pickled radishes… but better!
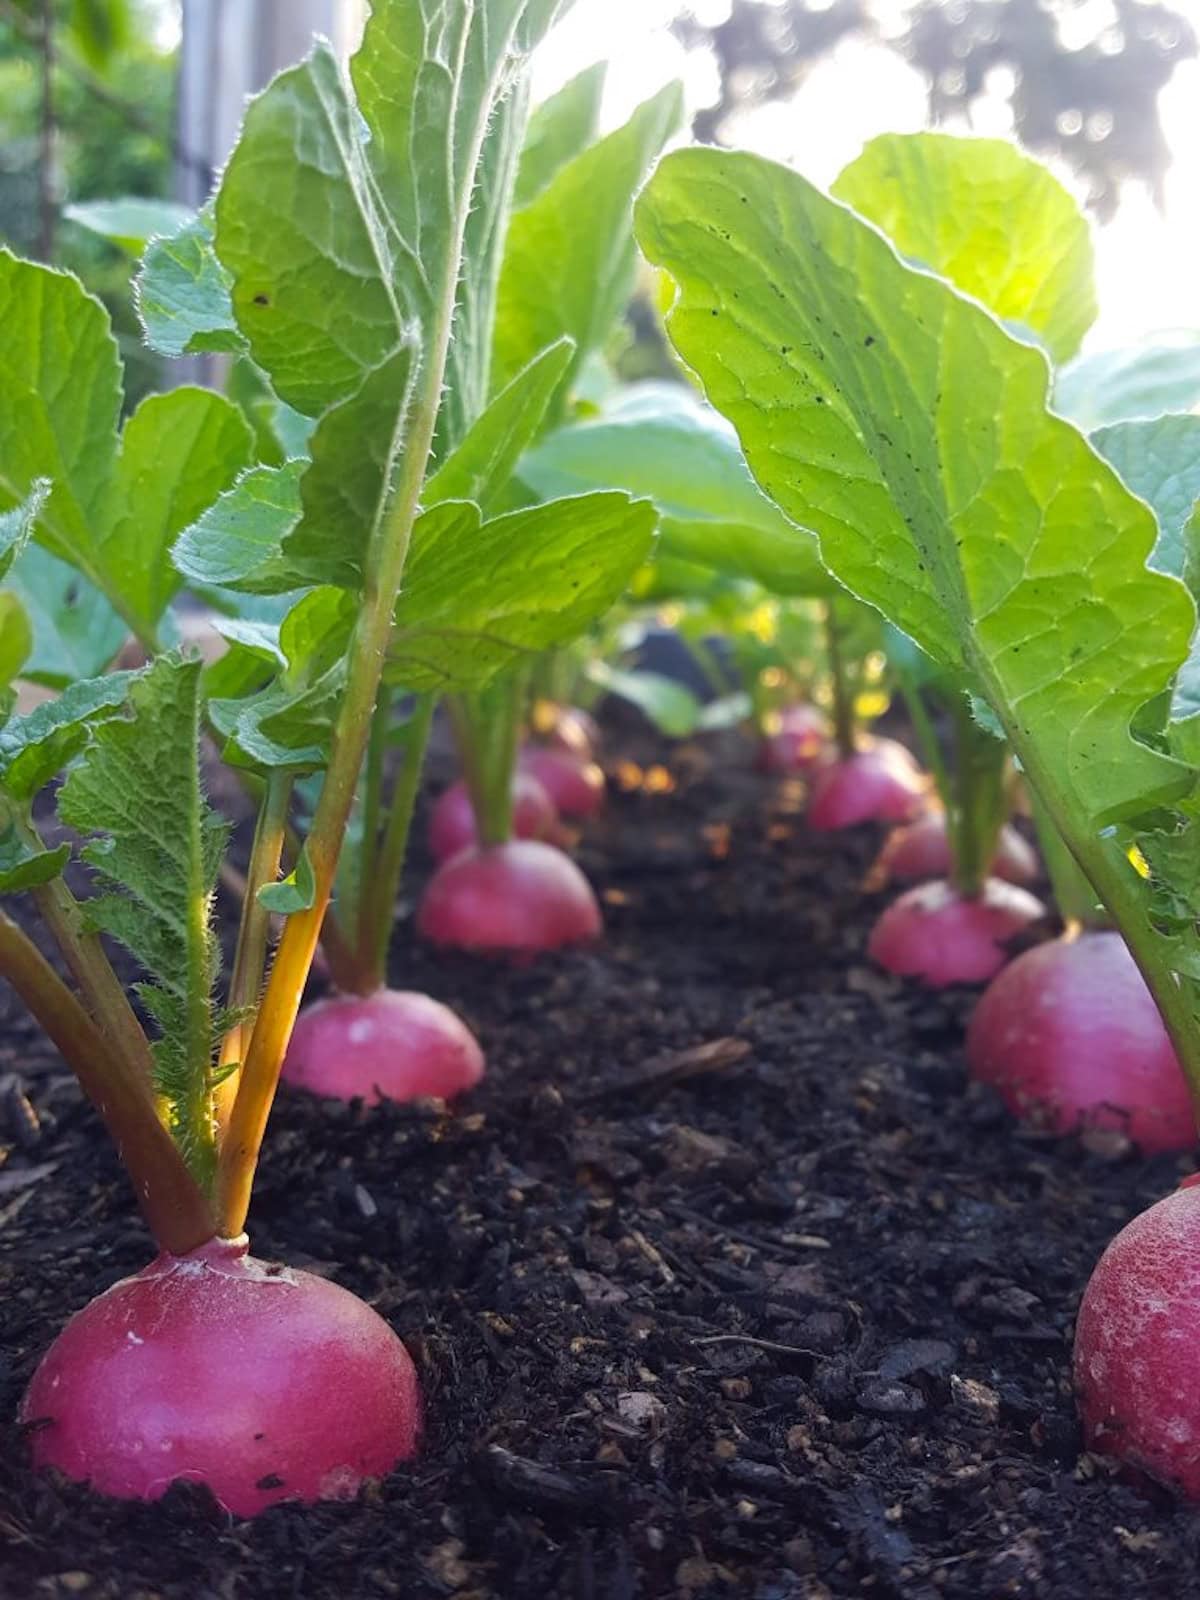
We’ve been making fermented radishes well over a decade. In fact, they were one of the very first homegrown foods we ever fermented! Now this our go-to way to preserve fresh radishes from the garden.
I love to eat fermented radishes with salads, sandwiches, tacos, charcuterie boards and more (though you can also catch me snacking on them straight out of the jar). Plus, I think they’re beautiful.
Note: This post was originally published in February 2019 but has been significantly updated.
Would you like to save this?
RELATED: Want to make it homegrown? Don’t miss our top tips on growing radishes! And if you enjoy fermented foods, come learn how to make apple cider vinegar, fermented hot sauce, or lacto fermented pickles.
How are Fermented Radishes Made?
Fermented radishes are sliced radishes that have been preserved in a salt water brine (as opposed to vinegar-pickled radishes). As they ferment, natural lactobacillus bacteria converts starches in the radishes into lactic acid and carbon dioxide, lowering the pH to prevent harmful bacterial growth and effectively preserve them. The process also increases their nutritional value by adding gut-healthy probiotics to the mix.
What Do They Taste Like?
Fermented radishes are tangy, crisp, and salty – and our recipe adds a little dill and garlic kick too. As they ferment, the usual sharp and spicy bite of raw radishes is transformed into much more mellow, zesty and pleasant flavors while retaining a perfect amount of crunch.
That means you don’t have be a big radish fan to enjoy this recipe! Honestly, I didn’t used to like radishes until we started to grow and ferment them ourselves.
Supplies Needed
- A glass jar or other non-reactive fermentation vessel (I don’t suggest using plastic). A wide-mouth pint or quart size jar is perfect to make a modest batch of fermented radishes, though I’ve also used half-gallon mason jars to preserve a lot of radishes at once!
- Fermenting weight* such as these glass weights
- Recommended: an airlock fermentation lid that fits your jar or vessel like this one or this other option. If you don’t have an air lock, you can lightly screw on a regular non-reactive lid instead (with a weight below), but make sure to “burp” (quickly open) your jars every day to release the built up carbon dioxide. I recommend these BPA-free plastic lids as metal may corrode.
*NOTE: A separate weight isn’t needed if your fermentation lid includes a weight or springs, like our Kraut Source lid or these airlock lids that come with a spring weight.
Ingredients
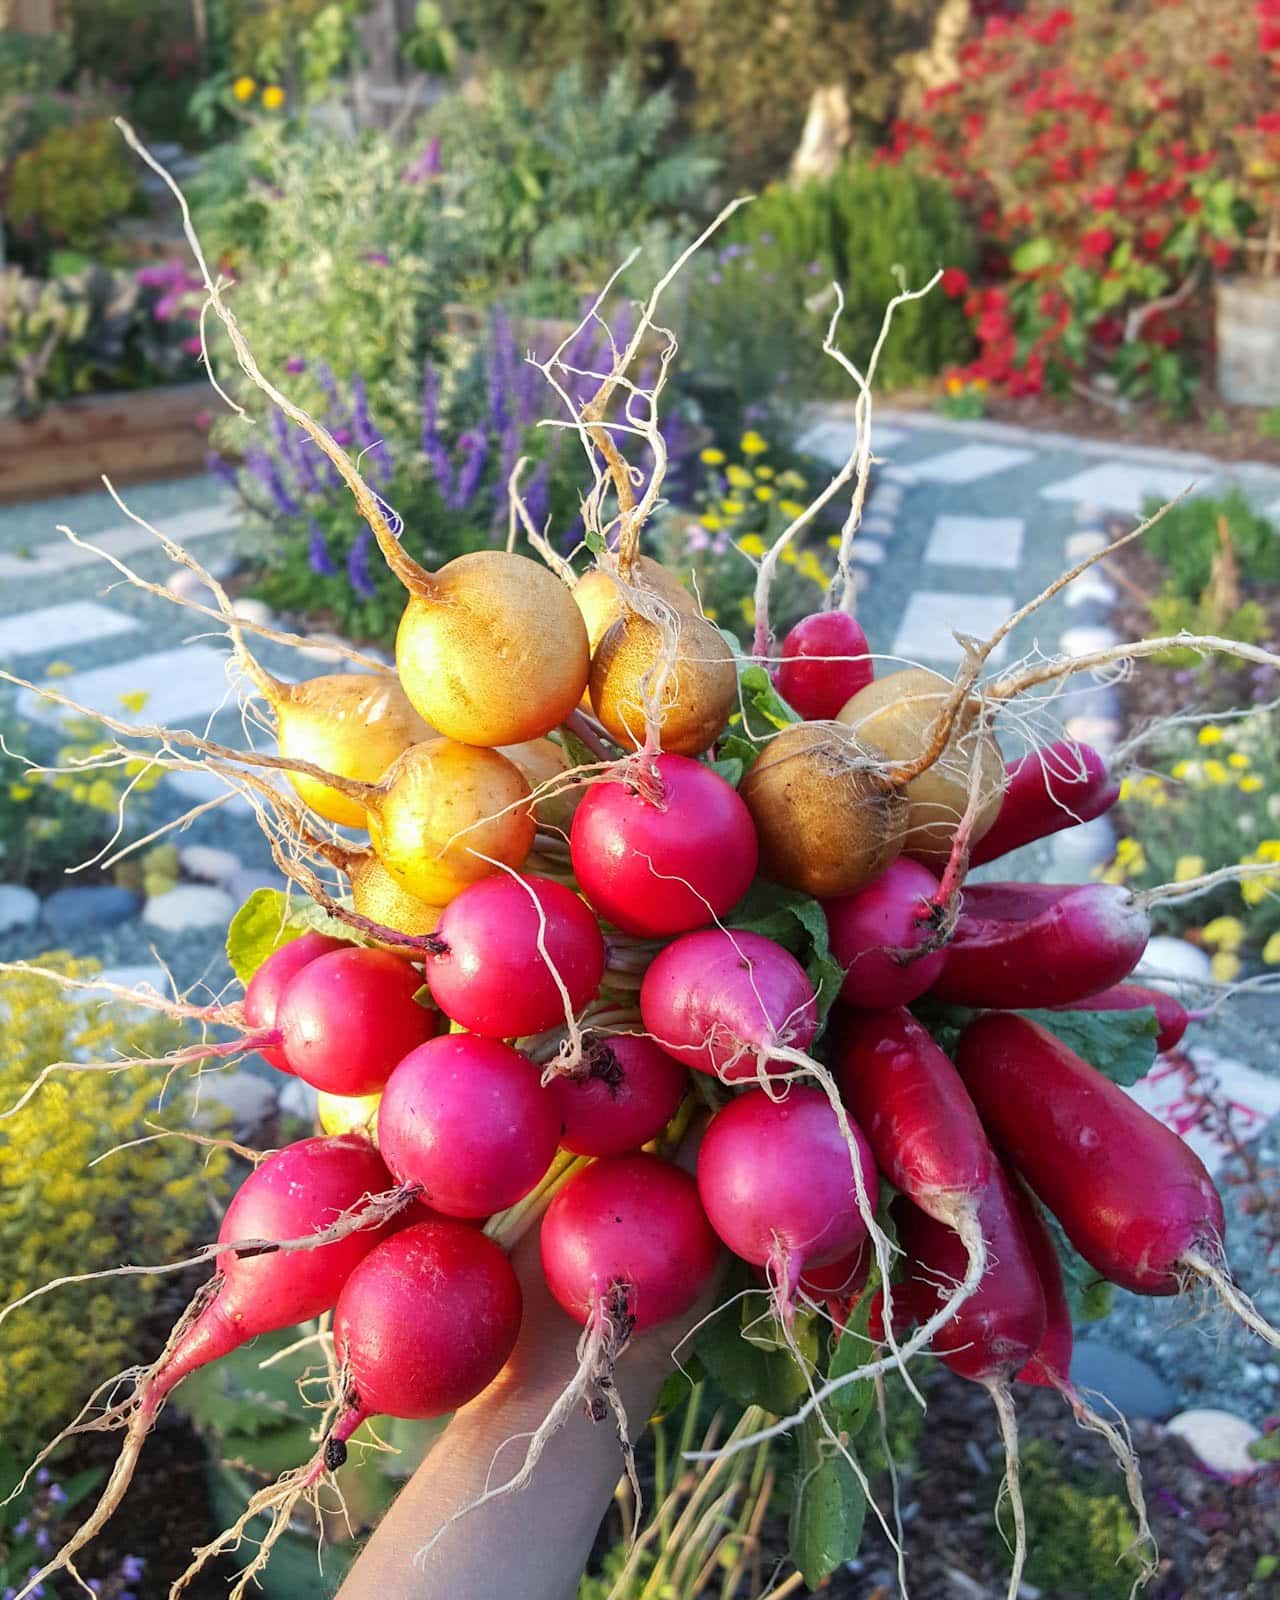
- Organic radishes, sliced – enough to fill your chosen jar or container almost all the way. For reference, I’ve found that 1 average bunch should fill a quart jar. You can use any kind of radish you grow or prefer: classic red round radishes, daikon radishes, or fun colorful varieties!
- Salt – sea salt, pickling salt or other kosher salt is best for fermenting vegetables. (Avoid using iodized table salt.) We like to use Redmond real salt. For a basic ferment brine, you’ll need 1 Tbsp of sea salt per 2 cups of water.
- Fresh Dill – several sprigs or up to 1 bunch (depending on size of jar). Or, you can use 1 fresh dill head or about 1-2 tsp dried dill per quart jar.
- Garlic – I recommend 1 to 2 fresh cloves (lightly crushed) per quart jar
- Filtered water
- Optional: If you like your fermented radishes with a little kick, feel free to add a few peppercorns, 1 or 2 sliced fresh chili peppers, and/or a pinch of red chili flakes. You could even add other veggies; we often mix ours with sliced carrot rounds or beets!
Expert Tip: Cleaning Fermentation Supplies
It’s important to start with a clean jar and supplies when fermenting radishes (or other veggies), but they don’t need to be sterile as they do for canning. Also, it’s best to avoid bleach or scented dish soap to clean your fermentation supplies since leftover residue will negatively impact the flavor! Instead, we spray ours with plain white vinegar, and then rinse well with very hot water.
Instructions
1) Make a Brine
- First, make a salt water brine by combining 1 Tbsp of salt per 2 cups of filtered water in a small saucepan. (2 cups of brine will be plenty to fill a pint or quart jar).
- Gently heat the water and salt together on the stovetop, just until the salt dissolves. There’s no need to boil it!
- Set the brine aside to cool to lukewarm or room temperature before pouring it over the radishes.
2) Prep Radishes
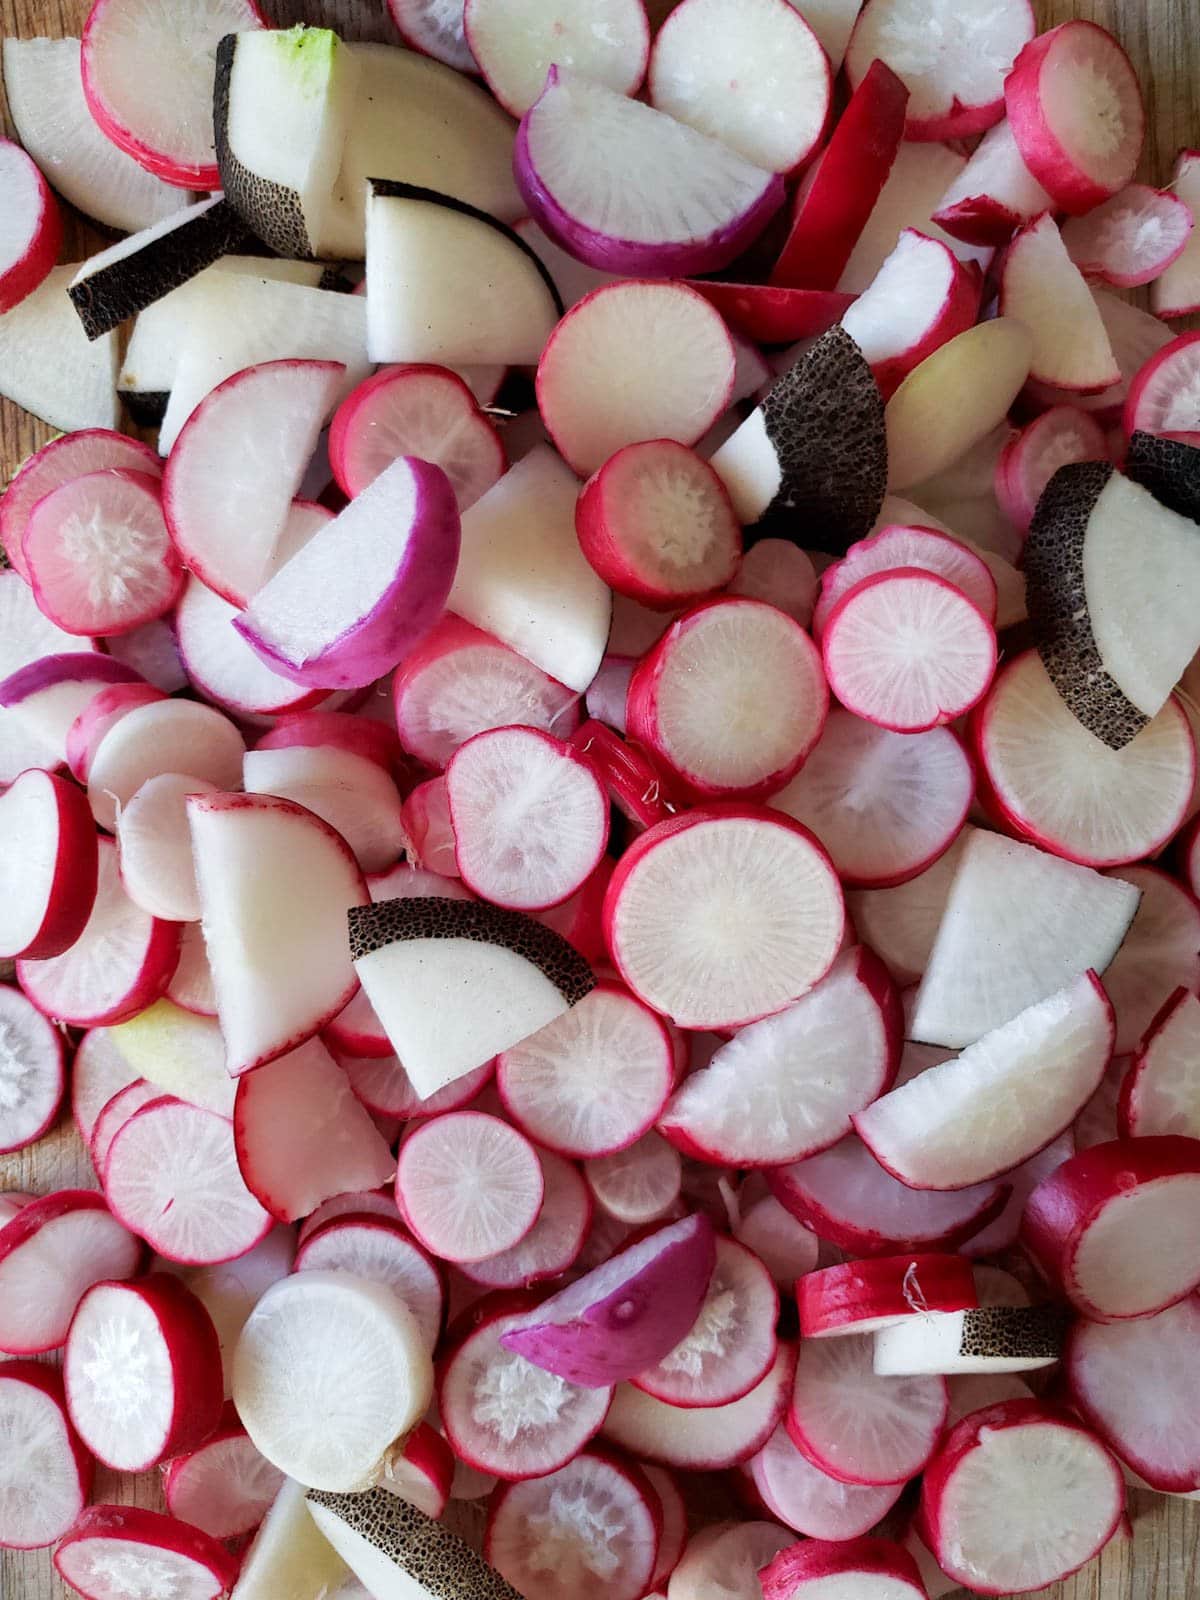
- Wash your radishes well to remove any dirt or debris, and cut off the green tops.
- Cut the radishes into bite-size pieces, about 1/8 inch thick. I find this size keeps the fermented radishes plenty crunchy and more enjoyable to eat than extra-thick chunks.
- You may cut small radishes into whole round slices. For larger radish varieties, I often cut them in half or even into quarter slices.
3) Pack the Jar
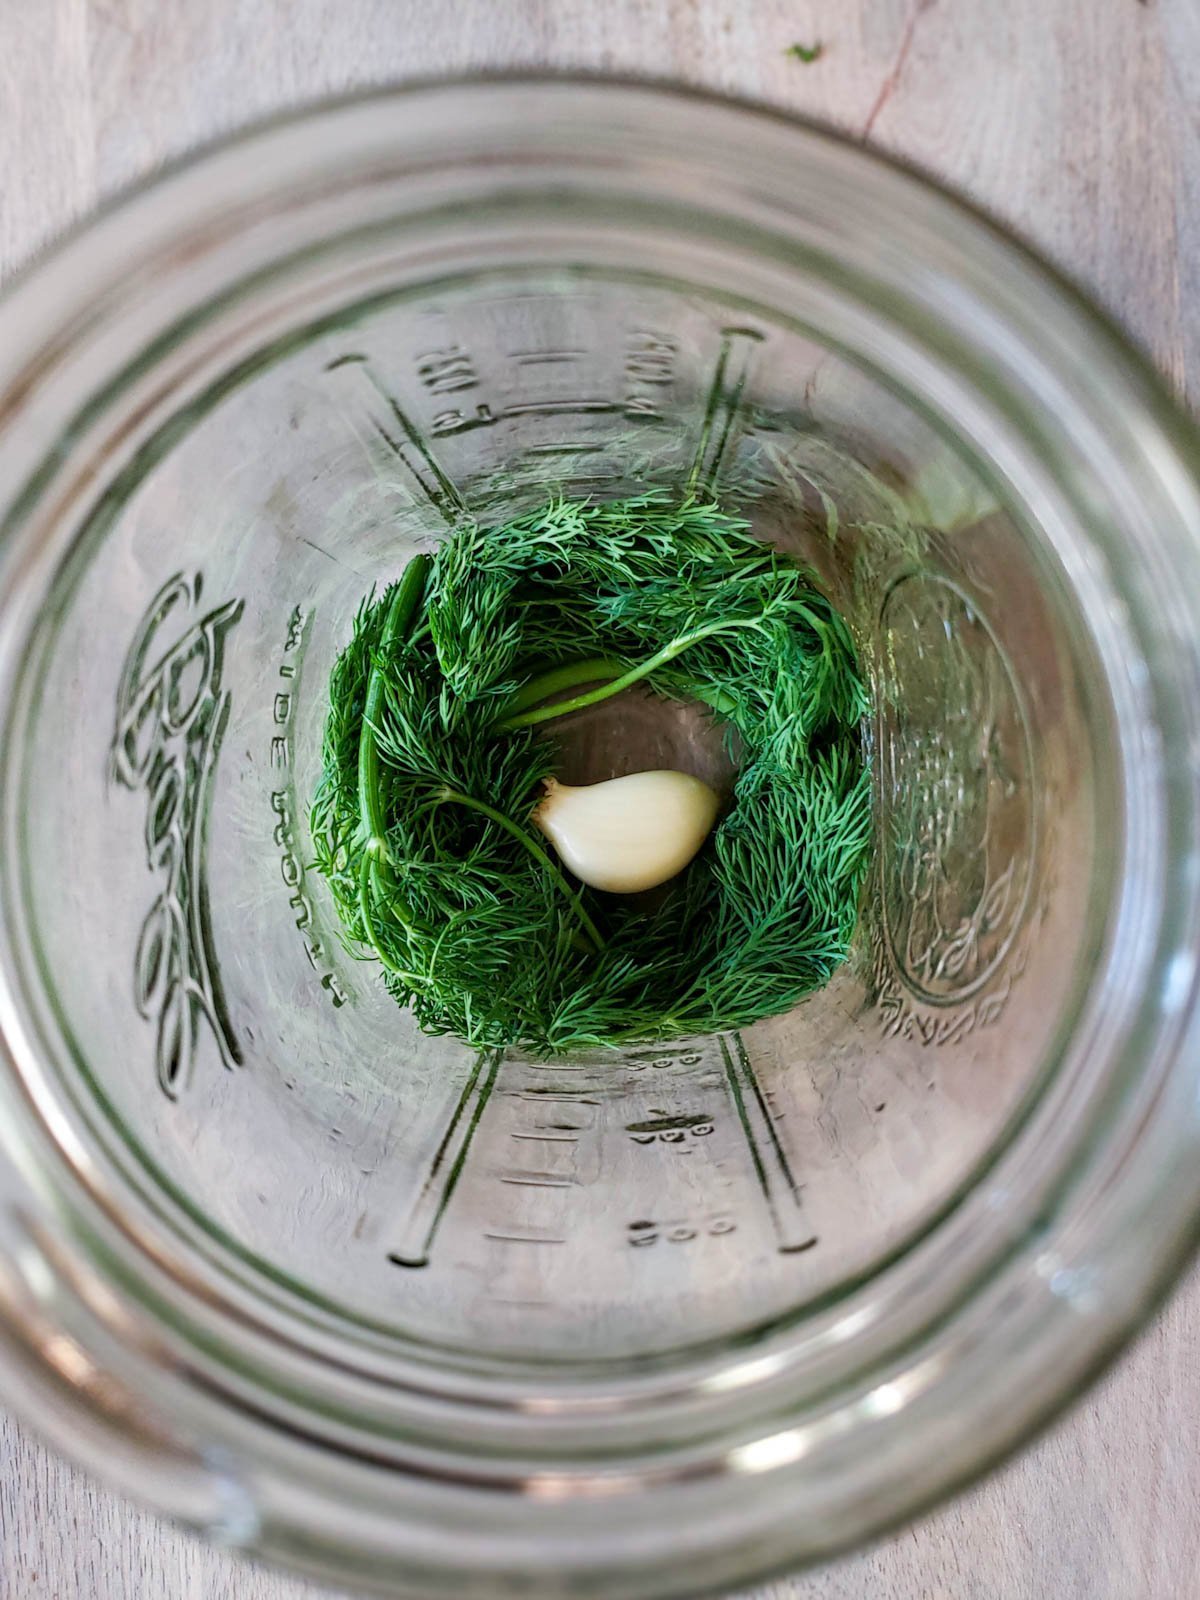
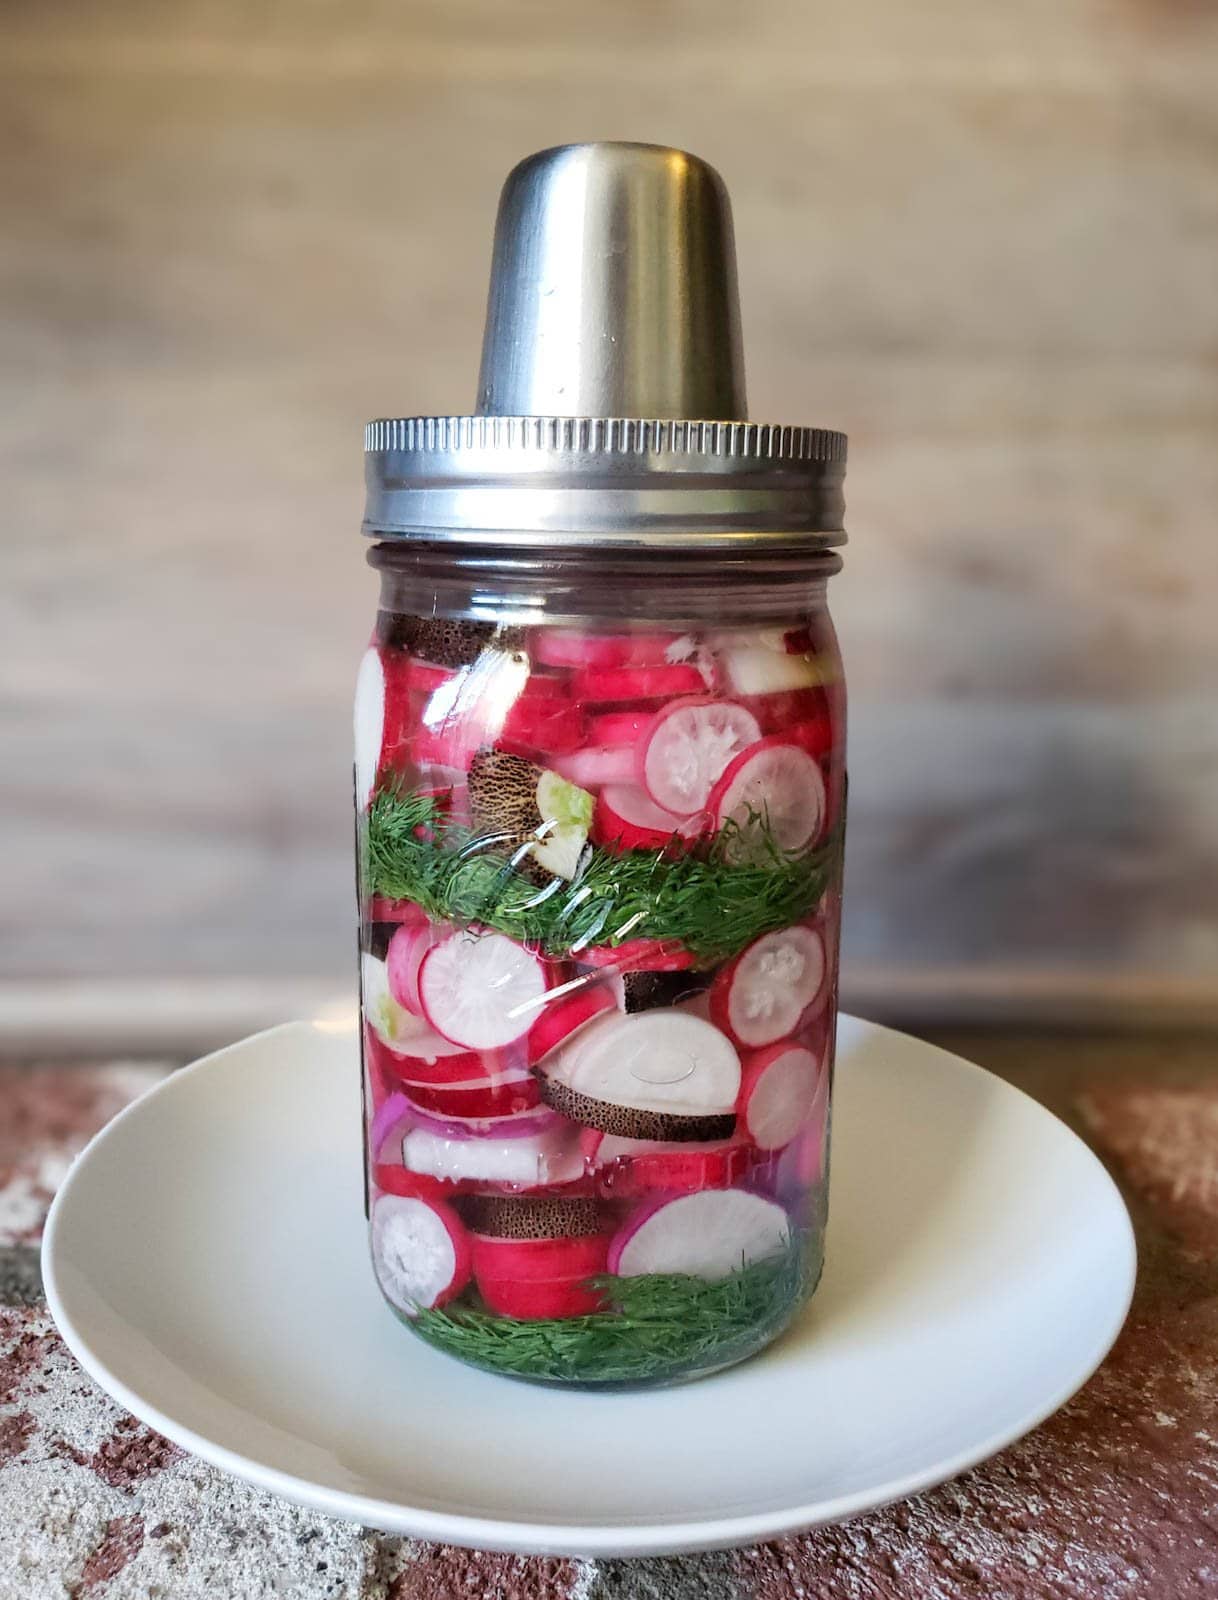
- In the bottom of a clean jar, add the seasonings: the dill, garlic, and optional spices or chili pepper.
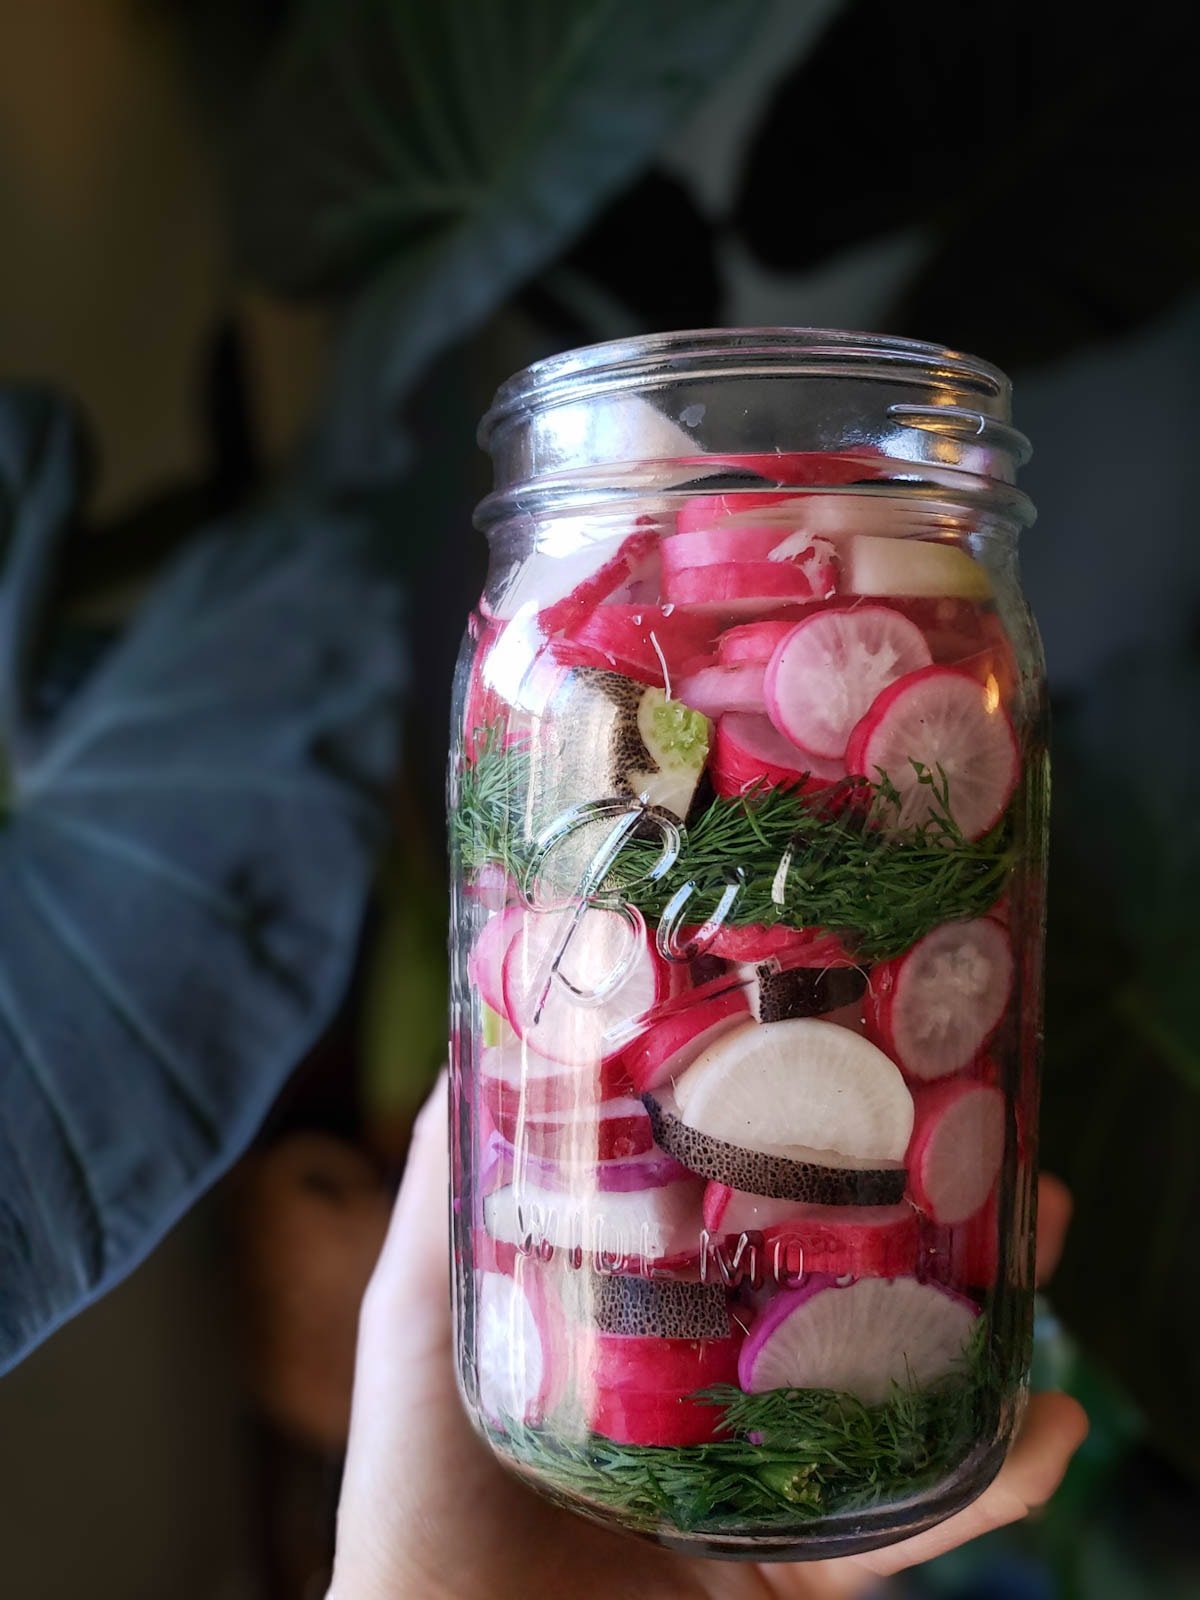
- Next, add the sliced radishes to the jar. Try to pack them in neat and tight, fitting in as many radishes as possible while minimizing empty air space in the jar.
- Leave enough room at the top of your jar for your chosen fermentation weight.
- When I’m filling a large container (e.g. a quart or half gallon jar) I usually fill half the jar with the sliced radishes, then add another little layer of dill and a clove of garlic about halfway through, then continue layering with more radishes until the jar is totally full.
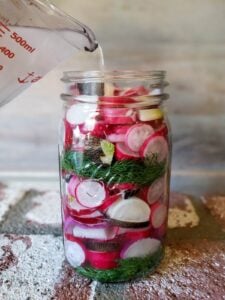
4) Add the Brine, Weight and Lid
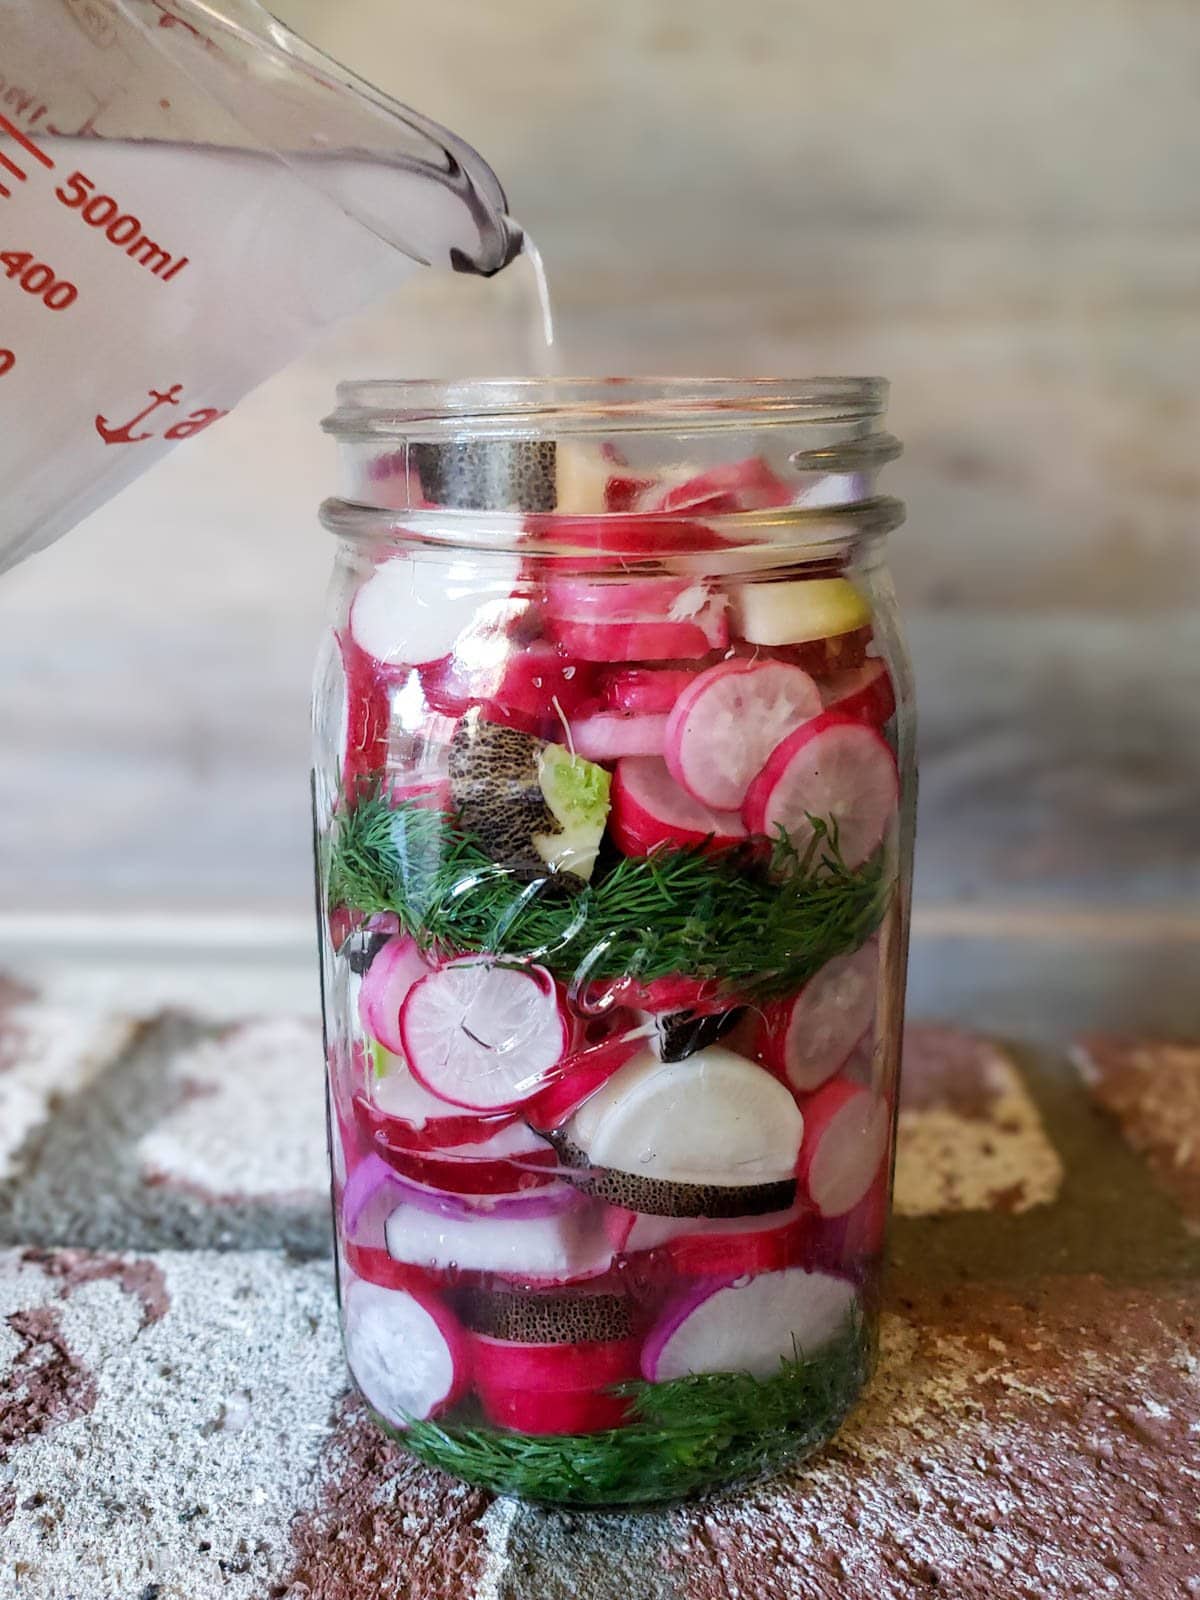
- Now, pour the saltwater brine into the jar until the radishes are completely submerged and covered with brine.
- To remove trapped air pockets, give the jar a little tap and wiggle. I usually use a large spoon or wooden kraut tamper to press the radishes down to help expel air too.
- Next, add a fermentation weight to keep the radishes submerged below the brine. This part is essential, as any “floaters” will be more prone to mold! If your airlock lid includes a spring to hold everything down, you don’t need an additional weight.
- Finally, add the airlock lid to the jar. Depending on your lid, the jar may overflow or leak when it starts to ferment and bubble, so we often set ours on top of a plate to catch any runoff.
TIP: When the jar is fully packed with radishes, you should have more than enough brine. However, if you happen to run out, mix a mini batch of brine by dissolving 1 tsp of salt in ½ cup of water to top off the jar.
5) Ferment
- Set the jar of radishes in a relatively cool location (65-75°F is ideal) such as the kitchen counter, or in a cool cabinet or spare room. Fermenting radishes in moderate temperatures yields the best flavor and texture, while warm conditions will make them ferment faster.
- Allow the radishes to ferment for 4 to 10 days, or up to two weeks or longer. Do a taste-test after 4 or 5 days to see how you like them. The longer radishes ferment, the more tangy yet mild the flavor becomes (the natural spice level decreases).
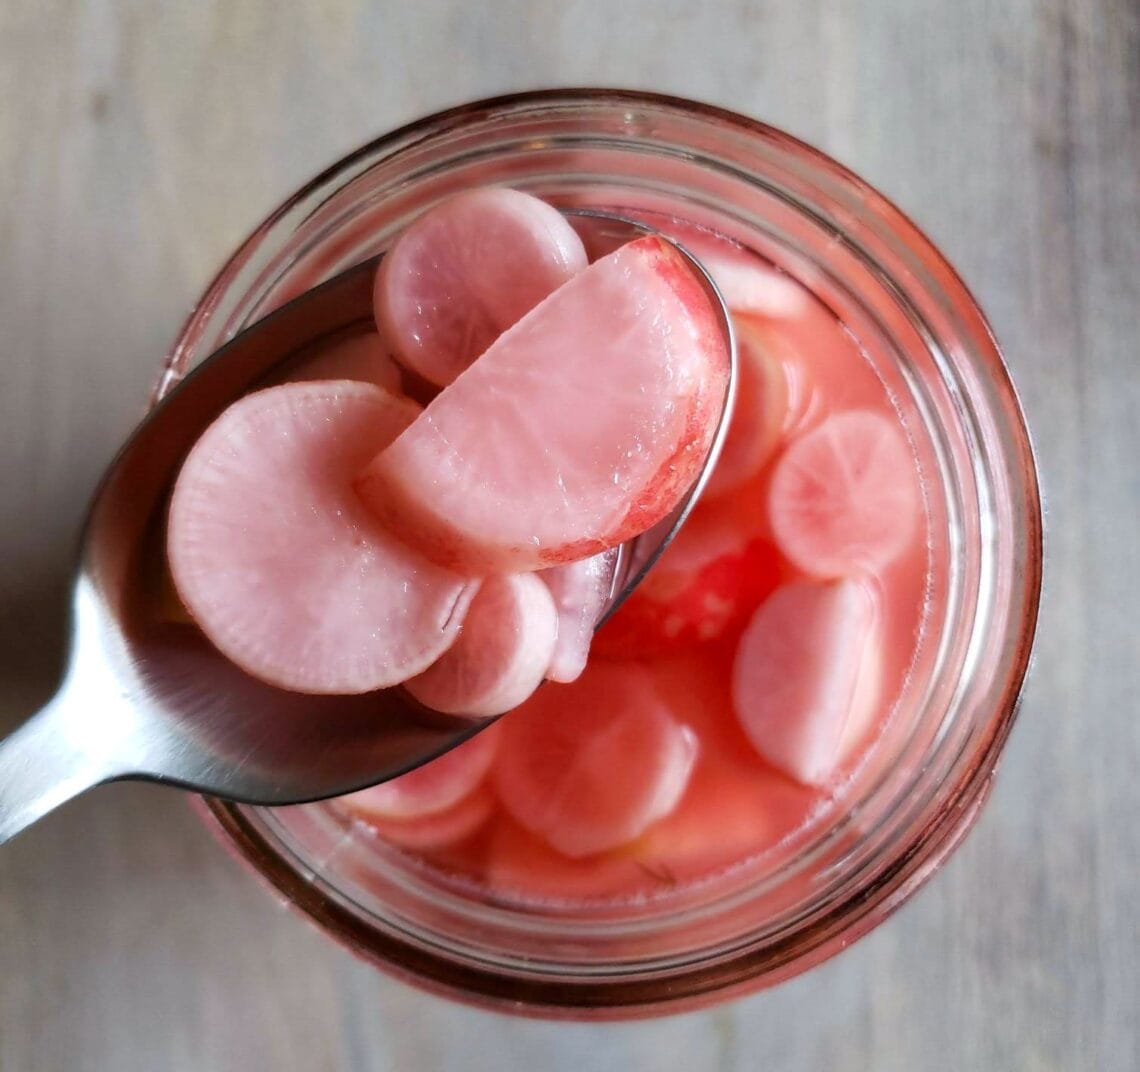
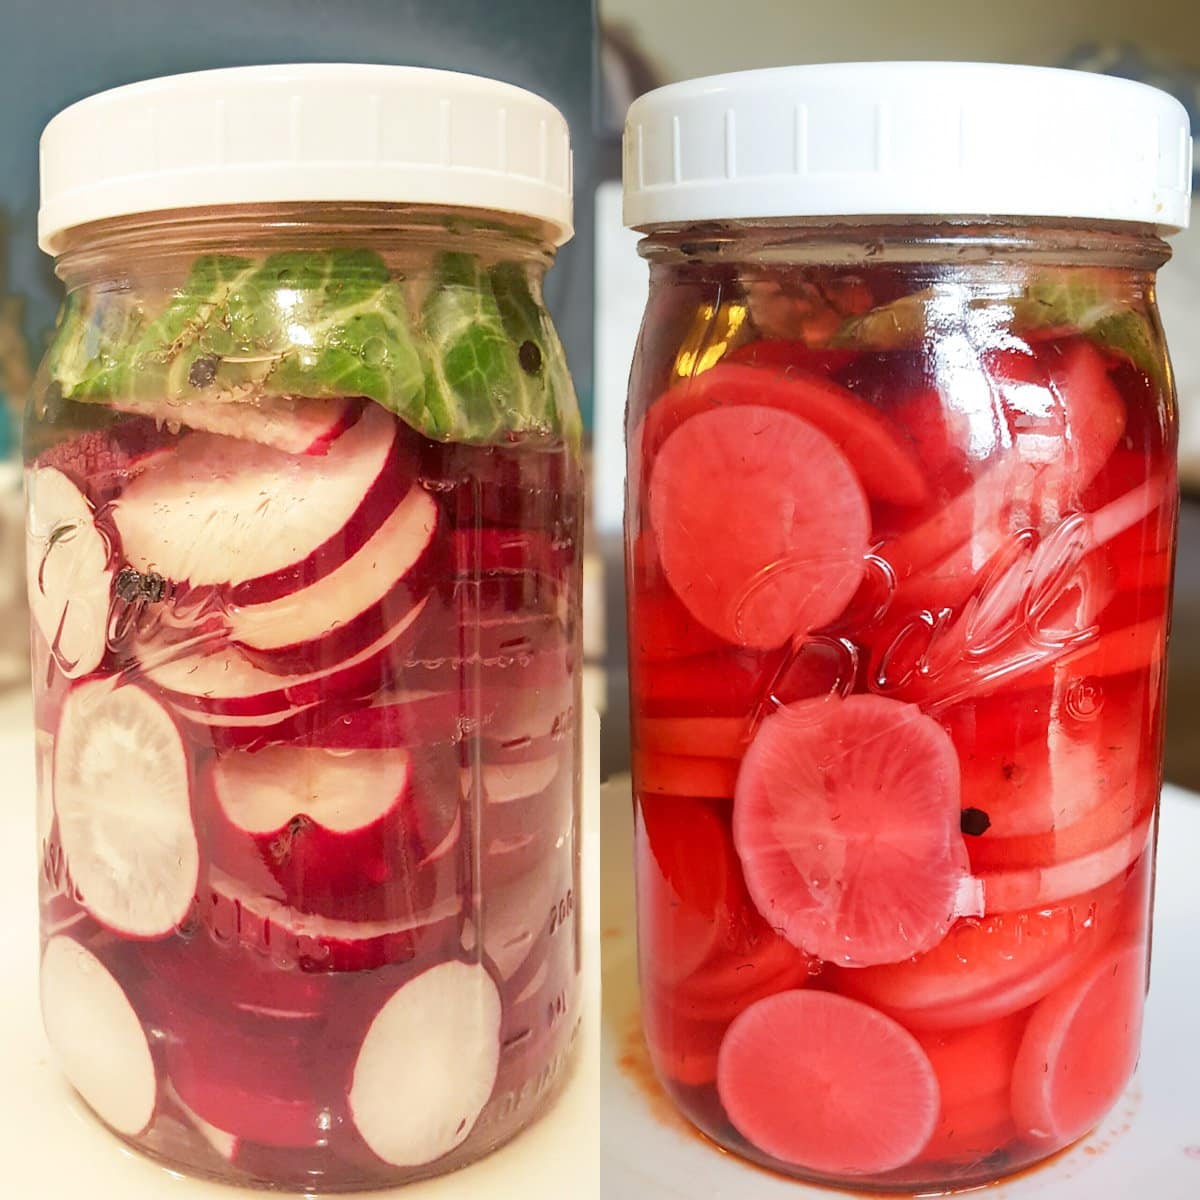
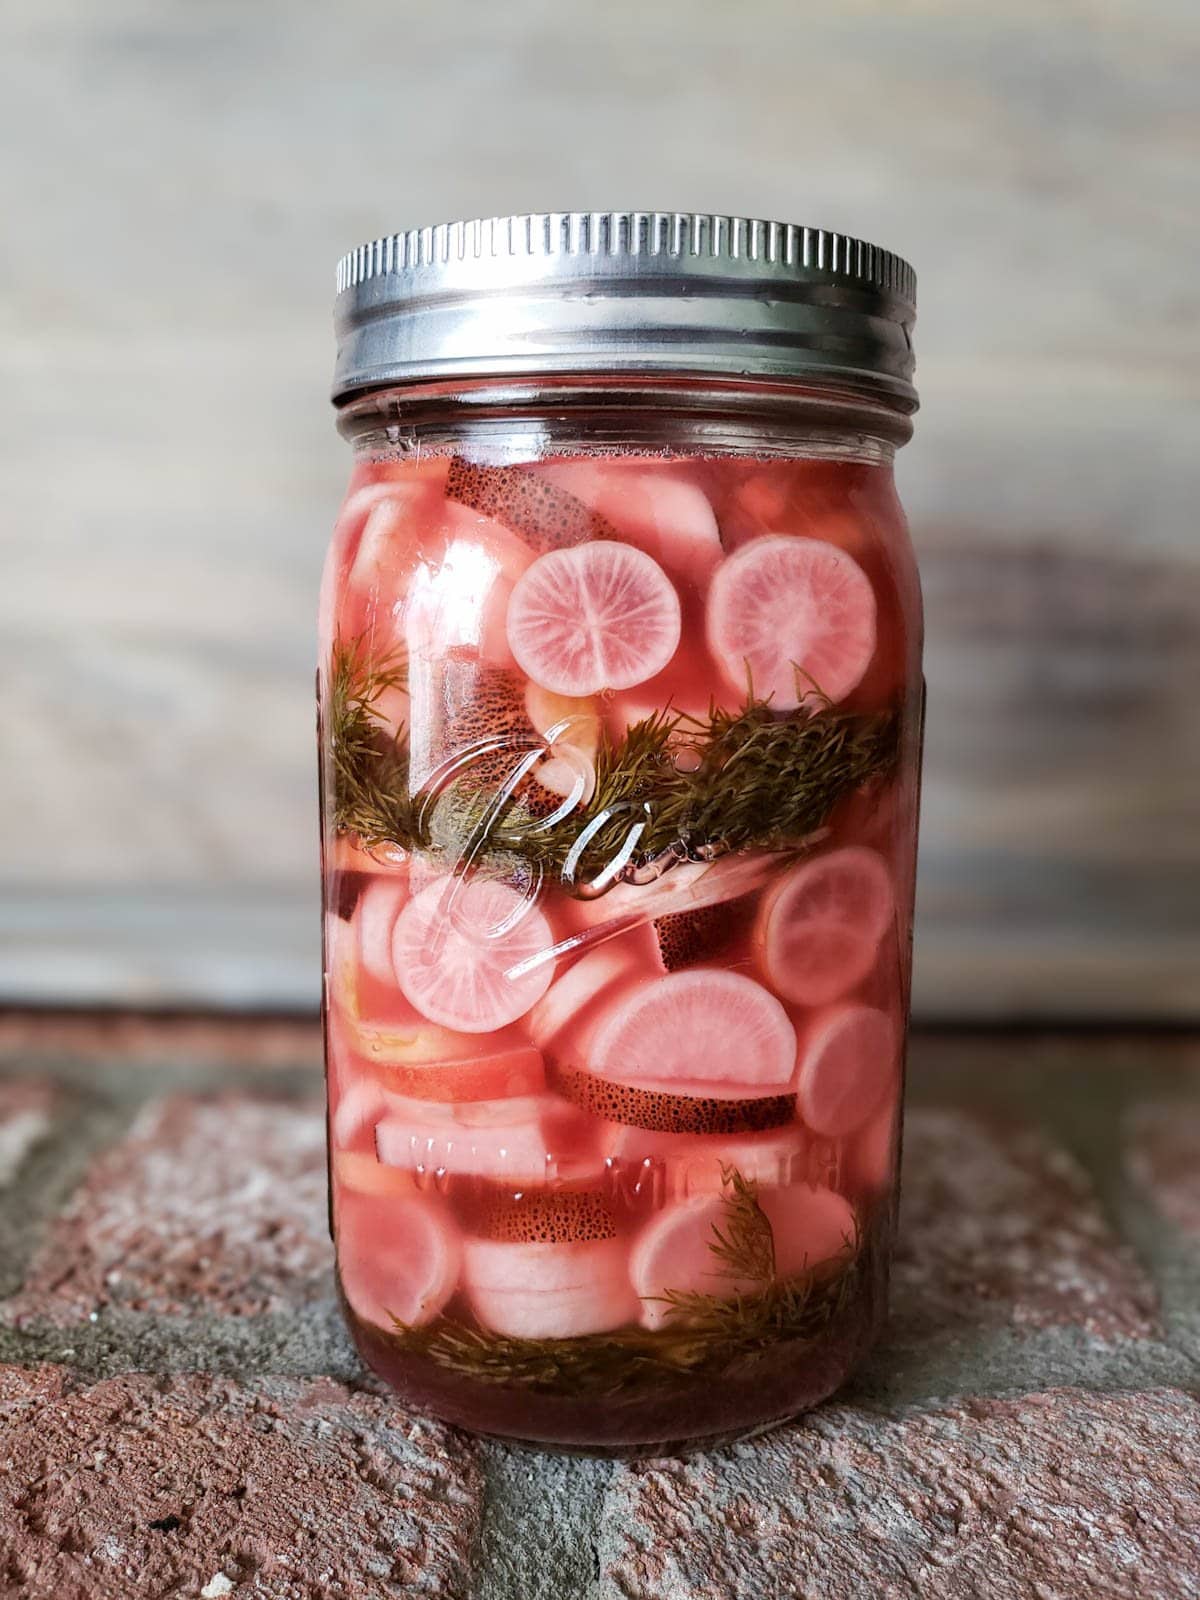
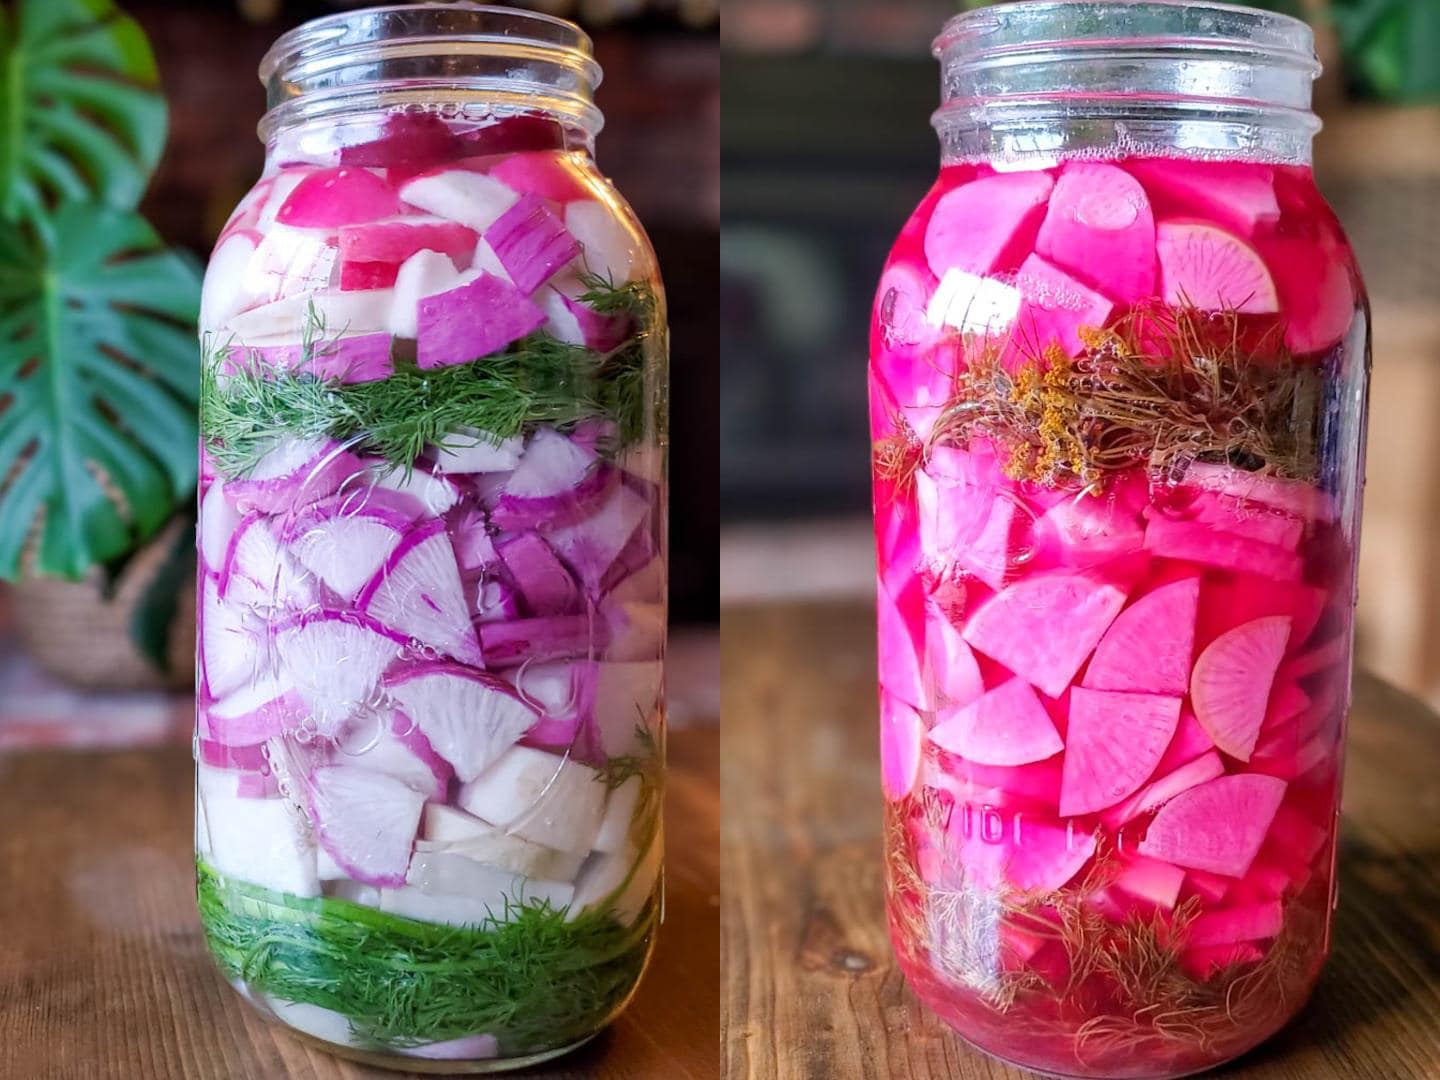
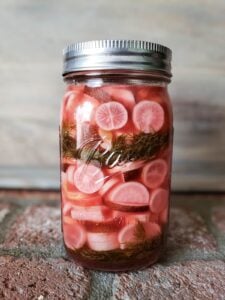
- During fermentation, you should start to notice bubbles in the jar within the first 48 hours. Also, the brine will turn cloudy (and pink) after a couple days – this is normal and good! The radishes themselves will change from white with red skin to light pink all over. Honestly, radishes smell a little funky while they’re fermenting too – but I promise they taste better than they smell!
- Once they’re fermented to your liking, remove the airlock lid and weight (replace with a standard lid) and move them to the refrigerator. See more storage and shelf life tips below.
Storage and Shelf Life
Once they’re fermented to your liking, store fermented radishes in the refrigerator where they will stay good for several months.
Technically, radishes that have been properly fermented will be safe to eat for up to a year or longer (as long as mold doesn’t develop) though the flavor and texture will change over time as they continue to slowly ferment. I usually like them best within the first few months.
Since they’re acidic, it’s best to store fermented radishes in a glass container with a non-reactive lid, such as these BPA-free mason jar lids or rustproof stainless steel lids. Or you can place a piece of parchment paper below a standard metal lid to prevent corrosion.
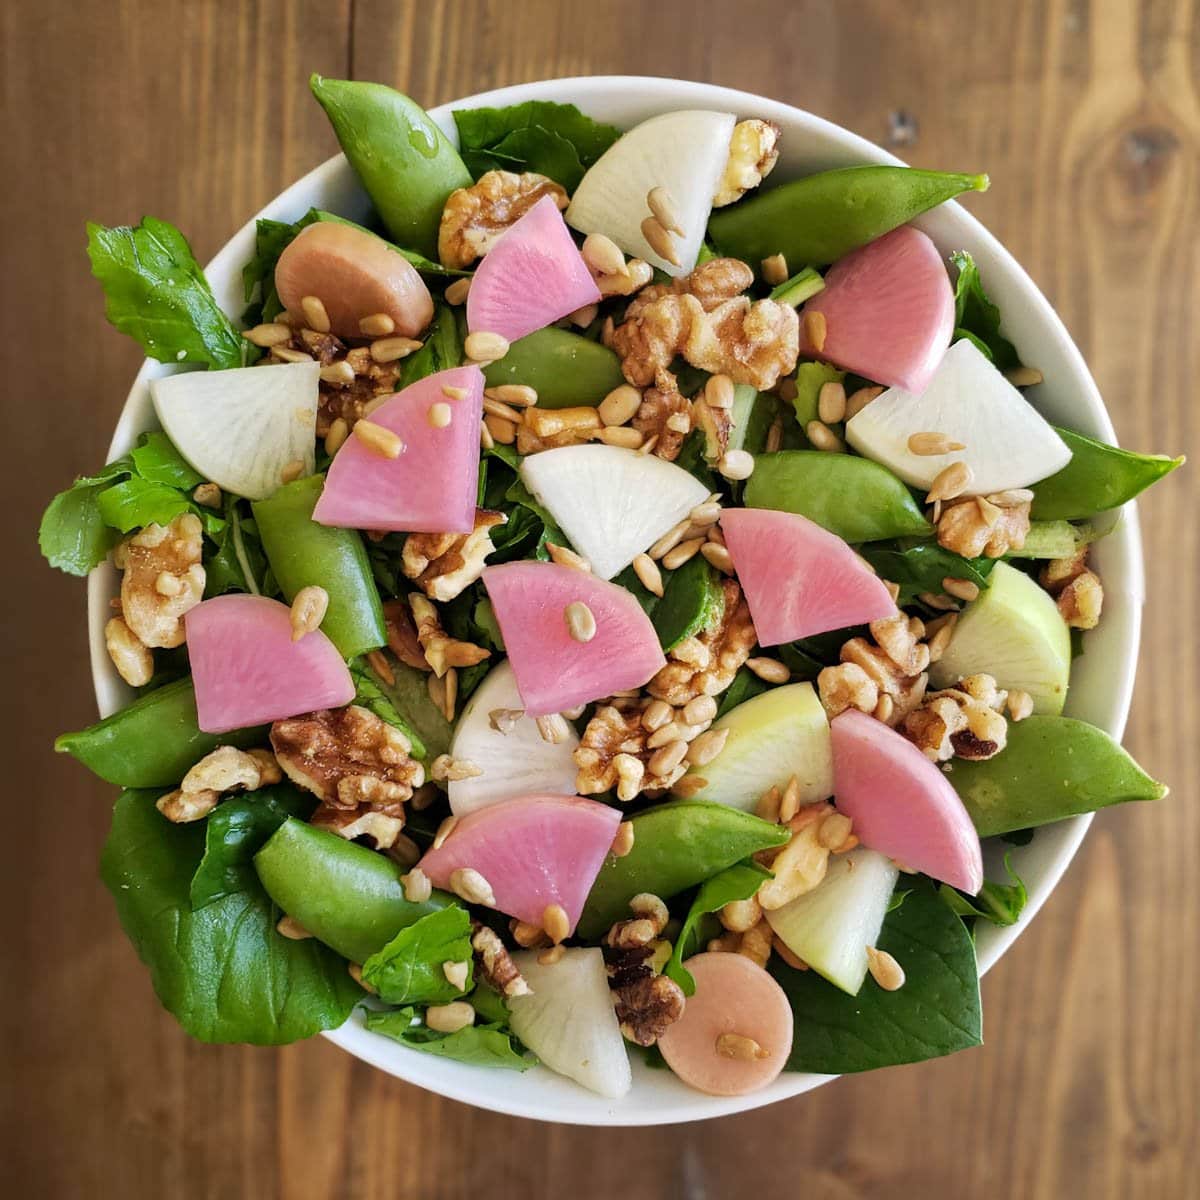
Ways to Eat Fermented Radishes
Now it’s time to enjoy your delicious, healthy creation! Fermented radishes add a fantastic pop of flavor, color and probiotics to salads, sandwiches, tacos, cheese platters, and more. I sometimes add them on top of sautéed garden veggies, in egg salad, or simply snack on them plain like a pickle.
Also, don’t waste the brine. The liquid is full of probiotics and beneficial enzymes too. In fact, you can often find leftover ferment brine (marketed as “gut shots”) sold at natural food stores – and they aren’t cheap! We like to drizzle some on top of salads with olive oil as a dressing, or even take little shots of it straight.
I hope you all enjoy this easy fermented radishes recipe a much as we do! Please let us knowif you have any questions in the comments below, and come back to leave a review once you give them a try. Happy fermenting!
You may also enjoy:
- Easy Fire Cider Recipe: How to Make Homemade Fire Cider
- How to Make Kombucha 101: Kombucha Recipe and Brewing Basics
- Easy Fermented Garlic Honey Recipe + Benefits and Uses
- Simple Fermented “Pickled” Beets Recipe with Dill and Garlic
- Easy Hot Pepper Honey Recipe (Fermented Jalapeño Honey)

Easy Fermented Radishes with Garlic and Dill
Equipment
- A glass container, such as a pint or quart size mason jar
- Fermentation weight, like these glass weights (separate weight not needed if your airlock lid comes with a weight or spring)
- Recommended: an airlock fermentation lid that fits your chosen jar like this one or this other option. (If you don't have an airlock lid, you can lightly screw on a regular non-reactive lid like these BPA-free plastic lids instead (with a weight below), but you'll need to “burp” (quickly open) your jars every day to release the built up carbon dioxide)
Ingredients
- 1 bunch organic radishes, sliced (for a quart jar batch) or enough to fill your chosen jar size
- 1 tbsp kosher or pickling sea salt (not iodized table salt) per 2 cups of water used
- 2 cups filtered water (per quart jar)
- 1 bunch fresh dill
- 1-2 cloves fresh garlic, peeled and lightly crushed (per quart jar)
- Optional: black peppercorns, red chili flakes, fresh hot chili peppers – if you like them with a kick!
Instructions
- On the stovetop on medium low heat, combine the called-for salt and filtered water to create a salt water brine. Heat only until salt dissolves. Do not add hot brine to the radishes! Allow to cool to room temperature/lukewarm as needed.
- Wash the radishes well, and cut away the green tops or tough portion near the stem.
- Cut the radishes into bite-size slices, approximately 1/8-inch thick

- Add one lightly crushed clove of garlic along with a small handful (few sprigs) of washed fresh dill in the bottom of a clean jar, along with an optional pinch of peppercorns or chili flakes.
- Pack the sliced radishes into the container until completely full – layering them neatly to minimize empty air space as you go. Sometimes I add another small layer of dill halfway between the radishes. Leave enough room at the top of your jar for your chosen fermentation weight.
- Pour the cooled brine into the jar until the radishes are fully submerged. Carefully tap and wiggle the jar (or use a large spoon to press down) to release any trapped air pockets.
- Add a fermentation weight to keep the radishes submerged below the brine. This part is essential, as any “floaters” will be more prone to mold! If your fermentation lid includes a weight or spring, you don’t need an additional weight.
- Finally, add the airlock lid to the jar. Depending on your lid, the jar may overflow or leak when it starts to ferment and bubble, so we often set ours on top of a plate to catch any runoff.

- Set the jar of radishes in a relatively cool location (65-75°F is ideal) such as the kitchen counter, or in a cool cabinet or spare room.
- Allow the radishes to ferment for 4 to 10 days, or up to two weeks or longer. Taste-test after 4 or 5 days to see how you like them. The longer radishes ferment, the more tangy yet mild the flavor becomes (the natural spice level decreases).
- Once they’re fermented to your liking, remove the airlock lid and weight and move them to the refrigerator for storage.
- Since they’re acidic, it’s best to use a non-reactive lid such as these BPA-free mason jar lids or rustproof stainless steel lids. Or place a piece of parchment/wax paper below a standard metal lid to prevent corrosion.
- Store fermented radishes in the refrigerator where they will stay good for several months. As long as mold doesn't develop, they'll be safe to eat for a year or longer though the flavor and texture will change over time.


38 Comments
bobbie
Made these radishes and they were great. I used the dill and garlic in a sour cream salad dressing, and the brine (now don’t laugh at me..) is incredibly delicious on it’s own. I usually take a bit of pickle brine for my tummy when it’s upset, but this radish water is just plain yummy!
Aaron (Mr. DeannaCat)
Hi Bobbie, the brine is quite delicious and full of probiotics, glad to hear you are enjoying it!
Monica
Hi Deanna,
I Love your site and have tried many of your recipes and gardening tips!! ☺️
This is my 2nd attempt at this recipe and I’m still unsure! I’m using a Kraut Source jar, and followed all instructions but there doesn’t seem to be anything happening in the bottle. No bubbling at all in first 5 days.
How do I know if it’s actually working? Thanks 🤷🏼♀️
Aaron (Mr. DeannaCat)
Hi Monica, you know it’s fermenting when the radishes start to change color slightly from where they started, the veggies being fermented will usually shrink in size slightly from where they starter, you should be able to smell a slightly different aroma coming out of the jar as well. Not all ferments will visibly bubble, it may just be a bubble here and there. Sometimes the ferment brine will overflow out of the top of the jar as it reaches peak activity which is why we typically place our fermenting jars on a plate. Chances are, your radishes are fermenting, it’s just not something that is as noticeable to you right now. However, radishes usually have quite the smell once they are fermented so that is when you know it is working or has worked. Hope that helps and good luck!
Claudine L.
Can’t wait to try this recipe. What do I do with the finished product if I don’t have a refrigerator to put them in?
Aaron (Mr. DeannaCat)
Hi Claudine, without colder temperatures to store your finished ferment, the radishes will continue to ferment which isn’t necessarily a bad thing, but the flavor will continue to change throughout the various stages of fermentation. I would try and store them in the coolest area of your house or basement to slow the continued fermentation slightly. Hope that helps and good luck!
Megan
I fermented some daikon radish last week, but the recipe I saw only said to leave it out around 4 days, so I did and it is now in the fridge. Was that too short a time? If so, would it work to take the jar out of the fridge and let it continue to do it’s magic at room temperature? Thanks!
Aaron (Mr. DeannaCat)
Hi Megan, if the temperature of your house during the ferment was fairly warm or the ferment was at least visibly active, I would just enjoy them as is. Next time, let them ferment for around 7 days and compare the two end results and see which ones you prefer.
Steffani
Probably one of my favorite foods now! I’ve made about a dozen jars, and my husband, 2 year old and 4 year old always gobble them up so quickly. Next year I need to dedicate an entire bed to radishes. 😜 Thanks for making fermentation so easy! I’ve made sauerkraut but this was my first real ferment. It was so great and since then I’ve tried SO many different ferments for my family!
Chantel @littleredhengarden
I was skeptical making these as they are the first fermented food I’ve tried. They are delicious! Thanks for the great tutorial and I can’t wait to try more ferments.
Leigh Anne Bedingfield
Do you have a printable version? I would love to have a simple printout to keep in my recipe folder.
DeannaCat
Hi there! I will work on getting one put together soon! I didn’t use to add the printable recipes at the end of posts, so I have been slowly making my way back through them all to add them. Thanks for your patience!
Brooke
I just attempted my first ferment today! I had seen on some other recipes that you could just put fabric or a coffee filter under the mason jar ring. Is there any reason you don’t list this as an option? I’m hoping with everything submerged it will still be ok even with out an airtight lid? Thanks Deanna!
DeannaCat
We have always followed the direction to use a tight fitting lid and air lock… which is why they make such things! But if there are suggestions to try otherwise, feel free to give it a shot and then let us know how it goes!
Siva
Thanks for this awesome tip. Beautiful summer veggies are coming in at my local farmers market and would love to ferment them 👍🏽❤️
Sara Overholt
I made your recipe out of my homegrown radishes and they are so good! So tangy with that great radish crunch! I let mine ferment this first time for 7 days. Next time, I’ll probably let it ferment for 10 days. I added crushed red pepper flakes, in addition to the dill and garlic, and that was a delicious addition. Thank you for sharing!
DeannaCat
I was trying to write “Good for you!” and it came out “Good food!” – so… both! Lol! I’m glad you liked it, and thanks for the feedback!