

Easy Homemade Fruit Leather Recipe (Dehydrator or Oven)
Come learn how to make homemade fruit leather – a tasty, chewy, all-natural snack! My flexible recipe is easy to make with any of your favorite fruits. Using only two or three ingredients (and no refined sugar) this recipe is much more natural and nutritious than store-bought fruit leathers or fruit roll ups too.
I’ve included tips to make fruit leather in the oven or a dehydrator, though I’ve found using a dehydrator is the most efficient and easy option. I love to use this recipe to preserve fresh fruit from our garden – including peaches, plums, apricots and more.
Would you like to save this?
Disclosure: Homestead and Chill is reader-supported. When you purchase through links on our site, we may earn an affiliate commission.
Tips to Make the Best Fruit Leather
- For the best flavor and texture, I recommend using ripe or even slightly overripe fruit. Juicy, soft fruit will be the easiest to blend!
- While fresh fruit is ideal, you can also make fruit leather with defrosted frozen fruit.
- To make the most visually appealing fruit leather, I suggest using colorful fruit (like strawberries, peaches, apricots, plums, or nectarines) and/or mixing them with more bland-looking ones that are prone to turning brown (like apples, bananas, or pears) instead of using those alone.
- The National Center for Home Food Preservation also suggests adding a little applesauce to the mix, which can decrease tartness, extend shelf life, and make homemade fruit leather more smooth and pliable.
- Spice it up! Beyond the basic recipe, I enjoy adding warm spices to my fruit leather – such as cinnamon, ginger, nutmeg or pumpkin pie spice. Start with just 1/4 to 1/2 a tsp. You could also add 1/2 a tsp. of vanilla or almond extract.
RELATED: Love drying fruit? Get tips on how to dehydrate apples (hellooo cinnamon apple chips and chewy rings!), how to dry apricots, or the the best dried persimmons.
Best Fruits to Use
Here are some of the best fruit ideas for homemade fruit leather. Try this recipe using just one type of fruit, or have fun mixing two or more!
- Stone Fruit: Peaches, apricots, plums and nectarines are some of my personal favorites to use – especially homegrown. They’re sweet, juicy, high in natural pectin, and create a perfectly smooth and pliable fruit leather.
- Berries: Strawberries, blueberries, raspberries, blackberries, and mulberries make beautiful, vibrant-colored fruit leather. Some berries can be a bit tart on their own but pair perfectly with sweeter fruits. Berry seeds may yield a more rustic texture unless you strain the puree before drying.
- Apples and pears are both popular bases for fruit leather, often combined with other fruits to enhance the flavor and texture (to make it more thick, sweet and smooth).
- Tropical fruits: Try pineapple, mangoes, papaya, guava, and more! Mangoes and papayas are especially thick, smooth and creamy – perfect for fruit leather.
- Overripe bananas are a great addition to our fruit leather recipe (an excellent thickening/binding agent) though their color isn’t quite as pleasant on their own. Try mixing banana with blueberries, strawberries, or other colorful fruit.
- Other: I also love to use our homegrown persimmons, pineapple guavas, and soft, juicy figs (they’re nothing like the hard dry figs you find in the grocery store).
- Finally, I DON’T recommend using extra-watery fruit like watermelon, grapes, or oranges on their own. The puree will be too runny (and take an extra long time to dry) but can be mixed with other thicker fruits.
Supplies Needed
- Blender or food processor
- Food dehydrator (preferred), or oven and baking sheets. A 13×18″ rimmed baking sheet works well.
- Parchment paper or silicone tray liners* – like these silicone baking mats for the oven, or these silicone liners for Excalibur dehydrators
- Air-tight container for storage
*I’ve tried both and found that parchment may wrinkle and look a little more rustic compared to silicone mats, but is easier to peel off once dried. Homemade fruit leather will also dry a little faster on parchment since it’s more breathable than silicone.
Ingredients
YIELD: This recipe will make enough fruit puree to fill two 15×15″ dehydrator trays or one 13×18″ baking sheet of fruit leather. Scale up or down as desired! I often double the recipe.
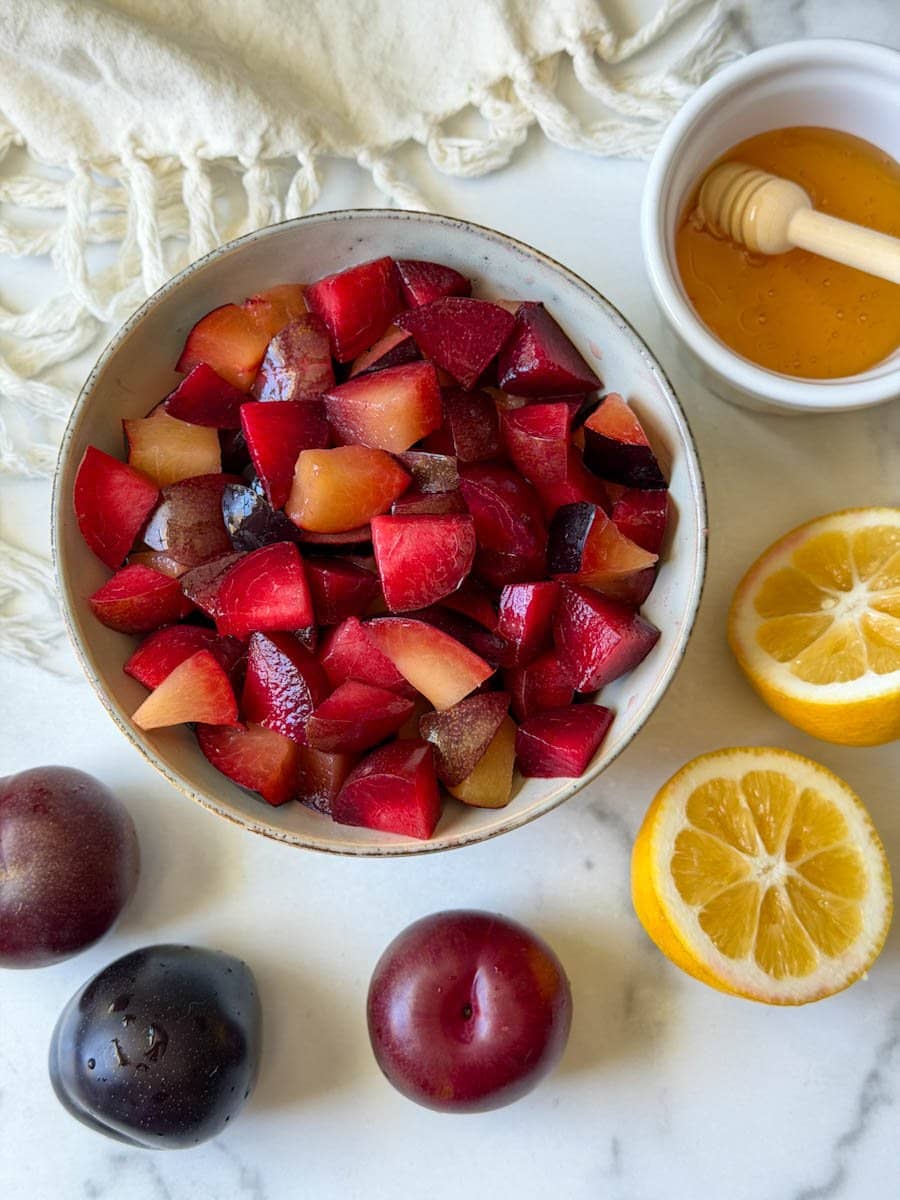
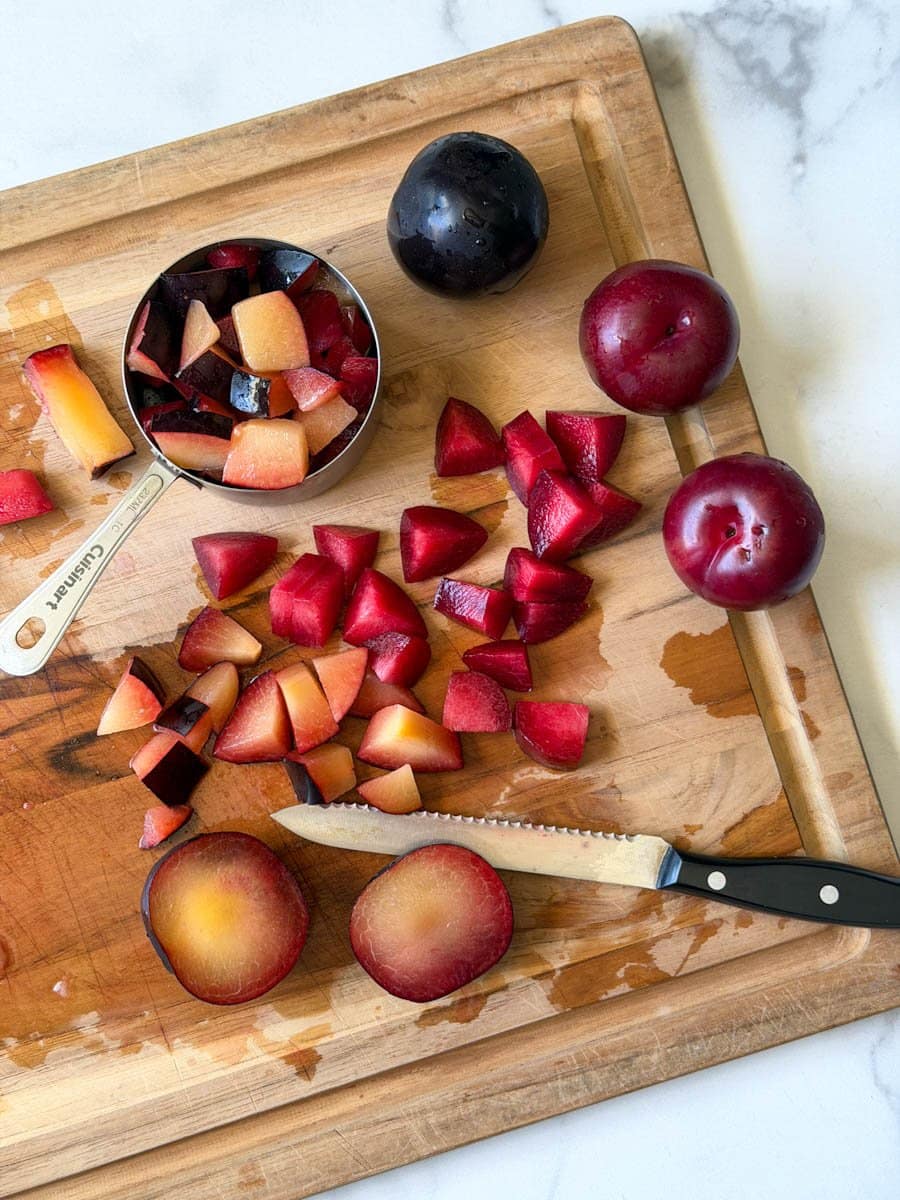
- 4 cups fresh ripe fruit, chopped
- 1 Tbsp lemon juice. Don’t skip this! The lemon juice helps to brighten and balance flavors, and also prevents darkening and preserves the color of the fruit.
- Optional: 1-3 Tbsp honey, maple syrup, or agave syrup for a little extra sweetness*
*PRO TIP: When I have them on hand, I sometimes like to use 1 or 2 pitted dates or half a banana instead of (or in addition to) honey or syrup. Dates and bananas sweeten and thicken the fruit leather, which is especially helpful when I’m using extra-juicy fruit like plums or grapes!
Instructions
1) Prep and Blend
- Gently wash the fruit under cool water, and remove the peel if needed (such as bananas, kiwi, or other fruit with inedible skin). Otherwise, I like to leave the skin on for things like peaches or apples. It’s all going to get blended up anyway, and the skins add a lot of good fiber and other nutrients!
- Cut and measure out 4 cups of chopped fruit into a blender or food processor, along with 1 tablespoon of lemon juice and 1 to 3 tablespoons of optional honey or maple syrup.
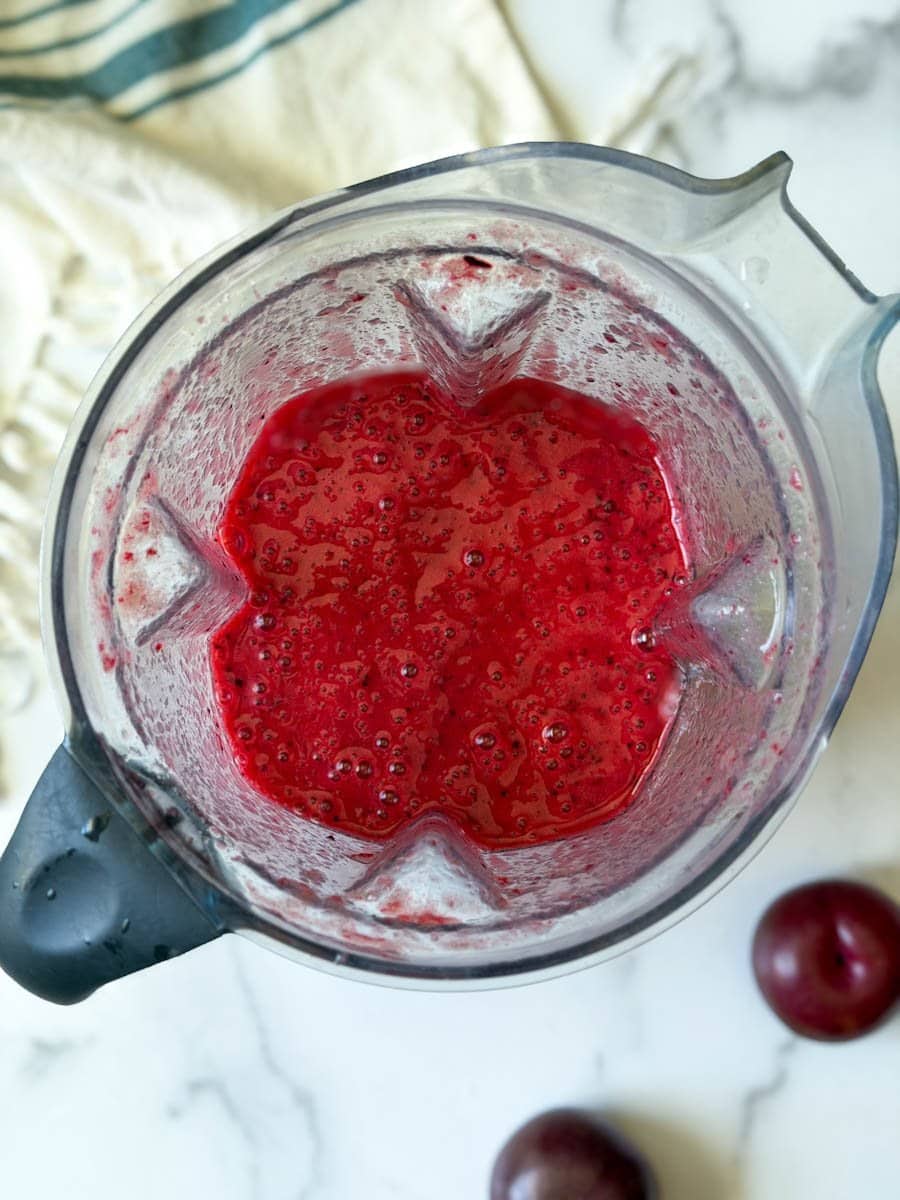
- Blend the fruit into a smooth puree. When working with thick or less juicy fruit, use your blender tamper to press down as needed.
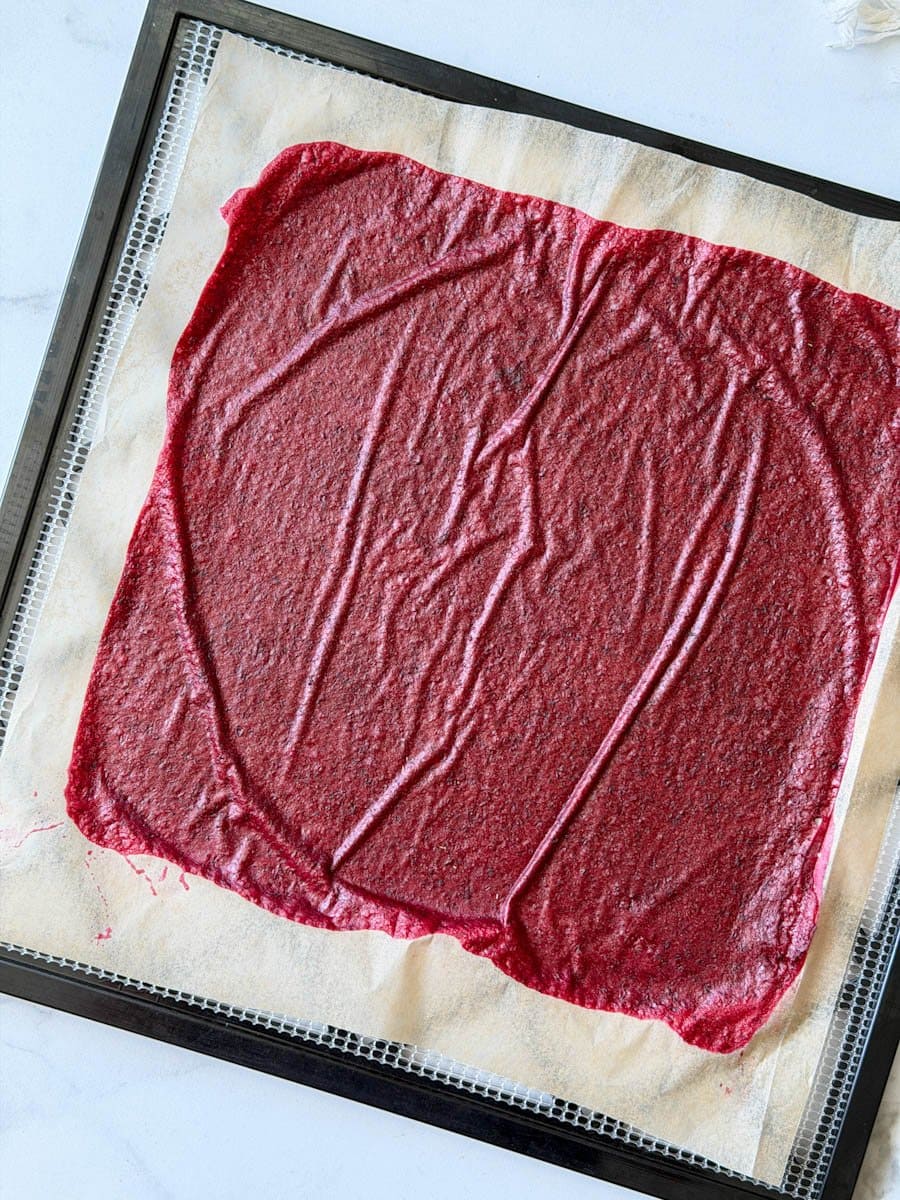
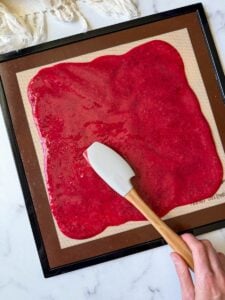
2) Spread On Trays
- This fruit leather recipe should fill about two dehydrator trays or one standard baking sheet.
- Line the dehydrator trays or baking sheets with parchment paper or a silicone mat. (Do not use waxed paper or tin foil.)
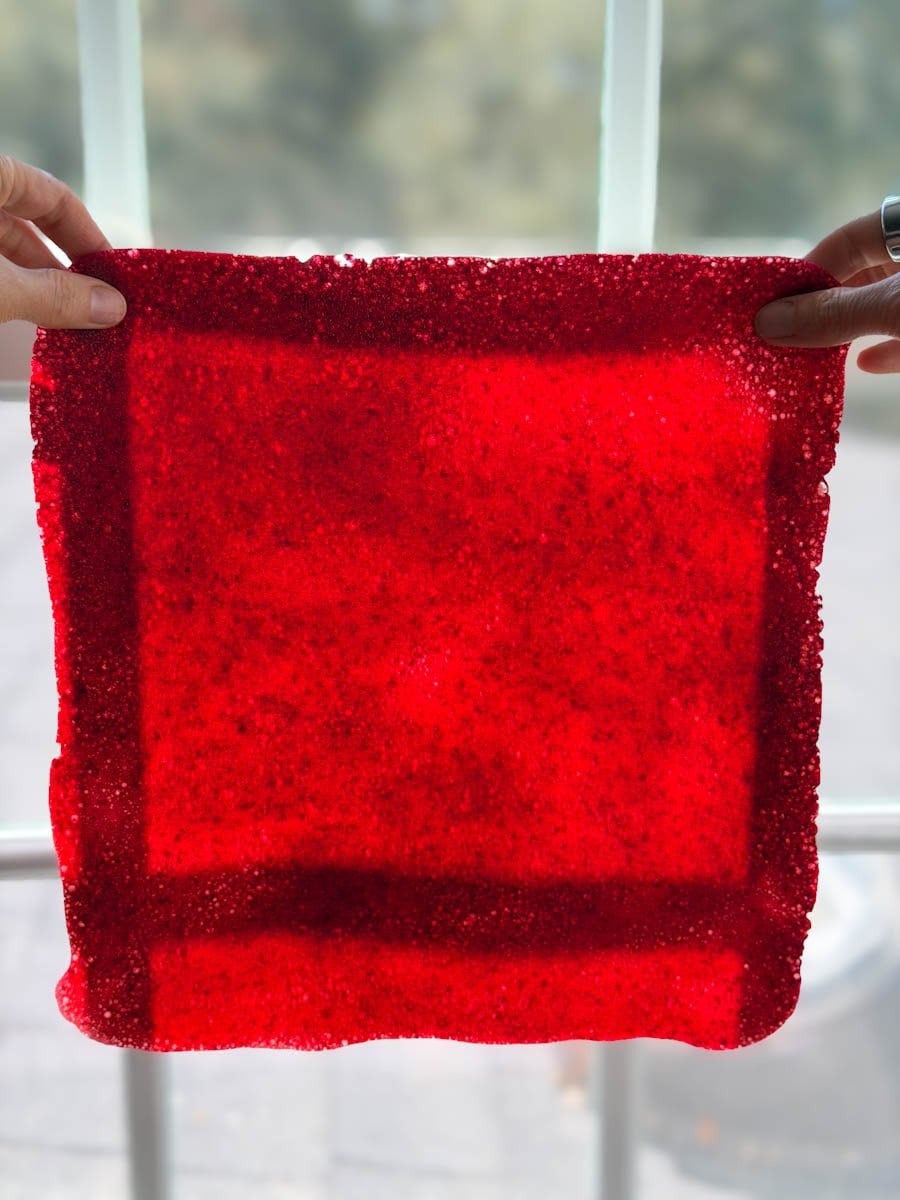
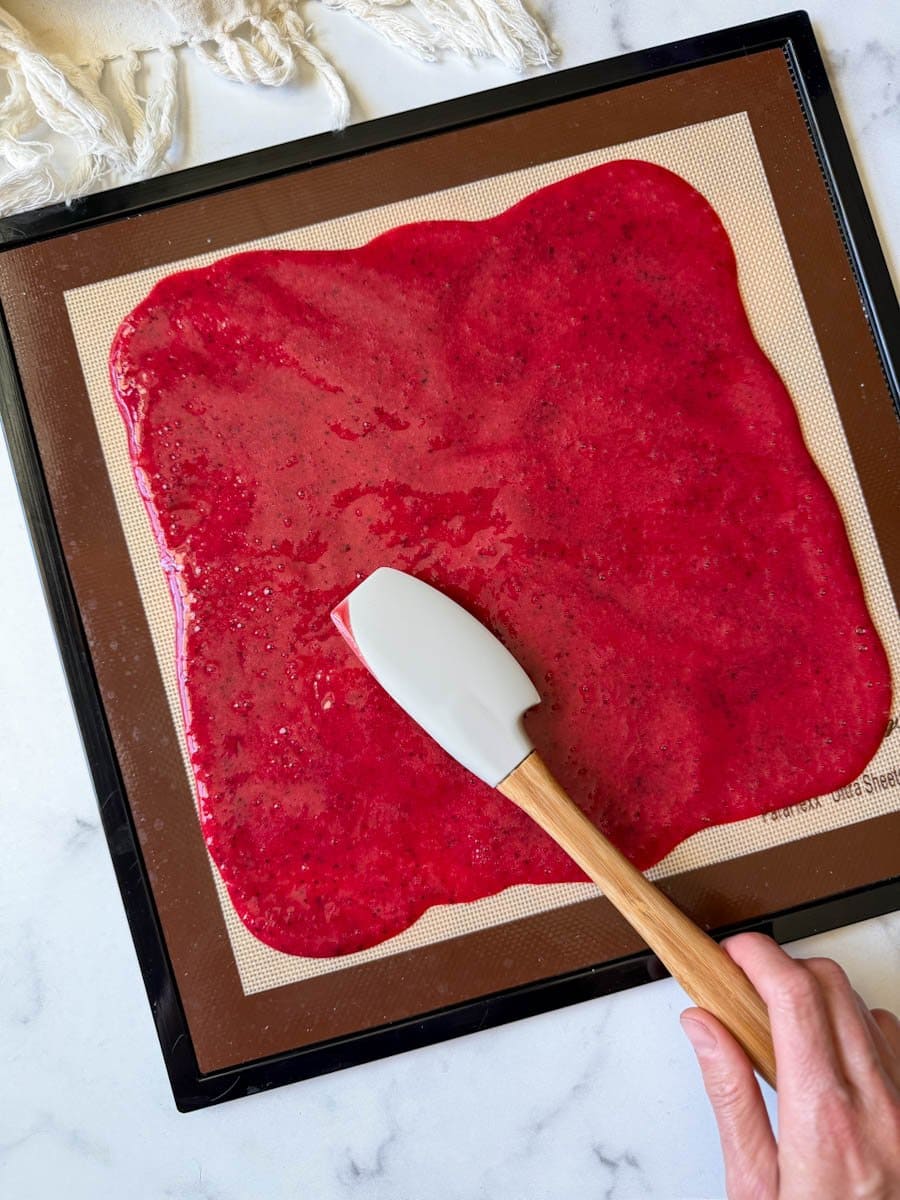
- Use a flat spatula to spread the fruit puree evenly across the lined dehydrator trays or baking sheet, aiming for about 1/8 to 1/4″ thick. Keep in mind it will get much thinner as it dries and excess moisture evaporates!
PRO TIP: Since the fruit leather tends to dry from the outer edges of the tray first, be sure to spread the fruit puree just as thick around the sides as you do in the center of the tray. I’ve found that keeping the outer edges nice and thick also makes it much easier to peel up once it’s dry. (Thin edges are more prone to splitting or sticking.)
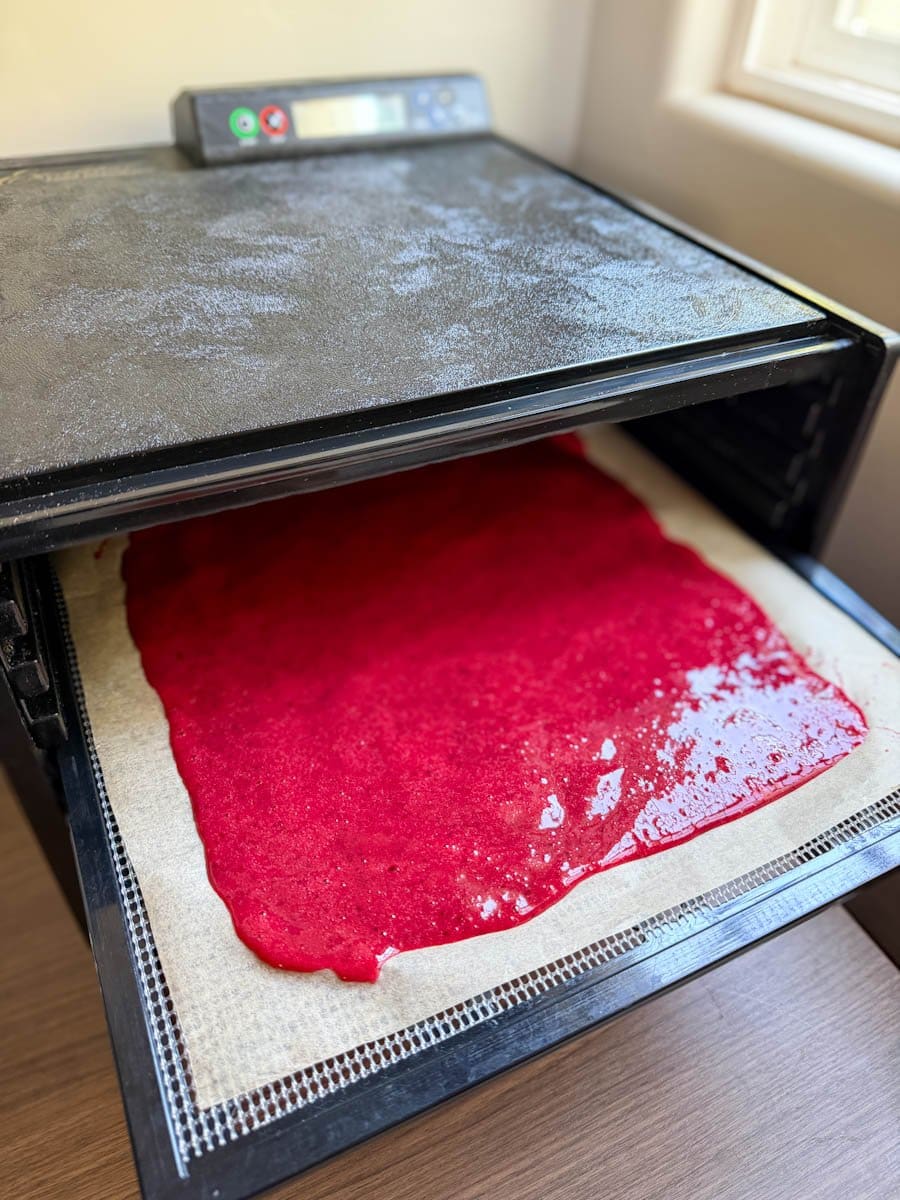
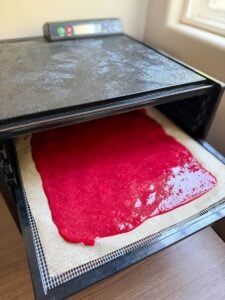
3) Dry (Dehydrator or Oven)
- Dry in a food dehydrator set to 135-140ºF (medium heat) for 6 to 8 hours.
- OR dry in the oven on the lowest temperature setting (150-200ºF) for up to 8 hours or longer. If baking multiple sheets, rotate the trays every 2 to 3 hours.
- Drying times can vary depending on your oven (or food dehydrator), temperature, type/thickness of fruit, etc – so start checking the doneness of your fruit leather after 3 to 4 hours.
- The fruit leather is done once it’s fully dry but still pliable. The surface will appear shiny, and it will feel slightly tacky to the touch but not overly sticky, wet or gooey. Remember that the outside edges will dry faster than the center.
- Allow the homemade fruit leather to fully cool before removing it from the trays.
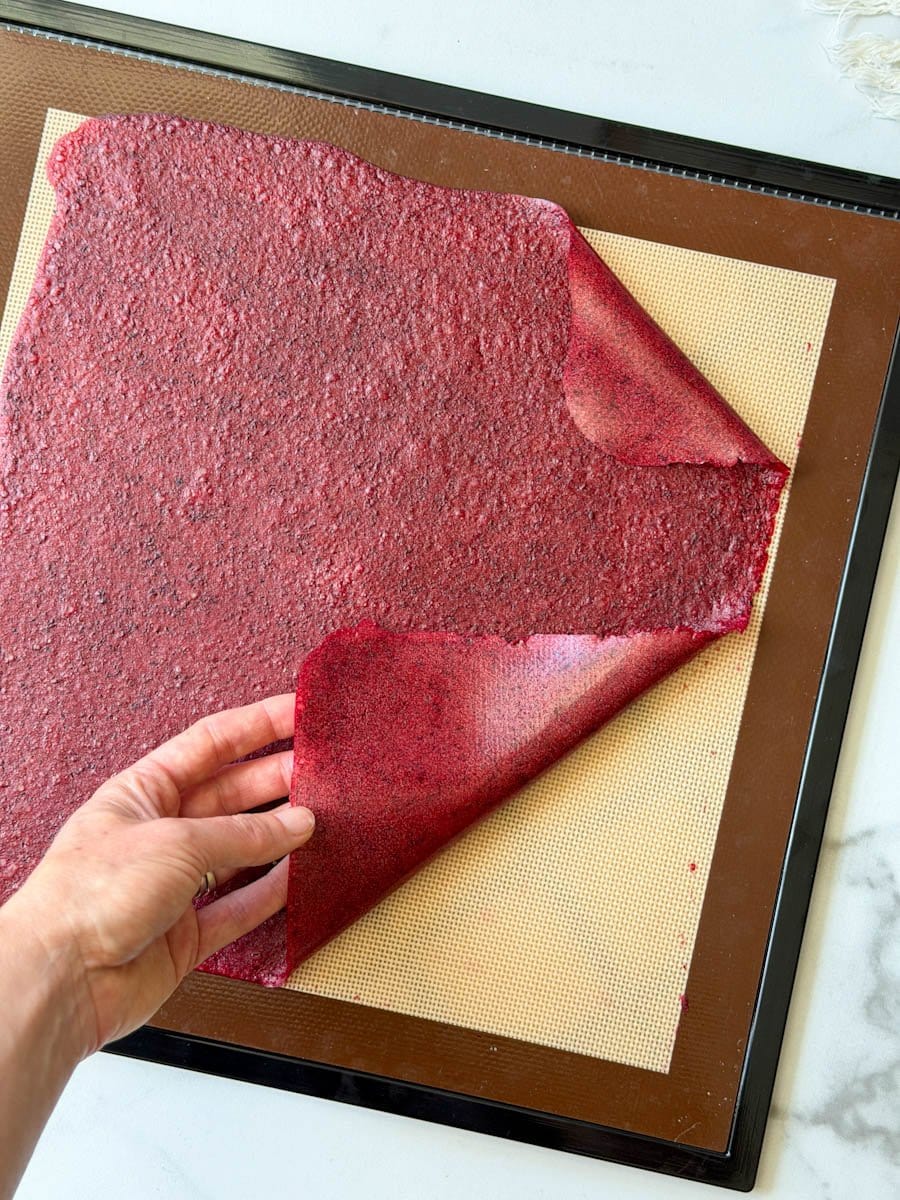
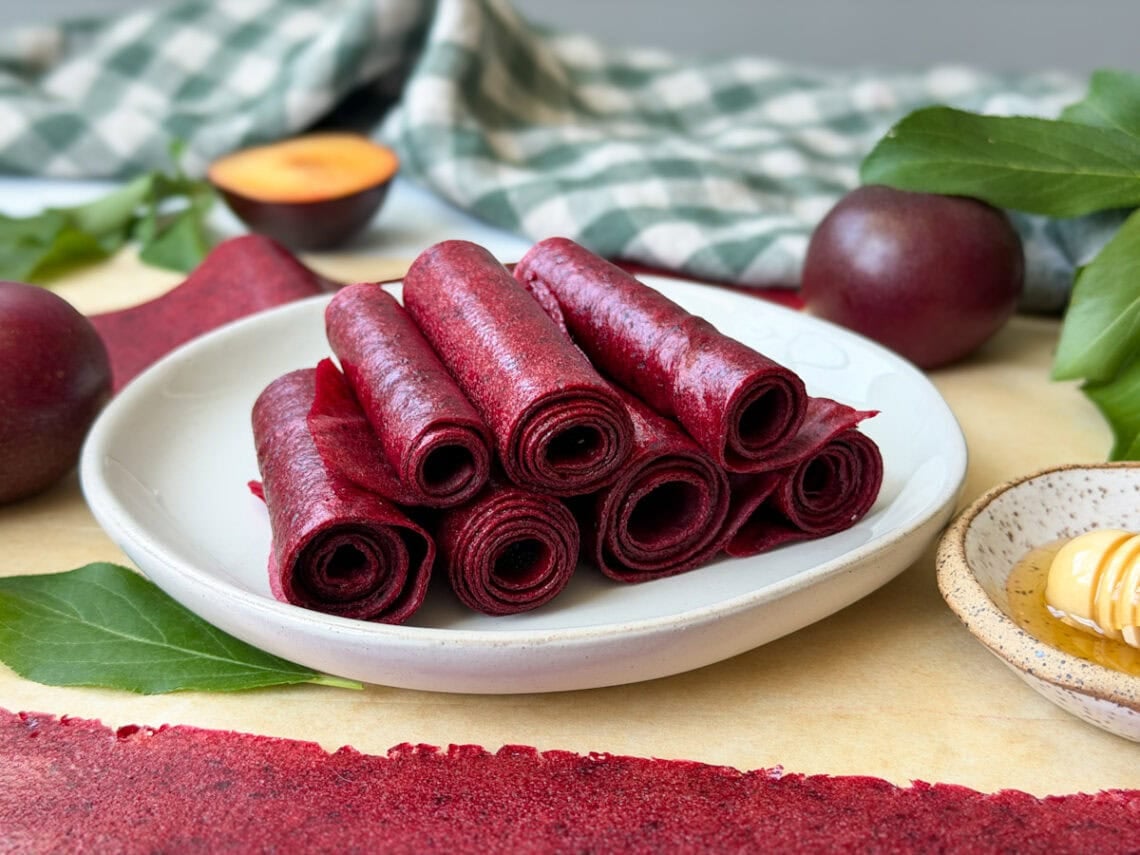
4) Roll and Store
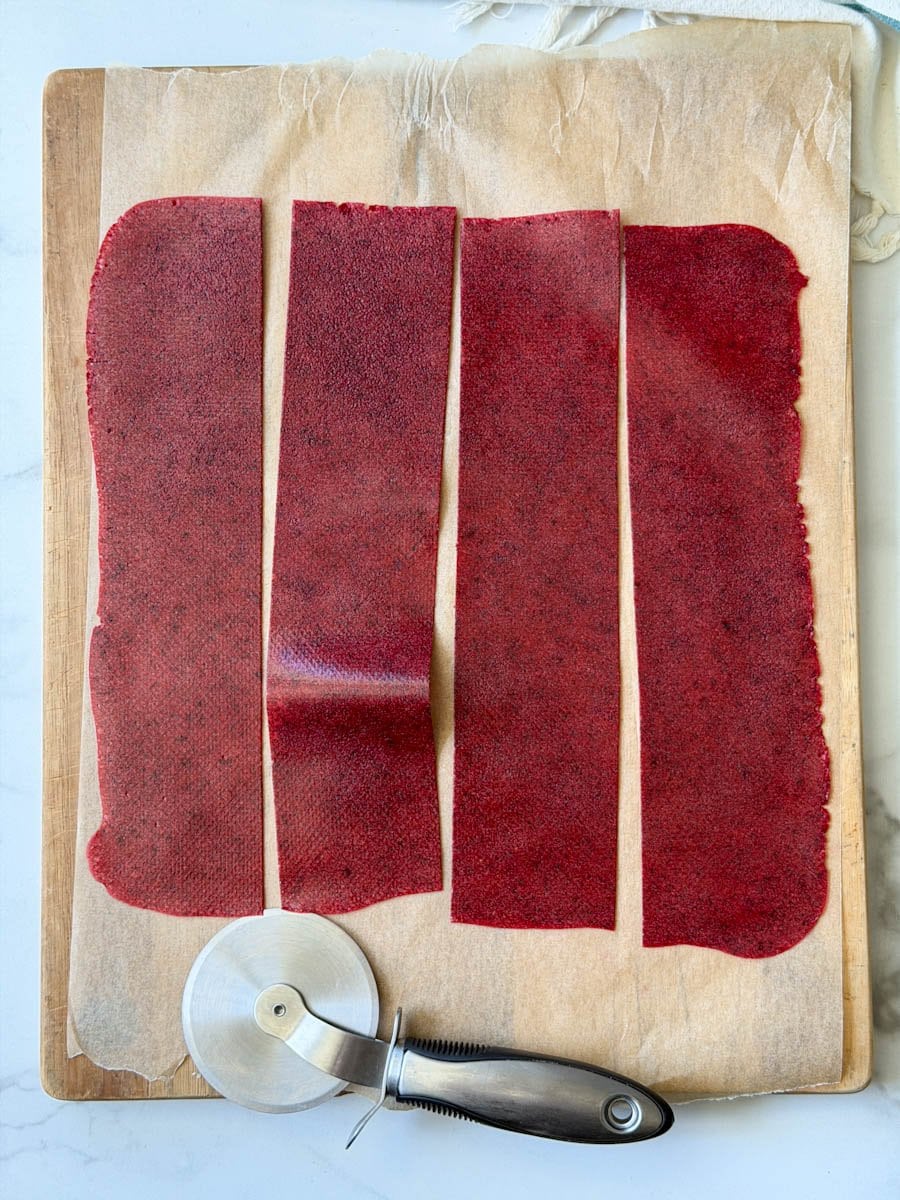
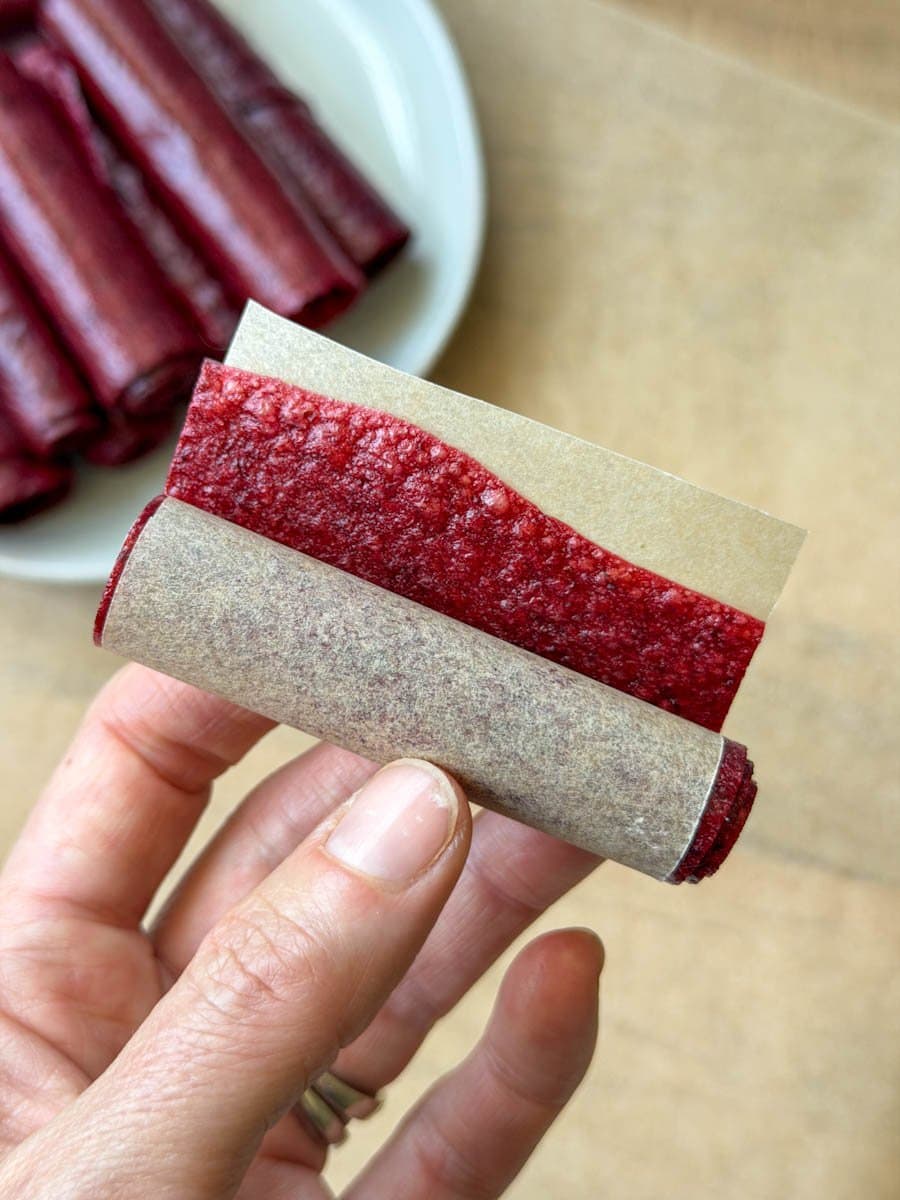
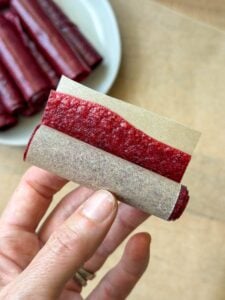
- Gently peel the fruit leather away from the silicone mats or parchment paper and use a knife, pizza cutter or kitchen scissors to cut the sheet into strips of your desired size. You could also use cookie cutters to create fun shapes for the kiddos!
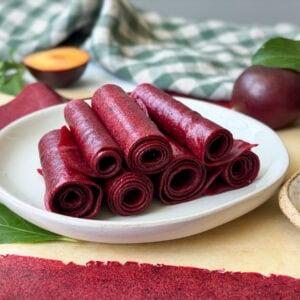
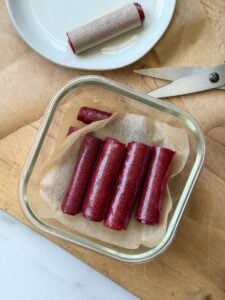
- Roll up the leather strips into individual rolls. You can roll them with a strip of parchment paper to prevent sticking, though I haven’t found that necessary. Instead, I lay pieces of parchment paper between stacks of several rolls in my storage container – see the photo below.
- Store in an airtight container or ziplock bag in a dry, cool, dark location.
- Homemade fruit leather should last at least 1 month stored in the pantry at room temperature. In my experience they can stay good for several months or longer, though we usually eat them before then! Refrigeration can also help extend the shelf life.

Enjoy!
I hope you enjoy making homemade fruit leather just as much as I do, and have fun experimenting with various flavor combinations. Please leave a review below once you give the recipe a try!
You may also like:
- The Best Peach Butter Recipe
- Simple Low Sugar Apricot Jam
- Strawberry Rhubarb Jam Recipe
- Spiced Apple Butter Recipe
- Easy Fruit Shrub Recipe (Drinking Vinegar)
Easy Homemade Fruit Leather (Roll Ups)
Equipment
- Blender, or food processor
- Food dehydrator (preferred), or oven and baking sheets
- Parchment paper or silicone tray liners
- Air-tight container for storage
Ingredients
- 4 cups fresh fruit, chopped (peeled only if needed) The best fruit options include peaches, plums, apricots, nectarines, strawberries, blueberries, mangoes, and papaya. Apples, pears, and overripe bananas are also a great addition to enhance flavor and texture, often mixed with more colorful fruit. Avoid watery fruit like watermelon, grapes or citrus unless mixed with thicker fruit.
- 1 Tbsp lemon juice helps preserve the color of the fruit, prevent darkening, and enhance flavor
- 1-3 Tbsp honey, maple syrup or agave syrup (optional) or add 1-2 pitted dates or 1/2 an overripe banana as a natural sweetener
Instructions
Prep
- Gently wash the fruit under cool water, and remove the peel if needed (I like to leave the skin on most fruit)
- Cut and measure out 4 cups of chopped fruit into a blender or food processor, along with 1 tablespoon of lemon juice and 1 to 3 tablespoons of optional honey or maple syrup
- Blend the fruit into a smooth puree.
- Line the dehydrator trays or baking sheets with parchment paper or a silicone mat. Do not use waxed paper or tin foil. (4 cups of fruit puree should fill about two dehydrator trays or one standard baking sheet)
- Use a flat spatula to spread the fruit puree evenly across the lined dehydrator trays or baking sheet, aiming for about 1/8 to 1/4″ thick. Make it just as thick around the edges as in the center, and keep in mind it will get much thinner as it dries and excess moisture evaporates!

Dry
- Dry in a food dehydrator set to 135-140ºF (medium heat) for 6 to 8 hours
- OR dry in the oven on the lowest temperature setting (150-200ºF) for up to 8 hours or longer as needed. If baking multiple sheets, rotate the trays every 2 to 3 hours.
- Drying times can vary so start checking the doneness of your fruit leather after 3 to 4 hours.
- The fruit leather is done once it’s fully dry but still pliable. The surface will appear shiny, and it will feel slightly tacky to the touch but not overly sticky, wet or gooey. The outer edges will dry faster than the center.

Roll and Store
- Once it fully cools, gently peel the fruit leather away from the silicone mats or parchment paper and use a knife, pizza cutter or kitchen scissors to cut the sheet into strips of your desired size.
- Roll up the leather strips into individual rolls.
- You can roll them with a strip of parchment paper to prevent them from sticking together, though I haven’t found that necessary. Instead, I lay pieces of parchment paper between stacks of rolls.
- Store in an airtight container or ziplock bag in a dry, cool, dark location (room temperature is fine) where it should stay for at least 1 month, possibly several months. Refrigeration can help extend the shelf life.


You May Also Like

How to Freeze Whole Tomatoes for Sauce, Soups and More

Easy Fermented Radishes Recipe with Dill and Garlic
