

Best Refrigerator Pickles Recipe: Quick, Easy, Crunchy Dill Pickles

Got cucumbers? Let’s make refrigerator pickles! Our homemade dill pickles recipe is exceptionally quick and easy to make – perfect for large or small batches. Without the fuss of canning, refrigerator pickles naturally stay more crisp since they’re not subjected to high heat. I’ve included a few tips on how to make your pickles extra crunchy too.
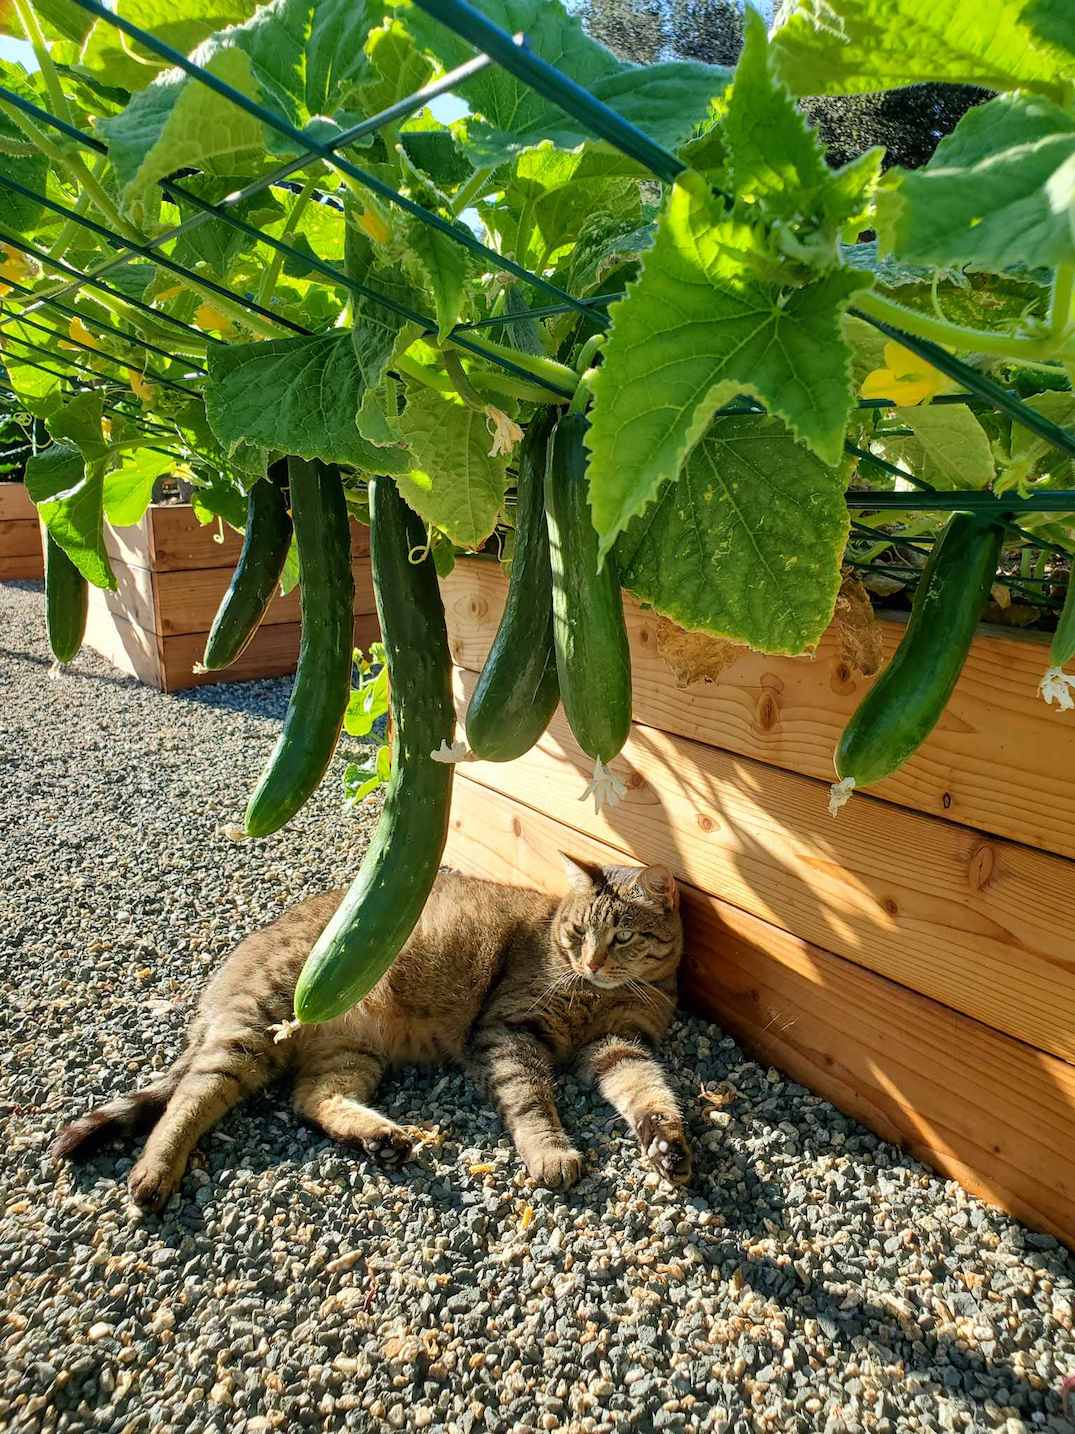
Whether you’re growing your own or are simply in the mood for a fun summer project, making refrigerator pickles is a great way to preserve cucumbers – and create a delicious and refreshing snack. We use homegrown cucumbers from the garden to make pickles all summer long!
Would you like to save this?
Disclosure: Homestead and Chill is reader-supported. When you purchase through links on our site, we may earn an affiliate commission.
RELATED: Learn how to plant and grow cucumbers here, or check out the 7 best clever, cheap, and easy DIY cucumber trellis ideas! You may also enjoy our lacto-fermented cucumber dill pickles recipe.
What cucumbers are the best to make refrigerator pickles?
Petite pickling cucumber varieties will make the best, most crunchy homemade pickles. (You know… the small bumpy ones.) That is especially true for canned pickles.
However, I find refrigerator pickles are more forgiving for texture, so we often use slicing cucumbers too. They stay plenty crisp for us! I’ve also heard Armenian cucumbers make for extra crunchy refrigerator pickles.
Always choose the most fresh and firm cucumbers you can find. Farmer’s Market cucumbers will always be more fresh than those you can buy in the grocery store. If you grow your own, make plan to make pickles within a few days of harvesting – and store them in the fridge in the meantime.
Never use cucumbers that have mold, and avoid those with major dings, bruises, or soft spots to make refrigerator pickles.

How to make refrigerator pickles crunchy and crisp
One of the most common questions (and qualms) is how to prevent homemade pickles from getting soft. One way is to add a crisping agent like “pickle crisp” (calcium chloride), though some folks prefer to avoid that. Thankfully, there are many ways to naturally make pickles crunchy too:
- Always use the freshest cucumbers possible. Just-picked cucumbers (e.g. from the garden or farmer’s market) make the most crunchy pickles!
- Cut off and discard the blossom end of the cucumber to prevent a soft pickle.
- Choose smaller cucumbers over extra-large ones. Petite ones will have a higher skin-to-flesh ratio and also fewer seeds – the part that gets most soft. Little guys (or gals) fit better in jars with less waste too.
- Add tannins. Include a couple grape leaves, horseradish leaves, oak leaves, blackberry leaves, or black tea leaves in each jar. The natural tannins found in these leaves help make pickles crunchy.
- Never peel cucumbers before making homemade pickles. The skin is what makes pickles crunchy!
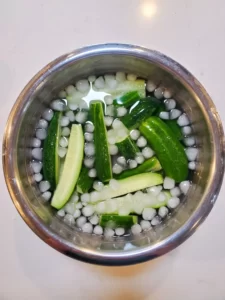
- Keep the cucumbers cold before making pickles by storing them in the refrigerator. For maximum crunch, soak your sliced cucumbers in a large bowl of ice water for several hours or overnight before adding them to the jar.
- For smaller batches and where cold storage space isn’t a concern, use a refrigerator pickles recipe (like this one!) rather than high-heat canning.


How to Make Refrigerator Pickles
Ingredients
The recipe below is per quart jar. Scale up or down as needed.
- Approximately 4 to 6 small pickling cucumbers, or 2 to 3 small to medium slicing cucumbers
- 3/4 cup water
- 3/4 cup distilled white vinegar
- 1/2 cup apple cider vinegar. We love the balance of sweet and sharp flavors by using two types of vinegar for this recipe.
- 2 tsp sea salt, kosher salt or pickling salt (not table salt)
- 1 Tbsp cane sugar
- Dill: about 6 sprigs of fresh dill (a small handful), 1-2 large dill flower heads, or 1 Tbsp dried dill
- 3 large cloves of garlic, peeled
- 1 tsp mustard seed
- 1 tsp black peppercorns
- a pinch of red chili flakes, more or less per personal preference (I like about a half a teaspoon)
- Optional (though highly recommended for crunchy pickles): 1 or 2 grape leaves or oak, horseradish, or black tea leaves. Another alternative is to use a pickle crisp granules.
- Optional: A few slices of onion and/or fresh hot chili peppers (e.g. jalapeño pepper). I added some homegrown sweet Walla Walla onion to this batch!
Instructions
Prep
- In cool water, thoroughly wash the fresh dill and cucumbers. Again, avoid using cucumbers that are bruised, soft, or otherwise damaged.
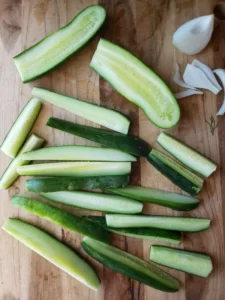
- Trim off the ends of the cucumbers, and then cut them into your desired shape such as round slices, halves, or my personal favorite, thick spears. Pay attention to the height of your jar versus the length of your cucumber pieces (so they aren’t too tall to fit inside). You can also leave small pickling cucumbers whole.
- If time allows, feel free to soak the cut cucumbers in ice water for several hours before proceeding to packing the jars. When I’m not going to soak them, I usually start the brine on the stove first (described next) so it can cool slightly while I am prepping the cukes.

Brine and Pack
- Create the pickling brine by combining the called-for water, vinegars, sugar and salt in a pot on the stovetop. Heat lightly and stir until the sugar and salt both completely dissolve, and then remove the pot from the heat. (The remaining spices will go right in the jar.)
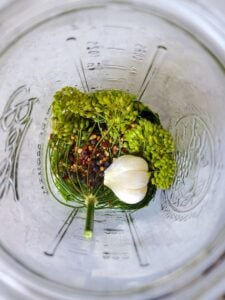
- Add the washed dill to the bottom of a clean jar. Then add the peeled garlic cloves and remaining called-for spices into the jar. Also toss in any optional goodies like onion or hot chili peppers now.
- If you’re using grape leaves (or other leaves) for tannins, you can either add those to the bottom of the jar now or put them on top at the very end, pressing them down into the brine. Alternatively, add a pickle crisping agent following the product instructions.
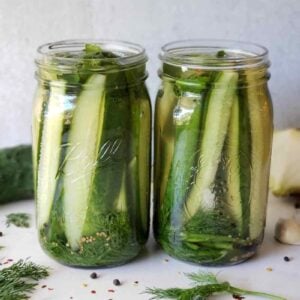
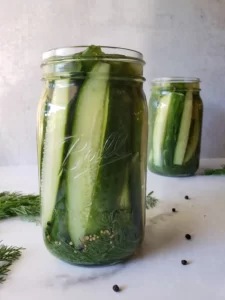
- Finally, fill the jar with cucumbers. Pack them in tightly to reduce wasted space.
- Once the brine has cooled to lukewarm, pour it over the cucumbers until they’re completely submerged and the jar is full. Using a hot brine will slightly cook the cucumbers and thereby make them less crunchy. You may have a little brine leftover. That’s okay! Better to have extra than not enough. (If you do happen to need more to completely fill the jar, simply splash a little more vinegar in on top).

Rest and Enjoy!
- Add a lid to the jar and then move it to the refrigerator. You can use a standard jar lid, though we’ve come to prefer using these BPA-free plastic mason jar lids for refrigerator pickles since the high acid content can make regular metal mason jar rings corrode and get rusty.
- Now, allow your refrigerator pickles to sit and marinate in the refrigerator for about 5 days before consuming in order to develop maximum delicious dilly pickle flavor. (I always sneak a few before then though!) Over the first couple days in the fridge, gently shake the jar every now and then in order to mix and wet the ingredients that may be exposed or floating on the very top of the jar. This isn’t crucial; I just do it when I see them and remember.
Now enjoy your delectable crunchy homemade refrigerated pickles! For the best quality and texture, consume within 2 to 3 months. Continued refrigeration is required.
If you end up eating the pickles fairly quickly (within one month) feel free to toss in more fresh cucumbers or other veggies to reuse the brine and create more pickles!

I told you it was quick and easy.
Are you officially craving pickles now? I sure am. I hope you love these crunchy refrigerator pickles just as much as we do. If you’re dreaming of homegrown pickles, be sure to check out our guide on how to grow cucumbers, including tons of cucumber trellis ideas!
Please let me know if you have any questions in the comments below, and be sure to stop back by to leave a review after you try them! Also please feel free to spread the dill pickle love by pinning or sharing this post. As always, we appreciate you tuning in. Happy pickling!
You may like these related recipes:
- The Best Zucchini Relish Recipe (Canning, Freezer or Refrigerator)
- Easy Refrigerator Pickled Peppers
- Best Cowboy Candy Recipe (Candied Jalapeños) Canning or Refrigerator
- Probiotic-Packed Lacto-Fermented Dilly Green Bean Pickles
- How to Make Homemade Sauerkraut
- Preserving Apples: How to Make Homemade Apple Cider Vinegar
Best Refrigerator Pickles: Quick, Easy, Crunchy Dill Pickles
Ingredients
- 2-6 Fresh cucumbers (depending on type and size)
- 3/4 cup Water
- 3/4 cup Distilled white vinegar
- 1/2 cup Apple cider vinegar
- 2 tsp Sea salt, kosher or pickling salt
- 1 Tbsp Sugar
- 6 sprigs Fresh dill (a small handful), 2-3 dill flower heads, or 1 Tbsp dry dill
- 3 cloves Fresh garlic cloves, peeled
- 1 tsp Peppercorns, to taste (about a dozen per jar)
- 1 tsp Mustard seed
- 1 pinch Red chili flakes (scant 1/2 tsp), or 1 fresh hot chili pepper (optional)
- 2 whole Grape leaves – substitute with horseradish, oak, or black tea leaves (optional, for maximum crispness)
- Optional: onion slices
Instructions
- Wash the fresh dill and cucumbers (avoid using bruised or damaged ones).
- Trim off the ends of the cucumbers, and then cut them into your desired shape and size (slices, spears, halves, etc).

- If time allows, soak the cut cucumbers in ice water for several hours before proceeding to packing the jars (for extra natural crisp!)
- Prepare the pickling brine by combining the water, vinegars, sugar, and salt in a saucepan on the stove. Heat lightly until the sugar and salt dissolve, but then allow the brine to cool to lukewarm/room temperature before adding to the jar.
- Add the fresh dill, garlic cloves, and remaining called-for spices to the bottom of a clean quart jar.
- Add recommended grape leaves (or oak, horseradish or black tea leaves) to the bottom of the jar now, or on top of the cucumbers.
- Add the cucumbers into the jar until full, carefully packing to reduce wasted space.
- Pour the brine over the top of the cucumbers until they are completely submerged. If you happen to run out, top off with plain white vinegar if needed.
- Place an air-tight lid on the jar, and then move to the refrigerator.
- For optimum flavor, allow the pickles to marinate in the refrigerator for at least 5 days before consuming.
- Enjoy your homemade pickles within 2 to 3 months for best quality and flavor. Maintain refrigerated at all times.


87 Comments
Jen
Absolutely fantastic! Making them again because we ate all of them two days after they were ready!. So good.
Charlotte
I just put 6 jars of these in the fridge! Could these be processed in a waterbath for shelf stable pickles? Thank you for all the info on this blog! You are my garden guru!
Aaron (Mr. DeannaCat)
Hi Charlotte, since this recipe isn’t for canning I would look into suggested water/vinegar ratios used for canning pickles as well as the suggested time and temperature for safely canning pickles. Hope that helps, we appreciate your support and thank you for following along!
Laura
Are you talking about grape leaves that grow on vines like the ones in my yard? Do you remove the grape leaves after the 5 days, of leave them in?
Aaron (Mr. DeannaCat)
Yep, if you are lucky enough to have grape vines in your yard, just grab a few leaves per quart jar and toss them in. Just leave them in until you get rid of the brine once you’re finished with the pickles. Good luck!
Laura
Should I remove the stems on the leaves and the leaf size on my vines vary wildly, can you give me an approximate size leaf I should use or does that not matter? I plan to omit the sugar, but could I substitute honey, or just leave the sweetener out all together? Thanks! I plan to make these today!!
Aaron (Mr. DeannaCat)
Hi Laura, leaf size doesn’t really matter. We take off the main stem but leave the leaf intact. Can you tell the size we used in our pickles from the photo? A couple that fit in the palm of your hand will work just fine and you can omit the sugar altogether, along with using honey as a substitute. Good luck and hopefully you enjoy the pickles!
Rosie
I made these using ingredients from my garden and went heavy on the jalapeños and garlic. They have stayed so crunchy and flavorful, I plan to use the rest of my cucumbers for this recipe! Such a tasty snack, thank you.
Aaron (Mr. DeannaCat)
Glad to hear Rosie and the peppers sound tasty!
Jerry
Yesterday I made a batch of the Crunchy Dill Piclkles following your recipe, including a couple of grape leaves, vinegar and ACV and other ingredients you mentioned in the recipe, in four small mason jars. They are in the fridge now, and am anxious to try it after 5 days on this Saturday. Thank you for the easy to follow instructions.
Aaron (Mr. DeannaCat)
Good to hear Jerry, hope you enjoy them!
Kathryn
I’ve just prepared my first batch of refrigerator pickles and am anxiously awaiting them! I had a question though: why isn’t it vital that everything stay below the liquid level, as it is with fermenting?
Thanks!
Aaron (Mr. DeannaCat)
Hi Kathryn, it is best to try and keep most of it submerged below the brine but vinegar is so acidic it doesn’t allow mold to grow that easily. You can always shake your pickles around once a day for the first few days to be sure the brine washes over any exposed parts. We didn’t do that on our batch and they turned out just fine.
Kathryn
Awesome, thank you!
Corinna E. Meissner
I’m definitely going to give this recipe a try. Can I skip the sugar or is it essential for the crunchy pickling process?
Aaron (Mr. DeannaCat)
You can absolutely skip the sugar, using part ACV will also give you a slight sweetness to the brine. Enjoy!
Corinna E. Meissner
Thank you! I can’t wait to give it a shot.
Andrea Runde
I have made something like these once before, but your recipe sounds better. From the basics, I KNOW they will be wonderful, and yes, I included a grape leaf or two also. Can’t wait to make your recipe. Sadly, tho, I will have to buy cucumbers because the nasty little rabbits kept eating off all the new shoots. Made us so disgusted we just pulled them out. Maybe next year?? ha
Harold
I’ve never made pickles with apple cider vinegar before but I will give it a try now. These look delicious! The grape leaf is a trick I learned a few years ago and people are always surprised to hear that it works.
Aaron (Mr. DeannaCat)
Hi Harold, we like the different acidity that ACV brings, hope you enjoy the pickles!
Lemony
I saw soms video’s on YouTube about worm compost and other great content. I wondered if you had a website or other platforms that you’re using.
I’m so happy to see that you have an updated websites with great recipes. I love your idea’s tips and tricks. Keep it up.
Aaron (Mr. DeannaCat)
Thanks Lemony, we’re glad you found our site!
Miriam wedel
Where does one find grape leaves and the other leaves you suggested ? Also what’s the difference between fresh dill and fresh flower heads? Sounds like a great recipe and so happy to find a recipe for 1 qt jars so don’t have a massive mess canning a canner full of qts.
Aaron (Mr. DeannaCat)
Hi Miriam, grape and oak leaves may be more difficult to source depending on your location. You can also use fresh bay leaf that you can usually find in the herb section of a produce department or black tea which may be more readily on hand. Fresh flower heads from dill is mostly referring to those that are growing dill as the tops can become large flower heads that are great for pickling. Hope that helps and enjoy!