

Preserved Lemons Recipe (How to Make Salt Pickled Lemons)
Come learn how to make simple salt-preserved lemons. They’re incredibly easy to make, and only require two ingredients: lemons and salt! Preserved lemons add a wonderful burst of bright and tangy flavor to a wide variety of meals.
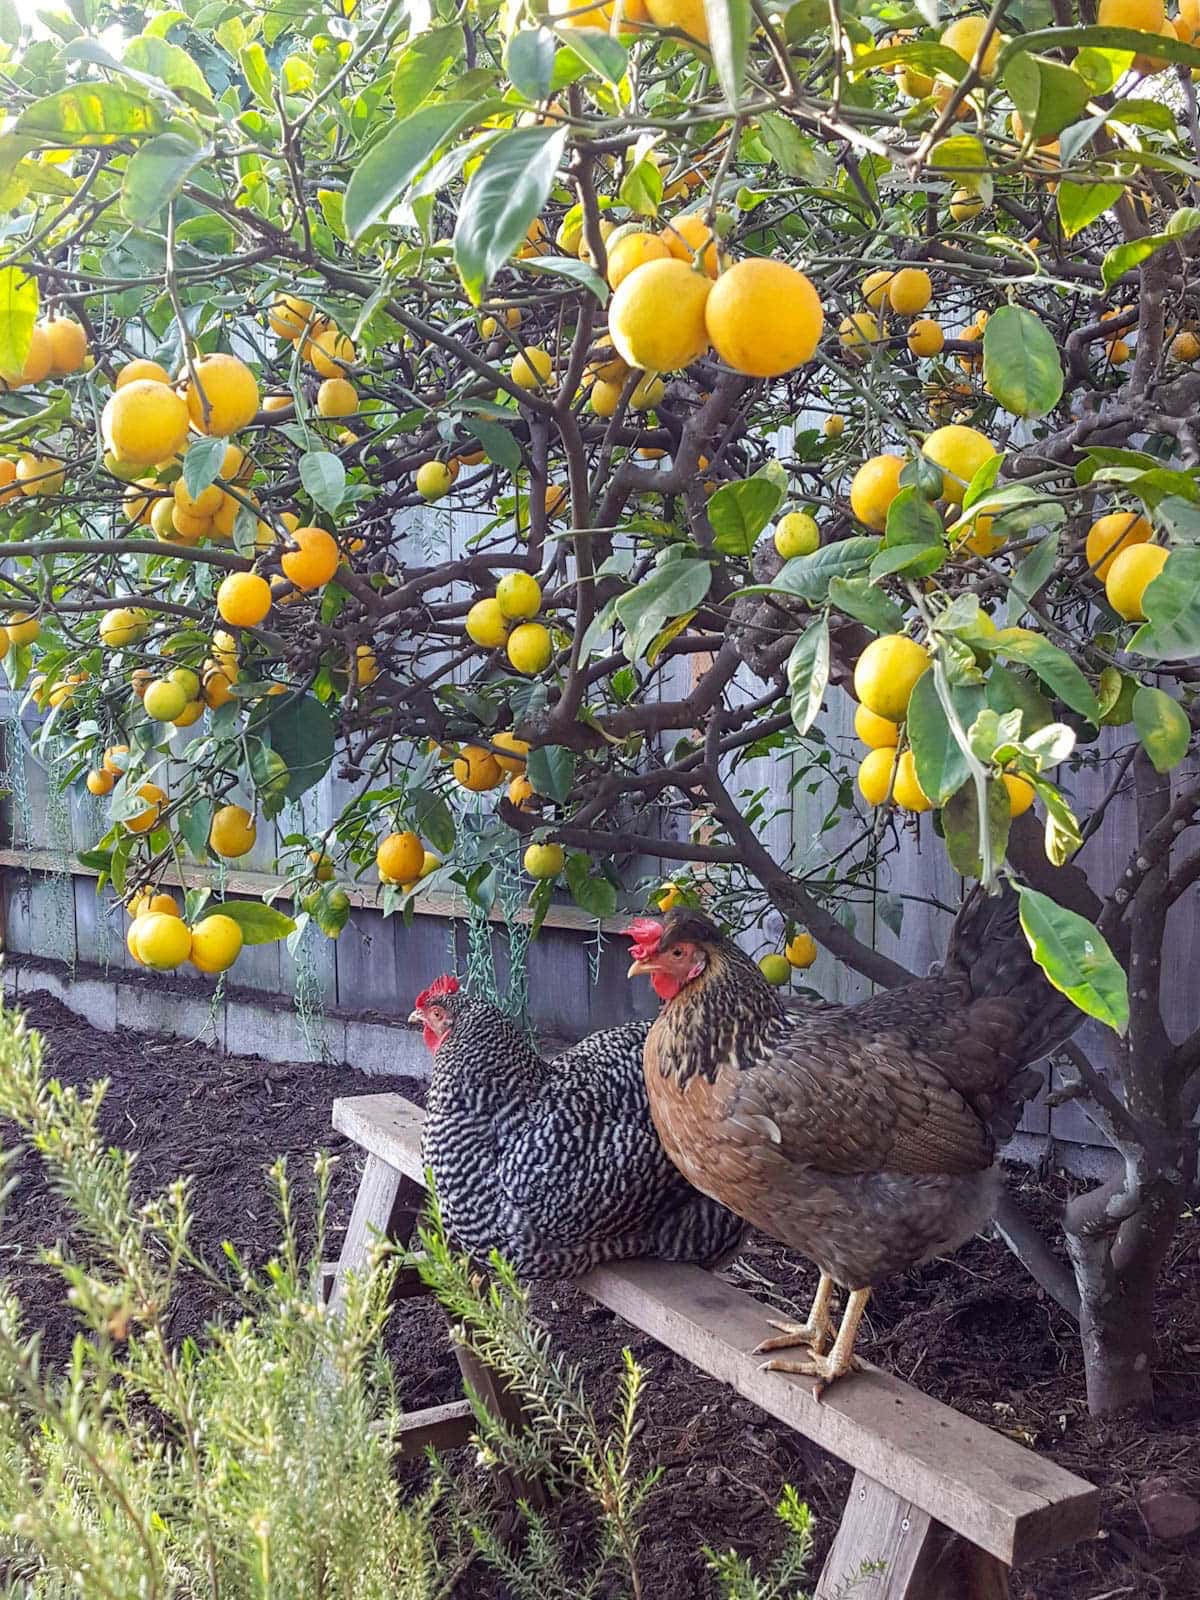
This is a fantastic way to preserve homegrown lemons if you have an abundance like we do here in California! We also love to freeze lemon juice and then save the peels to make dried lemon powder or homemade lemon vinegar cleaner.
Would you like to save this?
Disclosure: Homestead and Chill is reader-supported. When you purchase through links on our site, we may earn an affiliate commission.
What are preserved lemons?
Preserved lemons originate from Morocco as well as parts of the Middle East and Mediterranean region. Also known as salt-pickled lemons, this culinary creation is used in a variety of dishes including stews, braises, sauces, traditional Moroccan chicken tagine, and more. See the list of other ways to use preserved lemons at the end of this post!
As they’re cured in salt and naturally fermented, preserved lemons become increasingly soft and flavorful. The fermentation process also makes the peel less bitter, much like how fermented hot sauce tames the spice and enhances complex sweet flavors in hot chilis!
The combination of salt, acidic lemon juice, and beneficial lactobacillus bacteria effectively preserves the lemons, preventing growth of harmful bacteria or mold.
What type of lemons are best to preserve?
If possible, it’s best to make preserved lemons with Meyer lemons. That’s what we grow here at home! With their sweet, tender, thin skin and high juice content, they are exceptionally tasty – and also easier to squish and pack into a jar. Eureka lemons are the next best choice.
No matter the variety, be sure to use organic lemons. You eat the peel of salt pickled lemons, so you don’t want them full of pesticides. Non-organic lemon peels are especially high in chemical fungicides. Also try to choose nice blemish-free lemons.
Ingredients
- Fresh organic lemons – enough to completely fill your chosen jar, plus a few extra lemons to juice or use if needed. Approximately 6 to 10 lemons will fit in a quart jar and 4 to 6 in a pint jar, depending on the size, variety, and how tightly you pack them.
- Kosher salt – such as sea salt, pink Himalayan salt, or pickling salt. Do NOT use regular iodized table salt. You’ll need about 1/2 cup to 1 cup of salt total. I used a mix of kosher Real Salt and grey sea salt for this particular batch.
- Optional: one or two bay leaves, peppercorns, red chili flakes, and/or sugar. Preserved lemons are perfectly tasty with just salt alone, though some folks like to add extra spices or sweetness.

Supplies Needed
- A large glass jar, such as a quart jar or 1-liter jar. This 1-liter flip top container is perfect for preserved lemons. If you use a regular jar, you’ll want to place a piece of waxed paper on top to prevent the acid and salt from corroding the metal lid.
- Something to press the lemons down into the jar, such as a large wooden spoon or fermentation tamper.
- Optional: a glass fermentation weight to help keep the lemons submerged in their juices. Traditional preserved lemon recipes don’t often use a weight, though it helps reduce the risk of mold. Without one, you’ll simply have to turn the jar every day or two for the first couple weeks.

Instructions
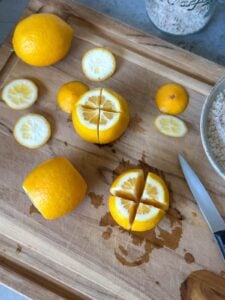
1) Prepare the Lemons
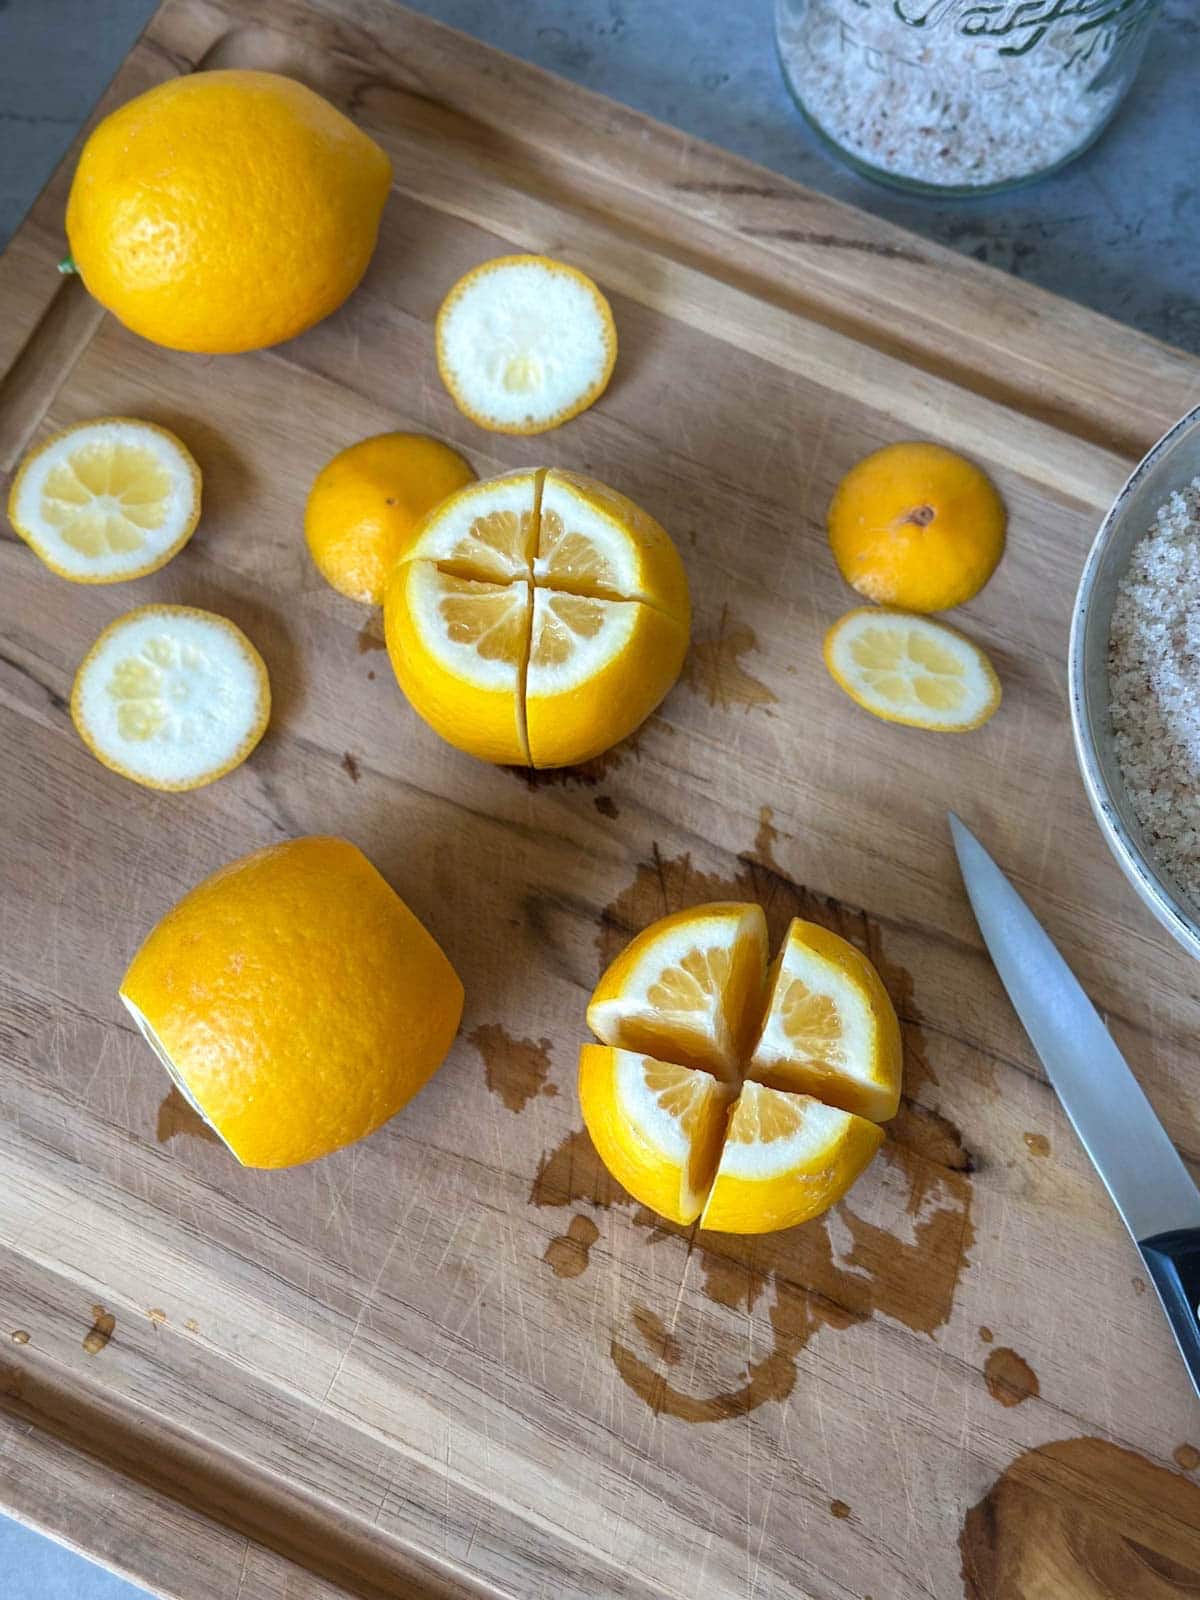
- First, thoroughly scrub and wash your lemons. Remember, you’ll be eating the skin!
- Under the palm of your hand, press down and roll the whole lemons back and forth on the counter or cutting board. This helps them to soften, release juices, and easier to pack into the jar.
- Next, trim off the stem and bottom portion of the lemon rind.
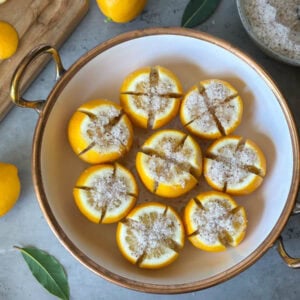
- Finally, start to cut the lemons into quarters, but don’t cut all the way through! Leave the bottom 1/4 of the lemons intact so the quarters stay connected.
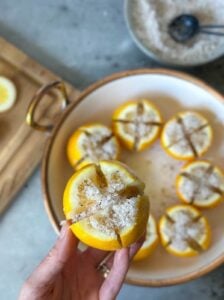
2) Add Salt
- Add 1 to 2 tablespoons of salt to the bottom of a very clean glass jar. (Use 1 Tbsp for pint jars, and 2 Tbsp for quart or liter jars). Also add 1 teaspoon of cane sugar if you’d prefer your preserved lemons with a touch of sweetness.
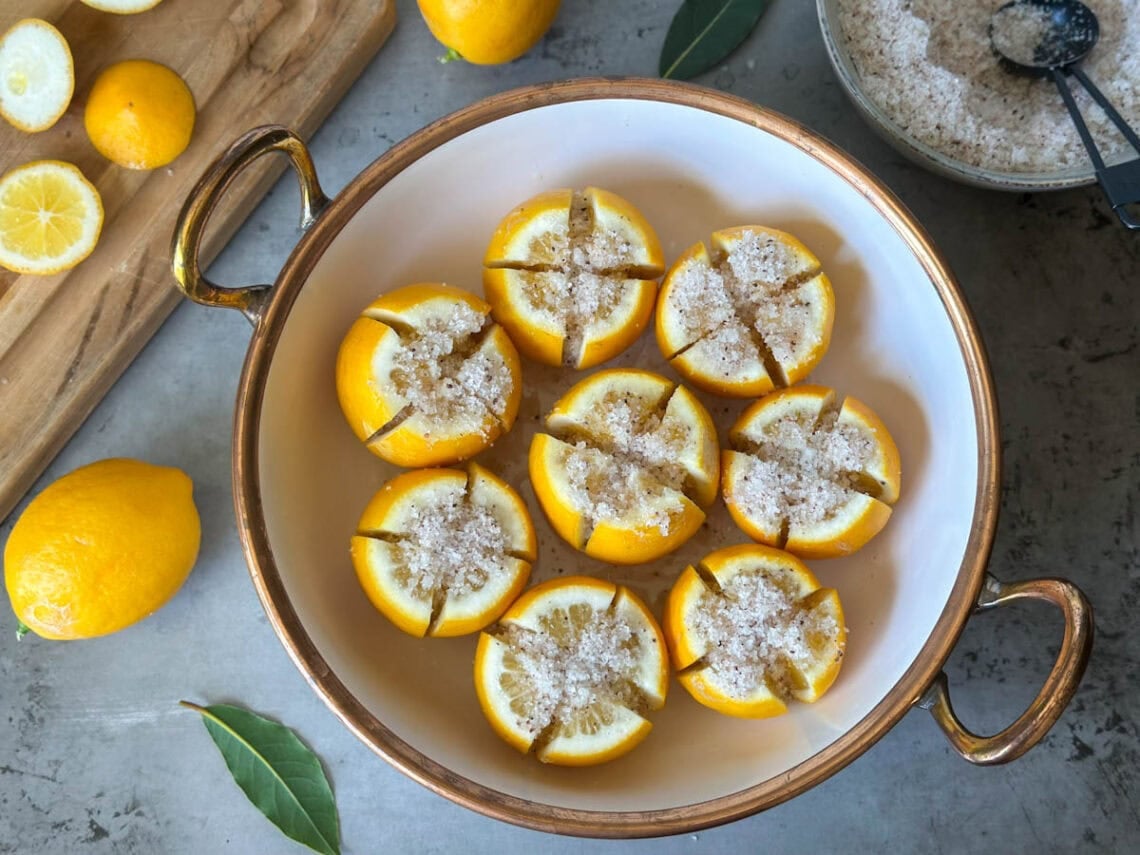
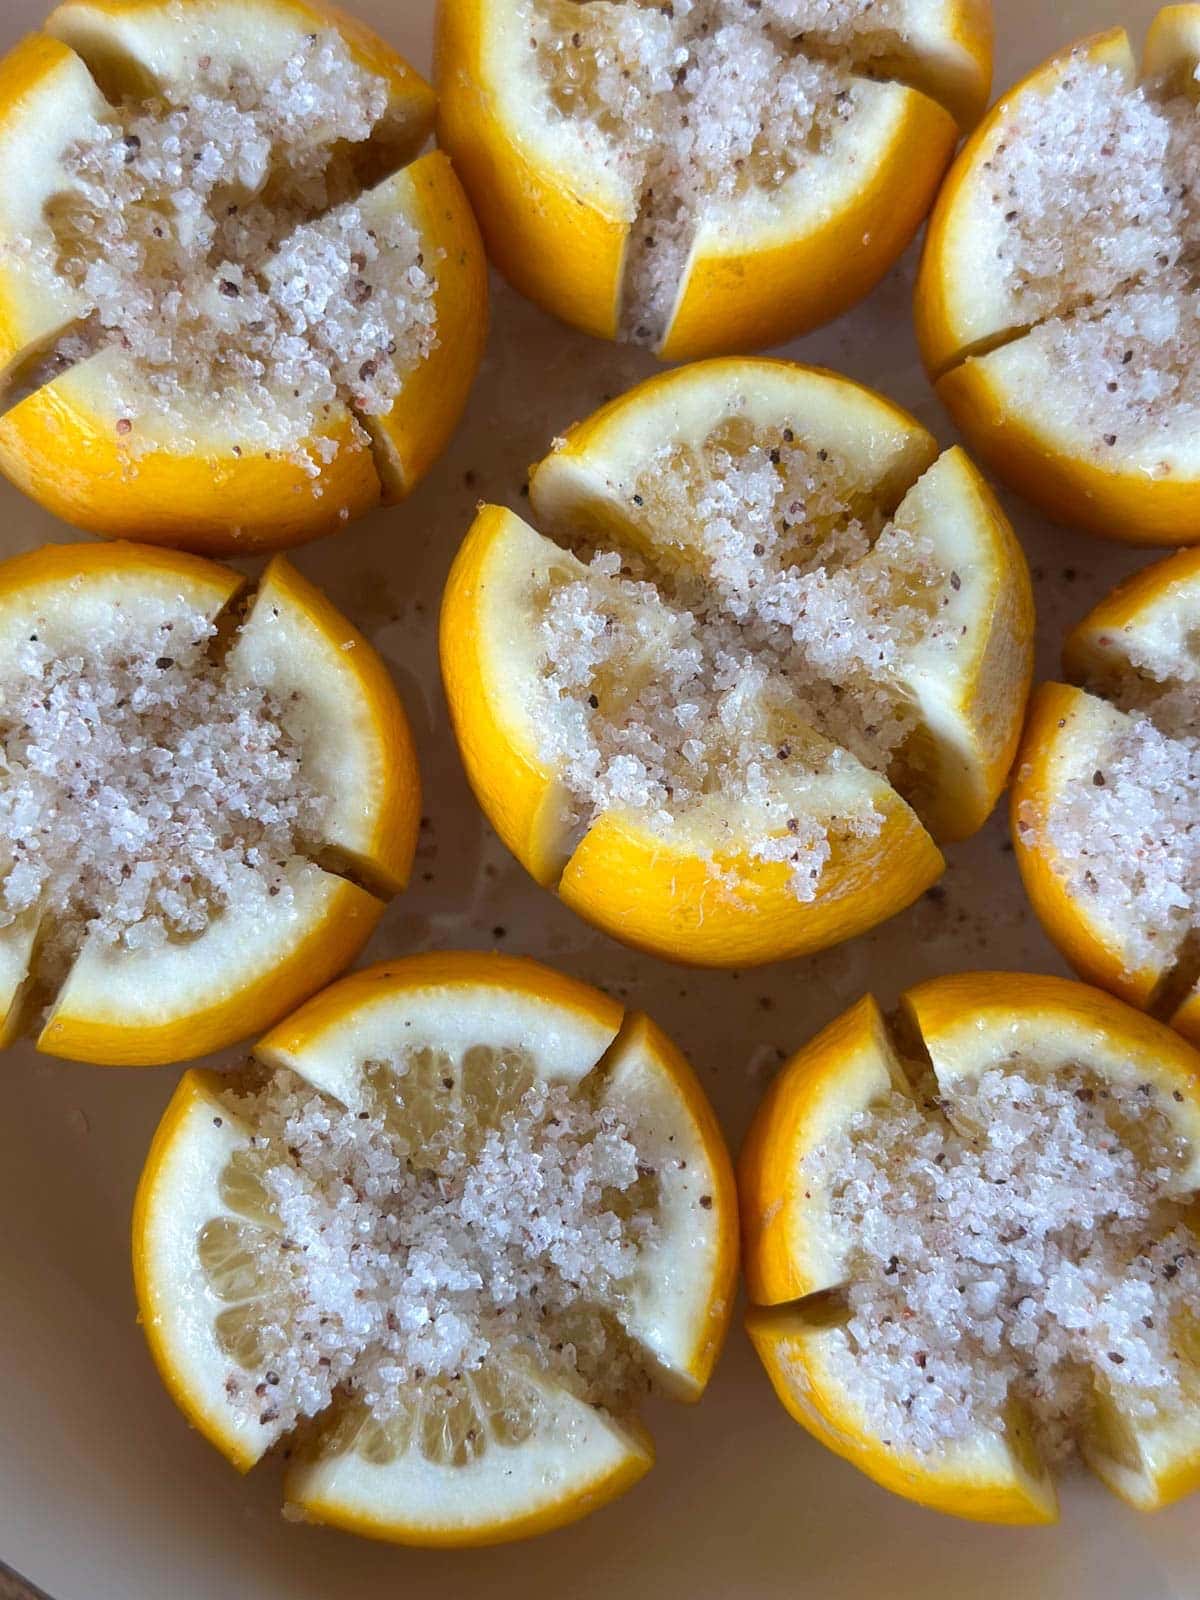
- Now generously sprinkle each lemon with 1 to 2 tablespoons of salt. Without detaching the bottoms, gently pry open and pack salt into the cut sections too. Salt should cover all of the exposed lemon flesh. I like to do this step over a large shallow bowl to collect the extra salt and juices, so I can easily add it to the the jar at the end if needed.

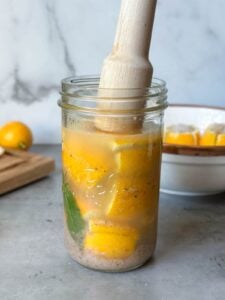
3) Pack the Jar
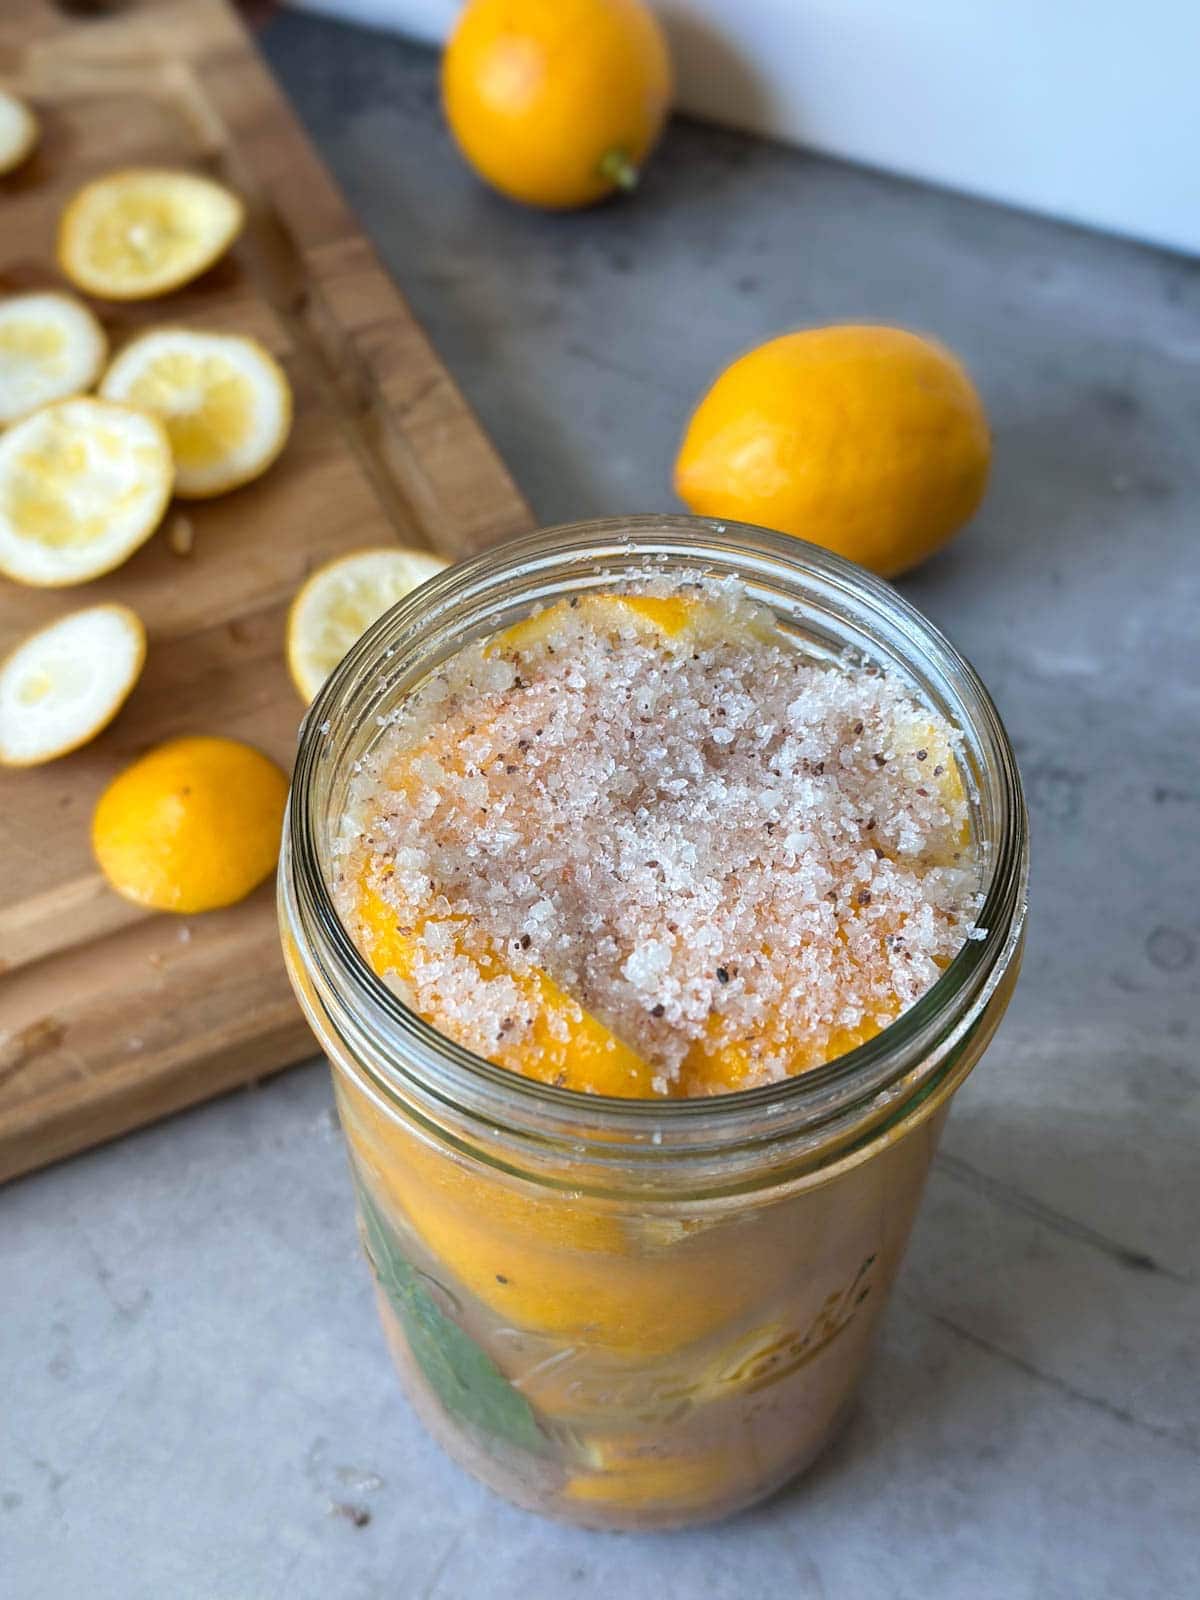
- Add a few salted lemons to the jar, and then firmly press down with a tamper, muddler, or large spoon so they release their juices and make room for more lemons on top.
- Optional: If you’d like to add one or two bay leaves, a pinch of red chili flakes or peppercorns, do so now.
- Continue to add more lemons, packing and pressing as you go. Fill the jar as tightly as you can but leave a little headroom on top – about 1/2 to 1 inch, depending on the size of the jar and if you’re using a fermentation weight.
- Once full, sprinkle another 1 to 2 tablespoons of salt on top of the lemons. Optional: add another 1 tsp of sugar if you desire.
- The salted lemons should be completely submerged in their juices now. If they aren’t, squeeze the juice from the reserved lemons on top until they’re covered. The top lemon or two may try to float above the juice. That’s okay as long as there is enough liquid to cover them when you do press down, though you’ll need to gently shake the jar every day or two to keep the tops wet. You can also add a simple fermentation weight on top to keep them submerged.

4) Cover and Wait
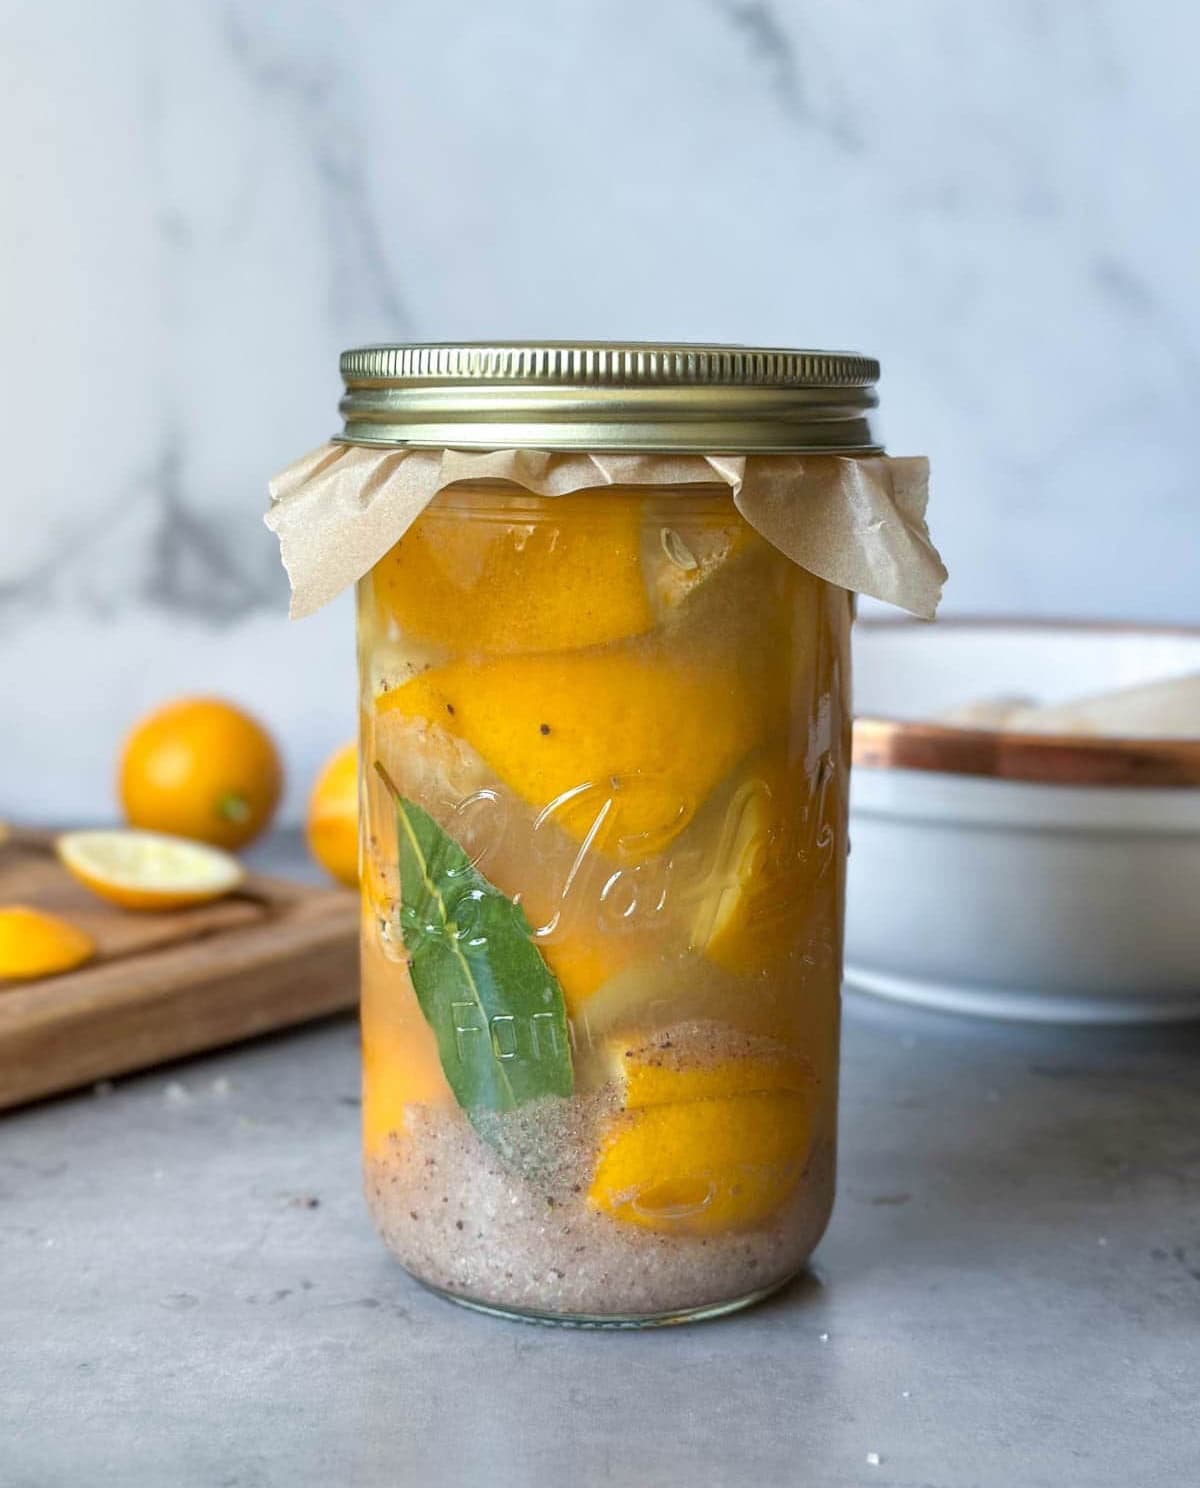
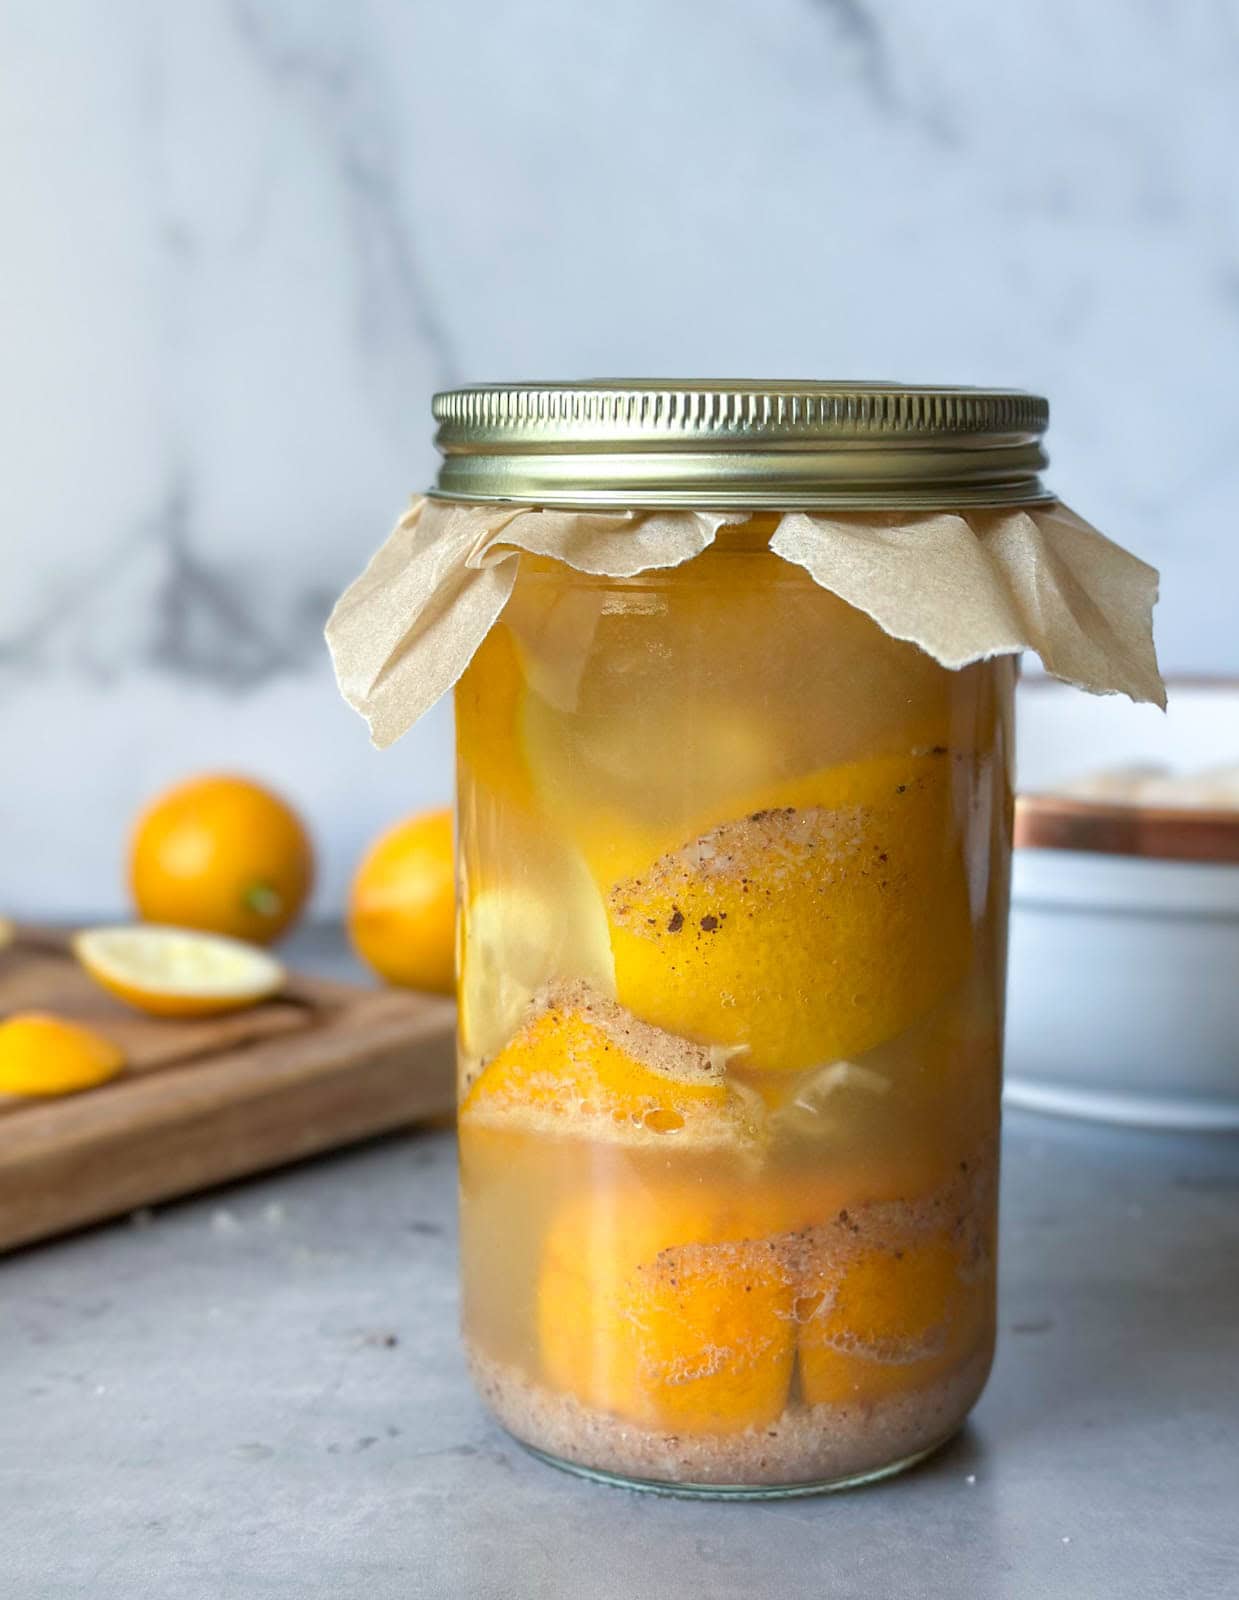
- Cover the jar with a lid. Since preserved lemons are so acidic and salty, I like to add a layer of wax paper under the metal mason jar lid to prevent corrosion.
- Leave the jar out at room temperature to ferment for about a week (out of direct sunlight) and then transfer to the refrigerator or a cool root cellar for long-term storage. Let the lemons cure for at least 3 to 4 weeks before consuming.
- To prevent mold, it’s best to gently tip or shake the jar once every couple of days for the first week or two (especially if you didn’t use a fermentation weight to keep the lemons submerged). Reducing air exposure is key to preventing mold. This will also help to evenly distribute the salt and juices.
- The skins will soften, turn darker orange in color, and small bubbles may develop as they ferment.
- Preserved lemons will stay good for about a year when stored in a cold, dark location.
How to Use Preserved Lemons
Preserved lemons compliment a variety of savory dishes with their tangy, bright, deep lemon flavor. They’re especially tasty in stews, marinades, braises, tagine, pilaf, couscous, pasta, salads, dips, and hummus. Many folks enjoy them with roasted chicken or vegetables. I personally love to add them to salad dressing, dill yogurt sauce and stir fry, or in homemade aioli to serve with baked artichokes.
Before use, thoroughly rinse the pickled lemons to remove excess salt before consuming. If you find them too salty, try using only the rinds as the flesh is often the most salty. You can even quickly blanch them in hot water to further reduce saltiness if desired.
In most cases, it’s best to thinly slice or mince preserved lemons before adding them to a dish. A little goes a long way! Try only 1/2 to 1 teaspoon minced at first and then add more as needed, similar to using lemon zest.
Enjoy!
I hope you love making easy preserved lemons as much as we do. Feel free to ask any questions in the comments below, and please leave a review if you found this post helpful!
Easy Preserved Lemons (Salt Pickled Lemons)
Equipment
- 1 glass quart jar (or liter jar), flip-top or with a lid
- fermentation tamper or large spoon to press the lemons down in the jar
- optional: fermentation weight
Ingredients
- 6-10 fresh organic lemons (per quart or liter jar), plus a couple lemons on reserve for extra juice if needed. Use about half the amount for a pint jar. Meyer lemons preferred.
- 1/2-1 cup kosher salt, such as sea salt or pickling salt (not iodized table salt)
- optional: one or two bay leaves, peppercorns, red chili flakes, and/or sugar.
Instructions
Prep
- Thoroughly scrub and wash your lemons – you'll be eating the peel!
- Gently press and roll the whole lemons back and forth on the counter or cutting board to soften and release juices.
- Trim off the stem and bottom portion of the lemon rind, and then cut an X into the top of the lemon to divide it into quarters – but don't cut all the way through! Leave the bottom 1/4 of the lemon intact it stays connected.

Pack the Jar
- Add 1 to 2 tablespoons of salt to the bottom of a very clean glass jar. (1 Tbsp for pint jars, and 2 Tbsp for quart or liter jars). Also add 1 teaspoon of cane sugar if you’d prefer your preserved lemons with a touch of sweetness.
- Sprinkle each lemon with 1 to 2 tablespoons of salt. Without detaching the bottoms, gently pry open and pack salt into the cut sections too.

- Add a few salted lemons to the jar, and then firmly press down with a tamper or large spoon to release juices and make room for more lemons on top.
- Optional: If you’d like to add one or two bay leaves, a pinch of red chili flakes or peppercorns, do so now.
- Continue to add more lemons, packing and pressing as you go. Fill the jar as tightly as you can but leave a little headroom on top – about 1/2 to 1 inch, depending on the size of the jar and if you’re using a fermentation weight.
- Once full, sprinkle another 1 to 2 tablespoons of salt on top of the lemons. Optional: add another 1 tsp of sugar if you desire.
- The salted lemons should be completely submerged in their juices now. If they aren’t, squeeze the juice from the reserved lemons on top until they’re covered. Optional: add a fermentation weight on top to help keep them submerged.


Ferment and Wait
- Cover the jar with a lid. Since preserved lemons are so acidic and salty, I like to add a layer of wax paper under the metal mason jar lid to prevent corrosion.
- Leave the jar out at room temperature to ferment for about a week (out of direct sunlight) and then transfer to the refrigerator or a cool root cellar for long-term storage.
- Let the lemons sit and cure for at least 3 to 4 weeks total before consuming.
- Gently tip or shake the jar once every couple of days for the first week or two (especially if you didn’t use a fermentation weight).
- Preserved lemons will stay good for about a year when stored in a cold, dark location.


Using Preserved Lemons
- Before use, thoroughly rinse the pickled lemons to remove excess salt before consuming. If you find them too salty, use the peels only as the flesh is often the most salty.
- In most cases, it’s best to thinly slice or mince preserved lemons before adding them to a dish. A little goes a long way! Try only 1/2 to 1 teaspoon minced at first and then add more as needed.
- Preserved lemons pair well with any savory dish were a bright tangy pop of deep lemon flavor would be welcome – such as stews, marinades, braises, tagine, roasted chicken or vegetables, stir fry, salads, dips, salad dressing, aioli, yogurt sauce, pilaf, couscous, pasta, or hummus.
You may also like:
- Besto Pesto Recipe: Lemon Walnut Basil Pesto (Freezer Tips)
- The Best Way to Freeze Lemon Juice + How to Store and Use It
- Easy Fermented Garlic Honey Recipe + Benefits and Uses
- How to Make Dehydrated Lemon Powder + 13 Ways to Use It


Deanna Talerico
Deanna Talerico (aka DeannaCat) is a garden educator and writer with over 15 years experience in organic gardening. She is a retired Senior Environmental Health Specialist, and holds a M.A. in Environmental Studies and B.S. in Sustainability and Natural Resources.


6 Comments
Anna E
Thanks for the comprehensive recipe and great photos!!
Cheri Micheletti
I know it’s traditional to leave the quarters attached, but honestly, there’s no good culiinary/science reason. I just whack ’em all the way (it’s easier to pack the jar too) and sprinkle the salt over each layer.
Alice Leone
This sounds really fun and interesting! I’ve never cooked with fermented lemons. Is there a brand of salt you prefer? I’m finding it hard to find one that is low in lead according to the testing data sheets. I can’t wait to try this recipe!
Aaron (Mr. DeannaCat)
Hi Alice, supposedly Redmond Real Salt (which we have only recently started to use) has never tested above 200 ppb and occasionally will have tests that don’t contain any at all being that the salt (and the elements that comprise it) is naturally occurring. It hasn’t really been something we have looked into too much but let us know if you find something different.
Jane
Great article!
Aaron (Mr. DeannaCat)
Thank you so much Jane, enjoy!