

How to Make Homemade Calendula Salve for Healthy Skin

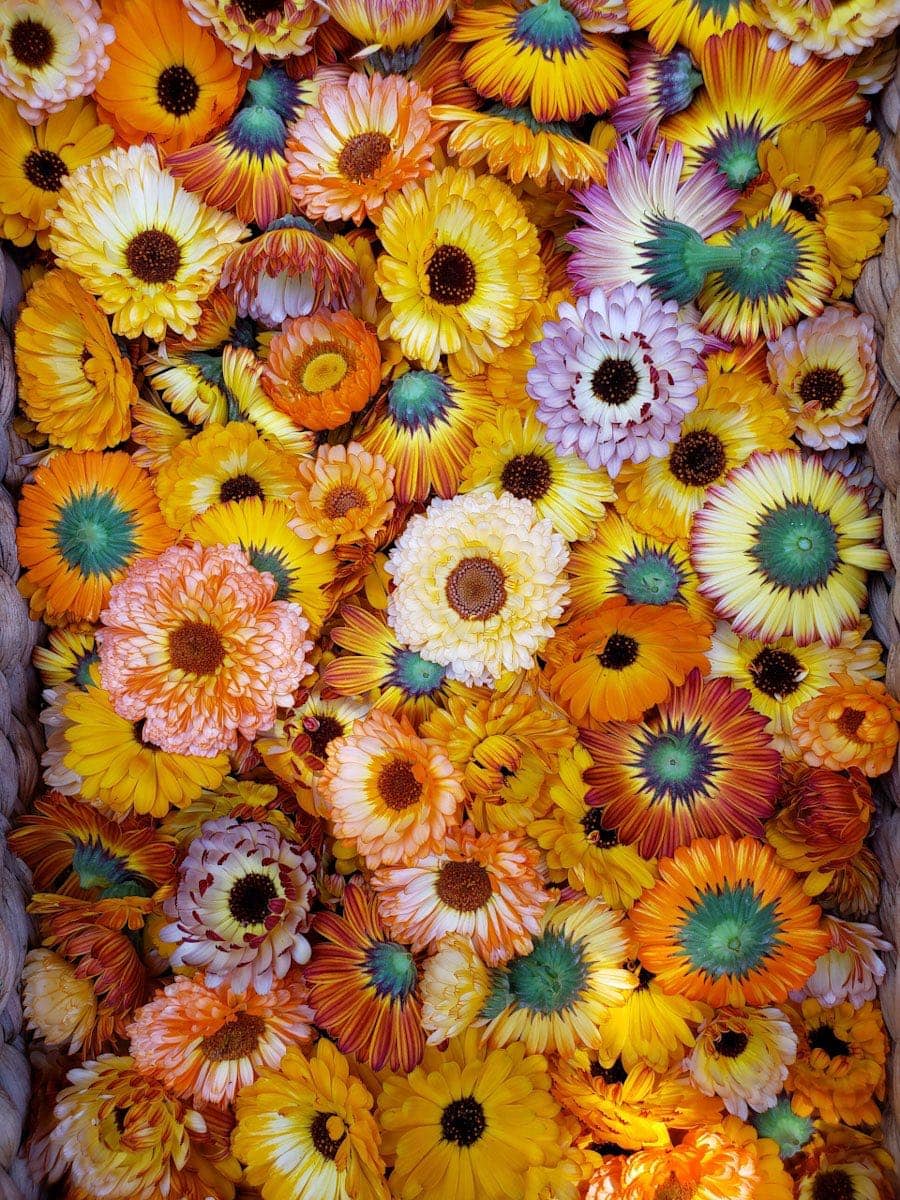
Here we are again: exploring the utility, beauty, and healing powers of calendula! It is no secret that this medicinal herb is one of my favorite companion flowers to grow in the garden. With its strong anti-inflammatory properties and ability to soothe dozens of skin ailments, calendula is also a choice ingredient for personal wellness and natural beauty recipes. From salads and teas to oils or salves, we love to use calendula in any way we can!
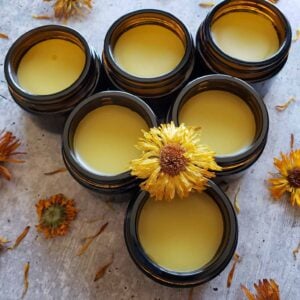
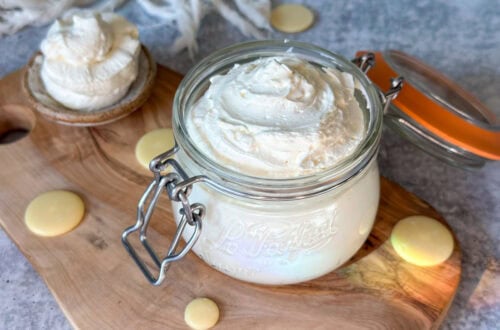
Read along to learn how to make homemade calendula salve. If you’ve never made salve before, don’t worry! It is incredibly easy to do, and requires very few ingredients, steps, and supplies. The final result is beautiful, creamy, golden yellow calendula salve that will nourish, moisturize, and heal your skin. You can use calendula salve to treat dry skin, burns, rashes, eczema and more. Homemade calendula salve also makes for a very sweet DIY gift for holidays, special occasions, or just because!
New to calendula? Check out this article to explore how to grow, harvest, and dry calendula at home. It is a very low-fuss plant that can even be grown in containers and in a wide range of climates.
Would you like to save this?
Disclosure: Homestead and Chill is reader-supported. When you purchase through links on our site, we may earn an affiliate commission.
What is Calendula Salve?
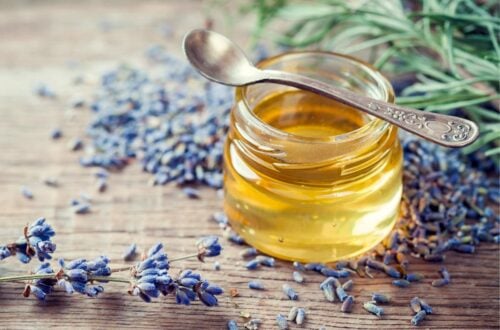
Calendula salve is a nourishing topical balm made from dried calendula flowers, oil, and wax that is used to heal skin conditions or provide general moisture moisture. Calendula salve recipes can be customized with a variety of different oils, natural waxes, butters, essential oils, vitamin E oil, and more. Lavender essential oil and chamomile essential oil are two of our favorite EO additions.
In general, a salve is simply the term for a healing solution that you put on your skin, in the same family as creams, ointments, or balms. Of those, salves contain the most wax and therefore are the most thick and firm, but still softer than a lotion bar. Salves are shelf-stable, semi-solid at room temperature, and long-lasting on your skin.
Beeswax is a popular natural wax to use in calendula salve recipes because it is readily available, easy to work with (especially when purchased in pastilles), and creates perfectly smooth results. Not keen on beeswax? See the ingredient list below for recommended vegan substitutions, along with carrier oil options.

Healing Properties of Calendula
Calendula officinalis has been used by herbalists, homesteaders, and natural healers for centuries. It can be used both internally or externally to support the immune system, heal skin and infections. Calendula works its magic by promoting cell repair and growth, coupled with its natural antiseptic, anti-fungal, and anti-inflammatory properties. Above all, it is gentle in its work. Unlike some natural remedies, you don’t need to worry about “overdoing it” with calendula.
What part of calendula is the most medicinal?
The potent medicinal oils within calendula blooms are most concentrated on the sticky green base of the flower head – botanically known as the sepal and receptacle. Resin is also present (but lesser so) on the petals themselves, which is why we choose to use whole dried flowers rather than plucked petals alone when making calendula-infused oil.

What can calendula salve be used for?
If you pay attention to labels, you’ll probably notice calendula as a key ingredient in many natural skin care products, and for a good reason! Topically, calendula salve can ease, heal, or otherwise treat a huge array of skin conditions. According to the Chestnut School of Herbs, this includes: rashes, sunburn, swelling, eczema, acne, stings, wounds, burns, scrapes, chicken pox, cold sores, and even genital herpes sores.
In her book “Medicinal Herbs, A Beginner’s Guide”, Rosemary Gladstar suggests using calendula salve or oil on babies to safely soothe cradle cap, diaper rash, or other skin irritations. (Be sure to check the safety of your chosen base oil for babies too!)
I personally love to use homemade calendula salve on my dry cracked cuticles after a day of digging in the dirt, or on scars, scrapes, chapped lips, and dry feet. It is a favorite daily hand moisturizer. I also find calendula salve or oil to be very soothing after shaving, to prevent or treat razor burn. Last but not least, calendula salve can also lessen the appearance of varicose veins and soften scars.

Calendula Oil
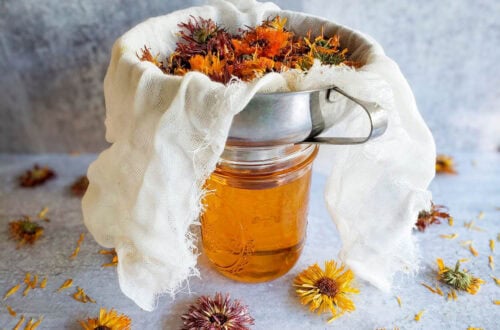
This homemade calendula salve recipe requires ready-to-use calendula oil. You can either make your own calendula-infused oil, or buy organic calendula oil here. Once you have calendula oil, it is very simple to turn it into calendula salve.
If you’re interested in making homemade calendula oil check out this tutorial – and then come back when you’re ready. It is really easy and affordable to do! All you do is steep 100% dry calendula blooms (either homegrown or purchased dried flowers) in a chosen carrier oil to extract the medicinal resins, and then strain it. We prefer to use a long, slow infusion method (3 to 4 weeks) rather than heating calendula flowers in oil for a quick extraction. Preserving the beneficial properties of the blooms by reducing exposure to heat makes it well worth the wait, in my humble opinion!

What is the best carrier oil for calendula?
Jojoba oil, sweet almond oil, coconut oil, and olive oil are all popular carrier oil options to make calendula infused oil and salve – though there are many other options out there! Our calendula oil article explores the pros and cons of a dozen different carrier oils. After all, various oils have unique textures (e.g. some are more or less “greasy”), different comedogenic ratings, and healing properties of their own. For this particular batch of calendula salve, we used organic jojoba oil as a carrier oil. Jojoba oil is very similar to natural skin sebum and therefore soaks in quite nicely.

Supplies & Ingredients Needed to Make Calendula Salve
- 1 cup of calendula oil, or 8 ounces
- 3 to 4 tablespoons* of beeswax pastilles, or about 1 ounce if you’re using shaved, block, or other forms of beeswax. *If you opt to also add shea butter, use only 3 level tbsp of beeswax pastilles. However if you skip the shea butter, use 4 tbsp beeswax. (Vegan options: replace with soy wax or candelilla wax. I recommend organic soy wax, since conventional soy is notoriously pesticide-intensive.)
- Optional: 2 tbsp of shea butter. I personally like to add shea, but it isn’t required! Shea butter is highly moisturizing and rich in vitamins, minerals, essential fatty acids, and antioxidants.
- Optional:essential oils of choice. Calendula has a mild earthy smell, but it is not extremely aromatic or floral on its own. Therefore, I like to add a few drops of certified organic lavender essential oil to my calendula salve for added soothing aromatherapy. Chamomile, peppermint, rosemary, oreucalyptus essential oils are also great choices for calendula salve! You only need a few drops of essential oils, as a little goes a long way.
- A double-boiler, or make-shift double boiler – such as a pot within a pot, or a glass pyrex bowl or stainless steel bowl perched on top of a saucepan with water below. The use of a double-boiler is important, to avoid overheating the calendula oil and thus reduce much of its healing potency!
- Small glass jars or salve tins, for storage. We used these 2-ounce amber glass jars for this particular batch, though we sometimes used larger 4-ounce jars too.
Makes: Just over 1 cup of finished salve (about 10 ounces).
Feel free to scale up or down as needed, depending on how much calendula oil you have. The general rule of thumb for salve is to use about 1 part of beeswax and butter to approximately 4-7 parts oil. A higher beeswax-to-oil ratio will result in a more firm salve, while going lighter on the beeswax will create a softer salve or balm.

Homemade Calendula Salve Instructions
Are you ready? Because this is ridiculously easy.
- Have your salve tins, glass jars, or other calendula salve storage containers of choice ready and waiting.
- In the top portion of a double-boiler (or makeshift double-boiler), add 1 cup of calendula oil and 3 to 4 level tablespoons of beeswax (sliding scale notes above). Also add the optional 2 tablespoons shea butter and a few drops of essential oils now, if you choose to use them.
- In the bottom portion of your double-boiler, add enough water so that the top bowl or pot is in contact and resting in the water below.
- Heat the double-boiler over a medium-low heat on the stovetop. Remember, we want to avoid excessively heating the calendula oil more than what is necessary to melt the beeswax!
- Monitor and routinely stir the mixture until the beeswax (and shea butter) completely melts. Stir to ensure everything is thoroughly combined, and then remove from the heat immediately thereafter.
- While it is still hot, carefully pour the now-liquid calendula salve into your chosen containers. If it starts to solidify while you’re still filling containers, simply put it back on medium-low heat until it liquifies again.
- Set the full calendula salve containers aside (lids off) and allow them to fully cool.
- Enjoy healthy, moisturized skin! Use either clean fingers or a salve spoon to collect a small amount of salve, and apply to your skin as needed. A little goes a long way!

Storage & Shelf Life of Calendula Salve
Store your salve containers in a cool, dark place. I always keep one out and about for regular use, then stash the rest away in a cabinet. Homemade calendula salve can “stay good” for several years! However, its medicinal potency may decrease with extended time and age.

And that is how you make homemade calendula salve!
What a simple and beautiful process, right? I hope you found this tutorial to be interesting, useful, and inspiring – to go make your own healing calendula salve! Feel free to ask questions in the comments below and spread the love by sharing this article. Please stop by for a review once you whip up a batch of your own!
You may also love:
- How to Make Rosehip Infused Oil, and 12 Ways to Use It
- How to Make Homemade Lavender Salve
- Homemade Lip Balm Recipe
- DIY Whipped Body Butter Recipe: Easy, Natural, Non-Greasy
- Soothing Homemade Chickweed Salve Recipe for Itching, Burns or Rashes
- How to Make Homemade Cannabis Salve
How to Make Homemade Calendula Salve
Equipment
- A double-boiler, or make-shift double boiler (such as a glass pyrex bowl or stainless steel bowl perched on top of a saucepan with water below)
- Glass storage jars or salve tins
Ingredients
- 1 cup Calendula oil
- 3-4* tbsp Beeswax pastilles, or approximately 1 once if you're using shaved, block, or other forms of beeswax. *If you opt to also add shea butter, use only 3 level tbsp of beeswax pastilles. However if you skip the shea butter, use 4 tbsp beeswax. (vegan option: replace with the same amount of organic soy wax or candelilla wax)
- 2 tbsp Shea butter (optional)
- 4-5 drops Essential oils of choice (optional)
Instructions
- Have your chosen salve tins or small glass storage jars ready and waiting.
- Add water to the bottom pan of your double-boiler. Now add 1 cup calendula oil, 3-4 tbsp of beeswax (see sliding scale notes above), optional shea butter and essential oils to the top section of the double-boiler.
- Heat the mixture on the stovetop over medium-love heat – only until the beeswax melts, and stirring frequently.
- As soon as everything melts and is thoroughly combined, remove from heat.
- While it is still hot, carefully pour the liquid salve into your chosen containers. (If it starts to solidify while you’re still filling containers, simply put it back on medium-low heat until it liquifies again.)
- Set the full calendula salve containers aside (lids off) and allow them to fully cool.
- The calendula salve will harden as it cools, and then it is ready to use. Use either clean fingers or a salve spoon to collect a small amount of salve, and apply to your skin as needed. A little goes a long way!
- Store your salve containers in a cool, dark location. Homemade calendula salve can “stay good” for several years. However, its medicinal potency may decrease with extended time and age.


101 Comments
Annemarie
I used the 3tbsp of beeswax pastilles and 2 tbsp of shea butter version. It took forever (slight exaggeration) for the beeswax to fully melt. I used med-low heat, stirring constantly and was worried I was heating the calendula infused jojoba oil for too long. Is it normal for the little beeswax pellets to take a long time to melt? Do you ever melt the beeswax and shea butter first and then add the oil? Super easy and fun salve to make. It’s hardening now and looks delightful. I can’t wait to use it on my many mosquito bites! Thank you for such clear directions.
Aaron (Mr. DeannaCat)
Hi Annemarie, beeswax has a melting point around 140 degrees F where as shea butter starts to melt just over 80 degrees so it can take a little while for the beeswax to fully melt using a double boiler (though not typically that long). I can’t compare to too many other beeswax pastilles as we mostly only use one although you can definitely heat the beeswax and shea butter fully before adding your infused oil. Hope you enjoy your salve!
Nicole Novak
Back again with another testimonial (last one was about my tick bite and a miraculous treatment with homemade calendula salve). This time it’s about poison oak that I probably picked up in the same locale as the tick (RIP, terrible tick). The itching started out fairly manageable but has progressed to more pain and annoyance than I choose to endure. Eureka, my salve took the itching and the pain away in less than a minute. I will continue to apply it as the symptoms return but if my intuition is correct, the poison oak will give up the fight and dry out and go away. Hurray hurray hurray for this miracle medicine and your wonderful recipe and guidance on growing calendula. It turns out that in our zone 9B, calendula grows year round. In the spring when I plant my summer garden I’ll be able to harvest a year’s worth of calendula flower!
Much love from Northern California,
Nicole
Aaron (Mr. DeannaCat)
Thank you so much for sharing Nicole! Poison oak is no fun and it’s amazing to hear calendula salve helped relieve your symptoms, have fun growing and turning your harvests into plant medicine!
Heather
I have made this twice and both times it has not hardened up, with adding more beeswax even any suggestions?
Aaron (Mr. DeannaCat)
Hi Heather, a ratio of 4 parts oil to 1 part beeswax pastilles will always get your end product to harden up into a firm salve and that is even with only using oils that are liquid at room temperature. Beeswax or vegan waxes are the only way to get the salve to harden up, just be sure you are measuring the ingredients correctly and if you adhere to the 4:1 ratio of oil to beeswax (1 cup oil to 1/4 cup beeswax), your finished salve will harden up. Hope that helps and good luck!
Daniel
This stuff is amazing! My flaky elbows and cracked skin on my hands are healthy again! Have you ever tried whipping it? It’s sometimes a little chunky in consistency. I wonder if that would work…
Aaron (Mr. DeannaCat)
Hi Daniel, we are so glad to hear you enjoy the calendula salve. We have only begun experimenting with calendula whipped body butter but you would need to use a lot less beeswax and more shea/mango/etc. butter along with added cocoa butter. Most whipped butters use around 60% butters to 40% oil so it would take some experimenting on your part to switch up the ingredients, hope that helps and good luck!
Cheryl
Does this recipe solidify hard enough to be used in a lip balm tube or will it mush all over the place when applied?
Aaron (Mr. DeannaCat)
Hi Cheryl, the salve is fairly firm but it isn’t as firm as a lip balm, it still takes some pressure to initially dig into the salve but you may want to add another tablespoon or two of beeswax pastilles if you want it to be more firm. Hope that helps and good luck!
Lisa L
This was a very straightforward recipe- easy to follow and I didn’t notice the yield, but mainly bc I didn’t have enough containers! Ha! I dried the flowers myself, and let the flowers sit in sunflower oil for about 3 weeks. Added Malama essential oil from Doterra to the first batch. I made it again as I had 1/3 cup left over and wanted to add Benzoin essential oil to that batch. The small batch made about 5 oz.
Aaron (Mr. DeannaCat)
Hi Lisa, we are so glad to hear you successfully made calendula salve, we hope you enjoy the end product!
Sam
This was my first time making something like this, truly from start (seed in the ground) to finish!!! I’ve been saving little jars just as long as I’ve been drying/infusing the flowers, and I got the jojoba oil from a bulk store, so this entire project was 100% zero-waste. This is a great start to at-home plant medicine, and you can’t beat those cheery flowers <3 Thank you!
Aaron (Mr. DeannaCat)
So great to hear Sam, we hope you enjoy your calendula salve!
mona daryanani
Hi I’d love to make this for myself as I am currently suffering from itchiness around my feet.
Can I add essential oils to it?
Aaron (Mr. DeannaCat)
Yes you can, we recommend around 5 drops for our recipe but we like to keep it on the lighter side in that regard.
Anna
I made this and it is very nice, but not firm. Should it be?
Aaron (Mr. DeannaCat)
Hi Anna, the salve should be firm but not too hard, you should be able to easily take some out without having to dig too hard at the salve mixture. If not, your beeswax to oil ratio may be off, use a liquid measuring cup for the oil and use 1 cup oil to 1/4 dry measuring cup for the beeswax. Increase the amounts as necessary depending on the amount of infused oil you have, hope that helps.
Michelle Stafford
Hello and thank you for all your help. I made the Calendula Salve yesterday with the added Shea butter.
I used the 3 tbsp of Beeswax and 2 Tbsp of Shea as recomended and measured as you recommended to the above person. I did add 10 drops of Vitamin E oil as a preservative since I made 10 1 oz jars. Mine is not liquidy but not as firm as I would like. Any thoughts? Thank you : )
Aaron (Mr. DeannaCat)
Hi Michelle, we typically do a 4:1: oil to beeswax ratio although we measure the oil in a liquid measuring cup and the beeswax in a dry measurement cup but we count each cup as being equal. We will also add .25 parts shea butter to the mixture. If you followed these steps and your salve isn’t as firm as you’d like, you would need to remelt all of the ingredients and add another Tbsp or two of beeswax. Hope that helps and good luck!
Michelle Stafford
Hi Aaron,
Yes, that helps. I will remelt and see how it is and let you know. I did add Lavender, will this be a problem remelting it with the essential oil in it?
Thank you!
Aaron (Mr. DeannaCat)
Hi Michelle, the essential oil may dissipate after reheating it so yo may want to add a little bit more after you remove it from the heat.
Renee Marroquin
Thanks for the info. I just bought some of yours:) Very nice.
Is Calendula oil useful for the same conditions as the salve? Or is it too strong straight?
Aaron (Mr. DeannaCat)
Hi Renee, thank you so much for the support and we hope you enjoy the calendula salve! You can absolutely use calendula oil on its own as it work just as well as the salve in regards to being beneficial to skin ailments and issues. Hope that helps and thanks again!
Laure
Thanks for sharing, can’t wait to try!! I was thinking about adding vitamin E, would there be any benefits to it in your opinion?
Aaron (Mr. DeannaCat)
Hi Laure, yes you can add vitamin E oil to your mixture. We would typically do so after all of our ingredients have melted together and the pot has been removed from the heat, good luck!