


How to Make Compost Tea to Fertilize Your Garden (Aerated)
Last Updated on May 18, 2024
Want your plants to grow bigger and better than ever before? Come learn how to make your own compost tea in this step-by-step tutorial. This guide covers the benefits of using aerated compost tea (as opposed to non-aerated), the required supplies, and various ways to use it in your garden. Video included!
When people ask how our garden looks so healthy, my usual reply is: “compost tea!” We feed our plants and fruit trees with aerated compost tea several times per year. Actively aerated compost tea, also known as AACT, is a biologically-active, nutrient-rich, mild-but-strong natural fertilizer.
RELATED: Want to learn more about composting at home? Learn how to set up a simple DIY worm compost bin here, or how to build a 3-bay compost bin here. I also show you how to harvest worm castings from a worm bin in this guide.
Would you like to save this?
Disclosure: Homestead and Chill is reader-supported. When you purchase through links on our site, we may earn an affiliate commission.
What is Compost Tea?
Compost tea is a natural liquid fertilizer that is made by steeping compost in water, with or without the addition of air. You can make compost tea with worm castings or other high-quality compost. The purpose is to extract beneficial microbes and soluble nutrients, and then provide them to plants in a form that they can readily uptake and utilize.
Compost tea is full of beneficial microbes including bacteria, fungi, protozoa and nematodes, all of which have an important role in soil health. Using aerated compost tea in your garden is a great way to enhance the soil food web – the best way to grow big healthy plants!
Soil Food Web Institute
“Chemical-based pesticides, fumigants, herbicides and some synthetic fertilizers kill a range of the beneficial micro-organisms that encourage plant growth. On the other hand, compost teas improve the life in the soil and on plant surfaces. High quality compost tea will treat the leaf surface and soil with beneficial micro-organisms instead of destroying them.”

Why Aerate Compost Tea?
Aerating compost tea makes it exceptionally rich in nutrients and beneficial microbes, while reducing the risk of potentially harmful pathogens.
Historically, gardeners and farmers have made a passive or non-aerated compost tea by soaking a sack of compost in water for an extended period of time, often up to two weeks. This passive brewing of non-aerated compost tea (NCT) has been occurring for centuries.
In more recent years, modern agriculturalists have began to brew super-charged compost tea in a much shorter duration of time, by introducing oxygen, food, and additional nutrients (ACT). By introducing air and a food source for the beneficial microbes, their populations within the tea increases by the thousands.
Soil Food Web Institute
“Aerobic organisms are the most beneficial as they promote the processes that a plant needs in order to grow without stress and with a greater resistance to disease. To enhance this community of beneficials, the compost tea must remain aerobic. Anaerobic conditions during brewing can result in the growth of some quite detrimental microbes* and also produce some very detrimental metabolites. It is best to avoid extremely low oxygen concentrations during brewing.”
*The reference to “detrimental microbes” above includes the potential development of human disease-causing organisms. It is only in anaerobic or low-oxygen conditions that harmful human pathogens can outcompete beneficial microbes and flourish.

What are the Benefits of Using Compost Tea?
- Compost tea enhances the soils ability to retain nutrients. The nutrients in the soil will runoff and be depleted less quickly. Therefore, there is less need to use other fertilizers.
- An enriched population of beneficial microbes, introduced via compost tea, can increase the bioavailability of nutrients to plants. They break down organic matter and free up minerals. This means the plants can uptake nutrients from the soil more readily.
- A healthy soil food web can buffer soil and plants against pollution. For example, compost-rich soil is excellent at reducing the impacts, uptake, and concentration of pathogens, contaminants, chemicals, and heavy metals that may be introduced or present in soil.
- Compost tea can help improve the soils moisture retention properties. This prevents stress to plants by maintaining a more evenly moist soil, and reduces the need for more frequent watering.
- Plants fed compost tea are reported to not only grow stronger, but also have a boosted immune system and improved ability to resist disease.
- Likewise, it increases a plants ability to tolerate and rebound from stress such as drought or pests.

Compost Tea versus Worm Bin Leachate
Many folks confuse worm bin runoff or “worm juice” with compost tea, but it’s important to note that they’re quite different! The liquid or runoff that can be collected from the bottom of an overly wet worm compost bin is leachate, and it’s anaerobic. It isn’t nearly as rich in beneficial microbes, and may even contain negative bacteria and pathogens.
As you’ll see in our tutorial on How to Make Worm Compost Bin, we don’t add drainage holes to the bottom of our tote-style worm bins. Proper feeding and maintenance keeps the bin at the ideal moisture level, eliminating both smell and runoff.

Supplies Needed to Make Aerated Compost Tea
1) Compost
The quality and nutrient content of your starting compost directly dictates the quality of your aerated tea. Whatever is in that compost is going to be amplified, so it’s important to start with good stuff! A variety of compost types can be used to make compost tea, though they may provide a slightly different end product.
San Francisco Department of Environment
“Research suggests that carbon-rich feedstocks (e.g. dry leaves, sawdust, wood chips, shredded newspaper), produce a compost with a higher fungal content. Nitrogen-rich feedstock (hay weeds, coffee grounds, herbaceous material and manures) produce compost with higher bacterial content. Vermicompost is used as an ingredient in many compost tea recipes. This compost is typically the highest in available nutrients.”
We usually make compost tea with homemade worm castings. Or, you can buy finished worm castings at your local garden center or buy some online. No matter what you choose to use, ensure that it is well-aged, balanced, and properly decomposed. For example, do not use fresh animal manures, or compost that is anaerobic and stinks like a landfill.

2) Brewing Vessel
For an average home garden, a basic 5-gallon bucket or two is adequate to make compost tea. Larger gardens, grow operations, or farms may choose to utilize bigger tanks instead. If it is important to you, there are BPA-free, food-grade 5-gallon plastic buckets available too.
We started brewing aerated compost tea using one 5-gallon bucket. Over the years, we have added more and more 5-gallon buckets to our brew day routine. Now, with the help of a multi-port air pump (described in #4 below), we can brew up to six 5-gallon buckets at a time!
3) “Tea Bag”
It is called compost tea for a reason! The compost needs to be contained and steeped within a little sack, just like tea does. You can get pretty creative here. The idea is to create a sack that is breathable to allow the exchange of microbes and nutrients between the compost and water, but won’t let too many larger particles through.
We have made sacks from burlap in the past, and still use one of them. Recently, we have been using nylon paint strainer sacks. They work perfectly, are reusable, and easily available. Several layers of cheesecloth could work, but may be more difficult to reuse. There are also some really nice quality, uber-durable compost tea bags on the market too – ready to cinch close and hang!

4) An Air Source
Next we need an air pump to introduce oxygen into the compost tea brew. In the past, we used a basic aquarium pump. It worked okay, but not nearly as well as the little commercial air pump we use now.
This air pump creates a ton of bubble action, but also has 6 ports so you can brew several buckets at once! The ports are adjustable, so you can turn off the ones you aren’t currently using, or dial the ones you are using up and down for more or less air flow.

5) Air Stone or Bubbler (and Tubing)
The air pump is what generates oxygen flow, but you’ll also need a tool to get the air from the pump and down into your brewing vessel. Air stones are often used to make batches of aerated compost tea. When we first starting brewing AACT, we used a basic air stone like this. They do okay, but can get clogged easily and therefore need to be scrubbed after each use.
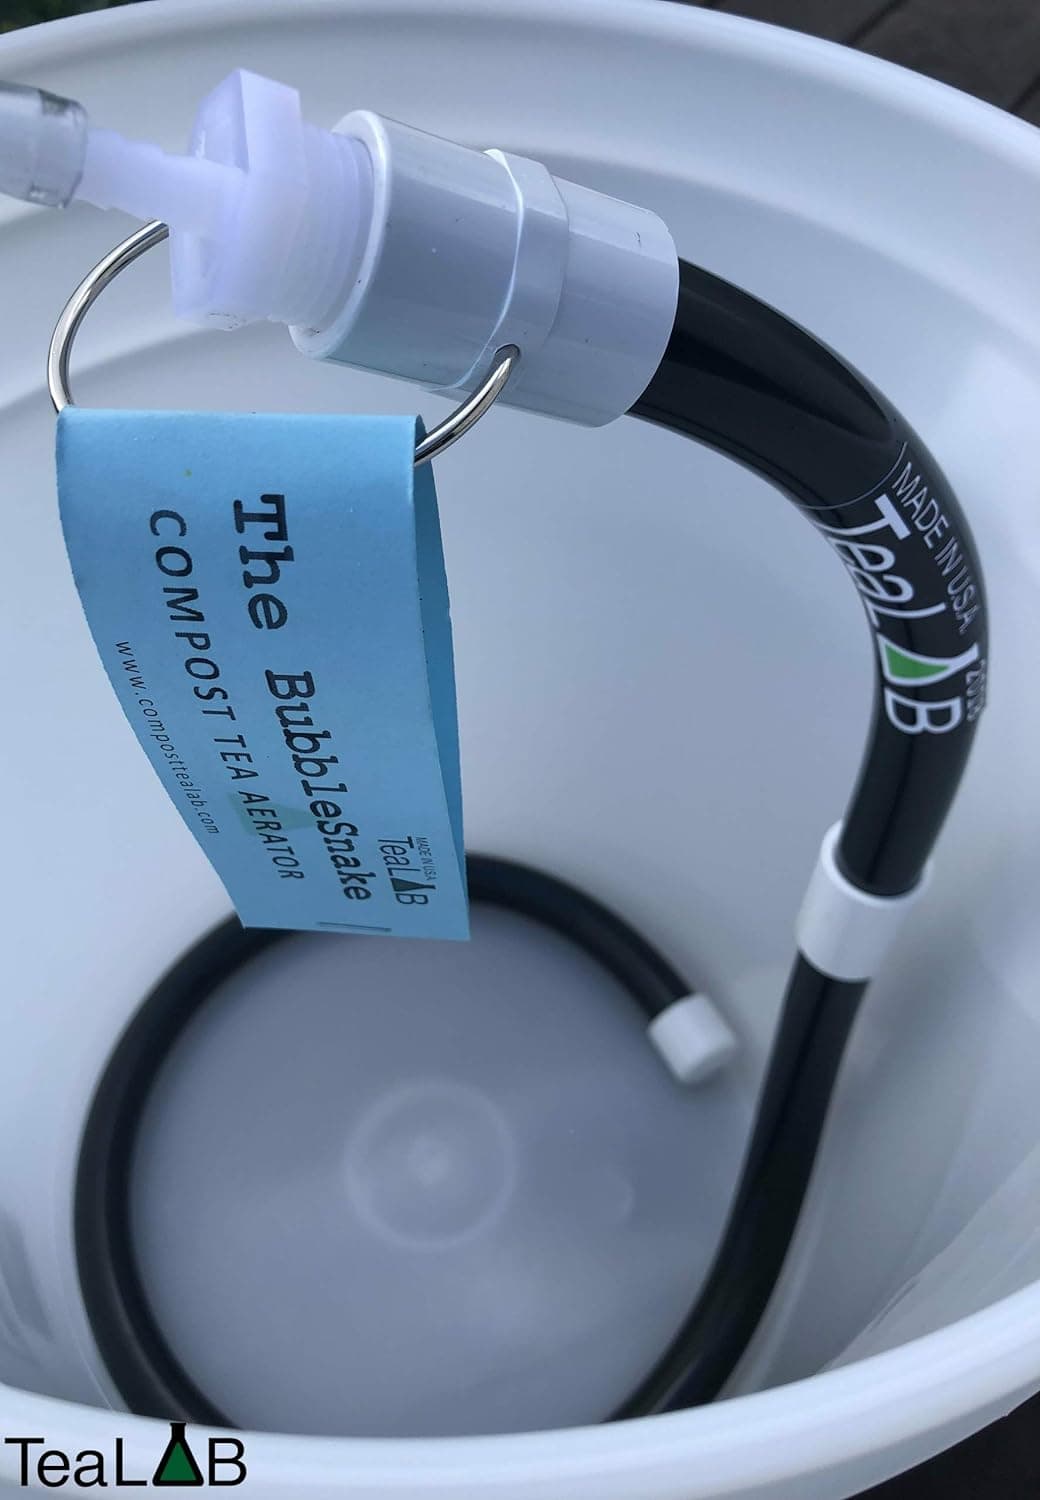
Now we use these awesome bubbler snakes by TeaLab to make compost tea. They’re designed to fit perfectly in the bottom of a 5-gallon bucket, and produce some serious bubble activity through the perforated holes in the bottom of the “snake”. There is also have a little loop to tie and suspend the tea sack from, which also keeps the snake weighed down in the bucket. Fun fact: The bubble snakes are made in Humboldt County, California!
Last but not least, slender silicone airline tubing is used to connect the air stone, snake, or bubbler to the air pump. The TeaLab bubbler tubing is 1/4″ and the standard air pump tubing is 3/16″, so we use these adapter pieces to connect the two hoses together.
6) Microbe Food Source
In addition to the compost itself, other nutrients are often added to aerated compost tea brews. The purpose is to feed the microorganisms in the tea, and thus increase their activity and quantity.
Common additions include kelp, fish hydrolysate, molasses, and humic acid. Most often, we use a little organic molasses, seaweed extract, and/or kelp meal.
7) Dechlorinated water
As much as possible, the water used to make compost tea should be free of disinfecting agents such as chlorine or chloramines. Those are meant to kill microorganisms, so using chlorinated water sort of defeats our purpose here! We use water from our rainwater collection system to make aerated compost tea.
If you are on municipal tap water that uses liquid or gaseous chlorine as a disinfectant, you can simply fill your buckets a day or two in advance, let the water sit out in the sun, and most of the chlorine should dissipate. Unfortunately, chloramines do not “burn off” the same way chlorine does. Another solution to this is to use filtered water. These carbon filters that attach to your hose will help do the trick! We use them extensively in our garden.
Now that we have our supplies covered, let’s brew!
Directions: How to Make Actively Aerated Compost Tea
1) Prepare Brewing Vessels
Add dechlorinated water to your brewing vessels. If needed, let your water sit out for a day or two to let any chlorine burn off. If you are making compost tea in 5-gallon buckets like we do, fill them up most of the way. We generally leave a few inches of room on the top to allow for bubbling and possible foaming.
2) Fill Tea Bags
Using your compost of choice, fill your tea sacks with several cups. There are varying recommendations out there for exactly how much compost to water should be used. We generally use anywhere from 2 to 5 cups of compost per sack, per 5-gallon bucket, depending on how much available compost we have at the time. If you need some tips for how to harvest finished worm castings from a compost worm bin, check out the link to see how we harvest and screen ours!
If you would like to add kelp meal as your microbe food source, add a quarter cup into each tea sack at this time.
Tie the sack closed on top with a string, hemp tie, or similar. Leave a little length to the string so you can suspend the teabag in the bucket.

3) Feed and Steep
Dunk your ready compost tea sack in the brewing vessel. Just as you would with a tea bag, lift and lower the bag in the water several times to moisten, agitate, and encourage infusion. Tie the extra length of string to the handle of the bucket. Or, if you’re using a TeaLab snake bubbler like ours, tie it to the designed steeping loop at the top of the snake.
At this time, add an additional food source for the microbes (unless you already added kelp meal in the previous step). We typically add 1/3 cup organic molasses to each 5-gallon bucket during every brew. Sometimes, we also add a slug of seaweed extract in place of the kelp meal.

4) Aerate
If you haven’t already, insert your air delivery device (air stone, snake bubbler, etc) into the brewing vessel. Ideally, it should rest on the bottom of the bucket, with the tea bag suspended above it. This prevents the bag from sitting directly on the bubbler and blocking the air flow.
Kick on the air pump! Allow the compost tea to bubble for 12-48 hours. This is the ideal timeframe for optimal microbial activity and nutrient extraction.
Aerated compost tea should ideally be protected from extreme temperatures while it is brewing. Excessive heat and sunlight or freezing cold temperatures can impact the microbial activity. We don’t stress about this too much. However, during the winter, we brew our tea in the garage to keep it a tad warmer. In the summer, we keep the brewing vessels out of the hot sun.

5) Use Right Away
At the end of the designated brewing period, be prepared to use your finished tea in the garden immediately. Actively aerated compost tea becomes anaerobic very quickly, and its benefits and strength quickly degrade. Therefore, we recommend that you make use of your AACT within an hour or two after removing the air source. The quicker, the better! We’ll talk about the many ways to use compost tea in the garden below.
What do I do with the “spent” compost in the tea bags?
There are a few different options for utilizing the compost within the tea bags! Which option you choose depends on how you want to use the compost tea.
If you are going to pour the tea into garden beds, containers, or around other plants straight from the bucket, the worm castings or compost can be incorporated into the tea itself. In that case, we simply open up the tea bags and empty the contents back into the bucket after removing the pump and bubbler. Then, as we give the plants compost tea, we stir the bucket frequently to prevent settling of the castings and ensure even distribution.
On the other hand, if you’d like to apply the compost tea with a watering can or sprayer, you want to keep the spent compost separate. It will clog the holes in a can or sprayer! Some folks even further strain their compost tea if they’re going to put it in a sprayer. In that case, pull up the tea bag, give it a good squeeze to ring out as much liquid into the bucket as possible, and then make use of the spent compost elsewhere in your garden instead! We often empty and spread the contents of the tea bags directly into a garden bed, or around the base of fruit trees.

Ways to Use Compost Tea in Your Garden
Using Compost Tea Soil Drench
Our preferred method for using compost tea in the garden is applying it as soil drench. A soil drench is just another way of saying “watering with it”. It is quick, easy, and effective! Using a measuring cup with a handle, we simply scoop finished compost tea from the bucket to pour around the base of each plant.
The amount applied varies from one-half cup to several cups each, depending on the size of the plant. Experts recommend to apply as much volume of compost tea as necessary to saturate a plants root zone. That means that smaller plants such as seedlings will need less – because they have such small roots at that point. Larger plants, like established tomato plants or even fruit trees, will appreciate more volume.
Aerated compost tea does not need to be diluted before application. It is mild and cannot “burn” your plants like many other fertilizers can! Use as much as you’d like, but also keep in mind, a little goes a long way! So if needed, you can dilute a smaller batch of tea to create more volume and feed more plants.
Alternatively, we sometimes add compost tea to a watering can. This is particularly helpful when we want to evenly distribute compost tea across an entire bed of small plants, such as with carrots or radishes. Using a large funnel, we ease the finished compost tea into a watering can after removing the tea bag.

When and how often?
It is best to apply compost tea to soil soon after a routine watering, when the soil is still damp. Damp soil more readily accepts more moisture than dry soil. Meaning, it will more easily absorb and less will run off. Additionally, you probably won’t need to water for a few days following, which gives the tea some time to do its work before getting diluted.
We like to spoil our plants with an application of AACT once every month or two, but especially for newly transplanted seedlings! Another treat for transplants or stressed plants is an aloe vera soil drench.
Benefits of a Compost Tea Soil Drench
Using compost tea as a soil drench is the most bang-for-your-buck, especially since we usually add the spent compost into the tea solution as well. Additional filtering, such as what may be required for use in a sprayer, creates an extra step. It also removes suspended particles that may contain nutrients & microbes. A soil drench is full-strength aerated compost tea, which delivers all those stellar benefits we previously discussed – straight to your plants root systems.
Another benefit of using compost tea as a soil drench (instead of a foliar spray) is that there is minimal concern for potential pathogens. The soil and root system of the plant act as a buffer to filter out harmful pathogens that could be present in the brew.

Using Compost Tea As A Foliar Spray
Rather than watering the soil and root system, you can apply compost tea directly to plant leaves! Plant foliage and their vascular system are extremely effective at readily absorbing and using nutrients from their surface. Many gardeners use this practice and swear by it.
To create a compost tea foliar spray, you may find the need to filter it further. This largely depends on the tea bags you use, and how fine or porous they are. Either way, do not empty your tea bag into your bucket if you plan to do a foliar application.
Add finished compost tea to a pump sprayer immediately after brewing, and apply to plants leaves until the point of runoff. Drench them! Like all foliage applications, it is best to wet leaves either early in the morning or in the evening hours. Direct sunlight on wet leaves can cause sunburn effects, and will also kill beneficial microbes present in the compost tea.
To be honest, this isn’t something we do very regularly. Mostly for the reasons above: it is an extra step, there are concerns of the sprayer clogging, and the slight risk of pathogens. I will say though, when we do make a foliar spray, I feel 100% comfortable using it on anything we aren’t going to consume directly! For example, on the foliage of tomato, squash, pepper, other veggies, cannabis, or non-edible plants where we aren’t consuming the raw greens.
So, what do you say?! Are you ready to get brewing with us?
Demonstration Video
In summary, you can’t go wrong with actively aerated compost tea! It is easy, and your plants and soil will love it! Sure, you may need a few supplies upfront… But that is a small, one-time investment that can in turn provide you with an otherwise endless supply of free, killer, organic, homemade fertilizer for your garden ~ for years to come! To me, it’s a no-brainer.
I hope you found this helpful. Please feel free to ask questions, and spread the love by sharing this article with friends!
Don’t miss these related posts:
- How to Build a Compost Bin: Step-by-Step Guide with Photos
- Hugelkultur: A Natural, Cheap Way to Make or Fill Garden Beds
- How to Practice Crop Rotation (Benefits Explained)
- What is No-Till Gardening or Farming (aka No-Dig): Benefits Explained
- How to Amend and Fertilize Garden Bed Soil Between Seasons
- How to Make Alfalfa Tea Fertilizer for Garden Plants

Deanna Talerico
Deanna Talerico (aka DeannaCat) is a garden educator and writer with over 15 years experience in organic gardening. She is a retired Senior Environmental Health Specialist, and holds a M.A. in Environmental Studies and B.S. in Sustainability and Natural Resources.


73 Comments
Sarah
I love all of your detailed posts with the how-to’s, and have followed several in the build out of my garden. I’ve been using your alfalfa tea recipe for the last year and seem to be getting some good results, and now that my worm bin is in full swing, i’m setting up for this aerated compost tea. I am curious about using it on native plants…we live not too far north of you, and outside of our food growing space, have nearly an acre of carefully curated locally native plants. That native soil could really use some more love, outside of the usual compost and mulching it gets. Is this compost tea appropriate for use on CA natives in native soil? I fee like the answer must be yes, that’s it great for everything, but I do know natives to be more sensitive to too much extra messing with, so i’m curious what your experience is with this. Thanks!
Aaron (Mr. DeannaCat)
Hi Sarah, we are so glad you have found our website to be so helpful! Giving your native plants some compost tea is a great idea! When we have to water a large number of plants with compost tea, we will typically water each plant with a two cup liquid measuring cup so each plant gets a little love without fully watering the plant with compost tea. Hope that helps and have fun growing!
Shaul Grantz
Great article. I use a similar method when making Aerated VermiCompost Tea (AVCT). The major difference in my method is that I use porous rubber tubing instead of air stones. Porous rubber tubing is like soaker hose for your garden, but instead of water coming out of it, you’re putting out air. The air exits at every part of the tubing, resulting in massive bubbling. The tubing can also be cut and shaped (using common drip-irrigation fittings) to the shape and size of the brew container.
Aaron (Mr. DeannaCat)
Thanks for sharing Shaul, we also use bubble snakes which have multiple holes throughout the length of the tubing although likely not as many as perforated tubing. Have fun growing!
Naturealley
We are new to making aerated compost tea and are lucky enough to have access to a very good microscope. We have tried compost from different locations, vermicast and looked at samples at regular intervals. We found bacteria, flagellates, ciliates, amoeba, yeasts and fungi mainly appearing in succesion, with numbers raising or falling dramatically between samples. So it is hard to pick the perfect moment, other than regular testing. Did you find you could make a reproducible tea? What would you consider a favourable ratio of these micro organisms for foliar spray? for soil application? Thanks in advance
Aaron (Mr. DeannaCat)
Hi Naturealley, that’s great you have been checking on the microscopic life going on in your compost tea at different stages of the aeration process. However, we have never done anything along those lines, we just start off with quality compost (i.e. our own worm castings) and aerate the tea for 24-48 hours, then water it into the garden. We have only been able to make observations with our eyes on the quality of the tea by witnessing the soil and plant health afterwards. We never noticed one batch being better than another, even though they all likely varied by the number of microscopic life within them at any point. We also mostly use compost tea as a soil drench and don’t often foliar spray with it but that could be something we choose to do in the future. Hope that helps and keep us updated on your progress, good luck and have fun growing!
Jeff
Great tips. I’ve been using this method for a few years using redworm compost and molases. The molases is cheaper at the cannabis grow shops (around $12 a gallon) and does not contain sulphur. The plants love this. Love your tips and advice.
Cheers!
Aaron (Mr. DeannaCat)
That’s great to hear Jeff and thanks for sharing, have fun growing!
Janille
Hi Deanna, I used your tutorial to set up a worm bin several months ago and am ready to make some compost tea! However, we don’t have space for a pump or big setup (live in an apartment, garden at an alottment). Is it still worthwhile to make passive compost tea? How long should it steep? I have tomatoes growing in small pots indoors right now that need a boost. Can I set them in a tray of compost tea? Or would it be better to place vermicompost at the soil baseline and let it wash down over time?
Also–I do have one of those large spray bottles with an air pump, but am guessing that wouldn’t be enough aeration. Would it help to use that at all?
Thanks for all the lovely tutorials, my garden is largely thanks to you. –Janille
Aaron (Mr. DeannaCat)
Hi Janille, congrats on setting up your worm bin! It is still worthwhile to passively make compost tea by adding one cup or so of castings to 4 gallons of water and stirring the mixture a couple times a day for 36-48 hours. Since you are living in an apartment and have a garden allotment, it may just be easier to top dress your tomatoes with some fresh castings and then water them into the soil. That way you don’t need to lug a 5 gallon bucket of compost tea to your garden space. Hope that helps and have fun growing!
Irma
I have a compost tumbler. When we get rain, the rain runs thru the compost and down into a pan underneath. I have discovered my garden plants do not like this liquid, even if I only mix a small amount in a bucket of water. Would aerating this liquid make it useable, or does the compost really need to sit in the water for a long time?
Aaron (Mr. DeannaCat)
Hi Irma, I wouldn’t use the water that drains through your compost tumbler, if you have finished compost from your tumbler, take a cup or two from it and make compost tea, either by simply adding the compost to a bucket of water and stirring it a couple times a day, after 48 hours, you can then water your plants or garden or you can use and aerator to make the compost tea as we outline in this article. Either way, 24-48 hours is a long enough time for the compost to be in the water, if your plants still don’t like the tea after these steps, I would make sure that your tumbler is indeed producing quality compost to use in the garden. You still need a nice ratio of greens and browns to produce quality compost, you don’t want anaerobic conditions which occur when the decomposing material is too wet. Hope that helps and good luck!
Carol Cowee
My compost breaks down great but how do
I know if it’s nutritous?
Aaron (Mr. DeannaCat)
Hi Carol, it is broken down organic matter which should be full of beneficial microbes that would benefit any soil it is added to.
Bruce
This is one of the best sites I’ve found.
It is ver informative and easy to understand.
Thank you.
Aaron (Mr. DeannaCat)
Hi Bruce, thank you so much for the kind words and support!
Dan
Aaron,
Good morning.
I’m wondering about the size of air pump you’d recommend.
My gardening is going to be pretty small-scale.
Happy Sundae to you two.
Listening to Flaming Lips,
Dan
Aaron (Mr. DeannaCat)
Hi Dan, are you going to be using the TeaLab bubble snake for a 5 gallon bucket? If so, a 750 GPH to 1110 GPH pump should work out great, enjoy the music and the rest of the day in the garden!
Michelle
Hello, Just clarifying, do you use molasses AND Kelp meal or seaweed extract or is it one or the other? Thanks! I ordered the tea lab kit with the bubble snake and I am excited to give this a try.
Aaron (Mr. DeannaCat)
Hi Michelle, we always use molasses as a food source for the microbes and we will occasionally add kelp meal if we feel like it but that part is optional, the Tea Lab bubbler works really great and you will be able to make really great compost tea with it. We love ours and are looking to upgrade to the large bubble snake so we can make 50 gallon batches of compost tea. Have fun making tea, your garden and plants will love it!
Moses
I get more a lot more bubbles than the pump and the snake bubbler in the picture. In the same five gallon bucket.
The pump and stones cost me $14.
I’m wondering if it was just your pump or setup. I’ve done 10 gallons easily. I’d probably have to by another pump to do 40-50 gallon batch, though!
Aaron (Mr. DeannaCat)
Hi Moses, whatever works for you is great, our air pump is 793 GPH so that likely isn’t an issue, I think using more air stones per bucket increases the amount of bubbles but we seem to get good results either way. Good luck and have fun growing!