

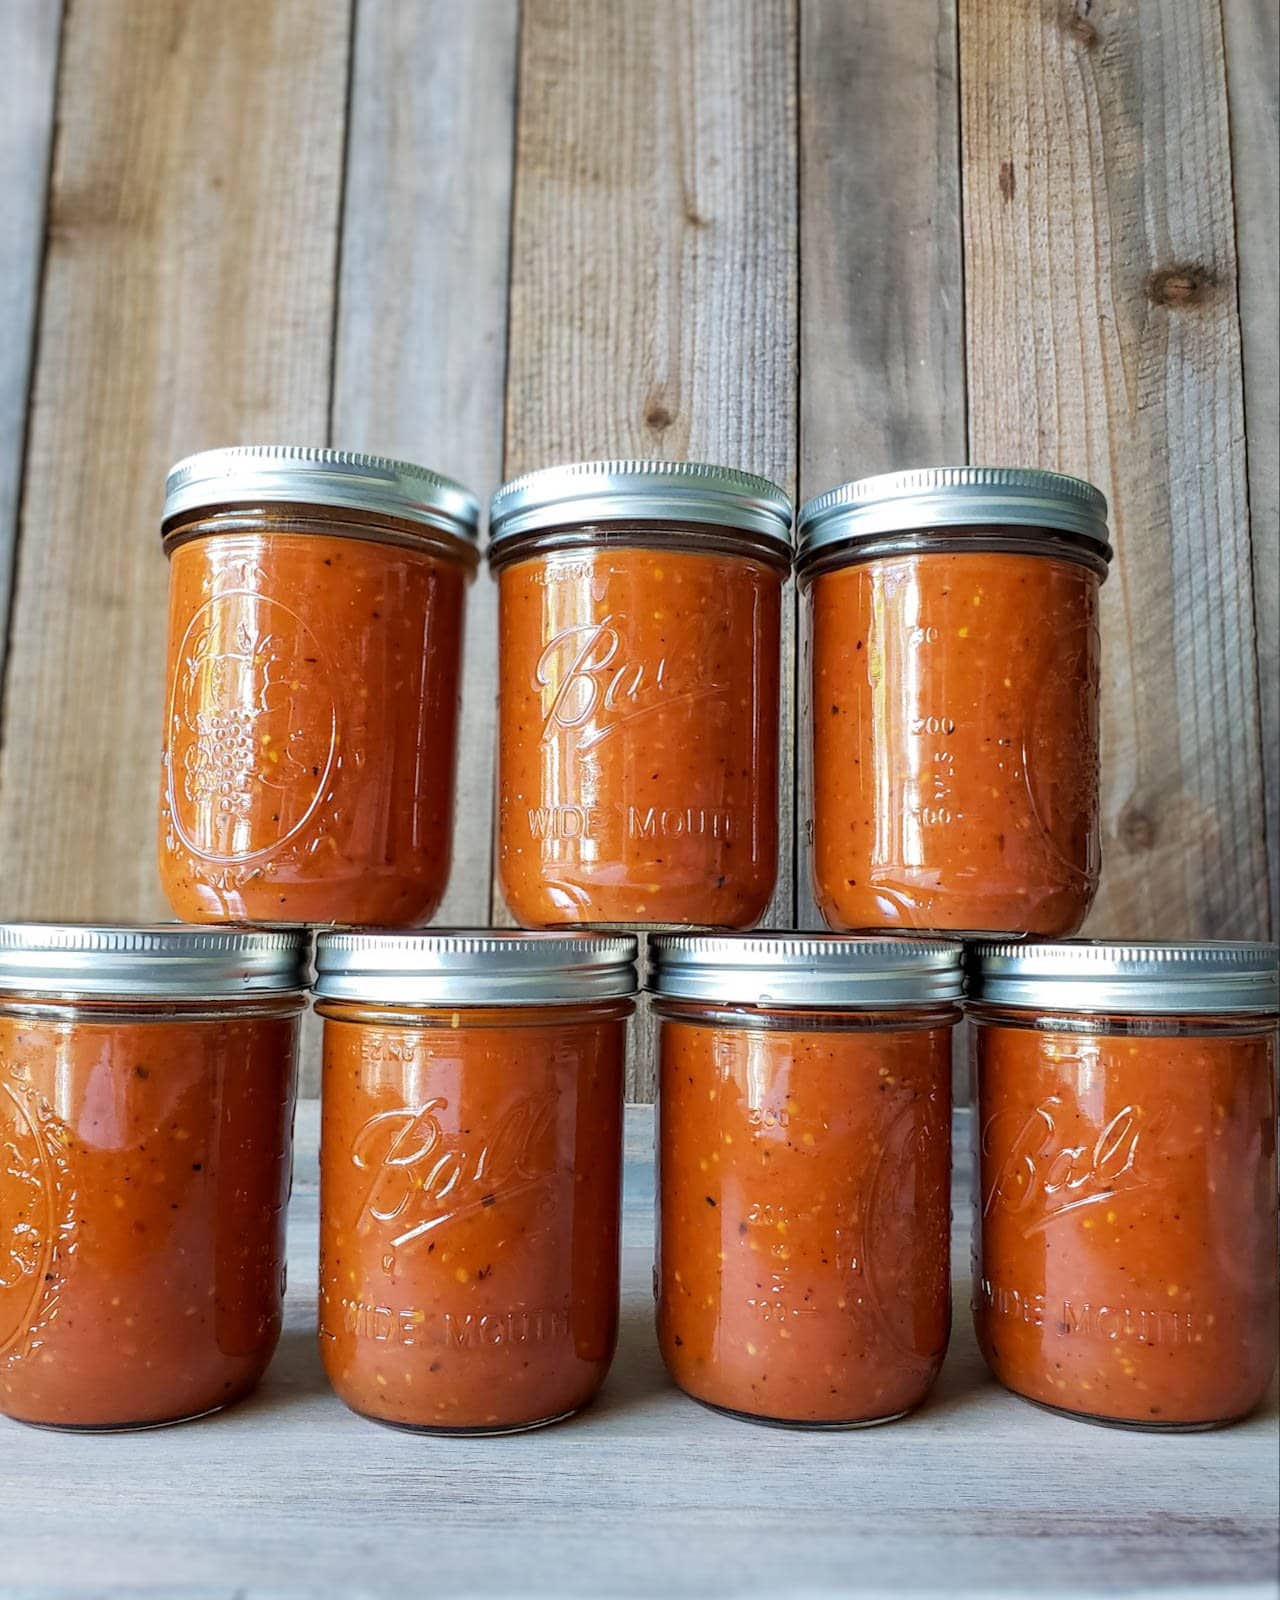
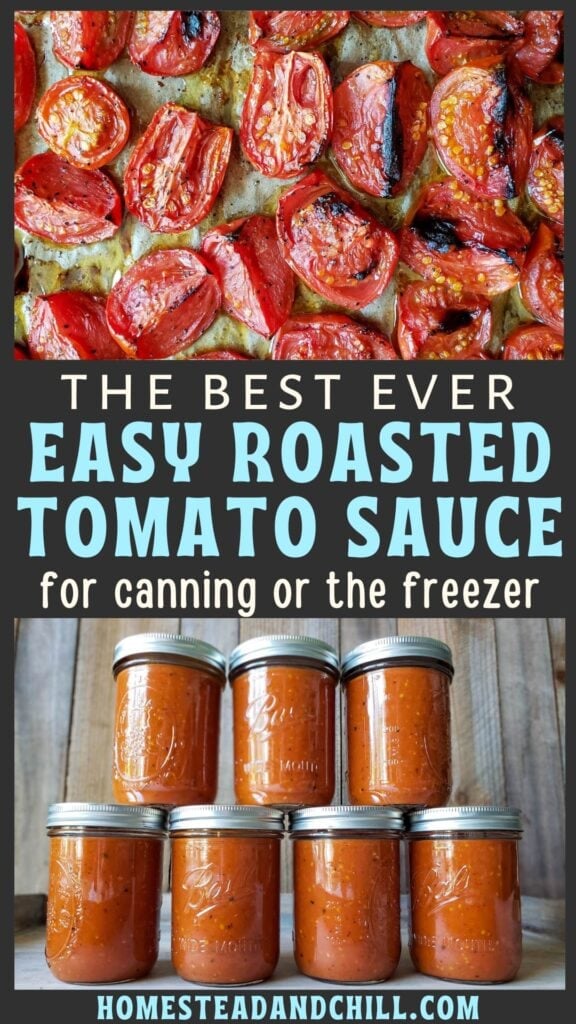
The Best Easy Roasted Tomato Sauce Recipe (Freeze or Can)

Say hello to your new favorite tomato sauce! Our easy roasted tomato sauce recipe is SO simple to make: it’s literally just fresh tomatoes, a little olive oil, salt and pepper – no peeling, de-seeding, or measurements required! Yet it’s far from basic in taste. Roasting tomatoes adds an incredible depth of sweet and savory flavors, and also helps to naturally thicken the sauce.
I love that this oven roasted tomato sauce recipe is easy to freeze but also safe for canning. This is one of my favorite ways to preserve homegrown tomatoes from the garden, so every summer I stock our freezer with delicious sauce to use all year long. Even if you don’t grow your own, grab some fresh local tomatoes from the farmer’s market while they’re in season!
NOTE: This article was originally published in August 2019 (same recipe!) but the post has been recently updated.

Would you like to save this?
Supplies Needed
- Baking sheet or roasting pans
- Large pot
- Blender – we like to use an immersion blender (aka stick blender), which makes it extra easy to blend the roasted tomato sauce right in the pot.
- Optional: parchment paper
- Freezer-safe containers or canning supplies
Ingredients
- Tomatoes – you can use any variety, even cherry tomatoes! Avoid using bruised, damaged fruit.
- Olive oil for drizzling (but do NOT use oil if you intend to hot-bath can this recipe)
- Sea salt
- Black pepper
- Optional: several cloves of fresh garlic
- Bottled lemon juice or citric acid (if canning)
A note about herbs and other additions
Unlike a traditional pizza or pasta sauce, I usually don’t add herbs or spices to our roasted tomato sauce – yet. Instead, this recipe will create a thick, delicious, versatile tomato sauce that can be used in a wide variety of ways, not just in Italian dishes!
For example, I love to add this sauce to Indian-style recipes like madras lentils or curry. Or, incorporated into various soups, stews, and roasted pumpkin chili. When desired, it’s easy to add more seasonings later to match the meal you’re making.
This recipe truly doesn’t need much else beyond tomatoes. But sometimes I toss in a few gloves of garlic, chunks of onion, or sweet bell peppers from the garden to roast as well. So, feel free to incorporate herbs, garlic, or a modest amount of onion if you wish.
RELATED: Don’t miss our delicious creamy roasted tomato basil soup recipe (which you can also freeze!), sweet-n-savory homemade ketchup recipe, or this round-up of 13 recipes for how to preserve tomatoes including tips on freezing fresh tomatoes.
Instructions
Step 1: Prepare and Season Tomatoes
- Preheat the oven to 425°F
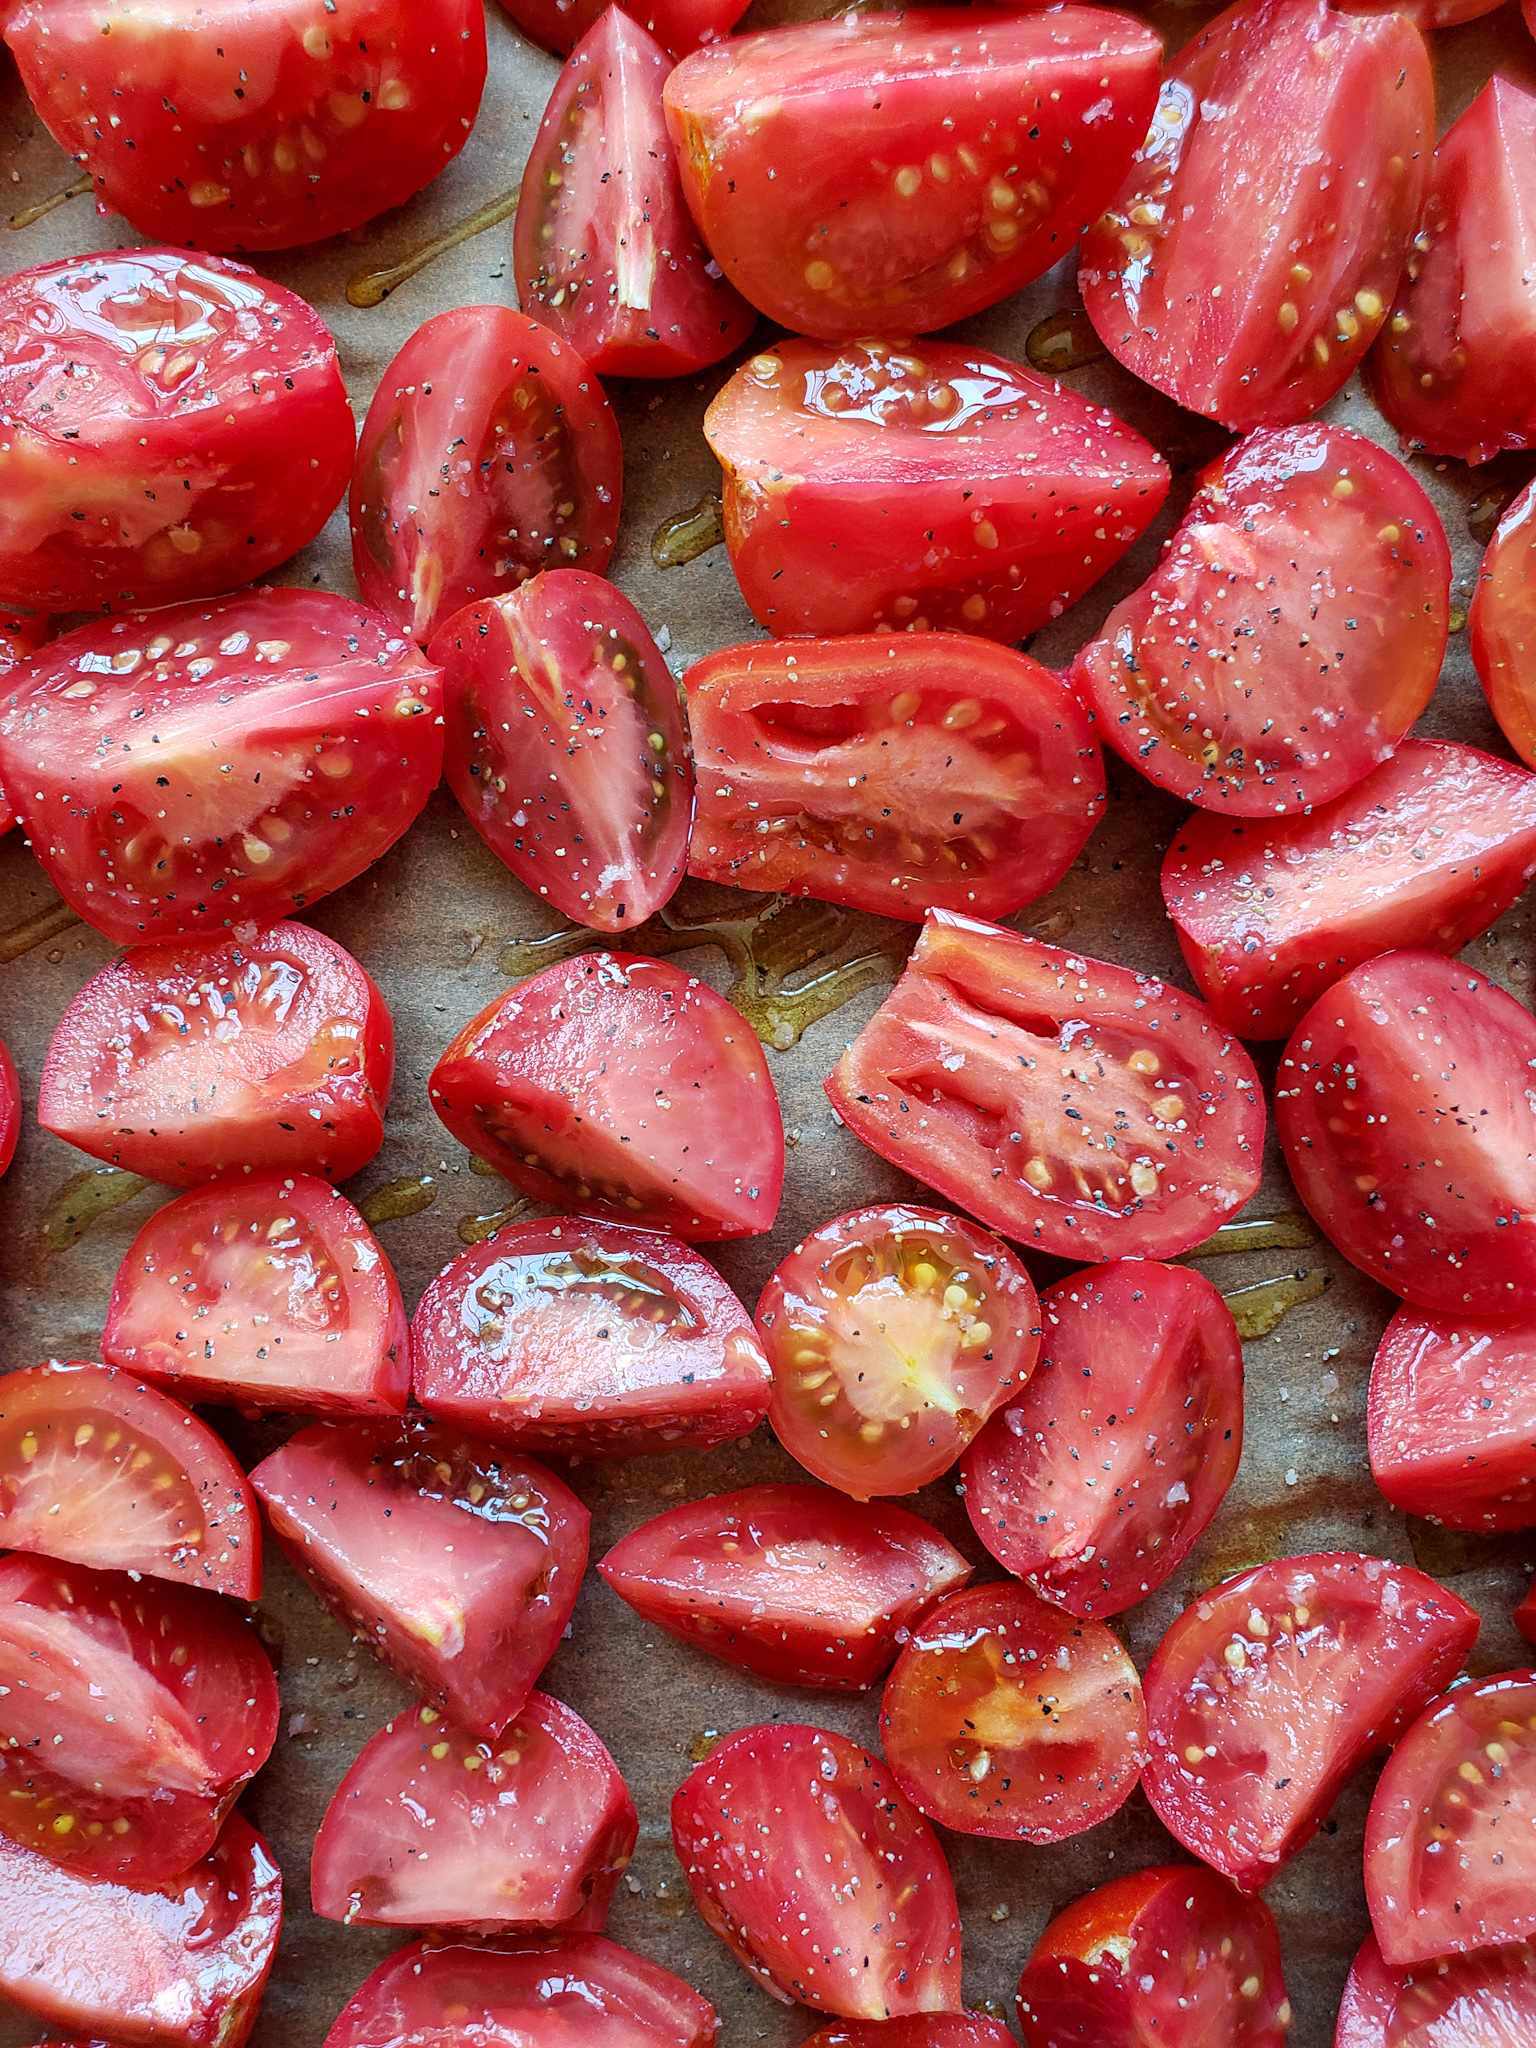
- Wash the tomatoes, then chop them into large chunks. Discard the firm stem core portion (if there is one). I typically cut smaller tomatoes in half, and larger ones into quarters or sixths. You can leave cherry tomatoes whole.
- Because everything will be cooked and blended together, the size and shape doesn’t matter much –nor do I bother removing the skins! I also leave the seeds and guts.
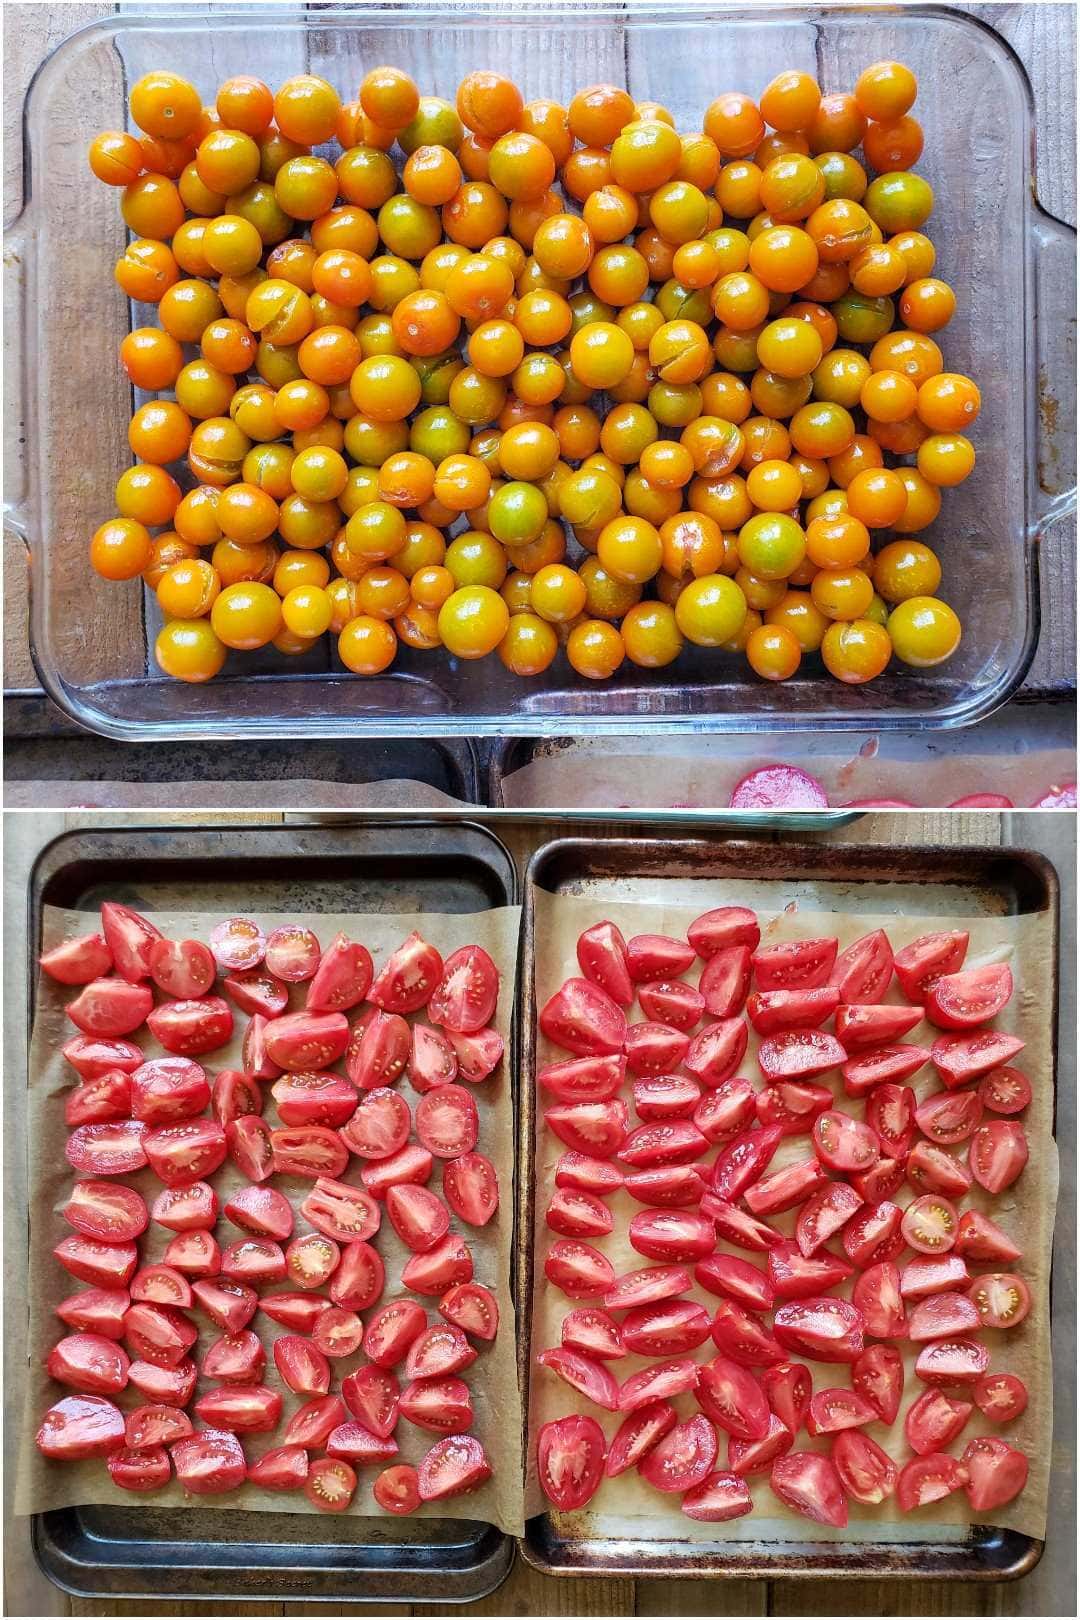
- Line a baking sheet with parchment paper for easy clean up, then lay out all the tomato pieces – skin-side down if possible. You can pack the trays full of tomatoes, but try to keep them in a single layer. I usually roast several pans at once, including a glass baking dish for cherry tomatoes.
- If you have more tomatoes than can fit on your roasting pans/oven but want to preserve them all (like we often do), check out optional Step 3!
- Now, drizzle the tomatoes with olive oil, and give them a sprinkle of sea salt and black pepper. Again, do not use olive oil if you wish to can your sauce.
Step 2: Roast the Tomatoes
Here’s where the magic happens! According to the Science of Cooking, caramelization occurs when foods are exposed to high dry heat, including roasting. As they’re lightly browned, a chemical reaction occurs as water is removed (as steam) and natural sugars break down to produce the characteristic caramel flavors. That means oven-roasted tomatoes taste far more complex, sweet, nutty and toasted compared to the more earthy, vegetal, or slightly bitter flavor of raw tomatoes.
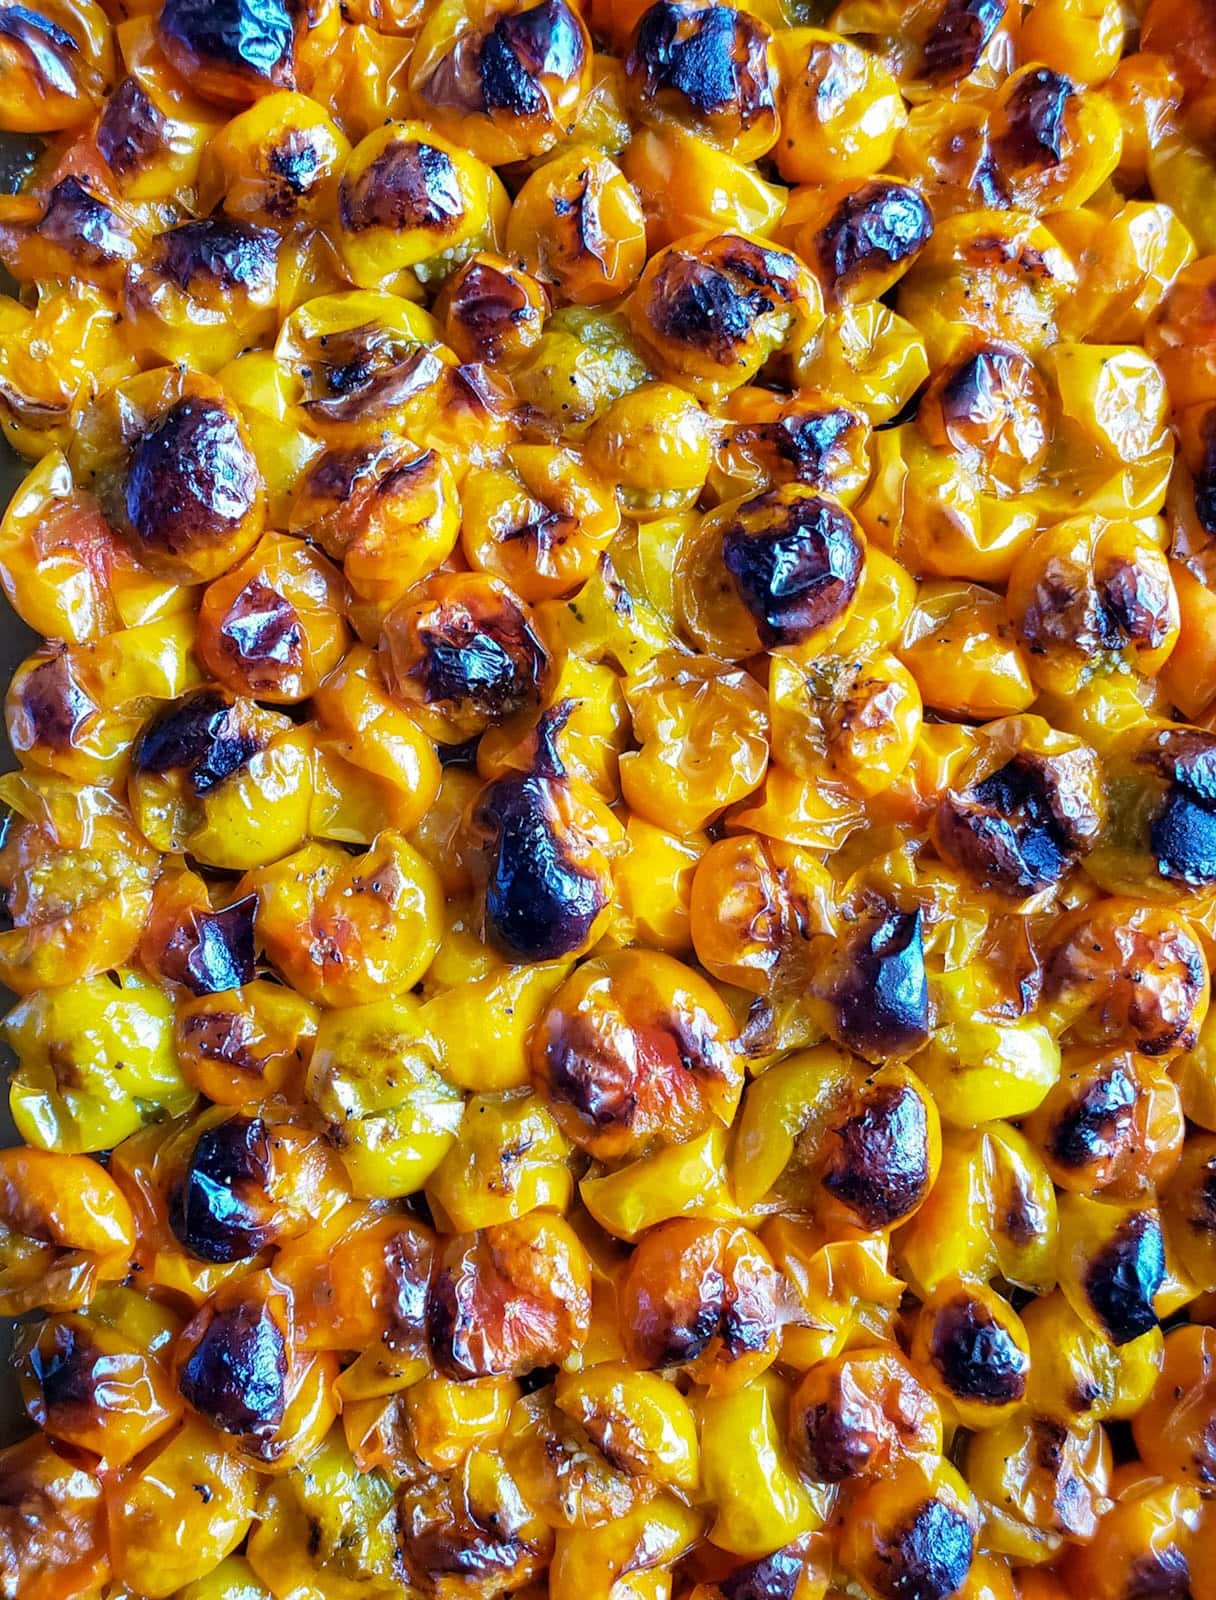
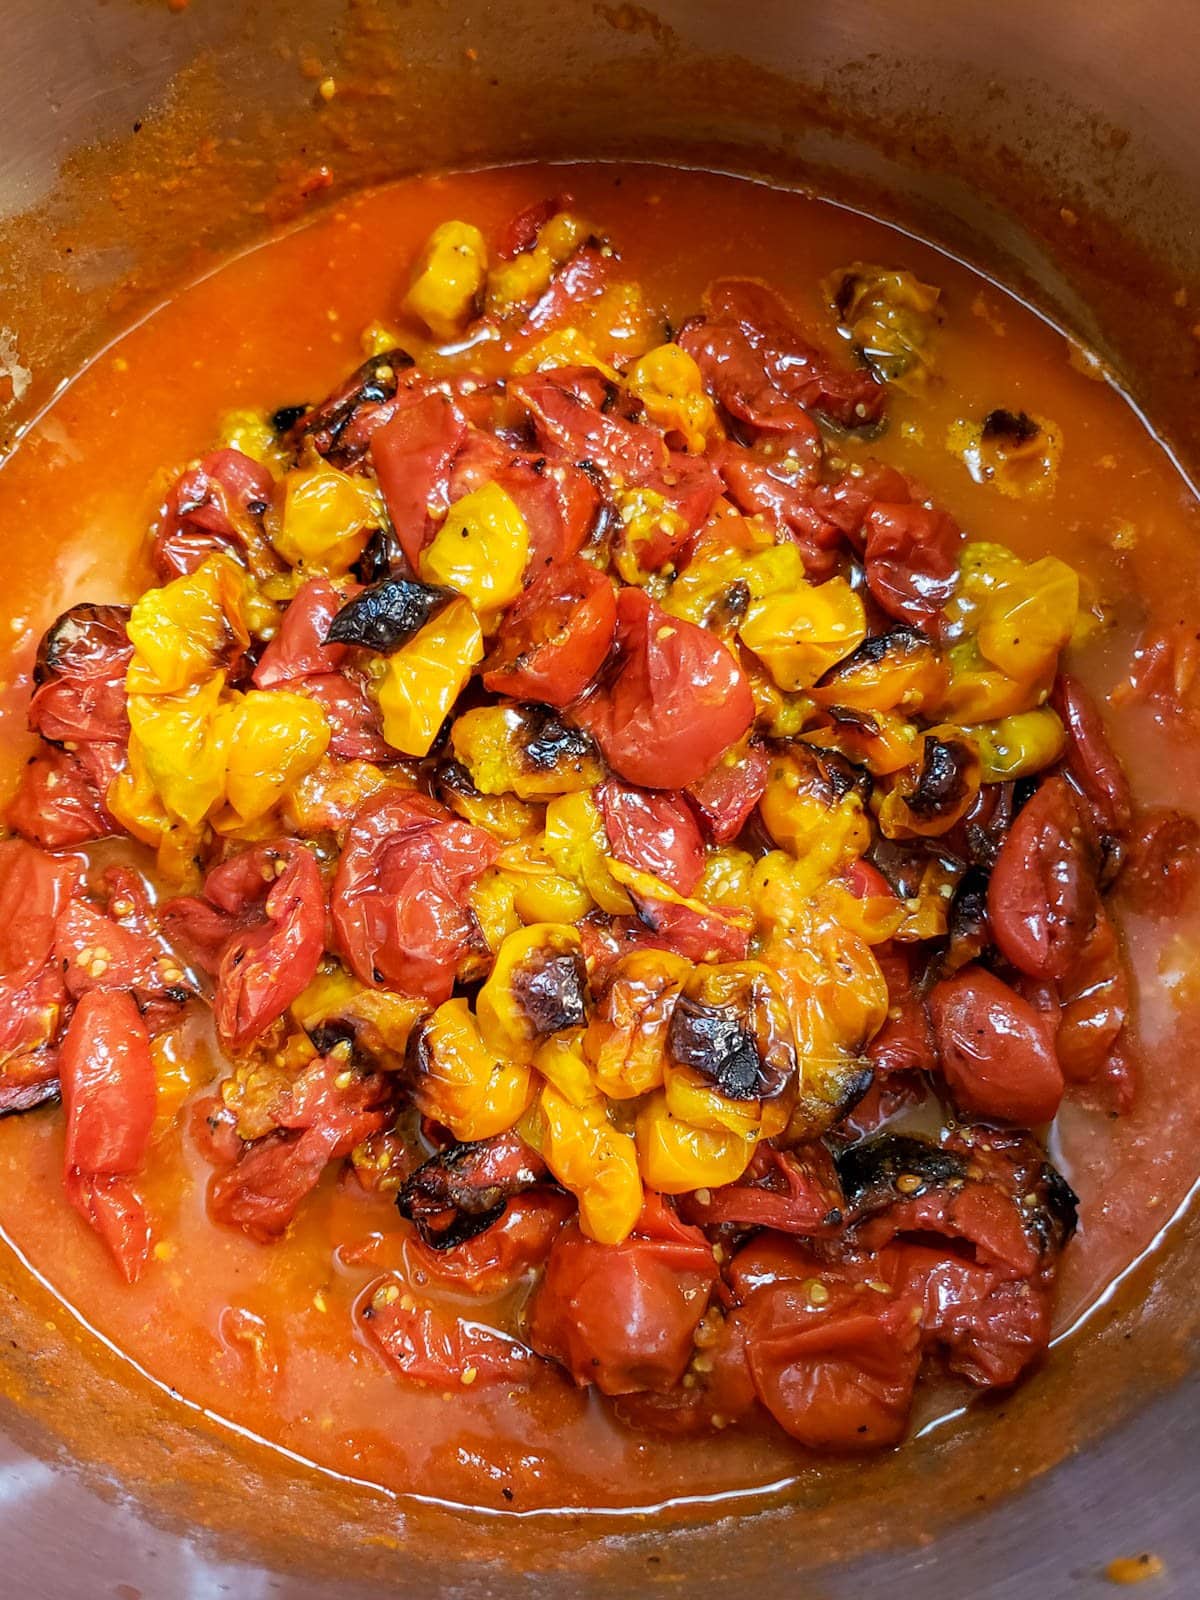
- Roast the tomatoes in the oven on 425°F for approximately 40 to 45 minutes, until they become soft and lightly browned – or even a tad blackened, like ours!
- If you’re roasting multiple trays of tomatoes, it may take a little longer (up to an hour).
- Rotate the trays halfway through to promote even cooking.
- If you’re going to can the finished tomato sauce, get your canning supplies ready (including pre-heating the the water bath) while the tomatoes are roasting.

Step 3: Stew Extra Tomatoes (Optional)
When I make roasted tomato sauce, I usually fill the entire oven with several baking pans – but still have more garden tomatoes left waiting on the counter! So rather than roasting multiple batches (no time for that) I stew some on the stovetop while the others are roasting, and then combine them all after. The flavor is still phenomenal. If you’re in the same situation, try this option!
- While the initial trays of tomatoes are roasting, prepare extra tomatoes like we did the others: cut away any tough stem portion, and chop them into a few chunks each.
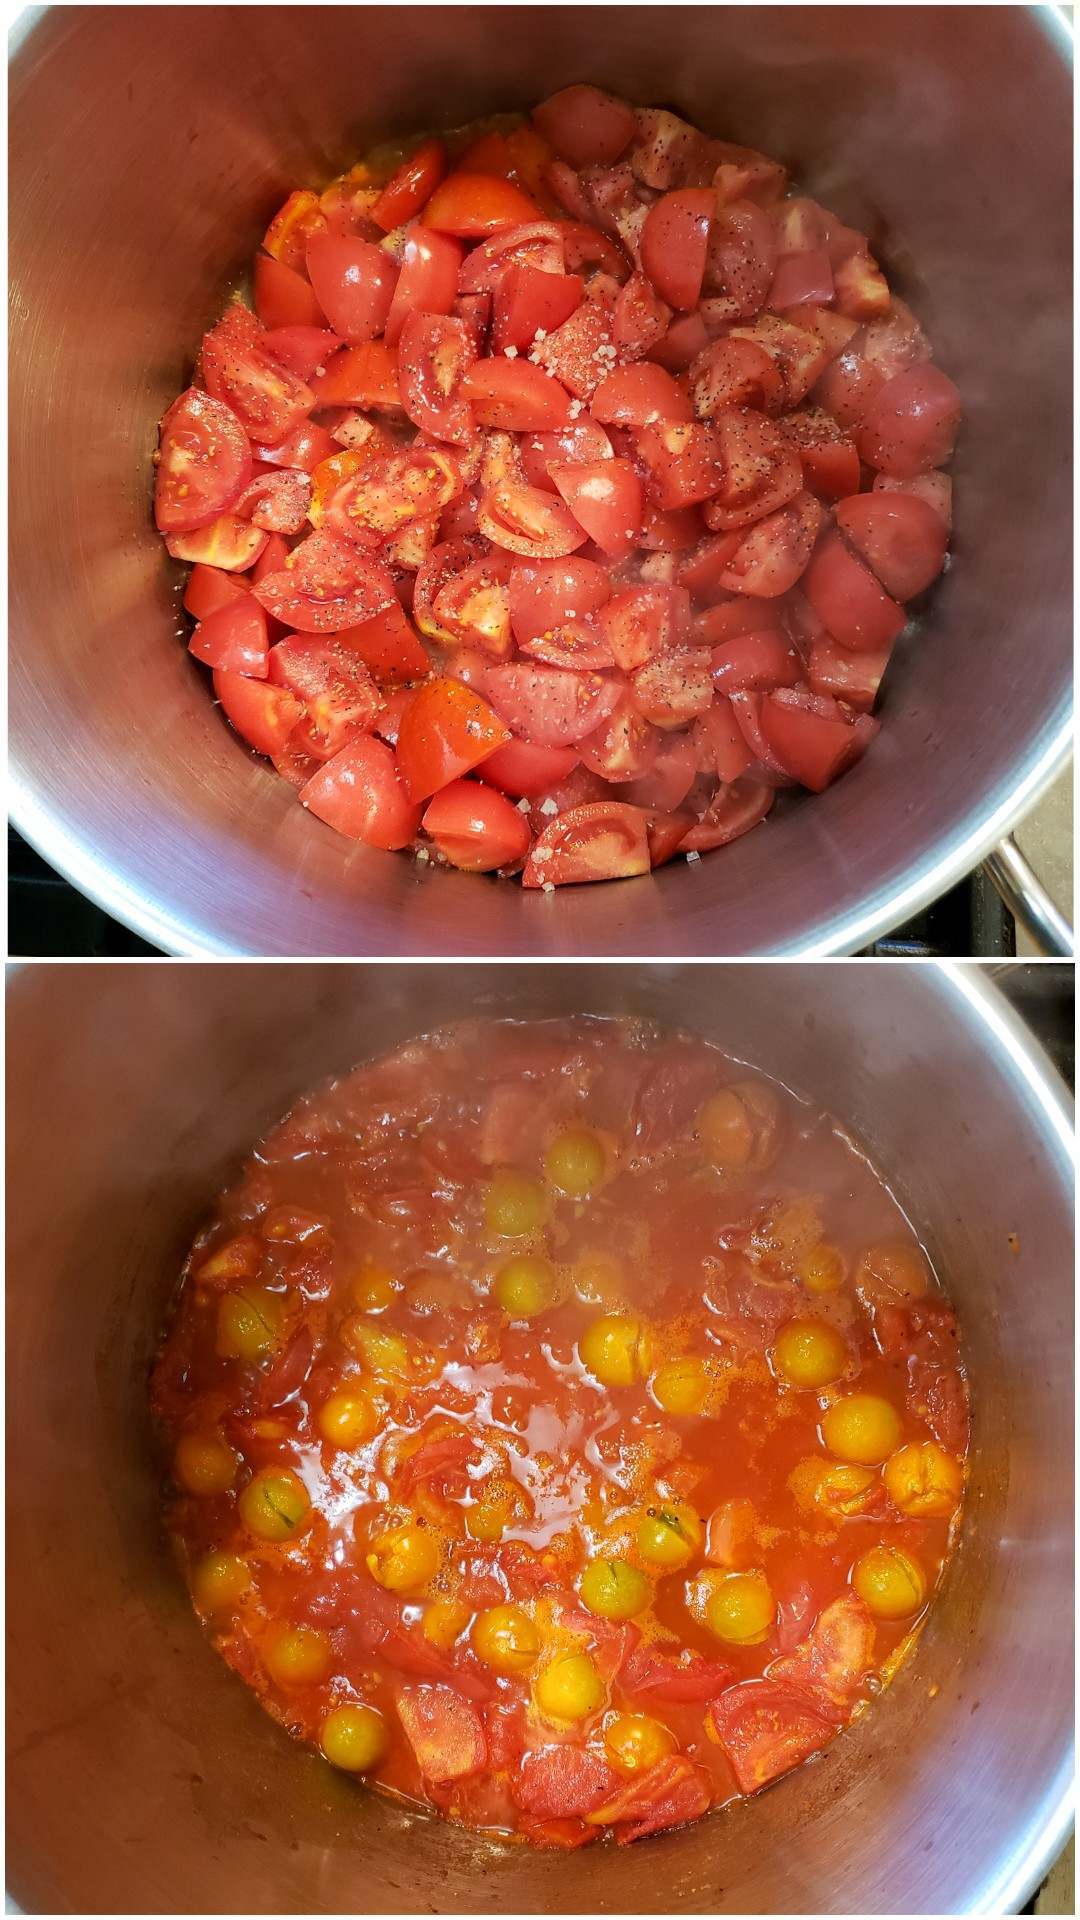
- Heat a large pot on the stovetop, and add a splash of olive oil followed by the extra tomatoes and their juices. (Use a pot large enough to add the tomatoes from the oven too.)
- Lightly simmer the tomatoes (uncovered) the entire time the others are in the oven – at least 30 minutes. Stir occasionally. They will become soft, wonderfully fragrant, and the liquid will significantly reduce.
Step 4: Reduce and Blend the Sauce
Once your tomatoes are finished roasting, you have a couple of options to blend and finish your sauce.
- If you’re using a traditional blender and didn’t stew additional tomatoes on the stove, you can simply transfer the roasted tomatoes directly from the oven to a blender. (Allow them to cool slightly first to avoid hot splatters). Blend well, and you’re finished!
- Or, to create an extra thick sauce (and/or if you have other tomatoes already stewing in a pot from step 3) carefully transfer the roasted tomatoes into a pot on the stove. Heat and simmer to further reduce the chunky sauce to a thickness of your liking – but keep in mind it will become even thicker once it is blended!
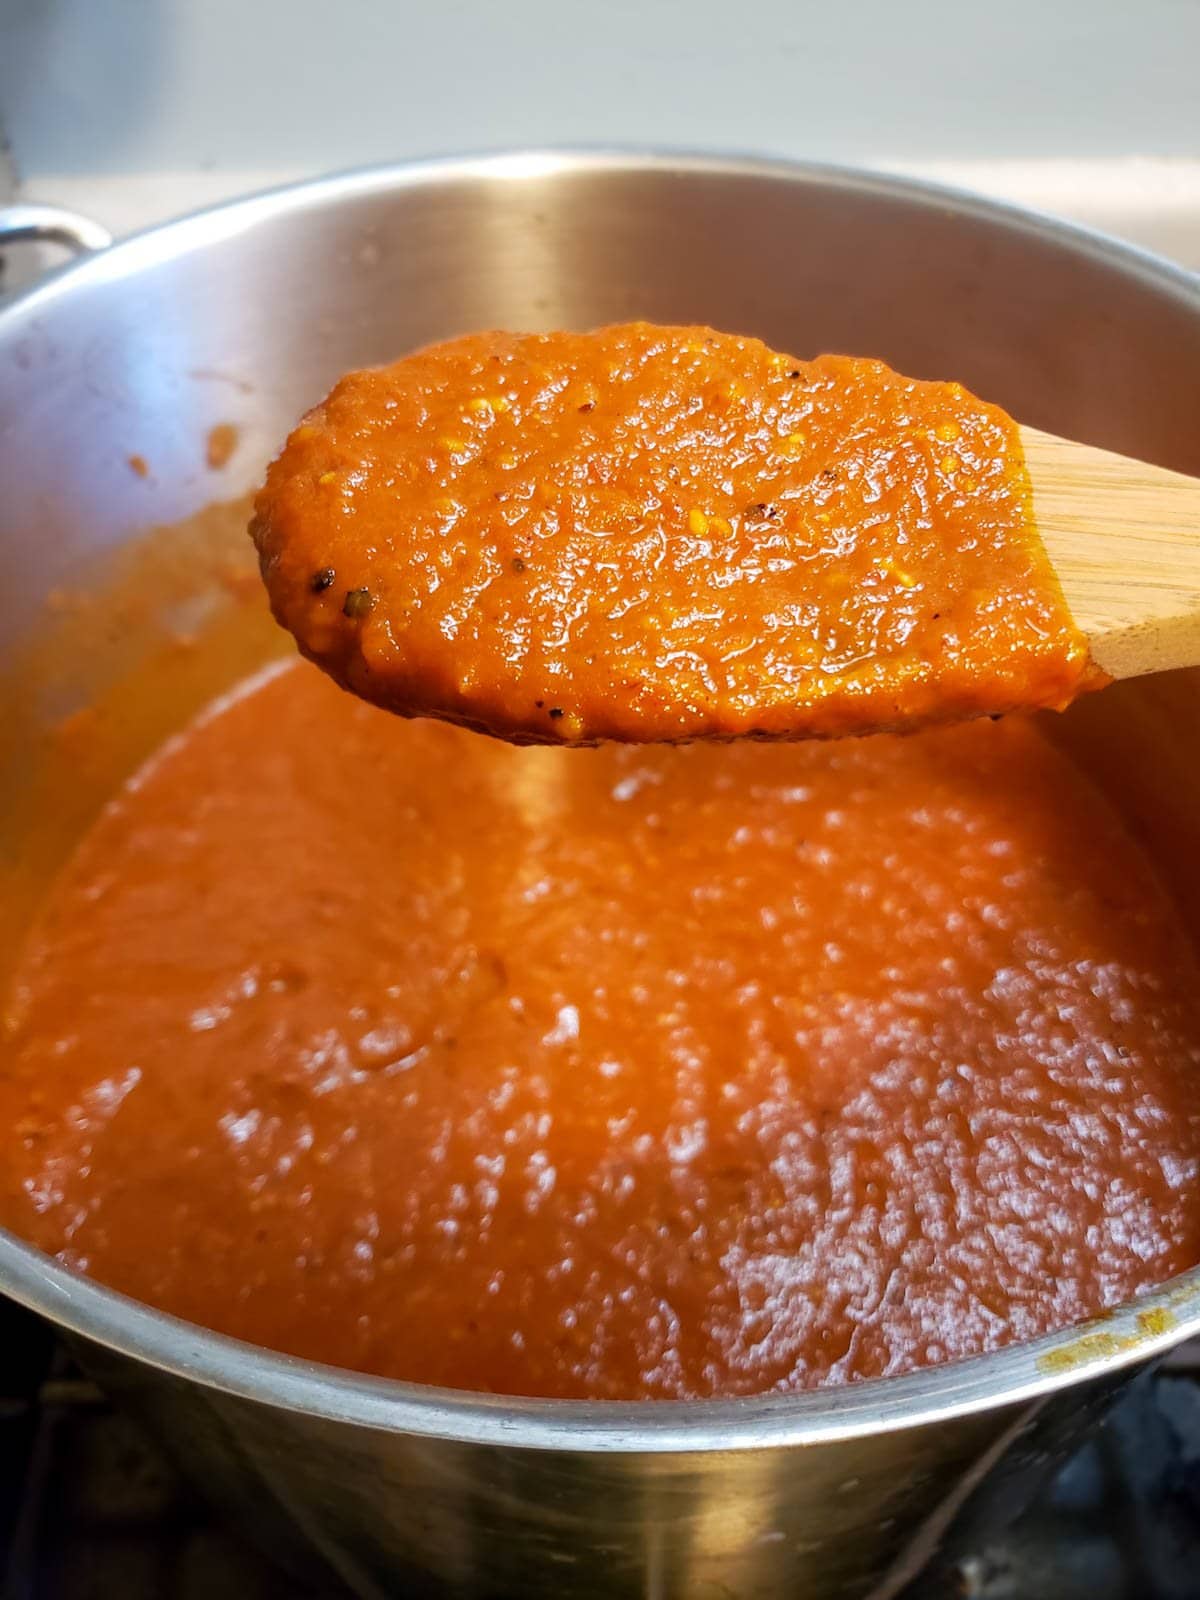
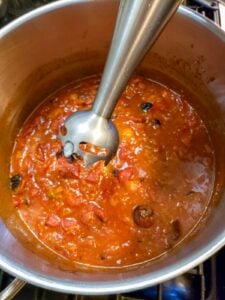
- Next, blend the roasted tomato sauce until it’s a smooth, creamy consistency. Using a stick blender makes this extremely easy, done right in the pot! I love to use this immersion blender for soups, sauces, and jam recipes. Alternatively, carefully transfer the tomatoes to a regular blender to blend in batches as needed.
- Assess the thickness after blending. If you want it even thicker still, continue to simmer on medium-low heat to reduce further.

Step 5: Freeze or Can
I usually prefer the ease and quickness of freezing our tomato sauce, but here are tips to do both! If you’re new to canning, please take some time to read up on canning basics here.
How to Freeze Tomato Sauce
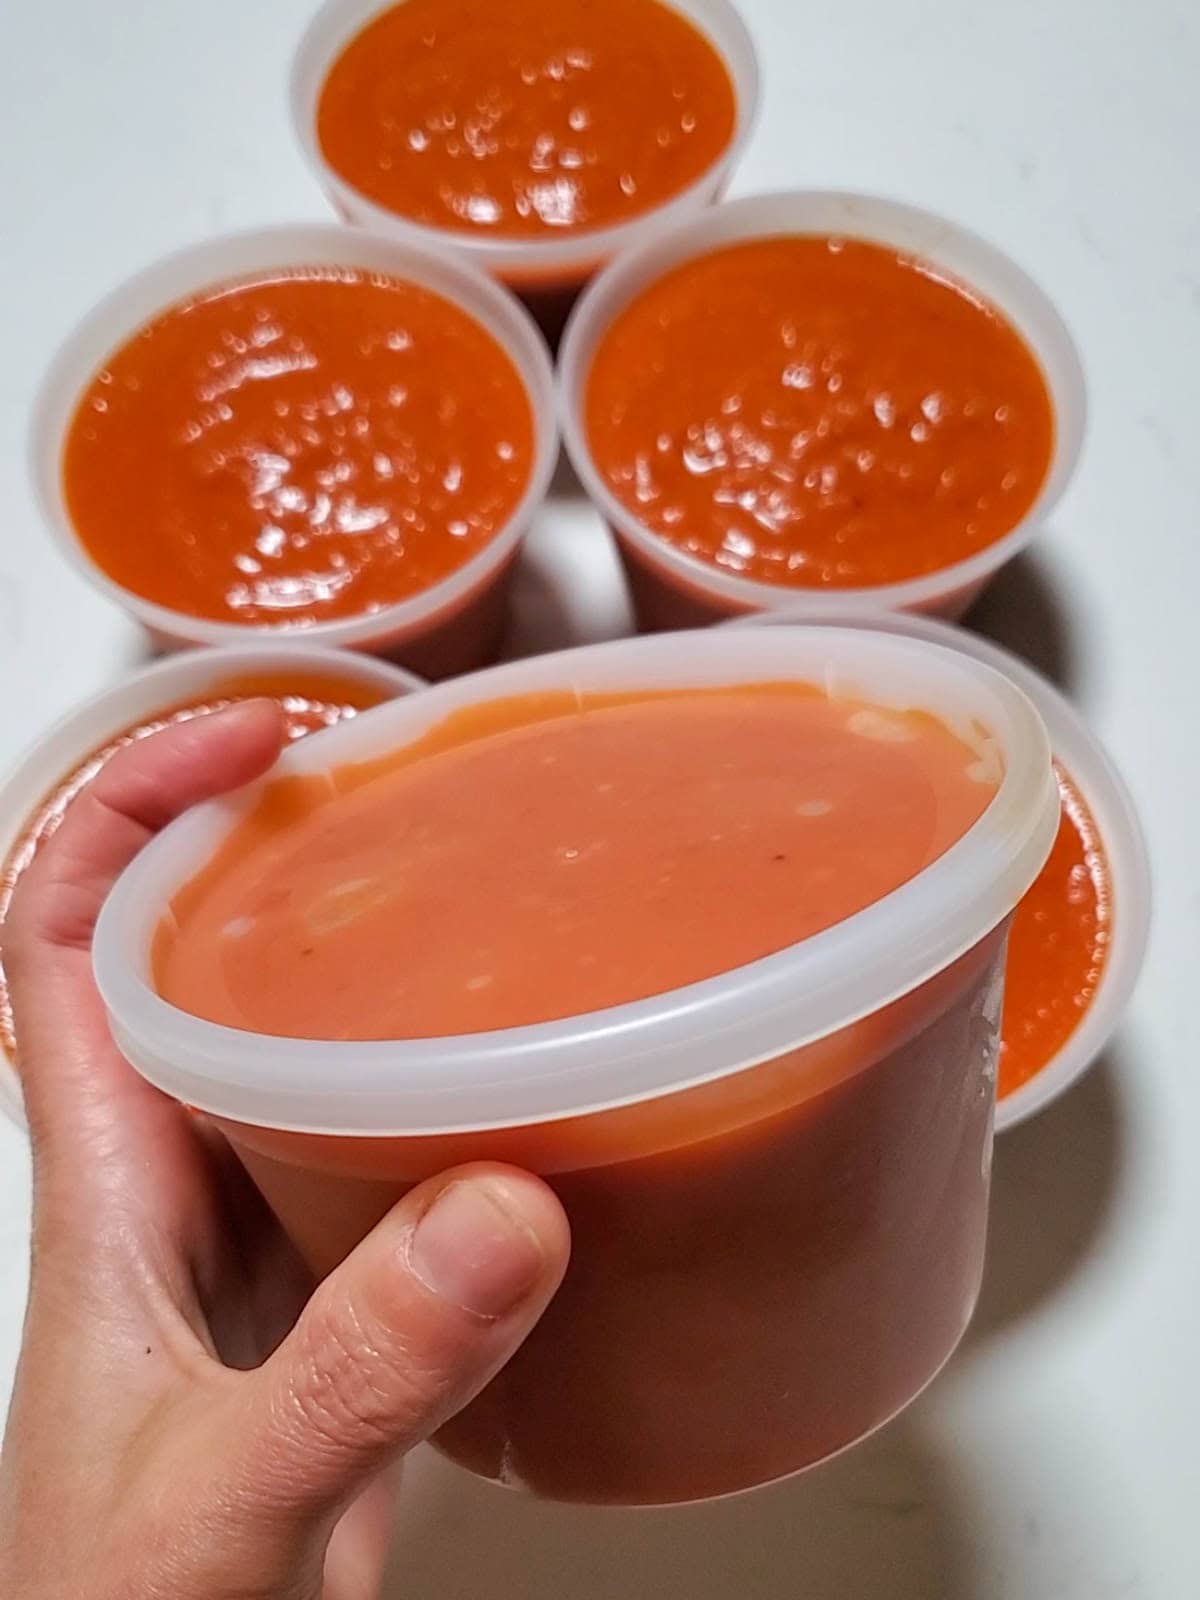
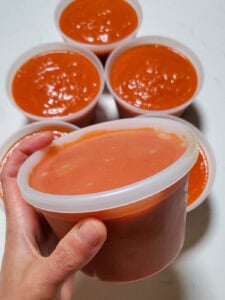
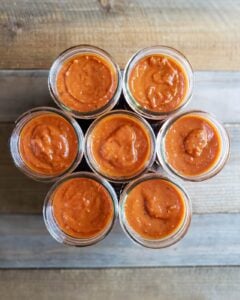
- To freeze roasted tomato sauce, allow it to cool to lukewarm in the pot before transferring it into your freezer-safe containers of choice.
- I love these durable, reusable BPA-free freezer containers that come in a variety of sizes. You can also freeze sauce in wide mouth pint or half-pint glass jars (not regular mouth, as jars with “shoulders” are prone to cracking in the freezer).
- Leave about an inch of head space to allow for expansion in the freezer!
- For the best results, allow the containers full of sauce to fully cool in the refrigerator overnight before transferring them to the freezer.
- Use frozen tomato sauce within one year for the best quality and flavor.
- When ready to use, defrost in the refrigerator overnight, or on the countertop for a few hours.
Canning Instructions
Only proceed with canning if you didn’t use olive oil in this recipe.
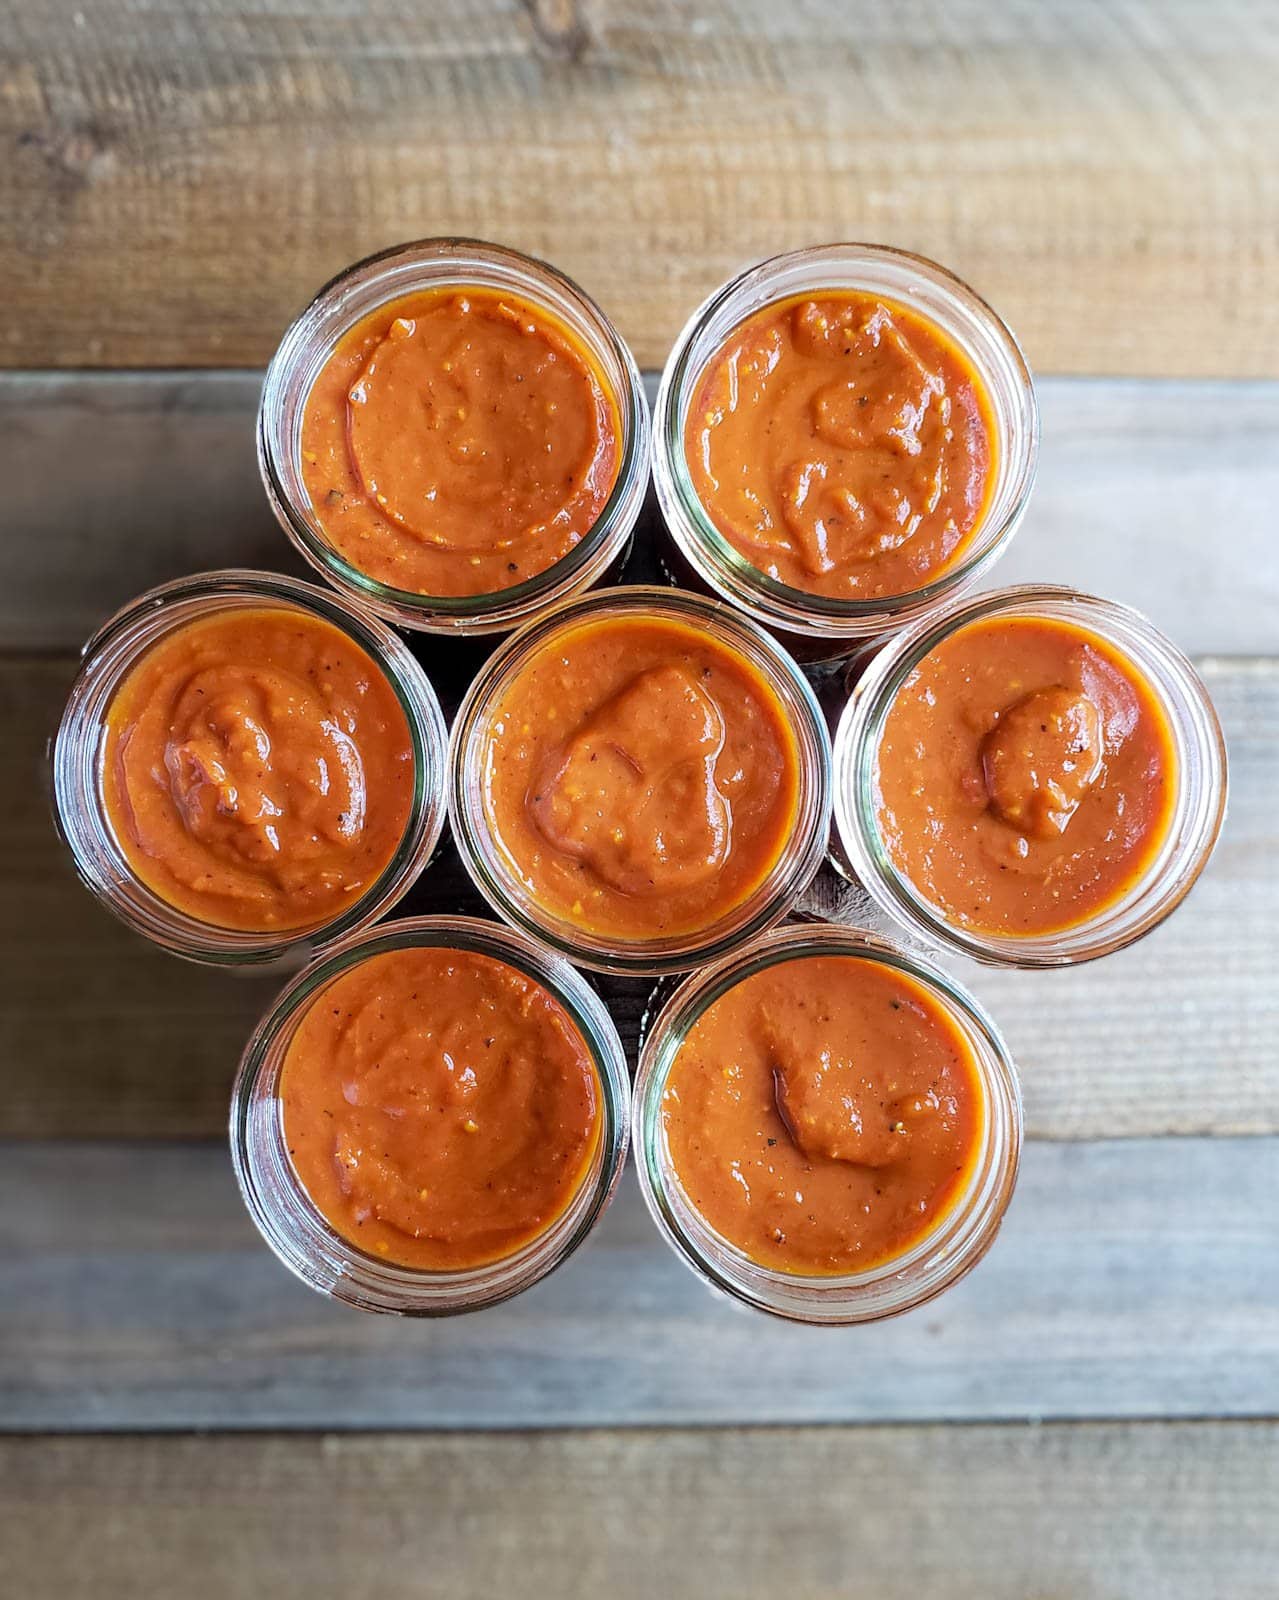
- Remove from heat, and transfer the hot sauce into hot sterilized canning jars with the assistance of a clean canning funnel.
- Fill jars nearly full, leaving 1/2 inch headroom. This handy tool makes it easy to measure headroom as well as carefully remove air bubbles from the jar.
- IMPORTANT: To ensure safe acidity when canning tomatoes, add bottled lemon juice or citric acid when processing in a boiling water bath. Thoroughly stir and mix in 2 tablespoons of bottled lemon juice or 1/2 teaspoon of citric acid per quart jar of sauce. For pints, mix in 1 tablespoon bottled lemon juice or 1/4 teaspoon of citric acid.
- Use a clean damp paper towel to wipe the rims of the jars before adding sterilized canning lids. Screw on the rings to finger-tight only, not overly tight.
- Use a jar lifter to carefully transfer the jars to your pre-heated canning pot, cover with a lid, and vigorously boil. See chart below for processing times.
- When finished, transfer the jars from the canner to a cooling rack and leave them undisturbed for at least 12 hours before checking jar seals. (Do not stack or press on the top of the lids.)
| Processing Time (minutes) for Canning Tomato Sauce | Pints | Quarts |
| Boiling Water Bath at Altitudes Of: | ||
| 0-3,000 ft. | 40 | 45 |
| 3,001-6,000 ft | 45 | 50 |
| 6,001-8,000 ft | 50 | 55 |
| 8,001-10,000 ft | 55 | 60 |
| Pressure Canner* | 15 | 15 |
Storage and Shelf Life
- Store the canned, sealed jars of tomato sauce in a cool dark location – such as a pantry, cellar, or kitchen cabinets. For the best quality, use within one year. Storing jars without canning rings reduces the risk of false seals.
- Frozen roasted tomato sauce will also stay good in the freezer for a year or longer, though the quality will start to degrade with time.
- Once open, store homemade tomato sauce in the refrigerator and use within one week. Signs of spoilage include mold growth, off odors or taste. Discard immediately if you suspect it has spoiled.
Enjoy!
Now enjoy your roasted tomato sauce with pasta, pizza, or however you see fit! Since it’s so thick and versatile, we often use it in recipes that calls for canned tomatoes or paste, including in soups, curries, lentils, or other saucy meals. I also love using roasted tomato sauce over zoodles, with homemade sourdough pizza crust, and drizzled over parmesan zucchini fritters.
To transform this sauce into a more classic Italian pasta sauce: Start by sautéing some diced onions and garlic in a pan until they’re soft and translucent. Then add the roasted tomato sauce, salt and pepper, plus fresh or dried herbs like basil, thyme, oregano, rosemary and sage – to taste. In the place of fresh garlic and onion, you can also use garlic powder or onion powder. Simmer to combine flavors.
Easy peasy! I hope you love and use this recipe as much as we do. Please feel free to ask any questions in the comments below, and help support our small business by leaving a review!
You may also enjoy:
- 13 Ways to Preserve Tomatoes: Recipes to Freeze, Can, and More
- How to Make a DIY Tomato Cage: Sturdy, Easy & Cheap!
- How to Make Sun Dried Tomatoes in a Dehydrator or Oven
- Best Cowboy Candy Recipe (Candied Jalapeños) Canning or Refrigerator
- How to Make the Best DIY Tomato Trellis (Stake Weave Hybrid)
- The Best Zucchini Relish Recipe (Canning, Freezer or Refrigerator)
The Best Easy Roasted Tomato Sauce (Freeze or Can)
Equipment
- Roasting pan or baking sheets
- Large pot
- Immersion blender, or classic blender
- Jars for storage (wide-mouth for freezing)
Ingredients
- Fresh tomatoes, of any kind
- Sea salt, for sprinkling to taste
- Black pepper, for sprinkling to taste
- Olive oil, light drizzle (do not use if canning)
- Bottled lemon juice or citric acid (if canning)
Instructions
- Cut tomatoes into quarters, halves, or leave smaller tomatoes whole and lay out onto baking sheets skin side down. (Lining baking sheets with parchment paper helps reduce a messy clean-up later!)

- Drizzle tomatoes with olive oil, sea salt, and black pepper. Do NOT use oil if intending to hot bath can the sauce.

- Roast the tomatoes in an oven pre-heated to 425°F for 40 to 45 minutes – until they develop a brown tinge. If using multiple pans, it may take longer (up to an hour). Rotate trays halfway through to promote even roasting.
- Optional: If you have more tomatoes than will fit in your oven, cut up and lightly simmer the remaining tomatoes in a pot for the entire time the roasted tomatoes are in the oven. Choose a pot that is large enough to accommodate the stewed and roasted tomatoes together, once they are added after roasting.

- Once the tomatoes are finished roasting, carefully transfer them to a large pot on the stovetop (combine with the optional stewed tomatoes). Blend with immersion blender directly in the pot, or add mixture to a classic blender in batches, and blend until creamy and smooth.
- If needed, simmer the sauce to further reduce until it reaches your desired thickness.
- To freeze the sauce, remove from heat and let it cool a bit before transferring into freezer-safe containers of choice. Leave 1/2" to 1" head room for expansion.
- IMPORTANT: To hot-bath can the sauce, ladle the hot sauce into hot sterilized canning jars, and then add and thoroughly stir in either 2 tablespoons of bottled lemon juice or 1/2 tsp of citric acid per quart jar. For pint jars, mix in 1 Tbsp lemon juice or 1/4 tsp citric acid to each. Leave 1/2-inch of head room. Process following the canning times based on jar size and elevation in the chart below.

- Storage and Shelf Life: Store the canned, sealed jars of tomato sauce in a cool dark location – such as a pantry, cellar, or kitchen cabinets. For the best quality, use within one year. Frozen roasted tomato sauce will also stay good in the freezer for a year or longer, though the quality will start to degrade with time. Once open, store in the refrigerator and use within one week.


Notes
|
Processing Time (minutes) for Canning Tomato Sauce
|
|
|
|
Boiling Water Bath at Altitudes Of:
|
Pints
|
Quarts
|
|
0-3,000 ft.
|
40
|
45
|
|
3,001-6,000 ft
|
45
|
50
|
|
6,001-8,000 ft
|
50
|
55
|
|
8,001-10,000 ft
|
55
|
60
|
|
Pressure Canner*
|
15
|
15
|


189 Comments
Cheryl
Making now, is it correct you do nothing about the seeds? Last summer when I made sauce the seeds kind of messed it up.
DeannaCat
Sorry for the delay! No, you don’t need to remove the seeds. It all gets blended anyways!
Afton
YOU ROCK! Thank you so much for posting this! For someone who is new to making their own tomato sauce this was so simple. The instructions you provided were easy to follow, and everything turned out amazing. My house smells so great and we’ll be having a wonderful meal with our very own tomatoes this evening! I will also smile so hard this chilly winter when I pull this out of the freezer and think back to summer days. Thanks again, you gained a follower in Wisconsin. =)
DeannaCat
Awww, thanks for the awesome review! And you’re so right… those jars in the freezer will feel like gold come Wisconsin winters!
Barb
Hi Deanna,
This recipe is so great!
Time-saving, great-tasting.
20 lbs of tomatoes created 14 wonderful jars of organic tomato goodness!
Thank you so much for everything you do to help us make the best of everything!
Barb Spillane
Thank you, Deanna! My favorite taste of summer in a jar!!
I can never get enough tomatoes! We have some beautiful, organic farms in the area and I was able to score my 1st 20lbs. With those 20 lbs, I made 14 jars of that roasted goodness you gave us in this recipe!
I’ll think of you every time I reach for one during the winter. Time-saving, great-tasting, organic goodness!
YAAAAS!!
Kristin Harko
Made a few jars from a variety of tomatoes. I did half roasted and half stewed. Came out sweet and delicious! And sooooo easy! Also made some pizza sauce from the base sauce. It was a hit!
DeannaCat
Perfect! Yes we made pizza with it right away too! 🙂 Thank you for the feedback. We’re glad it was a hit!
Annalee
Thank you for this recipe – I just made it with my garden surplus and it’s so easy! Can’t wait to use this with my winter cooking to bring back some flavors of summer. Also, just wanted to mention that two full baking trays of tomato filled three 8 ounce jelly jars. It was a bit thick with 40 minutes of baking, so next time I’ll try less time so hopefully the tomatoes hold more liquid! Keep the food preservation recipes coming, they’re so helpful.
DeannaCat
Hey Annalee! Great, thanks for the feedback! I know… we are bad about measuring and keeping track of starting versus finishing amounts sometimes – so thanks for that as well. If you want to make a tad thinner, I wouldn’t cut the roasting time. That is where the flavor really develops! Rather, try the optional step of adding some tomatoes to a pot on the stove too, and then combining that with the roasted ones! That will give you more bulk, and liquid! We almost always do it that way, and it is the perfect consistency 🙂 I hope that helps!
Brittany
So so simple and yummy! I had a ton of tomatoes and was getting overwhelmed with what to do with them! This recipe is a perfect and delicious way to use up my extra tomatoes!!
Stephanie Reid
As always, your recipes come out just in time. There isn’t much to do with cherry tomatoes (hard to can, etc…) so this made perfect sense! I love that you gave us permission to just leave skins on, throw them all together and blend them! Genius move and made it so much quicker and simpler. I have been canning all summer so this was just what I needed. A change of pace! P.S. It turned out delicious! THANK YOU!
DeannaCat
Haha! Yes, you have my permission! 🙂 You are so welcome, and thank you for the feedback!
Kriscalilife
Just made some of this sauce this morning and was eating it by the spoonful 🙂 This is such an easy recipe took me like 10 minutes (besides roasting). This will be my go to sauce recipe from now on, I wish i would have planted more tomatoes! Love the simplicity of it so I can use it for so many different cuisines by simply adding different herbs and seasonings.
DeannaCat
Oh yay! That is so awesome to hear! Now you see why it is our go-to favorite too. Low fuss, full deliciousness! Thank you for the review
Heather
When I have a bunch of small tomatoes I want to eat right away, I do this with some whole, peeled garlic cloves in the pan and then spread it on fresh bread. Soooo good. Tastes like summer.
Loreal
With my garden bursting with tomato’s I was so excited for a new recipe and this one was so easy and so delicious! I first took the tomato’s out with a slotted spoon thinking they would be to watery but I ended up putting the liquid back in when I blended them because it was to thick at first (a good problem to have!) after putting the lights back in it was perfect. I used red, orange and black cherry tomato’s for my sauce. I’m loving the content thank you for sharing!
DeannaCat
It’s in crazy how easily it gets thick?? Thank you for the comment. Glad you loved it as much as we do!
DeannaCat
Yum! Now, excuse me while I go back some bread to go with our sauce… 🙂 Thank you for the review!
Nicolle
I added more tomatoes to our veggie delivery next Tuesday so I can make those!! Can’t wait 😊
Ashley
I can’t wait to try this!! I’m in FL starting round 2, “winter garden” with lots of tomatoes!
Mckennae
Sooo simple and delicious! I purposefully waited to pick my tomatoes until this recipe came out 😂 I saw a sneak peak and didn’t know if it was going to be soup or sauce but I knew I was going to save up my tomatoes for it and I’m so glad I did! I added a bit of garlic powder to mine, but the roasting of the toms really brings out their sweet flavor profile. I love that this doesn’t have any added sugar, like you would find at the grocery stores. It’s a game changer and I can’t wait to put it on my sourdough pizza! Thank you again Deanna!
DeannaCat
You know, I never even thought about the added sugar that is in store-bought sauce… because it has been so long since we have purchased any! After making this, it is pretty hard to go back to that stuff 🙂 Thank you for the comment! Have a great weekend!
Andria
Super simple and super delicious recipe for processing and preserving a bountiful harvest of tomatoes! I will be making this again and again! Thank you so much for sharing!
DeannaCat
Awesome! Hooray for a new, easy, go-to recipe! Thank you for the feedback! 🙂