

Creamy Roasted Butternut Squash and Sage Soup Recipe

It’s soup season! (We celebrate soup season year-round around here.) I hope you love our hearty, sweet and savory roasted butternut squash soup recipe as much as we do. It’s easy to make, thick and creamy, and can be made with either dairy or coconut cream for a vegan twist. Roasting the butternut brings out the absolute best caramelized flavors of the squash!
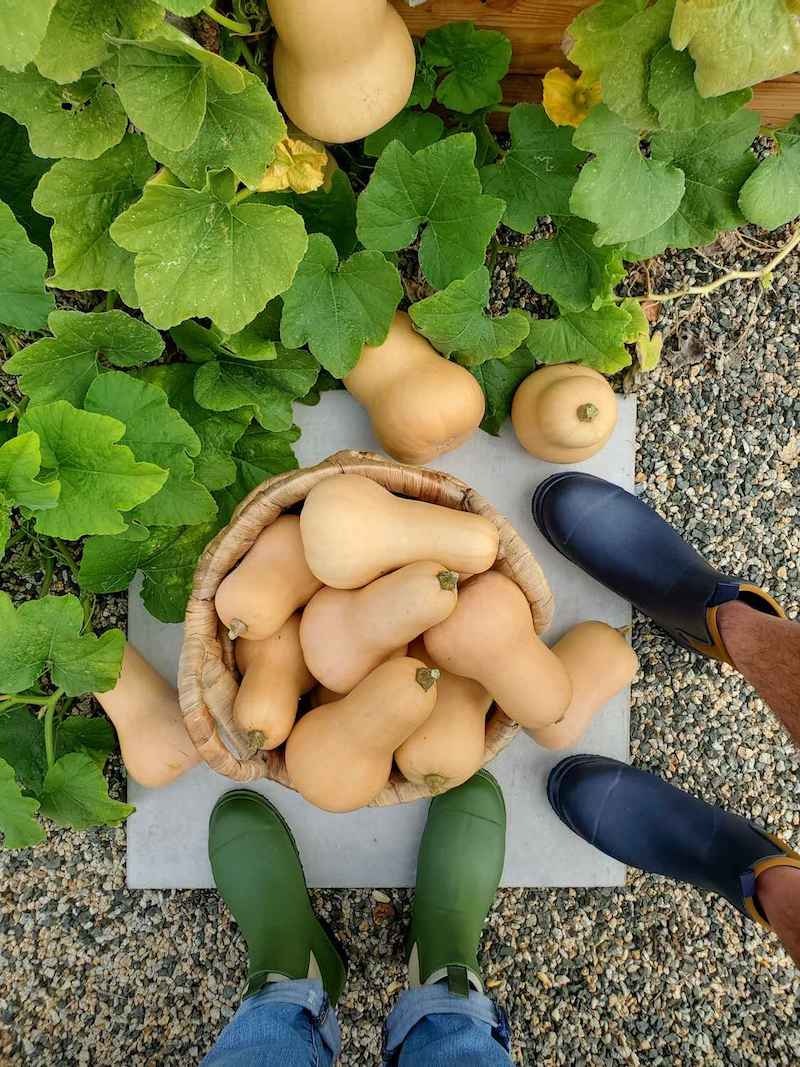
Roasted butternut squash soup is one of our go-to fall favorites. In addition to homemade butternut squash puree, making and freezing soup is a great way to preserve butternut from the garden too! We often make a double batch to stock the freezer for easy future meals.
Would you like to save this?
RELATED: Want to make it homegrown? Come learn how to grow butternut squash, or when to harvest butternut squash for the best flavor and storage life possible! Don’t miss our delicious butternut squash pie recipe too.
Ingredients
Yield: This recipe makes approximately 3-4 quarts of finished butternut squash soup.
- 2 large or 3 small butternut squash, or approximately 5 pounds. (We’ve also made this recipe using 5 cups of homemade roasted butternut squash puree that we’d already prepared and had stored in the freezer.)
- 2 medium granny smith apples
- 1 large sweet yellow or white onion
- 10 to 12 fresh sage leaves
- 4 cups (1 quart container) of low-sodium vegetable broth. We love to make and freeze homemade vegetable broth! Or, use concentrated “better than bouillon” paste mixed with water to achieve the same volume.
- 1.5 cups of water
- 1 cup plain canned coconut cream (not coconut milk) OR ½ cup of heavy cream
- 1.5 tsp salt
- ¼ tsp black pepper
- 1 pinch of nutmeg and/or clove
- Olive oil, coconut oil, or butter
- Optional: pumpkin seeds + parmesan cheese, to garnish

Instructions
Step 1: Roast Butternut Squash
- Preheat your oven to 425°F.
- Carefully cut the butternut squash in half, and remove the seedy guts with a spoon.
- Poke the fleshy parts of each squash with a fork in several places.
- On a baking sheet or roasting pan, roast the butternut squash in the oven until it is tender to the fork – about an hour. We usually line our pan with parchment paper first.
- You’ll want to let the squash to cool a bit before handling it, so you can wait to start the next step until after the squash is finished roasting.

Step 2: Sauté Apples, Onion & Sage
Yes, you read that right. Apples, in soup. Trust me – it’s good! Really good in fact. I do suggest using granny smith apples if possible, because they’re the perfect blend of tart and sweet.
- In a large pot over medium-high heat, add a dollop of your preferred cooking fat such as butter, coconut oil, or extra virgin olive oil.
- Dice the onion, apples, and fresh sage leaves and add them to the pot, along with a little dash of salt and pepper. The size and shape of the cuts don’t matter much here since it will all get blended later.
- Sauté and stir frequently until tender, about 7 to 10 minutes.

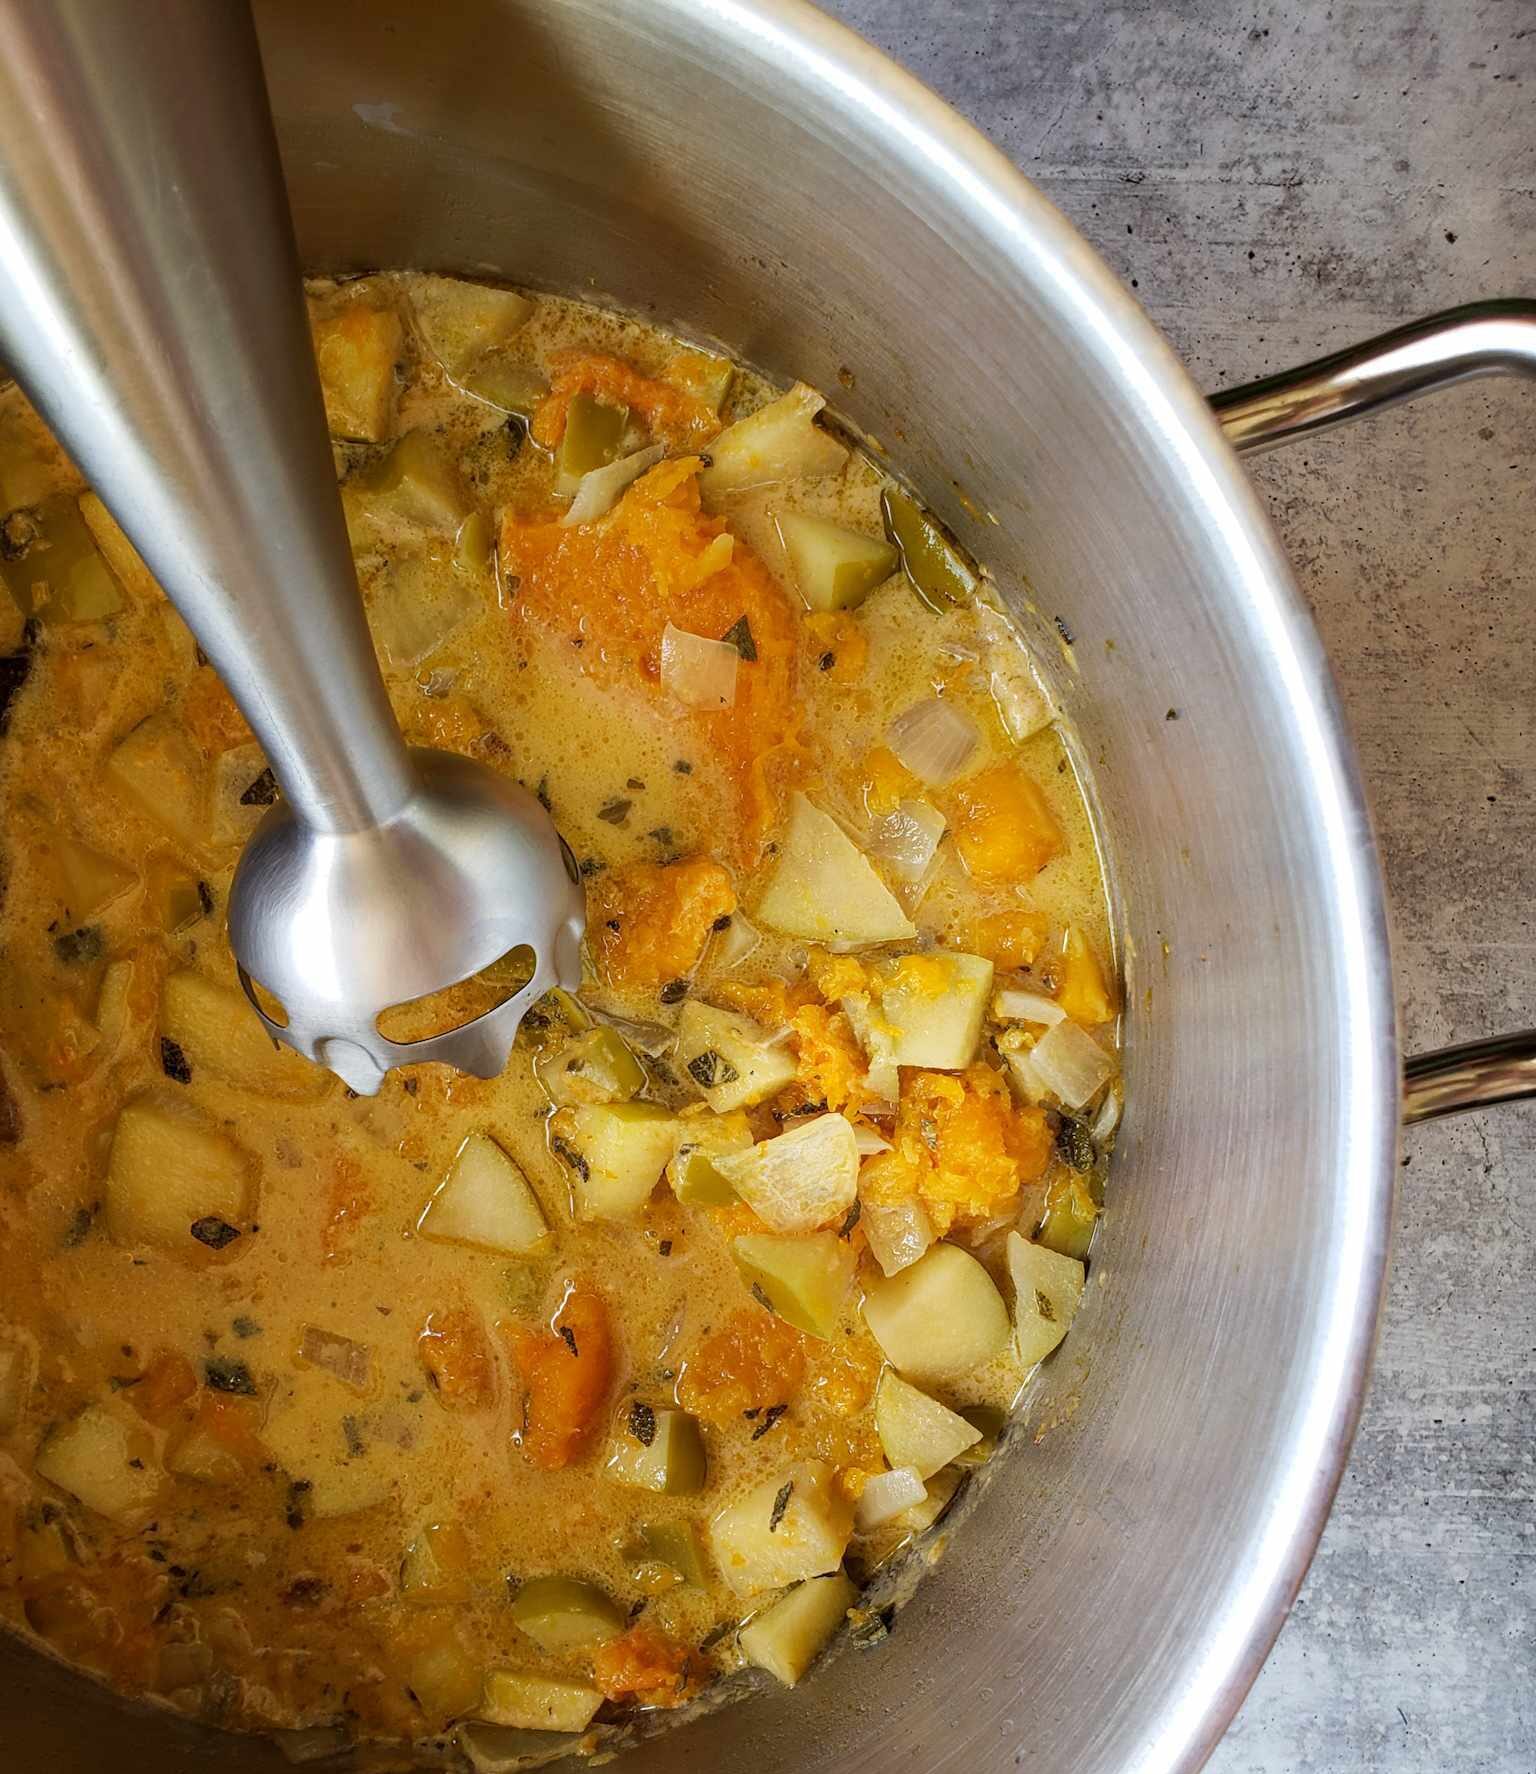
Step 3: Add Butternut and Broth
- Once the butternut squash has cooled enough to safely handle, scoop out the middle flesh to remove it from the thin skin portion.
- Next, add the roasted butternut to the pot of apples, onions, and sage.
- Pour in 4 cups of low-sodium vegetable broth (one full average quart container) and 1.5 cups of water.
- Add 1.5 teaspoon of salt, ¼ teaspoon of black pepper, and a small pinch of nutmeg and/or clove.
- If you are using coconut cream for this recipe, add one cup now. For those using heavy cream instead, wait until the soup is blended and off the heat (next step) to add the cream to avoid curdling.
- Stir to combine, bring it to a boil, and then reduce the heat to simmer for 15 minutes.


Step 4: Blend
After simmering for about 15 minutes, it is time to turn this chunky butternut squash soup into a creamy one! To blend the ingredients, we use an immersion blender right in the pot. If you don’t have an immersion blender, carefully transfer the soup into your standard blender to blend – in batches if needed. Blend until smooth and remove from the heat. If you haven’t yet added your cream of choice, do so now!

Step 5: Serve and Enjoy
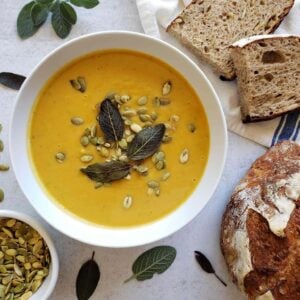
Now, please enjoy your roasted butternut squash soup. I highly suggest to garnish the top with roasted, sprouted, or even raw pumpkin seeds. They give it the perfect little addition of texture and crunch, plus protein!
We also enjoy ours with grated parmesan cheese and a slice of crusty, chewy homemade sourdough bread or fluffy sourdough focaccia. If you’re feeling extra fancy, try quickly pan-frying a few sage leaves in oil or butter until crispy. They’re delectable!
Even for a family of four or more, this recipe should give you some leftovers. Enjoy within one week if stored in the refrigerator, or keep reading below for freezing tips.

How to Freeze Butternut Squash Soup
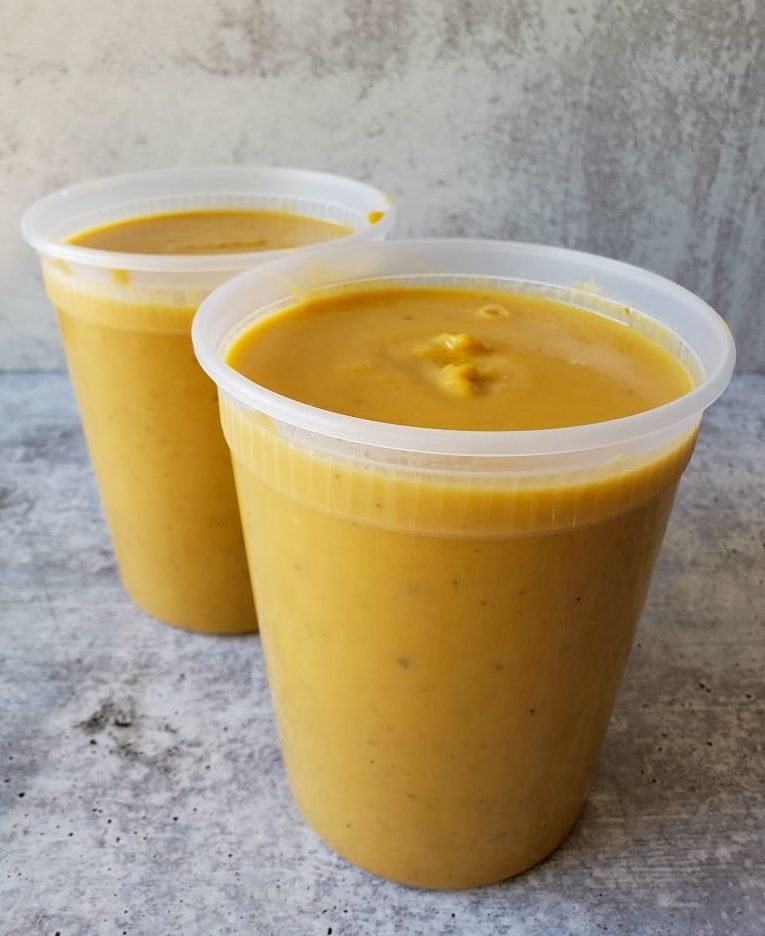
To preserve and freeze butternut squash soup, first let it fully cool before freezing. If you made a large double batch, you can help expedite safe rapid cooling by putting the pot in an ice bath in a clean sink. (Retired health inspector here!)
Once cooled, transfer the roasted butternut squash soup into freezer safe storage containers of choice. We love to freeze chili and soup in these reusable BPA-free freezer containers. The quart size makes a perfect two person meal. Butternut squash soup is good for up to a year in the freezer.
Defrost frozen butternut squash soup in the refrigerator a day or two before you want it, and simply reheat on the stovetop in a pot. To make a healthy meal even more nutritious, we sometimes like to lightly sauté fresh garden greens such as bok choy, kale, and/or mustard greens in the bottom of the pot before adding the soup to reheat it!
That’s it! We hope you thoroughly enjoy this delicious soup recipe too. Please let me know if you have any questions, and don’t forget to come back to leave a review once you’ve tried it.
You may also like:
- Easy Roasted Pumpkin 3-Bean Chili Recipe (Vegetarian and Vegan)
- Hearty Green Lentil Vegetable Soup Recipe (Vegan)
- Easy Vegan No-Chicken Noodle Soup Recipe (With Protein!)
- How to Make Pumpkin Shaped Sourdough Bread Loaf
- Easy Creamy Broccoli Soup (Gluten Free + Vegan Options)
- How to Make Crunchy Soaked and Roasted Pumpkin Seeds
Creamy Roasted Butternut Squash & Sage Soup
Ingredients
- 5 lbs butternut squash – 2 large or 3 small butternut squash – approximately 5 pounds
- 2 medium Granny Smith apples, diced
- 1 large yellow or white onion, diced
- 10-12 leaves fresh sage
- 4 cups low-sodium vegetable broth
- 1.5 cups water
- 1 cup coconut cream, OR 1/2 cup heavy cream
- 1.5 tsp salt
- 1/4 tsp black pepper
- 1 pinch nutmeg and/or clove
- olive oil, butter, or coconut oil – for sautéing
- pumpkin seeds and/or parmesan cheese, to garnish (optional)
Instructions
- Cut the butternut squash in half, and scoop out the seedy guts with a spoon. Poke the fleshy parts of each squash with a fork in several places.
- On a baking sheet or roasting pan, roast the butternut squash in the oven on 425F until it is tender to the fork – about an hour.
- In a large pot over medium-high heat, add a dollop of your preferred cooking fat such as butter, coconut oil, or extra virgin olive oil. Dice the onion, apples, and fresh sage leaves and add them to the pot, along with a little dash of salt and pepper. Do this after the butternut squash has finished roasting.
- Sauté and stir frequently until tender, about 7 to 10 mins.
- Allow the roasted butternut squash to cool slightly for safe handling. Scoop out the middle flesh to remove it from the thin skin portion.
- Add the roasted butternut squash to the pot of apples, onions, and sage. Add vegetable broth, water, 1.5 teaspoon of salt, ¼ teaspoon of black pepper, and a pinch of nutmeg and/or clove.
- If you are going to use coconut cream for this recipe, go ahead and add a cup now. Alternately, wait to add dairy heavy cream until after the soup is blended and removed from heat.
- Stir to combine, bring the contents of the pot to boil, and then reduce the heat to simmer for 15 minutes.
- Blend soup using an immersion blender, OR carefully transfer the soup into a standard blender to blend – in batches if needed. Blend until smooth, and remove from the heat.
- Add heavy cream now, if desired.
- Serve and enjoy! Use within one week in the refrigerator. Or, preserve and freeze the soup in freezer-safe containers. Use frozen soup within one year.


39 Comments
Betsy Bryan
I made this soup on Monday for Meatless Monday, and was quite pleased with how good it is. However, the next day in my lunch box it was even better! One of the things that surprised me the most is how filling it is. I’m one of those people who is hungry all the time, and this soup held me until the next meal, without needing to eat a snack! I will definitely make this again!
Sarah
This looks delicious and I can’t wait to make it! I also just wanted to say that I love the way you format your page; the photos, the detailed instructions, the suggested products at the bottom, and especially the lack of paragraphs of silly back stories before the recipe actually starts. Keep up the good work! I have your page bookmarked because I’m constantly referring to it!
Pamela Robledo
Absolutely delicious! My 3 and 9 year old loved it as well. We were able to use garden fresh butternut squash from our garden which made it that much better. 10/10
Caroline
This was delicious. A lot of recipes use garlic, and I was tempted, but followed the recipe exactly. I was surprised how amazing it was. Definitely recommend the coconut milk – it adds a great sweetness, and also serving the toasted seeds on the side. (I dont prefer how soggy they get in the soup).
My 1 year old is hit or miss with food, and he was screaming at me to give him more of this soup. Two days in a row. I got 3 dinners out of it for 2.25 people.
Jinny
I do not have an immersion blender, but I’d be willing to buy one for this recipe alone. Using a blender was fine, it just adds to the dishes as you transfer from one pot, to blender, to another pot. Still totally worth it. We didn’t have any pumpkin seeds so we tossed in some walnuts to top it off. It was delicious and satisfying.
DeannaCat
Thanks for the feedback Jinny! Funny story – this recipe is exactly when we did opt to get an immersion blender years ago for the same reasons, but use it often now! Other blended soups, roasted tomato sauce, veg/mushroom gravy around the holidays… Glad you loved it!
Inside_the_hive
I add fried Sage leaves as a garnish with the pumpkin seeds. Super recipe:)
Lynnette
This looks delicious!! Wondering if I can sub Delicata for the butternut? I have some from the garden and thought they might work. Haven’t got any butternut this year, but will be checking out the next farmer’s market for some!
DeannaCat
Sure, totally! Work with what you’ve got! I think it would make a delicious substitution. Let us know how it goes!
Wendy Rutan
Hi! Do you know if the seeds from the organic butternut squash that I got from Whole Foods could be planted? Or are they inert somehow.
DeannaCat
Hi there! The seeds would probably sprout, but may not “breed true” depending on how they were grown. Squash are prone to cross pollination by other varieties so saving “pure” seed that will produce the exact type of squash you want can be tricky.
Danyce
Made this recipe and it did not disappoint! Easy and delicious. I used Heavy cream this time because I happened to have some that needed to be used up, but I can’t wait to try it with coconut cream next time– because there WILL be a next time. Even my “meat and potaotes” hubby loved our plant based dinner.
Tip: I shredded and roasted up some crispy brussels sprouts to go on top- delish.
Lacey Daniels
Oh goodness, YUM!!! I’ve never roasted my butternut squash for my soups, but am so excited to try! This looks heavenly. Thanks for sharing!
DeannaCat
Oh then you’re in for a treat! It makes the prep so much easier too – not needing to try to cut up a bunch of rock hard squash, except for in half! Let us know how it goes!