

How to Propagate (Grow) Sage Cuttings in Water or Soil

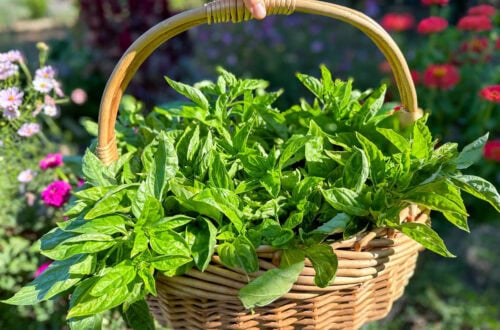
Sage is one of my very favorite culinary herbs, and also happens to be wonderfully easy to propagate! During our recent move, one of the things I knew I would miss most was the prolific patches of herbs in our old front yard garden. So to get a jump start at the new homestead, I took several cuttings from each of our healthiest sage plants: the trusty green sage, beautiful bushy purple sage, and stunning tri-color sage. Just a few weeks later, we had multiple healthy little seedlings with new roots – all ready to pot up or plant out!
Read along to learn how to propagate sage cuttings in water or soil. Both methods work, though I personally find the water method has a slightly higher success rate (especially without using rooting hormone). Plus, then you get to watch and observe the roots grow in water – which is half the fun! Hint hint: You can follow this same process to propagate many other herbs too, like basil, rosemary, and other varieties of sage.
Why propagate sage?
Propagation is the process of creating new plants from existing ones… and who doesn’t love free plants?! Growing new sage from cuttings is a great way to expand your personal herb garden, create more to give to family and friends, or start your very first plants using sage cuttings from a friend or the grocery store. Then you can use fresh homegrown sage in delicious recipes like this butternut squash sage soup, whole wheat herb sourdough crackers, garlic and herb roasted Brussels sprouts, or these smashed and roasted herb potatoes!

Would you like to save this?
Disclosure: Homestead and Chill is reader-supported. When you purchase through links on our site, we may earn an affiliate commission.
When is the best time to take sage cuttings?
You can take sage cuttings any time throughout the growing season. However, if you live in a climate with cold winters, it’s best to propagate sage cuttings in the spring to early summer. That way, the new seedlings have ample time to become established and increasingly hardy before the colder months arrive – enhancing their chance to survive winter. Also note that green sage is more cold-hardy than the purple or tri-color sages we grow here in temperate zone 9b.
Do I have to use a rooting hormone to propagate sage cuttings?
No, isn’t not necessary to use a rooting hormone to propagate sage, though it can help ensure the cuttings successfully develop roots – and faster! For instance, skipping the rooting hormone may result in only half of your cuttings taking, or it could take several days to weeks longer for root growth to occur without it. If you do not plan to use a rooting hormone at all, stick with the water method shown in this article (rather than planting sage cuttings in soil).
During this particular round of sage propagation, we used fresh aloe vera as a natural rooting hormone. While aloe isn’t quite as strong or surefire as commercial rooting hormone gel or powder products, it provides many similar benefits to stimulate new root growth – along with protecting against shock, disease, and encouraging healthy plant growth in general. (Read more about using aloe vera in the garden as natural fertilizer here.)
Step 1: Gather Your Supplies
It’s a good idea to have all your supplies ready and waiting before snagging the sage cuttings. They’ll have more success when the “wounds” are fresh, especially if you use a rooting hormone. If you’re working with already-cut or grocery store sage, simply add a fresh cut to the stem just above the old one.
Supplies needed:
- Garden snips or scissors to take sage cuttings. To avoid spreading disease, sanitize the snips with rubbing alcohol or vinegar first.
- A container of water (such as a vase, mason jar or cup) OR small pots and seed starting soil. It’s best to use sterile seed starting soil since it’s so light and fluffy – perfect for tiny roots to navigate. If you don’t have seed starting soil, use a potting soil made for containers or mix 50% peat moss with other garden soil.
- Sage plants to take cuttings from. Or pieces of sage, such as fresh grocery store bundles.
- Rooting hormone (optional). This Clonex gel is highly-rated!

Step 2: Take Cuttings from Sage
- When trimming sage cuttings from an established plant, select newer tender growth towards the tips of the plant rather than older woody growth closer to the base.
- Use clean scissors or garden snips to cut the stem about 4 to 6 inches long. Be sure the stem has at least one or two leaf nodes (where leaves grow from the stem).
- If possible, make a diagonal cut in the stem (about 45 degree angle) rather than cutting it straight across.
- Next, remove the leaves from the lower 2 to 3 inches of the stem – where it will be submerged in water or soil.


Step 3: Dip in Rooting Hormone
This step is optional, but highly recommended – particularly for folks using the soil method to propagate sage. Dip the just-cut stem in your rooting hormone of choice. Follow the directions on the package as needed. We used fresh aloe vera from our garden (for both the water and soil methods), and simply inserted the sage cutting into the gel portion of the aloe leaf. Aloe is most effective when it’s fresh too.

Step 4: Add to Soil or Water
Water method: Place the sage cuttings in a glass or other short, petite container of water. Add a couple inches of water to the bottom of the glass. Use filtered and/or non-chlorinated water if possible.
Soil method: Insert the cut stems into a container of seed starting soil or similar light potting medium. Plant the cuttings an inch or two deep. You can either place one sage cutting per container or cell (such as if using a 6-cell seed starting tray) or plant several in one larger container and gently separate them later. When grouping many in one container, leave at least a couple inches between each cutting so the roots won’t become too tangled.

Step 5: Wait for Roots to Grow
Now, set the container of cuttings aside in a location that receives moderate to warm temperatures and bright ambient light, but not direct sun. Keep an eye on your cuttings and provide more water as needed so they don’t dry out. If using the water method, some experts recommend changing out the water in the container every day. I don’t find that necessary, but do change out the water once every four or five days.
How long does it take for sage cuttings to root, you wonder? On average and under ideal conditions, it should take about 2 weeks for sage cuttings to grow new roots. Some of our sage cuttings took up to three weeks to grow roots, and a few failed to take root at all. The use of rooting hormone will expedite the process.


Step 6: Pot Up or Transplant
The time has come! Once the sage cuttings grow a good little tuft of roots, you can either pot them up into a larger container or transplant them outside. Do wait until they have developed many small roots that are at least an inch or two in length before transplanting. After potting up, we we watered our new sage seedlings with mycorrhizae to reduce transplant shock and encourage further root development. See all our top-tips for transplanting seedlings here.
Notes on Results
From this particular batch, 5 of our 6 sage cuttings in water propagated successfully, while 4 of 7 cuttings grew roots in soil. All in all (and after carefully separating the ones in soil) we ended up with 9 new little sage seedlings ready to plant at our new homestead. Of the ones that failed to root, there didn’t seem to be a pattern across the different sage varieties we used. Each of the green, purple, and tri-color varieties had about equal success rates. The cutting that failed to root in water appeared more woody than the other more tender cuttings, so that may have been the issue there.


And that’s how to grow sage from cuttings!
Pretty simple, right? I hope you enjoyed this easy step-by-step tutorial, and feel confident to go forward and propagate sage on your own now! And remember, you can use these same tips to grow basil, rosemary, thyme, lavender, oregano, or lemon balm cuttings in water too. Please let me know if you have any questions in the comments below, and pin or share this article if you found it useful!
Be sure to check out these herbaceous recipes and reads:
- Growing Herbs 101: How to Start a Kitchen Herb Garden
- How to Grow Bushy Basil to Harvest All Summer Long
- Harvesting Fresh Lavender: How to Harvest, Dry, and Use Lavender Flowers
- Roasted Two-Bite Garlic and Herb Smashed Potatoes
- Whole Wheat Herb Sourdough Crackers
- Creamy (Vegan) Butternut Squash and Sage Soup


12 Comments
Reno Noone
This is the best piece on propagation that I can find anywhere. Thank you so much!
Aaron (Mr. DeannaCat)
Amazing to hear Reno, so glad you enjoyed it!
Amber
Fabulous article! Very helpful.
Patricia
What a nice and informative read! I was wondering why my woody cuts not rooting 😅 today re do it with younger cuts and hopfully get some roots 🙏🙂
Aaron (Mr. DeannaCat)
Good luck Patricia!
Vegan Andy
What a beautifully written, annotated and illustrated article! This was top quality – as good as any professional example I have come across. It told me everything I wanted to know, in a structured and comprehensive manner, and was a pleasure to study. Well done to you and thank you so much for the free information. I shall approach my task with inspired and renewed rigour!
Andy (in the UK)
sarah bee
Thank you for posting. Never knew about aloe as stimulator before!
Elizabeth Crain
Thank you for the helpful tips as well as the lovely pictures! We are looking forward to trying this out.
Lauren Meadows
Awesome information! Very informative!
Who knew Aloe Vera was a good rooting hormone!
Thanks again for a great lesson! Lauren
Aaron (Mr. DeannaCat)
Thanks for reading Lauren!
Theresa Gallant
Excellent article and very helpful photos as well!
Just one question:
I’m planning to try to root in water. After dipping in aloe Vera, do you place the cutting directly in the water? Wait for the aloe to dry?
I’m imagining the aloe Vera just coming off whennplaces in water. …
Aaron (Mr. DeannaCat)
Hi Theresa, dipping the cut ends in aloe vera gel is most beneficial when rooting the cuttings in soil although you can still do it if you are going to root in water as well. I would just dip the cut ends into your aloe vera gel before placing them in water, the aloe will likely still stay around as it’s fairly gelatinous. Hope that helps and good luck!