

How to Build a Trellis: Inexpensive & Easy Designs

Trellises are a fun (and sometimes necessary) addition to any garden. They can help train and support plants, create privacy walls and “living fences”, or simply add style and flair to your space! Trellises are also great space-savers, and enable gardeners to “get vertical” – which can be especially useful when growing space is limited. However, some pre-made trellises can be a bit spendy – and the costs really add up if you need to buy several. The good news is, it is very easy and affordable to build your own trellis! Even better, you can customize and make a trellis that perfectly fits your needs.
Read along to learn our favorite materials and methods to build a simple and inexpensive trellis. I will walk you through two different but very similar trellis design options. Ftirst, let’s go over how to make the most easy, simple, and inexpensive DIY trellis ever. The second option is still very affordable, yet is increasingly sturdy and attractive with the inclusion of a wood frame – perhaps more ideal for more permanent placement. Finally, we’ll explore a few more trellis designs, including arched trellises.
What You’ll Find in this Article:
- Examples of ways to use a trellis in your garden
- What types of plants will grow up a trellis
- Difference between hog panel and concrete remesh wire
- Benefits of using remesh to build trellises
- How to to make a super simple and inexpensive trellis (Option 1)
- How to build a trellis with a wood frame (Option 2)
- Other trellis options & variations, including arched trellises
Disclosure: This post may contain affiliate links to products for your convenience, such as to items on Amazon. Homestead and Chill gains a small commission from purchases made through those links, at no additional cost to you.

Would you like to save this?
Ways to Use a Trellis
If you look around our property, you’ll see trellises everywhere! Some are temporary and mobile, giving short-lived annual plants like pole beans a place to climb. They can easily be moved in and out of garden beds as the seasons change, or as we practice crop rotation. I will show you how to make a simple trellis that is perfect for supporting beans, peas, tomatoes, and other veggies.
We designed other trellises as long-term living privacy walls, now covered with heavy, vigorous vines. Those are a bit more durable. For example, we chose to train all of our passion fruit vines on trellises along the perimeter of our yard, rather than allowing them to grow directly on our fences. Providing the vines with a designated trellis has several benefits: it protects our fence from damage, allows us to access both sides of the vines for pruning or harvesting fruit, and also enabled us to create privacy in our garden by building the trellis taller than the fence line.
Finally, you could build a trellis to serve multiple functions! Around our back patio garden, the wood-frame trellises create a separate intimate space, serves as a fence to keep the chickens out, and support plants all at once.

What Kind of Plants Grow on a Trellis?
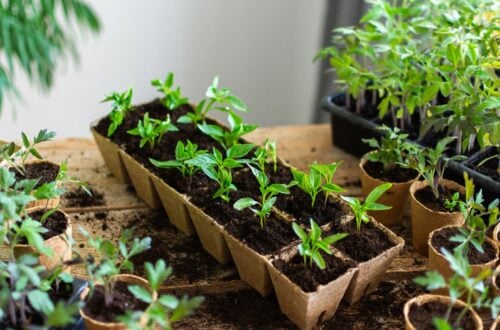
Many annual vegetable plants rely on a support structure as they grow. The most common examples include cucumbers, pole beans, snow peas and snap peas – who all readily cling to, wind around, or otherwise climb up a trellis. See even more DIY cucumber trellis ideas here.
Many other vining and sprawling plants may also appreciate the support of a trellis, including tomatoes, squash plants, melons, and sweet potatoes. Some of these are not natural climbers (e.g. tomatoes) but can easily be trained up (or tied to) a trellis with your help. Larger, heavier crops such as winter squash or melons will need the support of slings or makeshift hammocks under the fruit to prevent the vines from breaking.
In addition to vegetables, there are a ton of beautiful flowering or edible vines that will naturally grow up a trellis too: jasmine, black eyed susan, honeysuckle, kiwi fruit, grapes, bougainvillea, certain varieties of nasturtium, clematis, maypops, passion flower and passion fruit, just to name a few! For more information about how to grow passion fruit and maypops (and to learn the difference between the two) check out this article.


2023 update: Looking for a fantastic tomato trellis? Check out our new DIY tomato trellis tutorial here.
What Type of Wire to Use for a Trellis
Before we get started building, let me tell you about the secret ingredient in our homemade trellis design: remesh. While there are many options of wire fencing that can be made into a trellis, we prefer to make our trellises using sheets of concrete support wire called remesh.
Remesh is an incredibly affordable option compared to other wire fencing materials like cattle panel or hog panel. Remesh should also be easy to find. Check the concrete section of your local hardware store, near the rebar and other concrete support “accessories”. Our Home Depot always has these sheets of remesh available. Yet like everything, remesh wire comes with its benefits – along with a few cons. Let’s review those now.
Pros & Cons of Remesh Wire
- Cost: Perhaps the biggest perk of using remesh is the cost. At only around $7 per sheet, the price simply can’t be beat!
- Size & Flexibility: Remesh comes in 7 feet tall by 3.5 feet wide sheets. For us, this size has been perfect for nearly all of our trellises, meaning no cutting or modifications are required. Yet if desired, remesh panels are easier to cut than cattle panel. In our town, you can only purchase cattle panel in significantly longer lengths. Thus, we find the size and flexibility of remesh sheets much more convenient to transport. While still sturdy, the sheets can be curled into a cylinder and put in the back of my Subaru. I think we’ve even stuck a couple in the back seat of Aaron’s Camry before! Because they’re physically more flexible, remesh is also more versatile to use for other projects! For example, they can be secured into a cylinder to create a very sturdy, large, inexpensive DIY tomato cage.
- Wire Material: Like hog panel, remesh is made from steel. The primary differences are that remesh is a thinner gauge wire and not galvanized. This means that yes, remesh does get a rusty look to it. Personally, I see this as a pro instead of a con because I love the rustic, natural appearance over bright shiny metal. Because remesh has a finer gauge, it is lighter, and also easier to cut than hog panel. I still recommend using bolt cutters, but can be done with minimal effort.
- Potential Drawbacks: Because this is a construction product, the edges of remesh can be less “finished” than hog panel and may have sharp edges. The panels can vary in the store, so pick through to find the ones with smoother edges. When combined with rust, those sharp spots are a potential hazard – especially if you have kiddos in the garden. However, if you choose the wood-frame trellis option, it would be very difficult to injure yourself on it. This hasn’t been an issue for 95% of the trellises we have built. Once, I used a simple metal file to smooth out the sharp spots on an area we would be working around frequently.
That said, you could definitely opt to use cattle or hog panel fencing to build a trellis either of the ways described next. However, note that in addition to being more spendy – they’ll be a lot more heavy. Thus, you’ll want to use bigger, stronger, and longer stakes to support them.

HOW TO BUILD A TRELLIS: OPTION ONE
Materials Needed
For this ultra-simple and inexpensive trellis design, all you need is:
- One panel of wire remesh concrete support
- Two tall stakes
- Either zip ties, or some galvanized wire.
- A pair of bolt cutters or heavy-duty metal snips, only if you want to modify the size of the remesh sheet
- Total cost: under $20, and even less if you already have stakes.
When selecting garden stakes to support your trellis, choose stakes that are tall enough to come up at least 2/3rd the finished height of the trellis (once in the ground). For example, if you intend to have a 7 foot tall trellis, do not purchase 4 foot tall stakes. Once they’re at least a foot into the ground for stability, they’ll only provide three feet of support above.
Also, it is best to select stakes that have some texture to them. Tiny notches, grooves, or similar create grip for the zip ties or wire tires to catch and hold to. Otherwise, everything may slide around. We usually use 6-foot green-coated metal garden stakes to build our trellises (with the exception of design option two), but you could use any kind – wood, large bamboo, or even rebar! We usually purchase our stakes individually at a local garden center, but at under $2 each, this 25-pack is a really good price if you need a lot!

Instructions
- First, examine the location you would like to install the trellis. Determine the desired dimensions, and make adjustments to the remesh panel size if needed.
- Now, you can either put the stakes in the soil and then attach the remesh sheet to them in-place, or, build the trellis first and stick it in the ground already assembled. The latter option is the easiest, especially if you’re working solo. It is also easier to keep everything straight that way.
- To assemble the trellis, simply lay the remesh panel on the ground. Line up the stakes at the desired width. If possible, I suggest to keep the stakes on the outermost edges of the remesh sheet for maximum stability. Or, move them in a square or two and line them up with another interior vertical length of wire.
- Be sure to leave at least a foot or two of stake length extending beyond the bottom edge of the remesh, which will go into the ground. Try to keep them even.
- Next, attach the remesh panel to the stakes using zip ties or short pieces of galvanized wire. Pull everything tight, securing them in place.
- Finally, stick your new DIY trellis in place and plant something!
- This easy trellis design can also be used horizontally, to create a wide and shorter trellis. We have even “stacked” two sheets of remesh high up the stakes, creating an 8-foot tall, 7-foot wide trellis.


HOW TO BUILD A TRELLIS: OPTION TWO (WOOD FRAME)
The next DIY trellis design is very similar to option one, but has the remesh panel attached to a homemade wood frame rather than directly to the stakes.
These are the types of trellises we have used the most extensively around our property, to support passion fruit vines, create chicken fences, and living green walls. Some of them are installed stand-alone in the ground, while others are attached to raised garden beds. They’re durable, attractive, and still more cost-effective than purchasing most pre-made trellises of similar size.

Materials Needed
For this more sturdy and finished-looking trellis design, you will need:
- Wood to build a trellis frame with. We like to use redwood 2x2s, but cedar is another excellent long-lasting choice. Both are naturally resistant to rot and termites. You should be able to find them at Home Depot or other large lumber centers. To fit a standard remesh panel, purchase four 8-foot long 2×2” boards: one for each vertical side, one to split for the top and bottom, and one for support pieces. (Tip: Look for the straightest boards and avoid bowed wood when you’re picking them out).
- One panel of remesh
- Two tall stakes – see notes about stakes below
- 1 to 1.5 inch long, “wide head” cabinet screws like these (or as an alternative, poultry netting staples will work as well)
- Four 3″ tightening hose clamps. We use these ones.
- 2.5” decking screws, or other small-gauge screw that won’t split the 2×2″ wood OR steel corner braces (flat L brackets), with no longer than 1.5” screws
- Saw (skill saw or similar recommended)
- Power drill (recommended)
- A pair of bolt cutters or heavy-duty metal snips, only if you want to modify the size of the remesh sheet
- Total Cost: approximately $40-60, depending on where you source your materials and not including tools
In regards to stake length, follow the same recommendations as option one. Yet because this style of trellis is a bit more heavy-duty, I suggest to use more heavy-duty stakes.
Personally, we like to use 6 foot fiberglass stakes to support our free-standing wood framed trellises. Fiberglass stakes are badass because unlike the hollow metal ones, they are impossible to bend. Furthermore, you can drive them into the ground with a rubber mallet if needed – again, without bending. In this DIY trellis design, it is okay if the stakes do not have texture as recommended in option one. The trellis is secured to the stakes with strong tightening hose clamps, so it doesn’t matter that fiberglass stakes are smooth.
Instructions
Step 1) Take Measurements
First, examine the location you would like to install the trellis. Take measurements to determine the size of the wood frame you’d like to create. Do you need to adjust the size of the remesh panel? If not, measure the remesh panel to determine the lengths of wood you’ll need.
Note that most 2×2’s are realistically more like 1.5 by 1.5 inch, so take that into account in your measurements. Ideally, once the frame is built, the outer edges of the remesh panel will fall close to the center of each 2×2. Also consider the additional length you’ll gain in one direction or another, depending on how you line up the corners of the wood frame.
Keep in mind that you may want a foot or so of trellis “legs” to extend beyond the bottom edge of the trellis wire. They won’t be sunk into the ground very far though. Stakes will still be used for support in the ground.
Step 2) Build the Trellis Wood Frame
Using a saw, cut the wood 2x2s to the desired size. Most often, we don’t need to cut the two vertical sides at all. 8 feet works perfectly for a 7 foot remesh panel. (Edit: See the newer extra-large trellis we created using two panels of remesh below!)
Lay out the wood pieces on a flat work surface. Before attaching anything, I recommend to also lay the remesh sheet on top of the unassembled frame to see if any adjustments need to be made. If all is good, connect the corners of the wood frame either using decking screws or L-brackets. L-brackets are the most sturdy. If your wood wants to split, add small pilot holes first.
To prevent the frame from flexing and to provide increased strength, add a support piece of wood across the frame itself.* You can choose from many options, depending on what style you like. For example, we have cut 2x2s at an angle to add pieces at each corner, the top corners only, or have run a piece horizontally across the middle. See the photos below for ideas.
*Note: You could add the support piece flush inside the frame, or simply attach it to the backside. If inside the frame, add the support piece now. If you are going to add it to the back of the frame, follow Step 3 first (attach the remesh), and then add the support piece on top – essentially sandwiching the remesh panel.
Step 3) Attach the Remesh Panel to Wood Frame
With the wood frame still on a flat work surface, lay the sheet of remesh wire on top of the backside (e.g. where your L-brackets are showing, if you used them). Once it is square along the frame, I suggest to screw down the corners first to prevent things from getting out of whack as you go.
We use short wide-head cabinet screws to attach the remesh to the wood frame. Feel free to get creative with other methods (such as nailing in poultry netting staples), but this has worked swimmingly for us! Choose a junction or corner in the wire, and drill the screw in at a slight angle to pinch and hold the wire between the screw head and wood. Don’t over-tighten and strip the holes. Add screws every foot or so along the outer perimeter and also across your support beams.
This is where using remesh is great. It is thin and light enough to hold securely using cabinet screws. Given its girth and weight, I don’t think this attachment method would work well with hog panel.


Step 4) Install the Trellis
Unlike option one (where we attached the stakes to the trellis first), we typically put the stakes in place and then attach the trellis after. Because these are intended to be more permanently installed, we want to drive the stakes in the ground as far as possible (one foot minimum) before securing anything in place. The trellis itself gets in the way of the work.
That said, make every effort to put the stakes in the ground as evenly and straight up-and-down as possible. Measure the distance between the outer vertical pieces of wood (center to center) and place your stakes there.
Once the support stakes are in the ground, place your new trellis in front of them. Work the wood legs down into the top few inches of soil. Once everything looks good and straight, attach the wood frame to the stakes. While you use wire, we like the added strength of using hose clamps – one at each corner (or close). Fully open the hose clamp, wrap it around the wood frame and stake, and then use a screwdriver or drill to tighten it completely.


Double Remesh Wood-Frame Trellis
Check out our newest DIY trellis design below! We followed the same steps described above, but created a larger wood frame that fit two panels of remesh. The panels are laying horizontally and stacked on top of one another. The middle horizontal piece of wood serves as structural support for the wide design, as well as a place to attach the two edges of adjoining remesh panels to the frame. Installed, it has the same fiberglass stakes on each edge (driven about 2 feet into the ground). The wood trellis feet only extending a couple inches down in to the rock ground cover. Finally, we added an extra center stake for additional support.


Arched Trellises
Last but not least, I’m sure many of you are interested in learning how to build an arched trellis. Unfortunately, remesh panels are too short to be made into an arch. We bought our arch trellises from a local garden supply company. The rusted look matched with our current design, and the widths were also perfect for our space.
However, it is not difficult to create your own arched trellis with hog or cattle panels. You should be able to find these at your local Farm Supply or Tractor Supply store. Standard cattle panels are 16 feet long and 50 inches wide – ideal for a large arched trellis. The curved hog panel must be securely anchored into the ground (such as with T-post stakes) or attached to a sturdy structure like the sides of a raised garden bed. You can use pipe straps or pipe clamps to secure them to wood. That is what we did with our pre-made arched trellis. See the photos and sketch below.
If you’re not up for making your own arched trellis, check out the beautiful arches and arbor options from Gardener’s Supply! I especially love the Moongate and modern Gracie ones.


Other Trellis Designs
Needless to say, there are SO many other trellis design options and ideas out there! We use variations of these two designs as well, such as installing them horizontally as I mentioned above. Or, rather than creating a full four-sided wood frame, sometimes we use wood 2x2s on the vertical sides only.
Furthermore, in addition than creating a free-standing trellis, we often attach them directly to raised garden beds or other structures. Finally, you could install our wood-frame trellis at an angle like a lean-to, supported with stakes or against a structure. You could even put two together to create a teepee! See the photos below for more ideas.


And that is how to build a trellis.
I hope this article gave you plenty of ideas and options for how to build a trellis! And not just any trellis – but a sturdy, attractive, and durable one. As always, please let me know if you have any questions – and feel free to leave feedback in the comments or share this article.
Finally, tag us on Instagram at @deannacat3 or #homesteadandchill to show off the awesome new trellises I know you’re about to make!
If you enjoyed this article, you may also like:
- How to Design & Build a Raised Garden Bed
- 9 Ways to Add Whimsy and Interest to Your Garden
- How to Grow Passion Fruit & Maypops
- DIY Berry Trellis: How to Build a Wire Raspberry or Blackberry Trellis (Video)
- How to Make the Best DIY Tomato Trellis (Stake Weave Hybrid)
- The Top 23 Plants for Pollinators: Attract Bees, Butterflies, & Hummingbirds
- How to Turn Your Yard or Garden into a Certified Wildlife Habitat


124 Comments
David Vovos
Why would you not make A frame supports?
Aaron (Mr. DeannaCat)
Hi David, that is one option, most of our needs for a trellis came with wanting to grow vertically against fences or the side of our house. An A-frame trellis would have taken up more space than what we had unless we hung one half of the A-frame out of the garden bed.
Suzanne
Melons, squash, and pumpkins can all be grown on a trellis without slings, if you don’t mind slight elongation. As the fruit gains weight, the vine and stem actually thicken and become stronger as they fight the pull of gravity. We grew a 37lb pumpkin about two feet off the ground on a nylon net trellis one year.
Rose O'Reilly
Deanna: I grew up on a farm outside of Dublin, Ireland. I love your trellis idea. I have a small garden and want to have a trellis. I love your chickens. I live in San Diego, Ca. as the weather is much warmer here. I have cherry tomatoes, and parsley but would ike more vegetables and vines. Thank you,
Rose
Gene @The California Table
oh so cool! Formerly, I was stymied by the size and weight of hog panels…so I gave up on making a trellis. But you have this brilliant idea to use remesh! I am re-inspired and planning trellises galore:) Thank you for the great post and great ideas. Love your website and reading your blog is a happy spot in my day:)
Shreya Dalela
These trellis ideas are so helpful! I am super inspired. Great work!
Lisa M
Hi,
I wanted to thank you for your trellis design plans. I was going to build a large, very sturdy wooden lattice (from 1x2s) anchored in the ground with 4x4s; a very labor intensive project. I needed this for star jasmine vines which were to act as a privacy screen. While surfing the internet, I came across your web page. I immediately knew this was a keeper! I thought I would share my experience with you and your readers.
I used your design #2. However, I only used pine wood to save money. To protect the wood, I spray painted with Krylon in Hunter Green color. The look is amazing and matches my garden boxes and other garden accent items. I used t-posts to anchor my trellis to the ground and stabilize. I didn’t want to bury the legs of the trellises in the ground – I live in western Oregon and we get a lot a rainfall. Wood in the ground rots quickly. I aligned the posts such that the trellis frames fit snug & flush into the crease of the t-posts. The hose clams were put in place. Then I painted the t-posts and clamps (which were used and faded) to match the trellis once in place. These two trellises aren’t going anywhere. We get 20 mph winds regularly in our little valley – so I needed them to be secure. The trellises stand 8′ tall and are beautiful! Now I need those baby jasmine vines to grow! My total cost including paint was ~$35 each. I wanted to post a photo – but it doesn’t seem to be an option.
Again, thank you for your ideas. I’ve subscribed to your website. Have a sunny day.
Lisa is Oregon
Aaron (Mr. DeannaCat)
That is amazing to hear Lisa and it sounds like you did a wonderful job! You can email us a photo through our Contact tab if you are interested. Thank you for subscribing to the newsletter and we appreciate your support!
Leia
Hi,
Have you ever needed to take out the stakes for your 7ft trellis? Just curious if there’s a simple way. Also, have you made any taller trellises than 7ft? I am wanting to make a ~10ft trellis and searching for a way to do it. I really like your design but not sure if 10ft is too tall for it. If you happen to know, please share! Thank you!
Aaron (Mr. DeannaCat)
Hi Leia, why would you need or want to take out the stakes? If you do so, the trellis wouldn’t be sturdy enough to stand upright as the stakes are the main part that is stuck in the ground. If you were to do this, you would need to burry the actual wood legs of the trellis deeper into the ground to make it more secure. If you want to build a trellis that is 10 feet tall, I don’t believe the 2×2″ boards come in ten foot lengths. I would use 10 foot 2×4’s as the main support legs (with the 2″ part of the board facing front and back) and either use 2×2’s (even though they wouldn’t line up with the exact dimensions of the 2×4’s) or 2×4’s as the cross beams. From there you can either use stakes, bury the 2×4’s into the ground (which will make your trellis shorter), or use cement block footings that you bury and screw your legs into the metal fasteners that come attached to the cement footing. Anyway, those are a few options you can think about, let us know if you have any other questions, hope that helps and good luck!
Rebecca
If I am going to trellis and sucker my tomato plants how far apart would you recommend the planting spacing to be?
Aaron (Mr. DeannaCat)
Hi Rebecca, I think 18″-24″ would work out well. Good luck!
Leia
Hi Aaron,
Thank you for sharing. I wouldn’t want to take out the stakes if I decide to try this idea, but I would like to know how just in case. I don’t have a lot of space to use cement footings, which is why I was drawn to your idea. Thank you again for your help! Your page has made me excited to try this project!
Aaron (Mr. DeannaCat)
Hi Leia, no problem at all. If you wanted to take the stakes out you would have to loosen the pipe clamps we use to attach the stake to the wood trellis and from there, you just have to pull the stake out of the ground and hope it is not totally covered in vines. Also, in regards to your trellis idea, you could also use pressure treated wood for the trellis which would allow you to bury the wood deeper without a risk of it rotting as easily. Thanks for reading and good luck with your project!
Tiffany Zavala
Hi there! I love the trellis designs. Wondering if you think the remesh would be sufficient to keep a cat out of a garden bed. I have about a 4’ x 8’ in-ground that I want to cultivate, but I have noticed a neighborhood cat making it his litter box recently. Interested in a simple fence with a door like yours, but any other tips are appreciated!
Aaron (Mr. DeannaCat)
Hi Tiffany, I would imagine the remesh would work in keeping a cat out unless it was very determined. Also the openings are fairly small so the cat would have to be pretty slender to fit through as well. For a cat, if it seems like more trouble than it is worth, they will usually move on to other things. Hope that helps and good luck!
Suzanne
I place cattle panels horizontally on my raised beds. The plants are able to freely grow through the holes and my chickens and dogs are deterred from digging up the friable soil. I use fence staples to anchor them to the tops of the frames, so they’re not in direct contact with the soil.
Aaron (Mr. DeannaCat)
Thats a good idea for animal proofing your garden beds!
Maris
Hello – I am planning to plant some jasmine to use as a bit of privacy — would the simple remesh frame without the wood be sturdy enough? I know the wood will add to the aesthetic but simply as far as being able to support the plant growth could I do this without the wood frame?
Aaron (Mr. DeannaCat)
Hello Maris, jasmine vines can get quite large and crazy so they definitely need the wood frame for the added stability. We actually had a store bought wooden trellis break in half with a jasmine vine attached to it during a wind storm which prompted us to start making these trellises instead. Good luck and enjoy the jasmine as its aroma is intoxicating!
Tyler
We recently purchased some passionfruit vines and would like to build some wood trellises like yours. Which fiberglass stakes did you buy? Are they tree stakes? They look wider than the 6 ft. fiberglass tomato stakes on amazon, and the tree stakes all say they flex to allow for wind.
Aaron (Mr. DeannaCat)
Hello Tyler, we get the stakes at our local Ace Hardware store but I believe these are them here. It says the 6 foot are 3/8th inch diameter and the 8 foot stakes are 1 inch diameter, we have both the 6 foot and 8 foot stakes and have used both lengths for these trellises. Hope that helps and good luck on your trellis building!