

Homestead Update: Starting the New Garden

Hey friends! It’s been a couple months since we last checked in with a new homestead update… and we’ve accomplished SO much in that time! Planted fruit trees, landscaped a new hedgerow, worked on irrigation, removed some existing plants… and perhaps the most exciting of all: broke ground on the new main raised garden bed space! That particular project is nowhere near complete (it will be a large and ongoing one), but we’ve made some really stellar progress that I’m excited to share with you today.
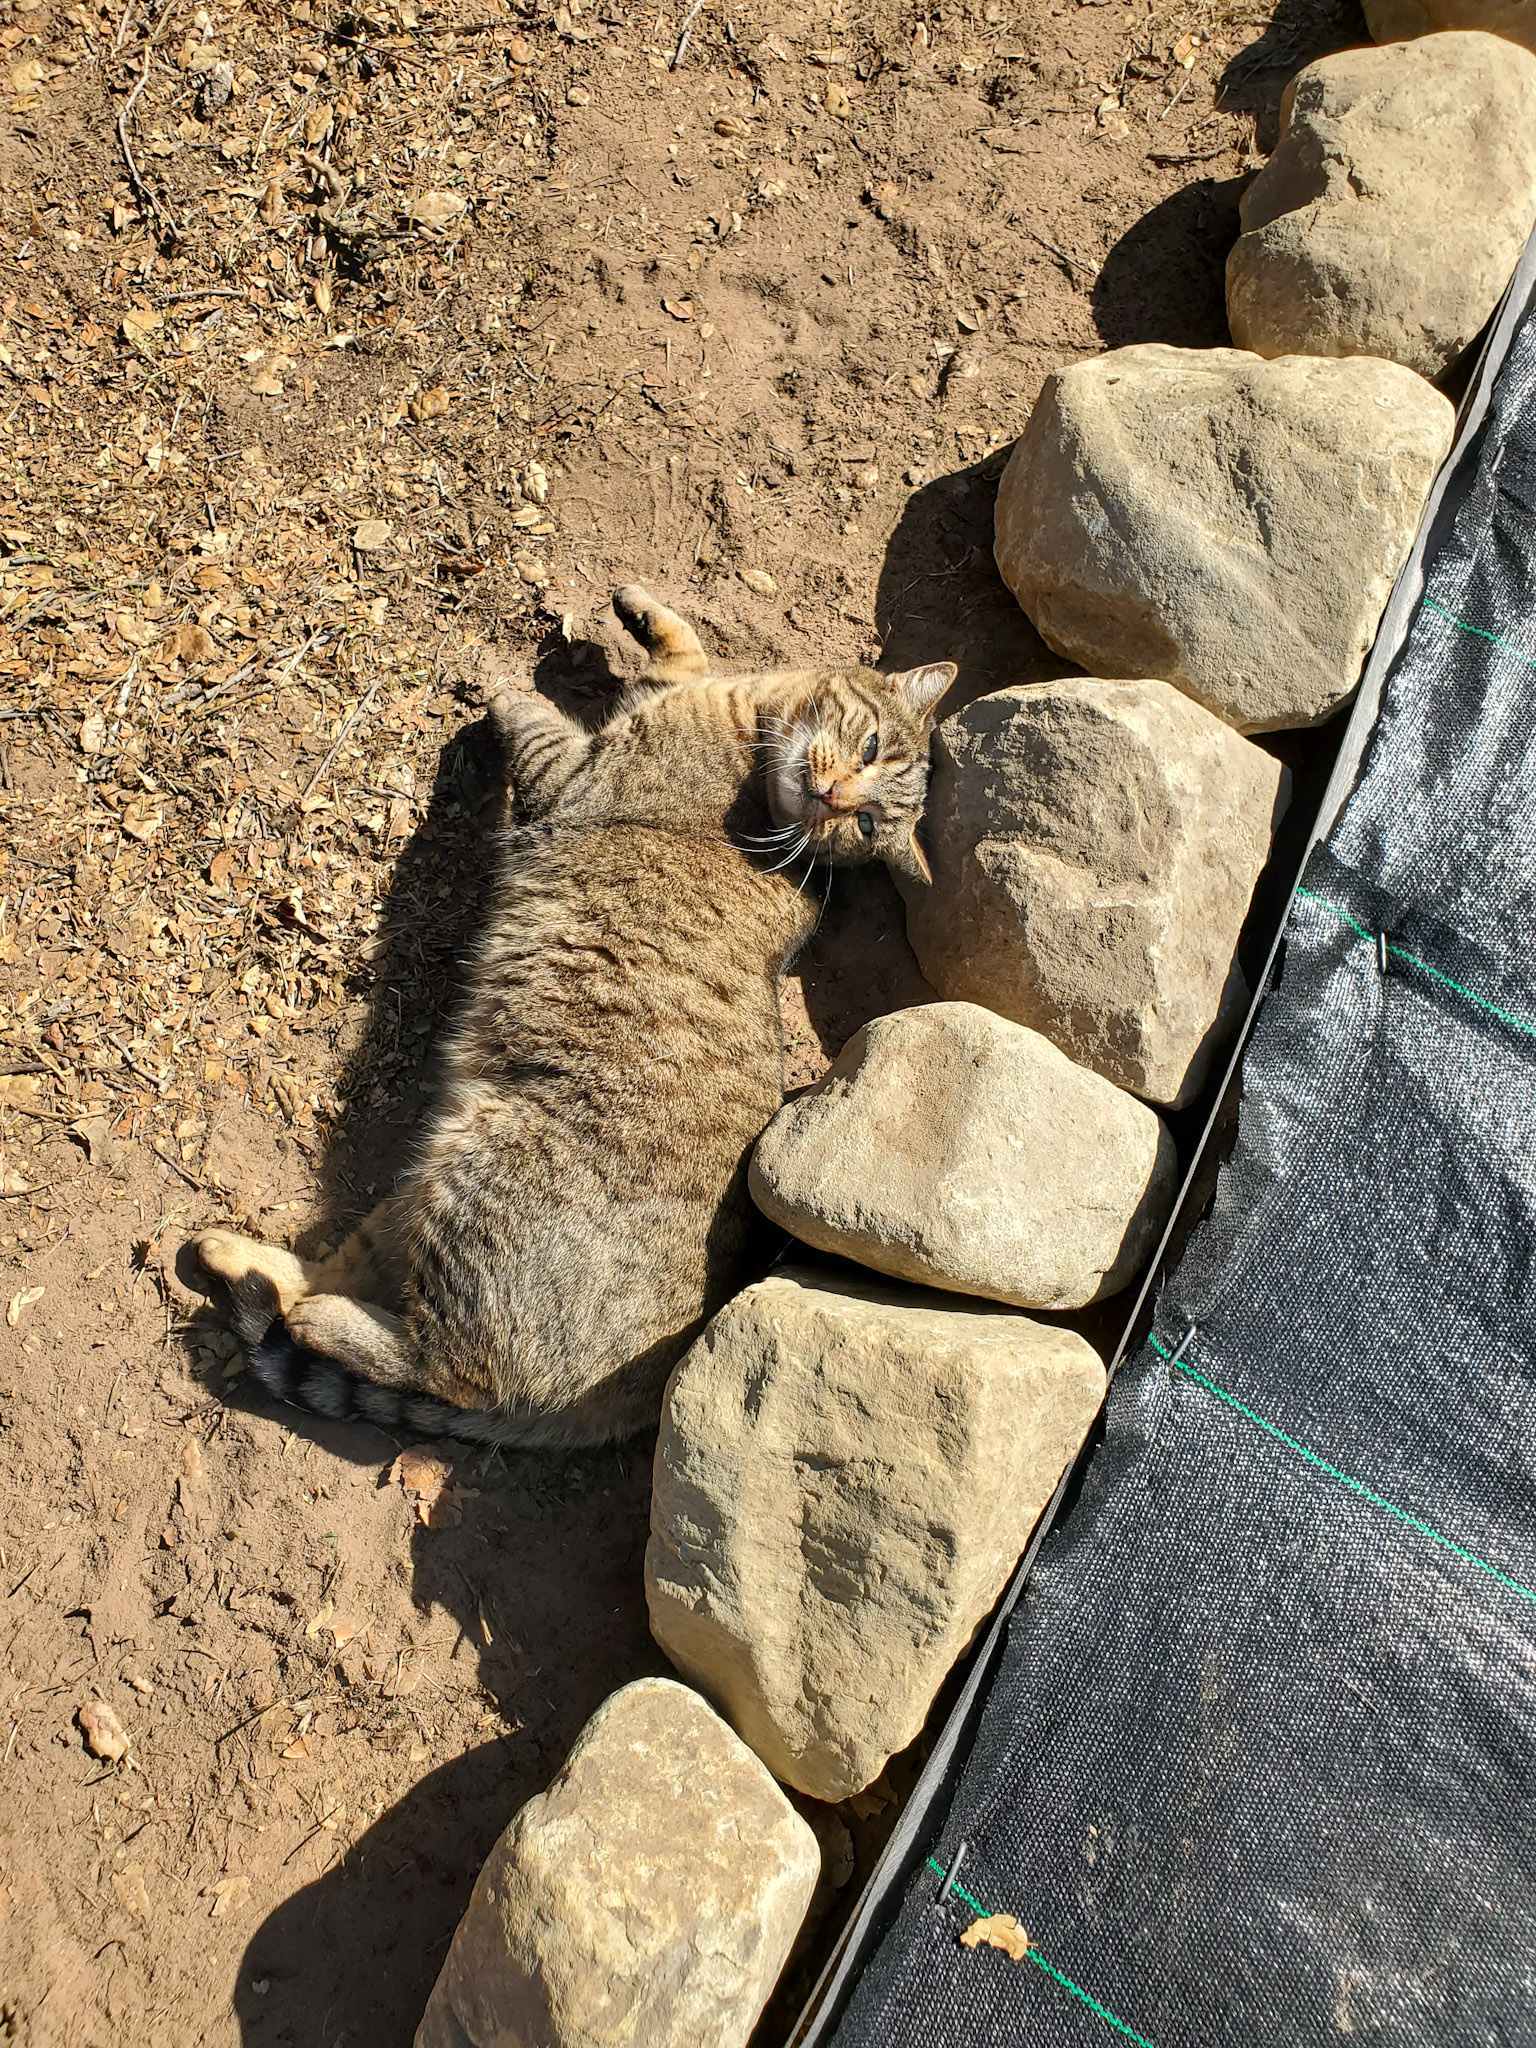
So, let me show you what we’ve been up to! You know me: I’ll share my thought process, lots of photos, details on the materials we used, and drop plenty of helpful tips and resources along the way. Also, get ready for quite a few kitty pics! We’re absolutely smitten with the barn cats we adopted with the property, and I think they love us back.
I hope you enjoy following along – and learn a few things too!
In case you missed the previous updates:
- A Brand New Chapter: We’re Moving!
- Chicken Coop Deep-Cleaning & Makeover
- Homestead Update: Our New Grow Room
- Full New Property & Garden Tour (video)

Would you like to save this?
Disclosure: Homestead and Chill is reader-supported. When you purchase through links on our site, we may earn an affiliate commission.
Fruit First
If you’ve read our “how to start a homestead” guide, then you know one of the things I recommend doing in any new homestead or garden journey is to plant fruit trees early on. Unlike veggies or herbs, trees can take many years to mature and bear fruit, so it’s great to get them in the ground (and feeding you) as soon as possible. Once established, they’re often far less work than a veggie garden too!
So far, we’ve planted four avocados, two fig trees, a fuyu persimmon, two Meyer lemons, two pomegranates, two pineapple guava, a lemon guava, and a dwarf weeping mulberry. Figs, lemons, and mulberries are self-fertile, but the pineapple guava, avos, and pomegranates will bear far more fruit with a partner around for cross-pollination. Avocados do best with a mix of Type A and Type B avocados around, such as a Hass (type A) and Fuerte (type B).
Many of the new additions were planted in a new hedgerow we created along the southwest corner of the property, while a couple of the trees went into the existing orchard. We planted the avocados in a big open space on the far northeastern property line, which will grow in to provide a fantastic living privacy screen from the modestly busy country road on that side.
We also inherited a few established fruit trees with the property: a mature apricot along with some younger peaches, apples, and citrus. I still want to add pears, plums, and many others with time! What edible trees are on your future dream list?


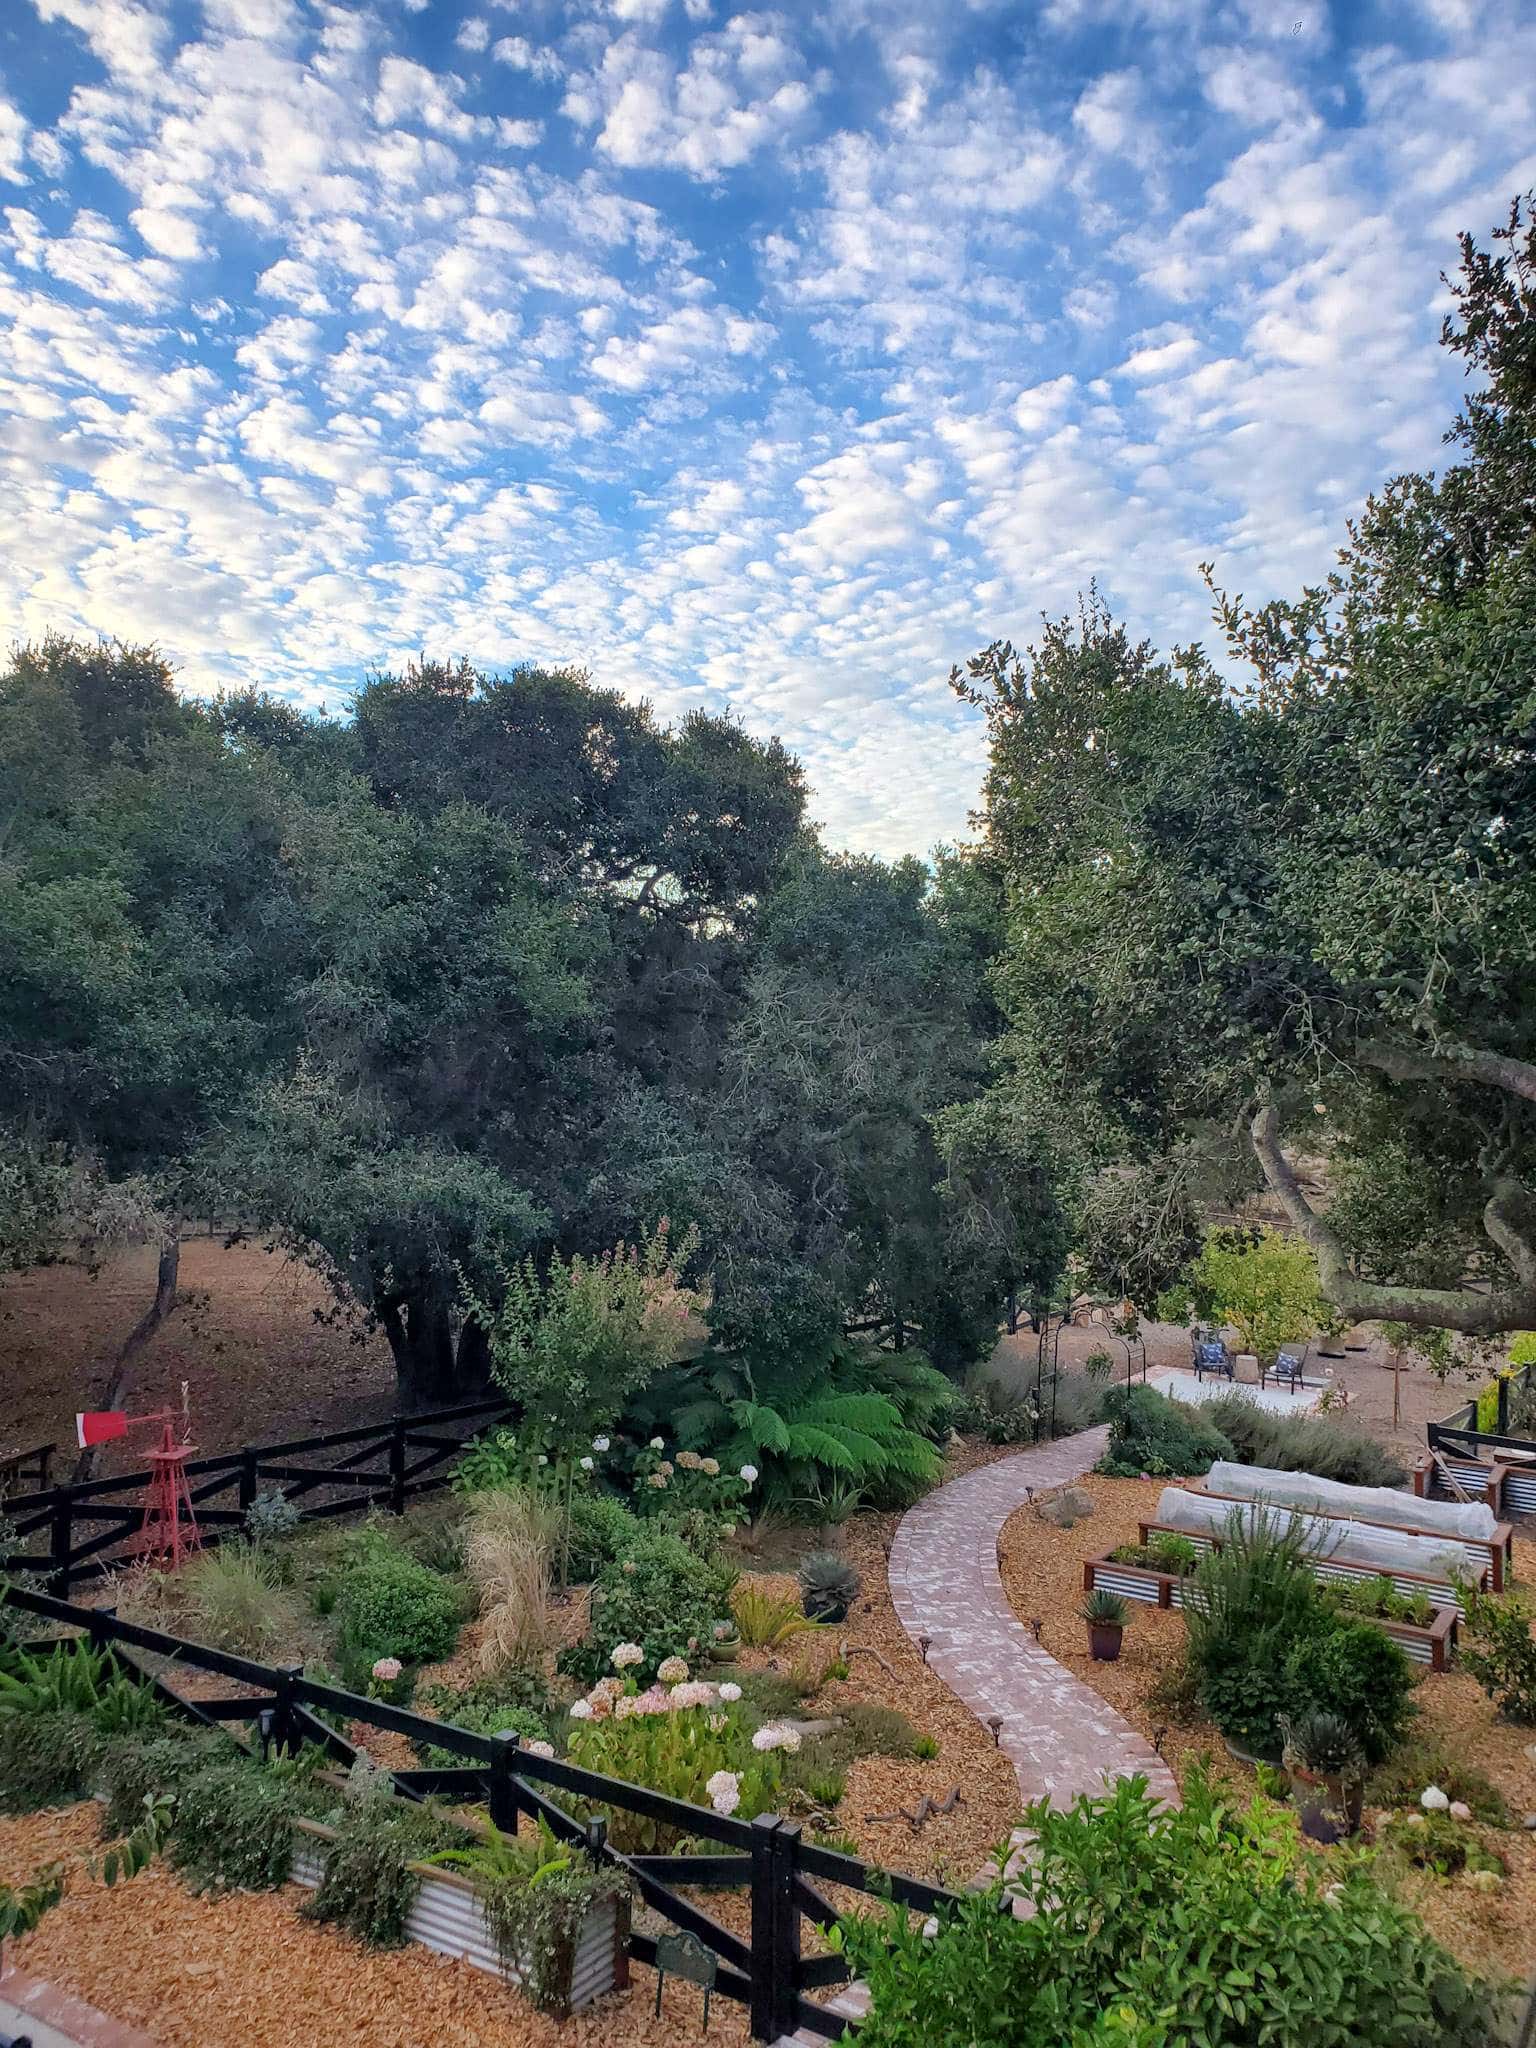
Clean-Up on Aisle Brick
You know that curvy brick pathway in the center of the existing garden? The one that was once lined with blooming purple catmint? Well… we dug out all the catmint. I know, I know. It was really romantic and dreamy… for the three months or so out of the year it flowered. Yet as the flowers faded, it quickly became an overgrown mess of brown. Catmint needs frequent pruning to prolong blooms, and also needs to be fully cut back to the ground every winter. That was simply too much work for us to maintain looking nice – especially 50+ feet or so of it, times two for both sides of the path!
Maintenance aside, another issues drove us to eliminate the catmint. The catmint became severely infested with sage leafhoppers, which started to spread to other plants in the garden. Leafhoppers are sap-sucking pest insects that damage plants by piercing and sucking nutrients from leaves. They are incredibly difficult to control in an organic manner, and removing the host plant (aka, the catmint) is one of the key ways to knock down their numbers. In addition to digging out the plants, we also released green lacewings in the area – a beneficial insect, and natural predator of leafhoppers along with aphids, mealybugs, and spider mites.


And now, the part you are likely waiting for most…
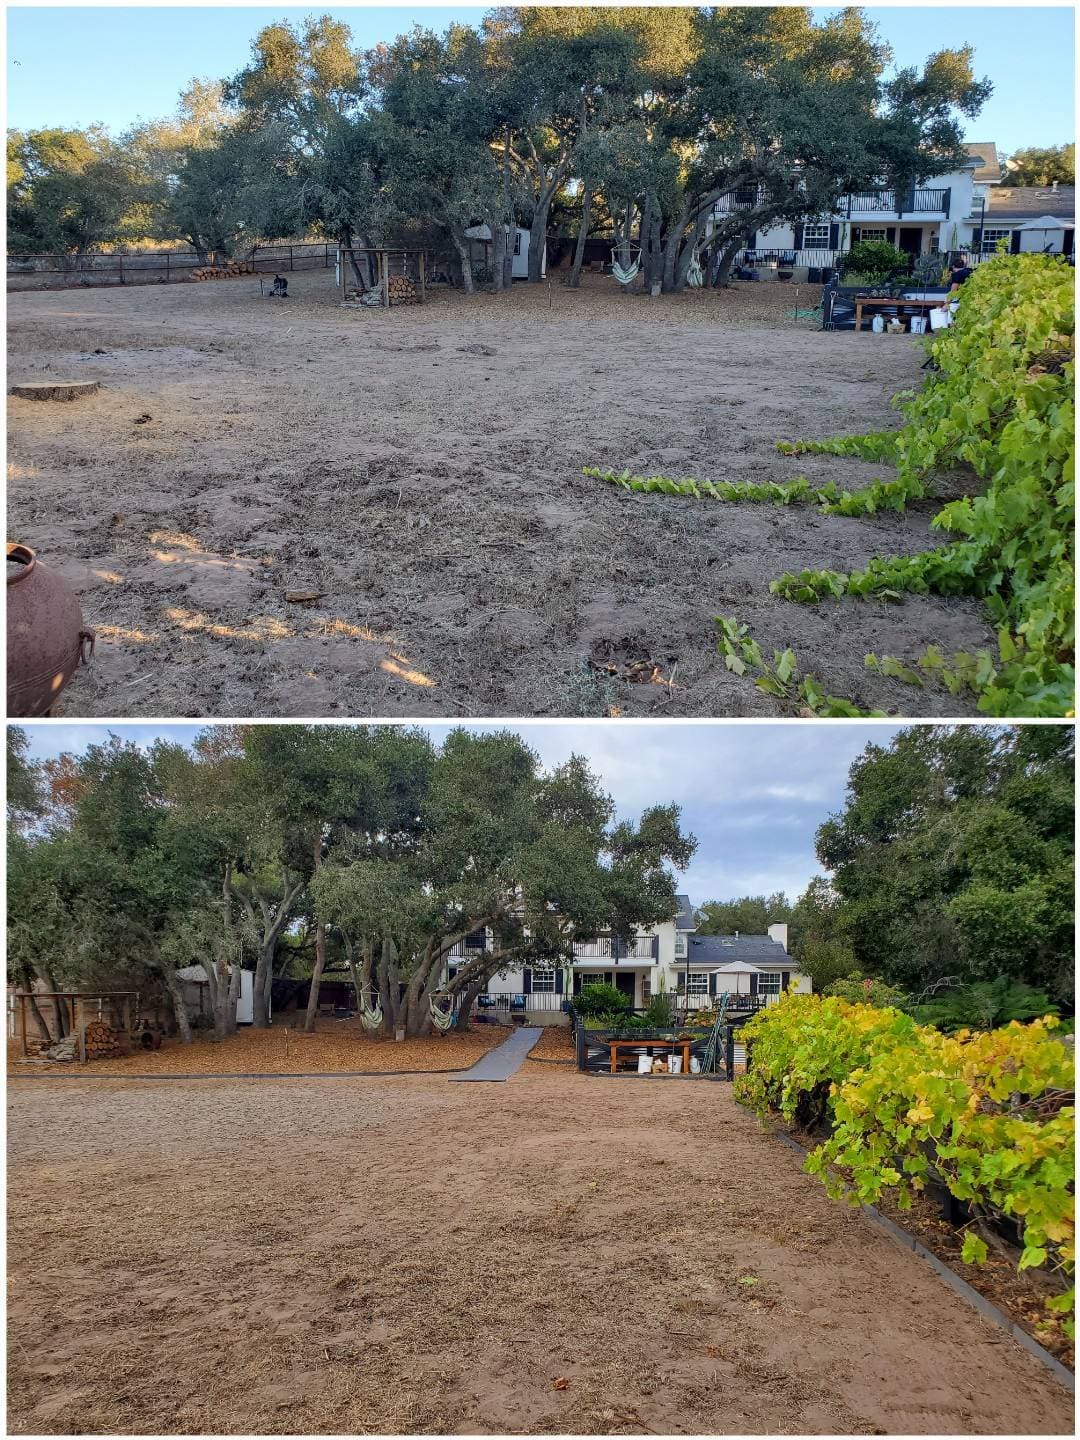
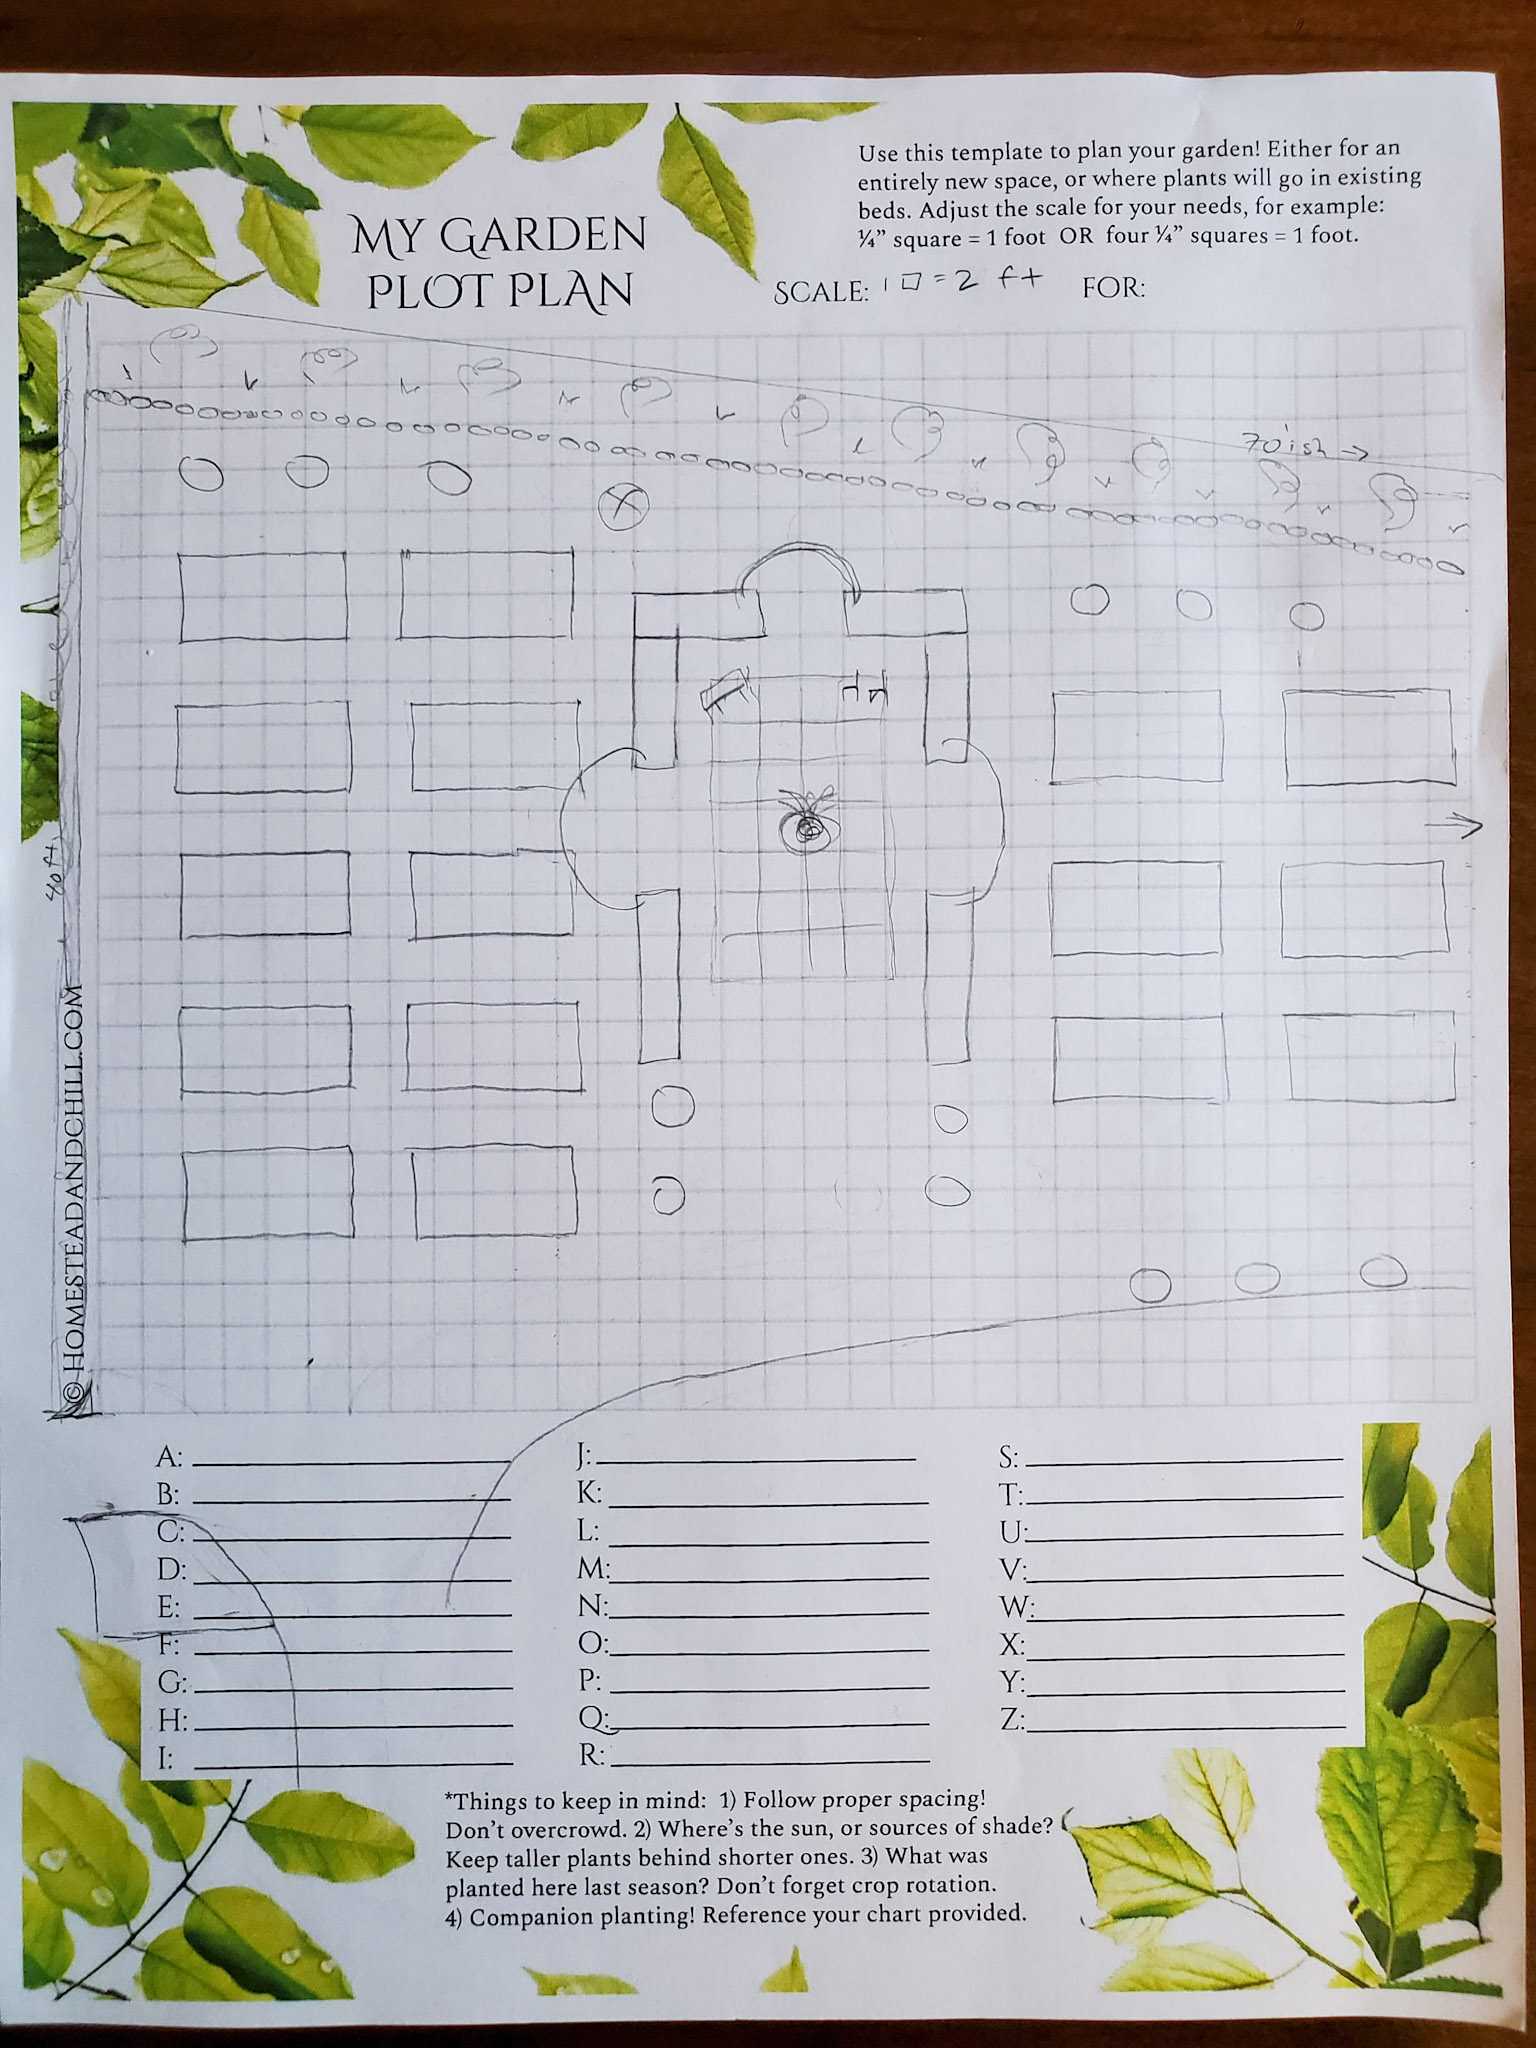
The Start of the New Raised Bed Garden Space
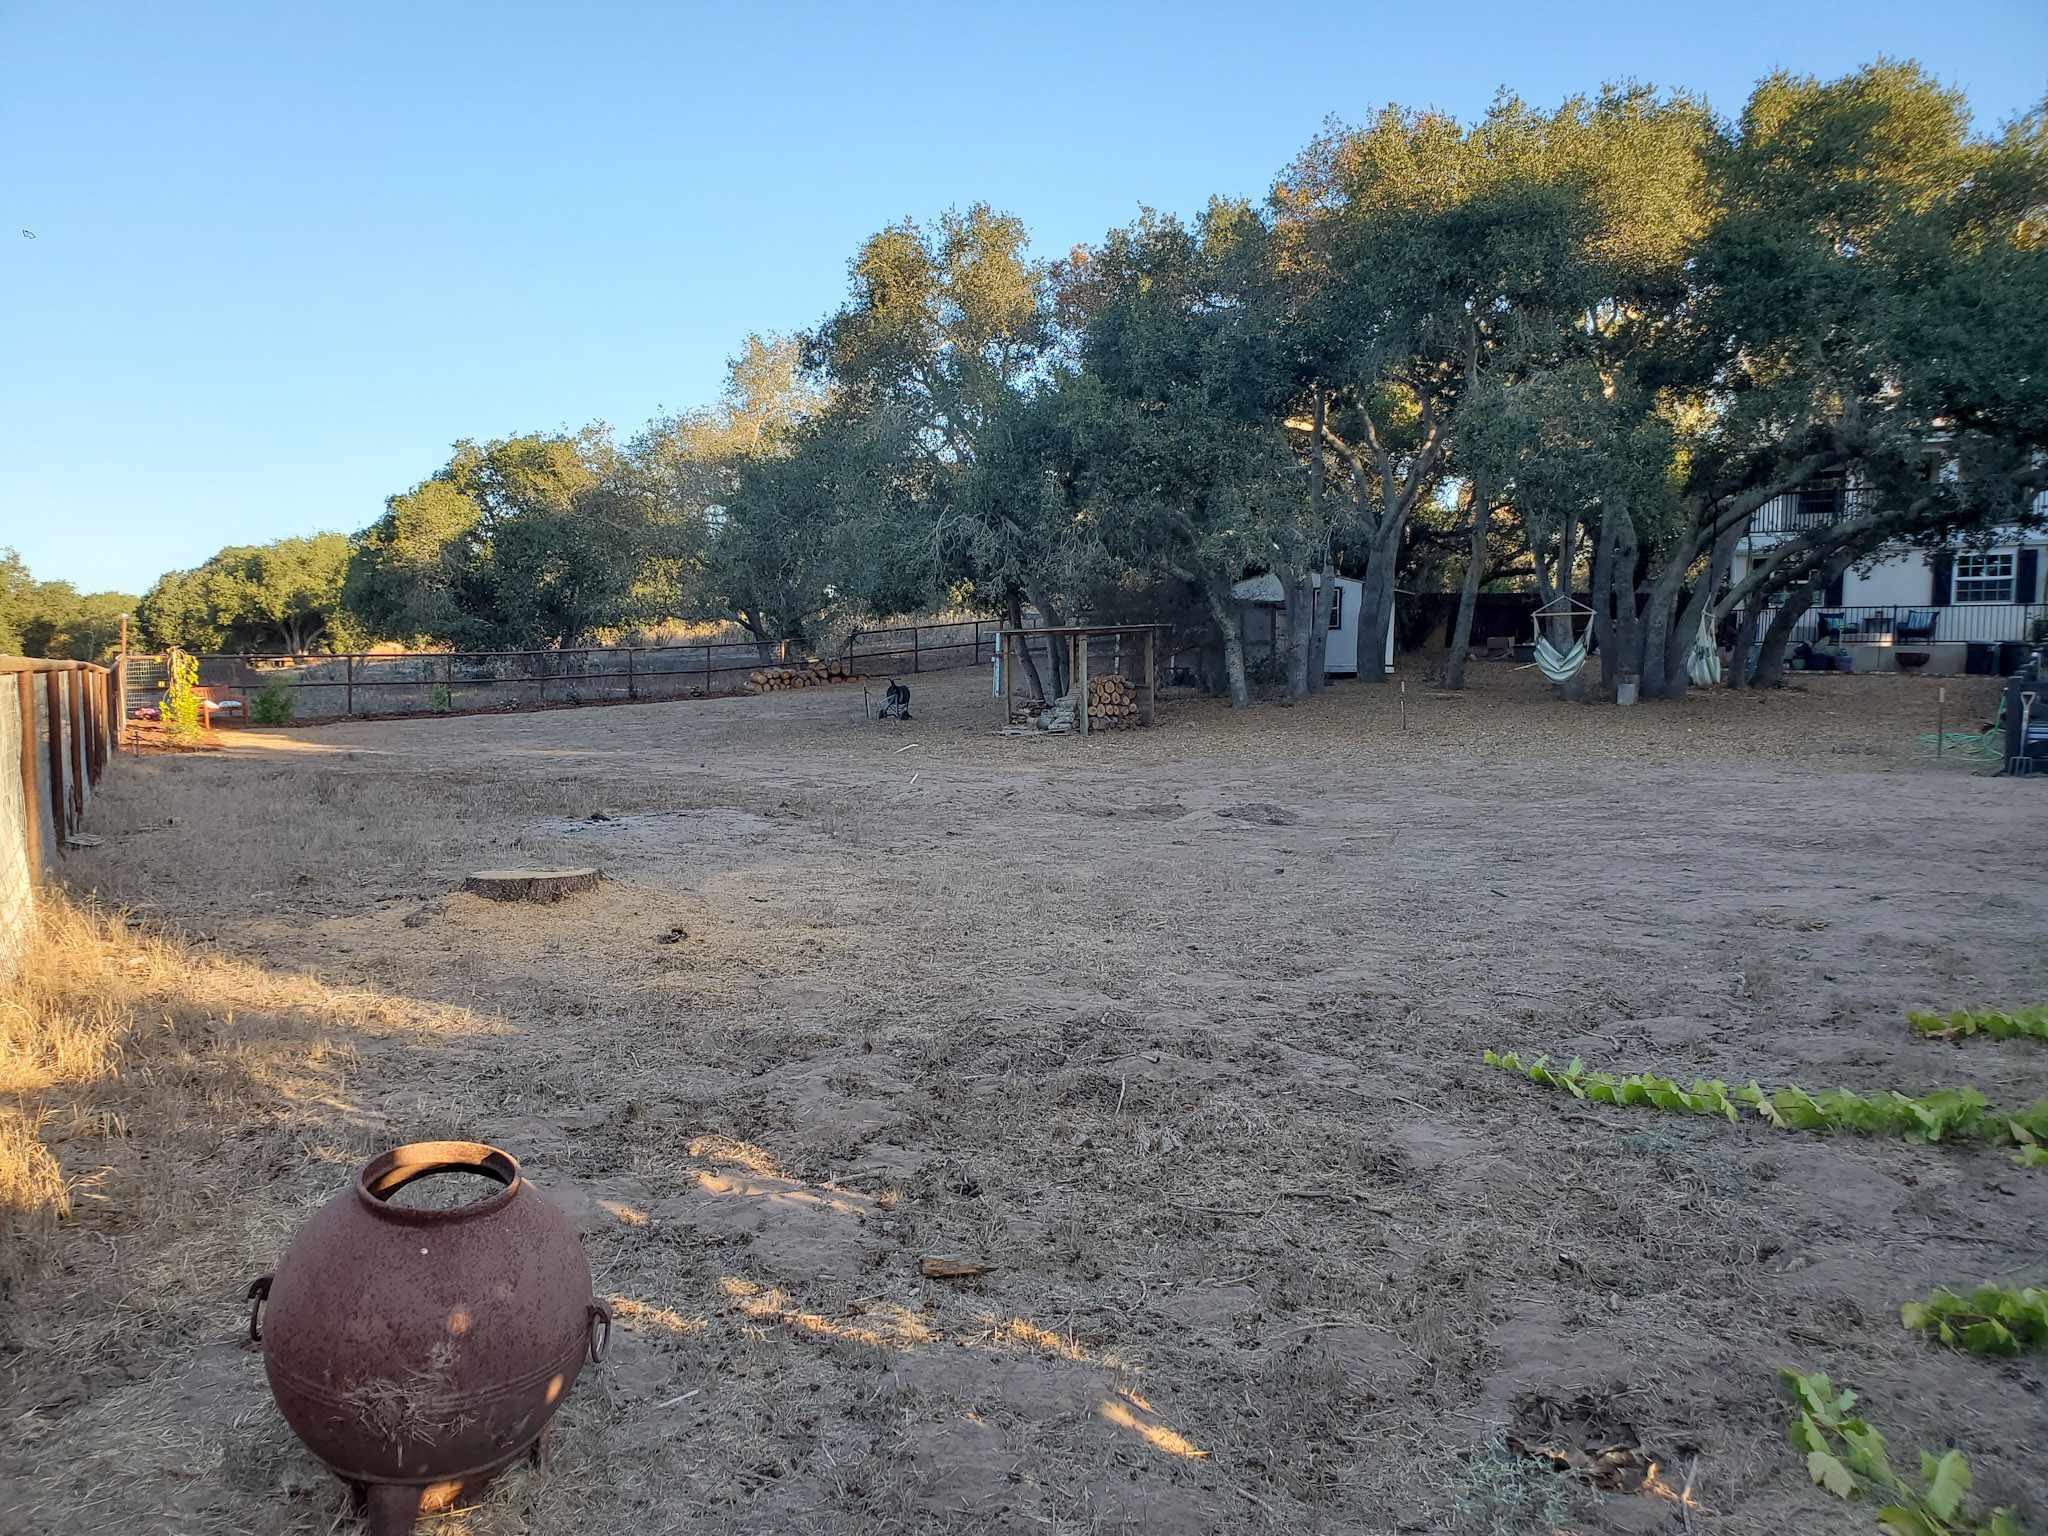
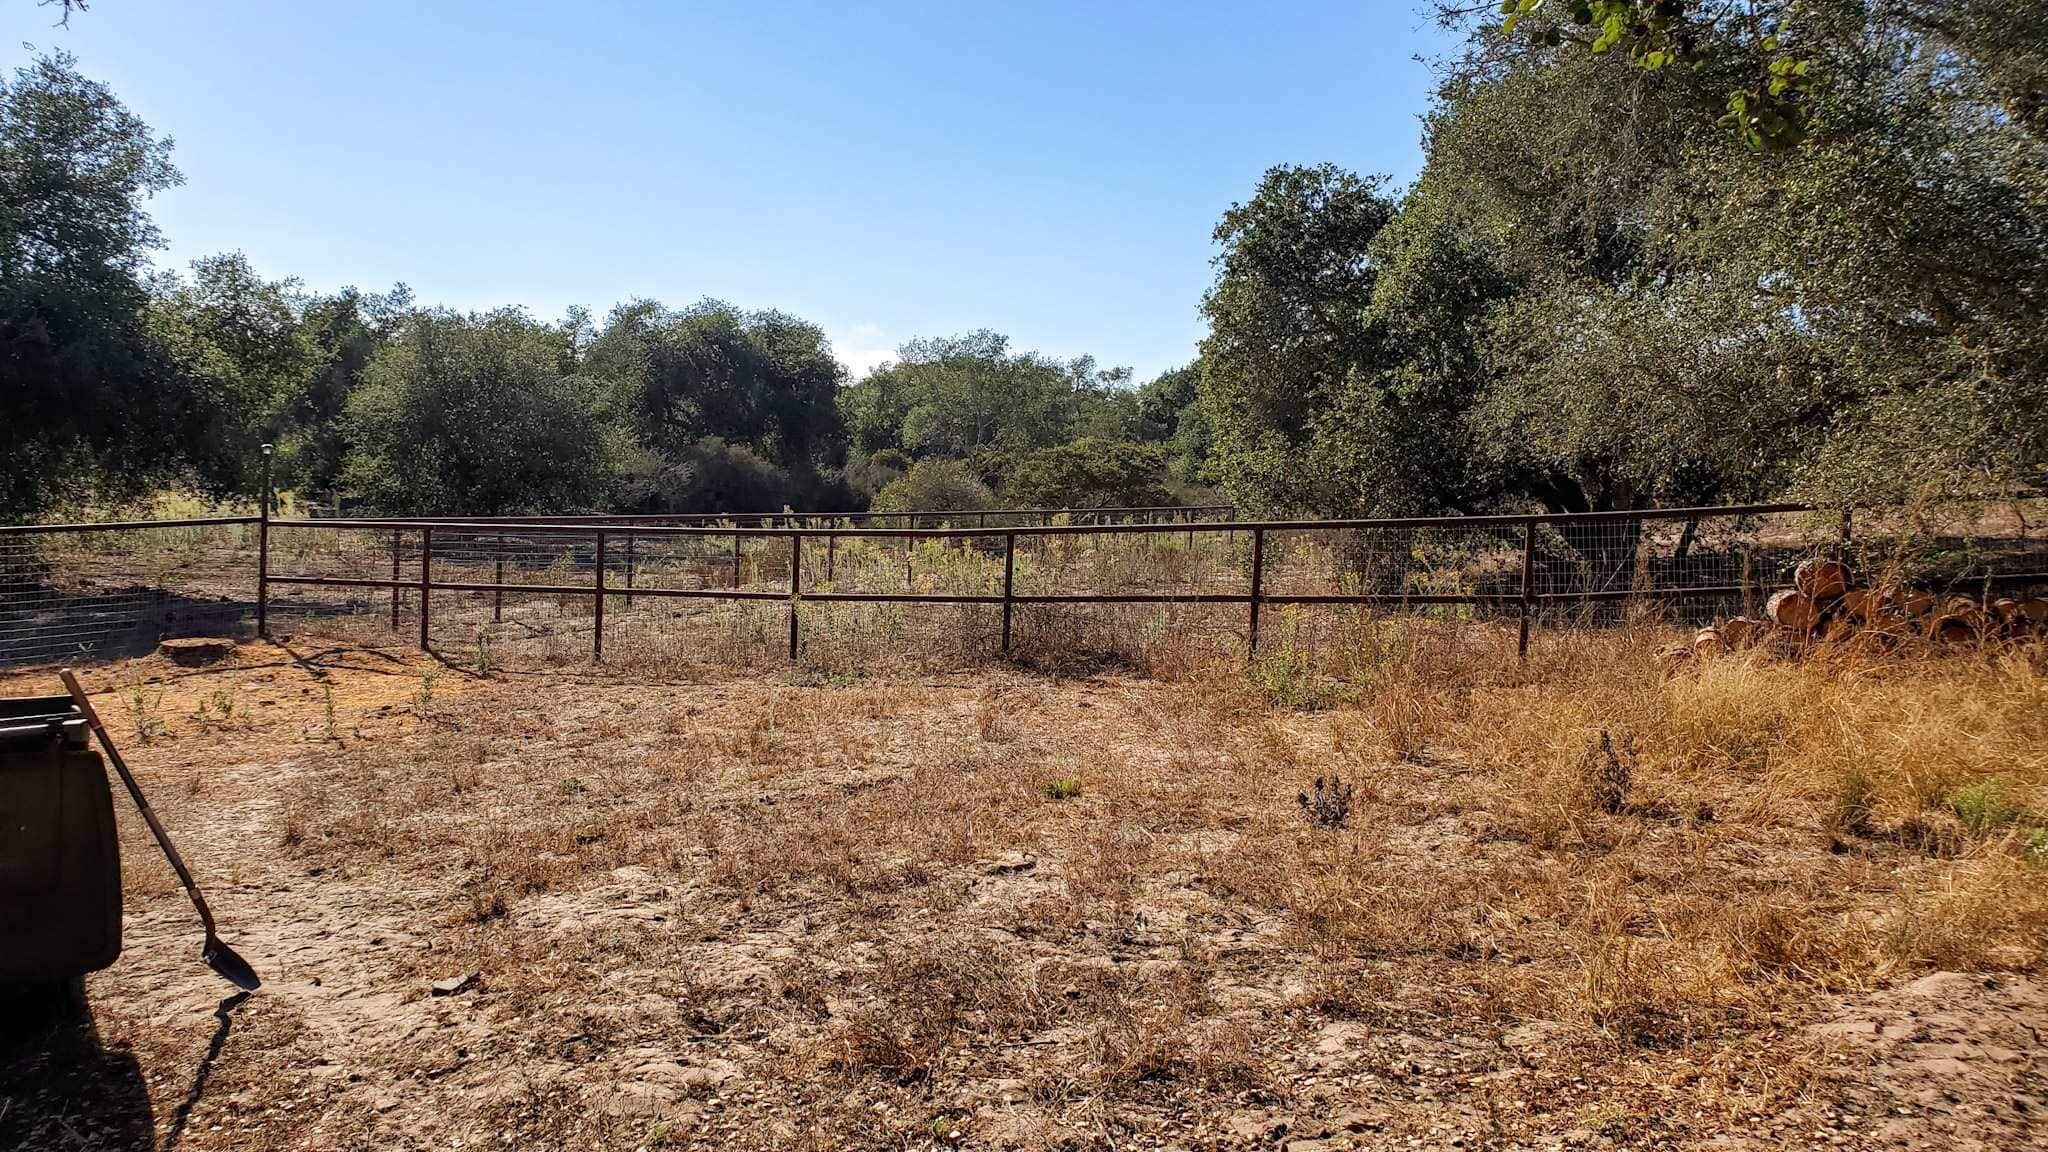
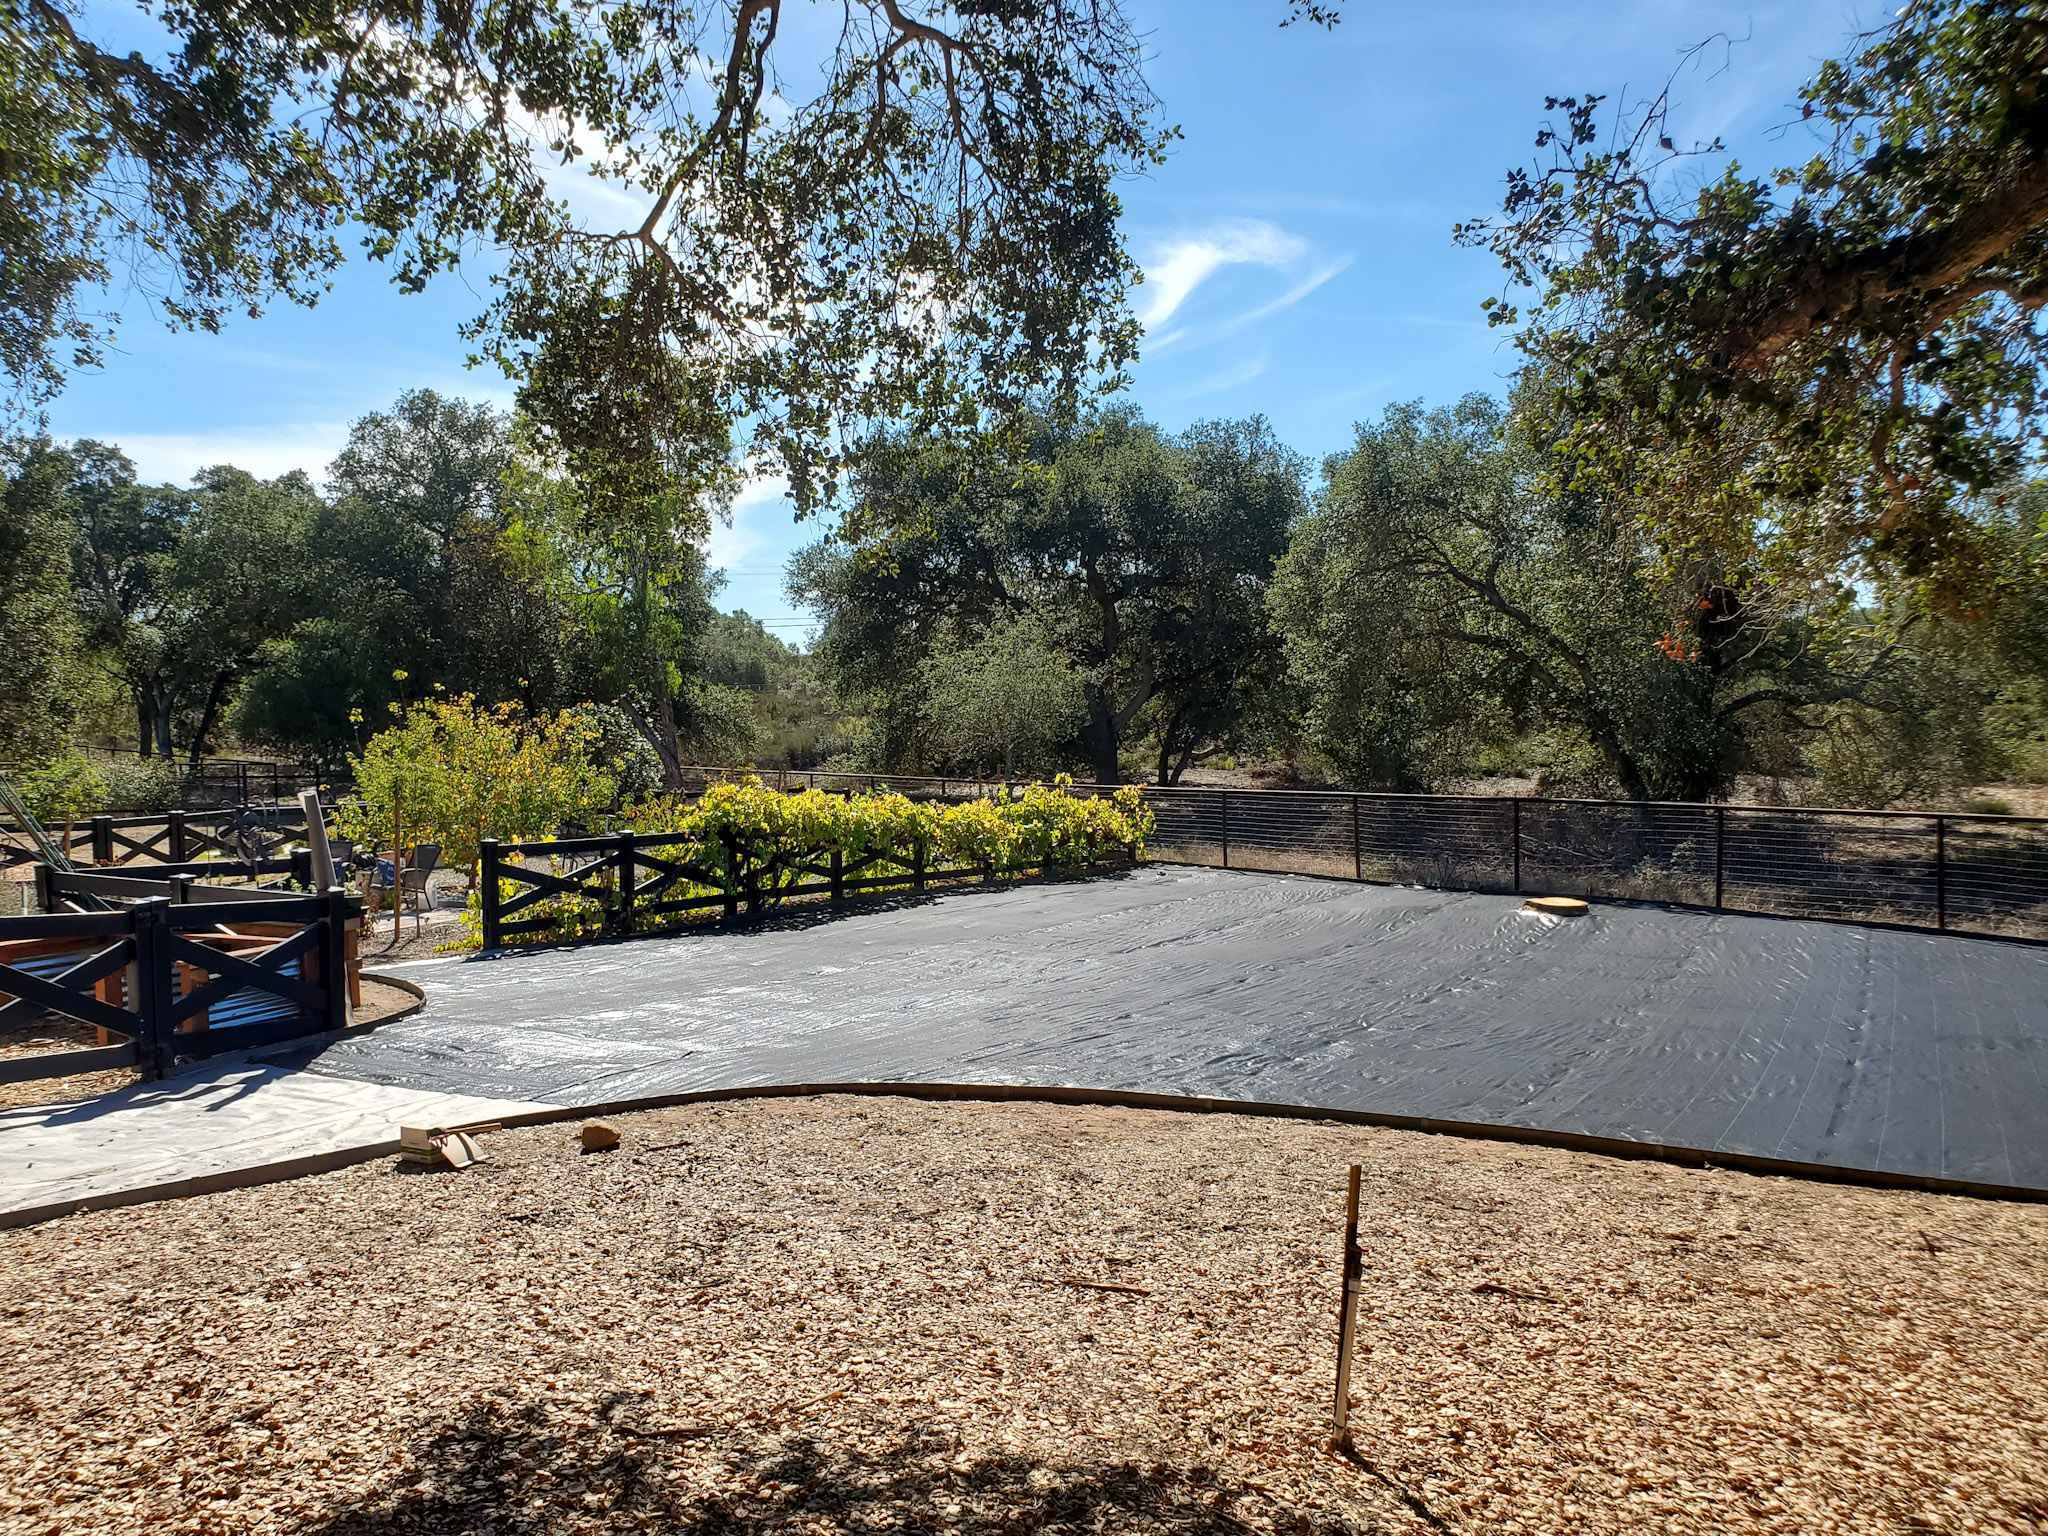
When gazing out at our soon-to-be new garden area, it was easy to feel overwhelmed at first. First of all, the space is pretty huge – nearly 140 feet long by 60 to 40 feet wide (getting more narrow at one end). It was a blank slate, but not necessarily the most inspiring kind. Nothing but dirt, knee-high weeds, gopher mounds, holes and uneven ground. I had a long-term vision developing, but… where to start? One step at a time.
As you continue reading, keep in mind that we followed very similar steps as we built out our previous front yard garden space – without the help of heavy machinery, just by hand and wheelbarrow, and even had to remove grass first – so all of this easily applies to smaller gardens too!

Step 1: Weeds Be Gone
My mom came down to visit from Washington just after Labor Day, and she unknowingly got the ball rolling on the whole project. Like me, she likes to keep busy and moving. After she’d finished weeding a few planters around our patio area, she asked where to weed next. I looked around and said, “Well, I guess let’s head down there” and pointed to the open field where the garden would go. So all three of us grabbed gloves, hats, and buckets to fill – and set off to start pulling weeds by hand. Yes, pulling weeds by hand in a big field may seem silly, but it was quite therapeutic! We don’t have a ride-on mower, and even if we did, that side of the property wasn’t accessible for small vehicles (yet).


Once the wedding was done and Mom had gone home, we rehabbed an old irrigation system and planted a hedgerow along the far fence. Those few plants and fresh mulch made the whole corner pop! Yet hauling over heavy potted plants, bagged soil and bark for this very modest-size project (in comparison of what was to come) made us quickly realize we needed more help… but not mom help. It was time to look into getting our first heavy machinery for the homestead.

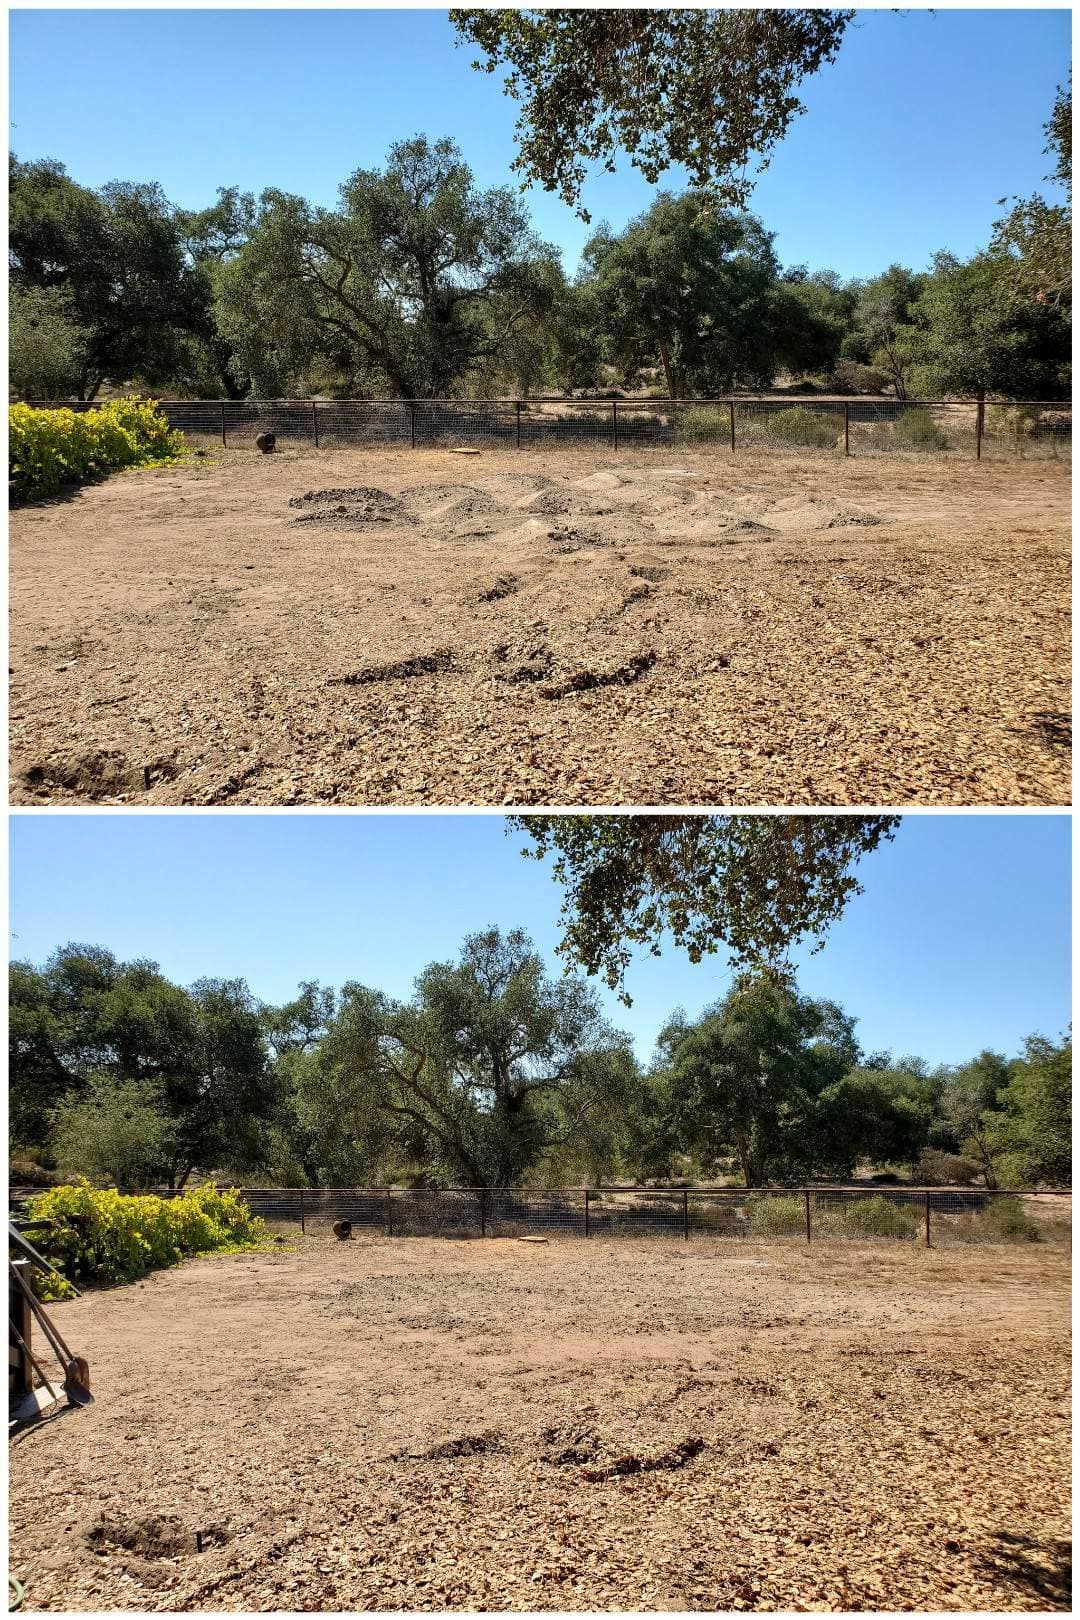
Step 2: Dirt Bowl
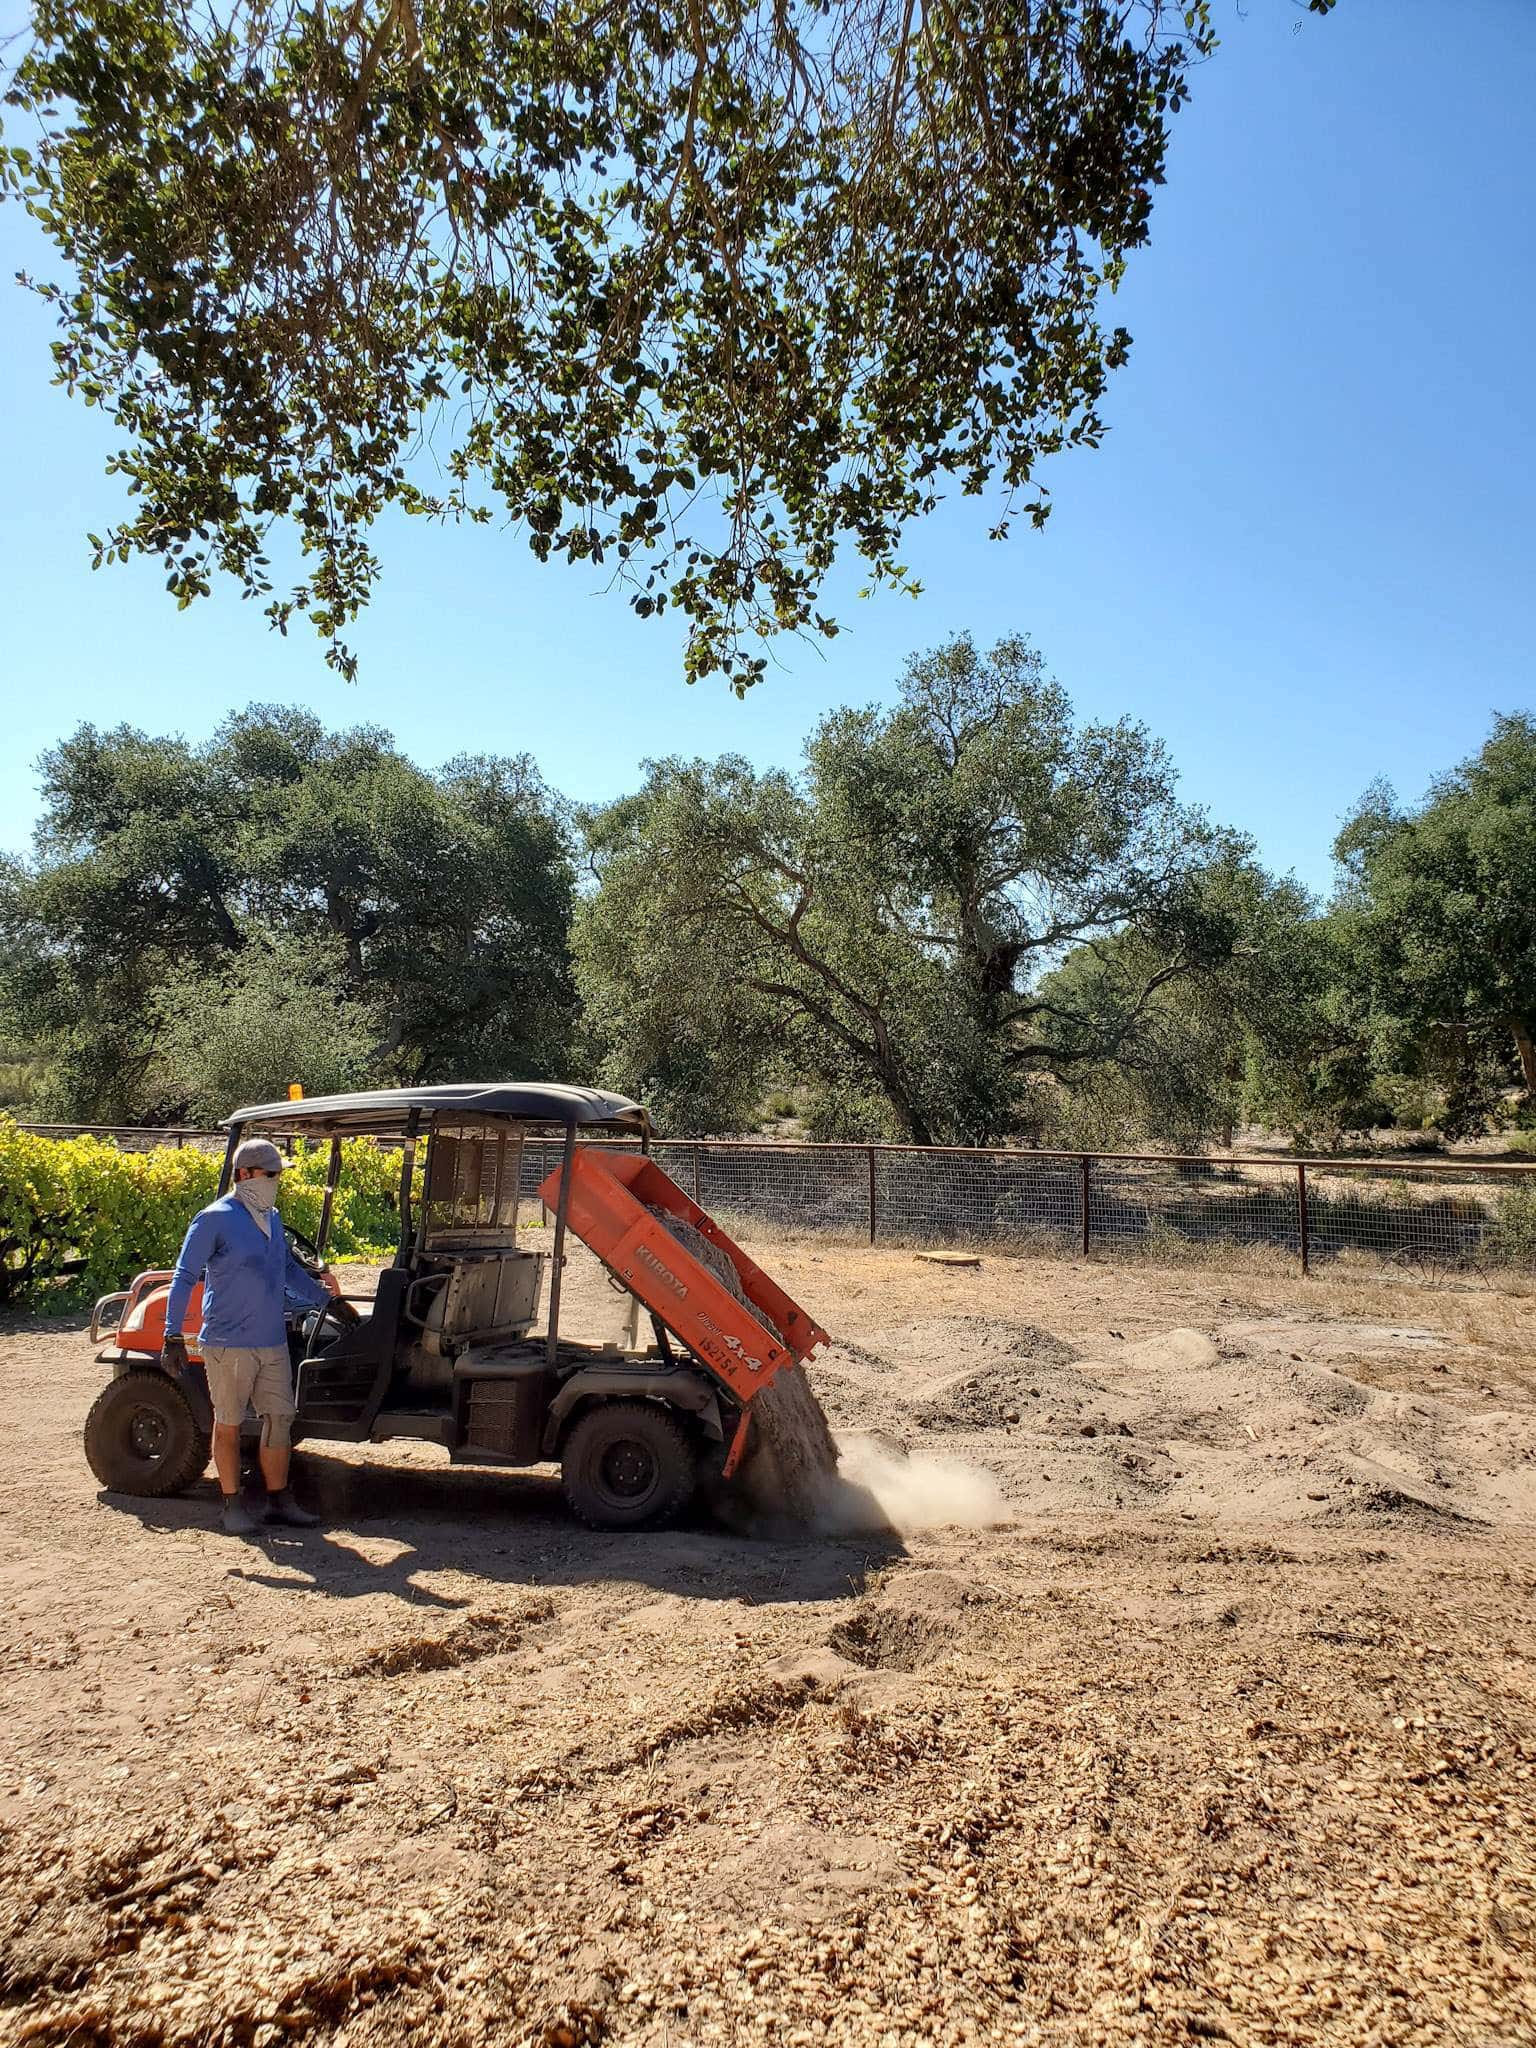
The next logical step was to level out the ground some, including filing a large bowl or depression right in the middle of the future garden. I did a quick calculation and determined that 6 yards of bulk fill soil should do the trick. Around that time we also started looking into used UTVs (Utility Task Vehicles) locally. A tractor would have also been helpful for all the earth and gravel-moving this project will require, but a cart or UTV will be the most versatile and useful for us long-term. We were able to test and then purchase a used Kubota RTV, and we love her already! Her name is Dusty.
In order for Dusty to drive over to the new garden area, we first had to remove a section of the black vinyl fencing that surrounds the existing garden and orchard in the center of the property. I do like that space, but it definitely splits up the property in a way that isn’t the most accessible or free-flowing at times. Once that was opened up (but still a very tight squeeze!) we loaded Dusty up with the bulk soil that had been dumped in the front driveway, shovelful by shovelful and load by load. Once all the soil was moved to the back, we spread and leveled the area with hard rakes. I also leveled other areas, spread gopher mounds, and picked up large sticks and debris.


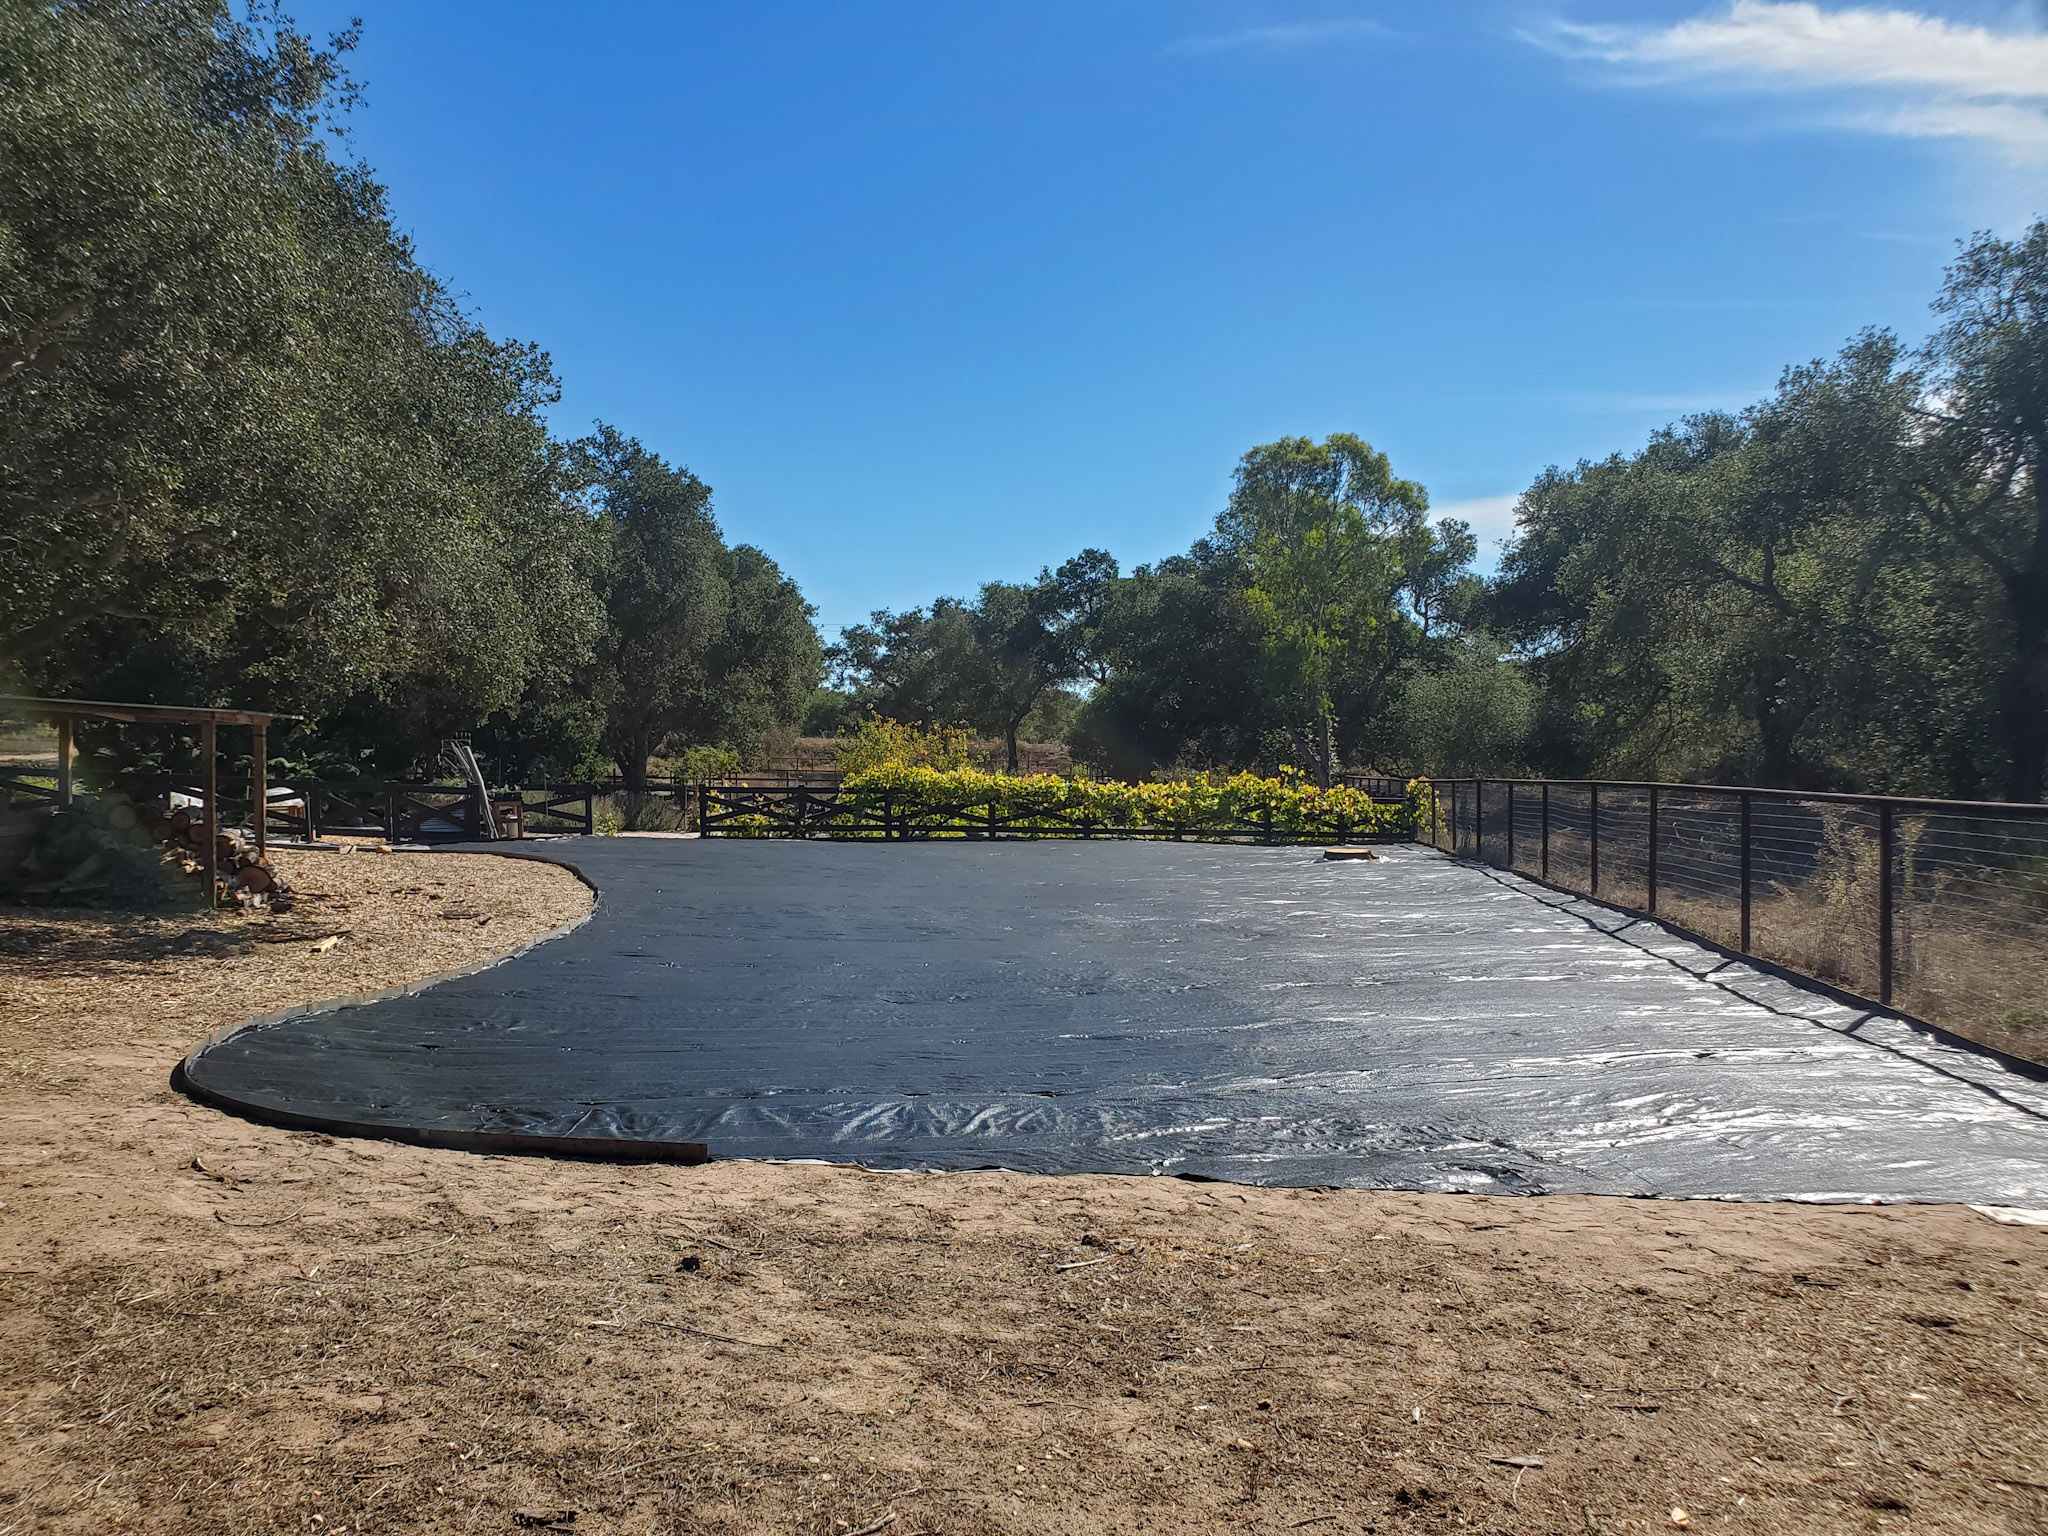
Step 3: Defining the Space
It’s amazing what a little definition can do in a space! As soon as we installed the edging, my vision really started coming to life. All of you following along on Instagram said the same, and also that it made the area look even larger than you first thought.
The plan is to put gravel over the whole space soon (more on that in a moment), along with a long “flower bed” of in-ground plantings and bark mulch along the back side, so we needed a sturdy border that would hold the gravel and mulch in – while also keeping the weeds out.
We chose to use hammer-in steel edging by Edge Right. It’s made of Corten steel, the same stuff sea cargo containers are made of, so it’s incredibly durable and weather-resistant. The metal starts out looking silvery and fresh, but will develop a rustic and protective reddish-brown patina over time. The edging comes in 4-foot pieces, and is available in either a 6-inch or 8-inch deep sizes. Since our soil is very sandy, the folks at Edge Right advised the 8” deep edging was the best option as it would stay most secure in place over time.
Installation was easier and quicker than I anticipated! We did it all in one long weekend, working on it for maybe 2 to 3 hours per day – so about 7 or 8 hours of active install time total for over 350 feet of distance. I am damn proud to say that I did ALL the hammering myself. I am a Cancer and a bit of a perfectionist, so it worked out best for Aaron to hold each piece steady while I hammered them in.
Let’s just say thank goodness for CBD! I have been heavily relying on my favorite organic CBD oil and topical roller to soothe my aching muscles and jostled joints with all this heavy lifting.


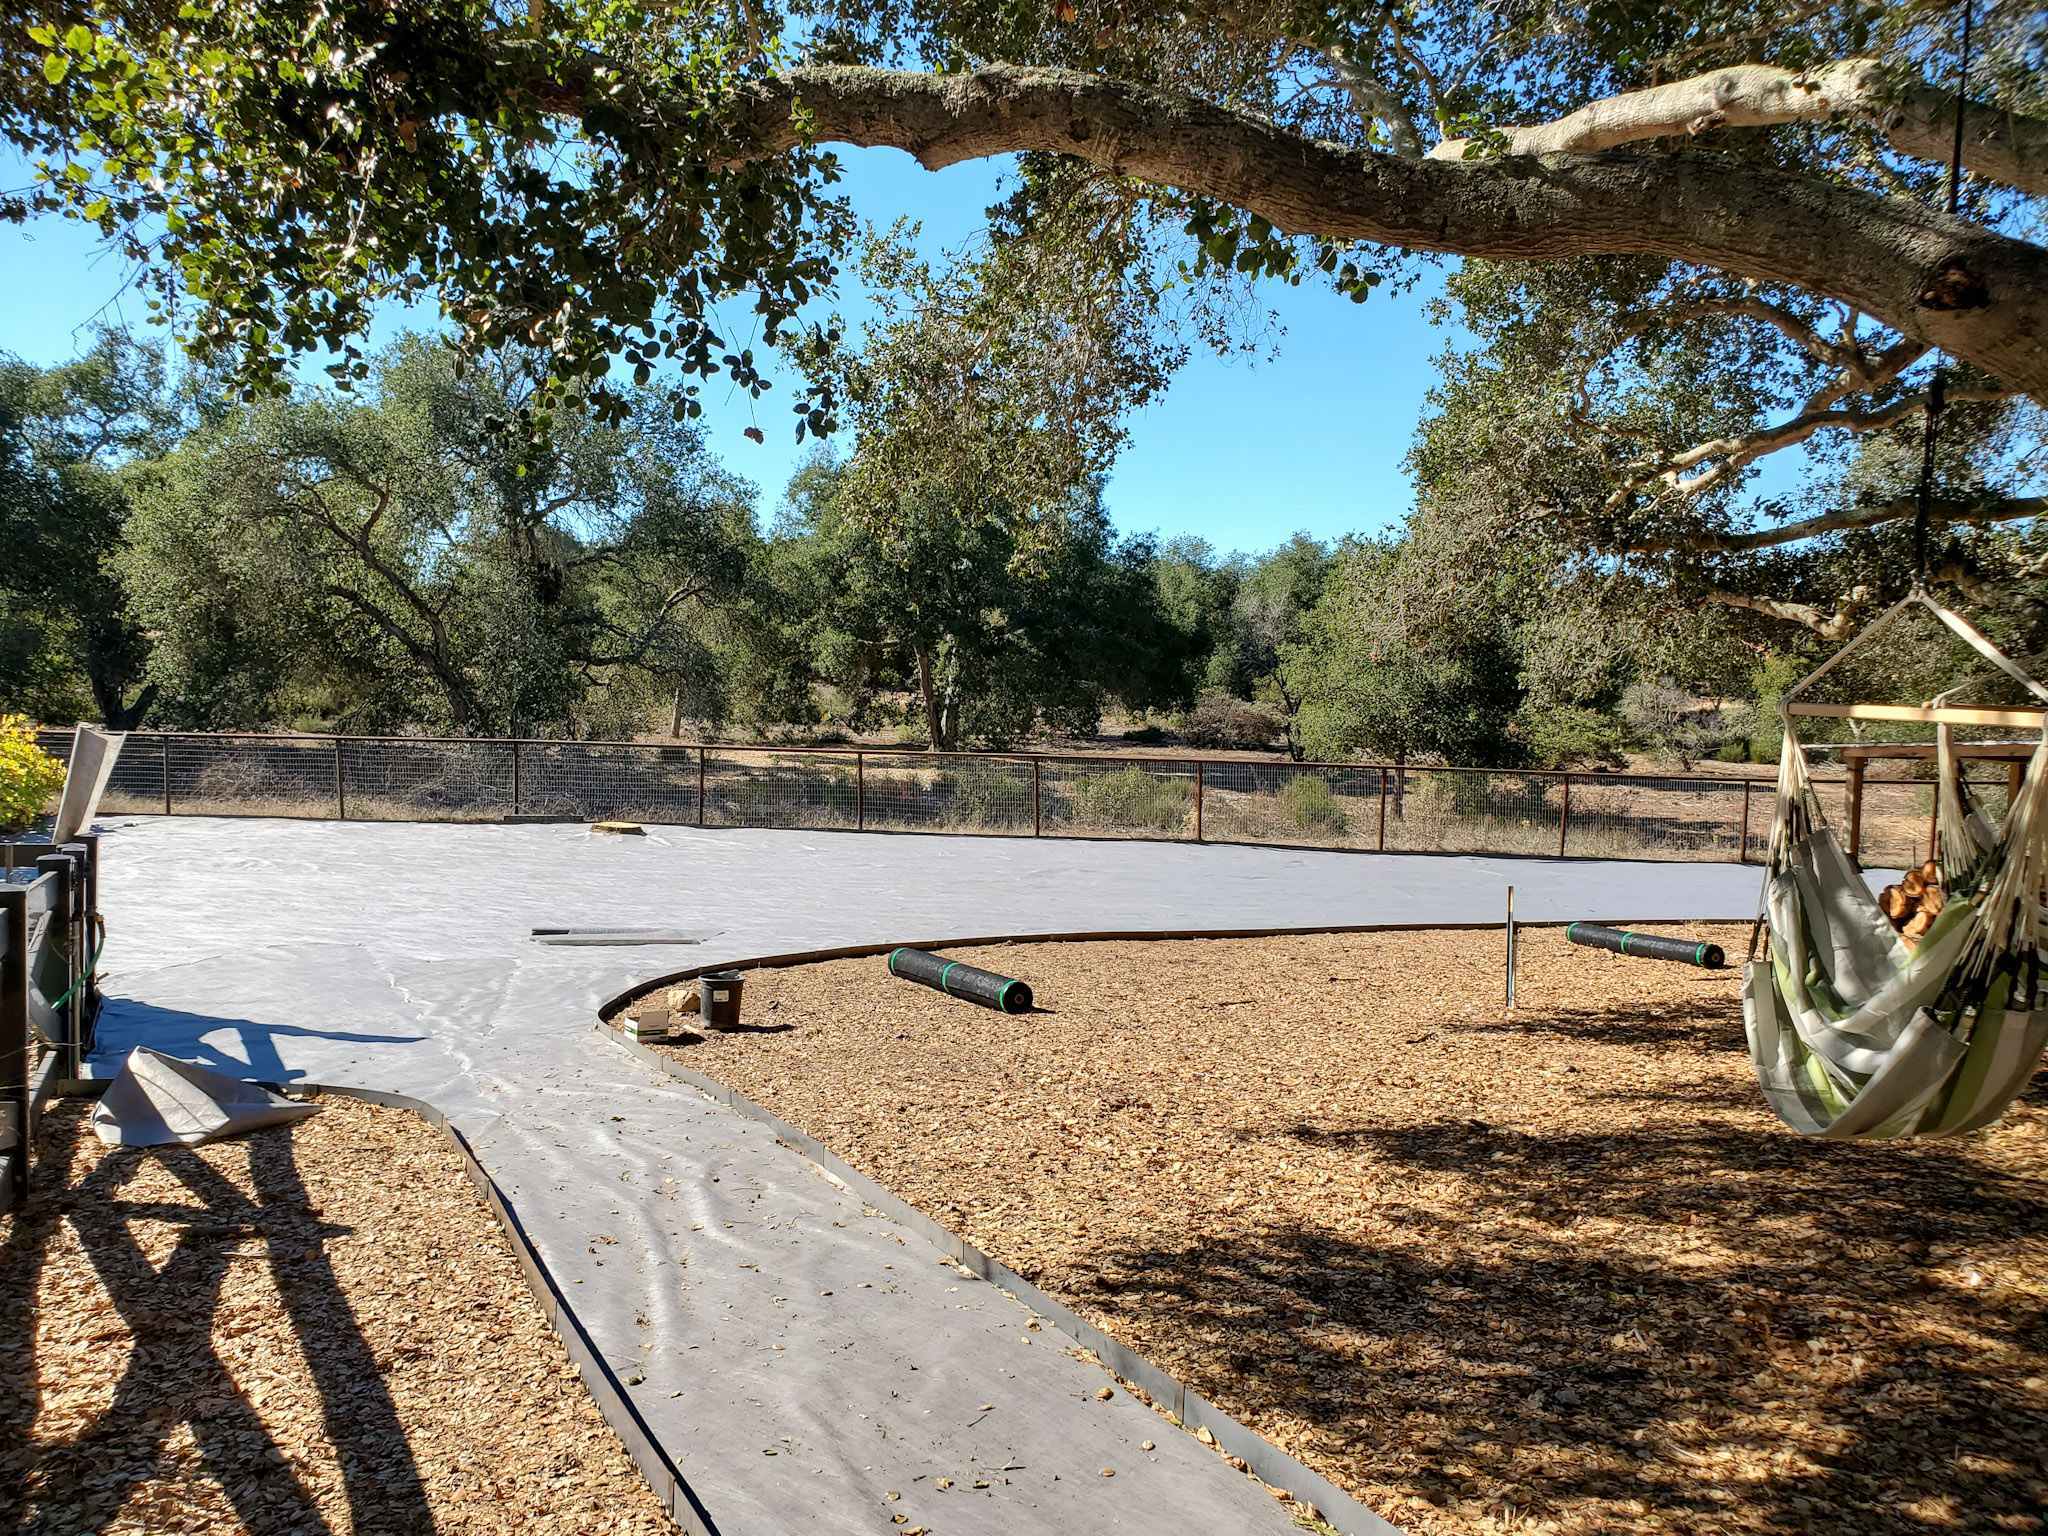
Step 4: Ground Cover
Next, it was time to prep the ground for the gravel to come. Rather than bark or wood chips, we are going to use gravel in our new raised bed garden area for several reasons. 1) I love the clean look of it, and it’s permanence. 2) Gravel will act as a fire barrier between our home and the neighbors wild, dry property of chaparral brush and oaks. Our new property is more rural and has a higher risk for fire than the last, so this was an essential consideration.
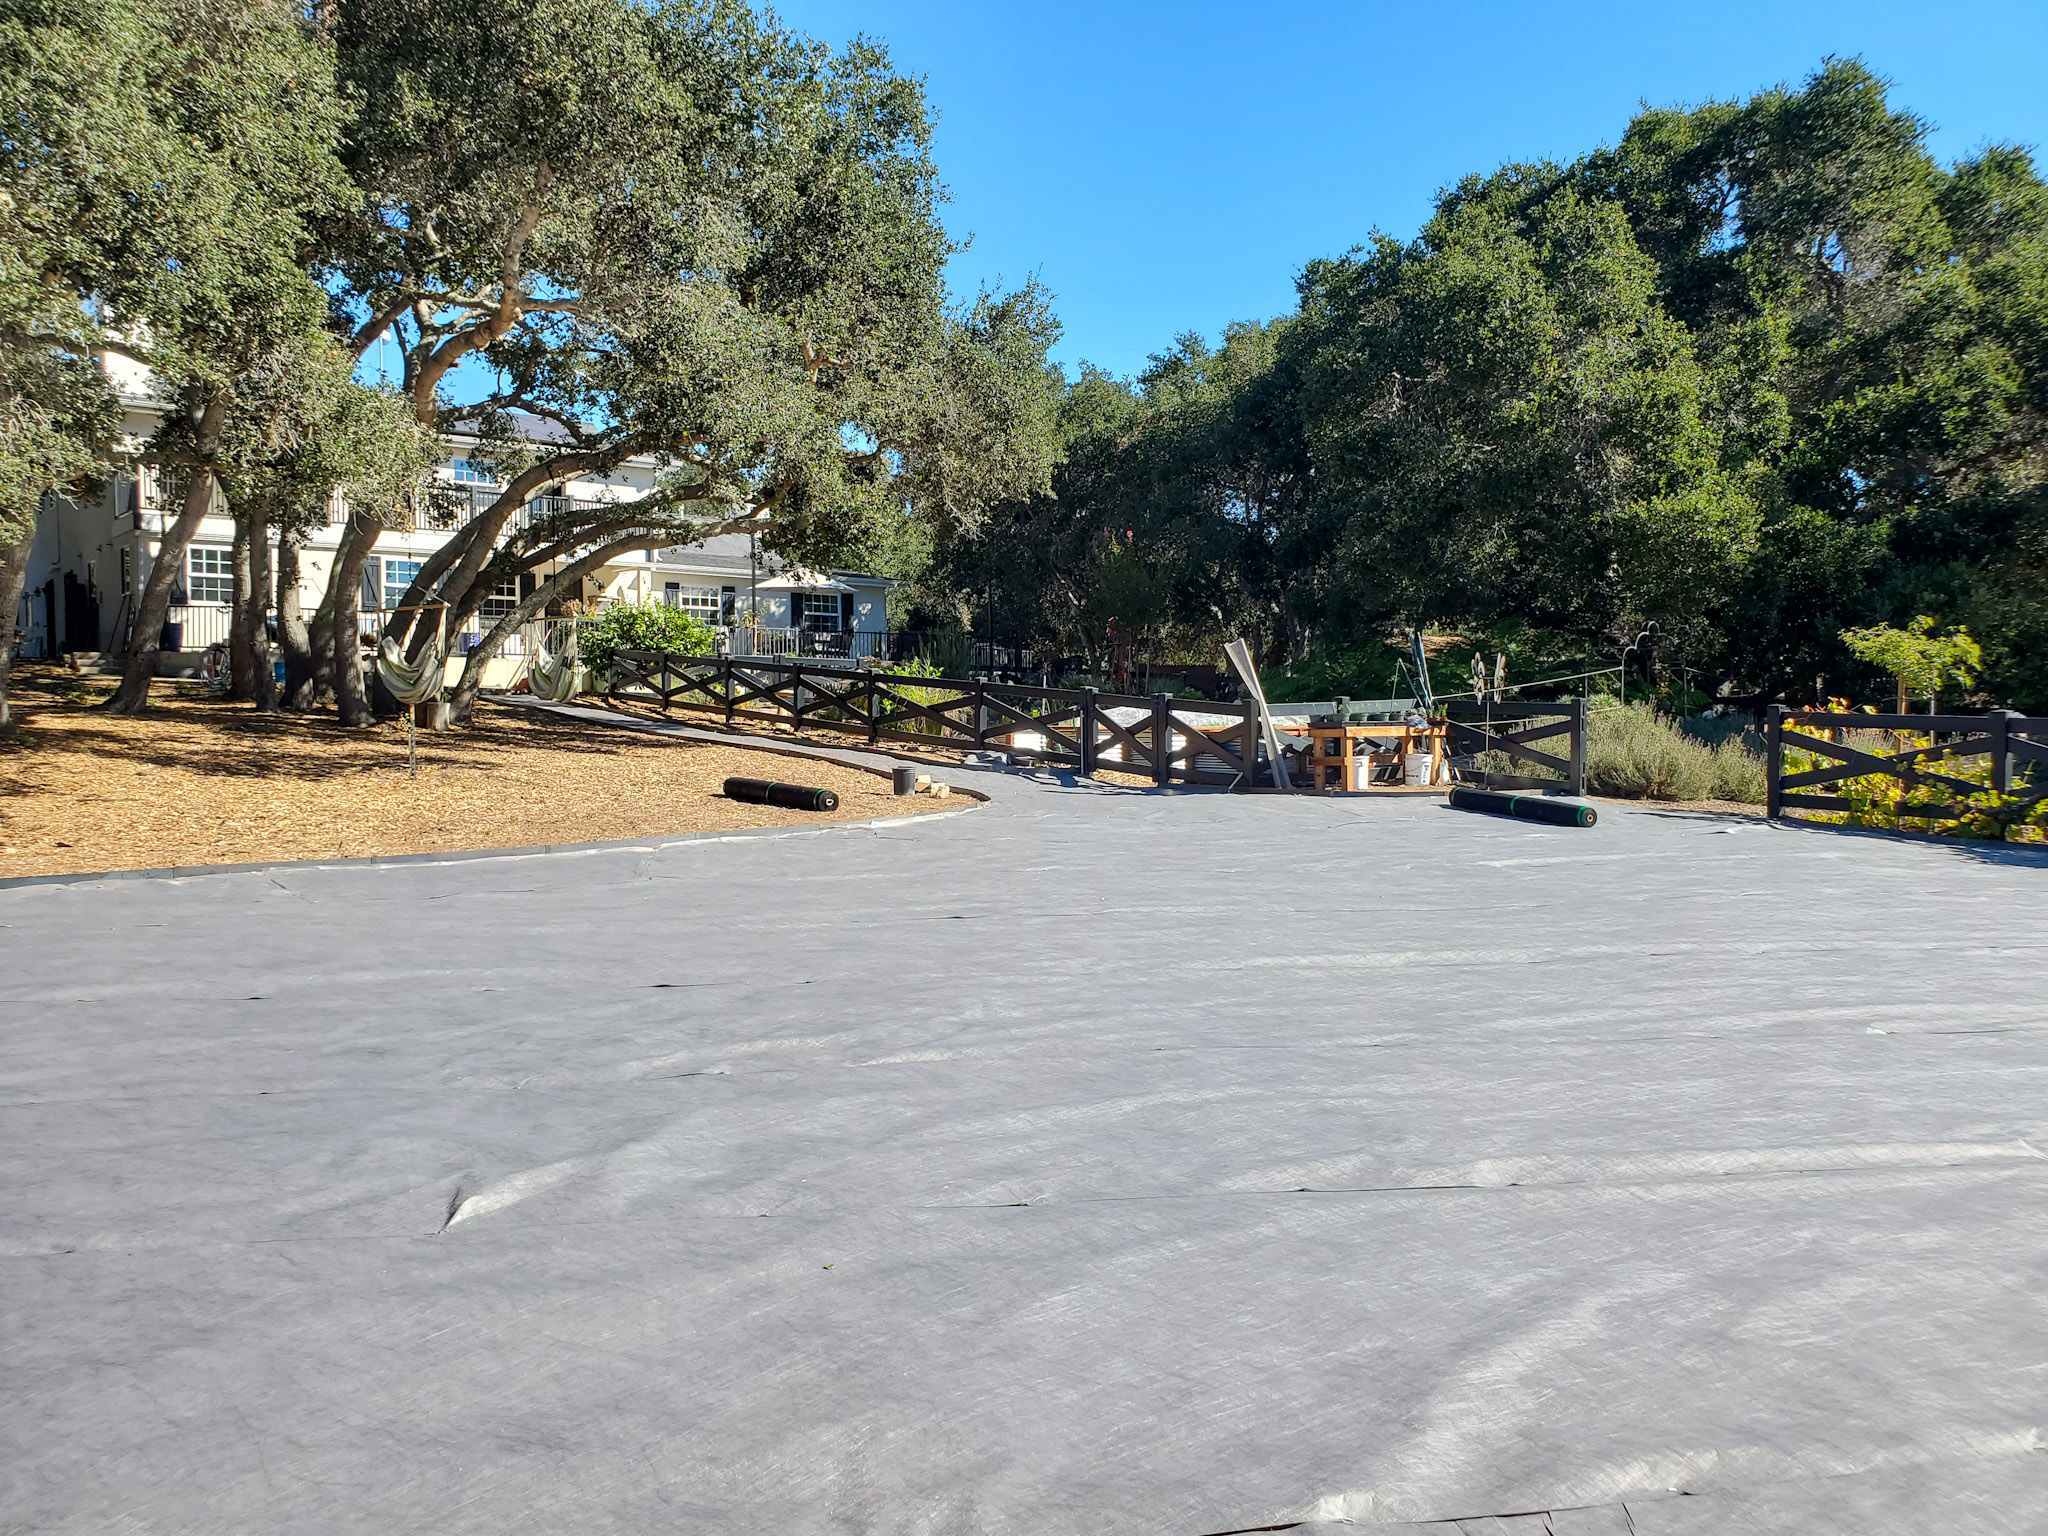
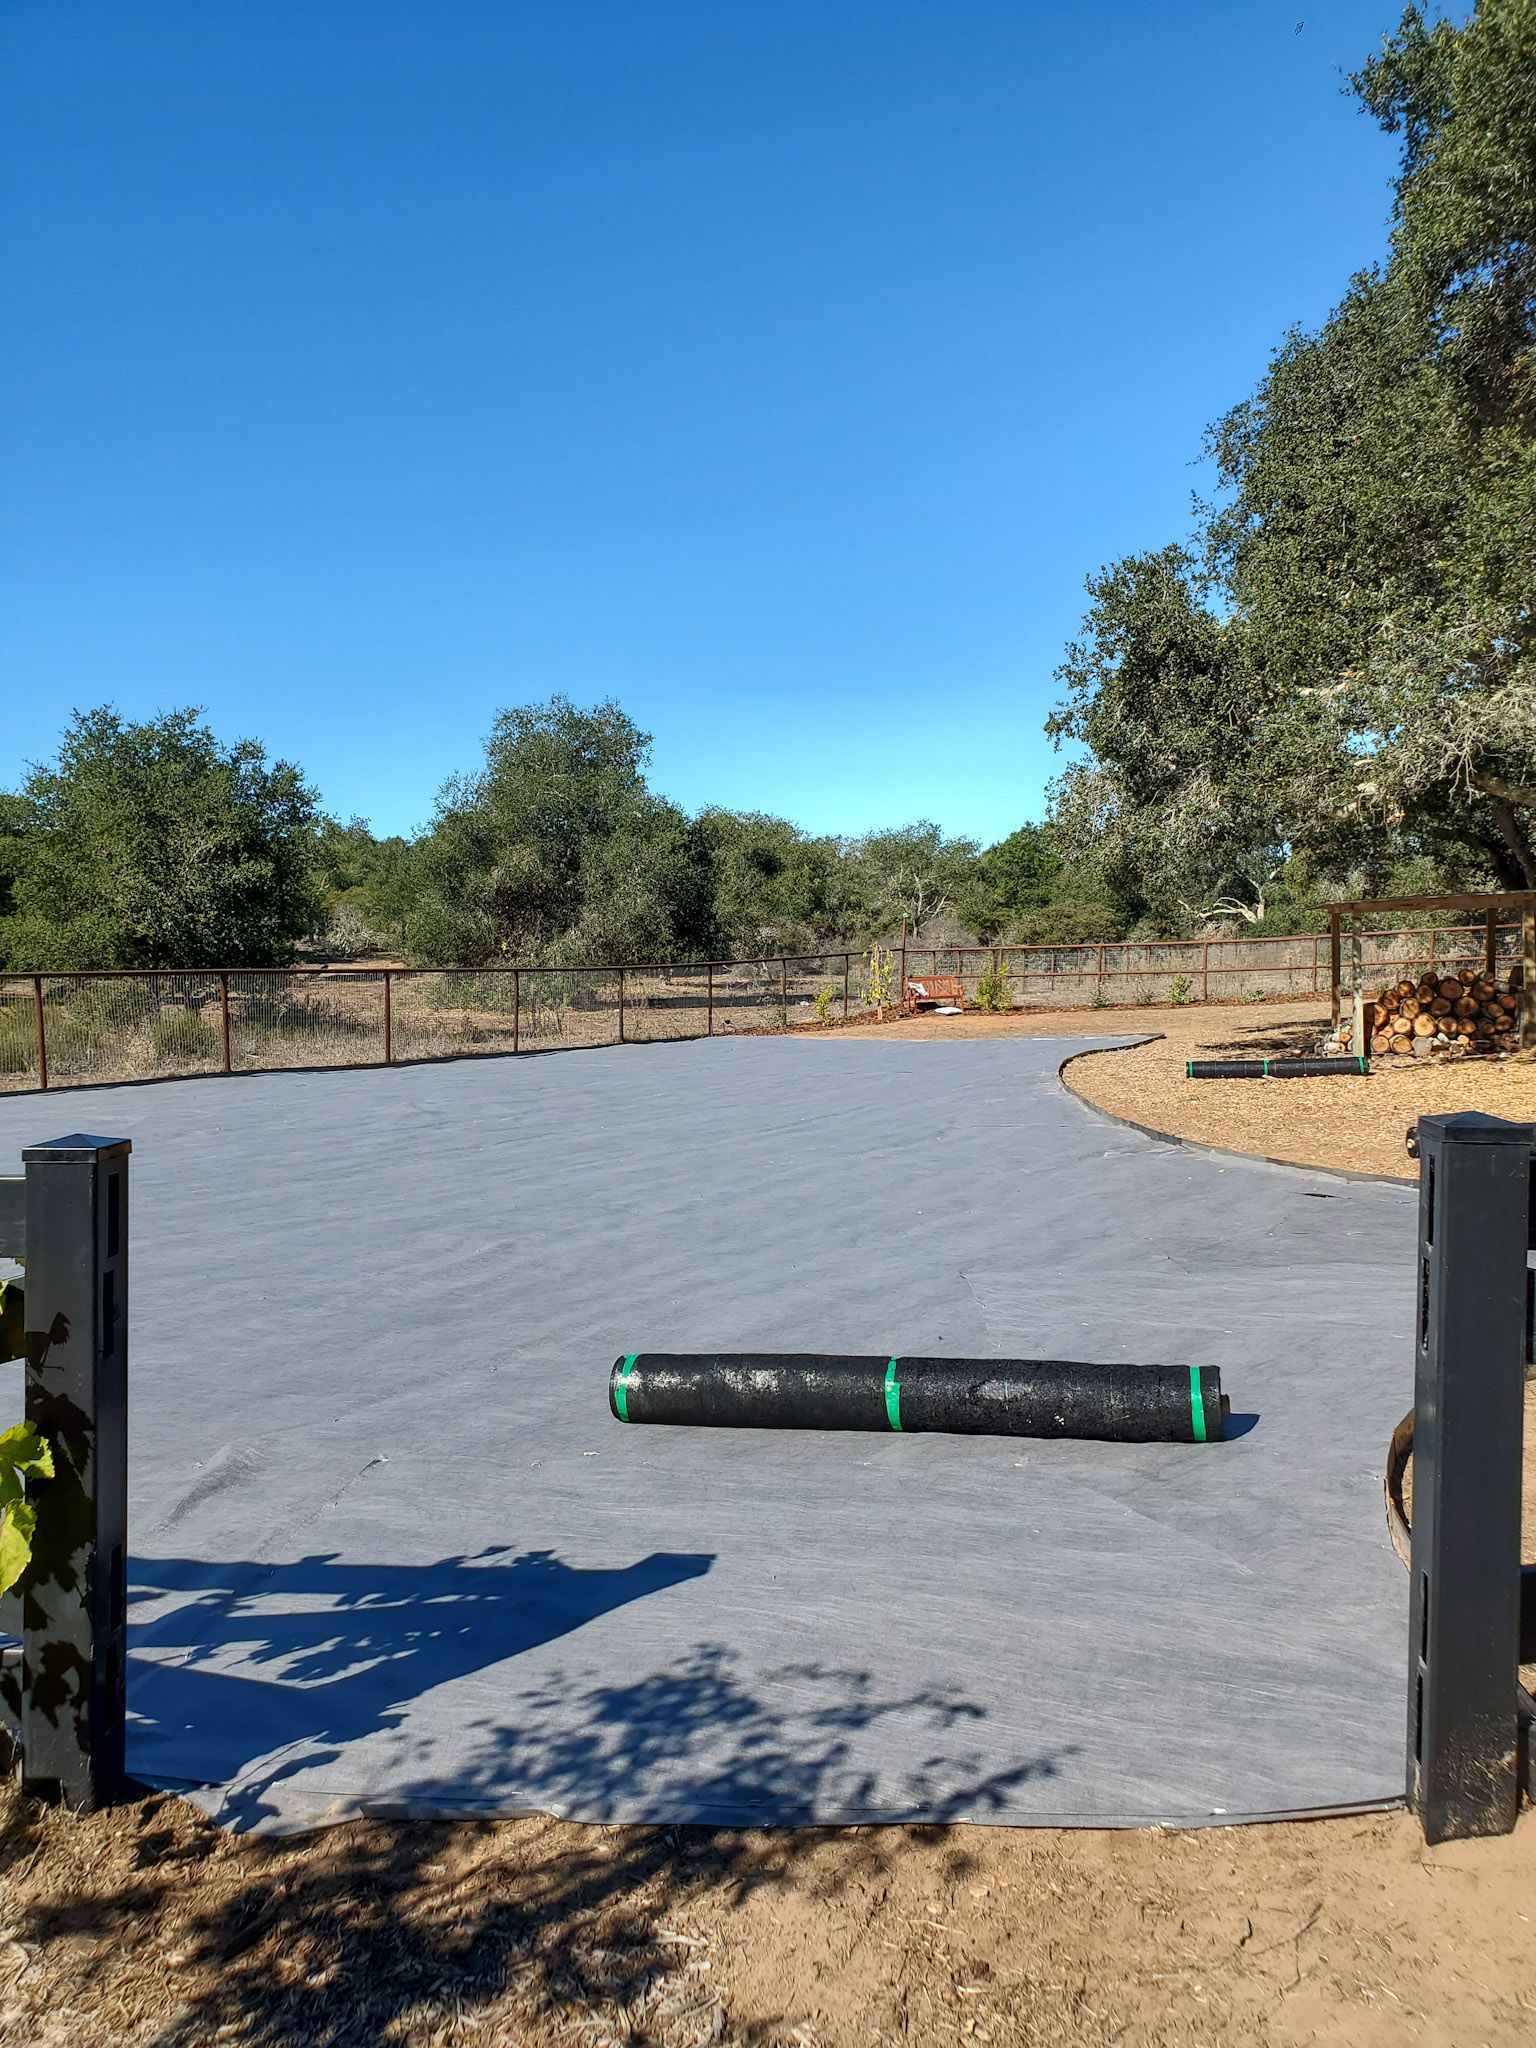
Before gravel, we laid down two layers of contractor-grade weed barrier landscape fabric over the entire space. This will provide a long-lasting foundation for the gravel to sit on, as well as block out weeds and gophers.
For the first layer, we used our go-to Landsmaster non-woven commercial weed barrier fabric. It’s the same stuff we used under the raised beds and gravel in our old garden, and does a fantastic job. It keeps out even the most noxious weeds, but is still very lightweight, breathable, and permeable to water. We used to be able to buy it in-store at Home Depot, but lately it has only been available online.
Next, we added a layer of a different type of contractor-grade fabric sourced from a local landscape supply shop that they recommended. It is a thick black woven type with a felt-like underside. Here is a very similar and well-rated product.

Why two layers, you may be wondering? Well, we did two layers of the Landmaster fabric at the old homestead. We were up against incredibly invasive crabgrass in that yard, and we found that it provided an excellent barrier from both weeds and gophers. Plus, the extra layer provided insurance in case one of them accidentally was torn.
Here, we wanted that same durable double-protection, but opted to use two different types of fabric because we need to be able to drive the UTV over the area to move boulders, gravel, wood and soil as we built out the space. The black woven fabric is much heavier, thicker, and stays more taught, so it seemed like the best option for driving over without getting all screwed up in the process.

A note on using landscape fabric:
Not all landscape fabric is created equal, nor do I recommend it for every situation! Please avoid the thin, stretchy black plastic-like material you can find at most garden centers. It’s ineffective, rips easily, and makes a hot wasteful mess. Stick with well-rated, heavy-duty contractor grade fabric if you do choose to use it.
However, there are many other more natural materials you can use as ground cover too! For instance, sheet mulching with layers of newspaper or cardboard under a thick layer of wood chips is a great way to suppress weeds in pathways or around flower beds. Or, climates with regular rainfall are ideal for using cover crops to create living green pathways and ground cover. Learn about the pros and cons of 8 different types of mulch here.

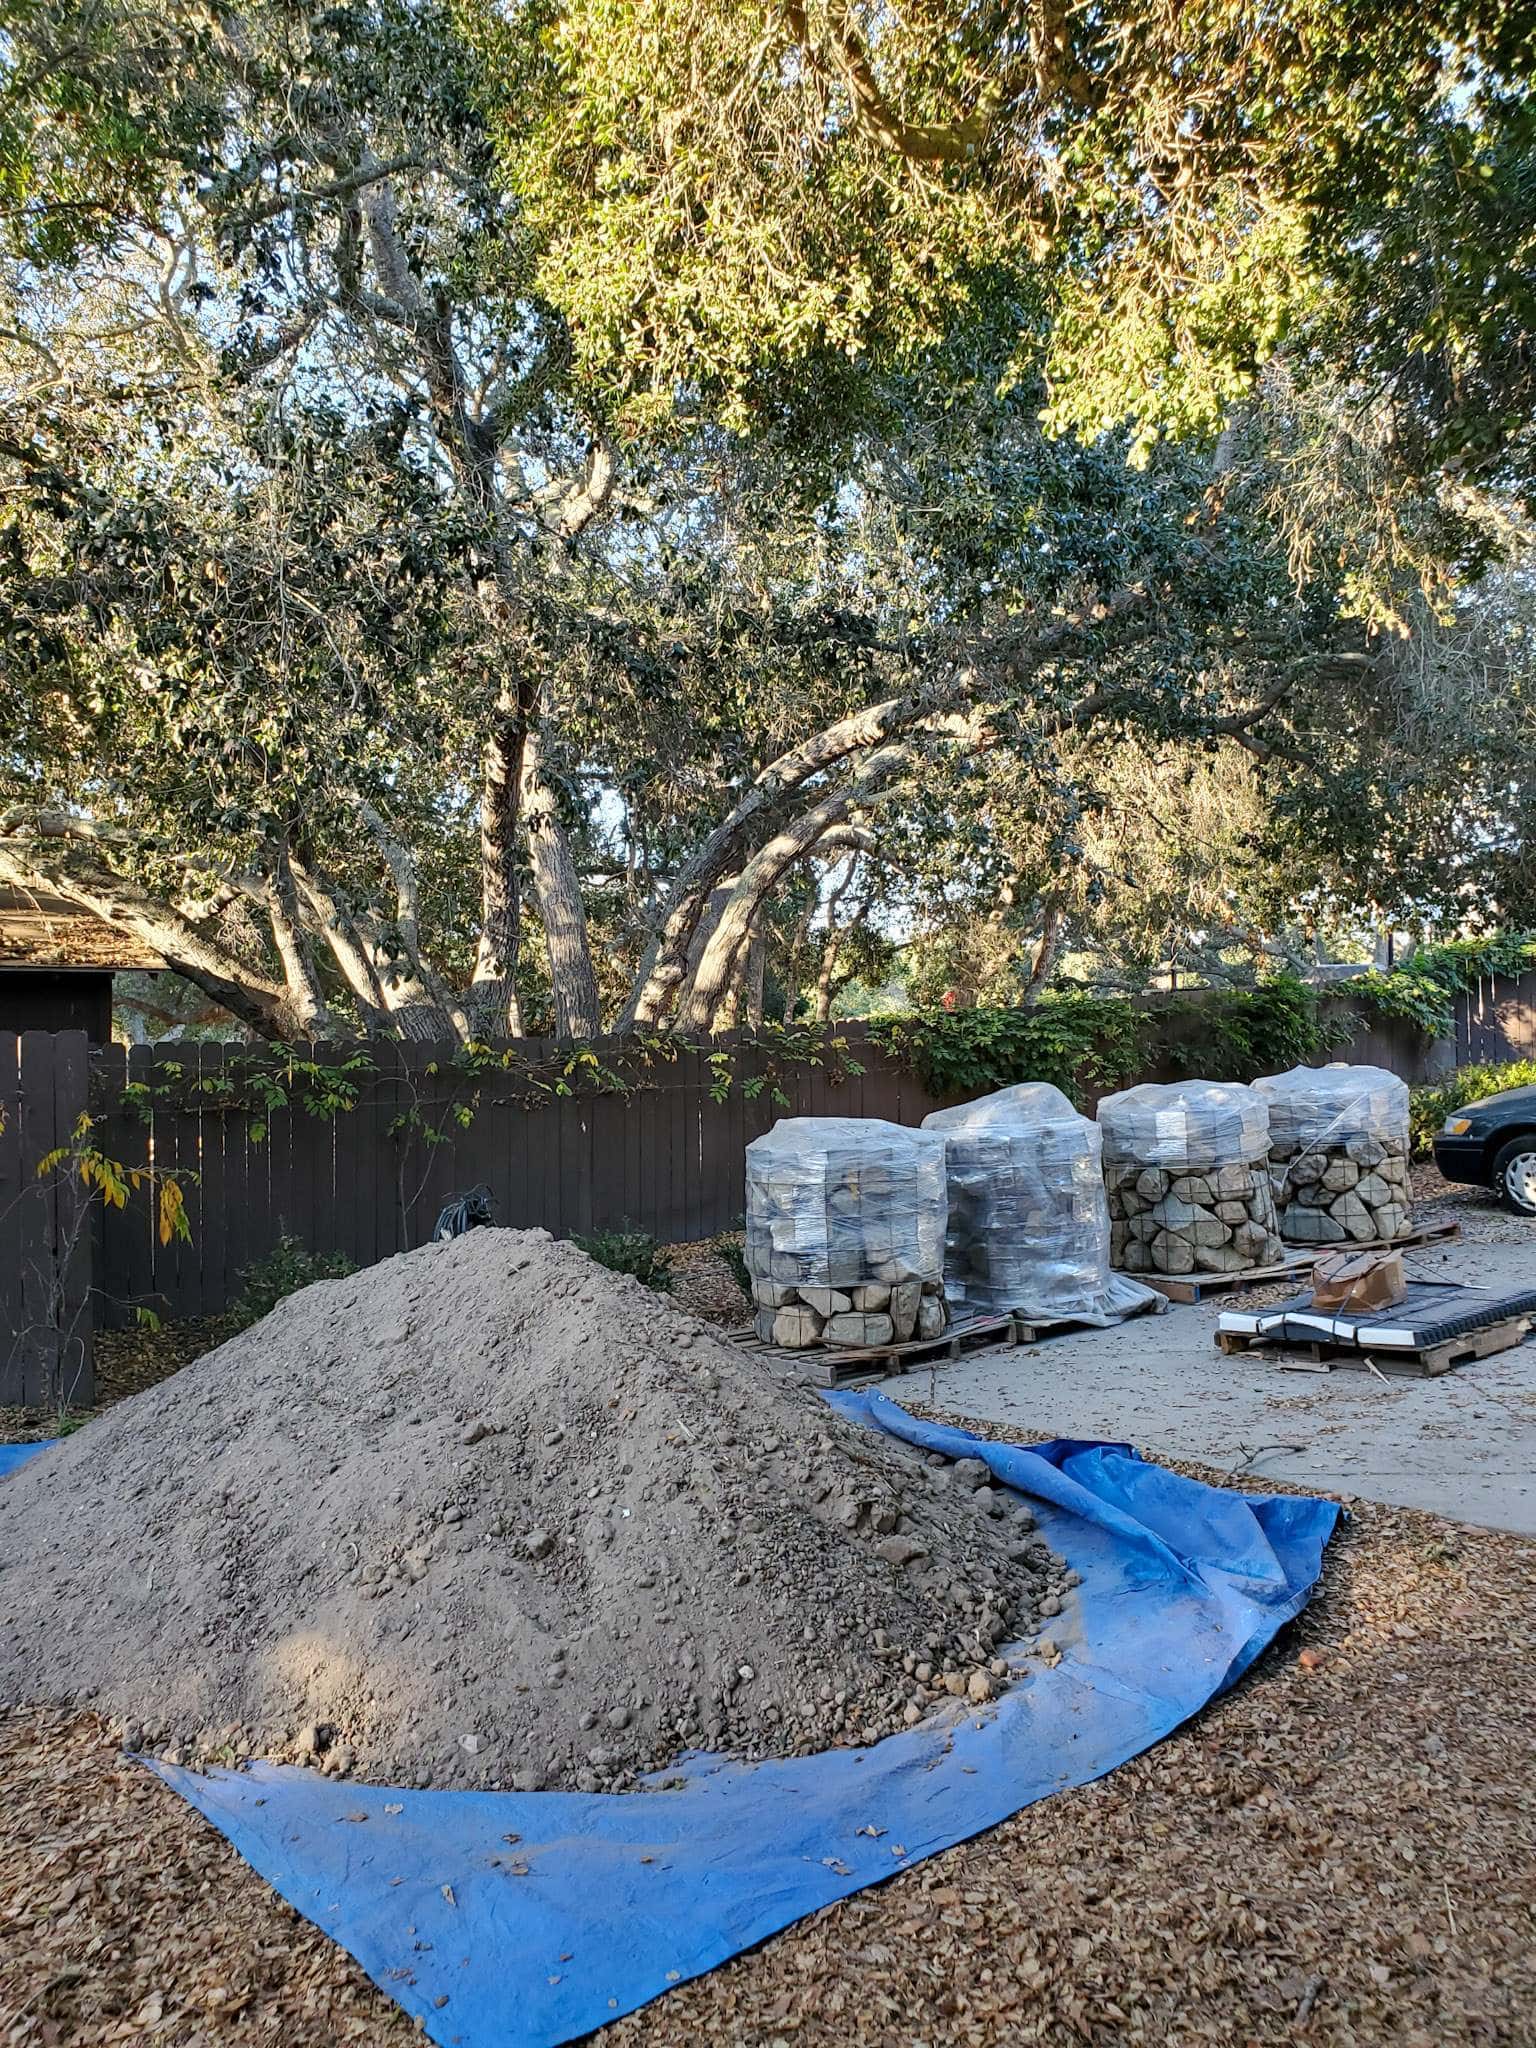
Step 5: Baby Boulders
Once the edging and landscape fabric was in place, we brought in some small landscaping boulders to further define the space and add a whimsical rustic flair. We used the small boulders to line select sections of the pathways and perimeter of the edging, as well as create an additional border between the raised bed area and flower bed that will run behind it along the fence.
One of my IG friends told me their local landscape supplier calls these “BFRs”. I’ll let your imagination fill in what that stands for. 😂 Fitting indeed, since the four pallets we had delivered weighed a total of 10,200 pounds. I was thanking my lucky stars for Dusty the UTV to help us move these too!


Next Steps
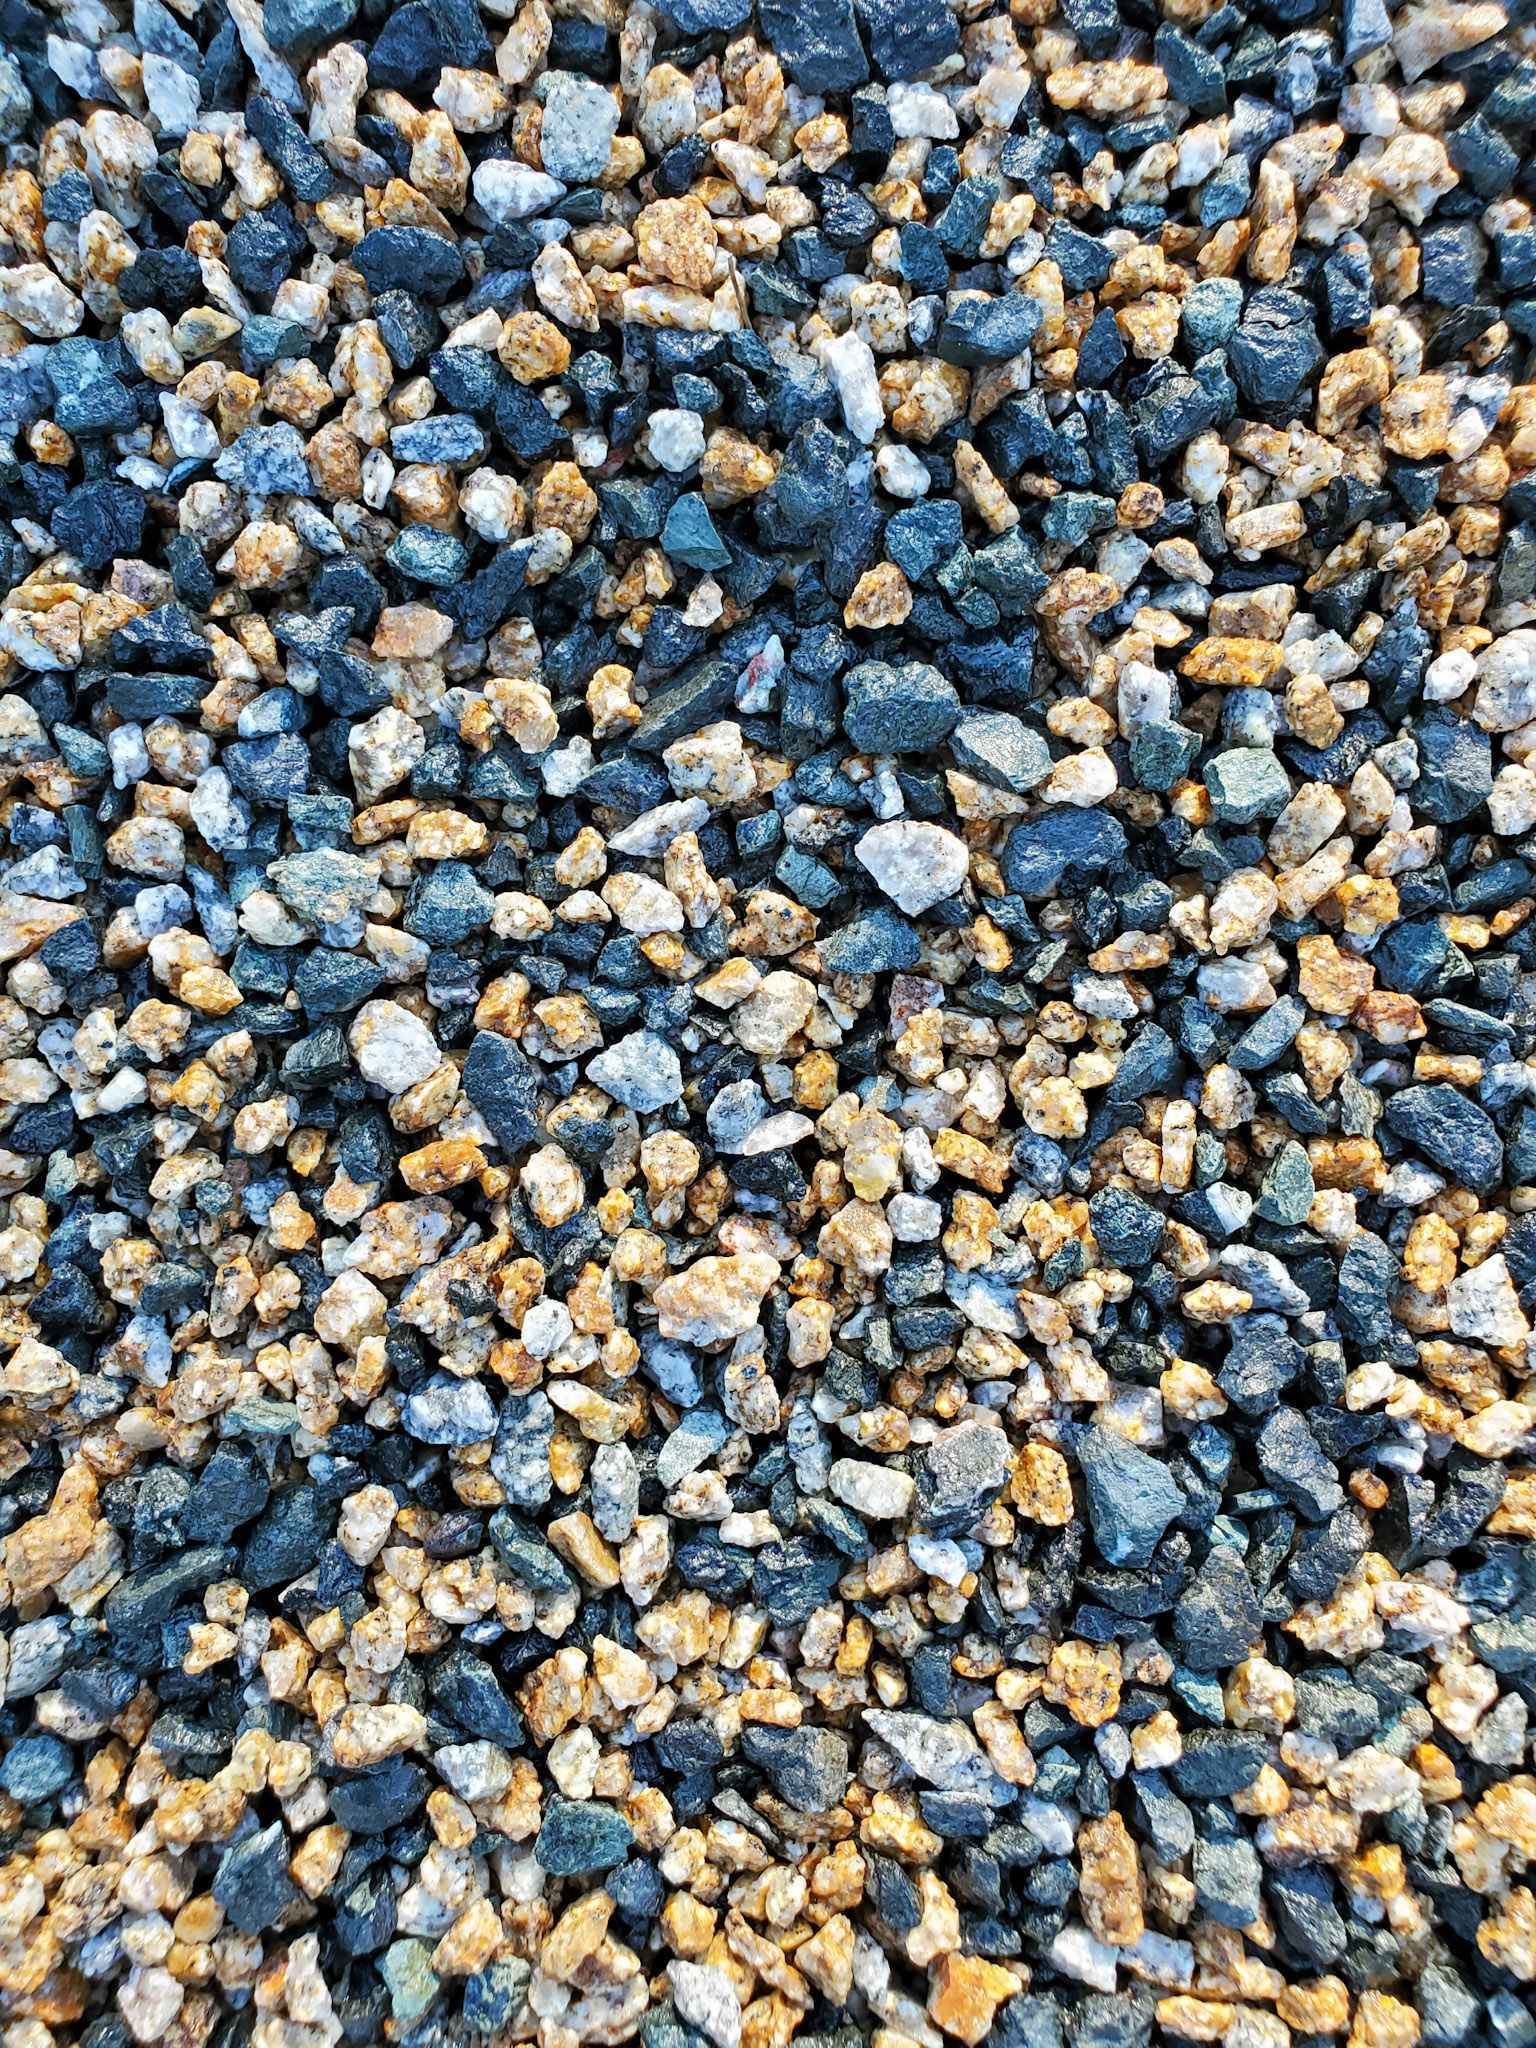
Next up: gravel! We’re currently deliberating between a few different types and colors of gravel to use here. Since we’ll need over 30 yards, we want to be dang sure of our decision before pulling the trigger. The guys at the landscape supply yard suggested taking home 5-gallon buckets of sample rock to lay out, rinse the dirt off, and see how it looks in the space – both wet and dry.
I want something a little more rustic and natural looking than the bright blue-green 3/8″ gravel we used at the old homestead (even though I do love the look of that one). We sampled one called “Navajo” but it was far too red and warm for my liking. So, I think we are going to mix our own! Yesterday we picked up two more samples: a dark green rock, and a warmer gold and grey granite. Together they create a fantastic “salt and pepper” vibe – the perfect blend of warm, cool, light and dark tones.
Color aside, we always use a crushed type of gravel. Due to its angular edges, crushed rock compacts and locks in place really nicely – unlike smoother pea gravel type stones, which sinks and move as you walk on them. (That drives me bananas!)
After the area is filled with gravel, we’ll slowly start adding raised beds. I have plans for dozens of raised beds in this space one day, but we definitely won’t be building and filling them all at once! See our step-by-step guide to build wood raised garden beds, or how we fill raised bed here.
The garden will also have a center courtyard with pavers, various seating, a fountain, and plenty of pretty potted plants, arched trellises, and wine barrel planters speckled across the space too.


Cheers to good hard work, gardening, and kitty friends!
Wow, are you still with me? Lol… my bad, this update wound up just a wee bit longer than I anticipated. 🤪 But hot dang, I guess we’ve been busy eh?! I promise I won’t wait so long between updates next time, especially when there is so much to share. We sincerely appreciate your interest in our homestead adventures, and hope that you found some value in this post! Stay tuned to see the progress – and see what color gravel we choose!
EDIT: The next steps and full garden reveal are done! Come check out the space after we added gravel, raised beds, arched trellises, plants, and more – tour video included!


39 Comments
Mariangela
You guys are amazing! We are reading each post and learning and copying (best form of flattery) your raised bed and trellis ideas at our property in wine country and your photos, detailed tips and sources have been fantastic and so helpful. We are in weed eradication mode and the 2-layer approach you are using as well as the edging will be our next guideposts. Congrats on accomplishing so much in what seems like a very compressed timeframe!
Aaron (Mr. DeannaCat)
Thank you so much Mariangela and we are happy to hear that you are finding the articles so helpful. We appreciate the support and good luck with transforming your property in wine country!
Bette
May I say some of us who live vicariously through your passionate garden plans, thank you both for the dedication
and love you put into the projects start to finish. You research, you think it through, you do what’s best for the environment, and the results are all most of us need to be convinced you love what you do. Thank you, thank you,
thank you, for sharing your super power with the rest of us. You are admired and respected for walking the talk.
All the best,
Bette
Aaron (Mr. DeannaCat)
Thank you so much Bette, you are too kind!
Icelsa Mejia
I’m stil with you, a lot of work but satisfiying even if is not my garden, I’m really enjoying everything. Is a coincidence that my son asked me about a DIY back patio for his house in preparation for him to go back to his Navy job in San Diego at the end of 2022 and I though about your house, you have great ideas and I’ll run them by him in his project, the double landscaping fabric alone is fantastic and checking the gravel color dry and wet is fenomenal. I love how your garden is coming together. Thank you for sharing your space.
DeannaCat
Hi Icelsa – Thank you so much for reading. We’re happy you picked up a few helpful tidbits along that way that may help with your son’s place! Have a healthy and happy holiday season!
charlie
wow!
it’s inspiring to watch the transformation.
i left instagram a couple months ago, and the updates on your homestead are one of the few things i’ve missed.
so glad i can still follow here!
Aaron (Mr. DeannaCat)
Hi Charlie, thanks for the kind words, we appreciate you still choosing to follow along through our site.
Lin Powell
Wow. Impressive!
Cindi Brown
OMG! I can’t believe how much you have done in such a short period of time. I’m inspired and now planning on replacing my short raised beds with much taller sides as my 70 year old body is feeling it. I’m curious as to the type of raised beds you will be installing. I like the existing ones. Also love the photogenic kitty. Looking forward to seeing the next stage.
Aaron (Mr. DeannaCat)
Hi Cindi, we have been going back and forth on the type of raised garden beds we want and we are leaning on building our old tried and true wooden raised beds out of redwood. We could possibly build something similar to the wood/metal beds that are already installed but we aren’t quite sure. If you are looking into taller raised beds yourself, check out Epic Gardening and the Birdies raised beds, some of which are even 30 inches tall which may be a suitable replacement for your old ones. Use “DeannaCat3” at checkout to save yourself 5% off. Anyway, thank you for your kind words and good luck on getting your new raised beds!
Lori
Hello, and thank you! I so enjoy your posts (tho I am always tired on your behalf afterward!). We just purchased a property with our son and daughter in law. You have once again inspired me! Keep up the rich and wonderful creative labor. And thanks again for generously sharing! Lori
Aaron (Mr. DeannaCat)
Hi Lori, congratulations on your new property! We’re glad that you have found inspiration in our posts and our efforts. Thanks for dropping in to say “hi” and we wish you luck on your new venture!
Barbara Larson
So Exciting! Love the new galvanized sided beds- do you have the plans or instructions for building those?
Aaron (Mr. DeannaCat)
Hi Barbara, thank you! The galvanized raised beds were here when we purchased the property. The construction would be to build a wooden frame and line the inside with galvanized sheeting, using screws to fasten the metal to the wooden frame. Unfortunately we don’t have an article or specific instructions on how to build them… Good luck!
Anne
I just want to send out a big thank you! I’ve been following along since the early days of your first place. Your garden posts have always inspired and given great info that helped our own garden adventures grow. We are also moving on in search of a place with more land to expand. Our home just sold and we’ve moved our family of 5 into an RV to begin our search. I’m looking forward to breaking ground on a big garden space soon and this post is everything I needed to keep my hopes up and put a realistic vision in my mind. Keep ’em coming!! Thank you 🙏🏼
Aaron (Mr. DeannaCat)
Thank you so much for your support Anne! It sounds like you and your family have undertaken quite the adventure yourselves, we wish you the best in finding that special place for you and your family to grow. Keep us up to date on your journey and good luck!
Julie Mills
Hi there: really enjoying watching you achieve your dreams! I am a long-time gardener but am starting a small, very downsized mini “permie patch”. I’m getting ready to build some raised beds and really liked your design. I did some searching of your site and couldn’t find any reference to building that particular design (looks like galvanized roofing material with treated posts to stabilize.) Do you get any “bowing out” of the sides due to pressure from the soil? Any help is appreciated. Good luck with your project – it looks amazing!
Julie, Nanaimo, BC, Canada
Aaron (Mr. DeannaCat)
Hi Julie, it’s great to hear that you are creating your own “permie patch”! The raised beds were here when we purchased the property and we have not built anything similar in the past to have an article or specific instructions on how to do so. We have not noticed any “bowing” out due to the pressure from the soil as of yet, though we are thinking we will build wooden raised beds out of redwood like we did at our last place. Birdies beds may be another option for you to look at as they can be made into various shapes and sizes which may be easier to work with in a smaller space. You can find them at Epic Gardening Shop and use code “DeannaCat3” to save 5% at checkout if you are interested. Hope that helps, thank you for the kind words and good luck on your new venture!
Cathy
Wow, that’s really coming along! Lots of hard work, I’m sure, but what an amazing space you’re creating. We’re cat folk here (6 rescues) so love to see Bear and Badger in your pics.