

How to Make Elderberry Syrup with Fresh or Dried Berries
Looking for some natural immune system support? Come learn how to make delicious homemade elderberry syrup with this easy step-by-step recipe. Elderberries can help prevent illness, soothe cold, flu and allergy symptoms, and promote a quick recovery when you’re feeling crummy. It tastes so good, the kiddos will love it too! Sharing bottles of elderberry syrup is also a fantastic DIY gift idea for the holiday season.
We’ve been making this elderberry recipe for many years, adapted from the queen-of-herbs Rosemary Gladstar’s book Medicinal Herbs: A Beginner’s Guide. You can make elderberry syrup using dry, frozen, or fresh elderberries, so I’ve included instructions for all options.
This post was originally published in February 2019.

Would you like to save this?
Disclosure: Homestead and Chill is reader-supported. When you purchase through links on our site, we may earn an affiliate commission.
RELATED: Don’t miss our homemade elderberry tincture recipe, elderberry gummies recipe, fire cider recipe, homemade cough drops, or delicious fermented garlic honey recipe!
The History of Elderberry
Known in the botanical world as Sambucus Nigra, elderberry has been used for centuries by traditional cultures and herbalists in natural medicine, both early in Europe and later in North America. Native Americans used the plants bark and leaves to make poultices to heal bruises and sprains, and internally to rid themselves of parasites. Now, the bark and leaves are not used as commonly in modern natural medicine due to its content of cyanide.
Safety precautions with fresh elderberries
There are several types of elderberries native to North America and Europe. The blue-black varieties are used for medicinal purposes (Sambucus Nigra). The varieties with red berries (Sambucus racemosa) are toxic and should be avoided.
Also, while there are no studies showing that elderberry is harmful during pregnancy, there is also a lack of studies to prove that it is safe. According to PubMed, “health care personnel should not advise pregnant women to use echinacea or elderberry against upper respiratory tract infection.”
Finally, please note that it is only safe to consume cooked, ripe, fresh elderberries (or dried). Other parts of the elderberry plant contain cyanide, including the stems or leaves – so be sure to thoroughly remove all the stems! Even pruning our elderberry plant gives me a rash. Raw, uncooked, or unripe berries will also likely cause an upset stomach and uncomfortable side effects. Considered “cooked”, dried berries do not pose the same risk.
Health Benefits of Elderberry Syrup
Combining the benefits of both elderberries and honey, elderberry syrup is a powerful natural cold and flu preventative and healer. Our elderberry syrup recipe also includes ginger, cinnamon, and other spices – making it extra therapeutic, and extra delicious!
Studies show that elderberries have antiviral and antimicrobial properties, helping to prevent illness as well as shorten and alleviate symptoms of the common cold. It’s full of antioxidants, vitamins, minerals, and amino acids that strengthen your immune system, cardiovascular system, and more. Elderberry syrup is also reported to help ease the symptoms of seasonal allergies.
Thick and sweet, honey is excellent at soothing sore throats and naturally suppressing coughs. Like elderberries, raw honey is also highly antimicrobial and loaded with antioxidants. Honey can help ward off internal pathogens when ingested, and can even be used topically to heal wounds too!
Health benefits aside, there are a number of other perks to making your own elderberry syrup at home. It’s fun and easy to do, and the end result is a nutrient-dense natural supplement for the fraction of the cost of buying it at the store!
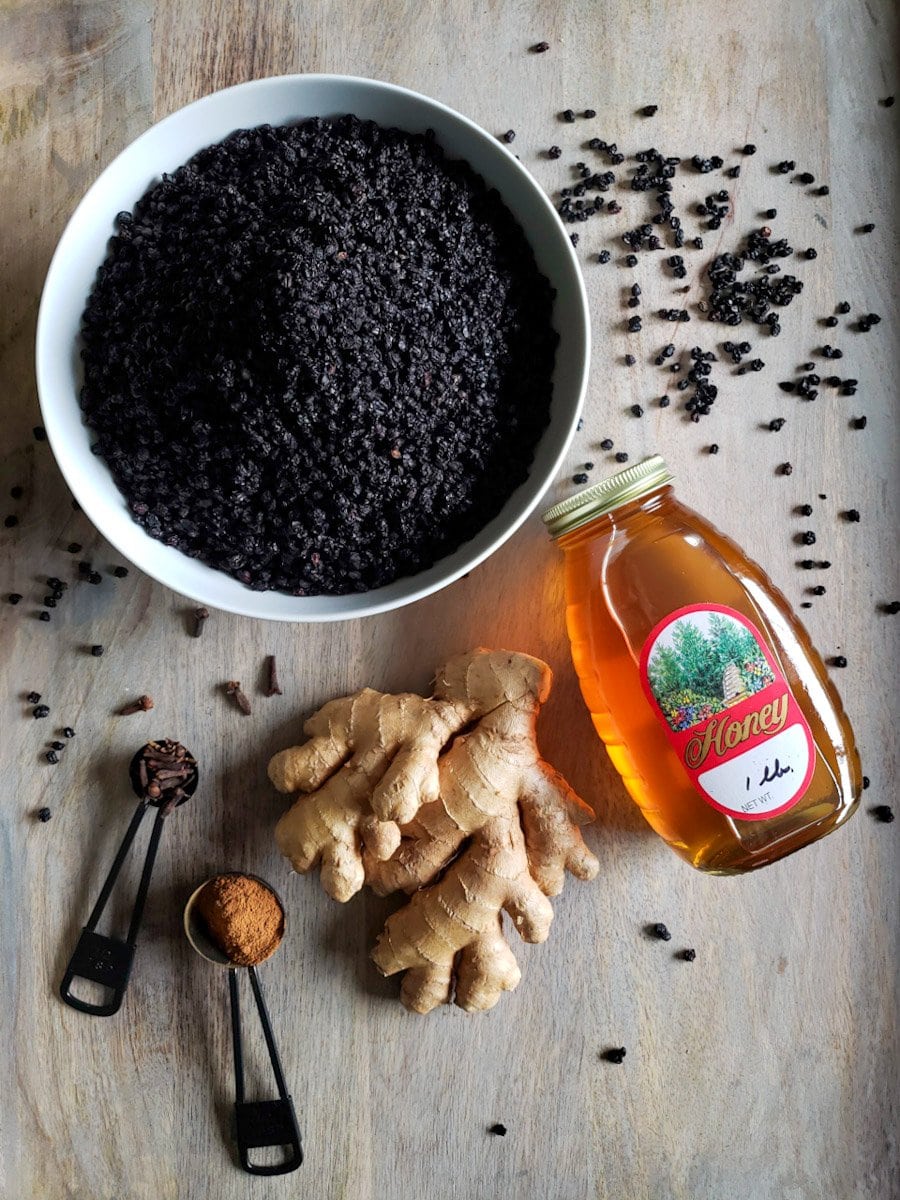
Ingredients and Supplies
This recipe yeilds approximately 40 ounces of elderberry syrup.
- 4 cups of dried organic elderberries OR 8 cup fresh, ripe organic elderberries (or frozen berries). We usually use these organic dried elderberries. One bag is plenty to make this recipe.
- Honey, 16 to 24 ounces. Honey is best for immunity though you could substitute with agave or maple syrup to make vegan elderberry syrup.
- 2 tablespoons of grated raw fresh ginger or 1 tsp ground
- 1 teaspoon of cinnamon powder OR 2 whole cinnamon sticks
- 1/2 teaspoon cloves (whole or ground)
- Optional: 2 to 3 whole star anise
- Optional: a splash of whiskey, vodka, or other alcohol (to help extend the shelf life)
- Water
- Cheese cloth or a nut milk bag to strain the berries
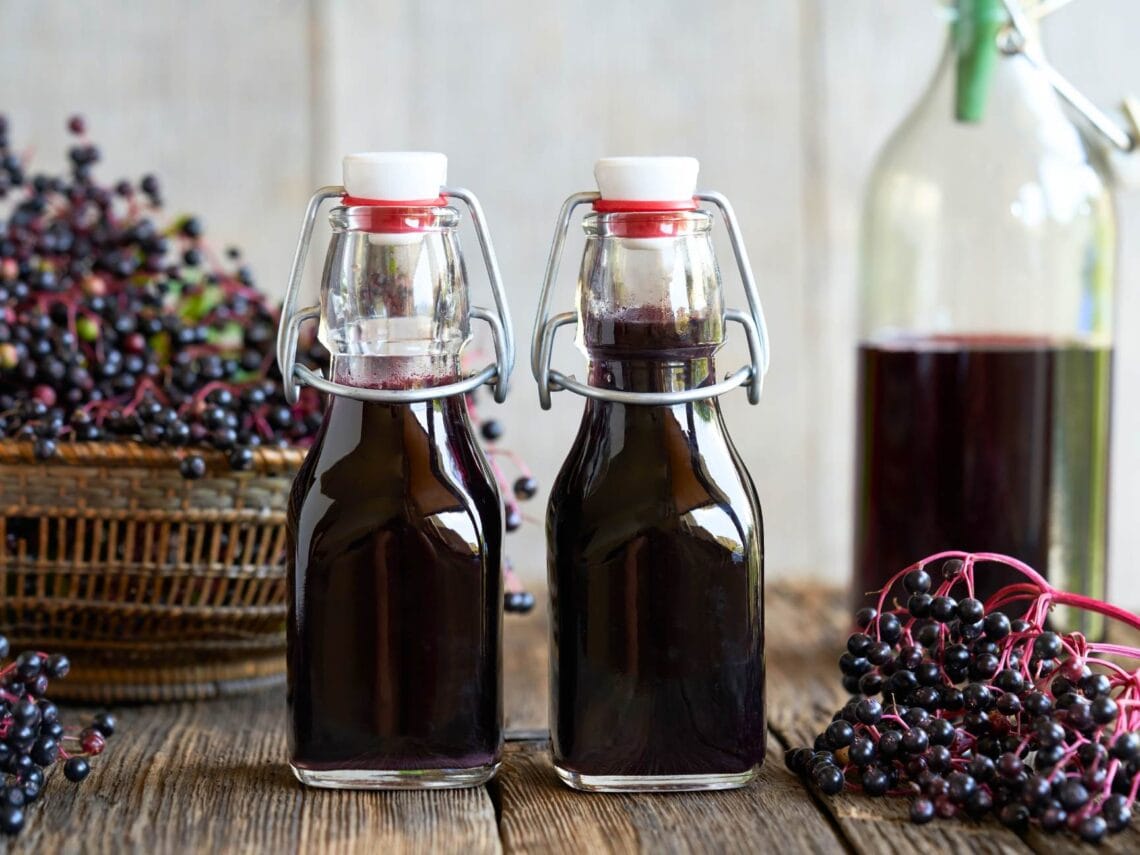
- Air-tight glass storage containers for the finished elderberry syrup, such as 8 oz swing top bottles, 16 oz glass bottles, or mason jars.
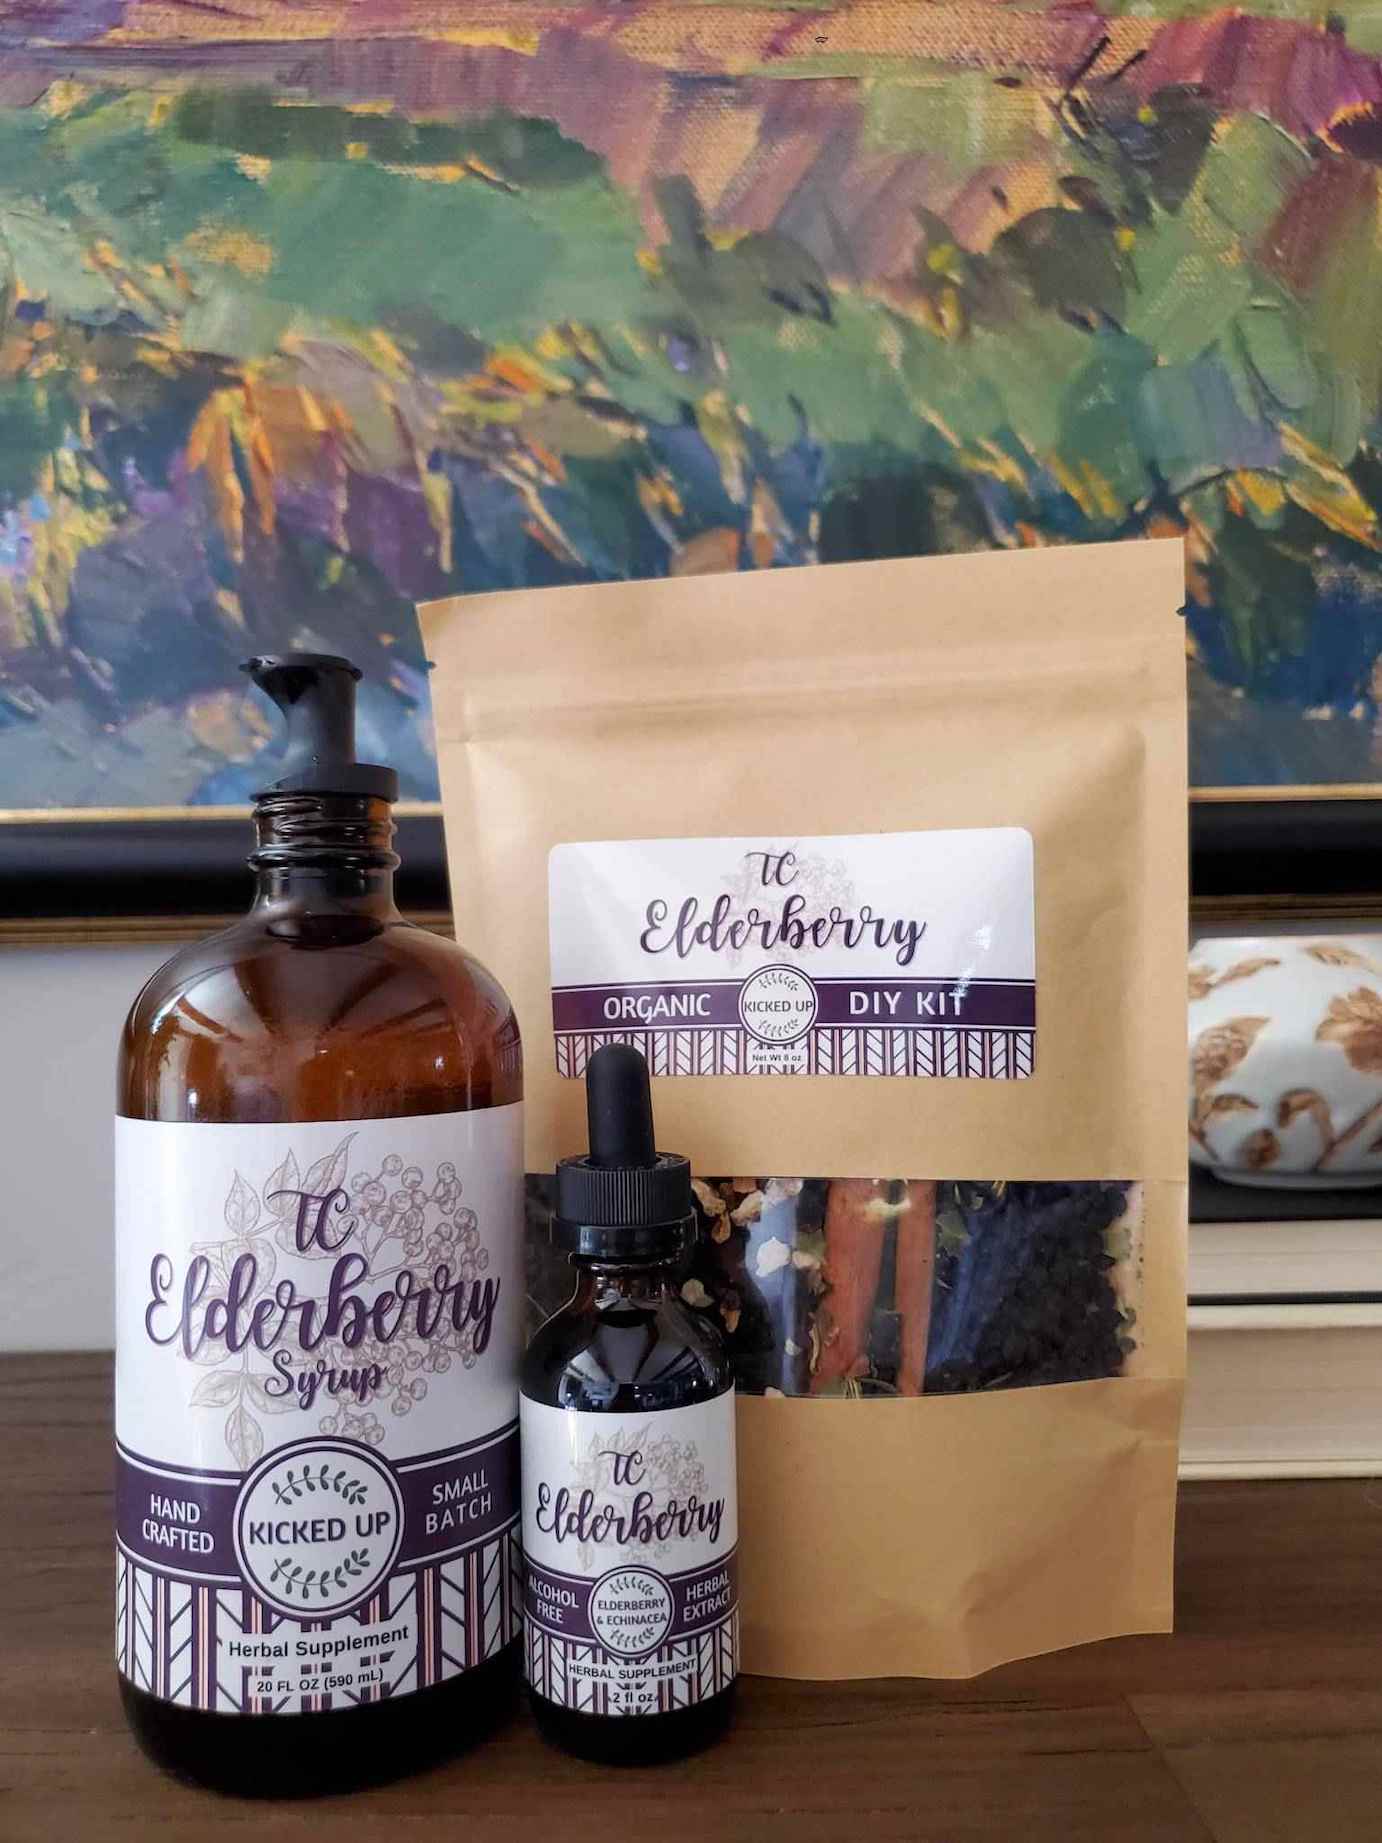
Another option is to get a convenient all-in-one DIY elderberry syrup kit like this one from TC Elderberry. It includes organic dry elderberries, cinnamon sticks, and other spices. All you have to do is brew it with water and add honey. Their “kicked up” version also has echinacea, rosehips and aronia berries for an added boost! They also offer finished syrup – made fresh to order. Use code “deannacat” to save 15% at TC Elderberry.
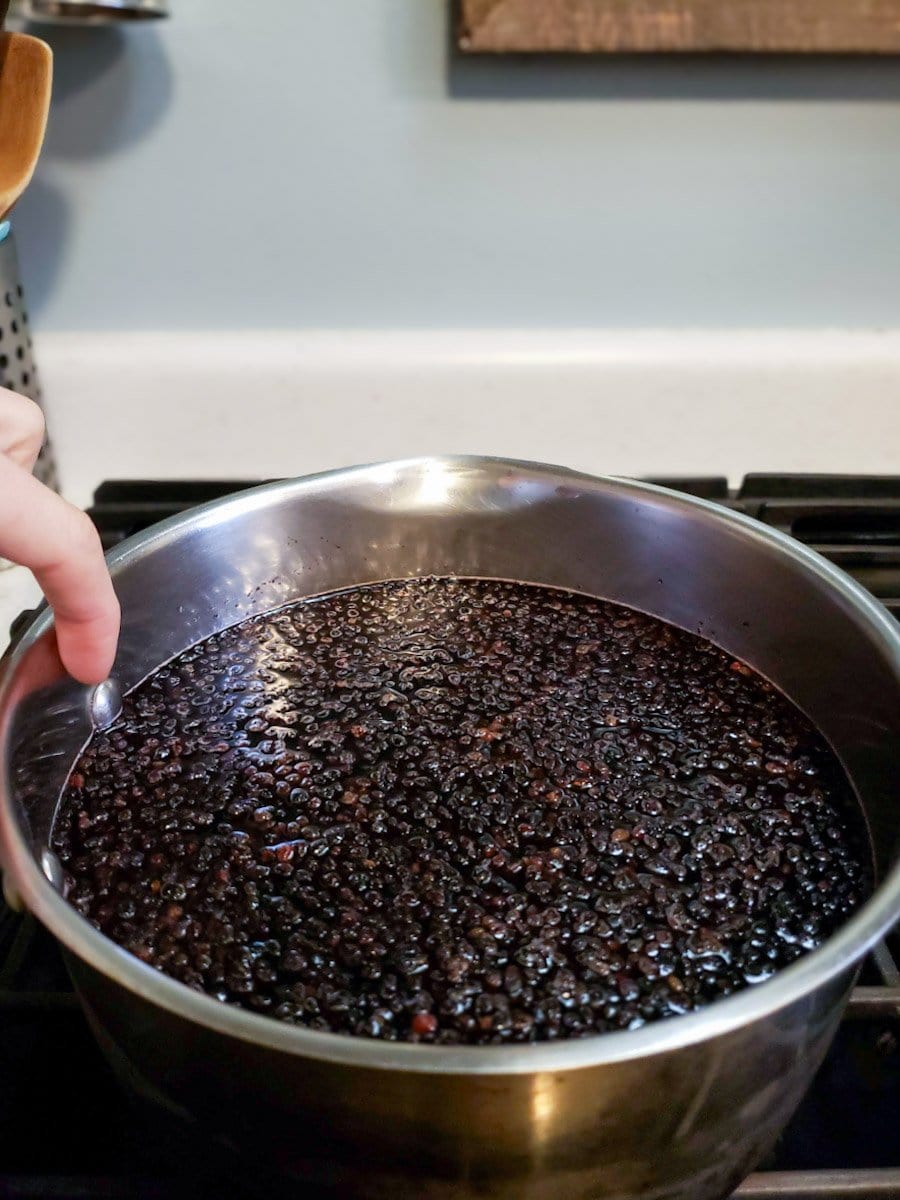
Step 1: Combine Elderberries and Water
Using dried berries: In a large pot or saucepan, combine 4 cups dried elderberries with 8 cups of water. Note the height of liquid in the pan.
Using fresh berries (or frozen): If you’re fortunate enough to have fresh elderberries available, use 8 cups of berries and just 1 cup of water. The natural juice in the berries will make up for the little amount of water added! Wash them and remove all the stems first. If you’re using frozen elderberries, there is no need to defrost them first.
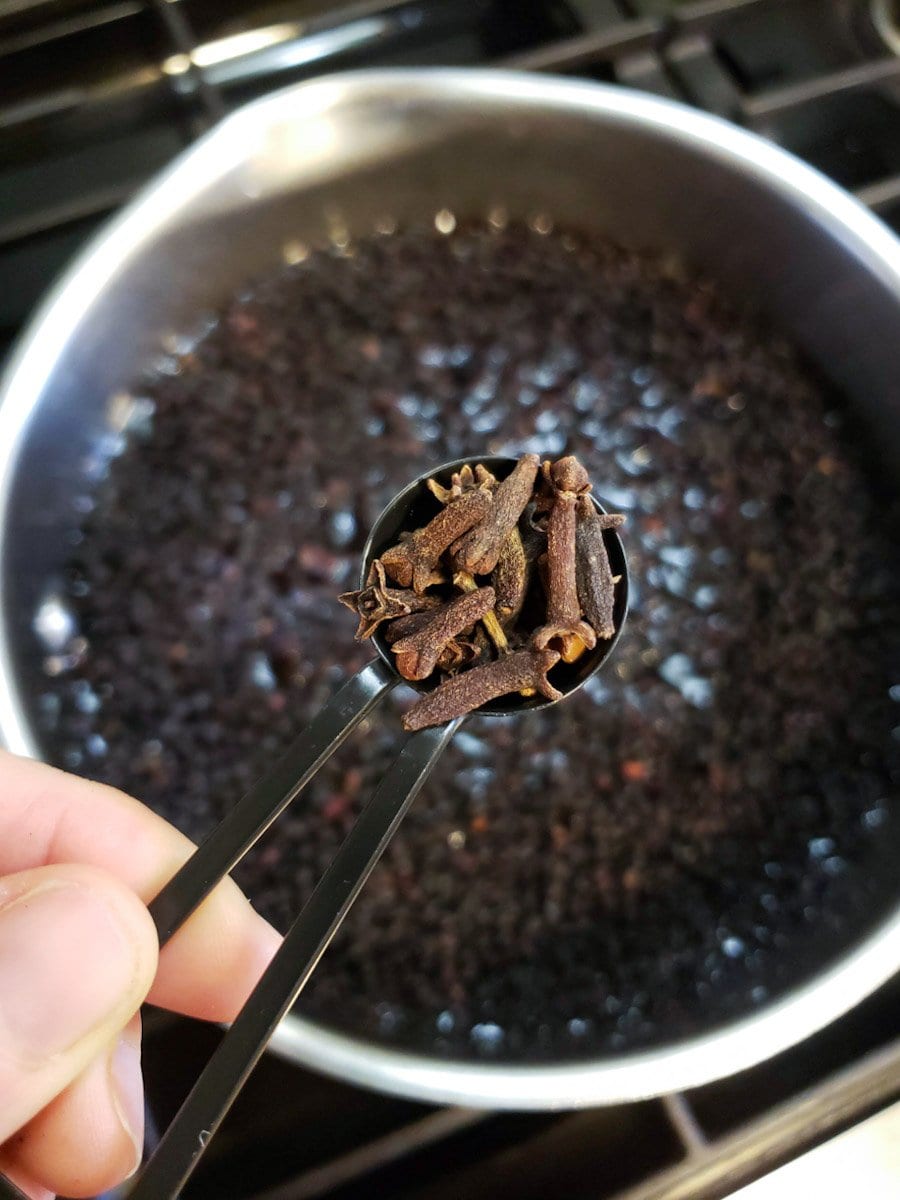
Step 2: Add Spices
Turn the stove on a medium-low heat, enough to simmer the mixture but not boil. Once the mixture has begun to heat up, stir in:
- 1 teaspoon of cinnamon powder OR 2 whole cinnamon sticks
- ½ teaspoon of whole cloves (or 1/2 tsp powder)
- 2 heaping tablespoons of freshly grated raw ginger
- Optional: 2-3 whole star anise
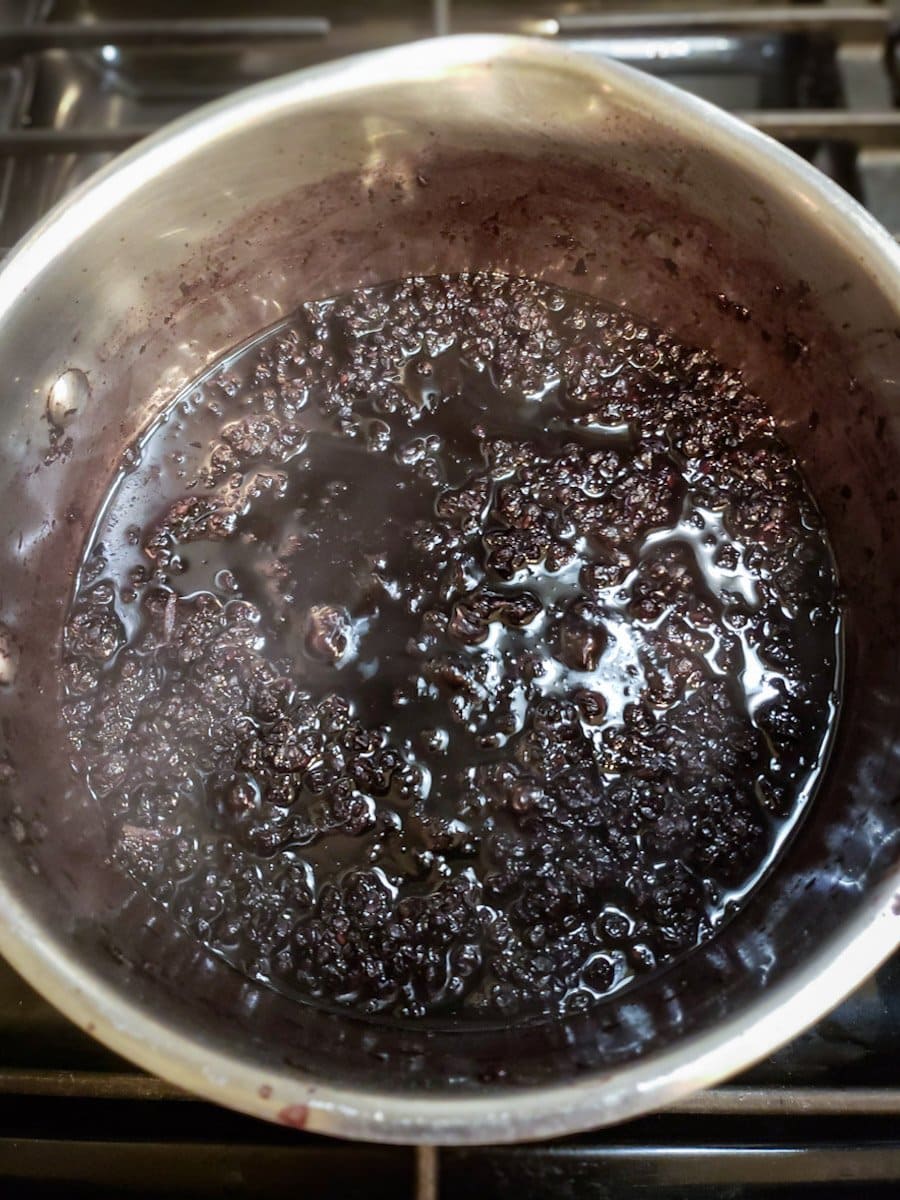
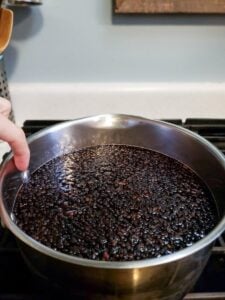
Step 3: Simmer and Reduce
Dried elderberry variation: Continue to simmer until the liquid has reduced to about half of the original volume. This could take only 30 minutes, or up to an hour or two, depending on how vigorous a simmer you set your stove to. We usually opt for slow-and-steady. As the berries soften and the water reduces, the elderberry juice becomes increasingly concentrated.
While simmering, leave the pot uncovered so steam can evaporate. Also stir the mixture on occasion. I use a large flat wood spoon to press the elderberries against the side of the pot as I stir. (Or you can use a potato masher if you have one.) This helps to squeeze out all the good juices we’re after!
Fresh elderberry variation: Simmer the berries and water for at least 30 minutes, until they’re soft and release their juices. Press and stir on occasion. Next, strain out the skins and pulp (as shown below) and return the elderberry juice to the pan. Continue to simmer until the original amount is reduced by about one-half.
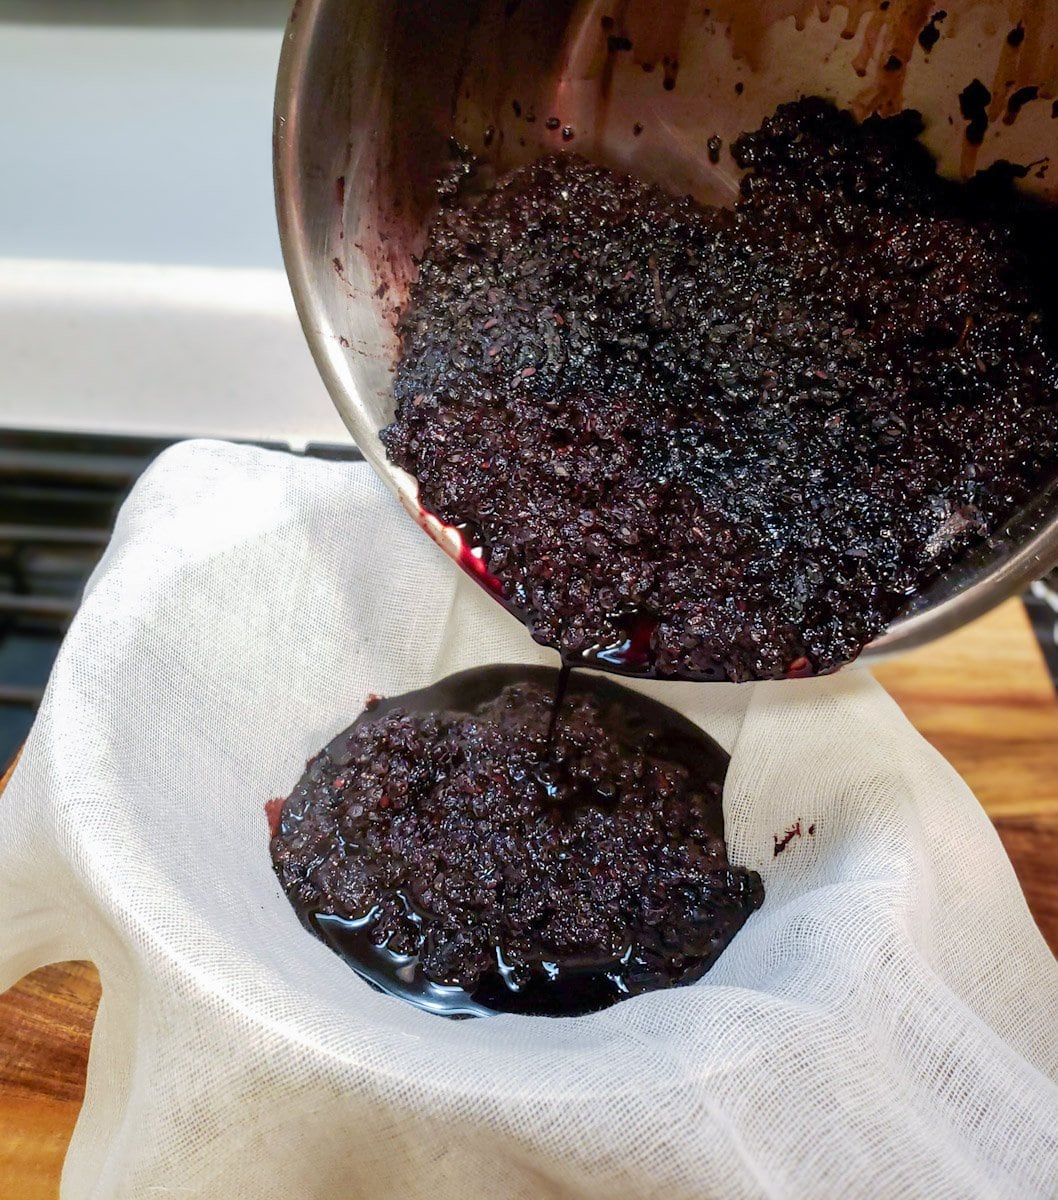
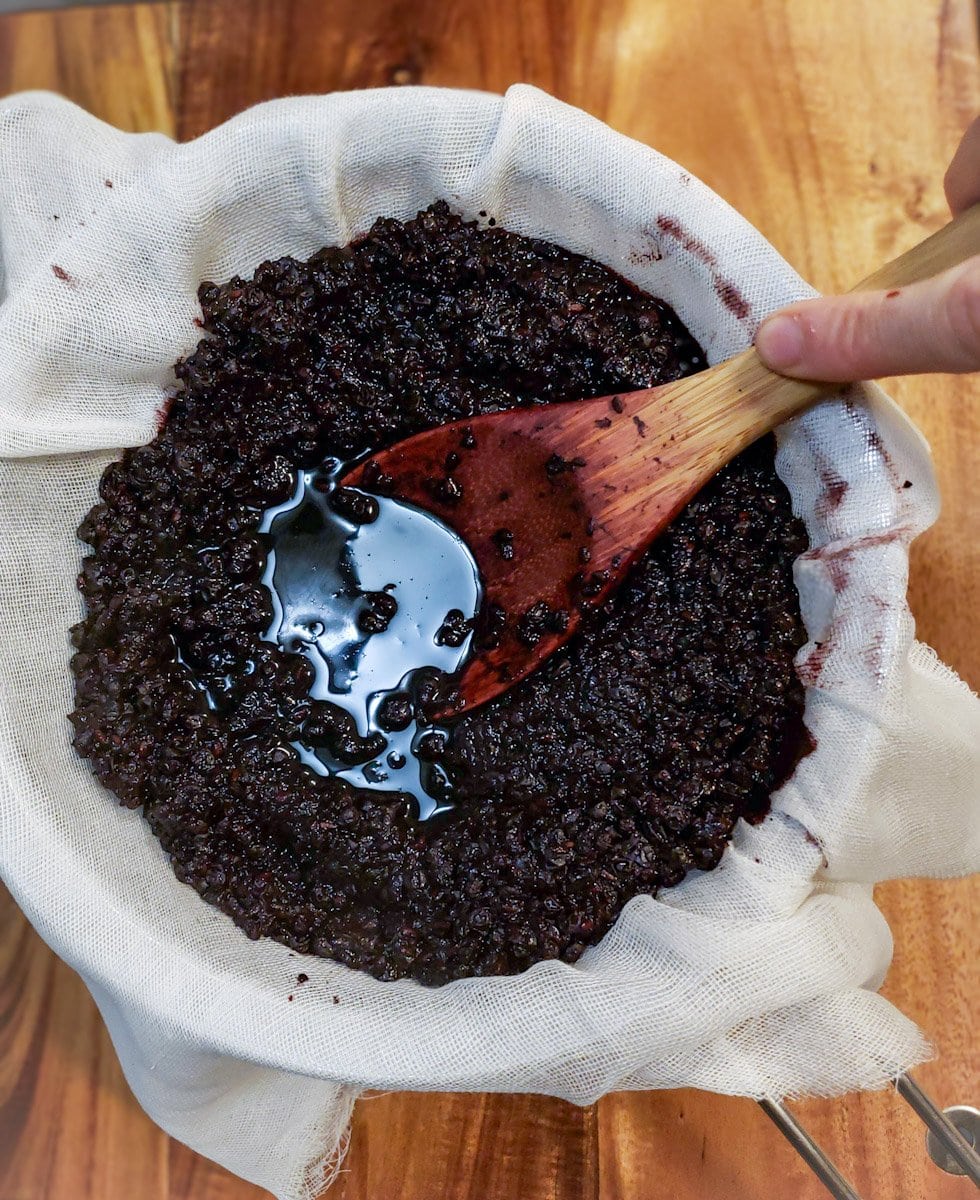
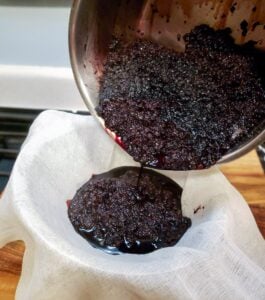
Step 4: Strain
Once the liquid reduces to about half of the original volume, it is time to squeeze and strain! (If you haven’t already done that with your fresh berries in Step 3, that is.) Allow the elderberry mixture to cool slightly before proceeding, but not completely. You don’t want to burn yourself, but also want to keep the liquid warm to help dissolve the honey later.
- To strain the elderberries, we set a fine-mesh stainless steel strainer lined with either a nut milk bag or cheesecloth, set on top of a glass mixing bowl. We like this organic cotton unbleached cheesecloth.
- Gently pour some of the mixture into the strainer. I found it best to add a little at time, pressing the berries down into the strainer and cheese cloth with a wooden spoon as we went. This helped to extract as much of the precious juice as possible. Add some, smush and mash, add some, smush and mash. Continue this until all you have left in the strainer is fairly dry berry pulp, with a nice bowl of elderberry juice below.
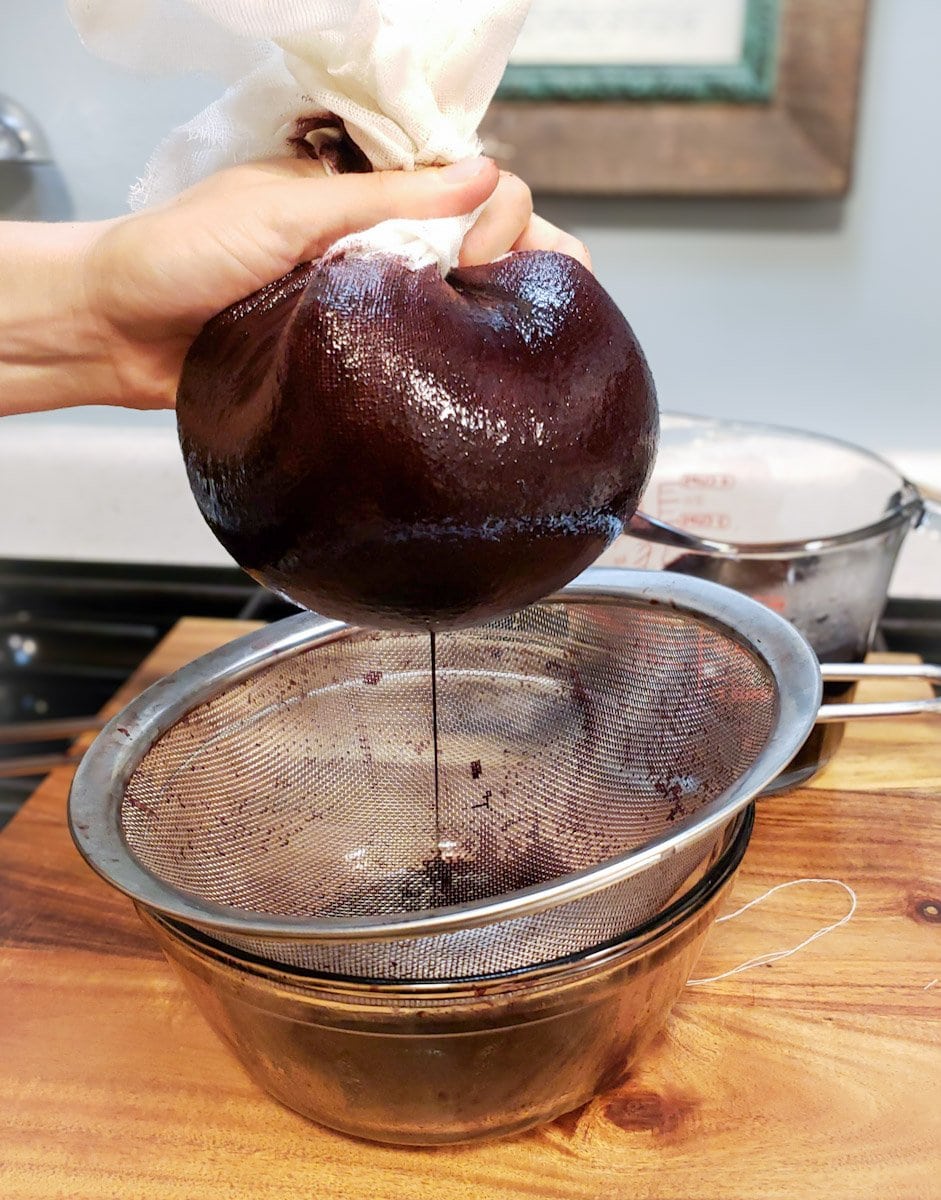
- Next, carefully lift and close up the sides of the cheesecloth, forming a nice little sack of berries. Then squeeze the heck of out it! This will dye your hands purple for a day or two, so wear gloves if you want to avoid that.

You can compost the leftover berry pulp, or steep it in water to create a dilute elderberry tea. If you have a food dehydrator, you can dry the leftover elderberries to save for future loose-leaf tea or to use in fire cider. They’ll be slightly “spent”, but should have some good stuff left inside too!

Step 5: Measure
Pour the strained, concentrated elderberry juice into a measuring cup and take note of its volume or amount (e.g. 3 cups). Now add the juice back into your pot, but do not turn the heat back on.
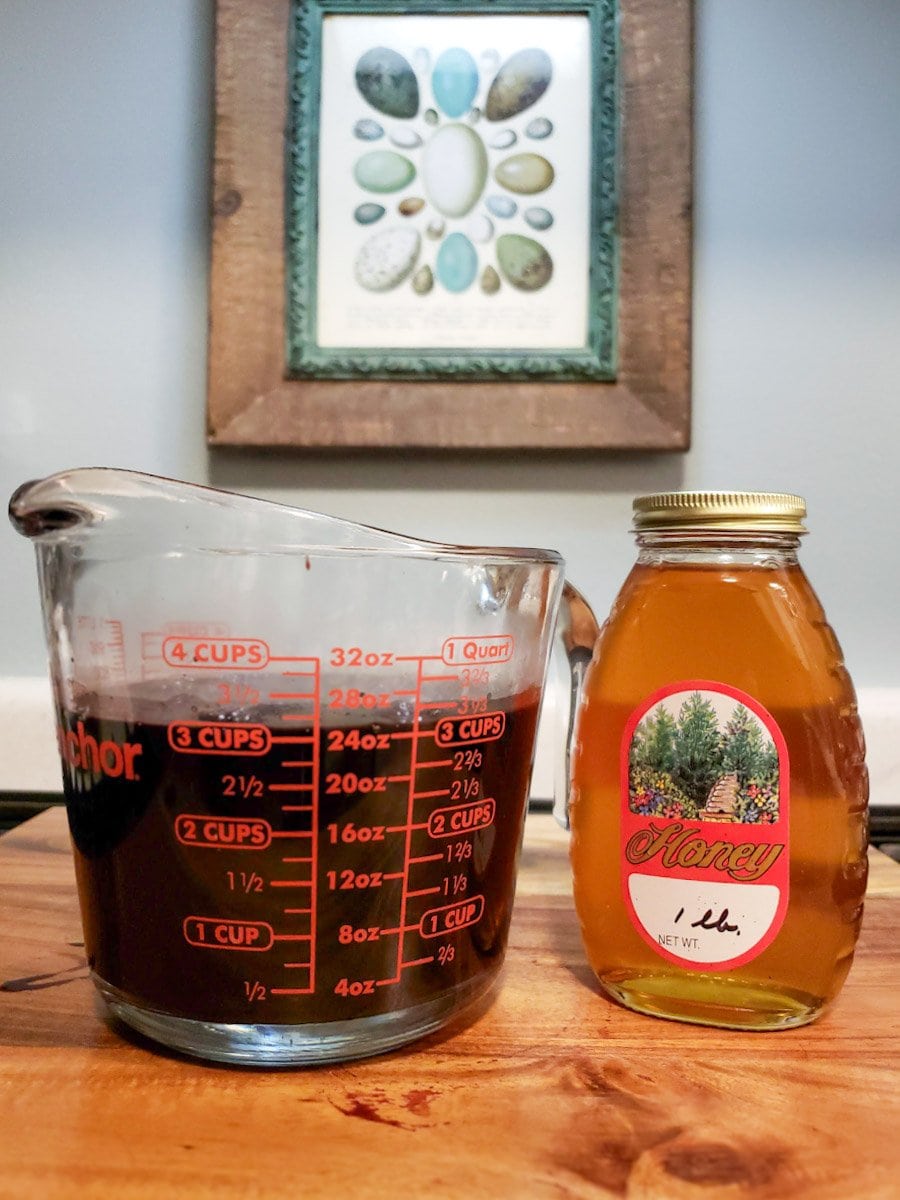
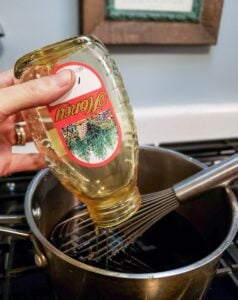
Step 6: Add Honey
Now it is time to turn your elderberry juice into syrup with the addition of honey!
Most elderberry syrup recipes say to add an equal amounts of honey to concentrated elderberry juice. For instance, 3 cups of juice and 3 cups of honey. Honey offers key healing properties of its own and acts as a preservative for the syrup.
The juice is likely still a bit warm, hopefully enough to whisk in the honey without needing to heat anything further. Avoid directly heating the honey, which can destroy its beneficial properties. If your honey is extra cold, set the sealed jar of honey in a bowl of warm water to help gently warm it up.
Since I’m Type 1 diabetic, we sometimes only use about ¾ the amount of honey – such as 16 ounces of honey to 24 ounces of elderberry juice. That’s plenty to preserve it, though we try to use it up faster than recommended just in case. (Storage and shelf life notes to follow.)
To extend the shelf life of homemade elderberry syrup, you can also add a splash of liquor like vodka, whiskey, or brandy as an extra preservative. One-third to half a cup of liquor for this size batch of elderberry syrup will do the job just fine.

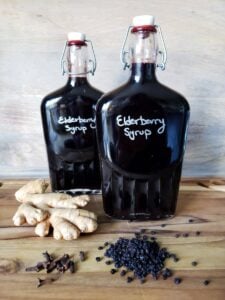
Step 7: Bottle
Finally, transfer your delicious homemade elderberry syrup into final storage containers such as mason jars, glass swing-top bottles, or these rad swing-top flasks. Store in the refrigerator.
Storage
When made with the full honey-to-juice ratio, elderberry syrup should stay good for at least three months in the refrigerator. The addition of alcohol will help prolong the shelf life further too. As long as it doesn’t develop mold, off flavors or odors, it is likely still good and safe to consume even after 3 months.

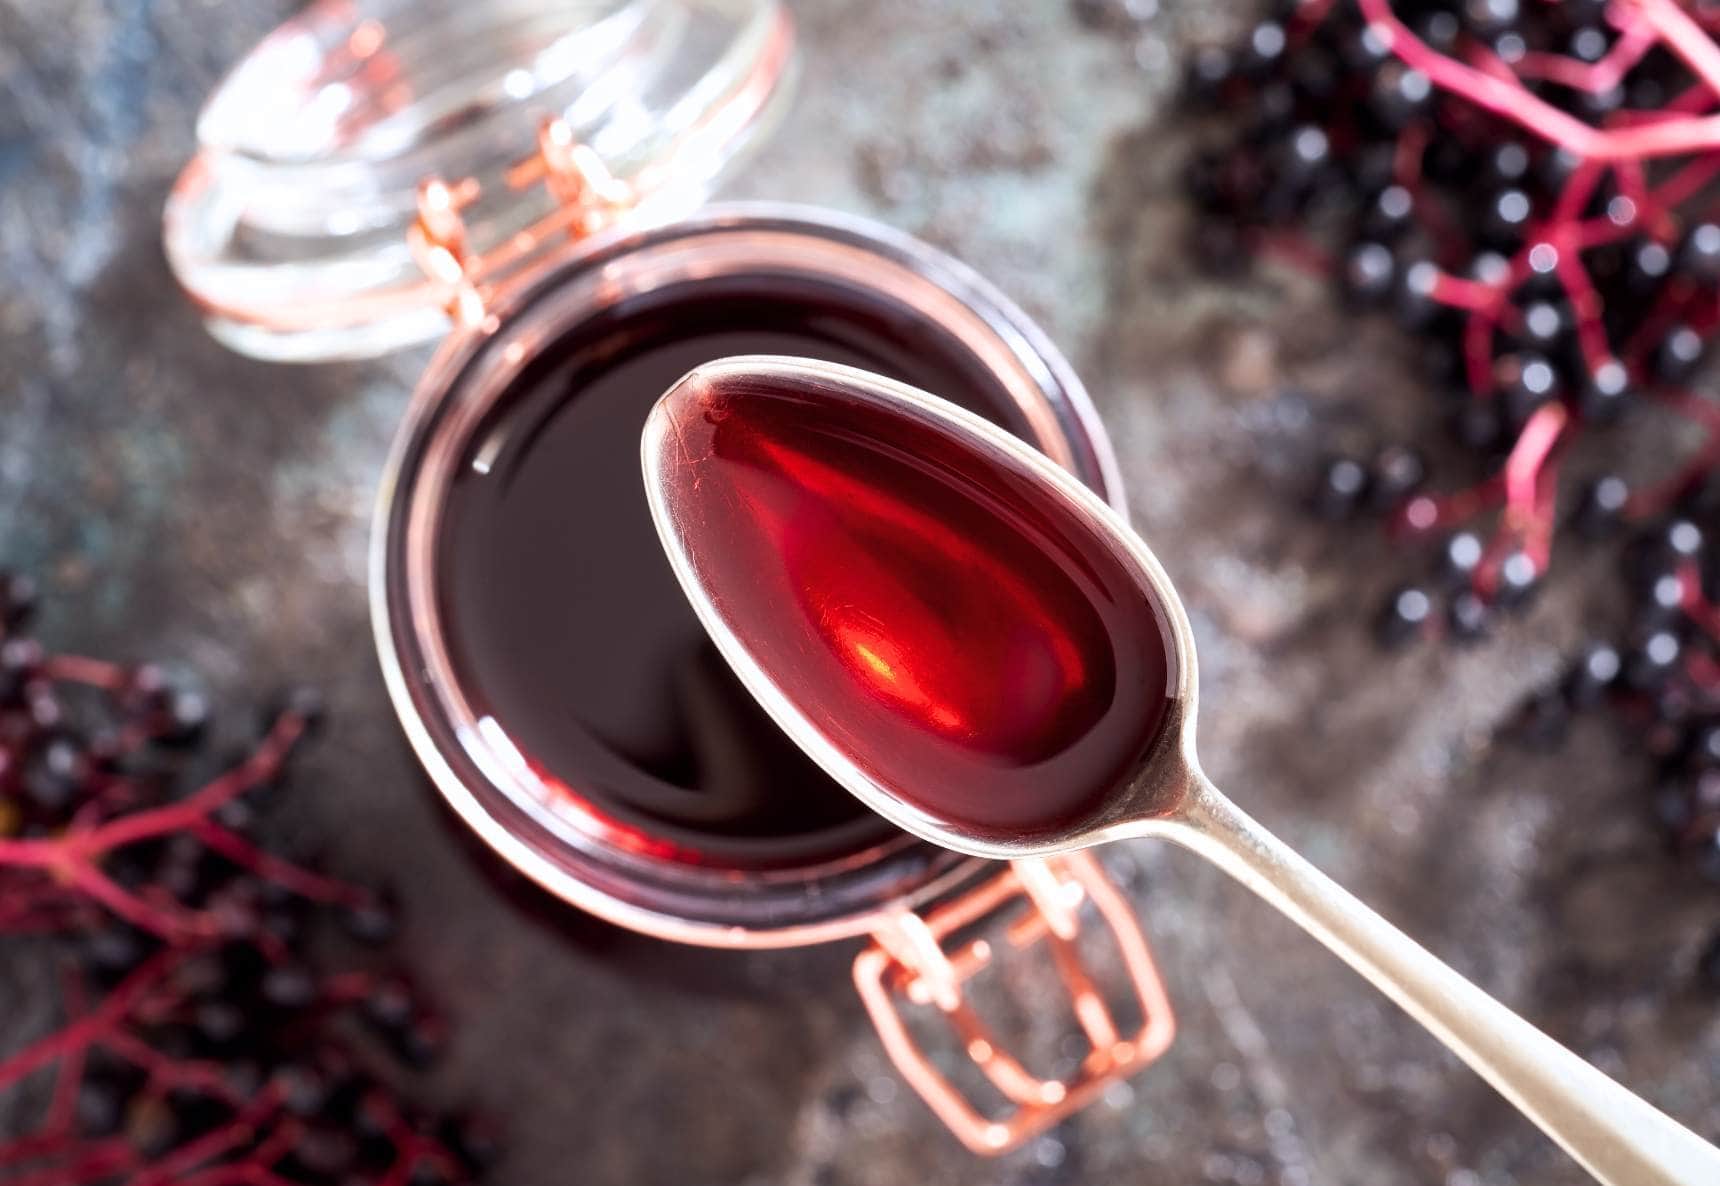
How to Take Elderberry Syrup
You can take one teaspoon of elderberry syrup up to three times per day. We generally consume one teaspoon per day as a preventative measure, such as during cold and flu season or when something is going around our workplace. If we feel crud coming on or are actually sick, we increase our dose to 2 or 3 times per day.
Elderberry works to inhibit viral replication, so it is best to take it as the very first symptoms of illness appear, or soon after you’re around someone who is sick.
You can also use your elderberry syrup to make homemade elderberry gummies!

Bottoms up! I hope you found this guide to be helpful. If so, please leave a review below. Also feel free to ask any questions. Thank you so much for tuning in. Cheers to staying healthy, naturally.
You may also like:
- Fire Cider Recipe: How to Make Fire Cider for Immune Health
- How to Make Medicinal Herb Infused Oil: Two Ways
- Homemade Elderberry Tincture Recipe with Dried or Fresh Berries
- Preserving Apples: How to Make Homemade Apple Cider Vinegar
- 10 Best Vegetarian and Vegan Supplements for Improved Health
- Calming Chamomile: How to Grow, Harvest, Dry and Use Chamomile

Homemade Elderberry Syrup (Dried or Fresh Berries)
Ingredients
- 4 cups dried organic elderberries OR 8 cups of fresh elderberries or frozen
- 2 tbsp freshly grated raw ginger OR 1 tsp powder
- 1 tsp cinnamon OR 2 whole cinnamon sticks
- 1/2 tsp cloves ground or whole
- 8 cups water OR only 1 cup, if you're using fresh elderberries
- 16-24 ounces honey
Instructions
- Add 8 cups of water and 4 cups of dried elderberries (or 8 cups fresh berries and 1 cup water) to a saucepan and simmer over medium-low heat.

- Once simmering, add cinnamon, clove, and grated ginger and continue to simmer, stirring occasionally until the liquid is reduced by half.
- Once reduced by half the original volume, allow the elderberry mixture to cool slightly.
- Using a fine mesh strainer or cheesecloth perched over a bowl, strain the mixture, using a spoon (and hands) to press the berries to extract as much juice as possible.

- Add the extracted elderberry juice back into the saucepan with the called-for honey, using a whisk to thoroughly combine. If needed, created a warm water bath to lightly heat and soften honey, but avoid microwaving or boiling honey!

- Optional: Add a splash (up to half a cup) of your liquor of choice, as an extra natural preservative.
- Pour the elderberry syrup into jars or bottles, and refrigerate. Without liquor, it should stay fresh for about 3 months. It is safe to use until mold develops!


170 Comments
Louise Edwards
I made this recipe yesterday and wasn’t sure if all the work picking the berries off the stalks would be worth the effort…but yes it was! This is delicious and I think that you can feel the goodness seeping into your body when you have a spoon! (Or that might be the brandy I put in, but either way it’s lovely!).
Also I can recommend putting an audiobook on while you strip the berries from the stalks. It’s not so bad when you have Stephen Fry to accompany you!
Aaron (Mr. DeannaCat)
Hi Louise, so glad you found the effort to be worth your while, enjoy your syrup and thanks for sharing!
Brandi Williams
Great recipes and very thorough instructions! Made it for the first time today. I eyeballed the honey and think I probably could have added a little more because it taste a little strong/stout but still delicious and excited to have this gem in my fridge for the cold & flu season!
Aaron (Mr. DeannaCat)
Congratulations on making your elderberry syrup Brandi, hope you enjoy it through the winter!
Ella
I just wanted to take the time to thank you for posting this detailed and very valuable recipe here. I grew up with many elderberry bushes on the property and in the neighborhood, and was especially fond of the steam juiced berries either fresh mixed with seltzer water, or turned into jellies and pancake syrups. I just recently found a small volunteer bush full of ripe berries and will have enough for this elderberry syrup recipe for health.
But, Deanna, I especially liked the idea of drying the leftover pulp and crushed berries and using the dried result for tea. That made me think of doing the same for when I steam juice concord grapes from the Italian neighbor’s decades old vine. What a brilliant idea! Saves me from separating the seeds from the pulp, which I have done (tedious!) and turned into grape fruit leather. Yay! Another (heart-)healthy option–elderberry and grape tea!
Aaron (Mr. DeannaCat)
Hi Ella, thank you so much for the kind words and it sounds like you have used elderberries in some very delicious ways! Separating the seeds from the pulp on concord grapes sounds like quite the task, we have a hard enough time just separating our grapes from the stems. Good luck on your elderberry harvesting and preserving!
Maria
I’ve always bought elderberry syrup but my friend gave me some dried berries. So I gave it a go and turned out great. A bit of a bitter taste but I didn’t measure the honey, so probably just needed more.
Thank you for the recipe.
Kela Futrell
Hi! When adding the alcohol , just to make sure I’m understanding, I add while reheating the strained elderberry juice? Is that because the heat helps dissolve the liquor flavor? Safe for kids?
Aaron (Mr. DeannaCat)
Hi Kela, if you intend on giving your kids the elderberry syrup, I wouldn’t add the alcohol at all. Chances are, if you and your kids are taking the elderberry syrup on a regular basis, it will likely be gone before the syrup goes bad. Hope that helps and reach out if you have any other questions, good luck!
Darlene Burgess
I never take the time to comment on these posts, but I am soooo impressed with the quality of information in Deanna’s Elderberry Syrup recipe, I must shout a “Yahoo!” To Deanna!!! You have blessed us with sooo much invaluable, quality information ! Thank you!!! I plan to go to your YouTube videos & subscribe to them right now. I love that you have taken the time to become educated in this very important field in order to help us. I just ordered the flask bottles to store my syrup & have ordered the syrup DIY Kit from TC Elderberry!
Aaron (Mr. DeannaCat)
Hi Darlene, thank you so much for the kind words and we are so happy that you find the site so helpful. Have fun making your own elderberry syrup and you should love the kit from TC Elderberry, they make really great products. Thanks again and enjoy!
Tanya
I made this recipe yesterday. My 9 year old doesn’t mind the taste but getting my 4 year old to take it is like getting him to take medicine. This might be a dumb question but if I dilute it with water, will it have the same effect/immunity properties?
Aaron (Mr. DeannaCat)
Hi Tanya, yes you can dilute the elderberry syrup with water, as long as the same amount is taken (even if added to 8 ounces of water), it shouldn’t make the dose any less effective. Hope that helps and good luck!
Tiffani
I’m looking forward to making this!! What about for kids? Ages 11-2.. can they also take a tsp daily?
Aaron (Mr. DeannaCat)
Hi Tiffani, dosing instructions can vary for children as there haven’t been studies done on the dosage amount so we can’t say for sure. It looks like (on some other sites) the recommended dosage for children is 1 teaspoon daily but if you have children under the age of 5, you may want to start off with a 1/2 teaspoon to play it safe. Hope that helps and good luck!
Meloney
Can you double this recipe.
Aaron (Mr. DeannaCat)
Hi Meloney, yes you can double the recipe, good luck!
Jessica Tisdale
Hi! I’m making this for the first time this week. I’m wondering, once it is made, what is the typical serving size? I’m guessing it follows the 1tsp 3 x a day or more if sick. Just wanting to make sure
Thank you in advance!
Aaron (Mr. DeannaCat)
Hi Jessica, we will typically just take 1 tablespoon, once a day for regular maintenance during the cold and flu season but you can take it multiple times throughout the day if you feel an illness coming on. Hope that helps and enjoy!
Sarah
Can I freeze this syrup to store it for longer?
Aaron (Mr. DeannaCat)
Hi Sarah, absolutely you can freeze the syrup to extend its shelf life, good luck!
Heather
Is it best to freeze the berry concentrate before you add the honey then add the honey later? Or is it ok to add the honey then freeze?
Aaron (Mr. DeannaCat)
Hi Heather, you can add the honey to the syrup and then freeze, enjoy!
Brianna
Hi! I definitely only added 4 cups of water instead of 8 cups! Is there anyway to save this?! 😭 I didn’t add the honey yet! Just finished straining
Aaron (Mr. DeannaCat)
Hi Brianna, how much liquid did you end up with after straining? As you can see from our pictures, we had about 3 cups total volume. You can either keep your liquid as is, knowing that it will be around double the strength than the recipe or you could add some water to increase your volume closer to the 3 cups that we show in the article. Hope that helps and good luck finishing your elderberry syrup!
Emily
Haven’t tried it yet but looking forward to it… 😀 I have a question though: can gin be used as a preservative as well? I have a bottle that I infused with wild rose and think it would be an awesome match… Also, by how long do you extend the shelf-life (in the fridge) with alcohol added? Thanks!
Aaron (Mr. DeannaCat)
Hi Emily, gin infused with wild rose sounds fantastic and it should would work great, really any 40% alcohol that one would drink seems to do a great job at extending the shelf life of elderberry syrup by a number of months at the very least compared to syrup made without the alcohol addition. Hope that helps and enjoy!
becky cyrtiraterra
can I cut this recipe in half?
Aaron (Mr. DeannaCat)
Hi Becky, yes you can cut the recipe in half, good luck!
Ann Krumholz
Hi! Your recipe was very easy to follow thank you. I had both fresh and dried elderberries I needed to use asap. After tasting the syrup the next day I realized I didn’t add enough honey. Can I slightly reheat the syrup to add additional honey?
Thank You!
Aaron (Mr. DeannaCat)
Hi Ann, you should be able reheat the syrup and add more honey as needed, enjoy!