

Easy Elderberry Gummies Recipe (How to Make Elderberry Gummies)
Berries and worms and bears… oh my! Follow our easy step-by-step elderberry gummies recipe and learn how to turn nutrient-rich elderberry syrup into homemade gummies for natural immune support. They’re delicious, fun, and easy to make! Plus, the kids will love these healthy and adorable little snacks. This recipe includes options to make classic gummies or how to make vegan elderberry gummies.

Would you like to save this?
Disclosure: Homestead and Chill is reader-supported. When you purchase through links on our site, we may earn an affiliate commission.
RELATED: Looking for more immune-boosting recipes? Don’t miss our homemade elderberry syrup recipe, elderberry tincture recipe, fire cider recipe, homemade cough drops, or fermented garlic honey!
The Benefits of Elderberry Gummies
Loaded with antioxidants, vitamins and minerals, elderberry gummies offer amazing natural immune support! Studies show that elderberries have potent antiviral and antimicrobial properties, helping to prevent illness as well as shorten and alleviate symptoms of the common cold. The gelatin in this recipe adds a welcome boost of protein and nutrients too.
This elderberry gummies recipe is kid-friendly*, and a fun way to encourage your kiddos to take elderberry syrup if they don’t usually like spoonfuls of liquid. Who doesn’t love gummy bears and worms?
NOTE: It is not recommended for children under 2 years old to consume honey, which is often in elderberry syrup. Also please note that I am not a medical professional nor is this intended to be medical advice.
Supplies
- Gummy molds of choice. We love the high-quality silicone gummy molds from The Modern Gummy. They have classic small bears, medium bears, worms and more. If you don’t have gummy molds, you could pour the mixture into a wide shallow tray or container and then cut them into small gummy squares once they set.
- 2-cup liquid measuring cup
- Small saucepan or pot
- Droppers or a mini baster (our gummy molds came with a handy dropper!)
- Baking sheet, tray, or platter large enough to hold the gummy molds, but small enough to fit in the refrigerator
The amount of bears you’ll get from this elderberry gummies recipe depends on the molds you use. The recipe yields about 400 to 425 mL of liquid total. That will fill just over three of these classic gummy bear molds or make about 180 small gummy bears. I filled one medium-sized gummy bear mold and one worm mold, yielding 55 larger gummies total. Since they only last a few weeks in the fridge, feel free to halve the recipe.

Ingredients
- 1 cup of elderberry syrup, either homemade or store bought. See our easy step-by-step elderberry syrup recipe here. At least 1/4 cup of the elderberry syrup must be cool or cold, so refrigerate some as needed.
- 1/2 cup water, or natural fruit juice to make sweeter elderberry gummies – especially if your kids don’t like the flavor of elderberry syrup on its own. Apple, grape, pomegranate, or cherry juice work great and add to the beautiful color.
- 1/4 cup (4 Tbsp) of gelatin powder, such as this high-quality grass fed gelatin. To make vegan elderberry gummies, you can substitute with 4 to 5 teaspoons of agar agar powder instead (though most elderberry syrup also contains honey).
- Optional: 2 tablespoons of lemon juice will help extend the shelf life. However, if you use lemon juice, I recommend using fruit juice instead of water to offset the tartness! Since it’s acidic, the fruit juice also helps lower the pH and make them last longer.

Gelatin vs Agar Agar
This elderberry gummies recipe requires a thickening agent to turn elderberry syrup into delicious squishy gummies, such as gelatin or agar agar.
- Gelatin is a protein made from animal collagen, so it adds a welcome boost of protein and nutrients to homemade elderberry gummies. It comes as a powder and is easy to work with. I highly recommend using a grass-fed gelatin for this recipe.
- Agar agar is a great plant-based substitution for gelatin. Derived from seaweed, you can use agar powder to make vegetarian or vegan elderberry gummies. However, agar agar is a stronger thickening agent so you usually only need about one-third to one-half of the amount. As a general rule of thumb, 1 to 1.5 teaspoons of agar agar is equivalent to 1 Tbsp of gelatin.

Instructions
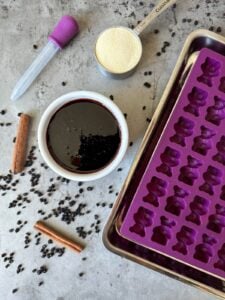
1) Prepare Supplies
- First, get all of your supplies and ingredients out and ready. Once the elderberry syrup is mixed with gelatin and removed from the heat, it will start to set – so you’ll want to be prepared to work fairly quick!
- If you are using silicone gummy molds, put them on a baking sheet, platter, or tray that will fit inside the refrigerator. This makes it much easier to move the otherwise floppy molds once they’re full of liquid.
2) Gently Heat Elderberry Syrup and Water
- Combine 3/4 cup of elderberry syrup and 1/2 cup of water (or fruit juice) in a small pot on the stovetop on medium-low heat.
- Do not use a full cup of elderberry syrup; reserve 1/4 cup for the next step.
- Do not boil the mixture. Heat until very warm, but not boiling.
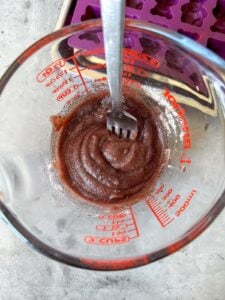
3) Mix Gelatin
- In a separate small bowl or a 2-cup glass measuring cup, mix 1/4 cup gelatin powder with the remaining 1/4 cup of cold or cool elderberry syrup. Stir until combined. Allow the thick paste to sit for a few minutes.
- This process is called “blooming” or activating the gelatin, and should be done with cool liquid, not hot. It helps to fully dissolve the gelatin and ensure the final mixture doesn’t have lumps.
- If you’re using agar agar, skip this step and mix it directly into the hot elderberry syrup and water (or juice) mixture on the stove.

4) Combine
- Next, combine the hot (not boiling*) elderberry syrup and water with the gelatin mixture. You can do this in the pot on the stovetop, or pour the content of the pot right into the glass measuring cup with the gelatin.
- Stir or whisk until the mixture is completely smooth.
- Finally, add the optional lemon juice and stir well.
*NOTE: Boiling gelatin can deactivate or ruin it’s gelling abilities.
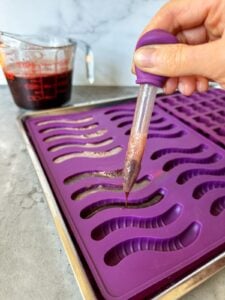
5) Pour and Refrigerate
- While it is still warm, carefully pour the mixture into your gummy molds, filling each cavity to the top. Using a dropper or mini baster helps a lot!
- If the mixture starts to set, I found it helps to place the glass measuring cup (or small bowl) inside a bowl of hot water to keep it warm while I work.
- Transfer the baking sheet of gummy molds to the refrigerator to chill for an hour or two, or until they become firm.
- Now pop them out of the molds and enjoy your homemade elderberry gummies! See storage tips below.


Storage
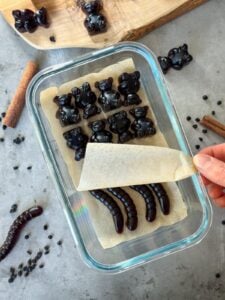
Store your homemade elderberry gummies in the refrigerator in an air tight container, such as a glass food storage container with a tight-fitting lid. If left at out room temperature, gelatin can soften, degrade or spoil.
To prevent them from sticking together, store the gummies in single layers between parchment paper or waxed paper. See notes about use and serving size below.
Shelf Life
How long do homemade elderberry gummies last?
When stored under ideal conditions (in the fridge in an air-tight container), homemade elderberry gummies will stay good for about two weeks. Adding acidic lemon juice and fruit juice can help extend their shelf life by a week or two. Discard if mold develops.

Serving Size
The recommended serving size for our homemade elderberry gummies recipe depends on the size molds you use, ranging from 1 to 3 gummies per day for kids 2 and over (e.g. 1 large or 3 small bears). Adults could consume double the amount: 2 large gummies or up to 6 small gummies per day.

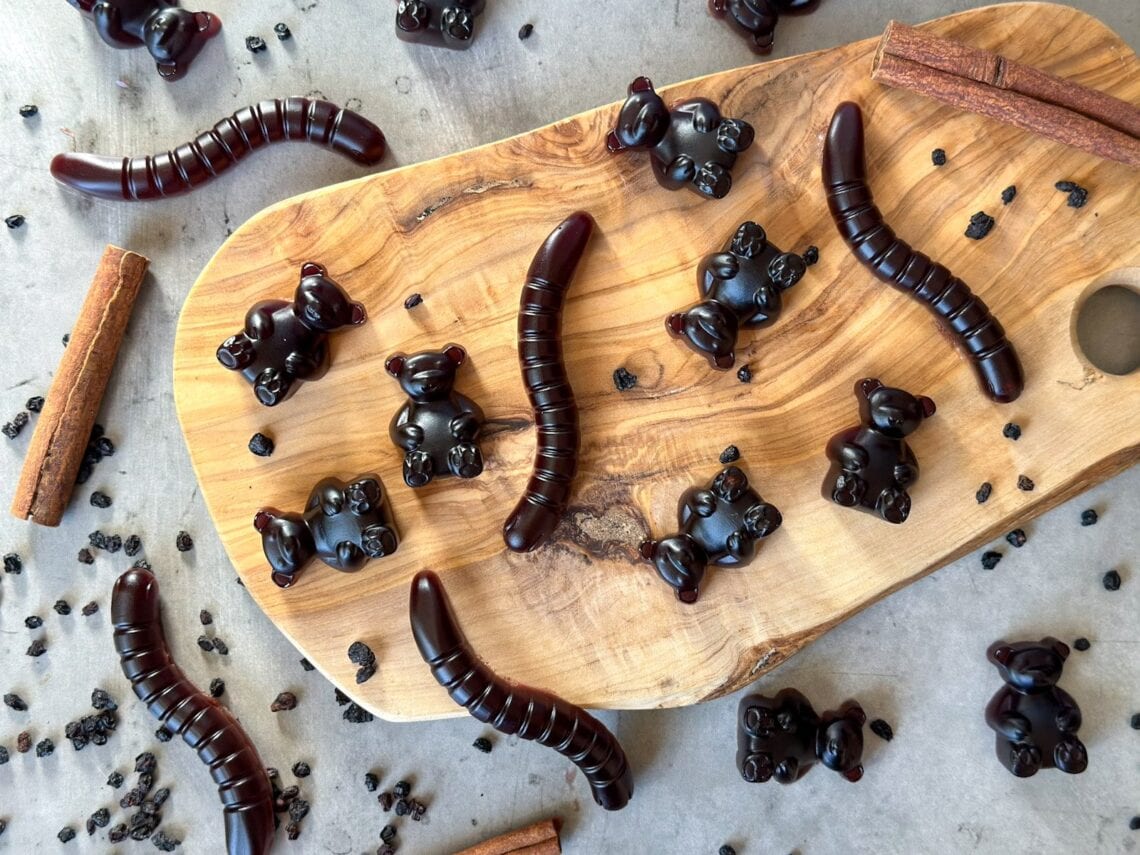
Aren’t they adorable?
Well friends, I hope you enjoy this easy homemade elderberry gummies recipe as much as we do. Please feel free to ask any questions, and be sure to leave a review a below! Thank you for tuning in today. Have fun and stay healthy!
You may also enjoy:
- Preserving Apples: How to Make Homemade Apple Cider Vinegar
- Easy Lip Balm Recipe (How to Make Homemade Lip Balm)
- How to Make Medicinal Herb Infused Oil: Two Ways
- 7 Awesome Fire Cider Benefits, According to a Nutritionist

Easy Elderberry Gummies Recipe
Equipment
- Gummy molds of choice
- Glass measuring cup or small bowl
- Small pot or saucepan
- Dropper or mini baster
- Baking sheet, tray or platter that fits in the refrigerator (to hold the gummy molds)
Ingredients
- 1 cup elderberry syrup (1/4 cup needs to be cool or cold)
- 1/2 cup water or natural fruit juice (apple, cherry, grape or pomegranate recommended)
- 1/4 cup grass-fed gelatin powder, or substitute with 4 to 5 teaspoons of agar agar powder to make vegan gummies
- 2 Tbsp lemon juice (optional to extend shelf life – but will make the gummies a little more sour if you don't use fruit juice too)
Instructions
- Get all your supplies out and ready, and place the gummy molds on a baking sheet or tray that will fit inside the refrigerator.

- Combine 3/4 cup of elderberry syrup and 1/2 cup of water (or fruit juice) in a small pot on the stovetop on medium-low heat. Heat, but do not boil.
- In a separate small bowl or a 2-cup glass measuring cup, mix 1/4 cup gelatin powder with the remaining 1/4 cup of cold or cool elderberry syrup. Stir until combined. (If you're using agar powder, skip this step and mix it directly into the hot elderberry syrup and water (or juice) mixture on the stove.)
- Next, combine the hot (not boiling) elderberry syrup and water with the gelatin mixture. You can do this in the pot on the stovetop, or pour the contents of the pot right into the glass measuring cup with the gelatin. Stir or whisk until the mixture is completely smooth.
- Add optional lemon juice and stir well.
- While it is still warm, carefully pour the mixture into your gummy molds. Using a dropper or mini baster helps a lot!
- Transfer the baking sheet of gummy molds to the refrigerator to chill for an hour or two, or until they become firm.
- Pop them out of the molds and enjoy your homemade elderberry gummies!
- Store in the refrigerator in an air tight container with a lid between layers between parchment paper to prevent them from sticking together.
- Homemade gummies generally stay good for about two weeks in the refrigerator. If you used lemon juice + fruit juice, they should last a bit longer. Discard if mold develops.
Notes


4 Comments
Laura
Would I be able to freeze some? Sending to my daughter and want them to last longer for her. Thank you!
Aaron (Mr. DeannaCat)
Hi Laura, yes you can freeze the gummies and they will last for months instead of weeks. We found that adding some lemon juice (as shown in the recipe), the gummies did last longer than when made without. Hope that helps and good luck!
Diane Kollmer
If I put Brandy alcohol in with elderberry syrup would the shelf life be considerably longer? No children use gummies.
Aaron (Mr. DeannaCat)
Hi Diane, we have found the alcohol does extend the shelf life of elderberry syrup by quite a bit but we have not tried making the gummies with elderberry syrup with alcohol. Try it out and let us know how it turns out, good luck!