


8 Organic Ways to Get Rid of Cabbage Worms & Cabbage Moths
Last Updated on June 12, 2024
Come learn eight ways to get rid of cabbage worms and cabbage moths. As one of the most common garden pests, they can be sneaky, frustrating, and cause a lot of damage to plants! But I have good news: there are many easy ways to stop cabbage worms from destroying your garden, and still reap a beautiful, bountiful harvest.
Some of these cabbage worm control options are preventative in nature, such as covering your plants with floating row covers – or even tricking the moths with color! Other methods involve directly killing the caterpillars. No matter what you choose, rest assured that all 8 of these methods are considered organic.
Would you like to save this?
Disclosure: Homestead and Chill is reader-supported. When you purchase through links on our site, we may earn an affiliate commission.
RELATED: Come learn how to grow cabbage in our comprehensive guide. Or, see how to naturally manage slugs and pillbugs with homemade slug beer traps, or get rid of grub worms on the garden.
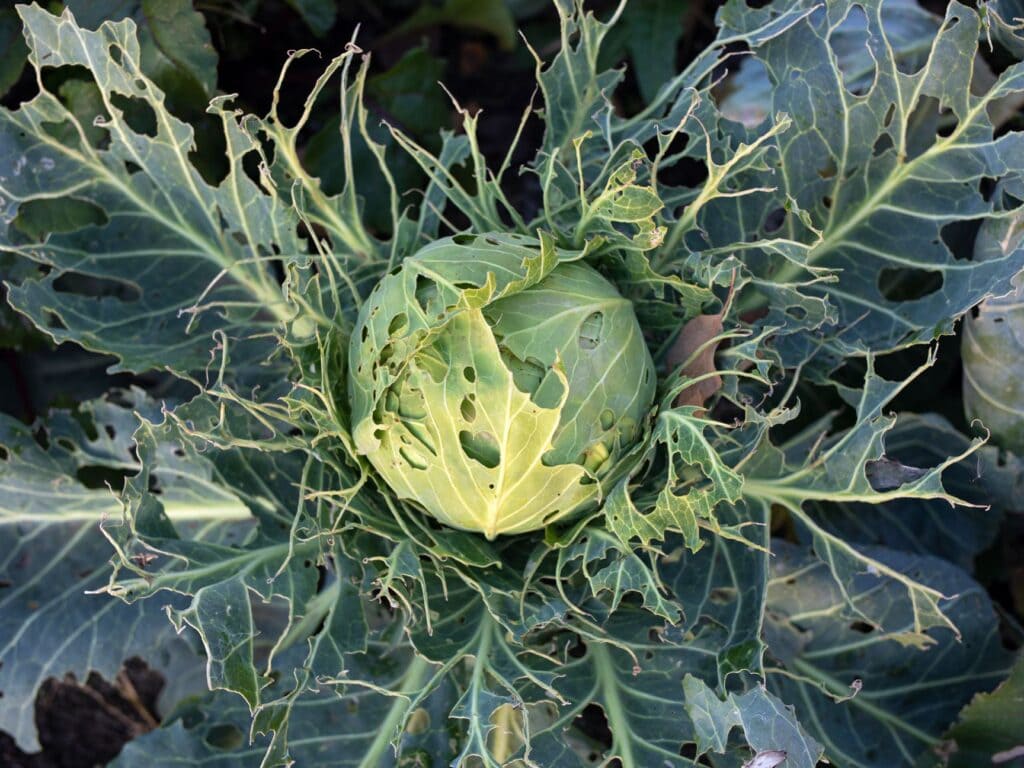
Before we dive into how to get rid of cabbage worms, let’s briefly familiarize ourselves with these little pests. Also, please keep in mind that an organic garden is not a perfect one. A few cabbage worms or nibbles holes is not the end of the world! But a decimated cabbage like the one shown above? I think we all want to prevent that.
What are Cabbage Moths and Cabbage Worms?
- “Cabbage worms” is a relatively generic term that refers to a handful of species of small green pest caterpillars.
- As their names suggest, they are most attracted to the cabbage and mustard plant family. Also known as the brassica family, this includes veggies like broccoli, kale, collard greens, Brussels sprouts, mustard greens, turnip greens, and of course, cabbage. Yet we also find cabbage worms on a wide variety of other plants in our garden, including flowers.
- Some cabbage worms are the larvae of small white butterflies, seen flitting around gardens during the day. The white butterflies are often referred to as “cabbage whites” or “cabbage moths” – even though they aren’t really moths at all. However, there is a similar caterpillar, the cabbage looper, that does indeed come from a brown nocturnal moth. Cabbage loopers closely resemble butterfly cabbage worms, except cabbage loopers are usually skinnier and move like inchworms… you know, humping along.
- Both cabbage worms and cabbage loopers are controlled in the same manner.

Cabbage Worm Life Cycle & Damage Caused
Cabbage moths or butterflies don’t directly damage plants themselves. That fun job is left up to the their larvae – the “worms”. If you notice white butterflies dancing around your garden, they’re probably laying eggs, and thus creating future destructive cabbage worms. As they land on plants, cabbage moths often bump their butts on leaves to deposit eggs.
Cabbage moth eggs look like white or yellow oblong dots. They are almost always attached to the underside of leaves. If you find and recognize these eggs, squishing them is a great early control method! However, please note that ladybug eggs are also oblong and yellow, but are found in clusters. Cabbage worm eggs are usually sporadic and solo.
As the larvae of cabbage moths and butterflies emerge from their eggs, the cabbage worms begin to immediately feed on the surrounding plant matter. This creates little holes in the leaves, expanding to larger holes – or to completely demolished leaves and plants as the caterpillars grow in size and population.
Some cabbage worm damage is only cosmetic, but can otherwise be devastating to small tender seedlings. The caterpillars will continue to eat and grow for several weeks, until they’re old enough to form a chrysalis and transform into a cabbage white butterfly (or moth).

8 Organic Ways to Prevent or Get Rid of Cabbage Worms
Now that you know more about their lifecycle, here are several ways to get rid of cabbage worms in your garden – organically! Let’s discuss each of them below.
- Manual Removal
- Floating Row Covers
- Plant Purple & Red Varieties
- Use Polyculture & Companion Planting
- Beneficial Insects
- Decoy Moths
- Bacillus Thuringiensis (Bt) Spray
- Neem Oil Spray
1) Manual Removal of Cabbage Worms
Manually squishing or removing certain pests right when you see them is often the most quick, easy and effective way to stop them in their tracks. Especially if you are only trying to manage a handful of plants. I often hand-pick cabbage worms and caterpillars off brassicas or leafy greens and give them to our chickens (or resident lizards). I also know some gardener friends that nab cabbage moths with butterfly nets and tennis rackets!
To get rid of cabbage worms by hand, you’ll need to inspect your plants frequently. Make it a routine to check over your plants once or twice per week.
When you’re out on the hunt, keep in mind that cabbage are most often found on the underside of leaves, or tucked in the new growth at the plant’s center. Sneaky cabbage worms will also lay along the center vein of a kale leaf, blending in and perfectly disguised. In addition to holey leaves, the “frass” or poop that they leave behind is a key indicator that a cabbage caterpillar is nearby! Look for poop.
It can be effective to squish or collect cabbage worms by hand, but you can also go after cabbage moth eggs to stop the damage even sooner. Examine the underside of leaves for the little oblong white to yellow dots, and simply wipe them away. Then they’re gone before they can do any damage at all.

2) Row Covers
One of the best ways to keep cabbage worms from eating your plants is to prevent the cabbage moths from accessing the plants to lay eggs in the first place. No eggs = no worms. Individual plants, raised beds, or sections thereof can be protected with row covers, traditionally supported on hoop structures. Also called “floating row covers”, they block out pests or other undesirable elements.
Some row covers are used to stop insects, while others may be used for frost-protection or providing shade. We use them in our garden to control cabbage worms as well as protect tender young seedlings from wild birds. Row covers can also protect your plants other garden pests like squirrels, rabbits, birds, neighborhood cats, and other nibblers too.
We use a combination of these sleek hoops along with this insect netting in our garden. Both have lasted many years of regular use! Be sure to tuck in or secure the insect netting around the bed perimeter the moths don’t sneak in from the sides. Learn more about garden hoops and row covers here, including tips about DIY PVC garden hoops, and using covers for shade or frost protection.


3) Plant Purple & Red Varieties
Did you know that pests are less attracted to red and purple vegetables? They sure are! So, choosing red and purple varieties of the cabbage family is one way to control cabbage worm damage.
Year after year, the purple cabbage and red kale in our garden is significantly less eaten by cabbage worms and aphids than their green counterparts.
One reasonable theory is that green or pale-colored pests can’t blend in and hide as easily on brightly-colored vegetables as they can on green ones. That would make them an easy target for predators.
Furthermore, studies show that anthocyanin (the antioxidant-rich flavonoid that makes red, purple and blue-pigmented veggies so good for us!) is actually mildly toxic to caterpillars. It may even deter larger pests like squirrels!


4) Polyculture & Companion Planting
Growing a wide variety of plants creates biodiversity in your garden. This is a great way to attract beneficial insects, reduce pest pressure, and encourage natural balance.
Additionally, variety and polyculture – the term for mixing many types of plants in one space – reduces the chances of widespread devastation by pests that are all attracted to the same crop. Meaning, it may not be the best idea to plant an entire garden bed full of just broccoli.
Consider interplanting some companion plants with your pest-prone crops. For example, brassica companion plants like thyme, dill, oregano, lavender, onions, garlic, and marigolds are said to deter cabbage moths. Learn more with our full garden companion planting chart and guide.
On the other hand, some companion plants can serve as a “trap crop” and actually attract cabbage worms – while luring them away from your veggies! Nasturtiums are a prime example. However, be sure to periodically remove infested trap crop plants to prevent a booming population of cabbage moths in your garden. Or manually remove and kill the cabbage worms from the trap crops.

5) Use Decoy Cabbage Moths
Apparently, cabbage moths are territorial and will stay away if there are other cabbage whites around! Thus, some gardeners have success in getting rid of cabbage worms (or at least reducing their presence) by placing decoy or dummy white butterflies around their garden beds to deter them. The most common way to do this is to make your own. There are printable templates available online to help.
6) Beneficial Insects: Parasitic Wasps
Parasitic wasps lay their eggs inside or on top of other arthropods, including caterpillars and their pupae. Once their eggs hatch, the wasp larvae feed on the host caterpillar, killing it.
Therefore, these beneficial insects can be a great tool against cabbage worms and other pest caterpillars like tomato horn worms. There are dozens of species and types, so they won’t all look like the one shown below.
You can encourage parasitic wasps to come naturally by fostering a healthy bio-diverse organic garden space, or you can actually buy them online. These Trichogramma wasps are a popular choice. Unlike other large wasps that you may be imagining, these do not bite or sting, and go virtually unnoticed by humans!
However, I am leery of purchasing parasitic wasps since we also encourage beneficial caterpillars like monarchs, swallowtails, and native butterfly larvae in our garden. I’d rather let them come naturally if they will.

7) Bacillus Thuringiensis – “Bt”
Bacillus thuringiensis, also known as Bt, is a naturally-occurring, soil-dwelling bacteria. It is a common active ingredient in organic biological pesticides. Namely, it kills caterpillars. Bt is ONLY toxic against the larvae of butterflies or moths. It makes them stop eating. Therefore, Bt is commonly used to get rid of cabbage worms and cabbage loopers on the brassica plant family. When applied to vegetable crops, Bt is considered safe for human consumption even if sprayed the same day as harvest.
“Bt is a bacterium that is not toxic to humans or other mammals, but is toxic to certain insects when ingested. It works as an insecticide by producing a crystal-shaped protein (Cry toxin) that specifically kills certain insects. Bt is naturally found on leaves and in soil worldwide, and has been used commercially both in organic and conventional agriculture for over fifty years. Over two decades of review, the EPA and numerous scientific bodies have consistently found that Bt and Bt-crops are not harmful to humans.”
Entomological Society of America
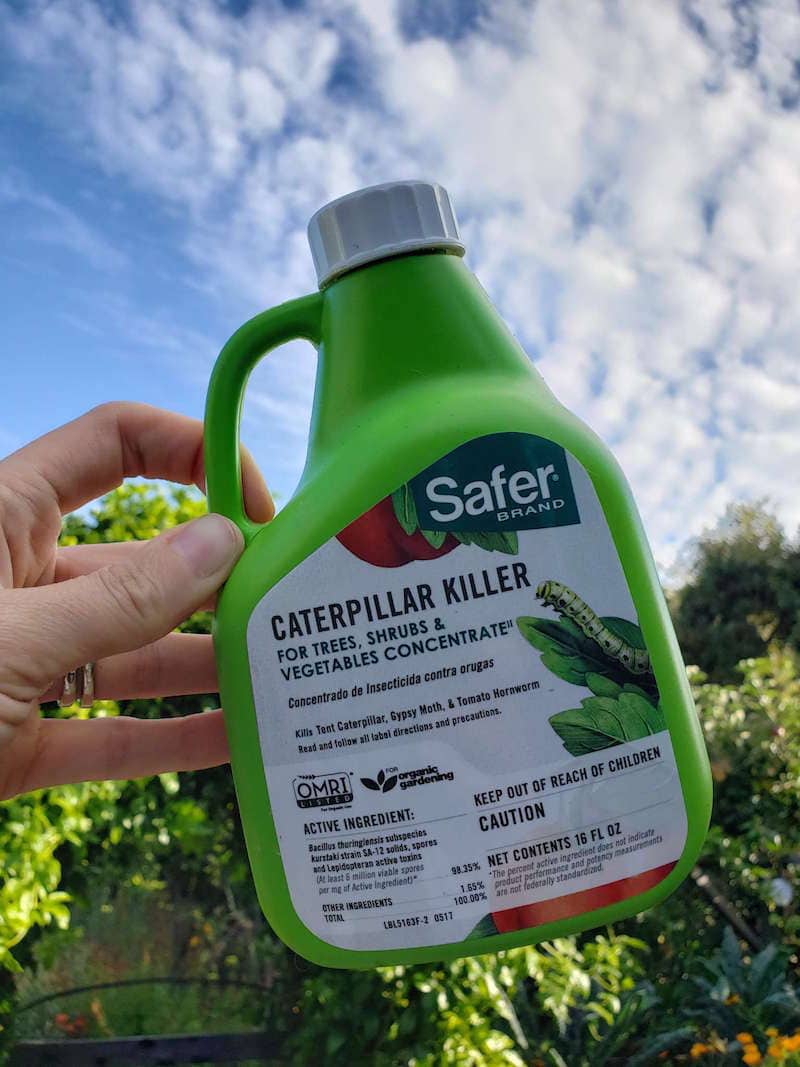
Bt spray is available to purchase either pre-mixed, or as a concentrate that must be diluted before it is applied to plants. Concentrates are the more cost-effective option. When cabbage worms are running a muck our garden (and all other measures have failed) we use this Bt concentrate from Safer brand. Keep reading below for tips on exactly how to use Bt in the garden.
How to Use Bt in the Garden
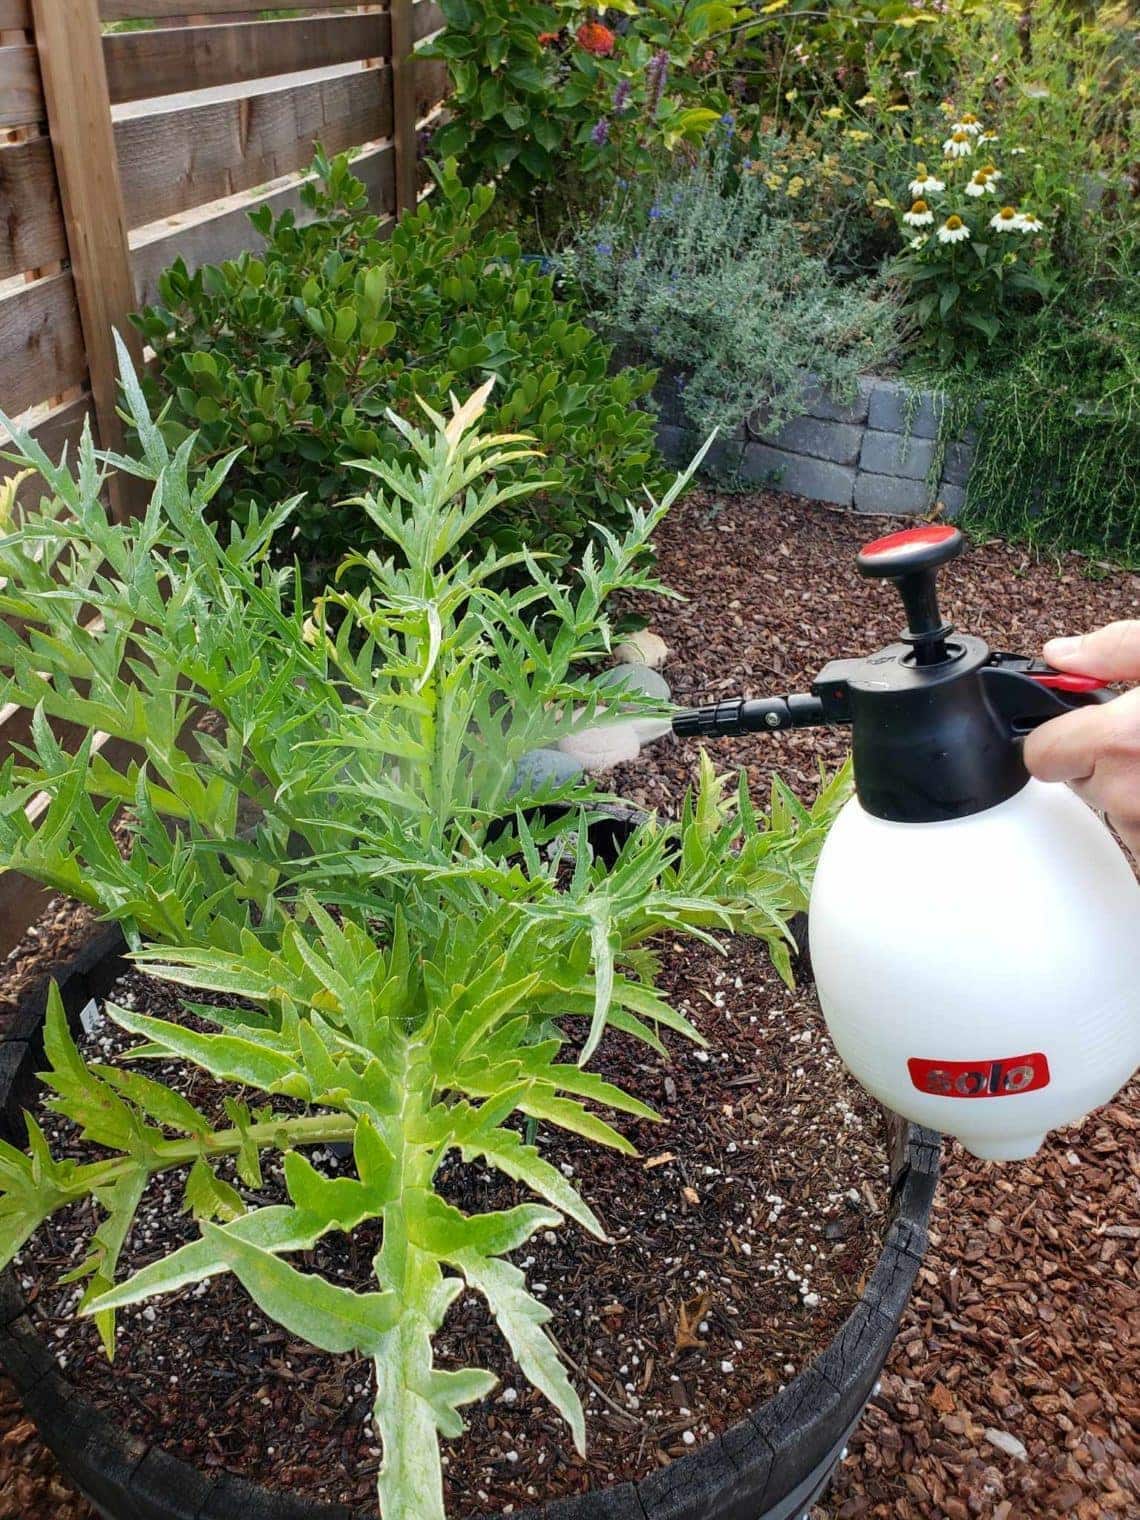
When mixing Bt spray, follow the directions on the Bt product you purchase. For the one we use, it calls to dilute 1 tablespoon of Bt per one gallon of water. Mix well directly in your pump sprayer. Spray your plants of concern to the point of dripping, including the bottom of leaves.
Like other foliar sprays, it is best to apply your Bt solution in the evening hours. Yet Bt is even more mild than others, and doesn’t pose the same risk for accidentally burning leaves with improper applications. On the contrary, Bt rapidly degrades in sunlight and also washes off with rain or other water. It is most effective the day or two after application, and considered virtually non existent after a week.
Bt is most effective against small caterpillars so is important to treat caterpillar-infested plants early on. It may not impact larger caterpillars, such as those over 1 inch long. You may need to hand-pick those big boys.
Avoid applying Bt in windy conditions. Since it will kill all small caterpillars (including larvae of beneficial butterflies) please be very cautious to not accidentally overspray onto non-target areas or near host plants like milkweed.

8) Neem Oil
Neem oil is a plant-based oil that is extracted from the seeds of the India-native neem tree. Concentrated neem oil must be diluted and mixed, and then sprayed onto plants for organic pest control. Neem oil is particularly effective at controlling small soft-bodied insects like aphids, thrips, spider mites, mealybugs, scale, and white flies. When applied directly, the oil can coat their bodies and kill them – or otherwise interfere with reproduction and feeding.
Neem oil can also help repel cabbage moths, mosquitoes, and flies. Therefore, routinely spraying your garden with a neem oil solution may make your plants less attractive to pests. However, if your plant is already infested, neem oil will not typically kill cabbage worms.
That said, neem oil is last on this list of cabbage worm control options for a reason. Used in conjunction with other control methods, neem oil can help the problem but will not likely prevent or eliminate the presence of cabbage moths entirely.
If you want to use neem oil in your garden, read more about how to properly mix and use neem oil here. Because neem combats fungal diseases like powdery mildew and doesn’t harm beneficial insects (when used correctly), it can be a great product to use in an organic garden. Yet when neem oil is applied incorrectly or in the wrong situation (which is common) it can do more harm than good.
And that is how to get rid of cabbage worms.
In closing, I hope you learned some new helpful tips to control cabbage worms! Again, perfection is not the goal here. Please don’t get discouraged (or feel tempted to reach for chemical pesticides) if your plants have a few blemishes. In contrast, be proud of your efforts to grow food in an organic manner! I commend you.
Please feel free to ask any questions, and spread the love by sharing this article.
You may also like:
- Organic Aphid Control: 9 Ways to Get Rid of Aphids
- Organic Slug & Snail Control: 10 Ways to Stop Snails or Slugs
- DIY Insect Soap Spray Recipe to Kill Aphids, Mealybugs & More
- How to Get Rid of Powdery Mildew: Organic Treatment and Prevention
- Top 23 Plants for Pollinators: Attract Bees, Butterflies & Hummingbirds

Deanna Talerico
Deanna Talerico (aka DeannaCat) is a garden educator and writer with over 15 years experience in organic gardening. She is a retired Senior Environmental Health Specialist, and holds a M.A. in Environmental Studies and B.S. in Sustainability and Natural Resources.


55 Comments
Keshia Gentili
I appreciate it a lot! 💯
Susan B
Hi Deanna,
Thanks for all your tips!
Here in southern New England cabbage moths and cabbage loopers will devistate broccoli, kale and, of course, cabbage.
The floating row covers can’t be used full season because the broccoli will bolt and none of them like the excessive heat we get here once summer really kicks in. The row covers hold in a lot of heat. Instead I’ve protected them with mosquito netting. The black color even provides a sort of shade but allows air flow and lets in enough light for healthy productive growth.
Thought I’d just pass that along. I really enjoy your site and posts. Thanks for all the useful, environmentally friendly advice. ❤️
Susan B
Aaron (Mr. DeannaCat)
Hi Susan, thanks for sharing your experience and we are grateful for your support!
D. Wilson
Thank you for your help! My husband and I noticed little white “butterflies”, then a little later a whole host of chrysalis around our new little veggie garden. with accompanying damage to our precious veggies.
I really appreciate all the valuable information that you have shared.
We will be using your suggestions to save our veggies now and in the future.
Again, sincere thanks, for all the crop damage that you have helped prevent.
-D.L.
Aaron (Mr. DeannaCat)
Great to hear D.L., have fun growing!
Phillip
Agree with great timing. Had a huge problem with these worms last year and this year they wiped out my brassica seedlings. Was using spectracide and neem oil to no avail. I will have to find my well hidden bt.
Thank you so much for all the work that y’all put into this blog. My grand daughter and I are hooked and read you every week. Your info is always interesting and well presented. Amazing that you can keep all this information on tap for weekly posts. I love it. Keep up the good work.
Phillip Andrews
Aaron (Mr. DeannaCat)
Hi Phillip, thank you so much for the kind words and we are grateful for you and your granddaughter’s support! We try and use hoops and row covers to keep the cabbage moths and birds at bay while our brassicas are still seedlings but a couple well timed BT sprays should allow them to get more size-able where they are more readily able to handle a little pest pressure. Good luck and have fun growing!
Renee
So helpful!!
What about these leaf-footed insects?! I’m not sure what damage they are doing but I’m sure it can’t be good!
Aaron (Mr. DeannaCat)
Hi Renee, squash bugs are the most notorious of the leaf-footed bugs and they feed on plants with their sucking mouthparts but there are also several other species that look very similar such as the assassin bug which feeds on other insects and not the plants themselves. However, leaf-footed bugs don’t typically do enough damage to constitute much of a response unless there is a severe outbreak. We have a variety of different leaf-footed bugs in the garden and we don’t notice much damage to our plants due to them. Using hoop and row covers would possibly be your best physical barrier to prevent them from getting on your plants but it may not be necessary either. Hope that helps and good luck!
Jeanine
I love your useful tips and have started to turn to your blog with many of my gardening questions!
BT has been a lifesaver for my garden.
Couple of questions for future posts?
Any tips for determining whether a new bug is friend or foe?
Any tips for determining what volunteer squash (or squash/cucumber that have been weirdly cross pollinated) are ok to eat and when/how to harvest the unexpected variety?
Aaron (Mr. DeannaCat)
Hi Jeanine, we are so glad you find our content helpful! We do have quite an article on Organic Pest Control, Pt 2: Identify the Top 18 Garden Pests & Beneficial Insects, we definitely recommend identifying any insect in the garden before you do anything, as oftentimes, people will smush eggs or larvae before they know what it is, ladybugs being a prime example in this case.
In regards to growing and or eating volunteer squash, that isn’t something we do as we like to start fresh with varieties that do well in our area as far as disease resistance goes. Volunteer squash may not be safe to eat if they are bitter, here is an article from Oregon State University which you may find helpful. Have fun growing!
Dana
Very helpful, especially the pictures of eggs and larvae. I think Ive been picking off ladybugs eggs on my spinach by accident!
Aaron (Mr. DeannaCat)
Hi Dana, so glad you found it helpful, it’s definitely a good idea to make a positive ID on eggs or insects before you take action as there is usually just as many good/beneficial insects as there are pest insects.
Lisa Coffman
I love your blog! I have recently recommended it to my gardening co-op. I bought the sprayer you recommended and it is wonderful!
Aaron (Mr. DeannaCat)
That is great to hear Lisa and we appreciate your support, have fun growing!
Sylvie
Perfect timing on this article! I’m a first time gardener and was at a loss after seeing signs of leaf damage. Thanks for sharing your knowledge in such a well-written way! Now to get over the yuck reaction to squishing eggs and pulling worms off the plants….
Aaron (Mr. DeannaCat)
Hi Sylvie, so glad you found it helpful, good luck and have fun growing!