

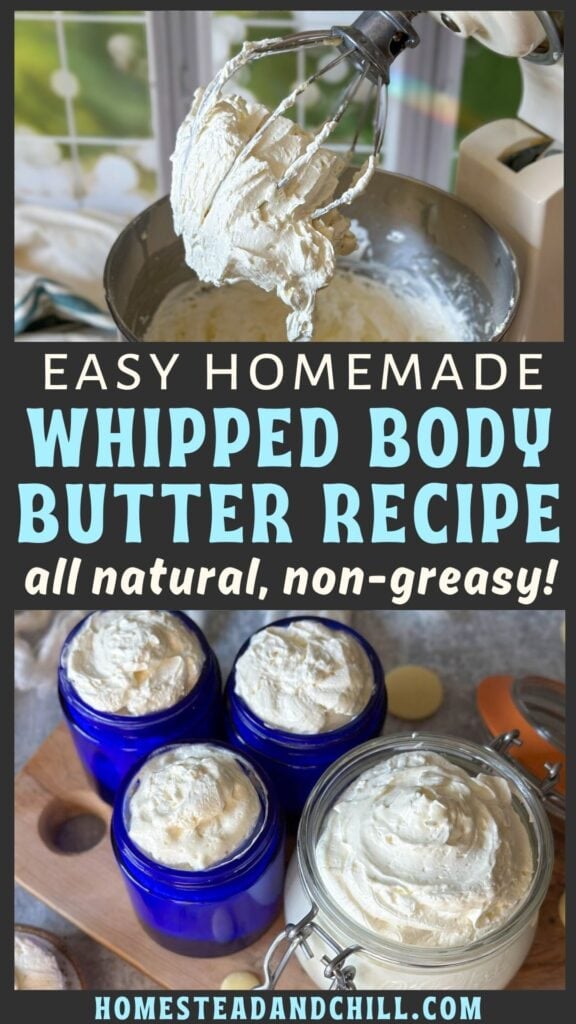
DIY Whipped Body Butter Recipe: Easy, Natural, Non-Greasy
Your skin is in for a treat! Come learn how to make your own nourishing DIY whipped body butter with our easy step-by-step recipe. You only need 4 all-natural ingredients to create a creamy, fluffy whipped body butter that melts into your skin to soothe, soften and moisturize. It’s also wonderful for homemade gifts!
I’ve also included a couple optional ingredients to help make your body butter not greasy, along with frequently asked questions and pro tips for the best results possible. You can also choose to not whip the body butter and simply leave it more firm like a balm instead.
Would you like to save this?
What is Whipped Body Butter?
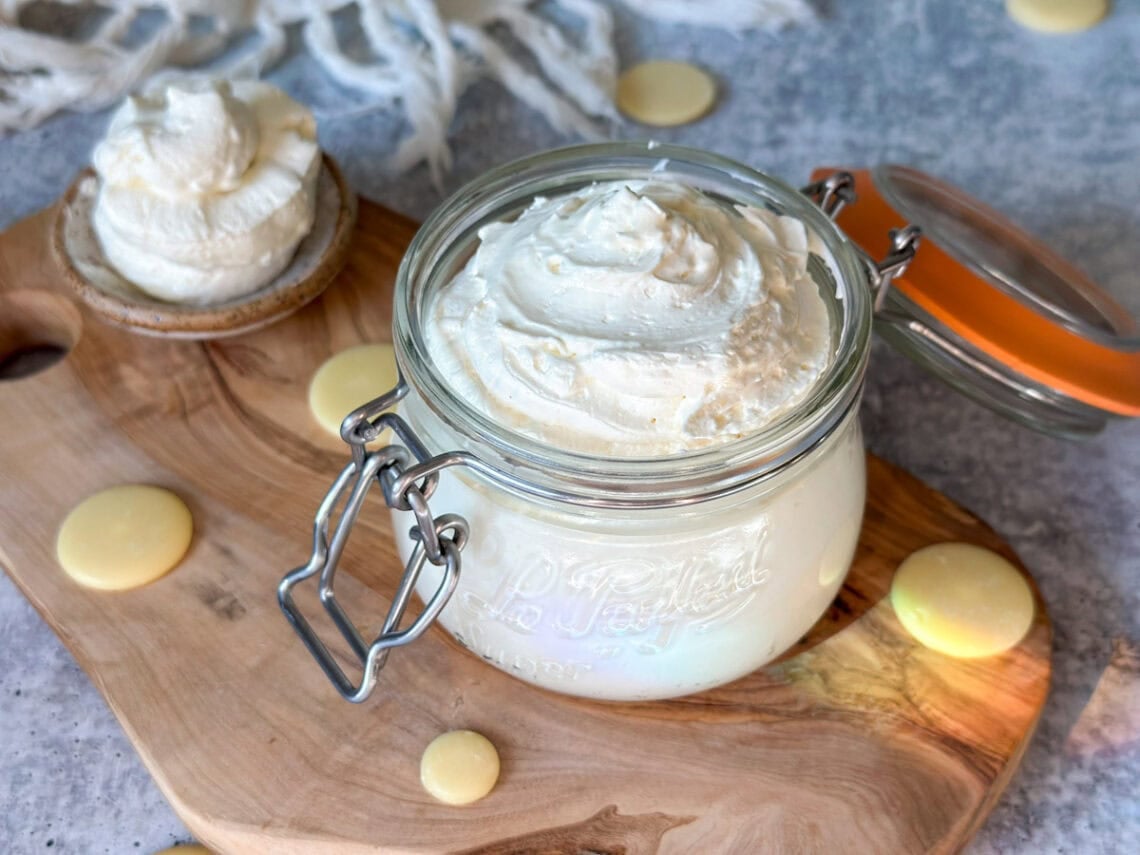
Body butter is a rich, water-free moisturizer made of natural butters and oils like shea butter, cocoa butter, and coconut oil. When whipped, it becomes luxuriously light and fluffy – resembling frosting that looks good enough to eat! It’s semi-solid in a container but readily melts and spreads when it comes in contact with warm skin.
Benefits for Skin
Whipped body butter provides deep, long-lasting hydration that is perfect for rough patches or trouble spots like heels, elbows, hands and cuticles. It also protects the natural skin barrier and improves skin texture by softening skin, reducing inflammation, and enhancing elasticity. Body butter can help soothe skin irritation including eczema, scars, stretch marks, rashes, or other concerns.
- Shea Butter deeply nourishes and hydrates the skin, restoring softness and smoothness while reducing inflammation. Rich in vitamins and antioxidants, it supports skin’s natural barrier and elasticity while promoting a healthy, radiant glow.
- Cocoa Butter creates a protective layer that locks in moisture, leaving skin silky and supple. Its naturally soothing properties help reduce dryness and promote a youthful, even-toned appearance.
- Coconut Oil is pure gold for skin health! When comparing dozens of different plant-based oils, this study found that coconut oil was the ONLY one that checked ALL the boxes for anti-inflammatory, anti-aging, anti-bacterial, anti-cancer, and antioxidant properties along with wound healing and skin barrier repair benefits.
- The other liquid oil you choose to use in this body butter recipe (e.g. jojoba or sweet almond oil) will offer additional skincare benefits too. Please visit our guide on the 11 best carrier oils for skin to learn more about the pros, cons, and benefits of each – including their comedogenic rating!
RELATED: Love DIY skincare? Don’t miss our homemade lip balm recipe, DIY bath salts, or guides on how to make lavender salve and calendula salve.
Supplies Needed
- Double boiler (or create a DIY double-boiler by nesting a smaller pot inside a slightly larger pot)
- Measuring cups
- Stand mixer or electric hand mixer for whipping
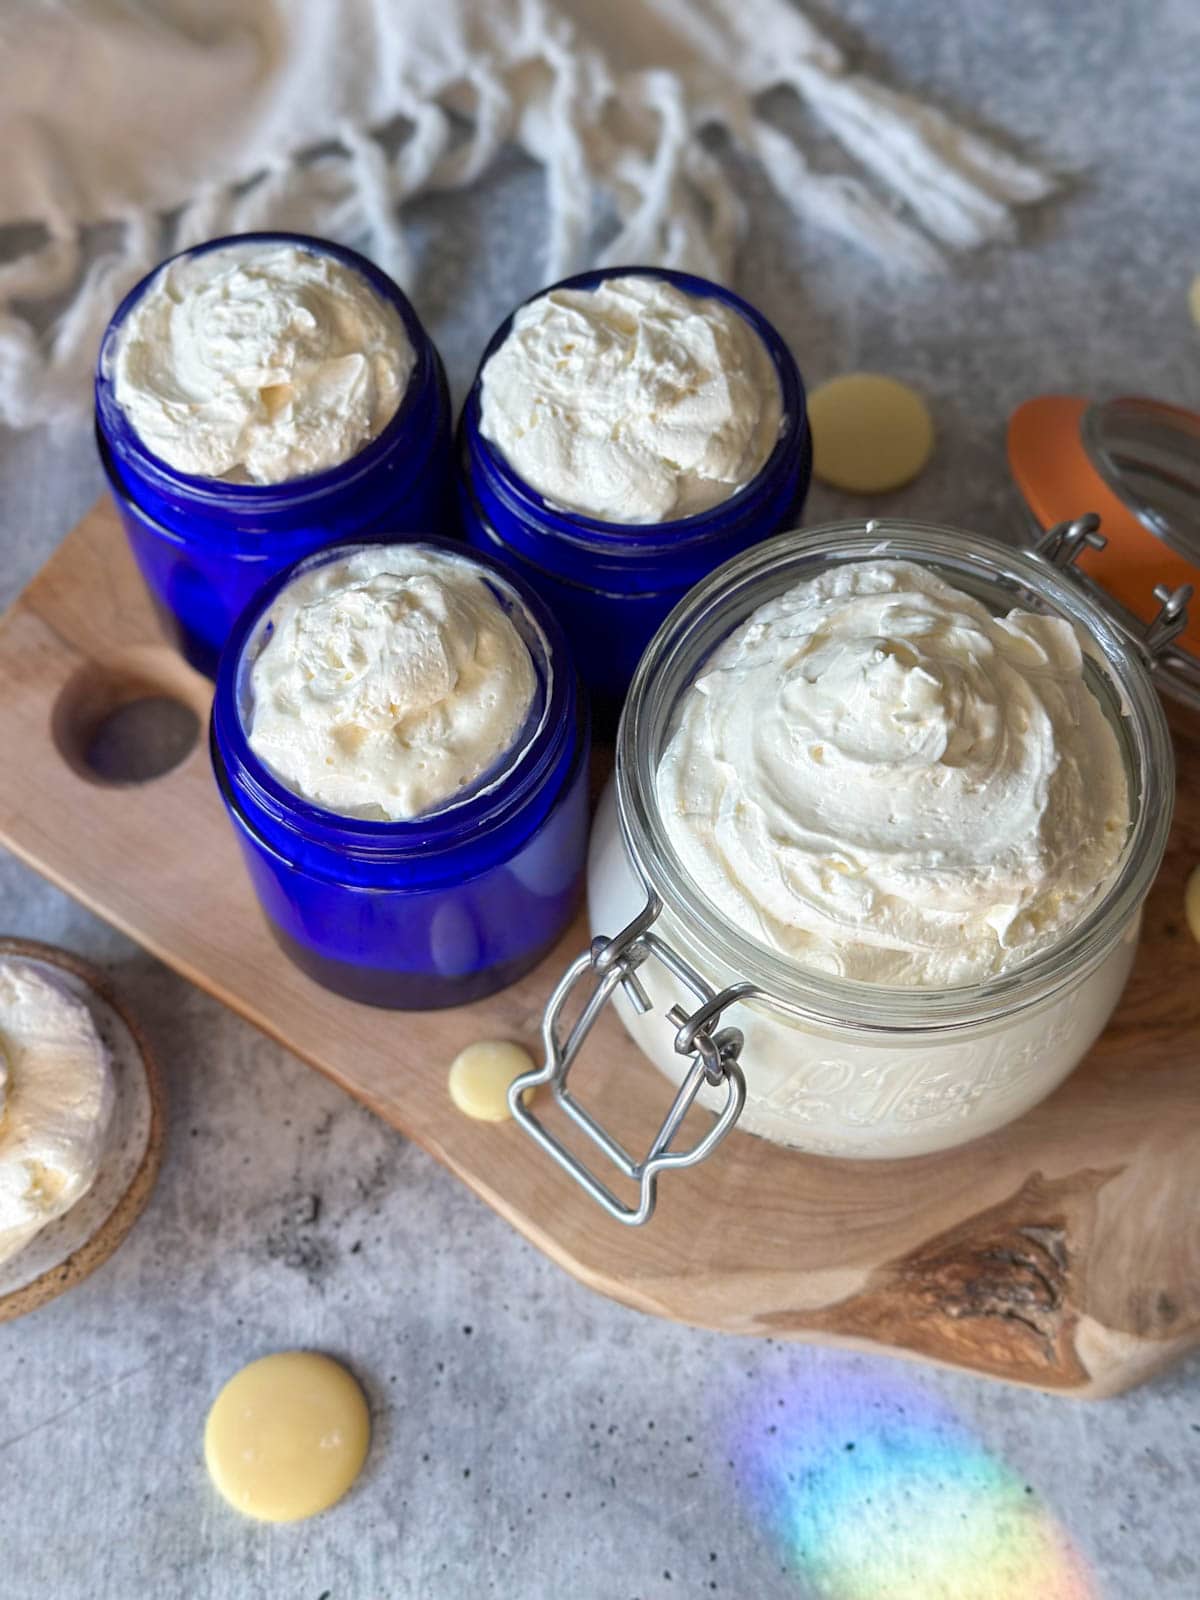
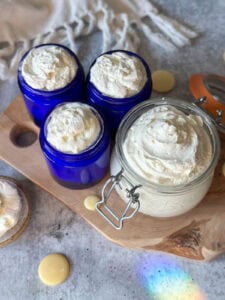
- Final storage container(s) of choice, such a glass jars with lids or glass flip-top containers. For gifts, we like to use 4-ounce amber jars or pretty cobalt blue ones.
- Optional: plastic bag or piping bag to help fill jars
Ingredients
This recipe makes about 3 to 4 cups of body butter after whipping (2 cups not whipped). I prefer to use organic ingredients to make it as healing as possible!
- 1/2 cup shea butter (4 oz)
- 1/2 cup cocoa butter (4 oz) – if using cocoa butter wafers like us, simply pack the 1/2 cup as full as possible or use just over a half cup to make up for the extra air space between the wafers.
- 1/2 cup coconut oil (4 oz) – the kind that is solid at room temperature
- 1/2 cup liquid oil choice (4 oz) such as organic jojoba oil (my favorite), sweet almond oil or olive oil. Jojoba and argan oil are the lightest options to help make body butter non-greasy. To make it extra-therapeutic, you can also use herbal oils like homemade lavender oil, calendula infused oil, DIY rosehip oil or similar.
Optional ingredients (add during whipping)
- 3 to 4 teaspoons of arrowroot powder, which will help make your body butter less greasy
- 10 to 25 drops essential oils (sliding scale based on personal preference) such as lavender, chamomile, sweet orange, peppermint, or other scent of choice. We typically leave ours plain – the cocoa butter and coconut oil combo smells amazing on its own!
Substitution notes: You can also make body butter using half shea and half mango butter (or shea butter alone), but shea and mango butter are much softer than cocoa butter. Therefore, I recommend reducing the amount of oil in this recipe by 2 to 3 Tbsp if you aren’t using cocoa butter.

How to Make Body Butter Not Greasy
Truth be told, body butter is always going to feel a little more oily than lotion since it doesn’t contain water. However, we’ve experimented with many whipped body butter recipes and have learned several tips to make them as smooth, absorbent, and non-greasy as possible.
- In general, whipped body butter is going to feel less greasy or heavy compared to non-whipped versions, so we’re off to a good start!
- Add 1 to 2 tsp of arrowroot powder (aka tapioca starch) per 8 ounces of body butter ingredients, which helps absorb some of the oil to create a drier, silkier finish. I listed this as an optional ingredient in our recipe, but highly recommend using it!
- Shea and cocoa butter are most commonly used for homemade body butter, but you could also experiment using mango butter – which is known to be even more soft, light, and non-greasy.
- The type of carrier oil you use will impact the texture too. For instance, lightweight “dry” oils like jojoba, grapeseed, or argan oil will feel less greasy compared to heavier oils like olive oil or avocado oil. While healing, castor oil is especially heavy and sticky.
- Consider adding stearic acid in addition to arrowroot powder. Stearic acid is a natural, non-toxic fatty acid that helps thicken, stabilize, and add a luxurious silkiness or “slip” to body butter, reducing greasy or sticky feelings. I’d only recommend this for serious body butter makers (just because it’s an extra thing to buy), but some of the best whipped body butter we’ve made included stearic acid! Around 3-6% stearic acid is a good starting point for body butter (about 1 to 1.5 Tbsp for this recipe) – added in the melting phase with the oils and butters.

Instructions
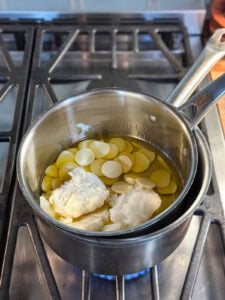
1) Melt
- Combine the shea butter, cocoa butter, coconut oil and other liquid oil of choice in a double boiler. (Do not add the optional arrowroot powder or essential oils yet!) Add enough water to the lower pot so that it’s touching the bottom of the upper pot.
- Heat the ingredients on the stovetop (uncovered) over medium heat until everything is fully melted and combined.
- If you don’t want to whip your body butter, you can mix in the arrowroot powder and essential oils at this time (after melting, once it’s removed from the heat) and then pour the melted ingredients into final storage containers of choice. Otherwise, continue to the cooling and whipping phase.

2) Partially Cool
- Once melted, remove the mixture from the heat and allow it to cool until it’s semi-firm but not hard to the touch. The surface should be solidified, but still soft enough that you can easily press your finger into it.
- This can take a few hours in the refrigerator or about half an hour in the freezer, but be sure to set a timer! Depending on your schedule, you can also simply let it sit out to cool overnight (not in the fridge) and whip the next day. However, rapid cooling can help prevent the shea butter from getting grainy.
Expert Tips
The ideal consistency for whipping body butter is solid but soft, which will allow you to whip air into it so it becomes light and fluffy. It can be difficult to whip if it’s too cold or hard, so if you accidentally leave it in the fridge or freezer too long, allow it to warm up at room temperature until it’s a bit softer before whipping. On the other hand, if it’s still partially melted or very soft, it may not hold air and fluff up well either.

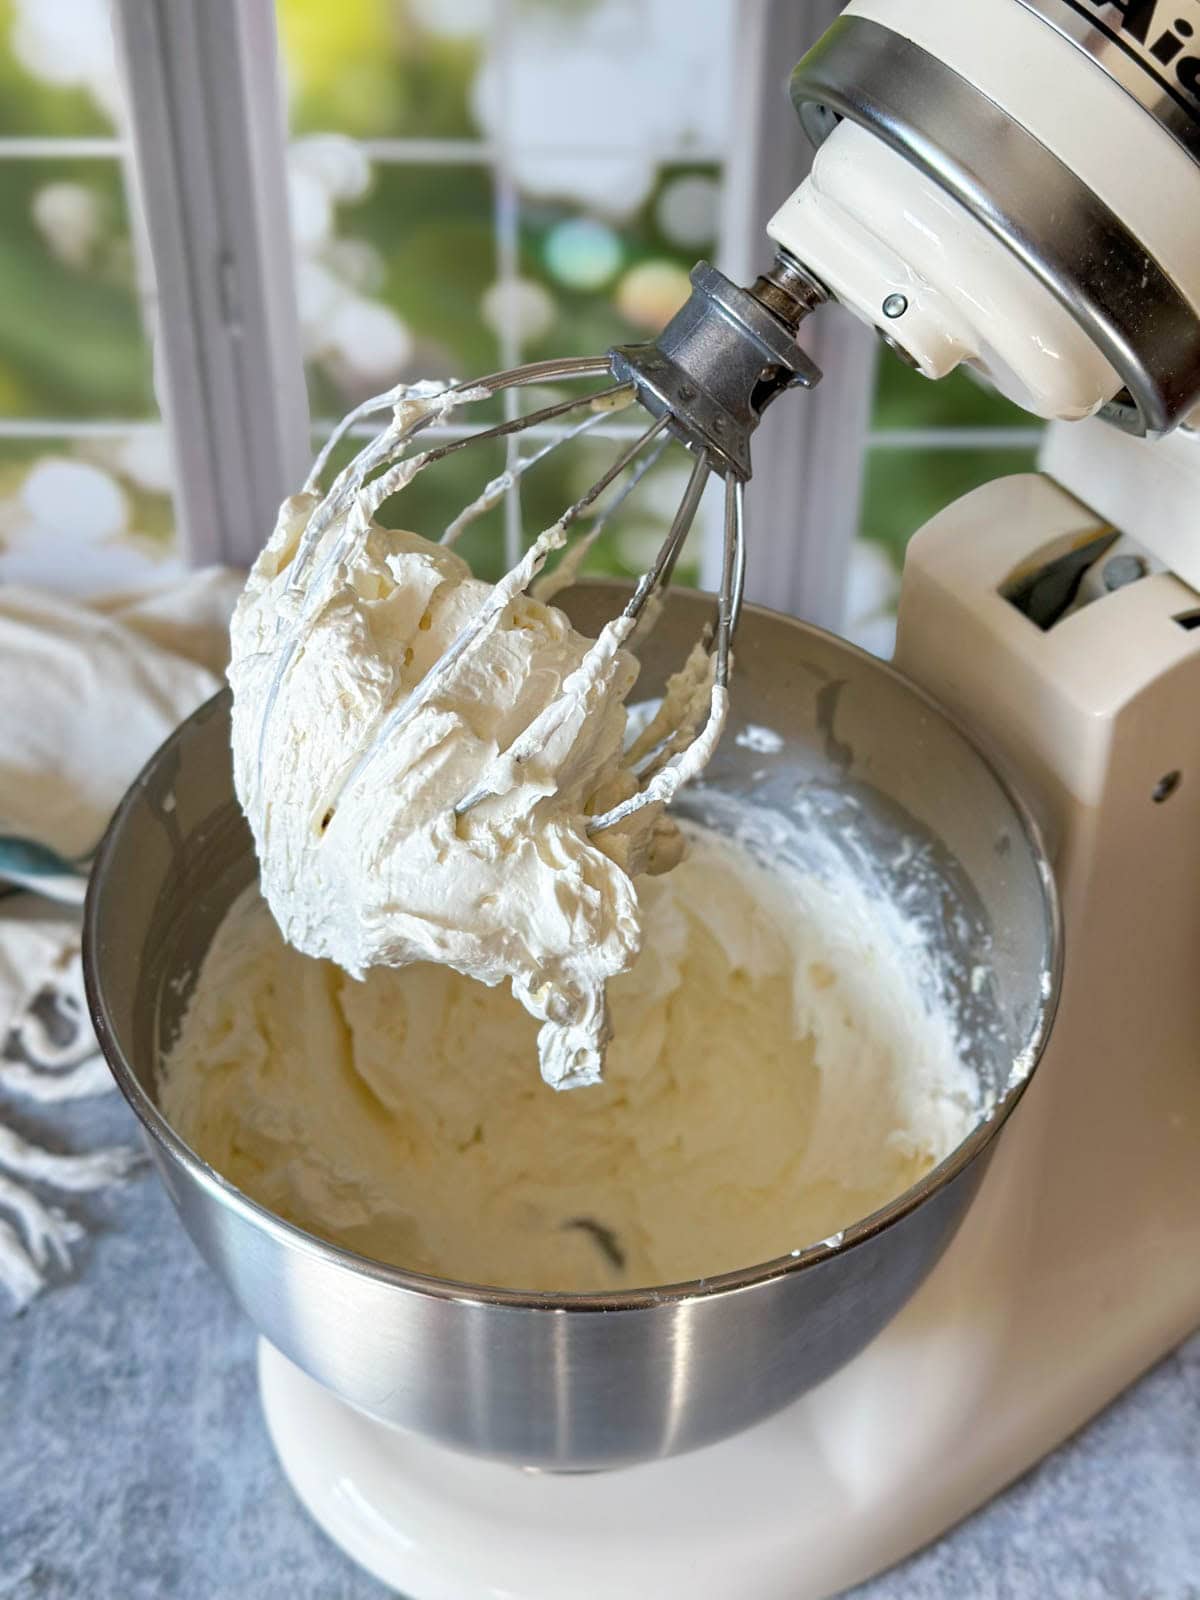
3) Whip the Body Butter
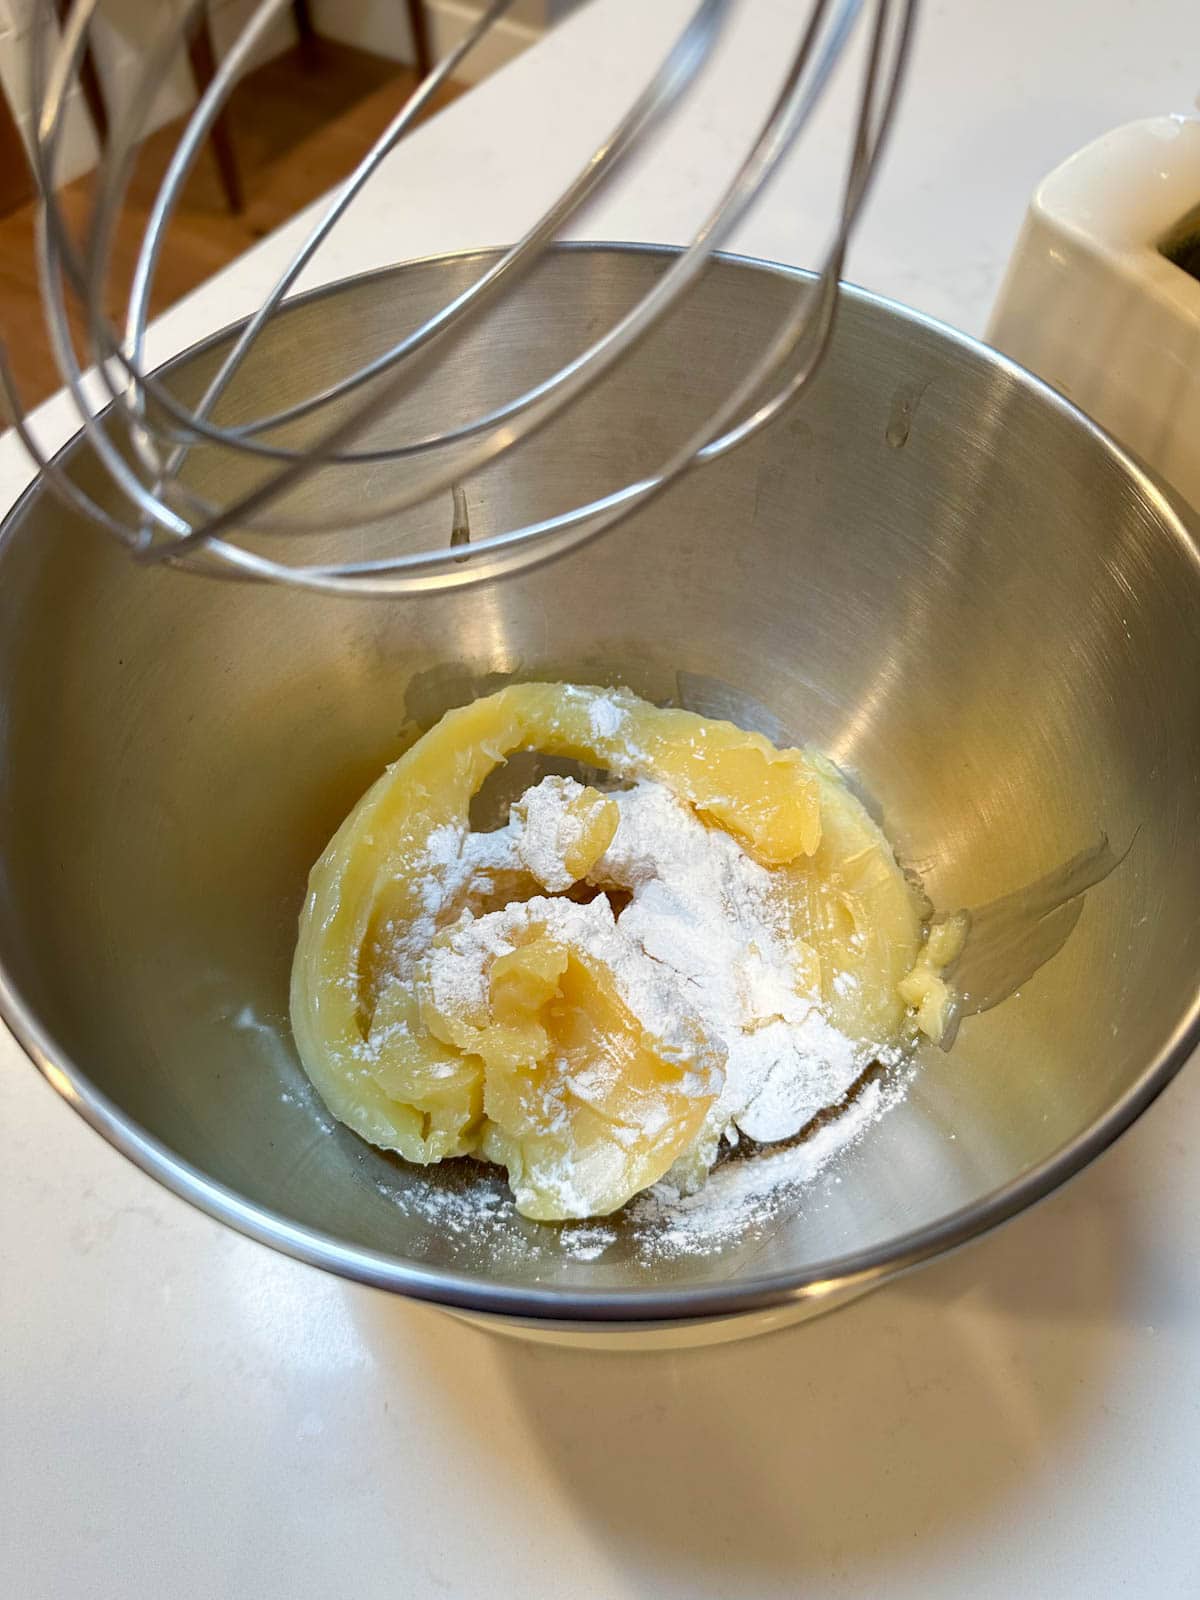
- Once the mixture has cooled to semi-firm, transfer it to a stand mixer (or mixing bowl to use a hand mixer) and add the optional arrowroot powder and essential oils at this time.
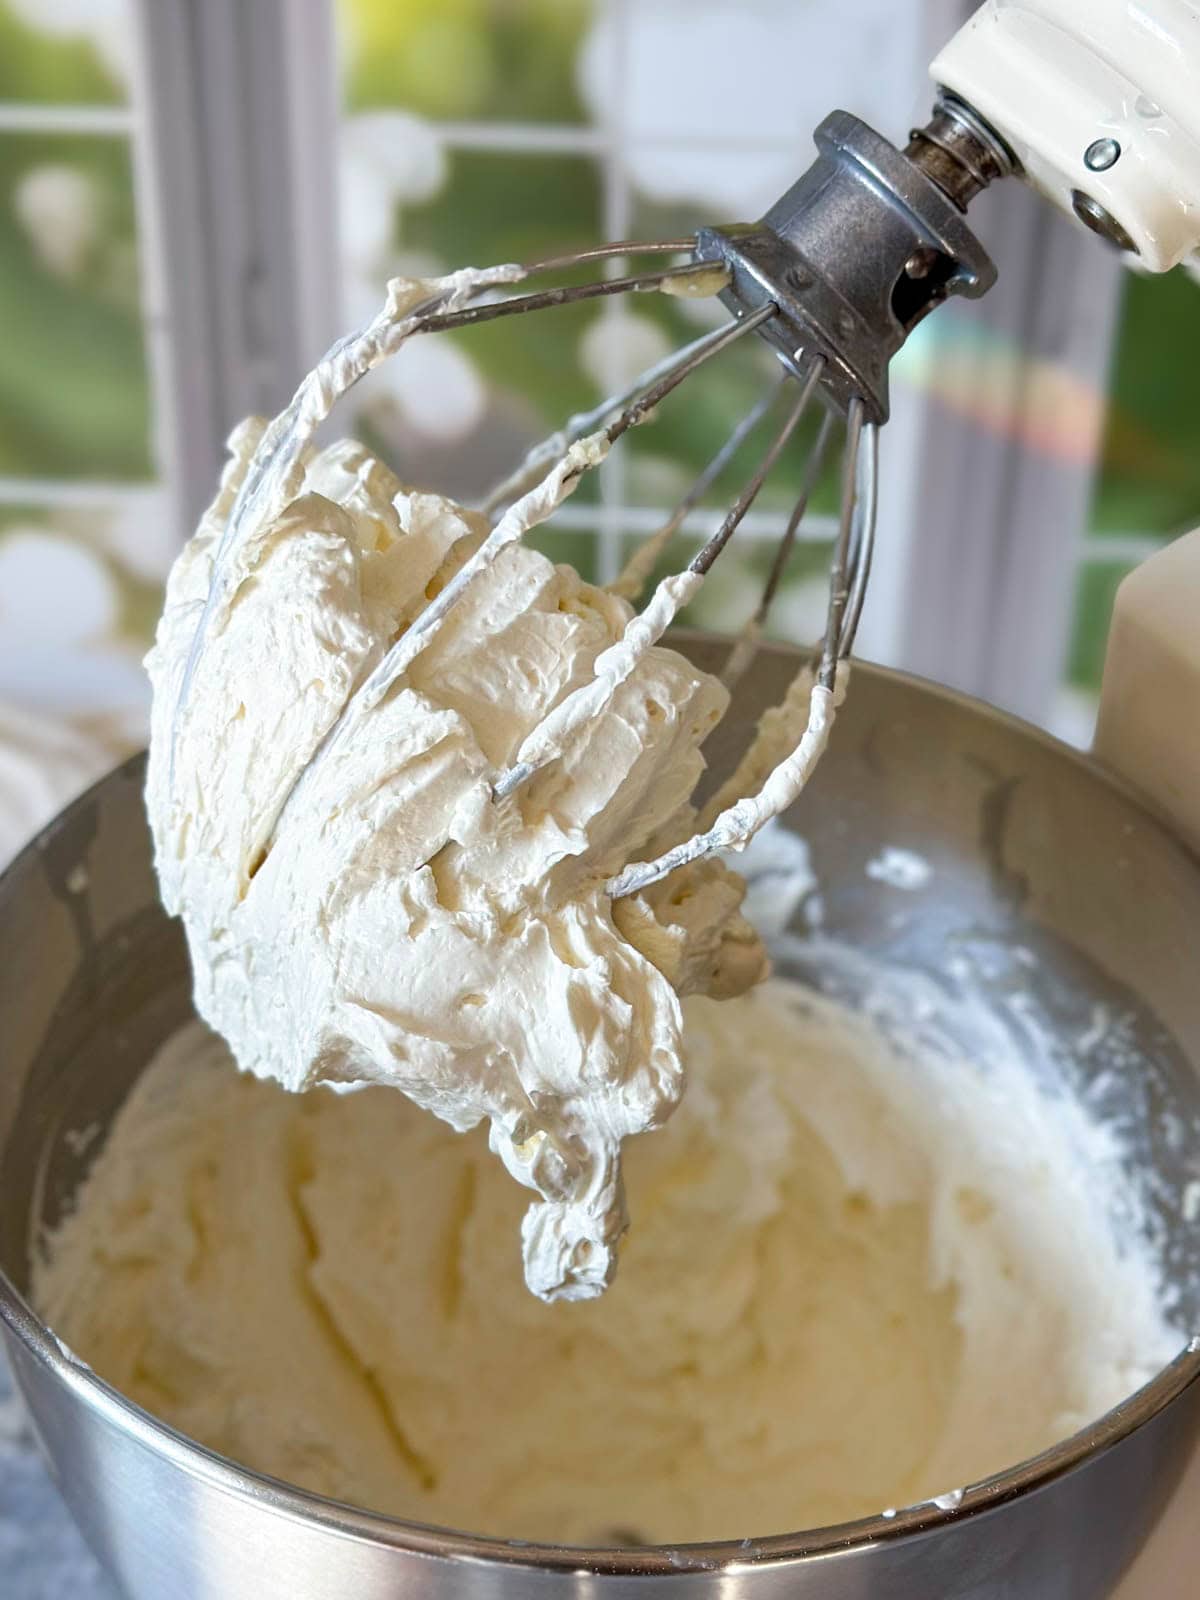
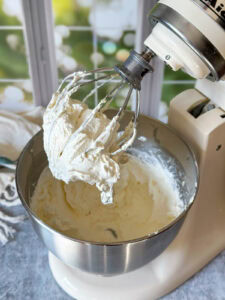
- Now whip the body butter using a stand mixer or hand beater for approximately 5 minutes. Start at a low speed just to incorporate the powder, and then move to a high speed. Stop to stir the sides once or twice while whipping. The mixture will quickly turn from yellow to white and double in size as you whip it to introduce air.
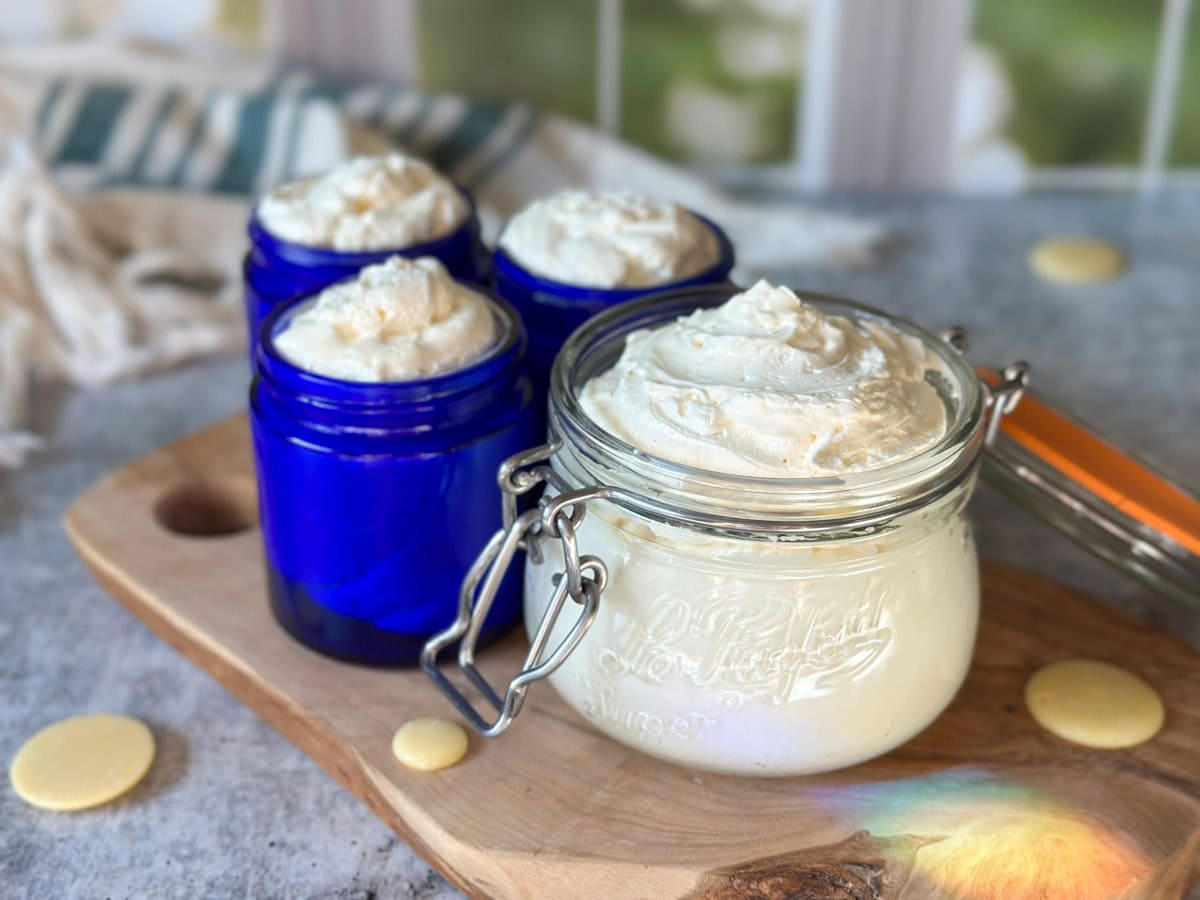
4) Package and Enjoy
- Finally, transfer the finished whipped body butter into storage containers of choice, such as glass jars with a tight-fitting lid.
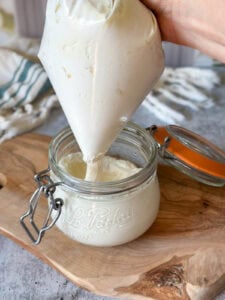
- You can either gently spoon and press the body butter into the containers, or transfer it to a piping bag (or ziplock bag) to squeeze it into the containers. I only find this necessary when I want to make a pretty swirl pattern, though it can also help reduce empty air space in the jar if done carefully.
- Add a cute label and/or piece of ribbon or twine to the lid to share these as the perfect handmade gift.
- Now enjoy! Whipped body butter may feel just a tad oily when first applied, but will absorb within minutes to leave your skin feeling soft, smooth, and supple – not greasy.
Storage and Shelf Life
Store homemade body butter in cool, dry location that isn’t prone to temperature swings. If your home is warm, you may want to store it in the refrigerator (especially during the summer) so it doesn’t melt.
Whipped body butter should stay good for up to a year or possibly longer. Good sanitation practices (e.g. using clean, dry tools) as well as the type of raw ingredients you used in the recipe will influence the shelf life. For instance, jojoba oil has a shelf life of up to 5 years while olive oil and sweet almond oil are only good for up to a year after opening.
Refrigeration will also help extend the shelf life. Any introduction of water will make it spoil faster.

Frequently Asked Questions
Altering the ratios of butter and oil in this recipe (or using different ingredients) could cause issues whipping the body butter, making it either too heavy or too thin to hold air and structure as it’s beaten. If the mixture is too cold (such as after rapid cooling in the fridge) or too warm (semi-melted) it may also not whip well. The ideal texture should be solid but soft.
Body butter is designed to readily melt into skin as it’s applied, but is also prone to melting if it’s stored in too-warm of a location. The natural melting point of shea butter is 89-100F, and even lower when mixed with oils. Cocoa butter has a slightly higher melting point of 93-101F. Therefore, store your body butter in a cool location or even in the refrigerator. You can also try reducing the amount of oil in the recipe.
To make whipped body butter more firm (and potentially melt less easily) you can experiment with adding more butter (or less oil) or a small amount of beeswax (2 Tbsp for this recipe) which has a much higher melting point. However, firmer body butters may not whip as easily. Storing body butter in the fridge will also make it feel firmer.
In addition to whipping it, adding arrowroot powder (tapioca starch), stearic acid, lightweight carrier oils, and/or mango butter are a few ways to make body butter less greasy. See a more detailed explanation and troubleshooting tips in the related section at the start of this article.
Shea butter and coconut oil can naturally turn gritty or grainy when exposed to temperature swings, especially if it melts and re-hardens several times (such as being left in a hot car or during shipping). The initial heating/cooling involved in making body doesn’t usually cause this though, especially if it’s rapidly cooled.
Enjoy!
This is one of my favorite things to put on my skin during the winter. In fact, we considered selling body butter in our shop alongside our organic calendula body lotion, healing salves, and lip balms… but it was going to be too tricky to ship, so I decided to share the recipe with you here instead.
I hope you love this whipped body butter recipe as much a we do! Please leave a review once you give it a try.
You may also like:
- Easy Lip Balm Recipe (How to Make Homemade Lip Balm)
- How to Make Medicinal Herb Infused Oil: Two Ways
- How to Make Salve or Balms 101: Simple Flexible Recipe
- DIY Bath Salt Recipe (How to Make Soothing Bath Salts)
DIY Whipped Body Butter: Easy, Natural, Non-Greasy
Equipment
- Double boiler (or create a DIY double-boiler by nesting a smaller pot inside a slightly larger pot)
- Measuring cups
- Stand mixer or hand mixer for whipping
- Final storage container(s) of choice, such a glass jars with lids or glass flip-top containers. For gifts, we like to use 4-ounce amber jars or pretty cobalt blue ones.
- Optional: plastic bag or piping bag to help fill jars
Ingredients
Base Ingredients (melt together)
- 1/2 cup shea butter (4 oz)
- 1/2 cup cocoa butter (4 oz) *see substitution notes below
- 1/2 cup coconut oil (4 oz) solid at room temperature
- 1/2 cup liquid carrier oil (4 oz) such as jojoba oil, sweet almond oil, olive oil, or other oil choice (including herbal oils like calendula, rosehip
or lavender-infused oil). Lightweight "dry" oils like jojoba, argan, or grapeseed will make body butter less greasy
Optional (add later during whipping)
- 1-2 tsp arrowroot powder or tapioca starch – to make body butter less greasy
- 10-25 drops essential oils of choice, such as lavender, chamomile, sweet orange or peppermint
Instructions
- Combine the shea butter, cocoa butter, coconut oil and other liquid oil of choice in a double boiler. (Do not add the optional arrowroot powder or essential oils yet!) Add enough water to the lower pot so that it’s touching the bottom of the upper pot.

- Heat the ingredients on the stovetop (uncovered) over medium heat until everything is fully melted and combined.
- Remove the mixture from the heat and allow it to cool until it’s semi-firm but not hard to the touch. The surface should be solidified, but still soft enough that you can easily press your finger into it. (You can speed this up in the refrigerator or freezer, but be careful not to over-chill until it's totally hard.)
- Once the mixture has cooled to semi-firm, transfer it to a stand mixer (or mixing bowl to use a hand mixer) and add the optional arrowroot powder and essential oils at this time.
- Now whip the body butter using a stand mixer or hand beater on high for approximately 5 minutes (starting on low speed just to incorporate the powder). Stop to stir the sides once or twice while whipping. The mixture will quickly turn from yellow to white and double in size as you whip it to introduce air.
- Transfer the finished whipped body butter into storage containers of choice, such as glass jars with a tight-fitting lid.You can either gently spoon and press the body butter into the containers, or transfer it to a piping bag (or ziplock bag) to squeeze it into the containers.
- Store homemade body butter in cool, dry location that isn’t prone to temperature swings – where it should stay good for up to a year or longer. If your home is warm, you may want to store it in the refrigerator so it doesn’t melt, which will also extend the shelf life.
- **You can also choose to NOT whip this recipe and leave it more firm like a balm – see notes and tips below.


Notes


21 Comments
Renee Ramage
This was the second recipe I’ve made using Shea butter and I wish I used it first! The Shea coco butter combo is great! I also mixed oils, ones I use for nail oils. This turned out great and making another batch very soon for gifts.. Thanks for all the extra help with the oils. Without knowing it totally I had settled on mixing jojoba, marula, sweet almond and argon for my nail oil. It works great but now I know why! Might add another but we’ll see. Why mess with a good mix!
Aaron (Mr. DeannaCat)
So glad you enjoy the whipped body butter and thank you for sharing!
Maria
Thank you so much for this and other fantastic articles.
I tried your recipes and they are the best I have ever made.
Aaron (Mr. DeannaCat)
We are so glad you enjoy our skin care recipes Maria and thank you so much for sharing!
Michelle
How many 4 oz jars do you get with this recipe please?
Aaron (Mr. DeannaCat)
Hi Michelle, you should be able to fill at least six, four ounce jars of the whipped body butter. Hope that helps and good luck!
nancy Mogden
For the measurements on the solid butters/oils, do you go by the ounce or cup? I used a 2 cup glass measuring cup on a scale, and I was hitting the half cup mark before the scale was registering the 4 ounces.
Love the recipe. It turned out great.
Thanks
Aaron (Mr. DeannaCat)
Hi Nancy, so glad the whipped body butter turned out so well for you and that you are enjoying it! We will typically just use a 1/2 cup dry measuring cup for the shea butter, cocoa butter, and coconut oil while using a liquid measuring cup for the liquid oil portion. Hope that helps and enjoy!
Viola
Recipe turned out amazing using olive oil for my oil. I made a bunch of it so that even I’ll have some for myself after Christmas! Thank you. The olive oil is strong smelling, but my skin is very soft.
Aaron (Mr. DeannaCat)
So glad it turned out so well for you Viola!
Marianne
I made this last weekend and it turned out amazing! I love how soft it makes my skin feel once it soaks in, and I can’t wait to give some away as Christmas gifts too. Thank you so much for sharing this!!
Deanna Talerico
Hi Marianne – Excellent to hear, we’re so happy you gave it a try and are loving it too! Thank you for the review!
Jaime
I am so excited to make this. Here in NV dry winter weather takes a toll on 50 yo skin. Can anyone recommend a good shea butter to use for this recipe? Thanks
Aaron (Mr. DeannaCat)
Hi Jaime, we are so glad to hear you are excited to make the whipped body butter! You can find quality shea butter from Dreaming Earth Botanicals or Mountain Rose Herbs, we always look for organic, virgin ingredients to use in our skin care products. Hope that helps and good luck!
Kay
How would one add raw honey to this? I find it makes a huge difference for eczema, just having trouble figuring out ways to actually incorporate it into my stuff. The Manuka honey makes the most difference, and doesn’t take much.
Aaron (Mr. DeannaCat)
Hi Kay, we would skip adding honey altogether, although it does have some benefits for skin care, it is water soluble so it wouldn’t mix well into the butter unless you use an emulsifier and even then, you would have to add a preservative as the end product would spoil quickly without it. Adding a small amount of honey to a dollop or portion of body butter before then applying it to your skin at the time of use would be the best way to incorporate it into your skin care routine. Hope that helps and good luck!
Kay
Thank you for your reply.
Julie in Denver
Ooooo, I can’t wait to try this recipe! I have supplies I bought earlier this year and did nothing with them as I’m new at this and it stressed me out LOL But this recipe and its instructions are so easy – thanks for sharing!
Aaron (Mr. DeannaCat)
You should do amazing Julie! It’s really quite easy, good luck and enjoy!
Jennifo
I make body butter every Fall since I have incredibly dry skin here in WI. I love mango butter because it is scent free & stays relatively soft. I don’t like smelling like cocoa, but that’s me. This butter is fantastic for the cuticles, split ends, under the eyes, cracked heels, just everywhere! It is amazing how just a little on my fingertips does the trick for fly away split ends & perking up my curly hair.
I’ve never tried the arrowroot starch for less greasiness, I shall try.
Aaron (Mr. DeannaCat)
So great to hear and thanks for sharing!