

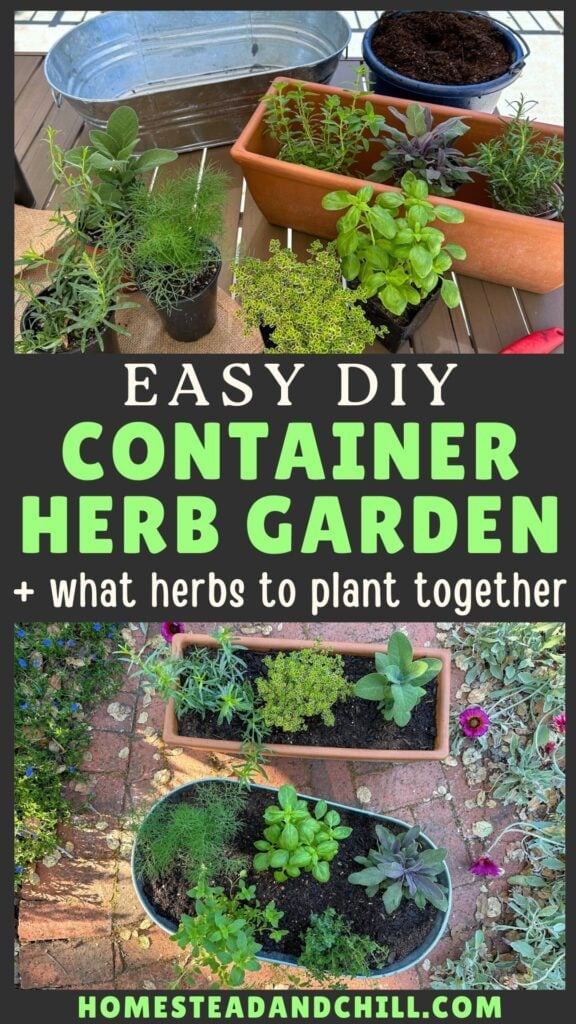
DIY Container Herb Garden Planter + The Best Herbs to Grow
There’s nothing better than cooking with fresh, just-picked homegrown herbs! Come learn how to make an easy container herb garden, perfect for small spaces like a patio, balcony, or a larger backyard garden. You could even keep an herb planter indoors in a sunny window or under a grow light.
This guide will explore the best herbs to grow in pots, container sizes, water and harvesting tips, and more. With this fun and simple garden project, you’ll be harvesting your own delicious herbs in no time!

Would you like to save this?
The Best Herbs to Grow in Pots
Herbs that grow well in containers include culinary herbs like basil, thyme, sage, chives, parsley, rosemary, dill, cilantro, and oregano. If you plan to grow herbs indoors, consider chives, tarragon, lemon balm, mint, basil or parsley – all of which perform better inside than some larger, woodier herbs.
Many of these herbs grow as annuals but can also survive as perennials in temperate zones or when protected over winter. However, they may become too crowded or stunted over time when confined to a container (especially if you plant several together). Thankfully, it’s cheap, quick and easy to re-plant fresh herbs each spring if you desire!
Mint also grows well in a container but should be kept in its own pot. Mint spreads aggressively and therefore should only be planted in a confined container – never in the ground or a raised bed! Fennel also does best in a separate large container as it readily out-competes other herbs.
What herbs grow well together in the same container?
Most herbs will happily grow alongside one another as companion plants when provided moderate water and sunshine. However, it’s wise to consider the different soil, sun, and water needs of various herbs too.
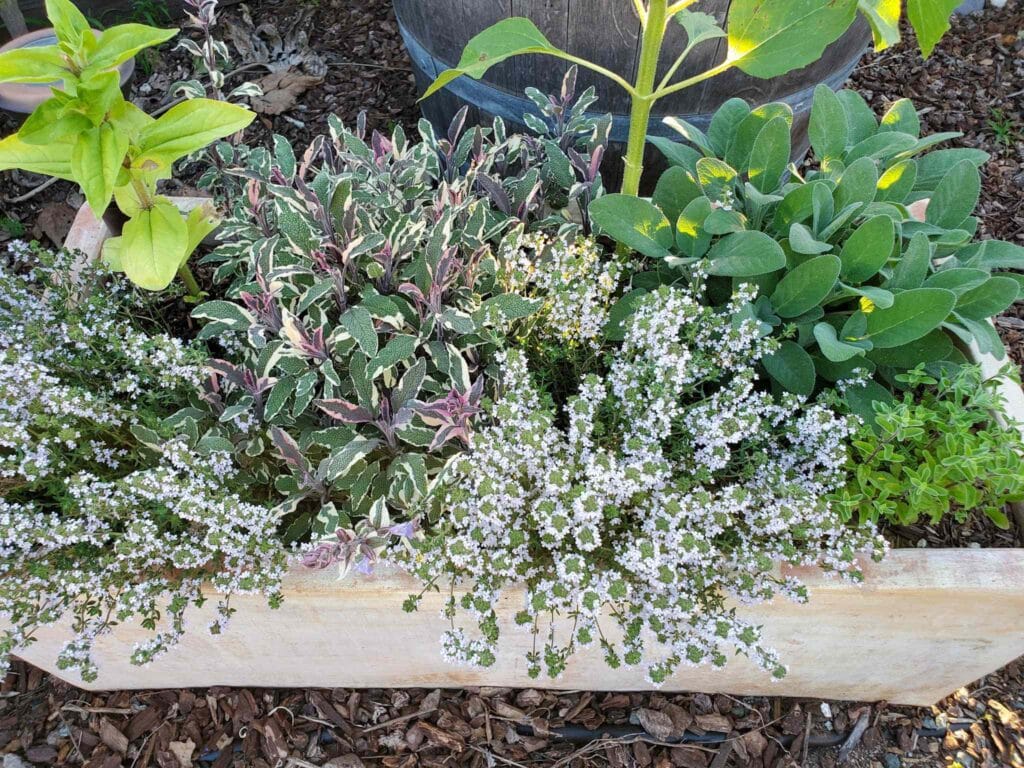
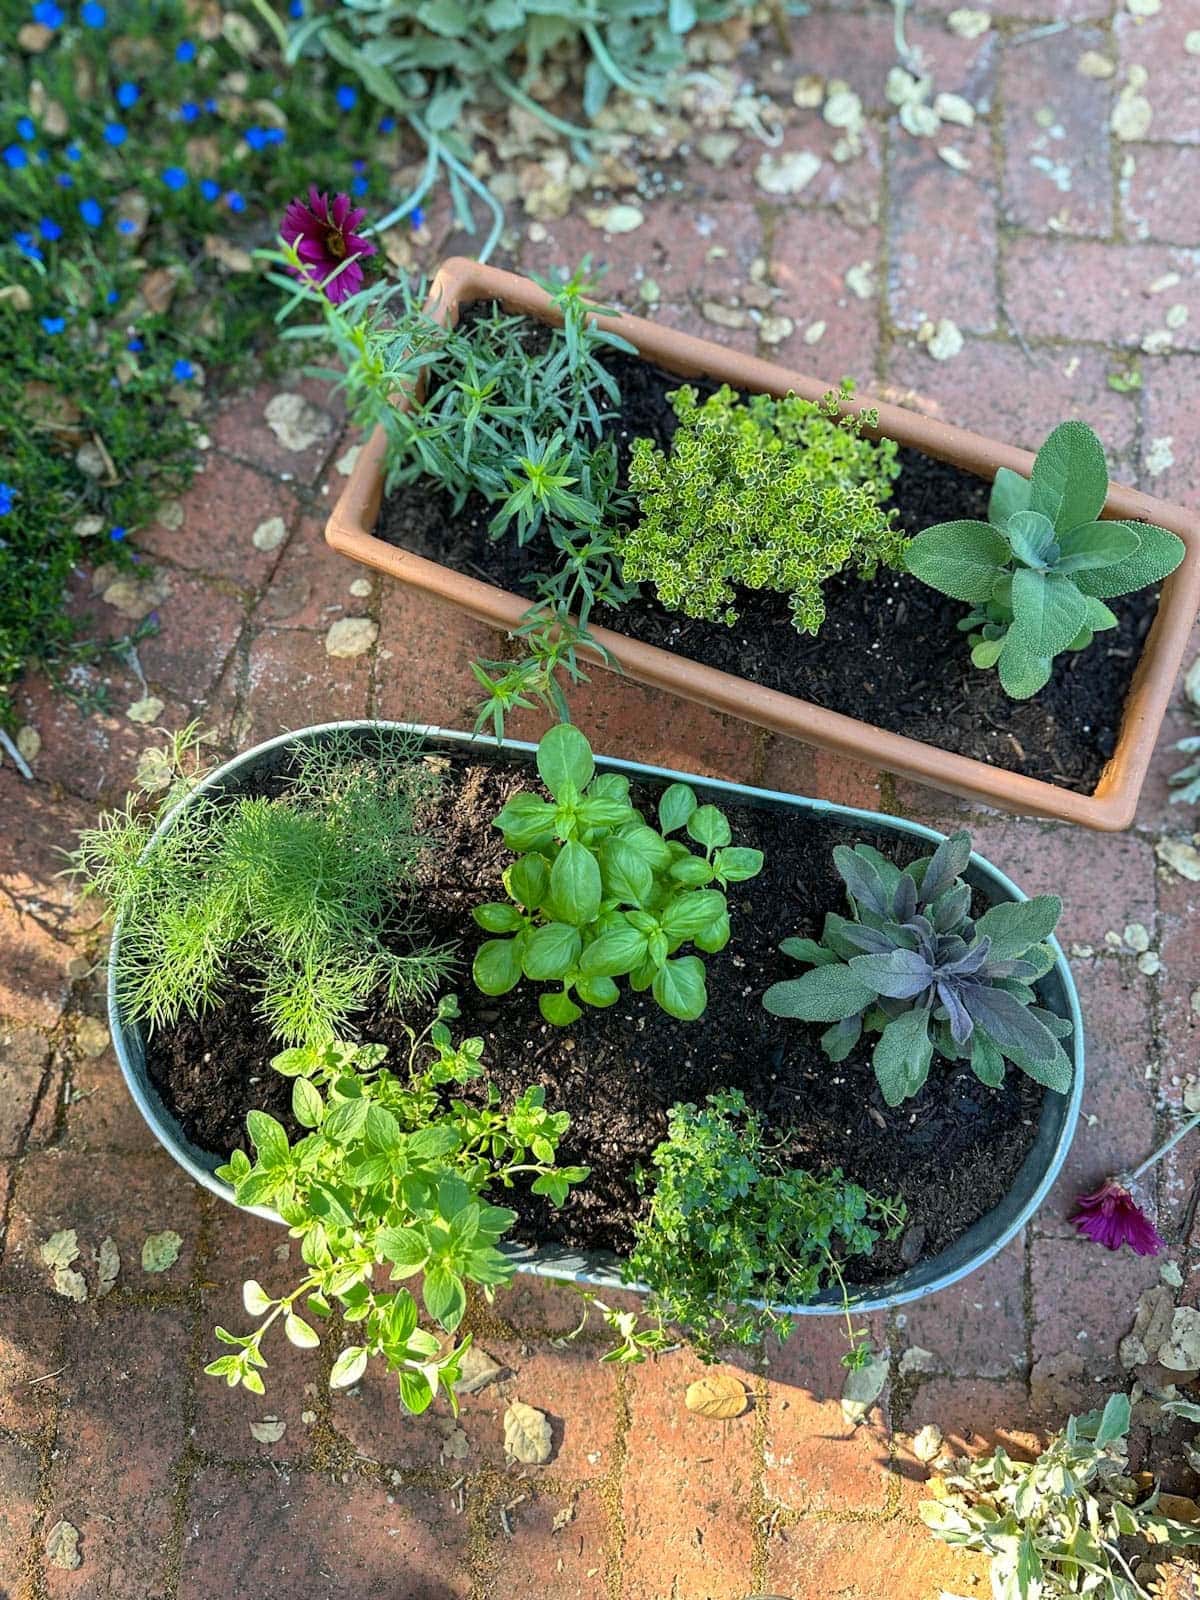
For instance, woody herbs like rosemary, sage, oregano, lavender, and thyme enjoy full sun and are more drought-tolerant than some more tender herbs, and therefore grow very well together in a common container or pot.
Likewise, dill, basil, parsley, cilantro and chives thrive together as they all prefer consistently damp soil (but not overly wet) and benefit from partial afternoon shade in hot climates.
RELATED: Learn even more about growing herbs here – including tips to start from seed, the most shade-tolerant or cold-hardy herbs, our favorite recipes to use or preserve fresh herbs, and more!
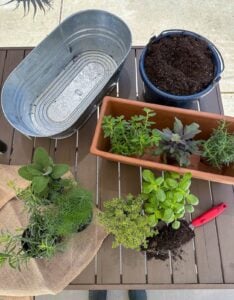
Step 1: Pick a Container
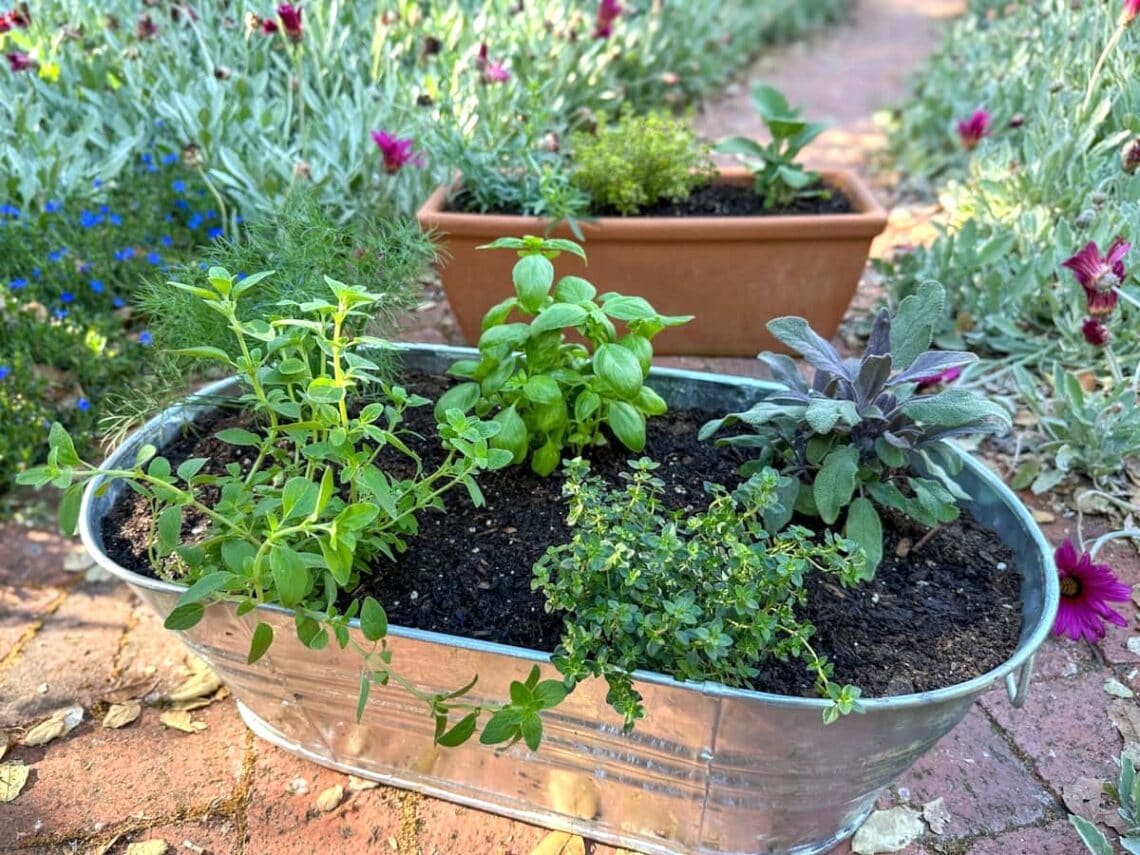
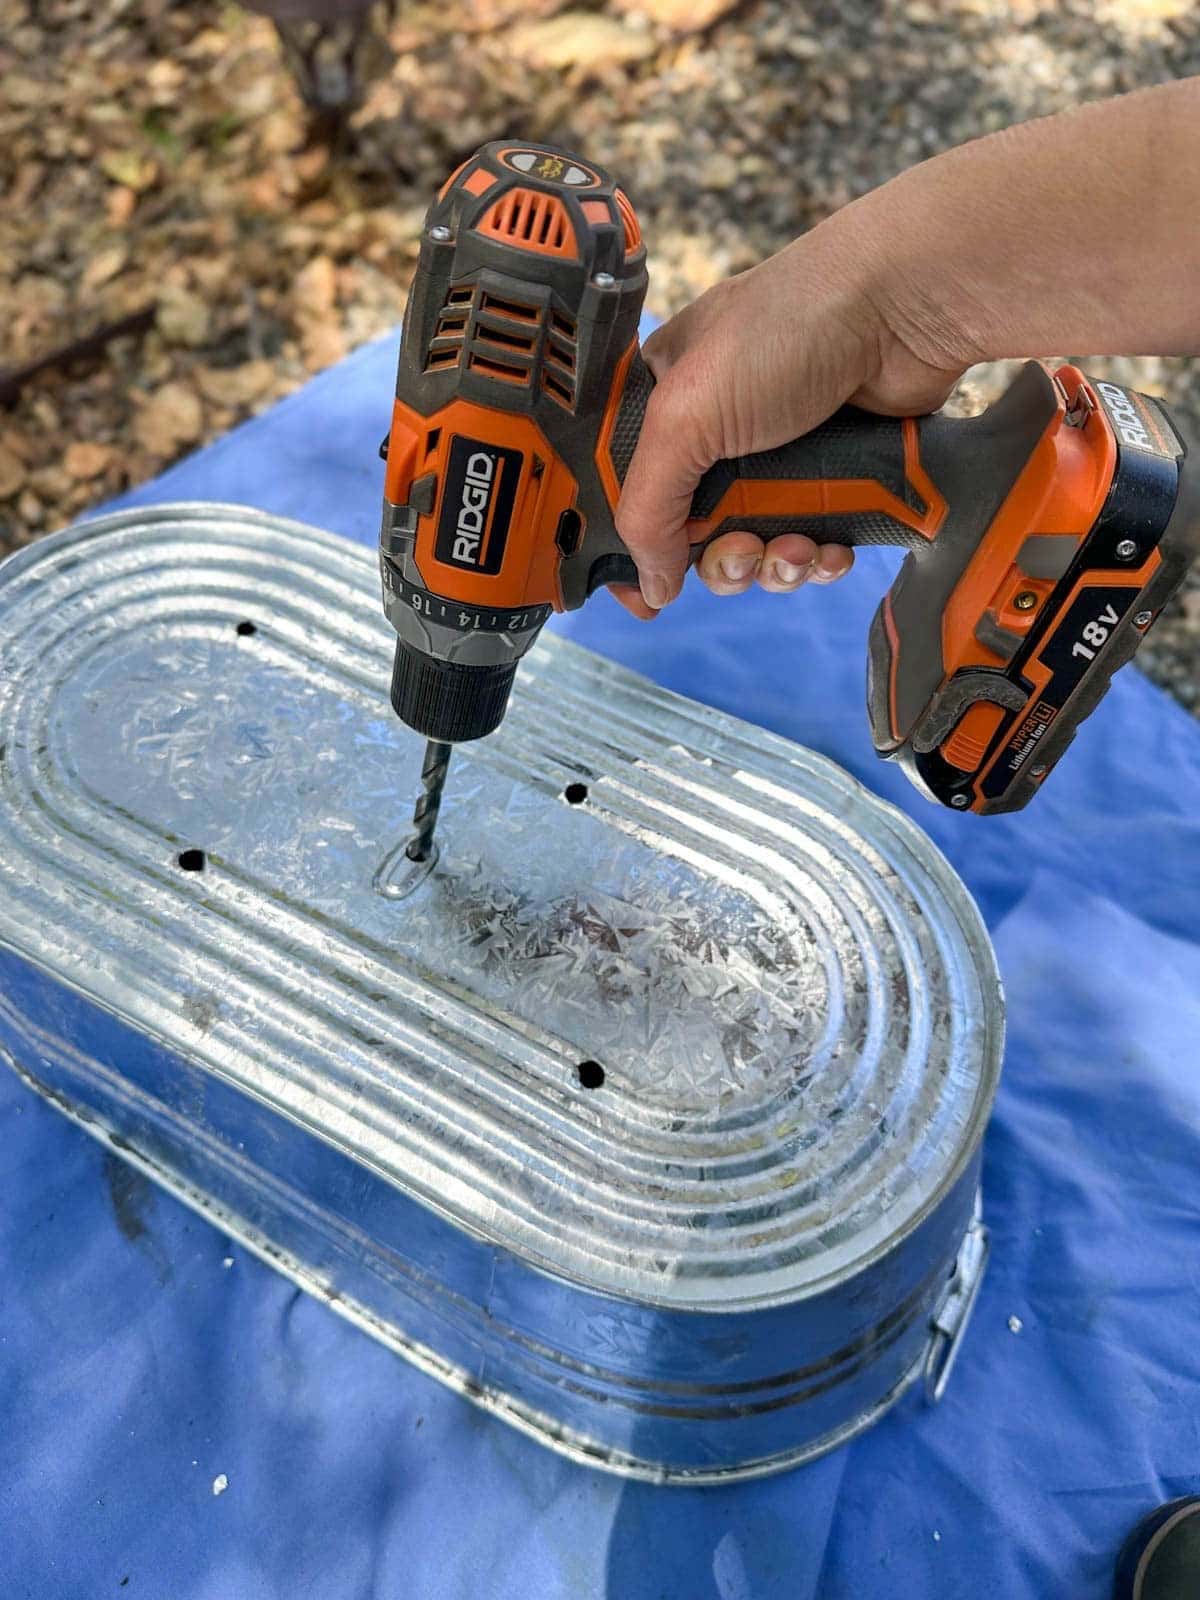
You can plant herbs in a container that’s made for gardening, or convert a container into an herb planter such as by adding drainage holes to a galvanized steel tub (shown in step 3). Yes, galvanized steel is food-safe!
Choose a container that is at least 6 inches deep. Most annual herbs will happily grow in 6 to 8 inches of soil, though 10 to 12 inches will provide even more root space, better water retention, and healthier plants. Herbs like dill, parsley, and cilantro grow especially deep tap roots.
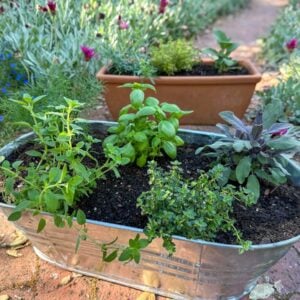
To plant many types of herbs in one container, choose a wide planter with plenty of surface area so each herb has adequate space to grow (with at least 5 inches between plants). Or to plant just one herb seedling per pot, choose a container that is at least 8 inches wide and tall.
To grow perennial herbs to overwinter for a second season or beyond, a larger herb planter is definitely best! Our massive 10-year old rosemary (zone 9 here) is thriving in a big wine barrel planter.

Step 2: Choose Your Herbs
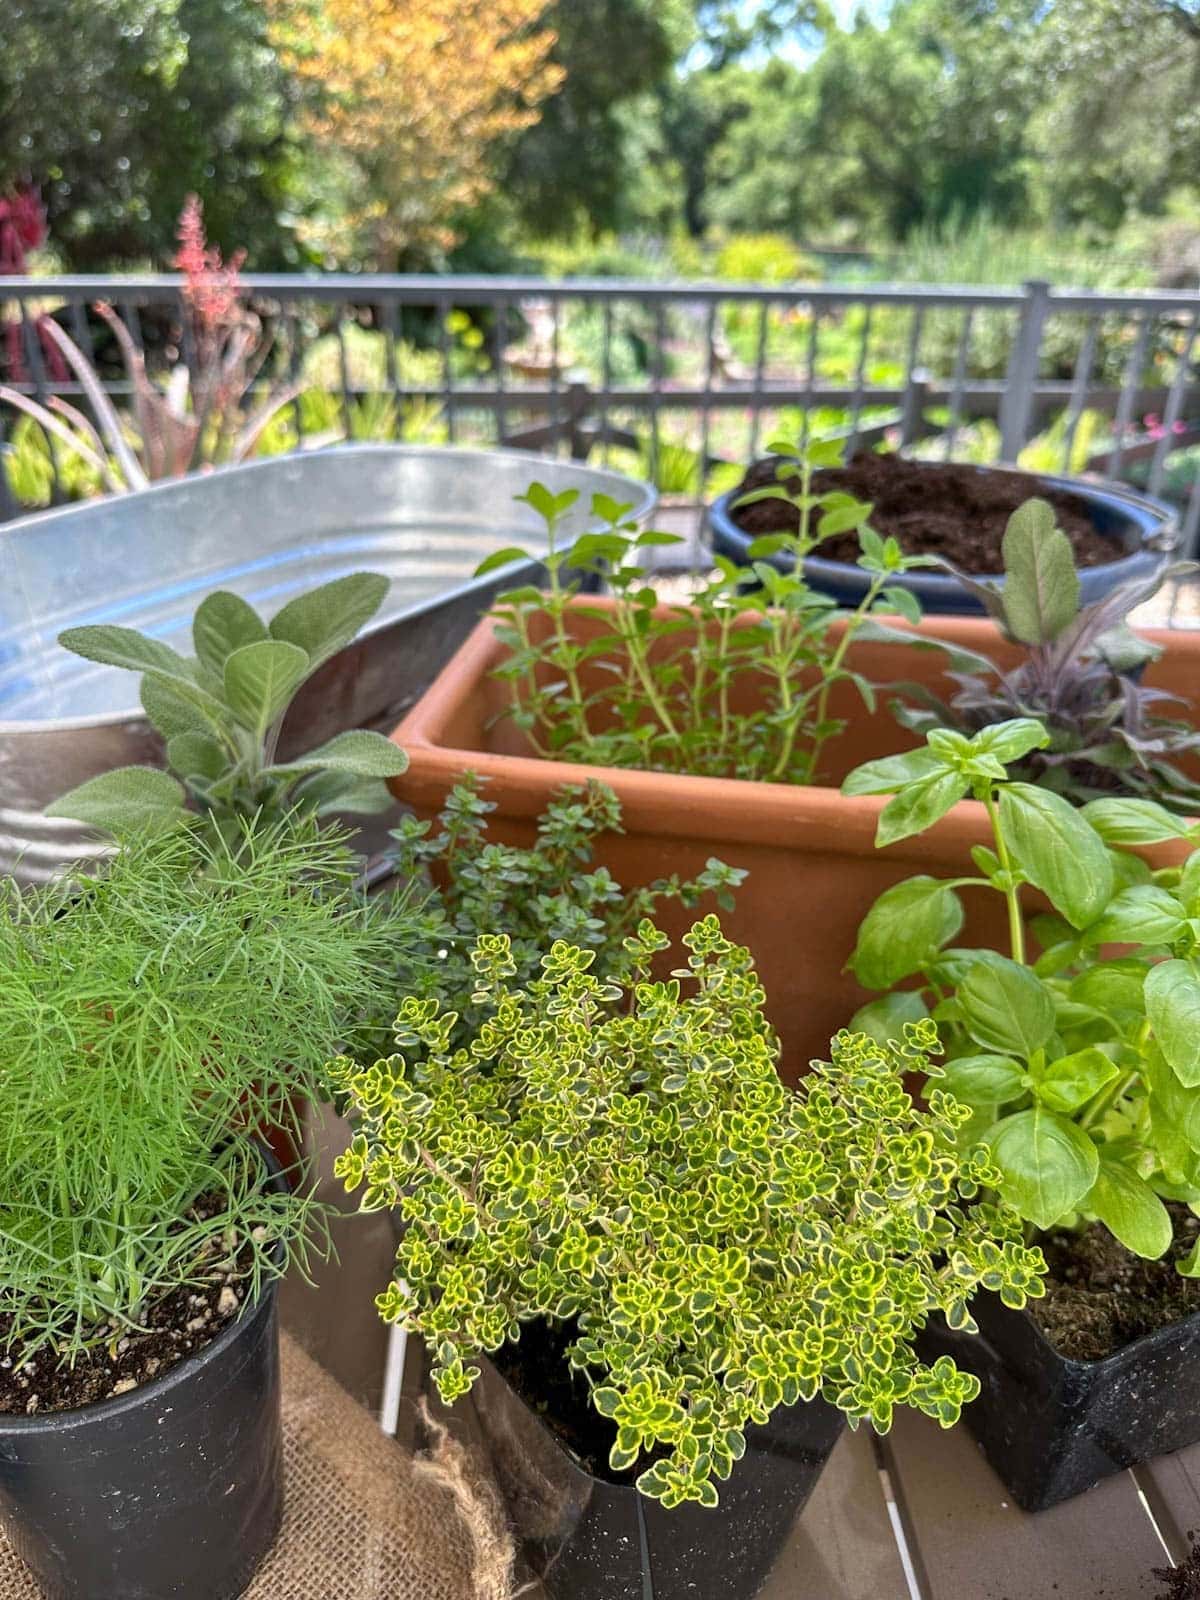
Next, select which herbs you’d like to grow in your planter. Pick herbs that you think you’ll actually use, plus maybe a few new-to-you options to try too! Since many herbs vary in size depending on the cultivar, look for compact varieties or ones marketed as container-friendly. (See a list of the best herbs to grow in pots at the beginning on this post.)
To get started, you can grow your own herbs from seed, though the most quick and easy way is to buy herb seedlings. Many of them will be large enough to start harvesting from right away! We prefer to get organically grown herbs from a local nursery, especially since big box garden centers are more likely to spray their plants with pesticides.
Some of my personal favorite herbs include thyme, sage, rosemary, oregano, and basil. Don’t miss my guide on growing basil to get huge bushy plants! I also really love to grow chamomile and lemon verbena to dry for tea or use fresh in homemade herbal sun tea.
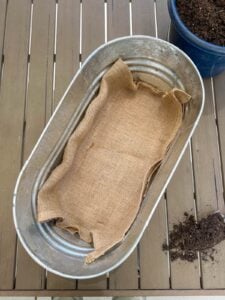
Step 3: Add Drainage and Liner
If your chosen herb planter doesn’t yet have drainage holes, it’s time to add some! Adequate drainage is essential so plant roots don’t rot in standing water. Most herbs prefer consistently damp soil, but not sopping wet.
We used a drill with a 3/8″ bit to add several drainage holes to a galvanized steel tub, though 1/4″ bit would work well too. If you don’t have a drill, you could also use a large nail and hammer. Caution: this will create sharp metal shavings and possibly some sharp edges around the drainage holes, so be careful while you work. I laid a cloth under the tub for easy clean-up.
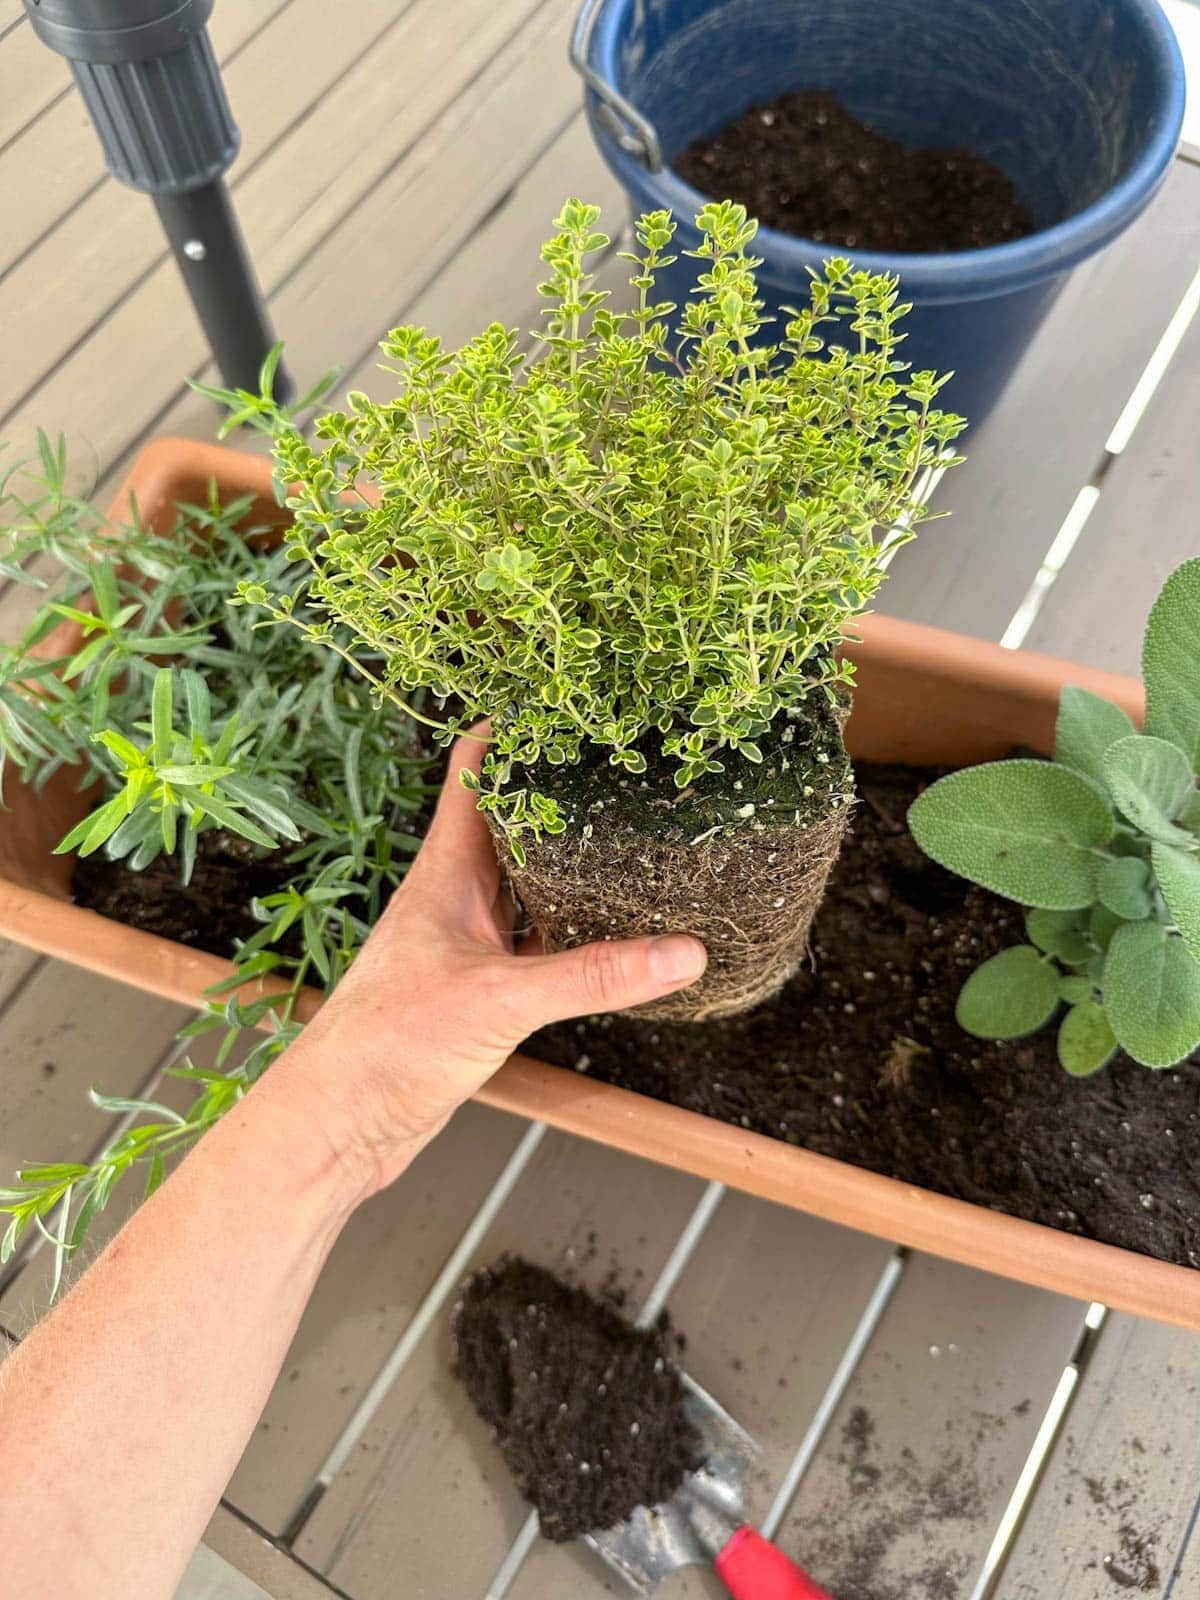
To prevent the soil from leaking through the drainage holes, you may want to line the bottom of the container with a piece of natural burlap or durable landscape fabric – especially if you intend to keep your herb planter indoors. (But don’t line it with impervious plastic!)

Step 4: Add Soil
Next, fill the herb planter about two-thirds full of soil. Herbs grow best in moderately rich, fluffy, well-draining soil. Fresh high-quality potting soil is an ideal choice for a container herb garden. I also like to mix in a few handfuls of aged compost and/or worm castings to the soil for additional nutrients.
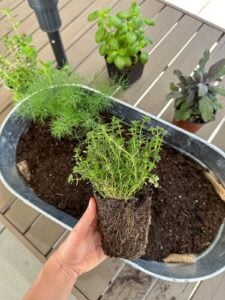
Step 5: Plant Herbs
Last but not least, it’s time to plant your container herb garden! Space each herb seedling at least 4 to 5 inches apart. For the best results and long-term growth, space them even further – up to 8 to 12 inches apart.
Many nursery starts come with more than one seedling per pot (basil is especially notorious for this), so be sure to gently tease apart and separate crowded seedlings before planting them too.
When planting the herbs, keep the existing root ball level with the soil. Add more soil as needed so that the container is completely full, but avoid burying the stems in soil so they don’t rot.

Where to Put an Herb Garden Planter
Most annual herbs grow best in full sun, so place your new herb planter somewhere that receives at least 6 to 8 hours of direct sunlight per day.
However, some herbs can also tolerate partial shade and may even benefit from a little afternoon shade during the hottest part of summer. Check the sunlight preferences for each herb you planted. That’s the beauty of growing herbs in a container: you can move it around as needed!
If you’re keeping your herb planter indoors, choose a location that gets as much natural light as possible, like near a south-facing sunny window. Or, use a basic grow light to provide better light if needed. You’ll also need a drainage tray below the planter to protect your surfaces and catch runoff after watering.
Watering Herbs
Water your herb planter often enough to keep the soil evenly damp but not overly wet. Let the soil dry out ever-so-slightly between watering. Water needs will vary depending on your climate, container, and age of the plants. Large mature plants soak up water more quickly than small seedlings. Note that smaller pots generally dry out faster than larger containers, raised beds or in-ground gardens.
When in doubt, use a handy moisture meter to check the soil before adding more water! I use it for my finicky houseplants too.
How to Harvest Herbs
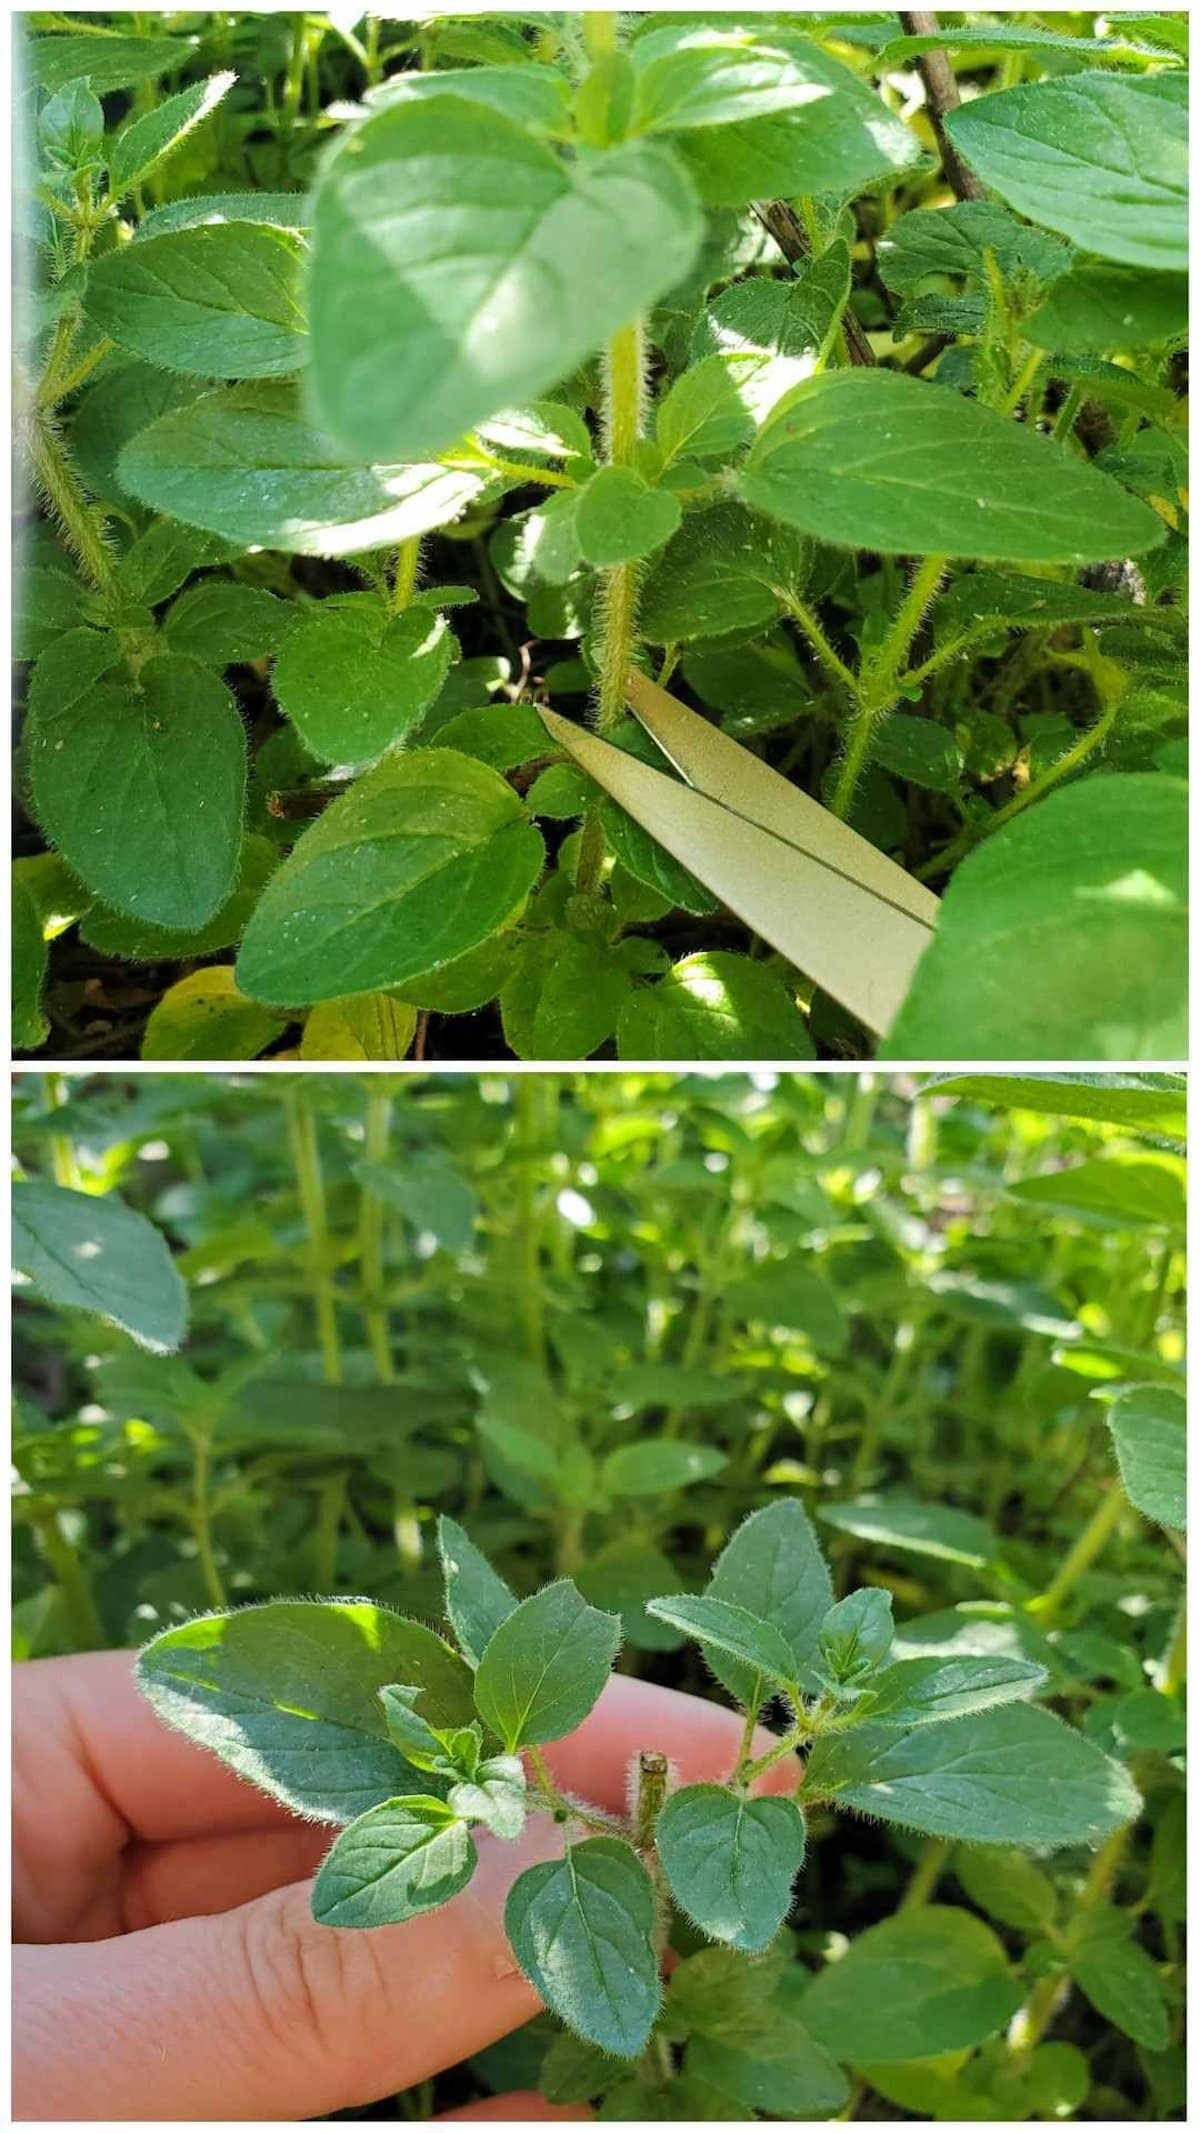
To harvest fresh herbs, it’s best to cut small clippings of stems rather than pluck off individual leaves only. With regular pruning, the herbs will branch out, growing more full and bushy. The more you harvest, the more it promotes new growth!
The exact method can vary slight depending on the herb, but in most cases, you can pinch or cut just above a small set of new leaves growing along the stem (aka, right above a leaf node). See photo below. Don’t cut stems all the way to the soil level though! I usually trim off the top one-third to half of a stem, leaving at least a couple inches to continue to grow.
If you overwinter perennial herbs in your planter, you can give them a deeper prune (cut back by about half to two-thirds) the following spring to promote fresh new growth.
Enjoy!
Now, for the best part: sit back, relax, and watch your new herb garden planter grow!
We love to use fresh herbs in recipes like our sourdough discard crackers, oven roasted artichokes, herb roasted Brussels sprouts, two-bite smashed potatoes, rosemary roasted mixed nuts and more! If you have enough to preserve, learn how to dry fresh herbs so you can make your own spice blends, tea, or herb infused oil.
I hope you enjoyed this simple garden project. Please feel free to ask any questions in the comments or leave a review below. Have fun!
DIY Container Herb Garden Planter
Equipment
- drill with 1/4" to 3/8" drill bit (if using a metal tub)
- burlap or permeable landscape fabric to line the container (optional but recommended, for indoors especially)
Ingredients
- a container such as a large terracotta pot, galvanized metal tub, grow bag, or wine barrel planter (see size tips below)
- herb seedlings of choice, such as basil, thyme, sage, oregano, parsley, tarragon, chives, dill, rosemary, cilantro, or mint* (plant mint in it's own separate pot)
- potting soil
- compost or worm castings
Instructions
- Choose a container that is at least 6 to 8 inches deep (10 to 12 is even better for long-term plant growth) and wide enough to space each herb at least 4 to 5 inches apart. The more space, the better! If planting just one type of herb per container, choose a pot that is about 8 inches wide and deep.

- Choose your herbs. Pick things you'll actually want to use and eat! Woody herbs like sage, rosemary, thyme, oregano, and lavender grow well together in a container as they all prefer full sun and are drought tolerant. Tender herbs like basil, chives, dill, parsley, lemon balm and tarragon thrive together with consistent moisture, partial afternoon shade in hot conditions, and also grow better inside than others.
- Add drainage holes if your container doesn't already have them. We use a 1/4 to 3/8" drill bit to add several drainage holes to the bottom of our galvanized steel tub. Use caution as it creates sharp shavings and edges.

- Add a liner. To prevent the soil from leaking through the drainage holes, you may want to line the bottom of the container with a piece of natural burlap or durable landscape fabric – especially if you intend to keep your herb planter indoors.
- Add soil. Fill the herb planter about two-thirds full of moderately rich, fluffy, well-draining soil, such as high-quality potting soil. I also like to mix in a few handfuls of aged compost and/or worm castings to the soil or additional nutrients.
- Plant herbs, spacing each herb at least 4 to 5 inches apart or up to 8 to 12 inches apart for the best long-term growth. Gently separate crowded nursery seedlings before planting. Top off with more soil if needed until the container is full, but don't bury the herb stems.
- Place your new herb planter somewhere that receives full sun (at least 6 to 8 hours of direct sunlight per day). Some herbs can also tolerate partial shade and may even benefit from a little afternoon shade during the hottest part of summer. If you’re keeping your herb planter indoors, choose a location that gets as much natural light as possible, like near a south-facing sunny window or under a grow light.
- Harvest herbs routinely by taking small cuttings (not by plucking individual leaves) just above a leaf node. The more you harvest, the more new growth and bushier they will get! Cut stems back by 1/3 to half.


You may also enjoy:
- Harvesting Fresh Lavender: How to Harvest, Prune & Dry Lavender Flowers
- How to Propagate (Grow) Sage Cuttings in Water or Soil
- Garden Companion Planting Chart, Plans, and Benefits
- How to Make Chive Blossom Vinegar + 8 Ways to Use it
- All About Calendula: How to Grow, Harvest, Dry, & Use Calendula Flowers

Deanna Talerico
Deanna Talerico (aka DeannaCat) is a garden educator and writer with over 15 years experience in organic gardening. She is a retired Senior Environmental Health Specialist, and holds a M.A. in Environmental Studies and B.S. in Sustainability and Natural Resources.


7 Comments
Karen
Great information!
Martina V Athas
Great article, very knowledgable. Definetly makijing couple herb containers for my patio.
Aaron (Mr. DeannaCat)
Hi Martina, that is great to hear and have fun growing!
Ann
A useful, thorough, and encouraging article As Always! Thank you Deanna! A little herb garden would be a wonderful way to intro or renew an Interest in having plants. Do you use a general guideline for substituting fresh herbs for dried herbs in your cooking?
Aaron (Mr. DeannaCat)
Hi Ann, so great to hear! Using fresh herbs can really bring your daily meals and recipes to a new level, for general fresh to dried herb conversions, if a recipe calls for 1 teaspoon of dried herbs, you would use 1 tablespoon of fresh as a substitute. Dried herbs are used at a 1/3rd ratio when compared to fresh herbs. I hope that helps and have fun growing!
Andrea Meza
The tutorials and recipes I’ve used from Homestead & Chill are amazing. They’re easy to understand and follow. The best part, they work!
Thank you Homestead & Chill, for making all of your tutorials and recipes easily understandable.
Aaron (Mr. DeannaCat)
Hi Andrea, thank you so much for the kind words and we are so glad you enjoy our website!