

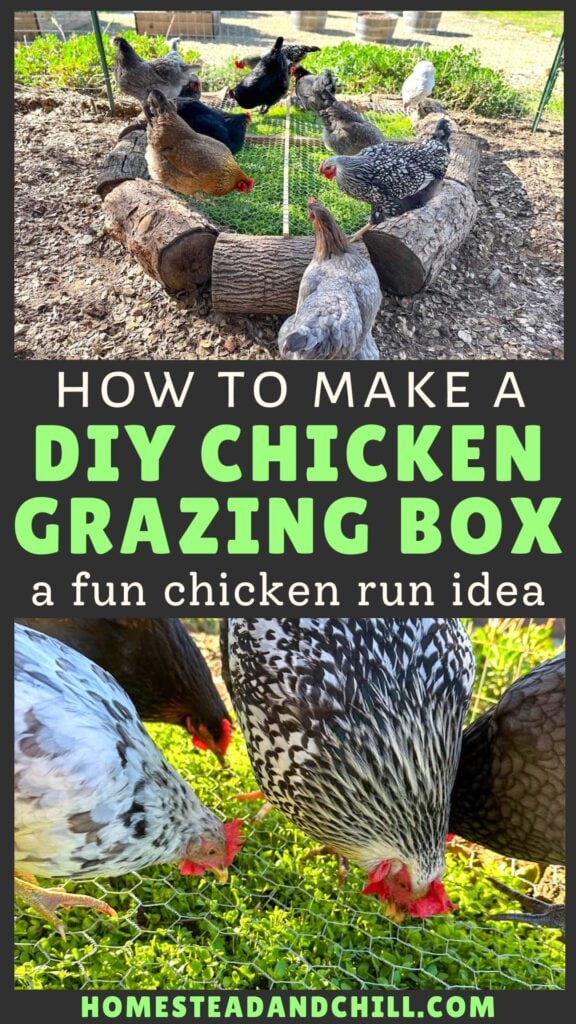
How to Make a Chicken Grazing Box (Chicken Run Idea)
Are you looking for fun chicken run ideas? Come learn how to make a DIY chicken grazing box, also known as a fodder box. Or, a “chicken salad bar”, as I like to call it! This easy project is a great boredom buster for chickens as it provides endless hours of entertainment, enrichment, AND nutritious greens for your flock.
This article will cover how to make a chicken grazing box using a wide variety of materials, with a flexible design and adaptations for any size chicken run or space. We’ve made a few different styles over the years, and even added automatic drip irrigation to our most recent fodder box.
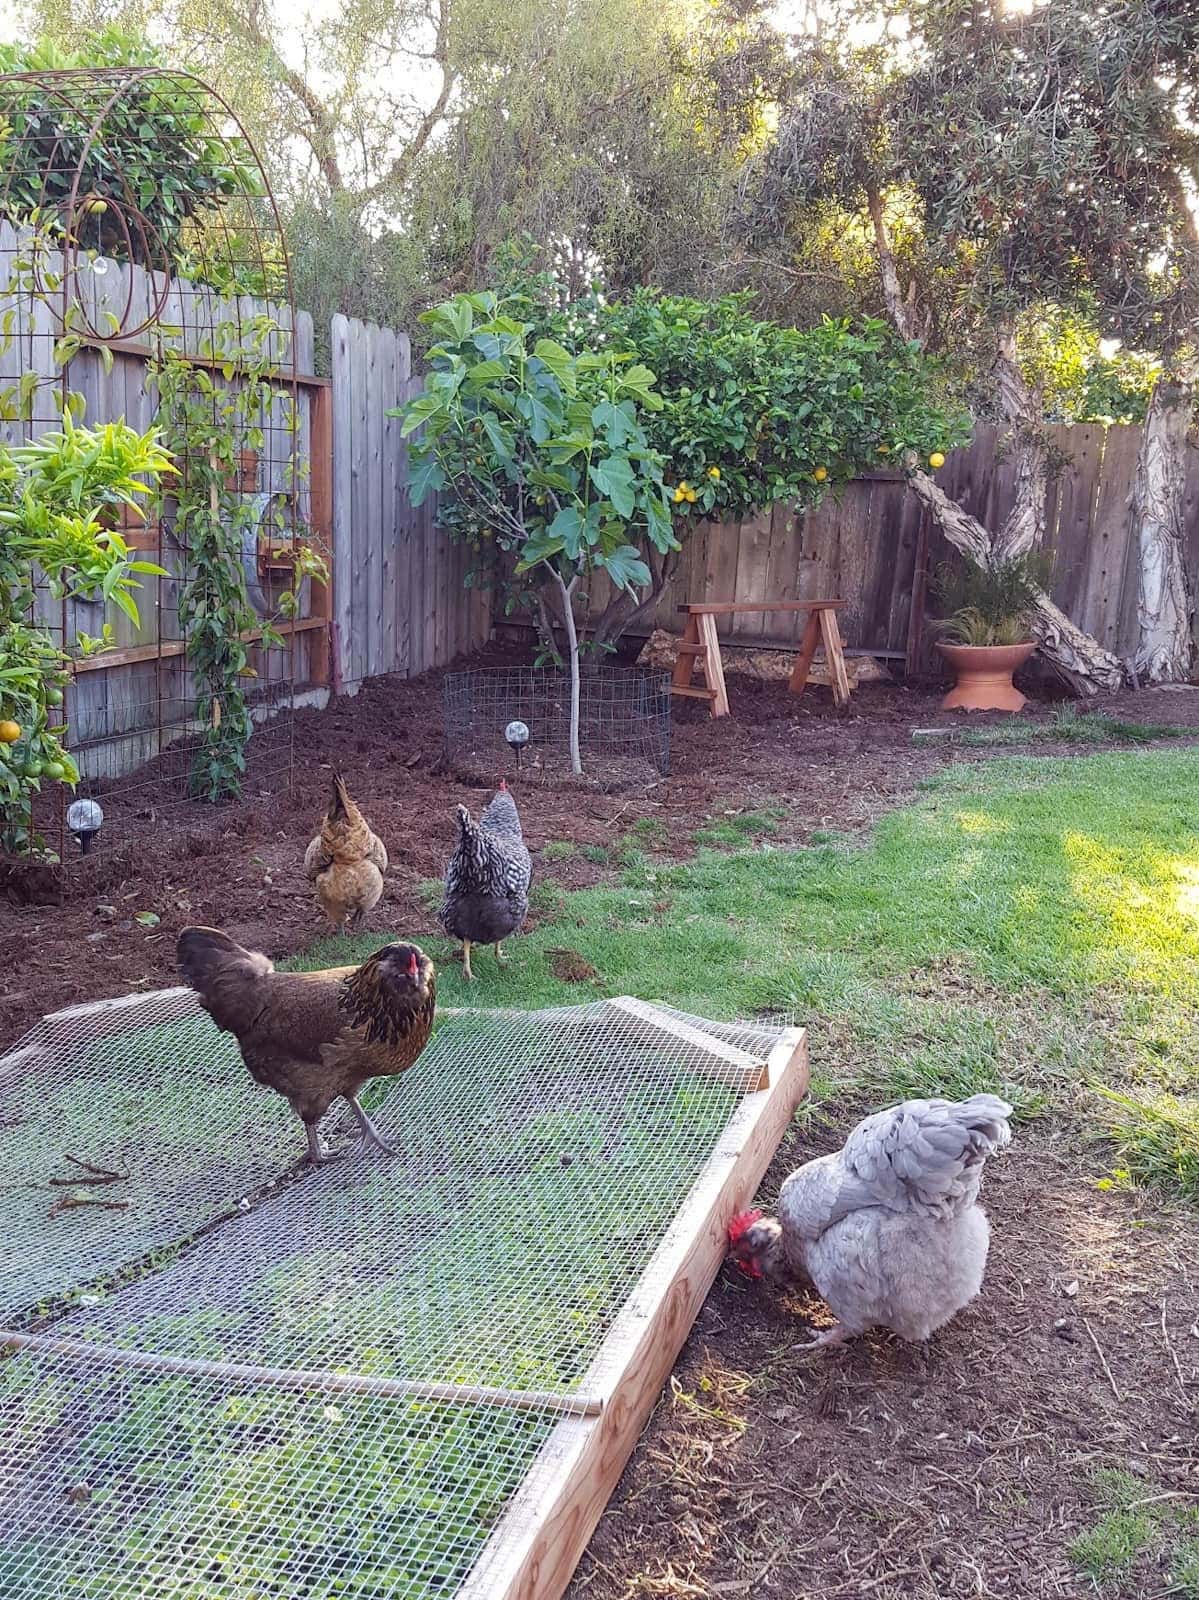
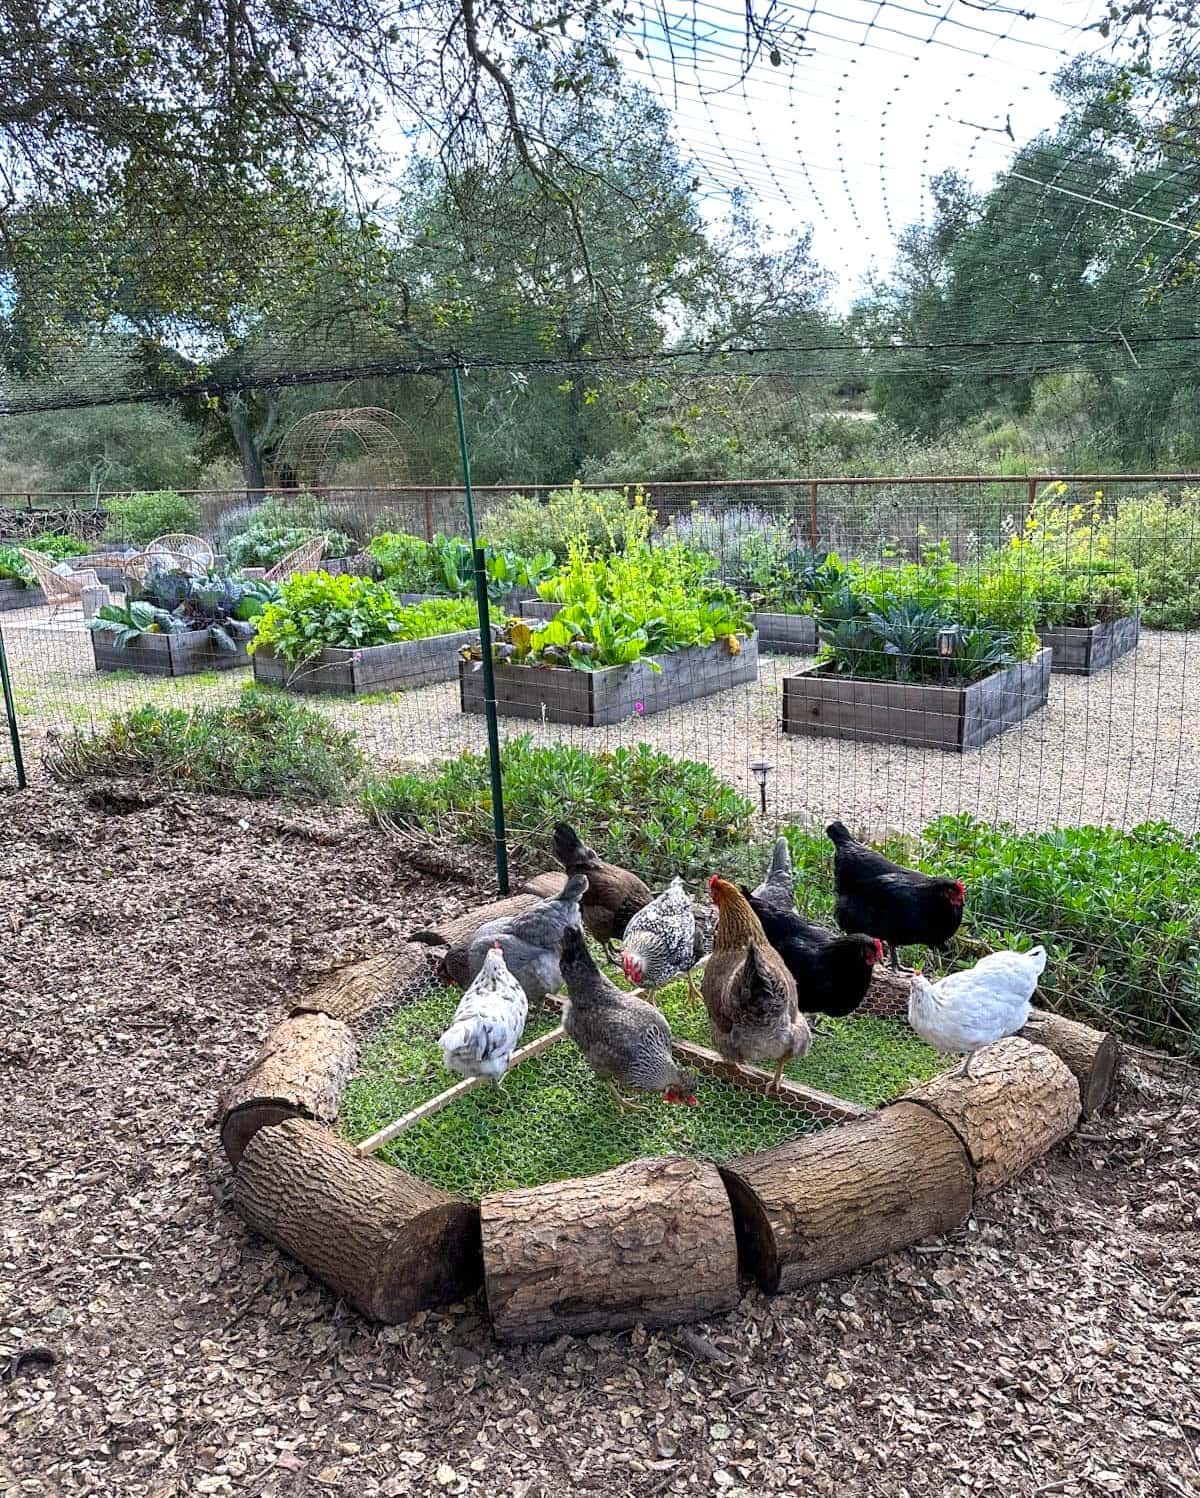
Our chickens can’t fully free range due to predators, and eat anything that sprouts in their run faster than it can get established. Needless to say, they love their salad bar! And I’m sure your flock will too.
Would you like to save this?
Disclosure: Homestead and Chill is reader-supported. When you purchase through links on our site, we may earn an affiliate commission.
What is a Chicken Grazing Box?
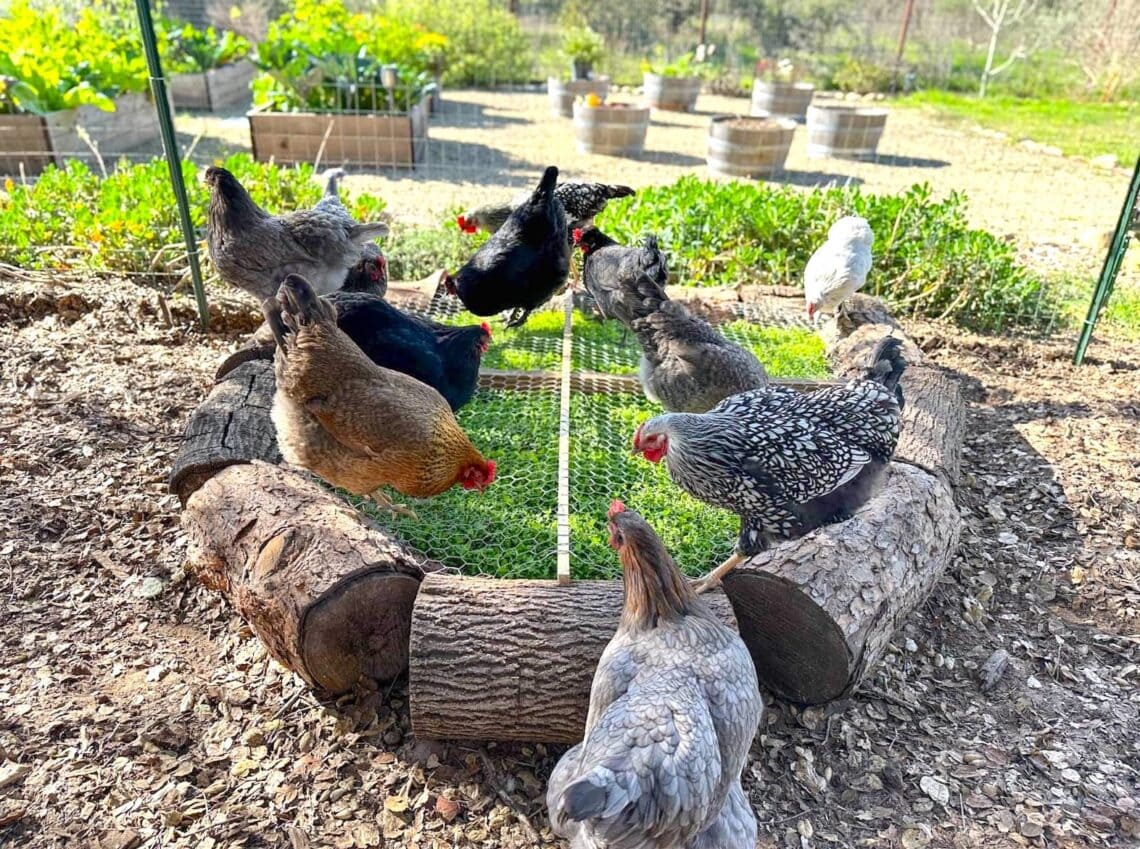
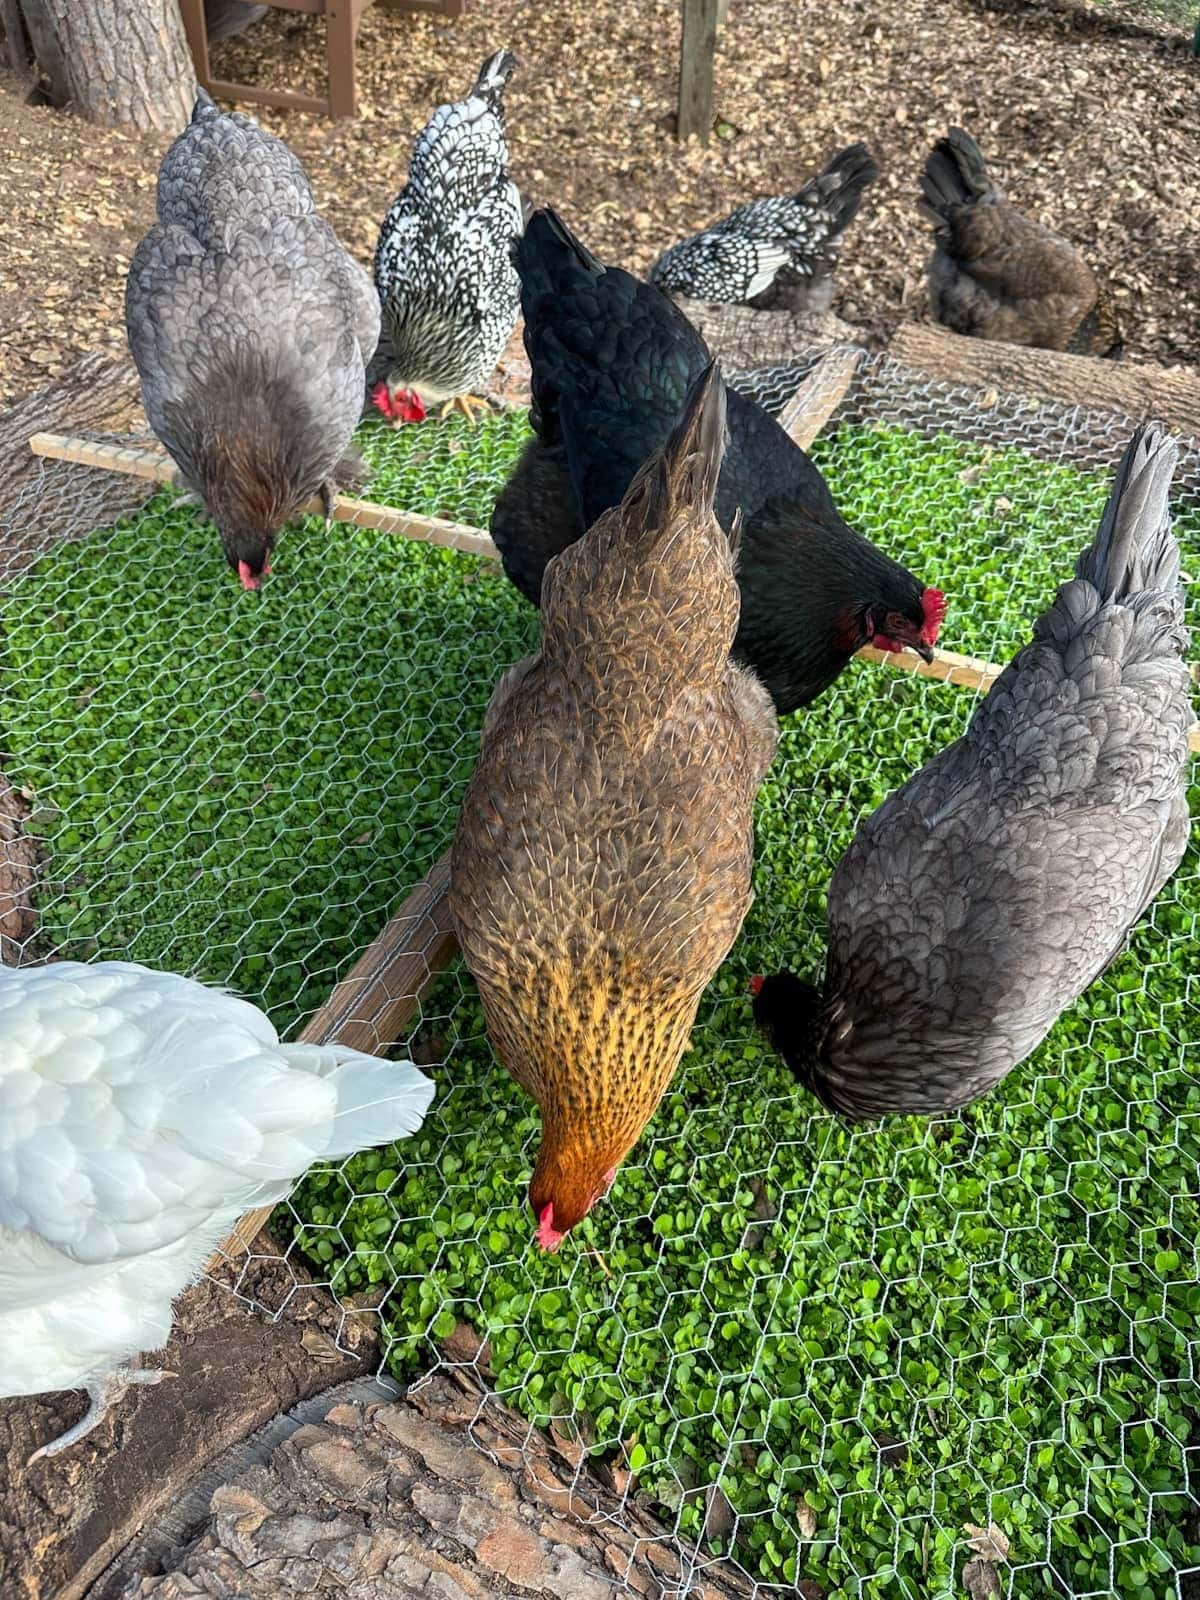
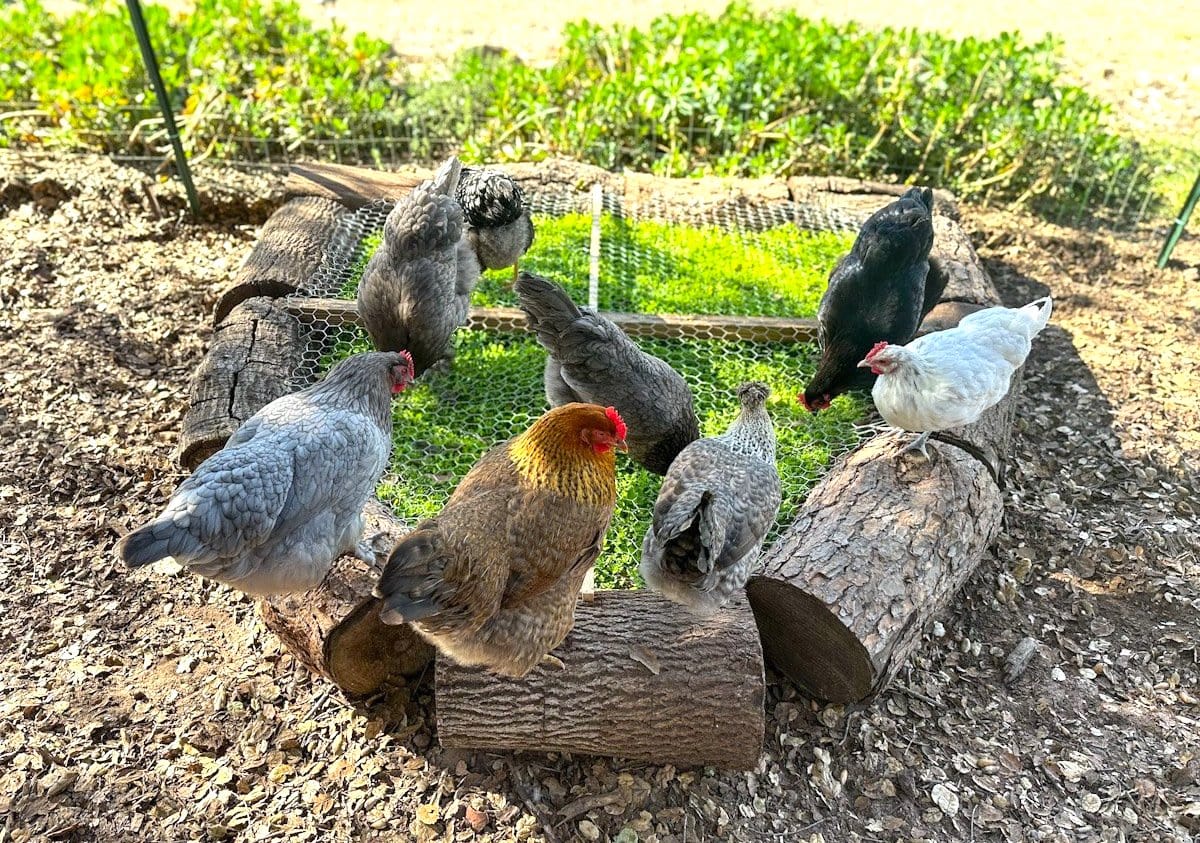
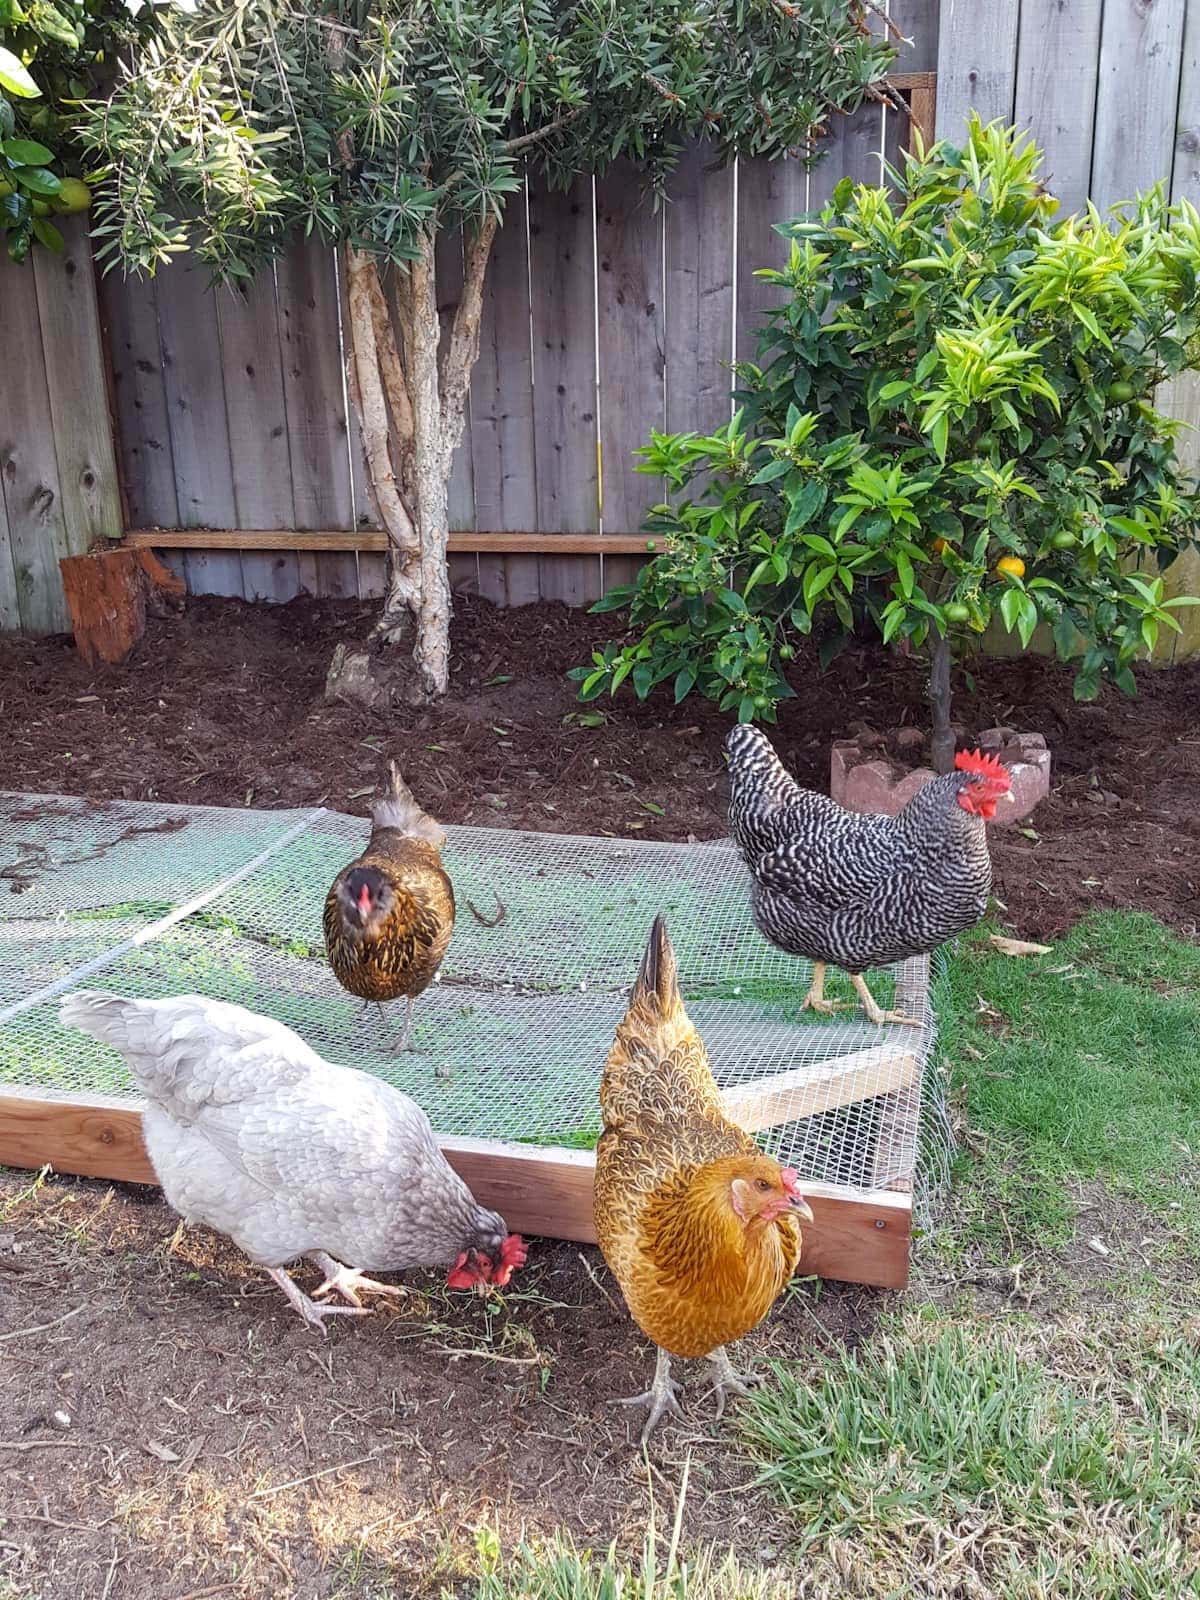
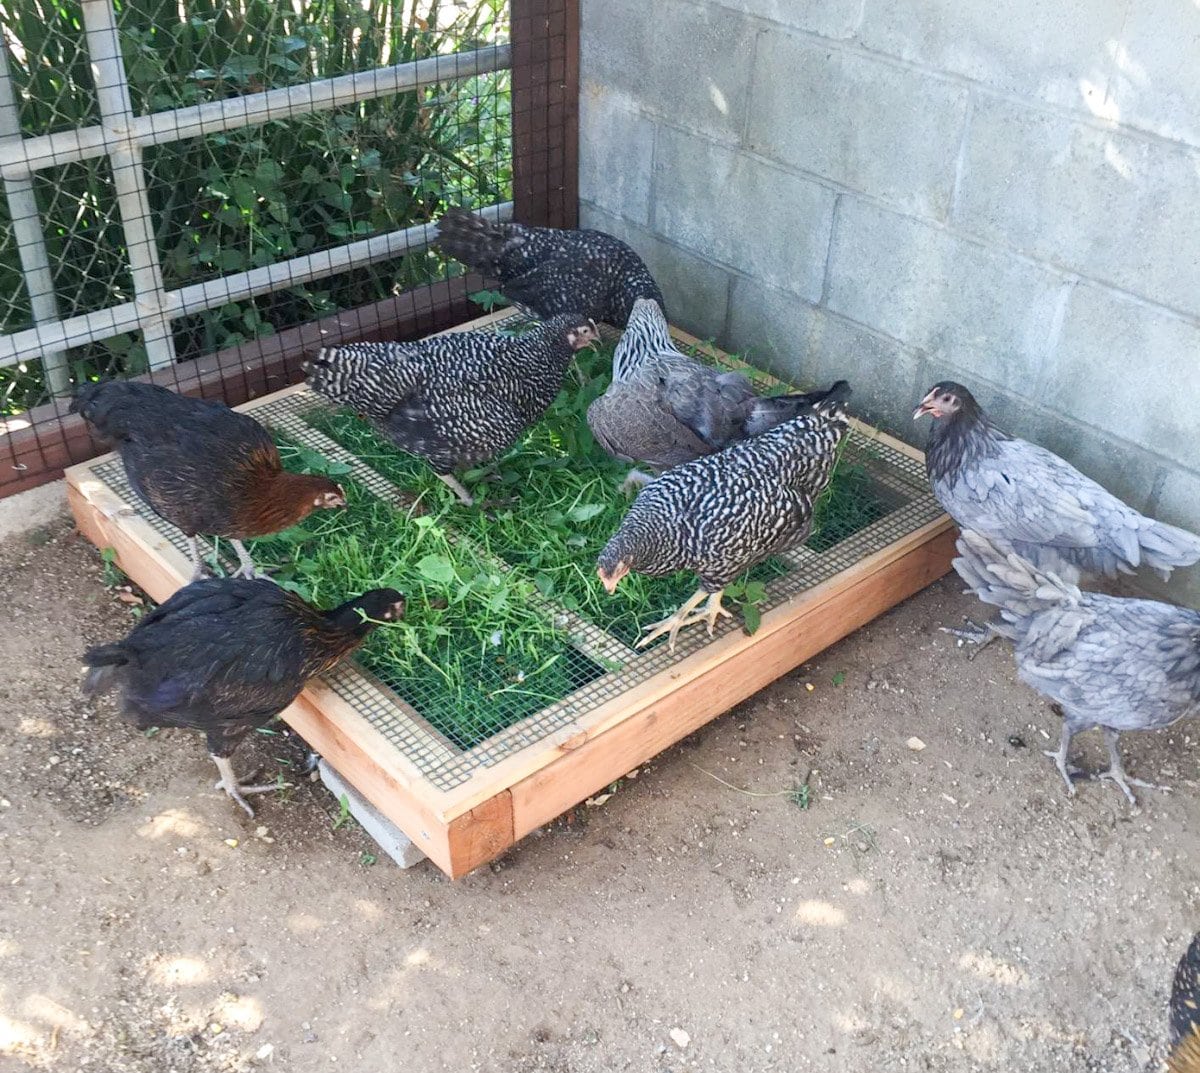
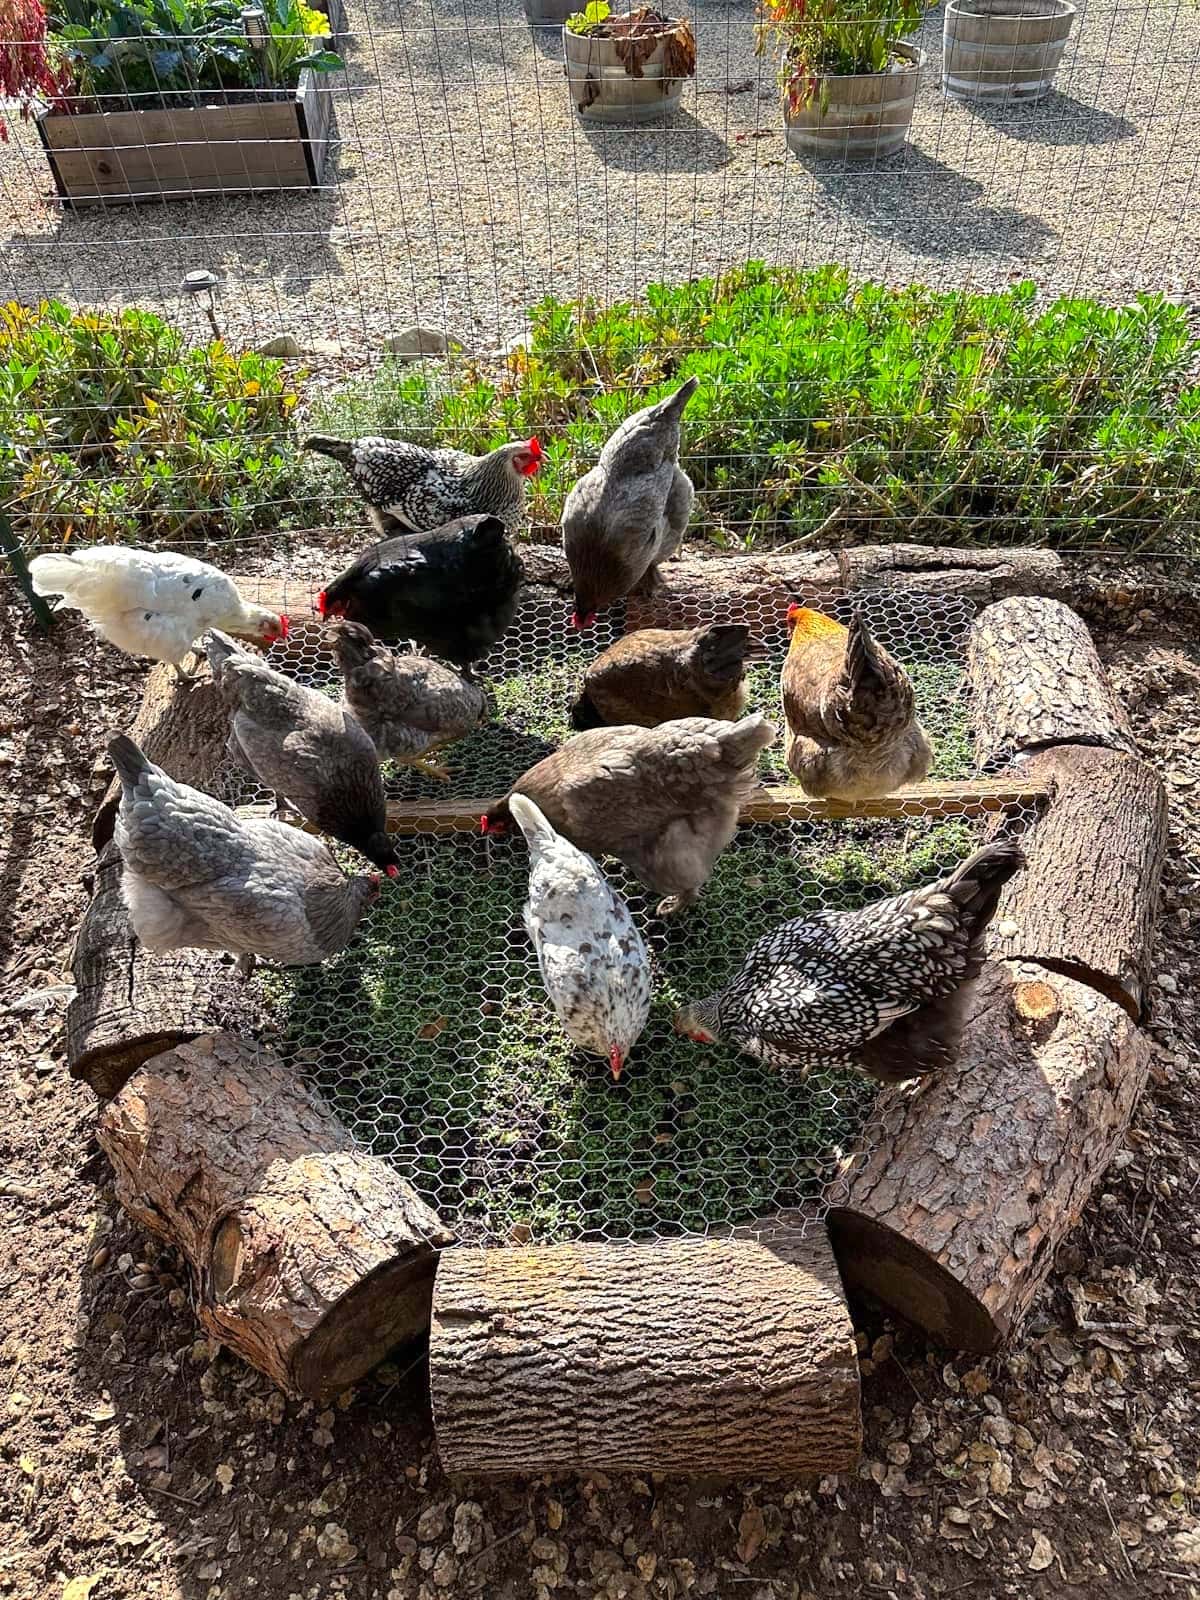
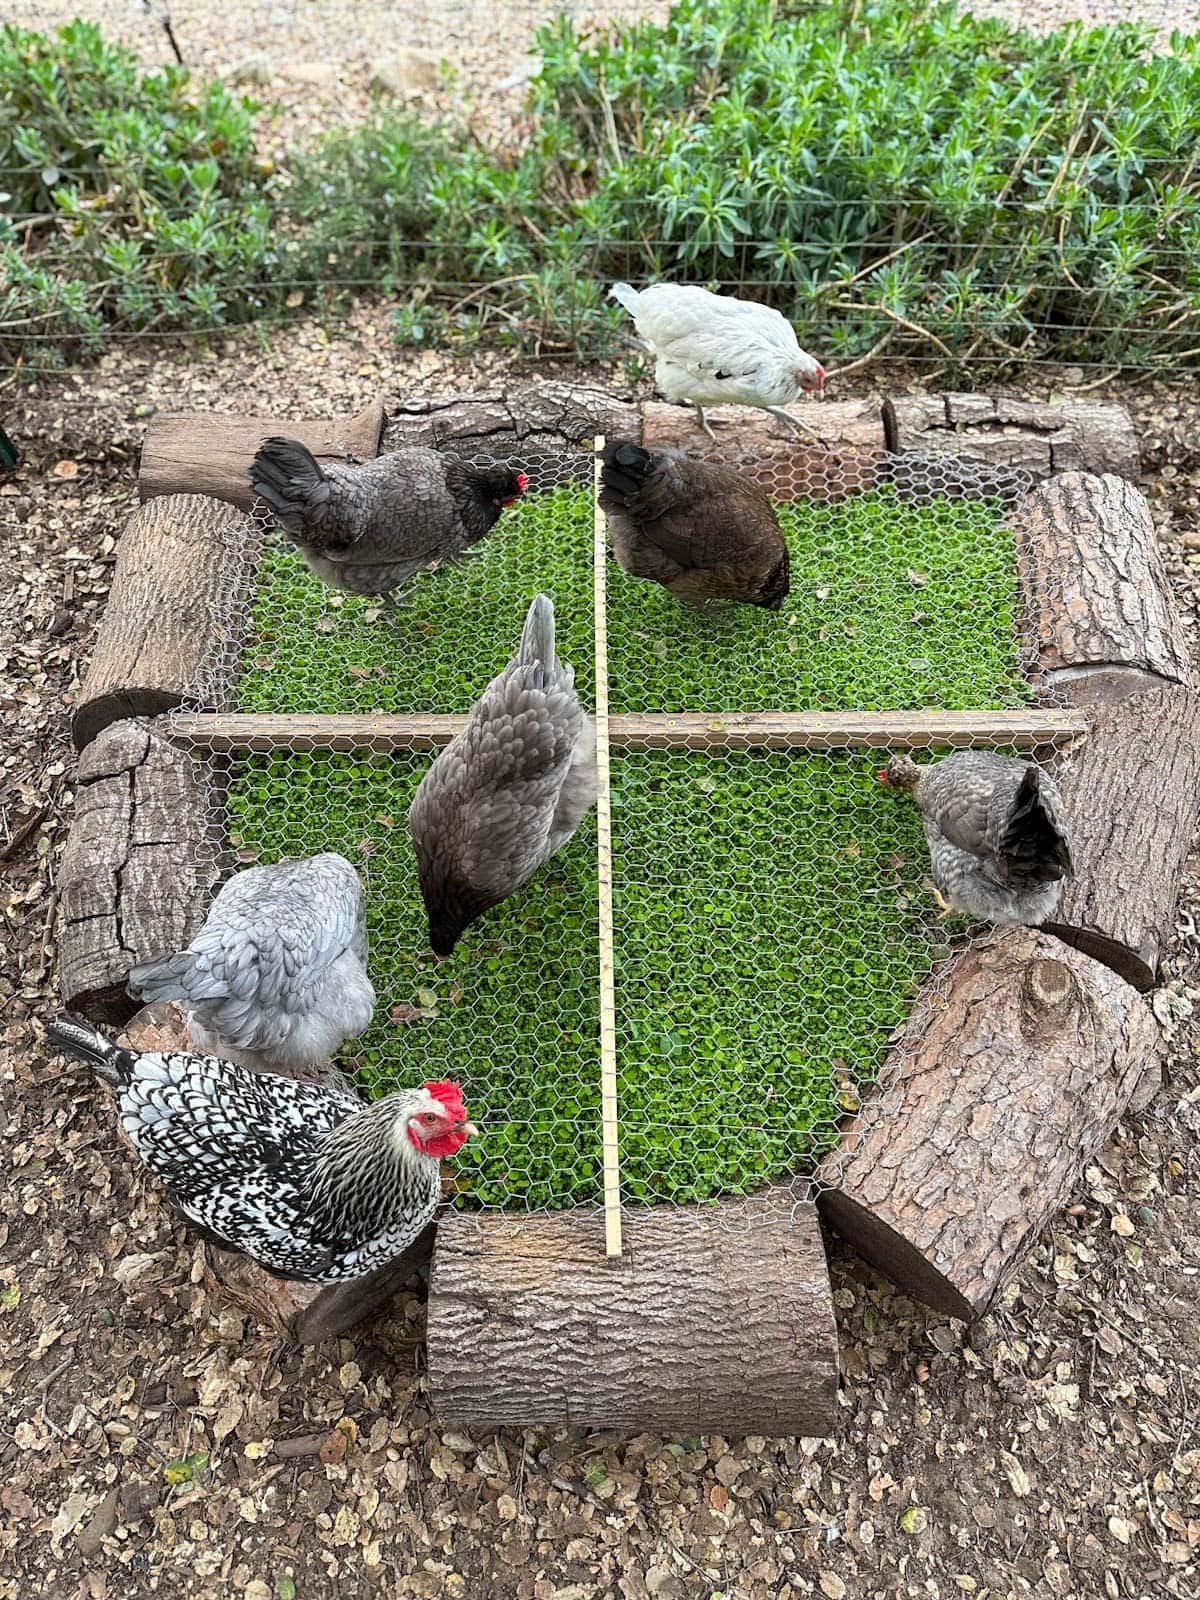
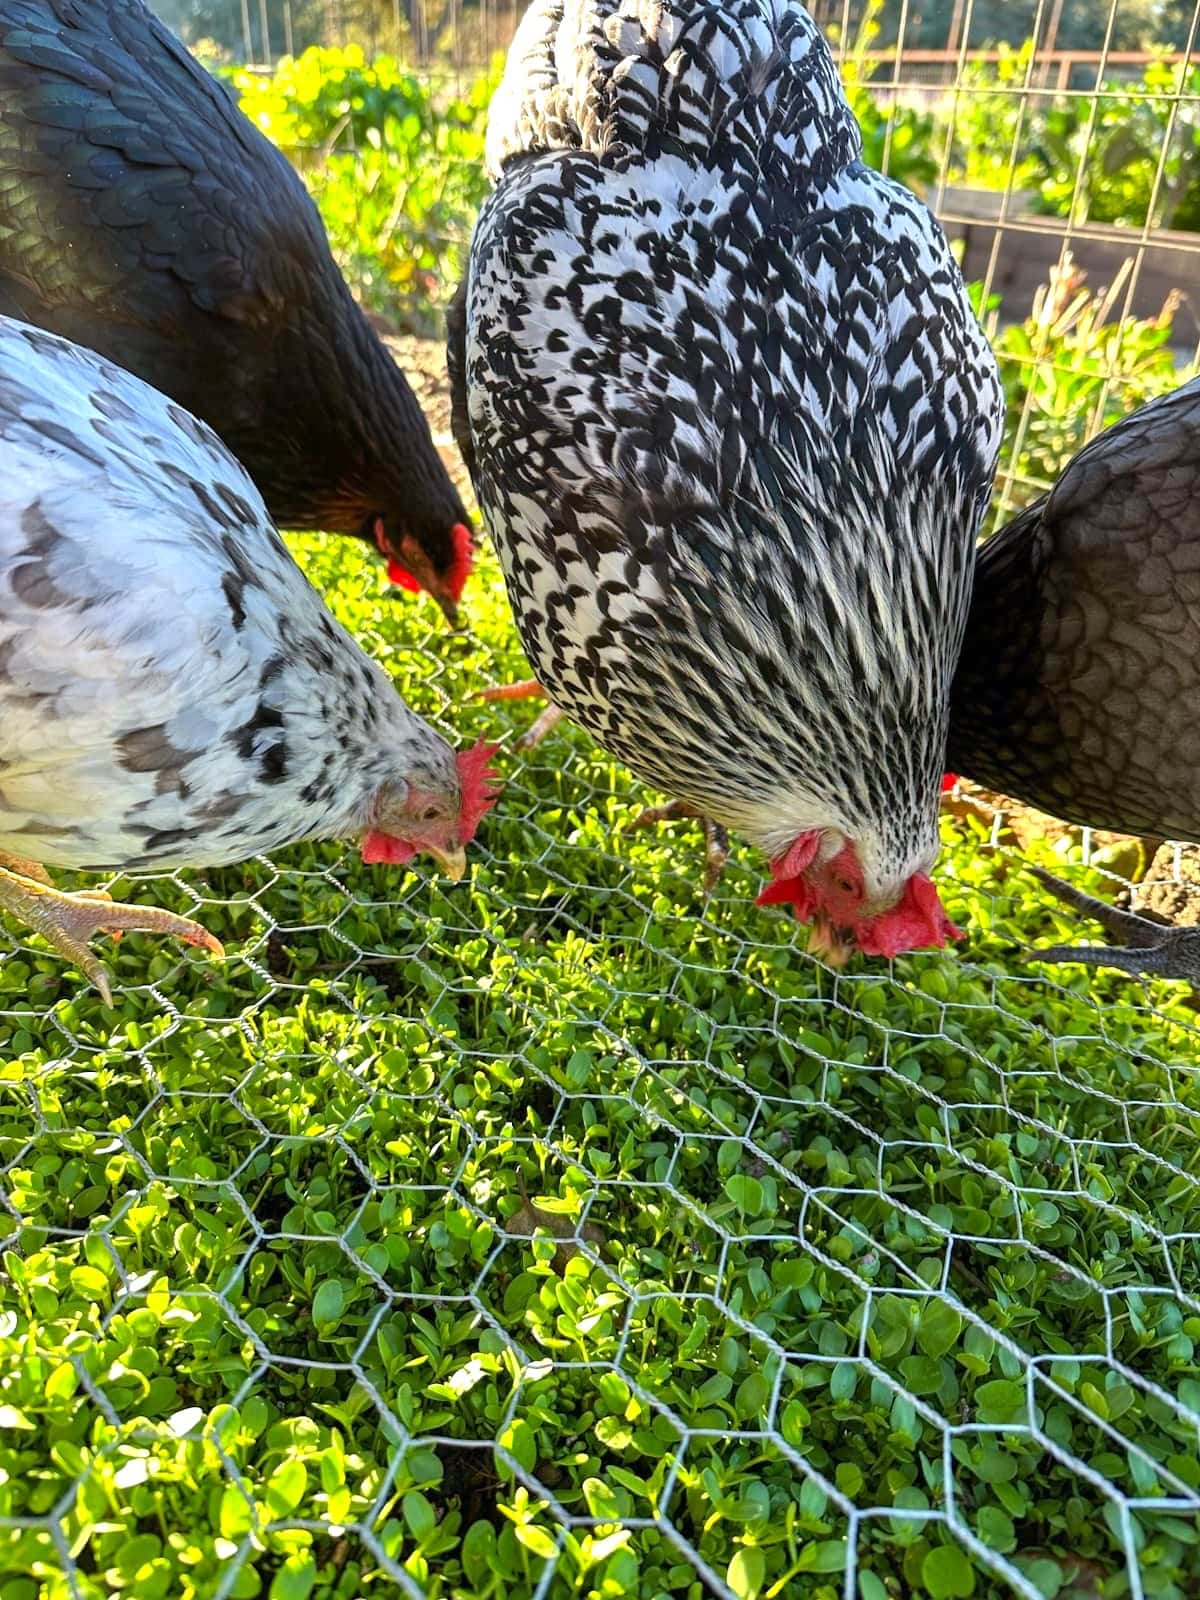
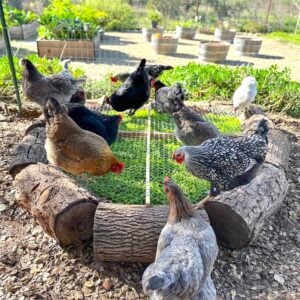
A chicken grazing box is a designated bed or area for your flock to forage on healthy greens… without doing what chickens do best: destroying it! The top of a box is covered with wire fencing, protecting the greens below. The chickens can safely can stand on top of the wire and peck at the greens as they grow taller, but prevents them from overgrazing, digging, scratching, and uprooting plants.
Giving chickens something to forage on is great for their physical AND mental health. Our girls even figured out that standing close together pushes the wire top down further, making it easier to access the greens. I’m so proud of their great team-building and problem-solving skills! LOL. I love being able to offer them nutrient-dense greens year-round this way.
Chicken Grazing Box Size and Styles
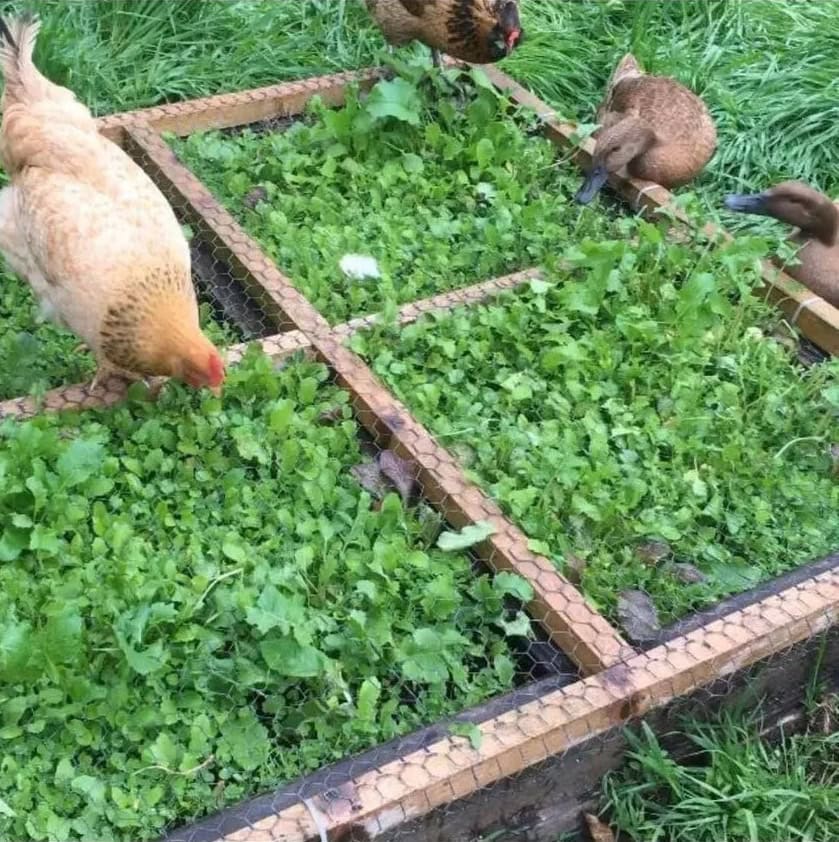
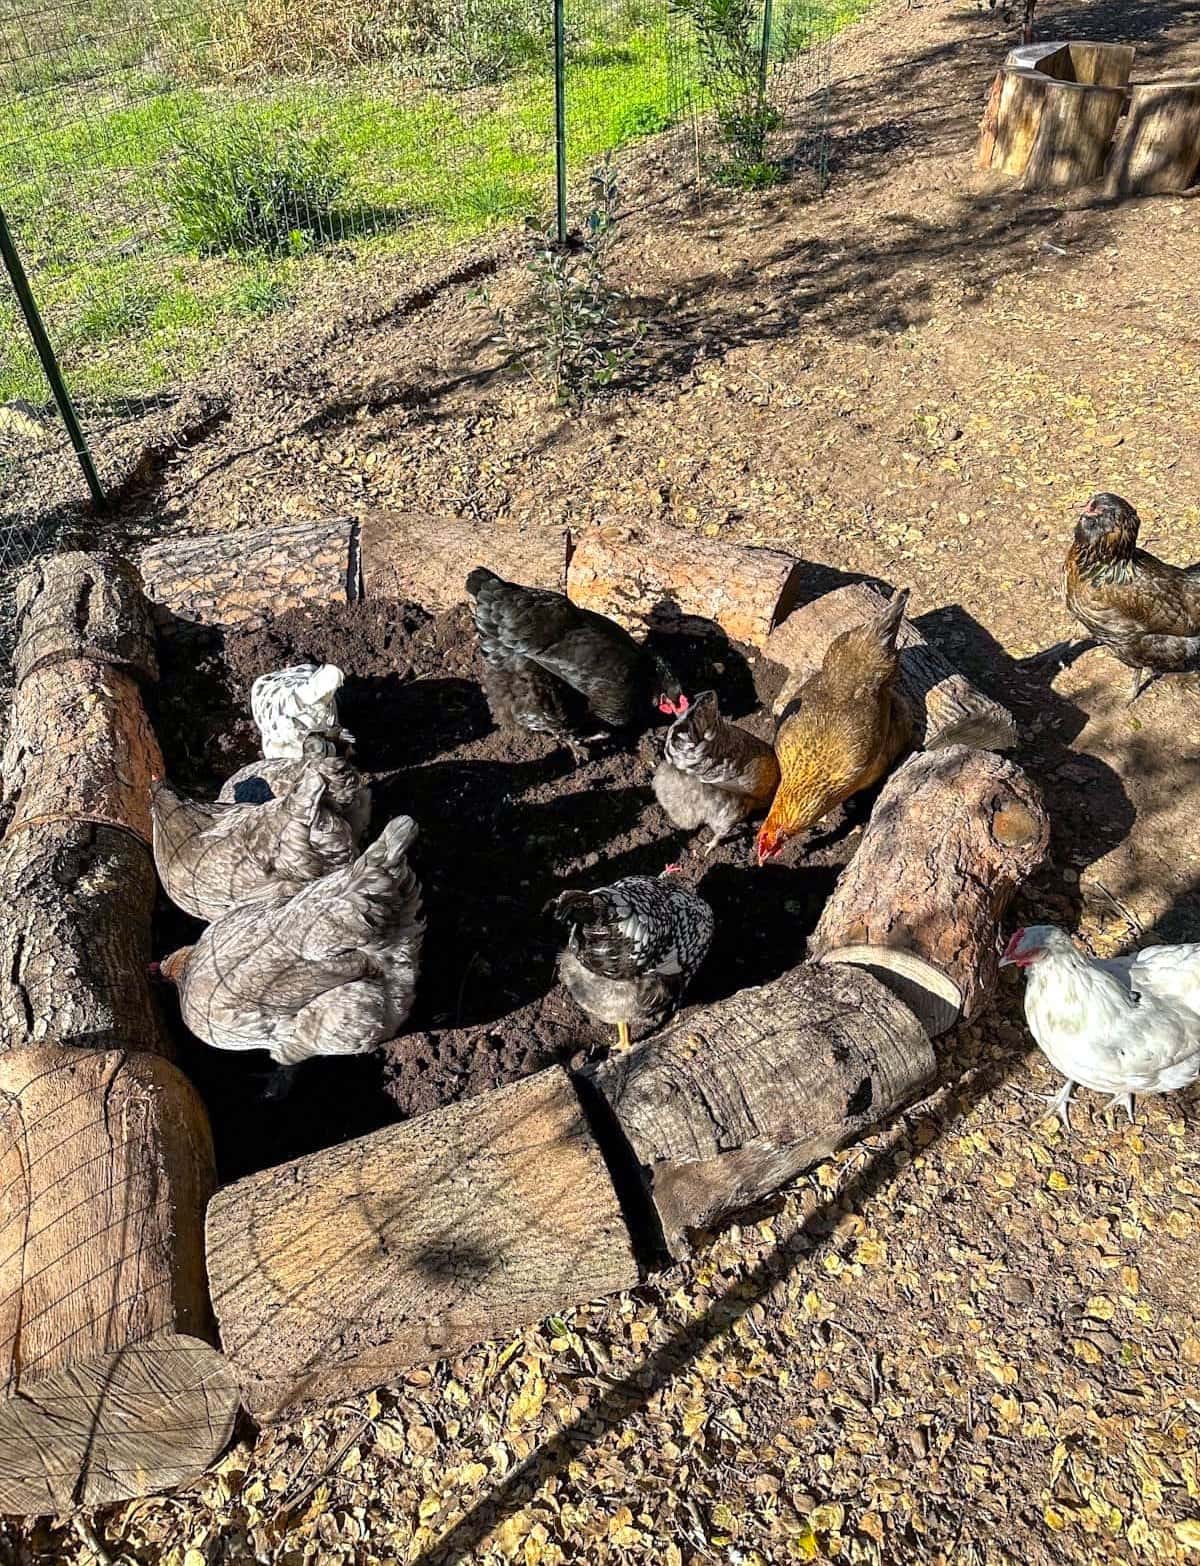
There are a number of styles of chicken grazing boxes you can make. Keep it simple with a basic wooden frame with wire to cover a patch of grass or greens; one you could easily lift up to move to a new location or reseed underneath as needed. Or, make a more permanent raised garden bed like we did. You could even take it a step further and build a removable wire cover to go on top. Have fun and get creative!
Either way, the fodder box should be tall enough to suspend the wire top at least a few inches above the soil and greens growing below. Three to six inches is ideal. Keep in mind the wire will sag lower once chickens walk on top it, especially chicken wire. So, the height of your box will depend on what you intend to grow in it, and if you’re adding soil inside (vs putting it straight over existing grass or ground).
TIP: If the wire top is too low, the greens won’t be able to get established. The chickens will simply pluck out the whole small sprout, roots included. Yet if the wire is high enough, the chickens will simply give the greens a haircut – allowing them to continue to grow for many months!
Supplies
- Wood for a frame. If you’re putting your chicken grazing box right on the ground, 2×4″ boards set on their tall side will work okay, though based on experience I suggest using 2×6″ boards for additional height. You could make an even taller raised bed too! We used logs we already had on our property to make our current fodder box.
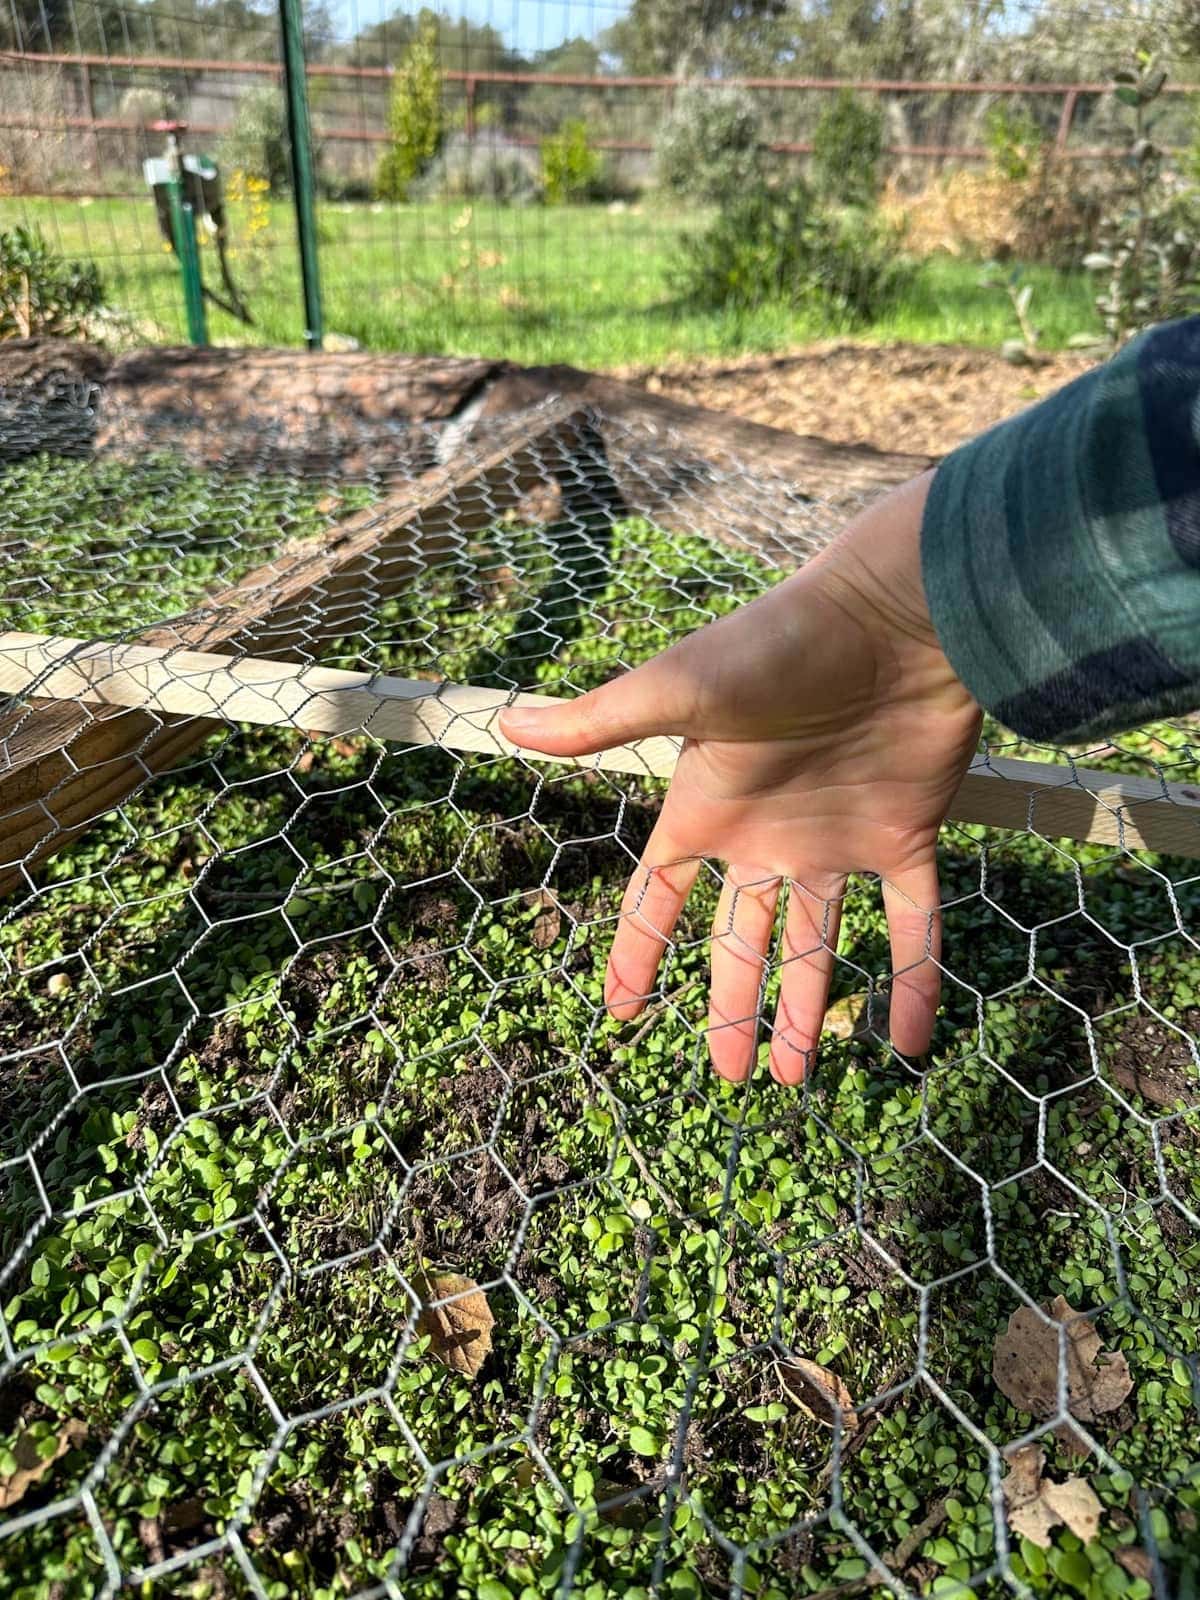
- Wire for the top. Either chicken wire or 1/2″ hardware cloth works well and is safe to walk on (for full-size chickens) but each has pros and cons. The larger holes in chicken wire allows for them to peck and graze more easily on a wider variety of greens, though it also stretches out and sags more – especially with the weight of a few hefty hens on top! Hardware cloth will stay more taught and sturdy, but the smaller holes makes grazing a little more challenging, and is best suited for narrow grass-like greens.
- Cross supports. Depending on the size of your fodder box, you’ll need at least one (if not several) cross supports across the middle of the bed to prevent the wire from sagging too much. Additional 2×2″ or 2×4″ boards, wood stakes, or sturdy garden stakes work well.
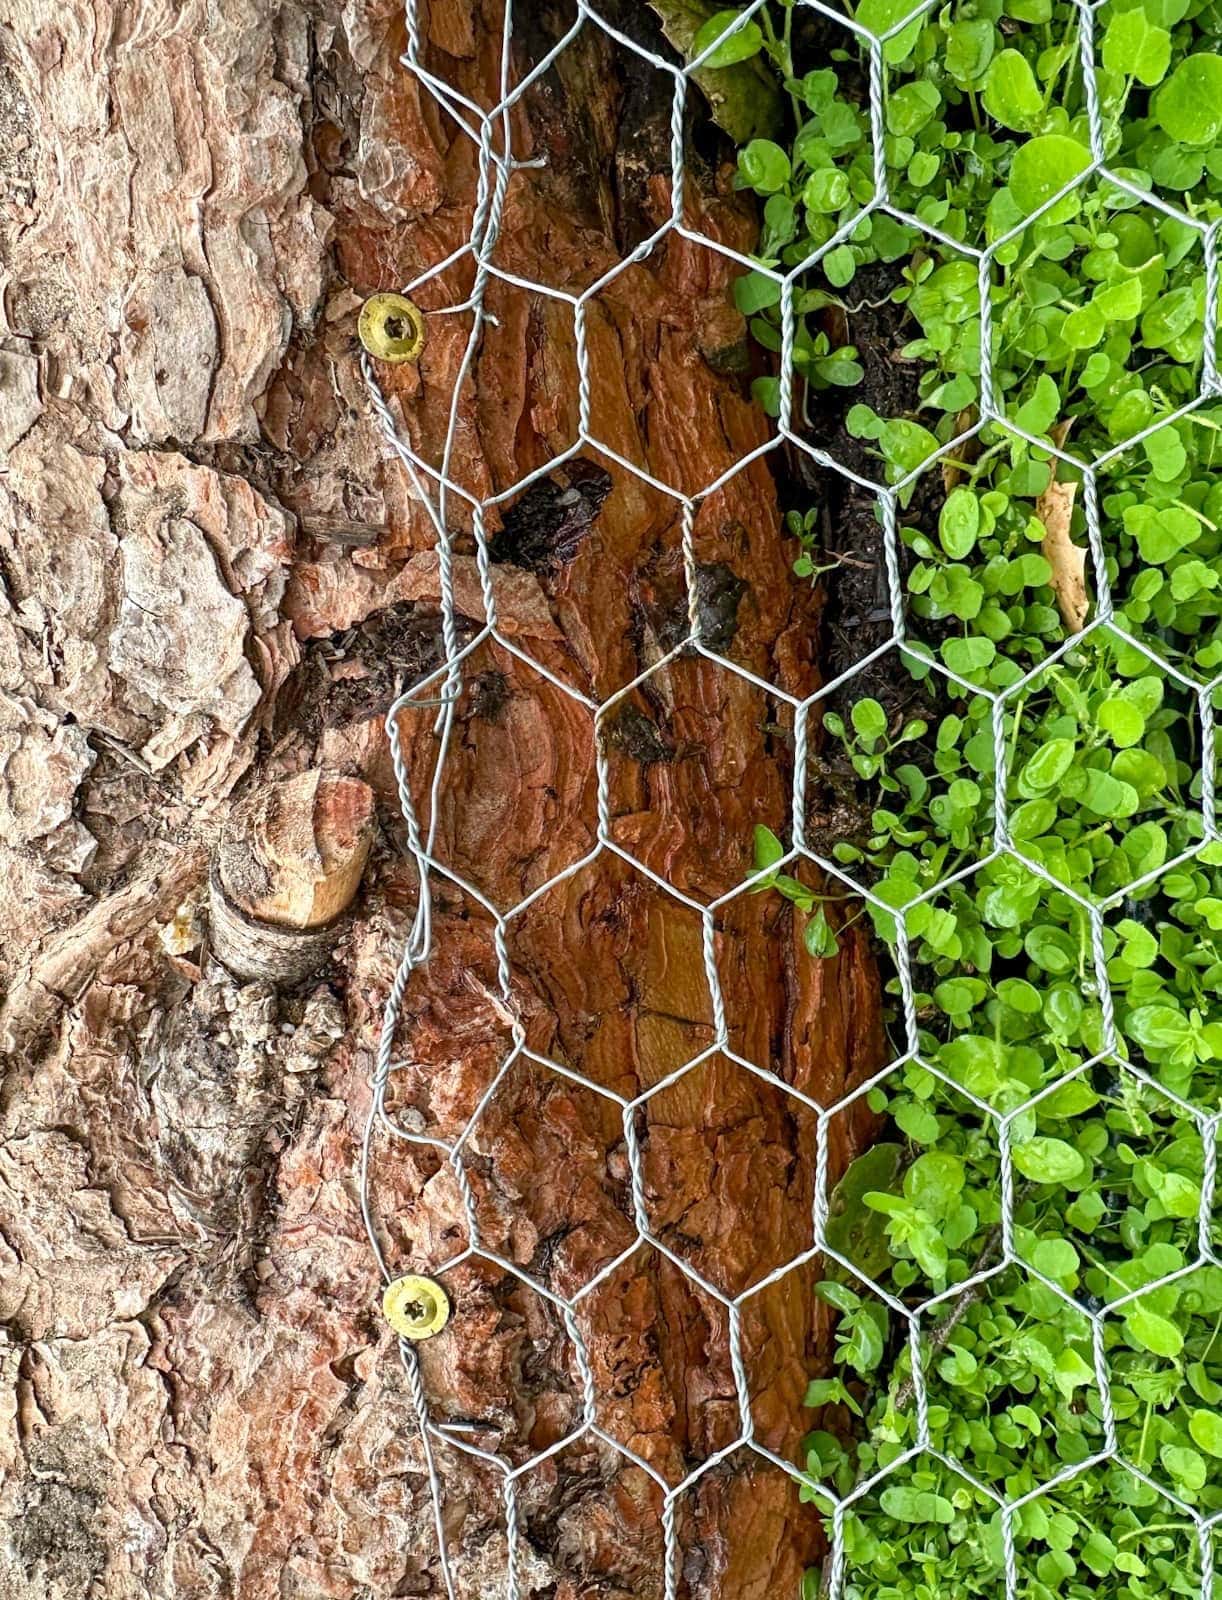
- Screws, including decking screws to connect the frame boards together, and wide head cabinet screws to attach the wire to the top. I don’t recommend using staples as they can easily pop out and become a hazard to the chickens.
- Poultry pasture forage seed. See more details about the best types of forage greens for chickens below!
- Other tools needed to assemble the bed, such as a saw, drill, and heavy-duty wire cutters.

Optional Supplies
- Soil. If you’re building a deep fodder box (or, depending on the current ground in your chicken run) you may want to add some soil and/or compost to give the greens something more rich and fluffy to grow in.
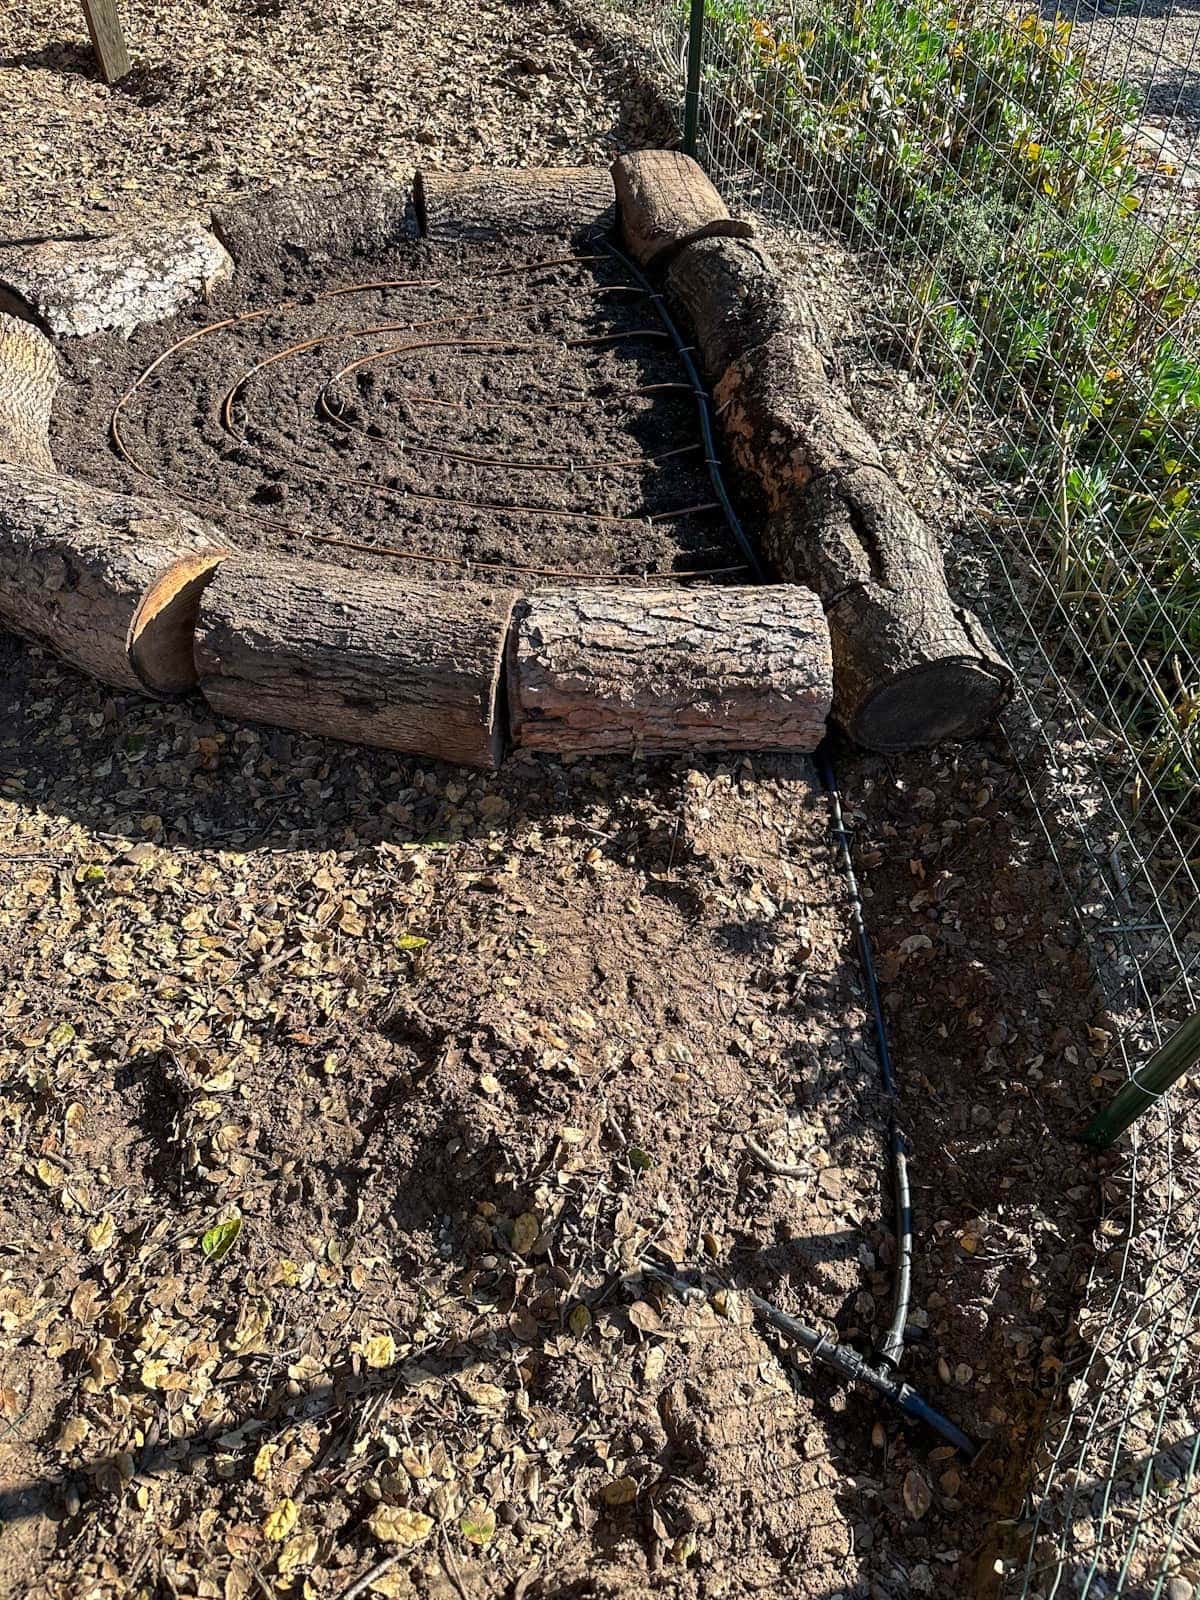
- Irrigation supplies. Since we live in a dry climate, we followed the steps outlined in this easy DIY raised bed drip irrigation tutorial to connect our new chicken salad bar to a nearby spigot and automatic timer. You could also hand-water or use a sprinkler as needed.
- Removable cover. Instead of connecting wire directly to the grazing box, you could build a removable lid (e.g. wood frame and wire) to make future maintenance or re-seeding easier, especially for larger permanent beds. Since our bed is an unusual shape we didn’t bother at this time, but may create a removable cover using PVC in the future!
What to plant in a chicken grazing box?
The best forage for chickens are nutrient-dense legumes and forbs such as clover, alfalfa, peas, flax, vetch and buckwheat – like this poultry pasture seed blend. Most of these crops grow anywhere from one to three feet tall, perfect to plant in a chicken grazing box. A one-pound bag of seed is enough for a modest size bed, while a 5 pound bag of seed is great for a larger bed, especially if you plan to routinely re-seed it.
Regular grass can be fun to pick at too, but does not provide valuable nutrients for chickens.

Step 1: Make Grazing Box Frame
- First, choose a location for the grazing box in your chicken run. Most chicken forage greens will grow best in full sun to partial shade. Level out the ground as needed too.
- Determine the best size for your box and cut any wood as needed. If you’re building a permanent raised bed, I recommend making it no wider than 4 feet across for accessibly.
- Connect the corners of the frame using appropriate size wood screws. Larger boxes will benefit from additional corner supports, such as short pieces of 2×4 or 4×4 inside each corner. See our detailed instructions on how to build a raised garden bed for more tips.
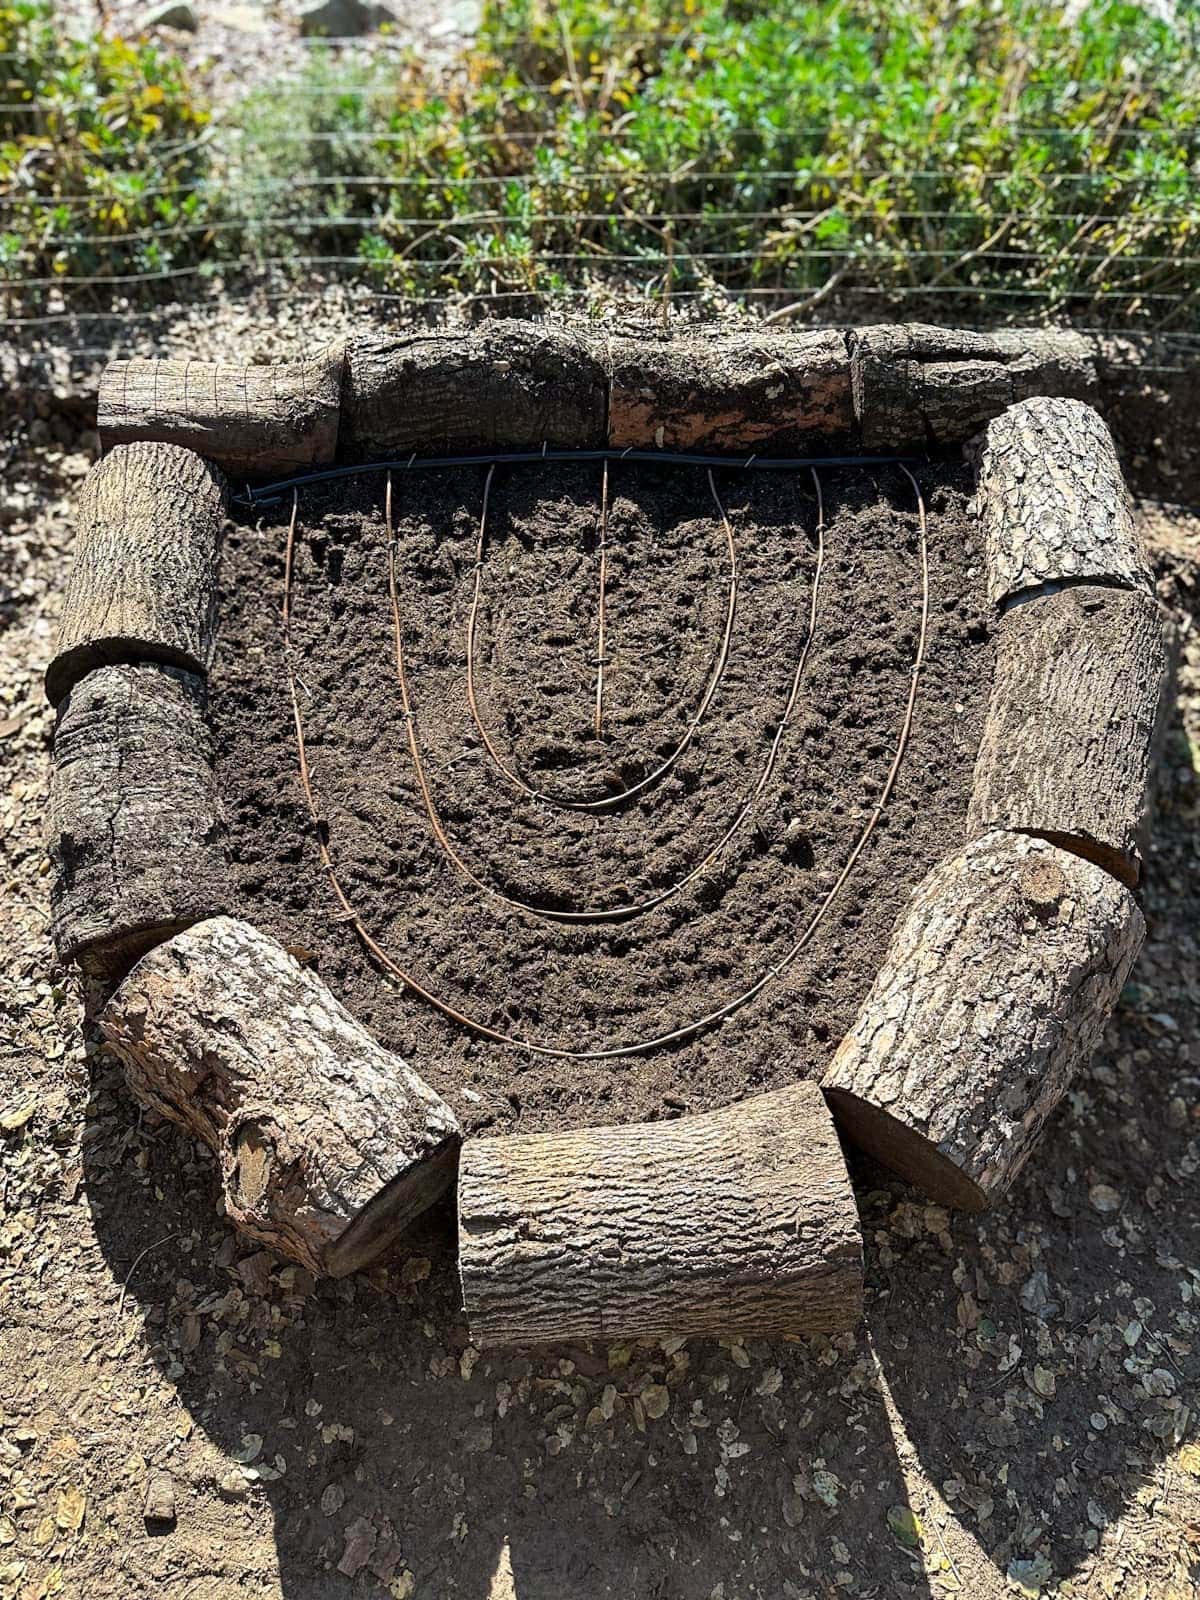
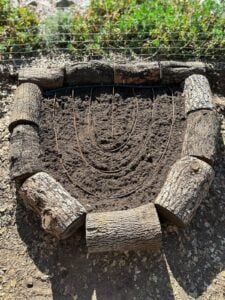
- To create our log chicken salad bar, we simply dug each heavy log into the ground by a couple inches then packed soil around them. The wire top also helps to secure and hold them in the place.
Step 2: Soil and Seed
- Next, add soil and/or compost as needed. However, don’t fill it to the top like a regular raised garden bed! The soil level should be at least 3 to 4 inches (or up to 6 to 8 inches) below the top wire to allow space for the greens to grow, and for the wire to inevitably sag some.
- If you’re not adding additional soil to your box, loosen the existing ground by lightly tilling or working the top couple of inches.
- Now sprinkle a generous amount of chicken forage seed evenly across the top of the soil, followed by a very light dusting of soil on top of that. Cover the seeds by no more than 1/4 to 1/2 inch of soil to encourage sprouting.
NOTE: We also installed the drip irrigation system at this point – after adding soil but before seeding.

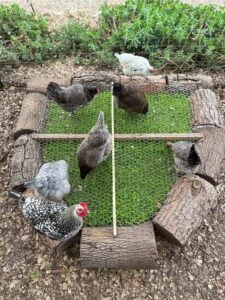
Step 3: Add Cross Supports and Wire
- Next, add cross supports across the width of the frame, spaced about every 2 feet to evenly support the wire. We secured a 2×2″ board and smaller wooden garden stake into the logs/frame using screws.
- Now cut the wire fencing cover to the size of the bed, or just larger. It’s easiest to cut hardware cloth using aviation snips. I try my best to cut it in a way that minimizes sharp, pokey edges (or tuck them under).
- If you need to use more than one section of fencing to cover the bed, try to line up and have the two edges meet along a cross support.
- Finally, attach the wire to the top of the grazing box frame and supports (or removable lid, if you’re making one). Pull it nice and tight as you do! We use cabinet fasteners with wide heads that effectively pinch and hold the wire against the wood. See photos below.
Step 4: Water and Grow!
- To promote fast sprouting and growth, it’s essential to keep the seeds and soil surface evenly damp during germination. Most chicken forage seed should sprout within about a week.
- I hand water daily for the first few weeks to get things going, and then let the auto drip irrigation take over once things are established. Be gentle though! To avoid disturbing or washing away the seeds, don’t totally blast the soil with water or make it flood.
- After a few weeks, the greens should grow tall enough for the chickens to reach and enjoy. And enjoy they will! See tips for continued maintenance below.
Fodder Box Maintenance
Once all the greens have been eaten, died back, or are otherwise no longer growing lush and tall, it’s time for a refresh!
Depending on the style of chicken grazing box you made, you can either relocate the frame to a new location and start over, or simply re-seed the current bed. Either way, I’m sure the chickens will love to get in there and help clean up shop!
This is where a removable cover could come in handy, though we can also easily re-seed right through our chicken wire top.
And that’s how to make a chicken salad bar.
Well friends (and feathered friends), I hope you all enjoy this easy and fun chicken run idea as much as we all do. I can’t wait to see how your fodder boxes turn out – tag me @deannacat3 on Instagram so I can see! Please feel free to ask any questions or simply say hello in the comments below. Happy grazing!
You may also enjoy:
- How to Make a Chicken Dust Bath: Easy DIY Ideas
- Best DIY Flock Block Recipe: How to Make a Chicken Treat Block
- How to Ferment Chicken Feed for Better Hen Health & Eggs
How to Make a Chicken Grazing Box (Chicken Run Idea)
Equipment
- heavy duty wire cutters or aviation snips
- Saw
- drill
Ingredients
- wood for a frame (2x4s or 2x6s)
- chicken wire or 1/2" hardware cloth for the top
- additional cross supports such as 2×2 or 2×4" boards, wood garden stakes, etc
- screws to assemble the wood frame, and wide-head screws to attach the wire
- chicken forage or pasture seed
Optional supplies
- soil and/or compost
- irrigation supplies
- removable cover
Instructions
- Choose a location in your chicken run that gets full sun to part shade, with fairly level ground.
- Construct a basic wood frame to the desired size and length. A box that is at least 4 to 6 inches tall is ideal (if going straight on the ground) or taller if you intend to add soil like a raised garden bed. Larger boxes will benefit from additional corner supports, such as short pieces of 2×4 or 4×4 inside each corner. See our detailed instructions on how to build a raised garden bed for more tips.
- Next, add soil and/or compost as needed. However, don’t fill it to the top like a regular raised garden bed! The soil level should be at least 3 to 4 inches (or up to 6 to 8 inches) below the top wire to allow space for the greens to grow.

- If you’re not adding additional soil to your box, loosen the existing ground by lightly tilling or working the top couple of inches.
- Sprinkle a generous amount of chicken forage seed evenly across the top of the soil, followed by a very light dusting of soil on top of that. Cover the seeds by no more than 1/4 to 1/2 inch of soil.

- We installed a basic drip irrigation system at this point (optional)
- Next, add cross supports across the width of the frame, spaced about every 2 feet to evenly support the wire.
- Cut the wire fencing cover to the size of the bed (or just larger) and attach the wire to the top of the grazing box frame. Pull it nice and tight as you do!
- To promote fast sprouting and growth, it’s essential to keep the seeds and soil surface evenly damp during germination.
- Most chicken forage seed should sprout within about a week. After a few weeks, the greens should grow tall enough for the chickens to reach and enjoy.
- Once all the fodder is eaten or dies back, either relocate the frame to a new location and start over, or simply re-seed the current bed.


Deanna Talerico
Deanna Talerico (aka DeannaCat) is a garden educator and writer with over 15 years experience in organic gardening. She is a retired Senior Environmental Health Specialist, and holds a M.A. in Environmental Studies and B.S. in Sustainability and Natural Resources.


5 Comments
Eve M
This is such a good idea! I can barely wait to get started preparing one, or two, for my flock! Thank you for sharing and giving such clear and concise instruction as well as alternative ideas! You rock!
Deanna Talerico
Awesome! It’s our pleasure. Have fun and report back on how it goes! I’m sure they’ll love it 🙂
Lynlee
Is there a concern the beaks will get scared or injured from wire?
Deanna Talerico
I’m not concerned, and I know many chicken keepers that set up similar boxes. Their beaks are super sturdy… they sharpen/file them on rocks! But it’s always a good idea to monitor your birds and look for any signs of injury or issues in general.
Mary W
This is a very thorough post for people to learn so much – just had to tell you I appreciate all the effort and thought that went into it. I’ve always wondered how to help my granddaughter with her chickens and providing the necessary tools to build this is a great gift idea. Her husband is very talented at almost anything he wants to get done and will certainly use your terrific instructions. Gifting bags of meal worms will be second to gifting something to grow nutrition yourself. Not only useful but nice to look at – a fountain of nutritious food!