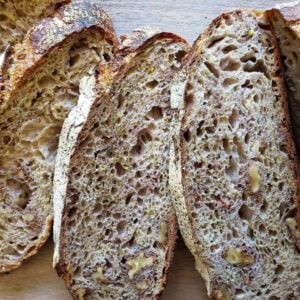
Rustic Zucchini and Walnut Sourdough Bread Recipe
A rustic, savory zucchini sourdough bread loaf with optional walnuts. It's chewy, nutritious, delicious, and a great way to use extra zucchini from the summer garden.
Equipment
- Large mixing bowl
- Lined banneton bread basket, for shaping and proofing dough
- Kitchen scale
- Cast iron combo cooker or dutch oven
- Grater, to shred zucchini
- Colander or strainer
Ingredients
- 110 grams active sourdough starter
- 460 grams total flour - we use 300 grams of white bread flour, 140 grams of whole wheat, and 20 grams of rye flour though you can use all white
- 1.25 cups filtered water in very humid climates, start with 1 cup of water and add more as needed
- 9 grams salt - sea salt, kosher salt, or Himalayan salt is preferred over iodized table salt (plus a sprinkle on the zucchini)
- 1 medium zucchini, grated (approximately 1 to 1.5 cups, see sliding scale notes below)
- 1/2 cup walnuts - we use raw, unsalted, halves & pieces substitute with unsalted sunflower seeds or pumpkin seeds as needed
- optional: ½ tsp of garlic powder and 2 tsp of onion powder
Instructions
- Feed your sourdough starter several hours before mixing the dough, allowing it to reach peak activity level.
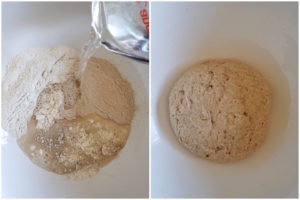
- Make an autolyse by combining the flour and water only in a bowl until thoroughly mixed. Let it sit covered at room temperature (70-75 degrees is optimal) for about an hour. (The dough may seem more dry than usual sourdough, because the zucchini will add more moisture later)
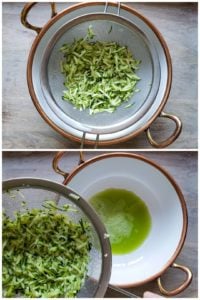
- Use a box grater to shred one medium zucchini into a colander or strainer. Next, sprinkle the zucchini with a few light shakes of salt (no more than 1/2 tsp) and toss to mix. Rest the strainer in a very clean sink, or set it over a larger bowl. Over the next 15 minutes, the salt will draw excess water out of the zucchini. Toss and lightly press (wring out) the zucchini a few times to remove excess moisture. Do not add the collected zucchini water to the recipe!
- After the autolyse has rested for about an hour, mix in the called-for active sourdough starter, salt, and grated drained zucchini until thoroughly combined. (Also add optional ½ tsp of garlic powder and 2 tsp of onion powder).
- Optional: Lift the dough ball (which may be quite loose) out of bowl and on a clean counter use the “slap and fold” technique to tighten the dough.
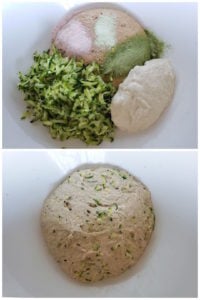
- Once finished, put the dough back in the bowl, cover, and allow to rest at room temperature for 30 minutes. This begins the 4-hour bulk fermentation time.
- After 30 minutes, fold in the walnuts during the first round of “stretch and fold” - gently lifting up on one side of the dough and folding it back over itself several times. Cover the bowl again and let sit.
- Repeat 2 or 3 more rounds of stretch and folds about 30 minutes apart, and then let the dough rest undisturbed for the last 2 hours of bulk ferment.
- Next, transfer the dough to a lightly floured surface and shape the loaf into a similar shape as your banneton (proofing basket - e.g. a round loaf, or long oval loaf).
- Place the formed dough ball in a lined, flour-dusted banneton proofing basket of choice. Cover with a breathable towel, and place in the refrigerator to proof for 8 to 16 hours. We usually do this overnight.
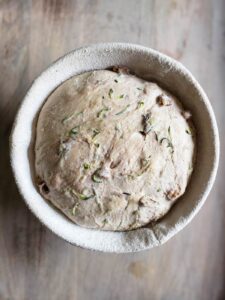
- After cold-proofing in the refrigerator, preheat the oven to 475 to 500 degrees F. (Experiment to see what temperature works best for your oven). If you’re using a dutch oven or combo cooker, place it in the oven to preheat for one hour.
- After an hour of preheating, quickly and carefully transfer the cold dough (straight from the fridge) out of the banneton and into the hot combo cooker or dutch oven. Line the combo cooker or dutch oven with parchment paper first. Score the top of the loaf with a bread lame if desired.
- Bake the loaf covered for approximately 35-40 minutes, and then remove the lid and bake for an additional 5-7 minutes uncovered. (Times may vary with individual ovens)
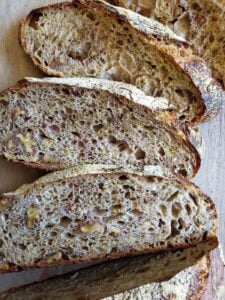
- Once done, immediately transfer the loaf on a wire rack to cool for several hours before cutting.
Tried this recipe?Let us know how it was!