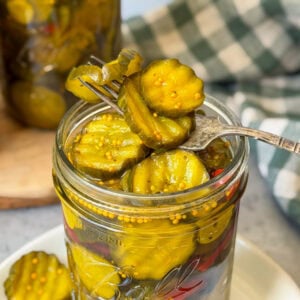
Best Bread and Butter Pickles (Canning or Refrigerator)
These bread and butter pickles are easy to make, deliciously crisp, and the perfect balance of sweet, sour, and a little bit spicy (if you use the optional peppers). You can make them as refrigerator pickles though this recipe is also safe for canning. Enjoy with sandwiches, burgers, salads, tacos and more!
Equipment
- Large mixing bowl
- large cooking pot
- strainer or colander
- knife or crinkle cutter
- canning supplies and jars
Ingredients
- 3 pounds small fresh cucumbers (Persian or pickling cucumbers preferred), cut into 1/4" rounds
- 1 medium yellow or white onion, thinly sliced
- 2.5 tbsp sea salt, canning, kosher, or pickling salt (not table salt) - only used during prep, not in the brine
- 2 whole fresh hot chili peppers, sliced into rings (I like red jalapeños) or sub with 1 tsp chili flakes (optional)
Pickling Brine
- 3 cups vinegar, 5% acidity if canning (I like to use a mix of 1.5 cups apple cider vinegar and 1.5 cups white vinegar)
- 1-1.5 cups white sugar (sliding scale for personal preference)
- 1/2 cup light brown sugar
- 2 cloves fresh garlic, thinly sliced (sub with 1/2 tsp garlic powder)
- 1 Tbsp yellow mustard seed
- 1 tsp celery seed
- 1 tsp turmeric powder
- 1/2 tsp whole peppercorns
- 1/8 tsp ground cloves or allspice
- pickle crisp (optional, if canning)
Instructions
Prep, Salt, and Rinse Cucumbers
- Wash the cucumbers well, trim off (discard) both ends, and cut into 1/4-inch thick slices.
- Peel and thinly slice the onions, along with the optional peppers.
- Combine the sliced cucumbers, onions, and peppers in a large mixing bowl, and sprinkle with sea salt or canning salt. Gently toss and mix to evenly distribute the salt. Cover the bowl and let it rest in the refrigerator for 2 to 4 hours, stirring occasionally. (You'll see water collect in the bottom of the bowl, which will be discarded)
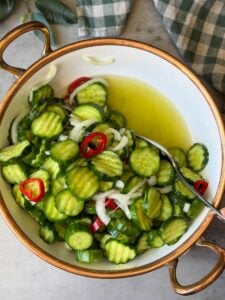
- Transfer the cucumber mixture to a strainer and rinse very well under cool running water for a couple minutes to wash away the salt. Toss gently to ensure they’re thoroughly rinsed. Allow to drip dry for a few minutes after.
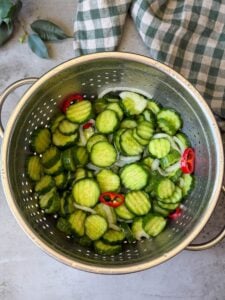
Make Brine and Pickles
- In a large pot, combine the vinegar, sugar, sliced garlic, and pickling spices: mustard seed, celery seed, turmeric, peppercorns, and allspice or cloves. (Do not add salt.) Bring to a boil and simmer for 3 to 5 minutes.
- Add the sliced cucumbers and heat again, but only until the brine comes back to a quick and gentle boil – then remove from heat. Stir gently a few times while heating.
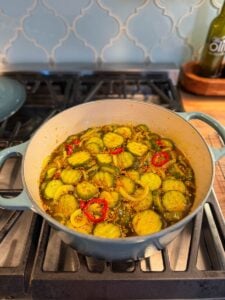
- While they’re still warm, use a slotted spoon or tongs to completely pack hot jars with sliced cucumbers, onions, and peppers first, filling the jars up to 1″ of the rim.
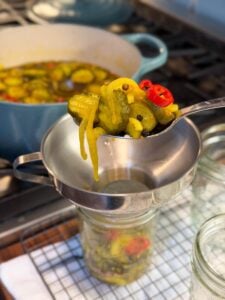
- Then ladle the hot brine (pickling syrup) into the jars over the pickles. Leave 1/2″ head space if canning.
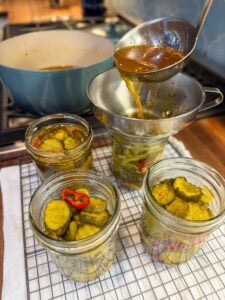
- See canning instructions below. Or to make refrigerator pickles, simply allow the jars to cool slightly before adding a lid and storing them in the refrigerator.
Canning Instructions
- Optional: you may want to add a rounded 1/8 tsp of pickle crisp (food-grade calcium chloride) to each pint jar to maintain maximum crunch.
- After filling the jars (with ½ inch head space), remove air bubbles from the packed jars with a canning bubble tool, chopstick, or clean butter knife and wipe the rim of the jars with a damp paper towel or clean cloth.
- Place fresh canning lids centered on the jars, and then add jar rings. Lightly tighten the jar rings to finger-tight only.
- Using a jar lifter or canning tongs, carefully transfer the jars into a boiling hot bath canner. The jars should be covered by at least 1 to 2 inches of water, and be resting on a canning rack (not directly on the bottom of the pot)
- Once the canner returns to a rolling boil, process for 10 minutes. (To adjust for altitude, process 15 minutes at 1000-6000 feet above sea level, and 20 minutes at 6000+ feet.)
- When the time is up, remove the lid and turn off the heat, but let the jars sit in the canner for another 5 minutes before carefully transferring them to a cooling rack. Leave jars undisturbed for at least 12 hours before checking seals. (Do not stack or press on the top of the lids.)
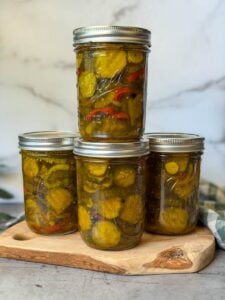
Tried this recipe?Let us know how it was!