

When to Harvest Onions and How to Cure Them for Storage
Are you growing onions? Right on. Now come learn how to harvest them! This quick guide will teach you how to tell when your onions are ready to harvest, the best way to go about picking them (it’s different than you likely imagine), and how to properly cure onions to make them last in storage. I’ll also share tips on how to store and preserve onions. Truth be told, onions are one of my favorite things to grow – and use in the kitchen!

Would you like to save this?
RELATED: If you’re new to growing onions, be sure to check out our guide on when and how to plant onions – including our favorite varieties, and why we prefer to start from seed or seedlings NOT sets! (Spoiler alert: sets are far more prone to issues.)
When to Harvest Onions
- Technically, you can harvest and eat onions at any stage. Picked young and early, you can enjoy their tops as green onions and immature bulbs as spring onions. I love staggering our harvest to use fresh onions for meals over the many months they grow!
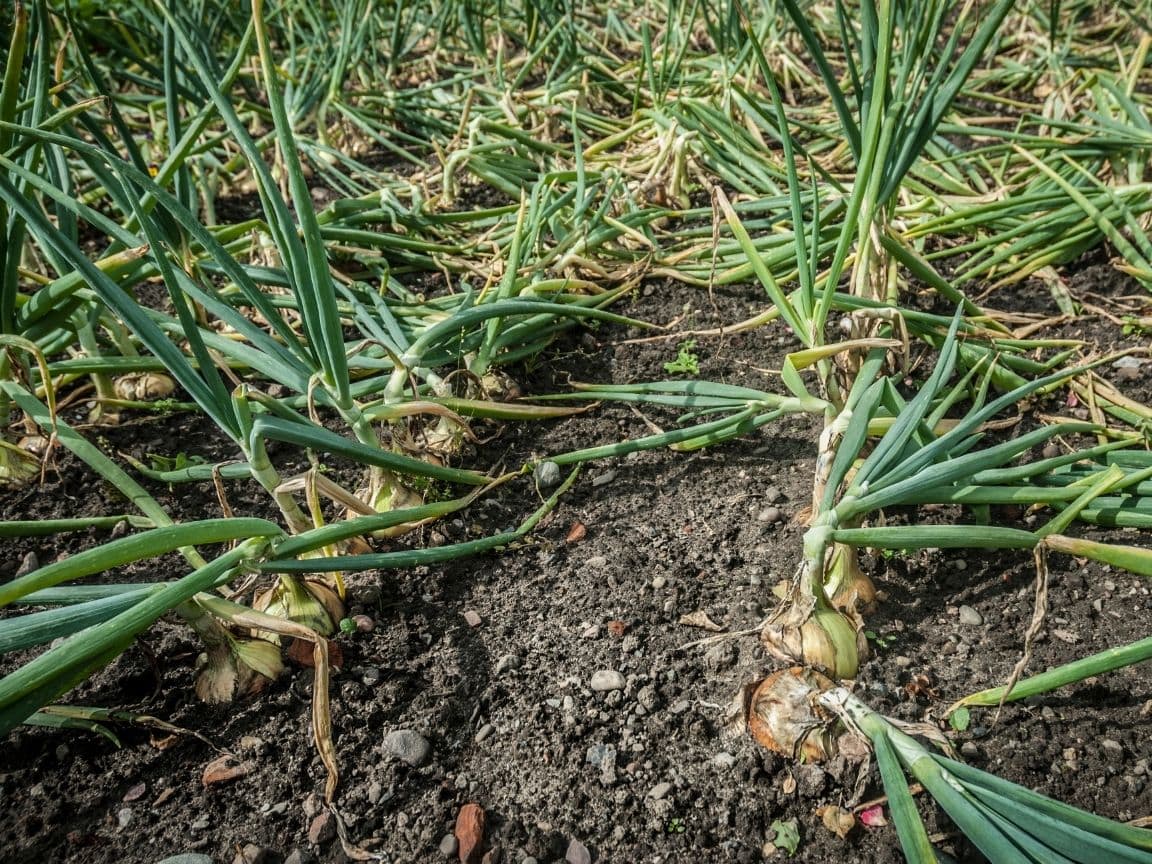
- For maximum storage potential as dry bulbs, wait to harvest onions until they reach full maturity (but before they flower). You can tell onions are mature and ready to harvest when their leaves start to turn yellow or brown and the main stalk gets soft, skinny, and flops over just above the bulb. This is usually about three to five months after planting, depending on variety and climate.
- After your onion tops fall, wait another week or two before harvesting, allowing the bulbs to dry further.
- If your onion stalks don’t fall over on their own but you want to harvest soon (e.g. if they’ve reached a mature size, freezing weather is in the forecast, etc) you can also manually bend or push the stalks over – which will signal the onions to stop growing and prepare for harvest.
How to Harvest Onions
- When the time is right, harvest onions by gently pulling up on the bulb. Avoid pulling up on the stalks as they may break, which can prevent them from curing properly.
- If needed, carefully loosen the soil around the onions first with a trowel or garden fork, but take care not to puncture or bruise them – they won’t hold up in storage if damaged!
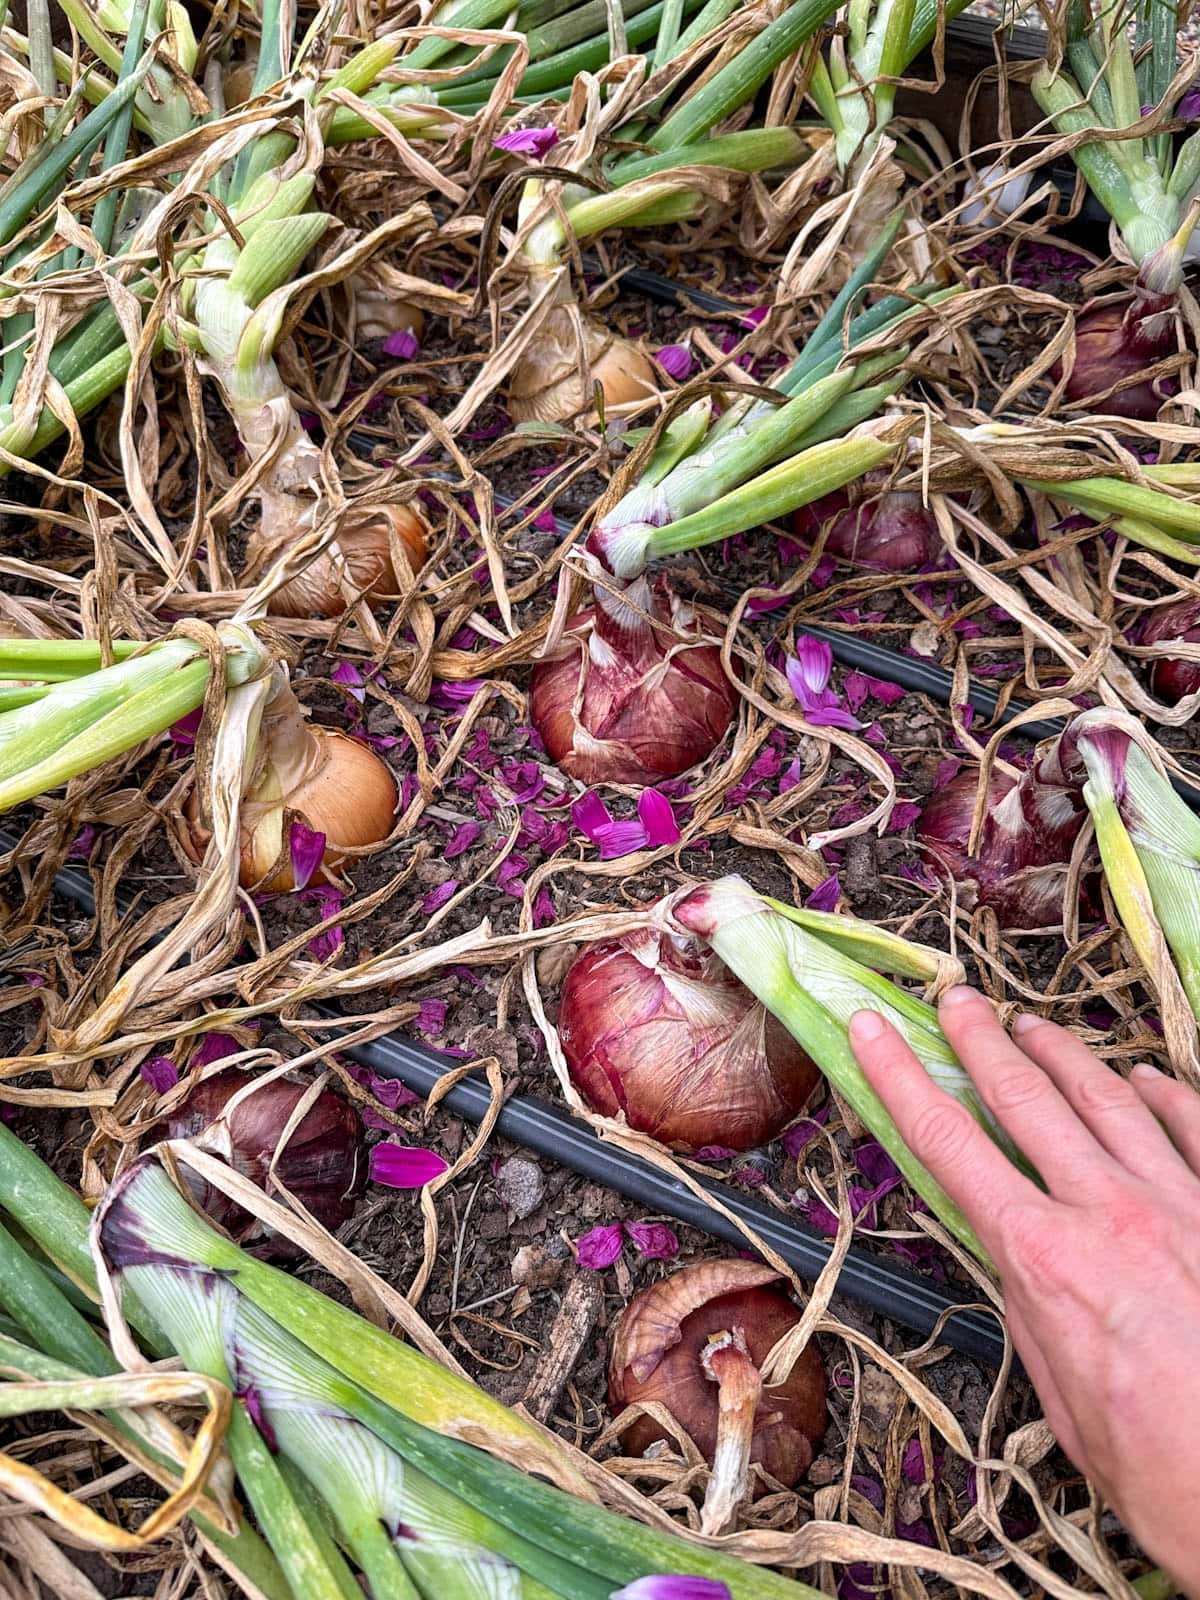
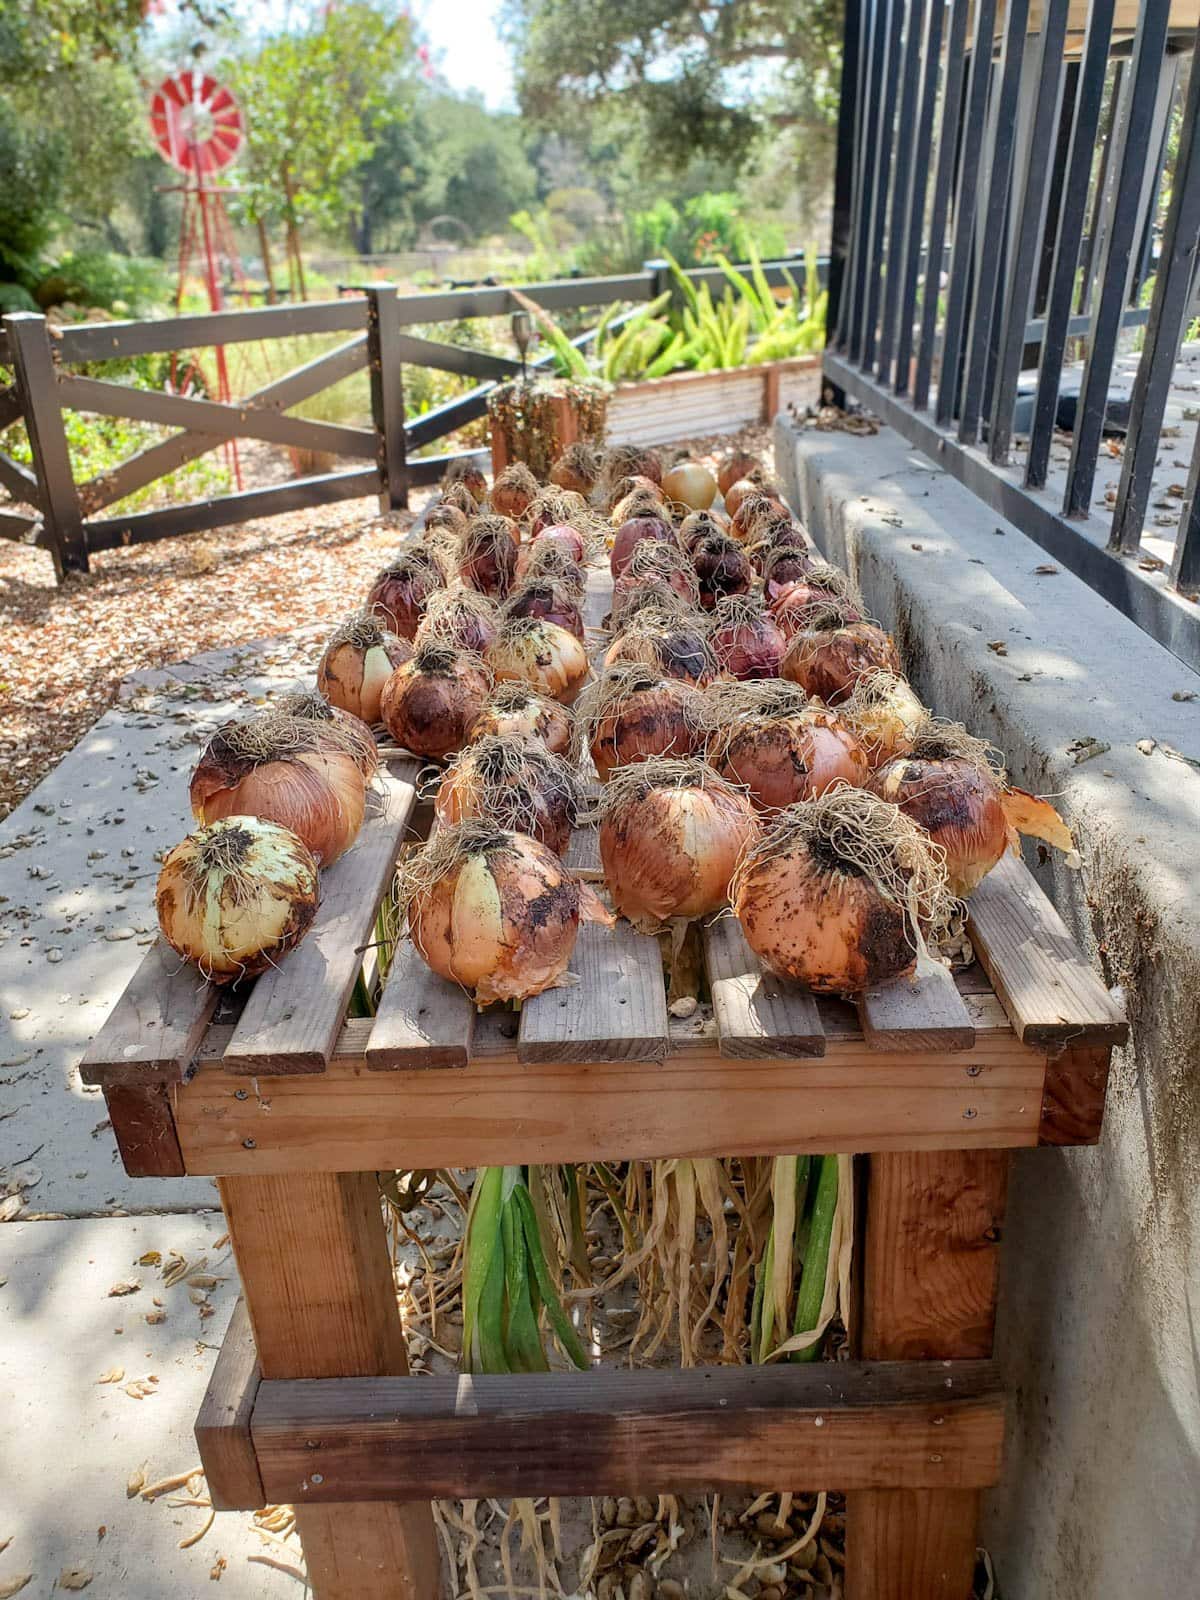
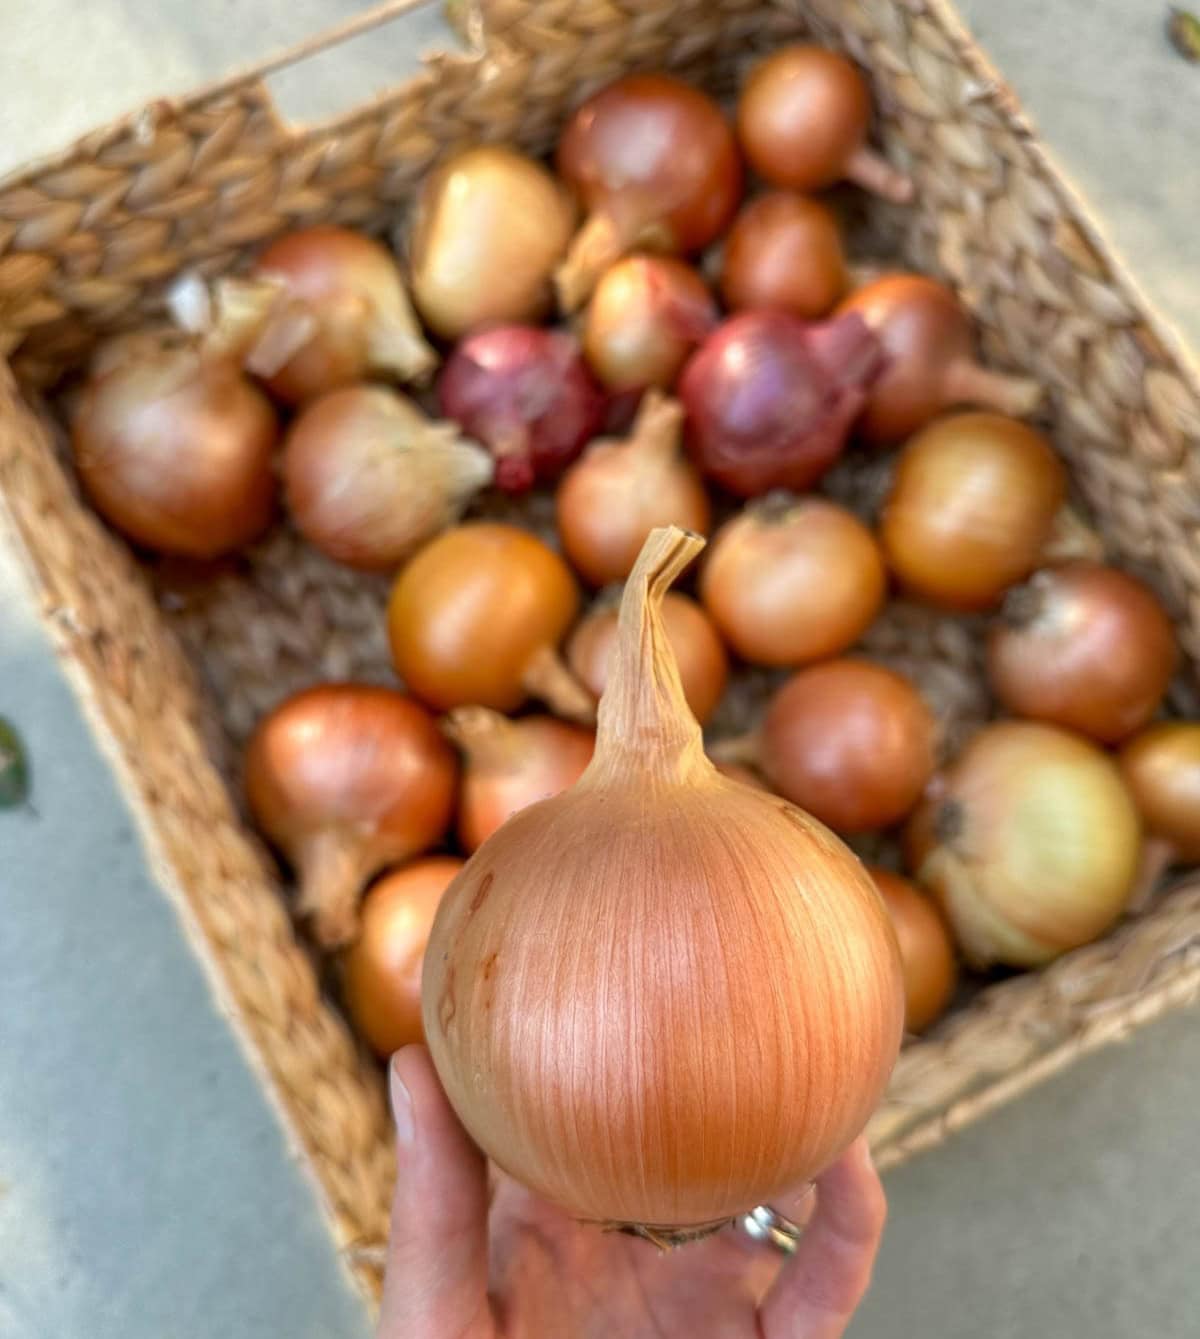
- After harvesting onions, leave them out to lay on top of the soil for a day or two in the sun (as long as rain isn’t in the forecast) so they can begin to dry and cure.
- Do NOT wash the onions, or remove the green tops and roots yet! Those should be trimmed off only after the onions are fully cured.
How to Cure and Trim Onions
- Curing onions is the process of allowing them to finish drying and sealing after harvest, which is essential for them to last in long-term dry storage! Note that immature onions or those that have started to flower will not cure or store well.
- In very hot, dry climates, those couple days onions spend lying and drying in the field after harvest may be sufficient curing time. Yet most gardeners further cure their onions by relocating them to a dry, shaded, well-ventilated area for 7 to 10 days.
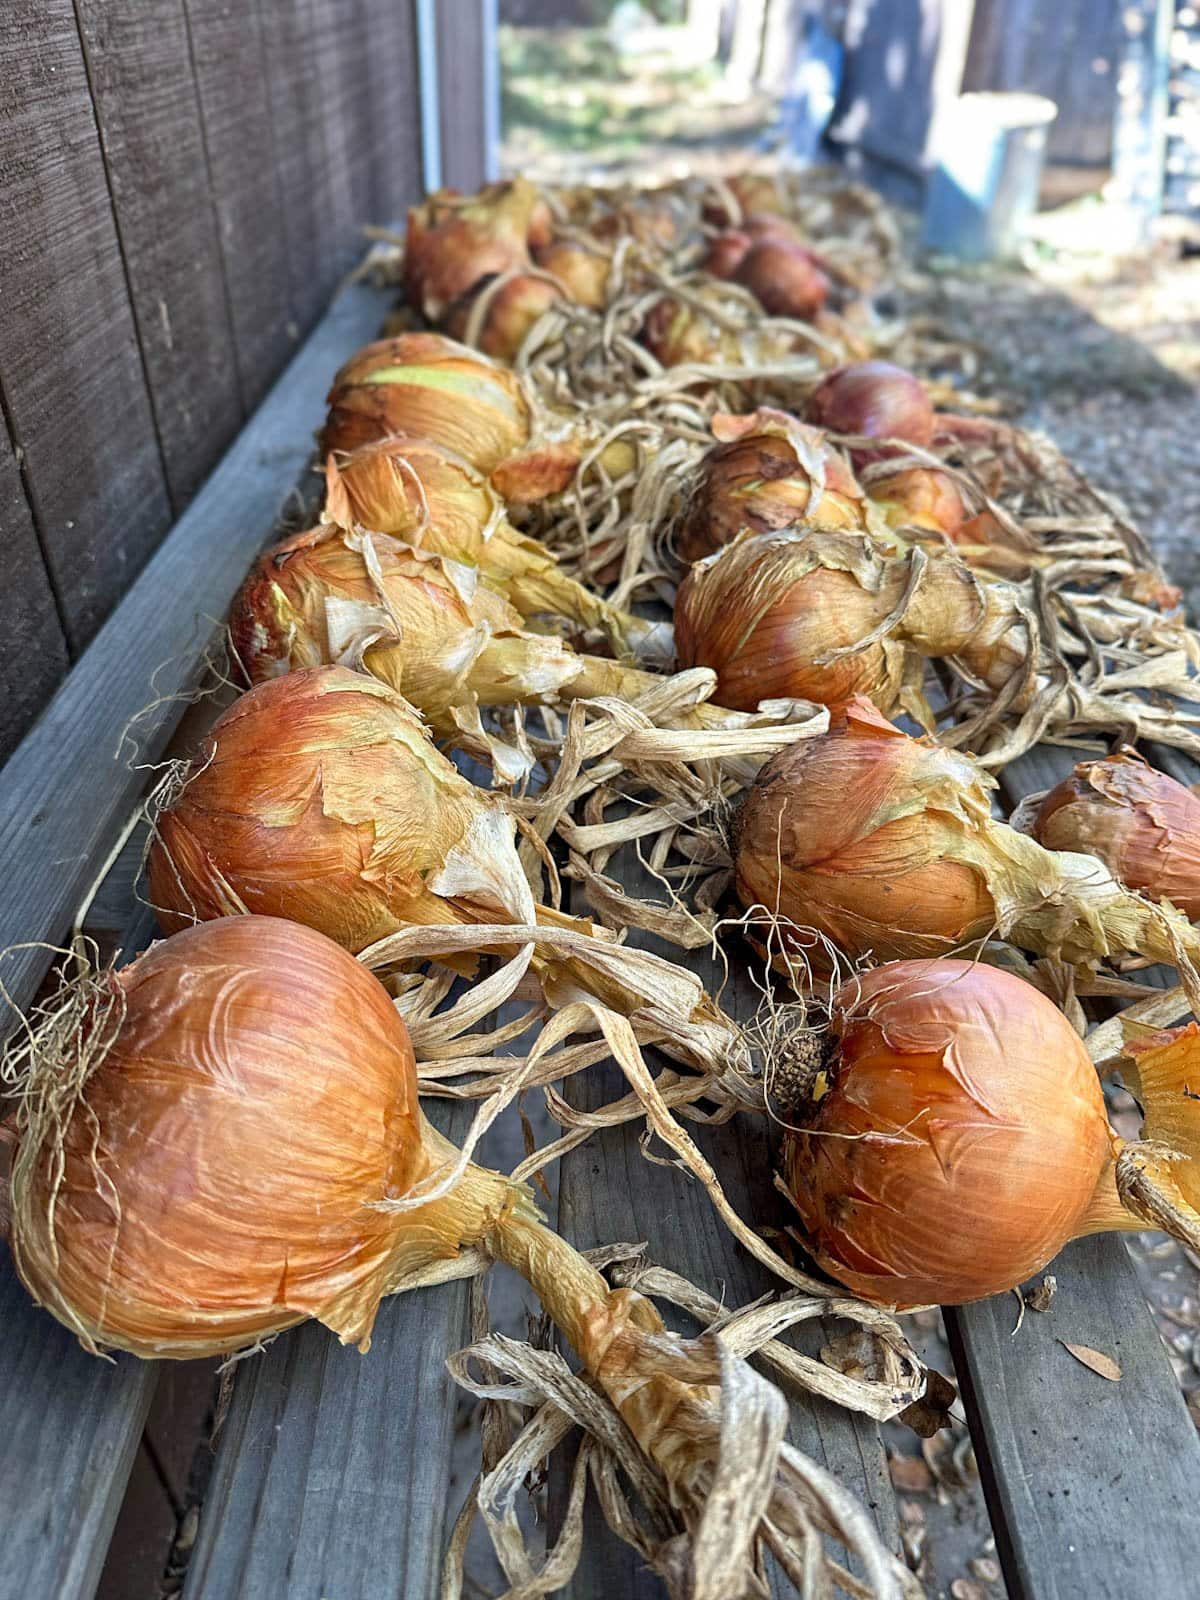
- It’s important to leave the green tops and roots intact as the onions cure, as the bulbs are still drawing final nutrients from them as they dry. Cutting the tops off too early can also compromise the seal and introduce moisture or mold into the bulb.
- You can cure onions in a drafty garage, carport, patio, shed or even right outside in the shade (as long as it isn’t too humid and they’re protected from rain).
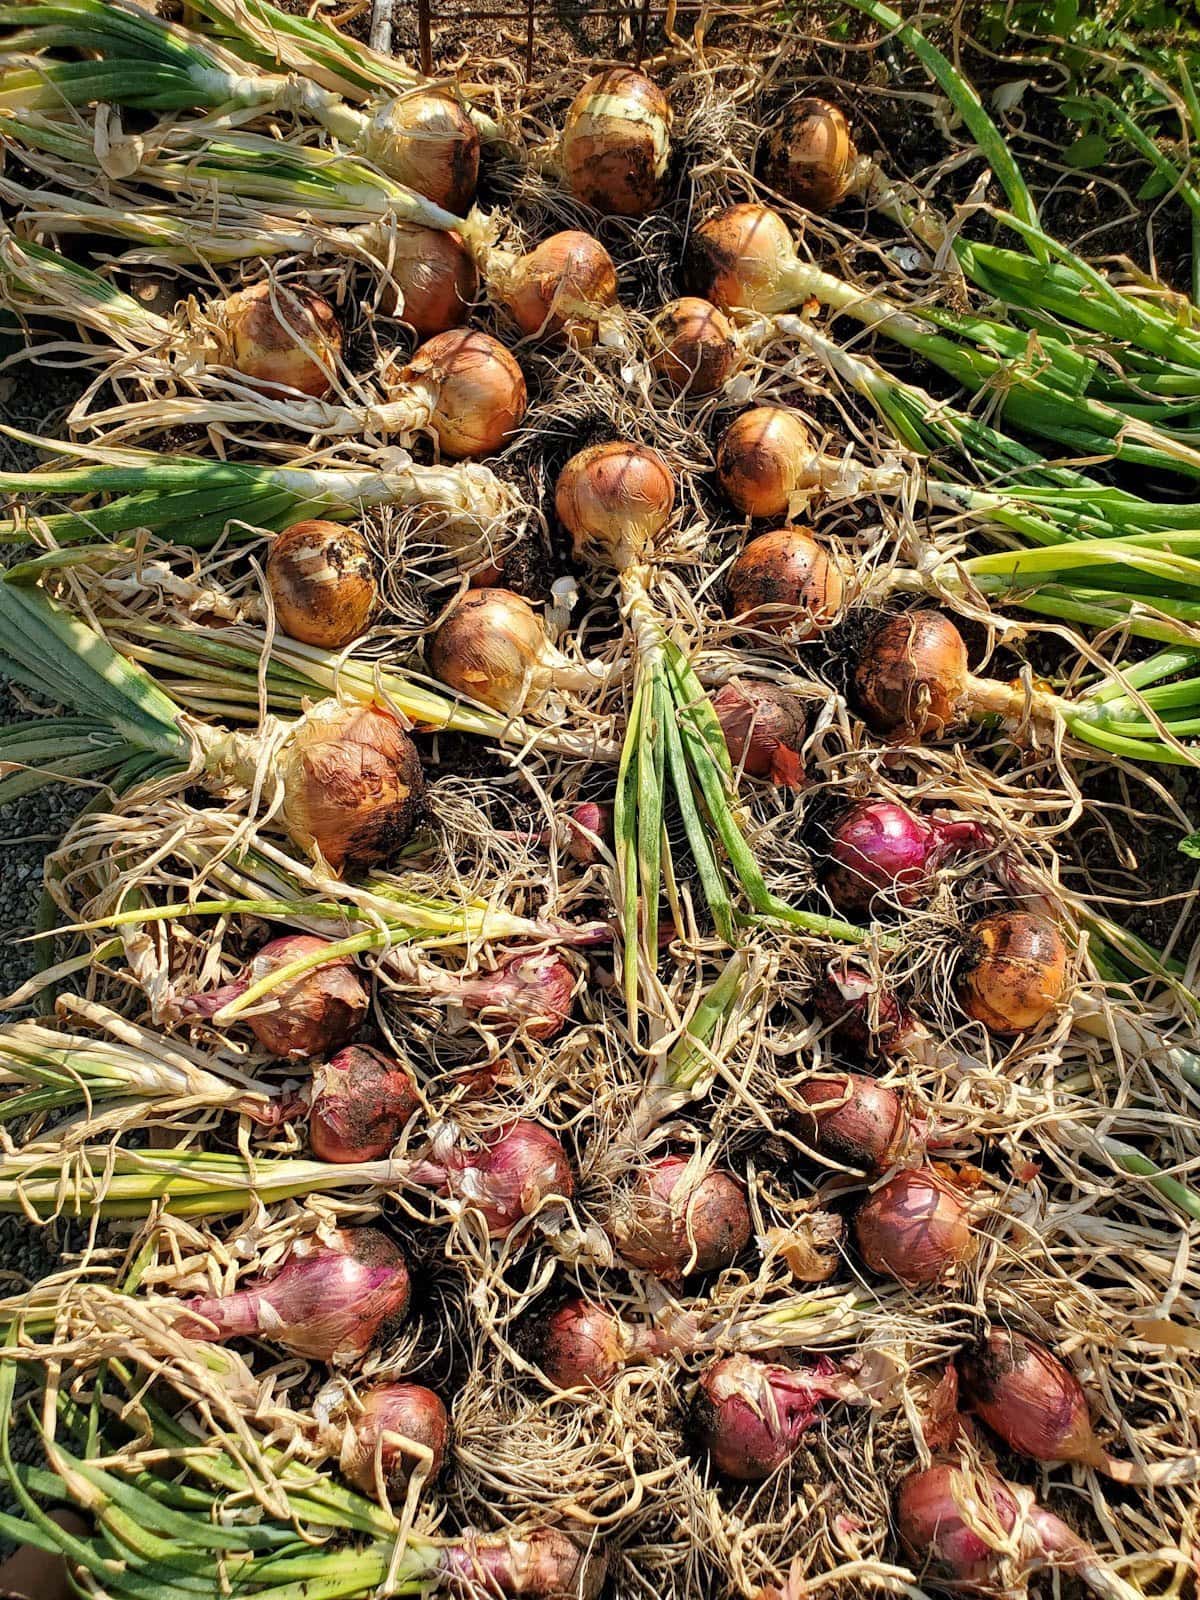
- Hang onions from a homemade drying rack, or lay them out flat on a wire rack or screen. Curing onions on a solid tabletop can also suffice as long as there is ample air circulation. Consider using a fan nearby as needed. Take care not to bruise or damage them in the process.
- As onions cure, the roots will shrivel up and the greens will dry up to form a seal at the top of the onion. (The stem just above the bulb should feel very thin and dry when they’re finished curing.)
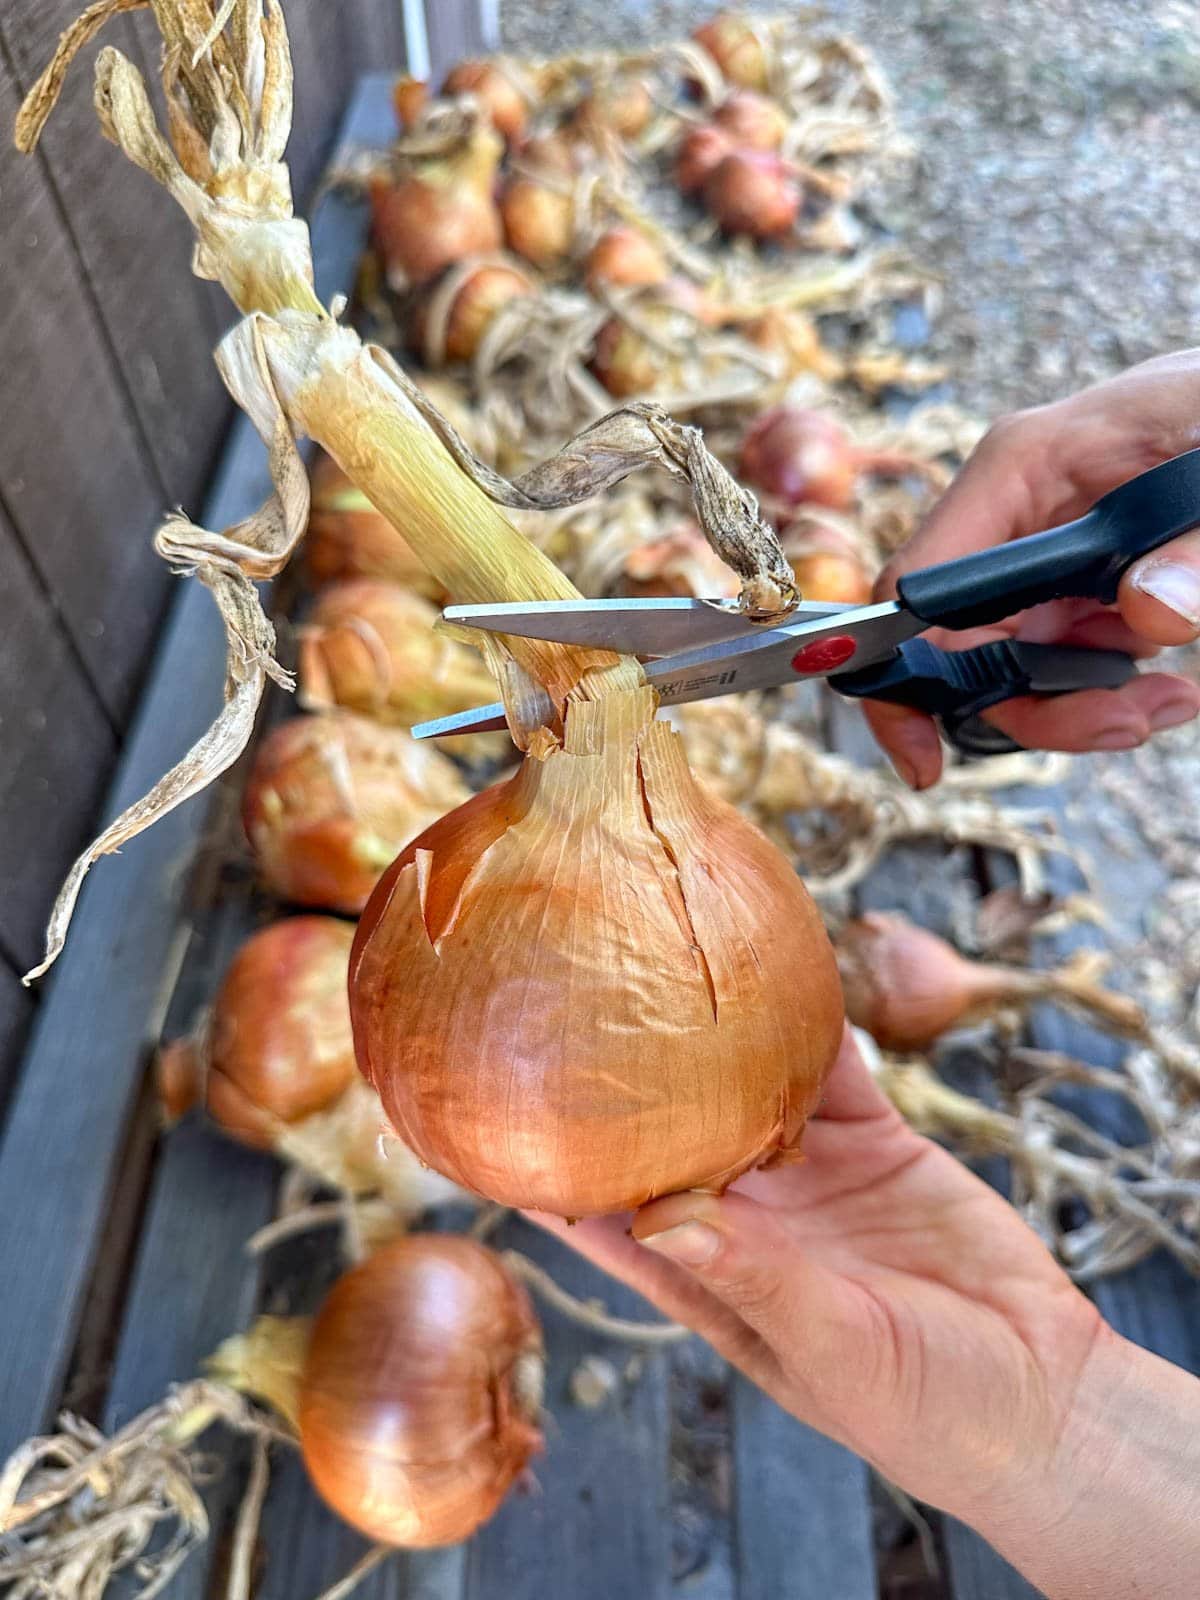
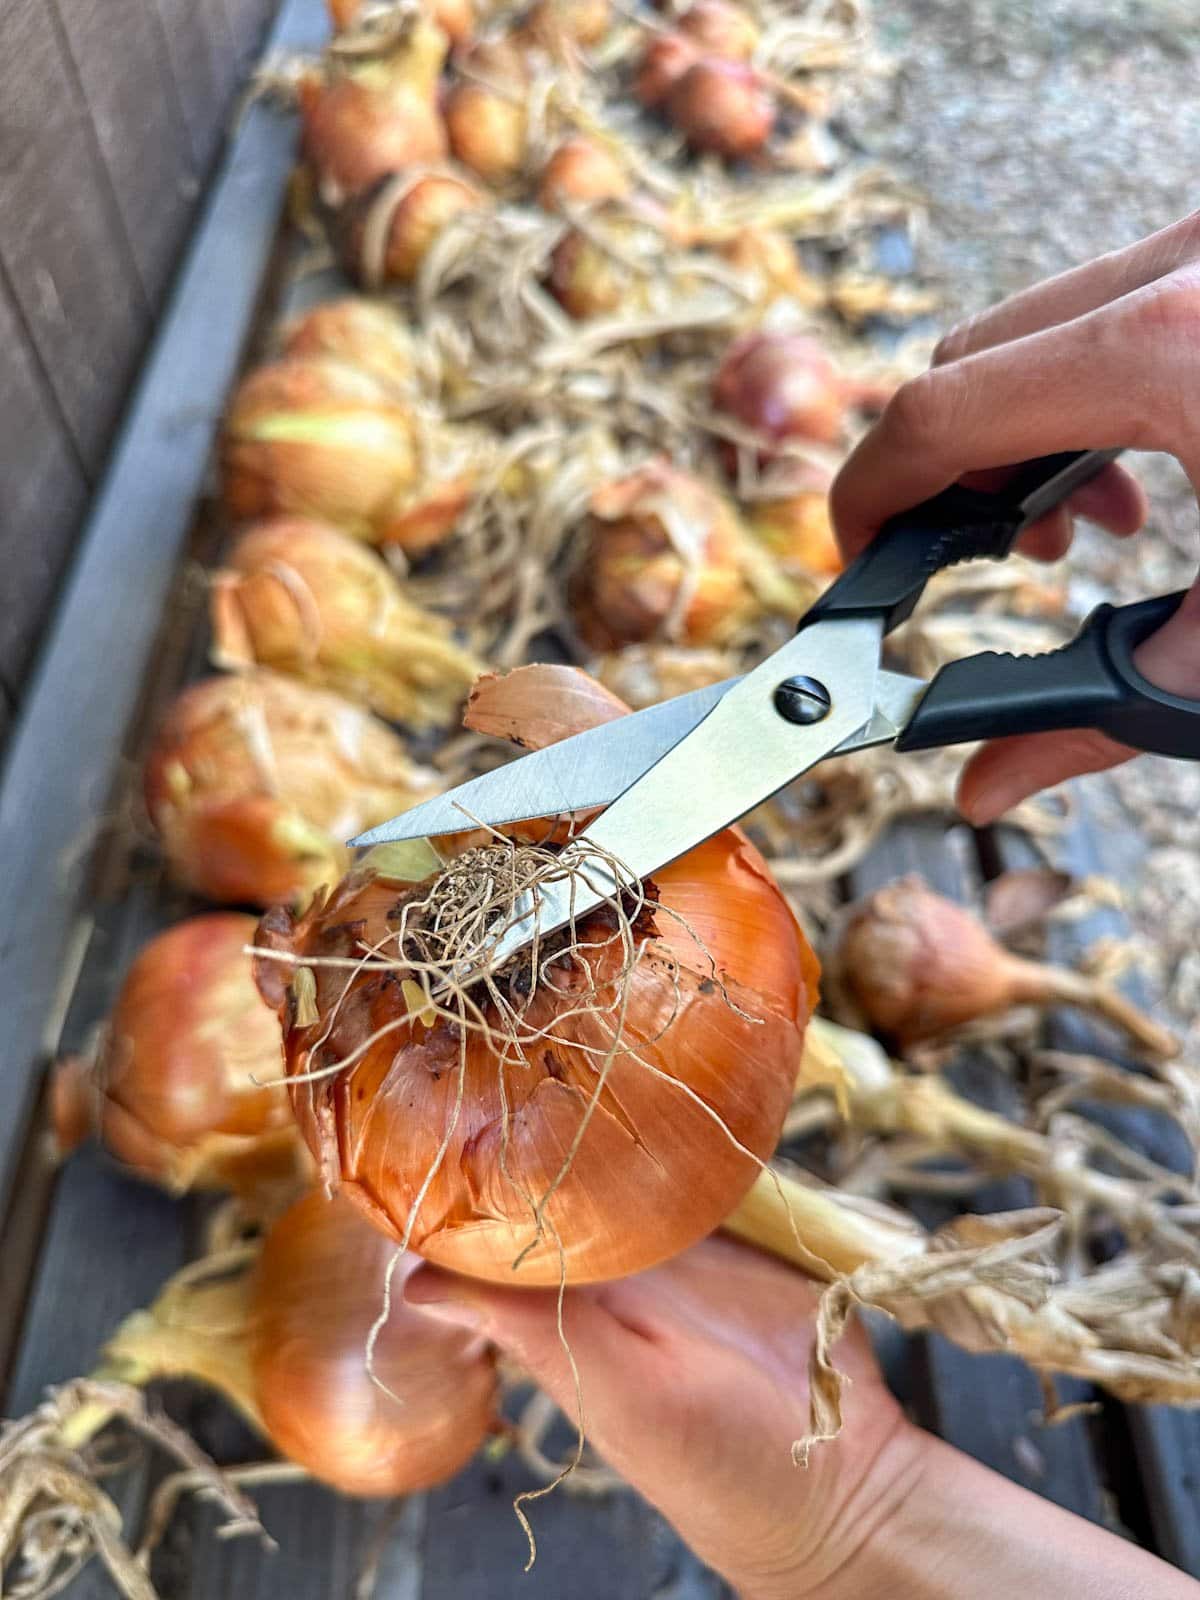
- Once they’re nice and dry, trim off the roots and tops before tucking them away for long-term storage. You can gently brush off the dirt and remove any dangling peeling skins, but otherwise leave their papery skins intact.
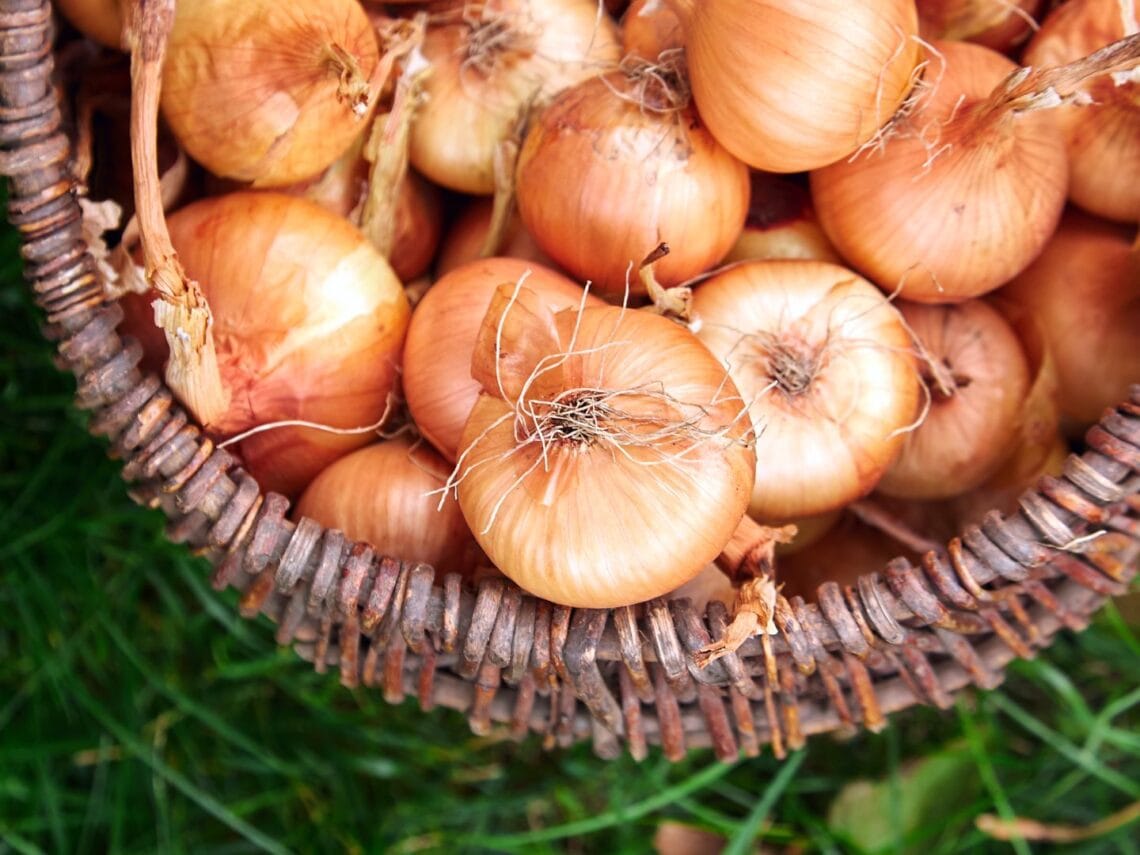
How to Store Onions
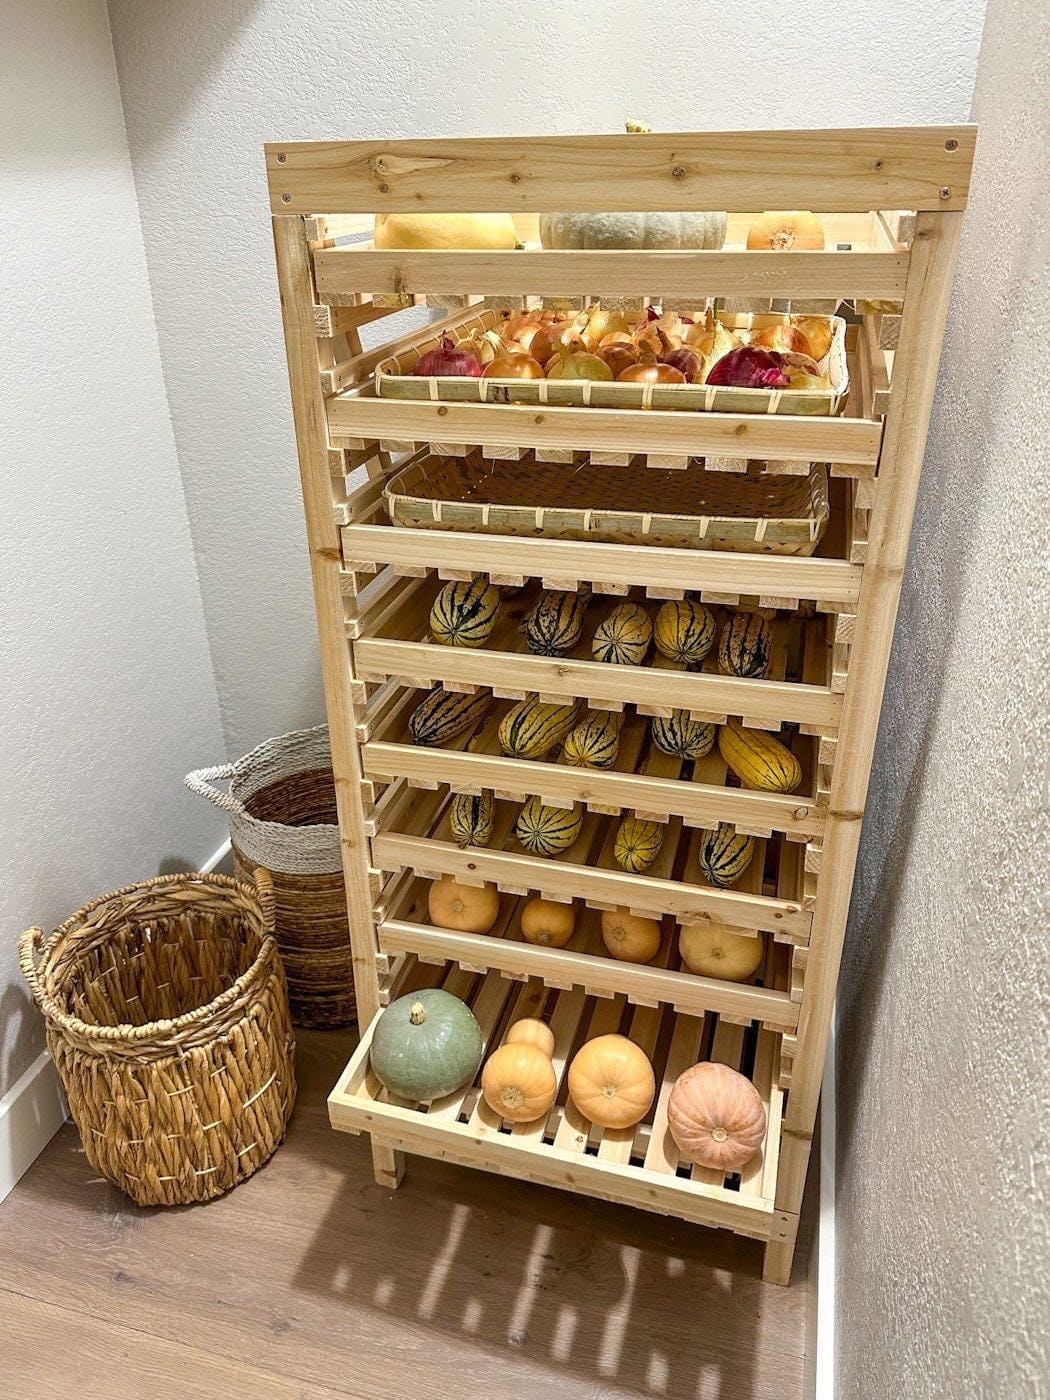
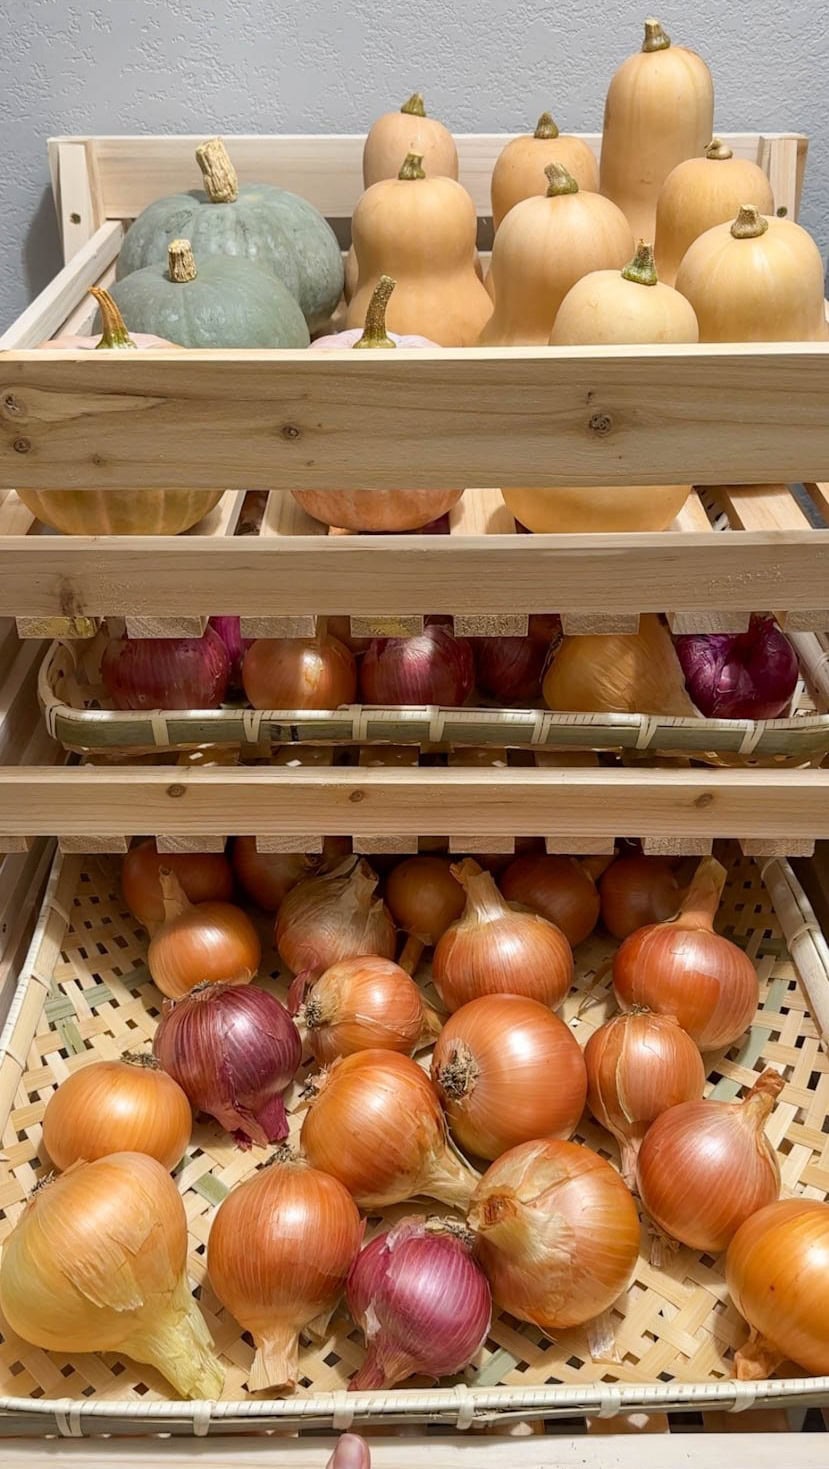
- Store cured onions in a cool, dark, dry location with good air circulation. For example, in a woven basket, stackable wire baskets, or a cardboard box in a cool closet or cabinet, root cellar, basement, or similar temperate location. We store our onions, garlic, and winter squash on this nifty harvest storage rack in a cool (north-facing) guest room closet.
- The ideal storage temperature for onions is around 45-55°F, though ours last for a very long time in our cool spare closet (around 60-65°F).
- Onions that were properly cured should last several months in dry storage under ideal conditions. Depending on the variety and quality of the bulbs, some onions may last just a couple months, while other varieties can last nearly a year! For instance, our huge tender Walla Walla onions always start to go downhill long before our favorite storage Calibra onions do.
- Mature onions that were not cured as well (or at all) can be stored at room temperature for a couple weeks, but they’ll last longer in the fridge. Store immature onions (green, spring, scallions, etc) in an airtight container in the refrigerator for maximum freshness.
- Check your onion storage often, at least every few weeks. Be sure to use (or preserve) any soft, damaged, or bruised ones first.
Ways to Preserve Onions
Use these ideas to preserve your onions if they start going soft in storage – or simply as a fun new way to use them!
- We love to make homemade dried onion powder, especially with immature onions or those that have started to flower and thus can’t be cured. We even dry the green tops for powder! Learn how to make onion powder here.
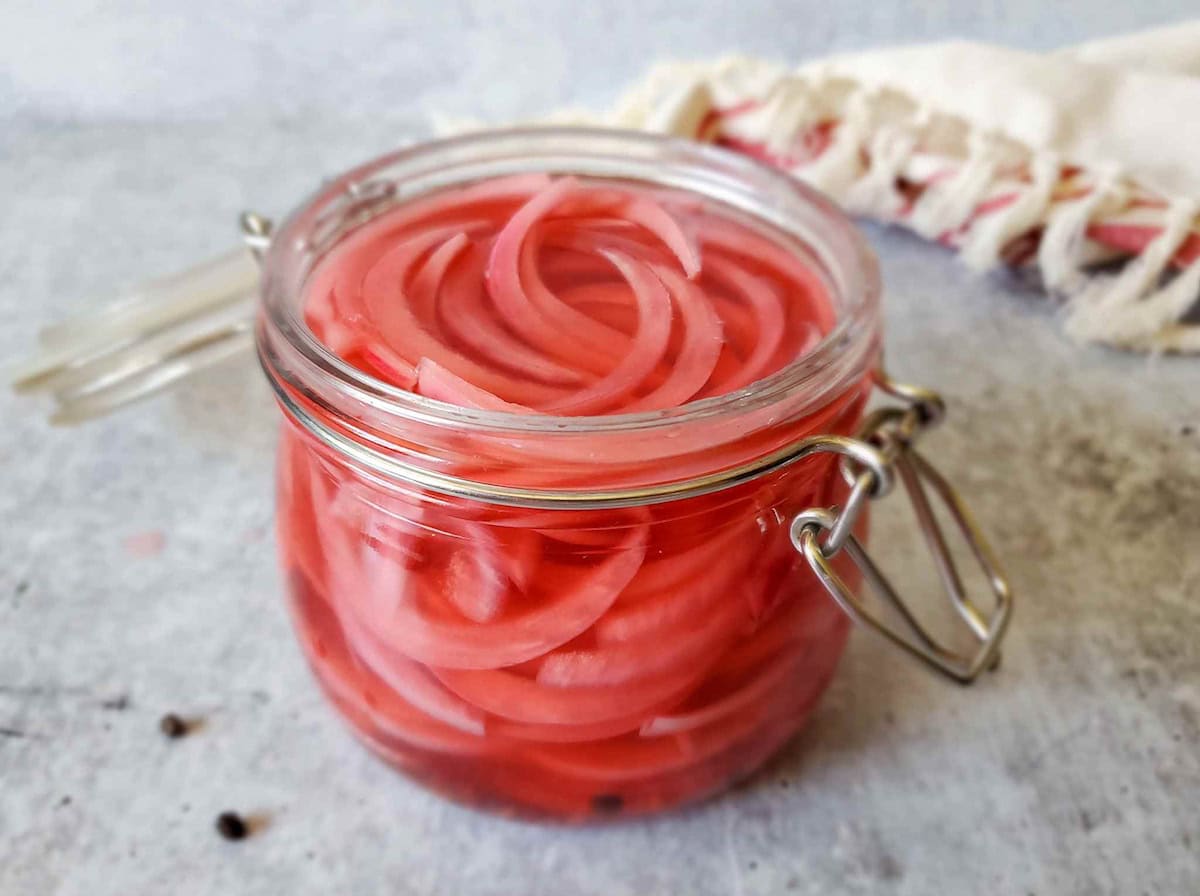
- Another great option for preserving onions is to make quick pickled onions. They’re awesome on top of salads, sandwiches and more.
- We’ve also frozen roasted onions in the past; they’re super-flavorful, lightly caramelized, and delicious added to soup, stew, vegetarian chili, or quiche.
Well, I hope you learned something interesting and new today! And I especially hope you have a very successful onion harvest and storage season ahead. Please let me know if you have any questions in the comments below, and happy harvesting!
You may also like:
- How to Plant and Grow Garlic: The Ultimate Guide
- When to Harvest Garlic, Plus Curing and Storage Tips
- The Best Zucchini Relish Recipe (Canning, Freezer or Refrigerator)
- The Best Easy Roasted Tomato Sauce Recipe (Freeze or Can)


4 Comments
Christy
I didn’t know you could manually bend the tops to stop their growth! Great article. Thank you!
Aaron (Mr. DeannaCat)
So glad you learned something new!
Jeanette
Thanks so much for another great article! I am going to take your advice on waiting a couple weeks after the tops flop over and then letting the onions dry on the soil for a day or two. I am having issues with my onions and garlic curing properly outside because we get dew every single night during my curing process. I have had success with my onions this time around because I am only pulling a couple at a time and bringing them inside at night. But this is definitely NOT sustainable for growing large amounts in the future. Do you ever experience this living on the coast?
Aaron (Mr. DeannaCat)
Hi Jeannette, we do experience overnight fog and we have still had success curing onions and garlic outside in the shade. It’s best to keep them somewhat protected if you have a shady spot next to your house that can help keep them somewhat more dry, this year we have them in front of our garage, underneath an overhang of the house. If you have space in a garage, that could be an option or even a pop up canopy tent could be useful if you had one accessible as well. Hope that helps and good luck!