

How to Amend Garden Bed Soil: Organic Fertilizer, Compost and More

Out with the old, in with the new! Come learn how to refresh and amend garden soil, with tips to prepare a new or established raised garden bed for planting.
This article explores the the best way to remove old plants from the garden, when and how often to add fertilizer, our favorite organic fertilizer and compost options (and other natural amendments), and the step-by-step process we use to amend our garden beds before planting.
Soil health is KEY to the success of a garden, and should never be ignored! With these tips, your plants will grow bigger, stronger, and more productive than ever.
Starting with a brand new bed? Come learn how to fill a raised garden bed with organic soil and compost.
Note: This post was originally published in October 2019 but significantly refreshed in 2025.
Would you like to save this?
Disclosure: Homestead and Chill is reader-supported. When you purchase through links on our site, we may earn an affiliate commission.
Removing Old Plants from the Garden
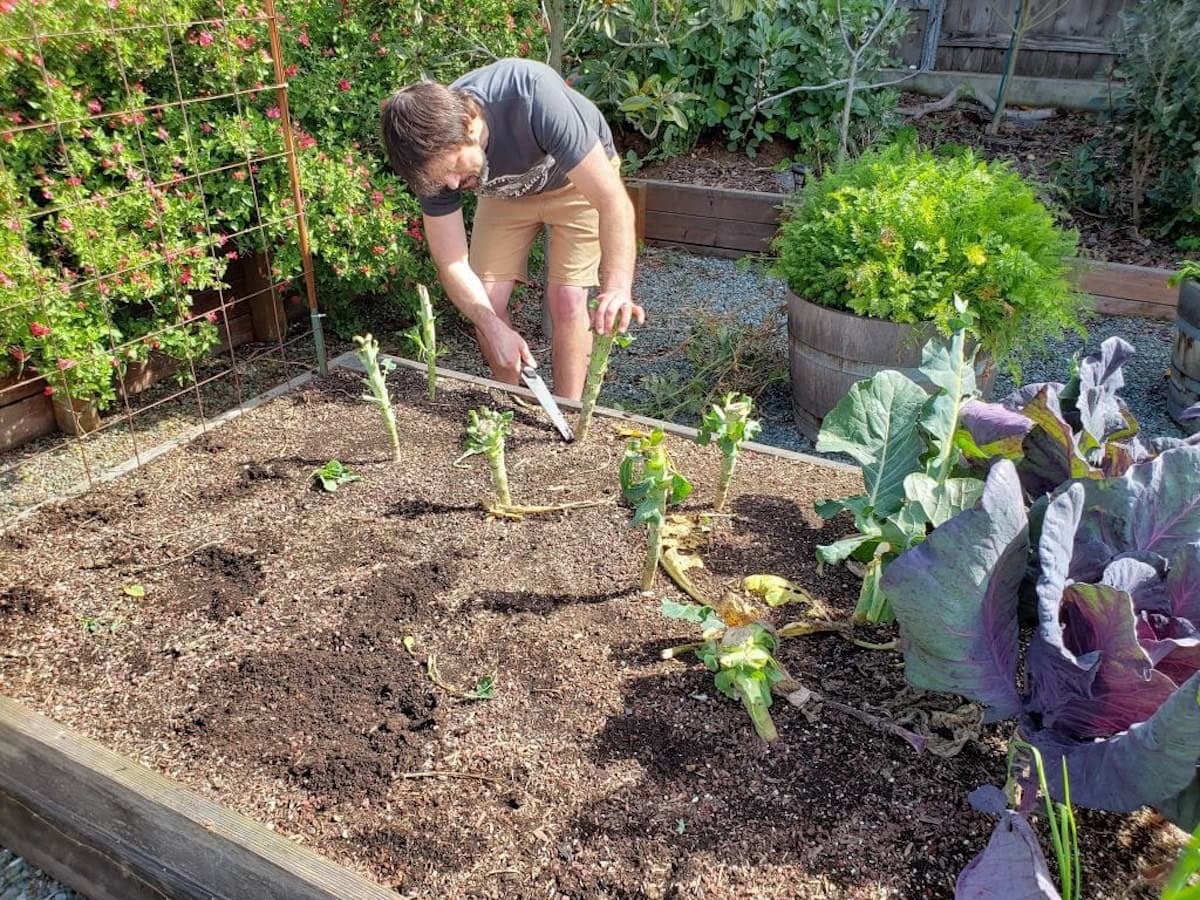
When it is time to remove old plants from a garden bed, we prefer to follow a “no-till” or no-dig method most of the time. Rather than pulling plants out by their roots, we cut them out at the soil line or just below and leave the roots to decompose in place.
To cut out old plants, we use sharp pruners or a small hand saw, depending on the size and toughness of the stem. The roots will break down over time, providing food and nutrients to the plants, along with the worms and other beneficial microorganisms in the soil!
No-till farming offers numerous benefits to soil, such as improved biological diversity, fertility, resiliency, water retention, organic matter, and nutrient cycling. In contrast, tilling soil increases erosion and disrupts the natural soil structure and beneficial life within.
If the spent plants aren’t diseased, we add them to our compost bin (or share some with our backyard chickens, when edible and appropriate). Otherwise, they go in the green waste.
RELATED: Learn more about no-till gardening here, including when it may be a GOOD idea to lightly till your soil too (such as to combat root-knot nematodes).
Why Amend Soil?
As plants grow, they draw up essential nutrients from the soil, leaving it low or even depleted by the end of the growing season. So, it’s important to replenish nutrients so the next round of plants can thrive! To do so, gardeners typically apply fertilizer and/or compost each year (or more often).
Some amendments are also used to improve soil texture or drainage, not just nutrients. For example, you can add compost and/or potting soil to fluff up dense clay soil or to improve moisture retention in sandy soil.
Crop rotation and cover crops can also be used to enhance organic soil health and nutrition.
When To Amend Garden Soil
Most gardeners amend their soil in spring, just before planting time. Ideally, plan to add fertilizer a week or two prior to planting, giving it time to mellow out before the plants go in. (This is especially true with strong fertilizers like bone or blood meal that pose a risk of burning plants. Since we use more gentle options, we sometimes fertilize immediately before planting without issue.)
However, amending too early can be wasteful. For example, if you apply fertilizer in the fall and leave the beds empty all winter, rain will wash away much of the added nutrients.
We live in a temperate climate and garden year-round, so we amend our beds twice per year – once in early spring and again late summer before planting fall crops.
It can also be helpful to offer heavy-feeder crops additional fertilizer once or twice during their growing season. We’ll discuss ways to feed soil mid-season in the “fertilizer options” section to follow.
How to Amend Garden Soil Before Planting
- If you haven’t already, clear out old plants from the bed. Also remove any weeds or other debris as needed. Again, we avoid tilling or digging unless necessary. If your garden beds are mulched, you may want to pull back the mulch before applying amendments and then put it back on top afterwards.
- Again, we generally avoid turning or tilling soil. Yet if the soil level has sunk significantly in the bed (common in newer raised garden beds), we sometimes add more fresh soil before the next compost layer.
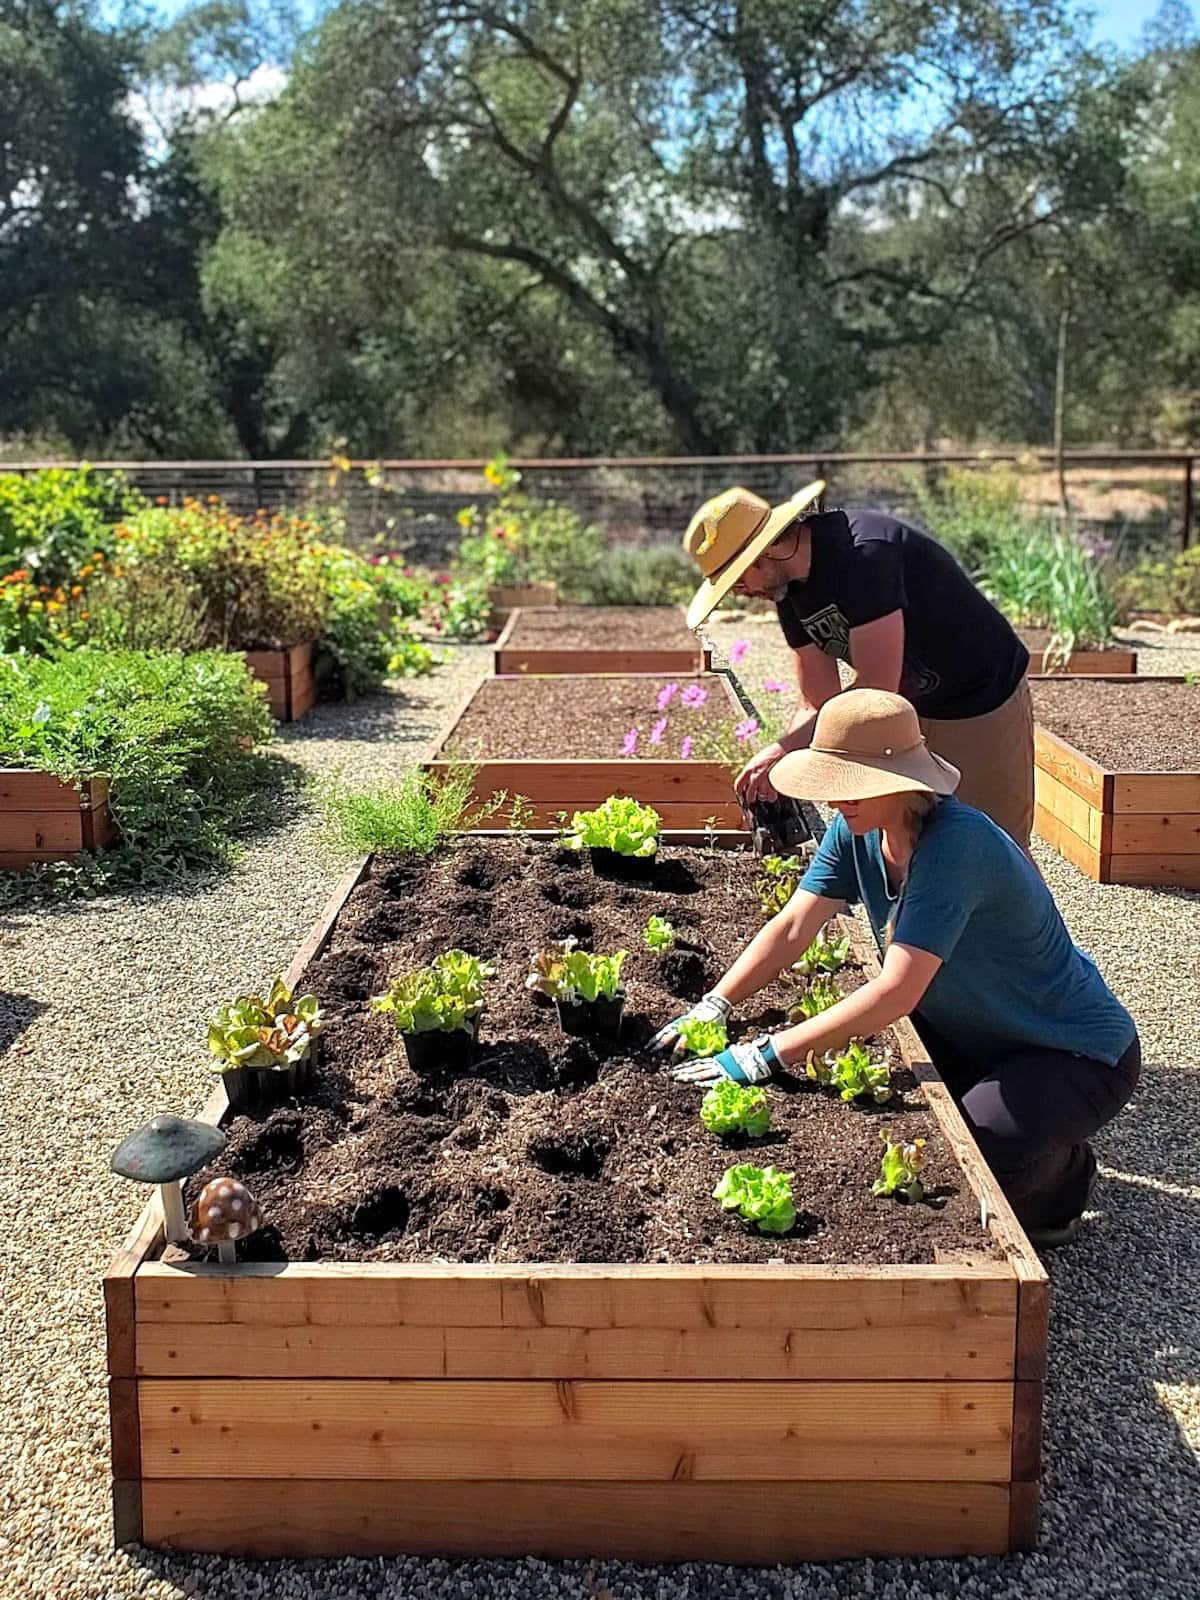
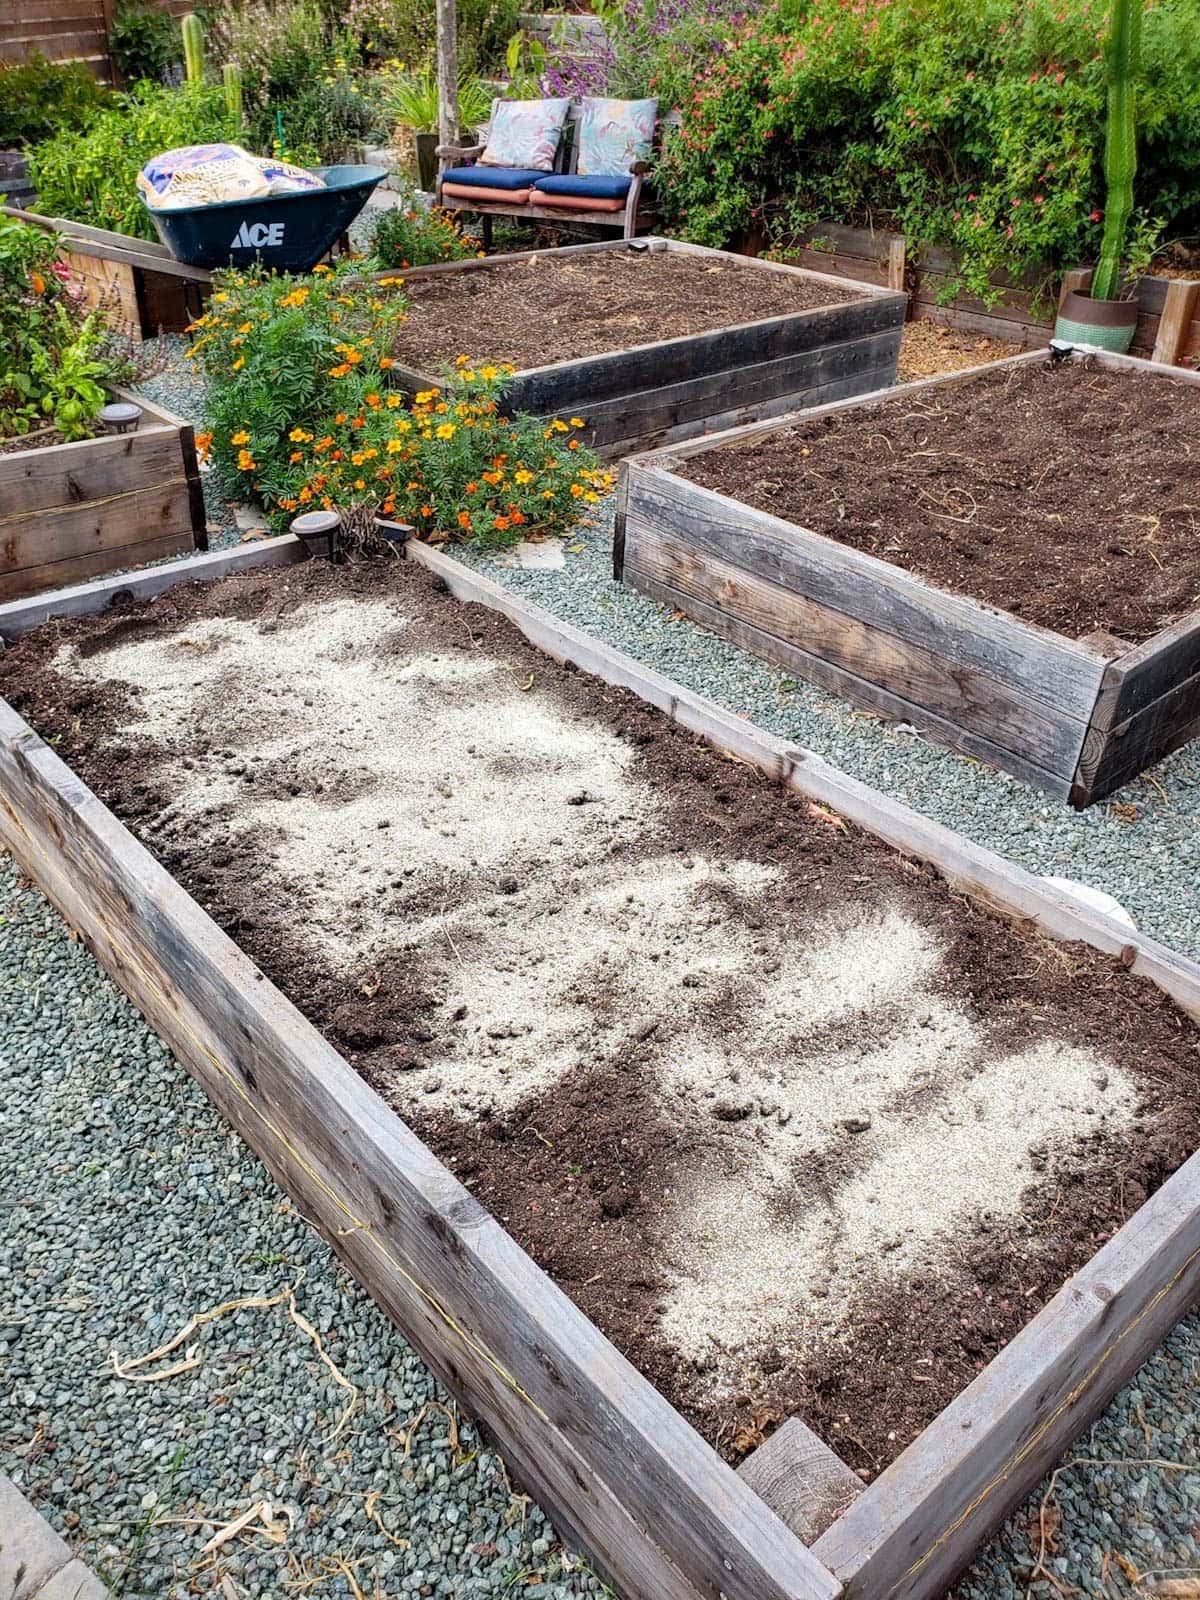
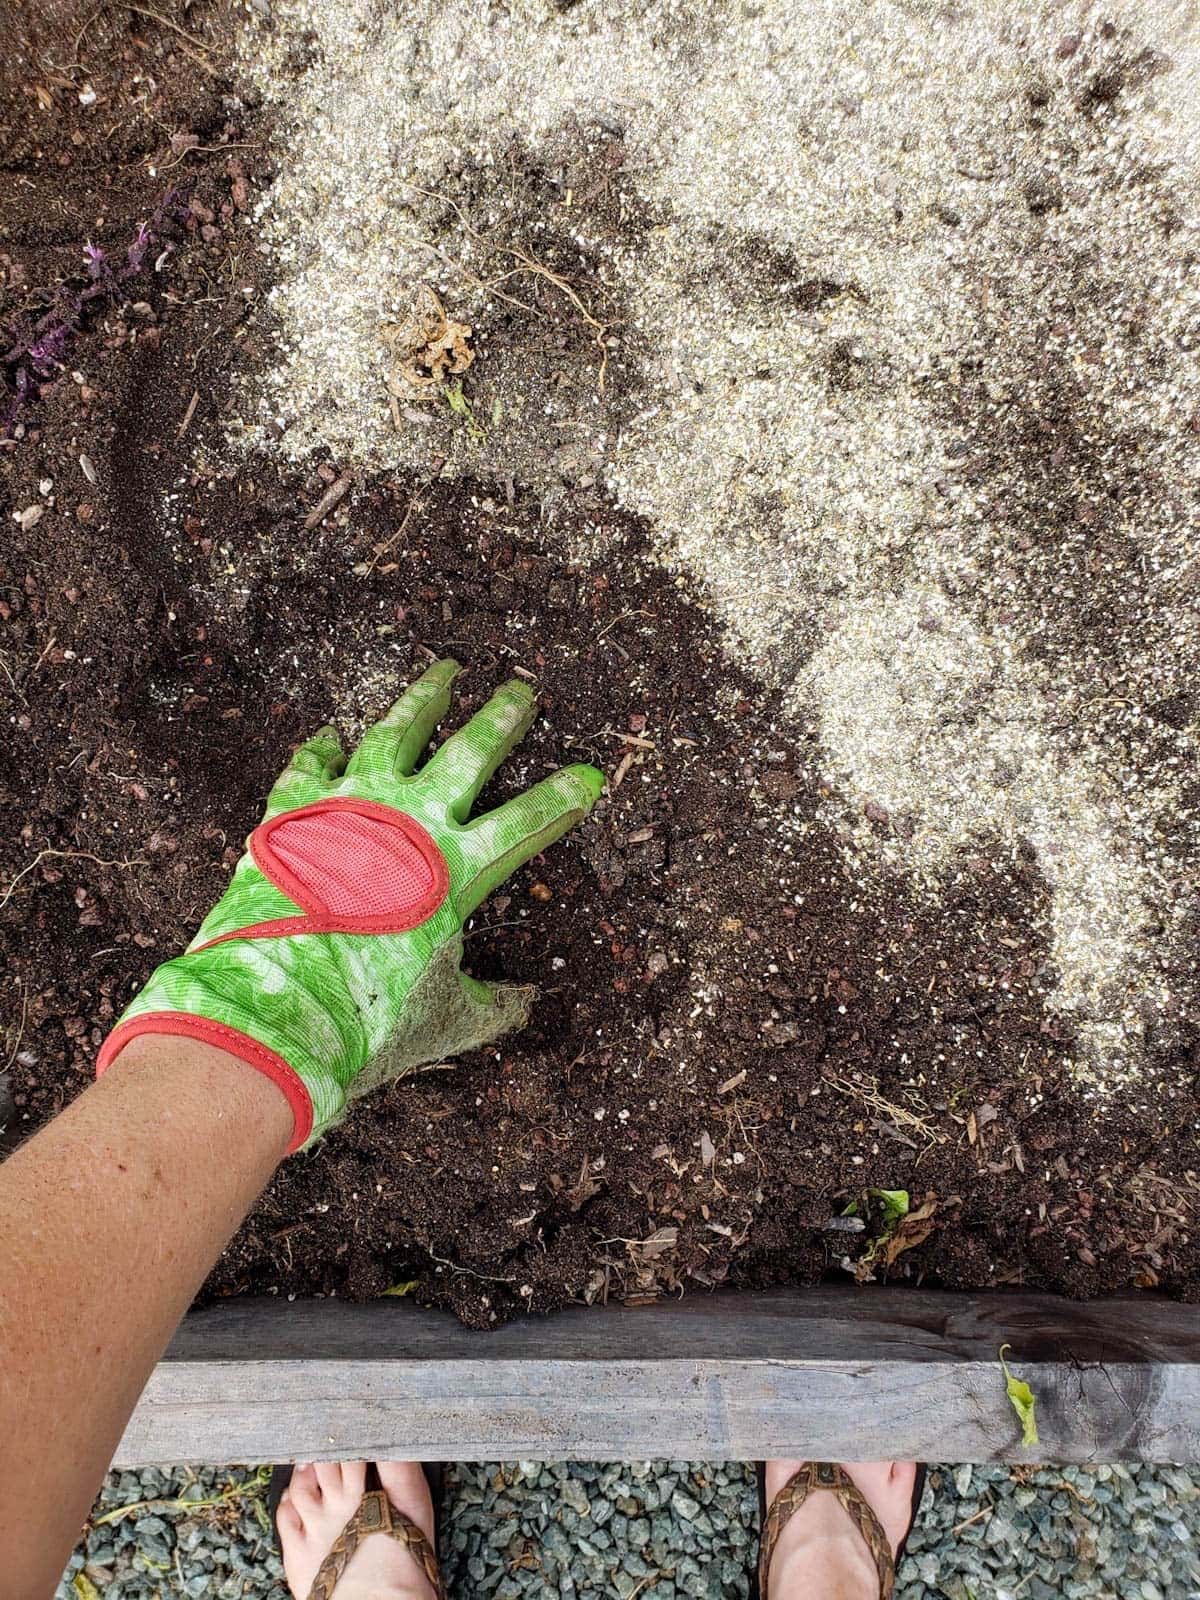
- Next, add a slow-release organic fertilizer of choice. (See discussion about various fertilizer and compost options below.) Sprinkle it evenly across the soil surface, and then scratch or lightly work it into the top couple inches of soil with your fingers. I recommend wearing gloves, and use just slightly less than the suggested amount on the package.
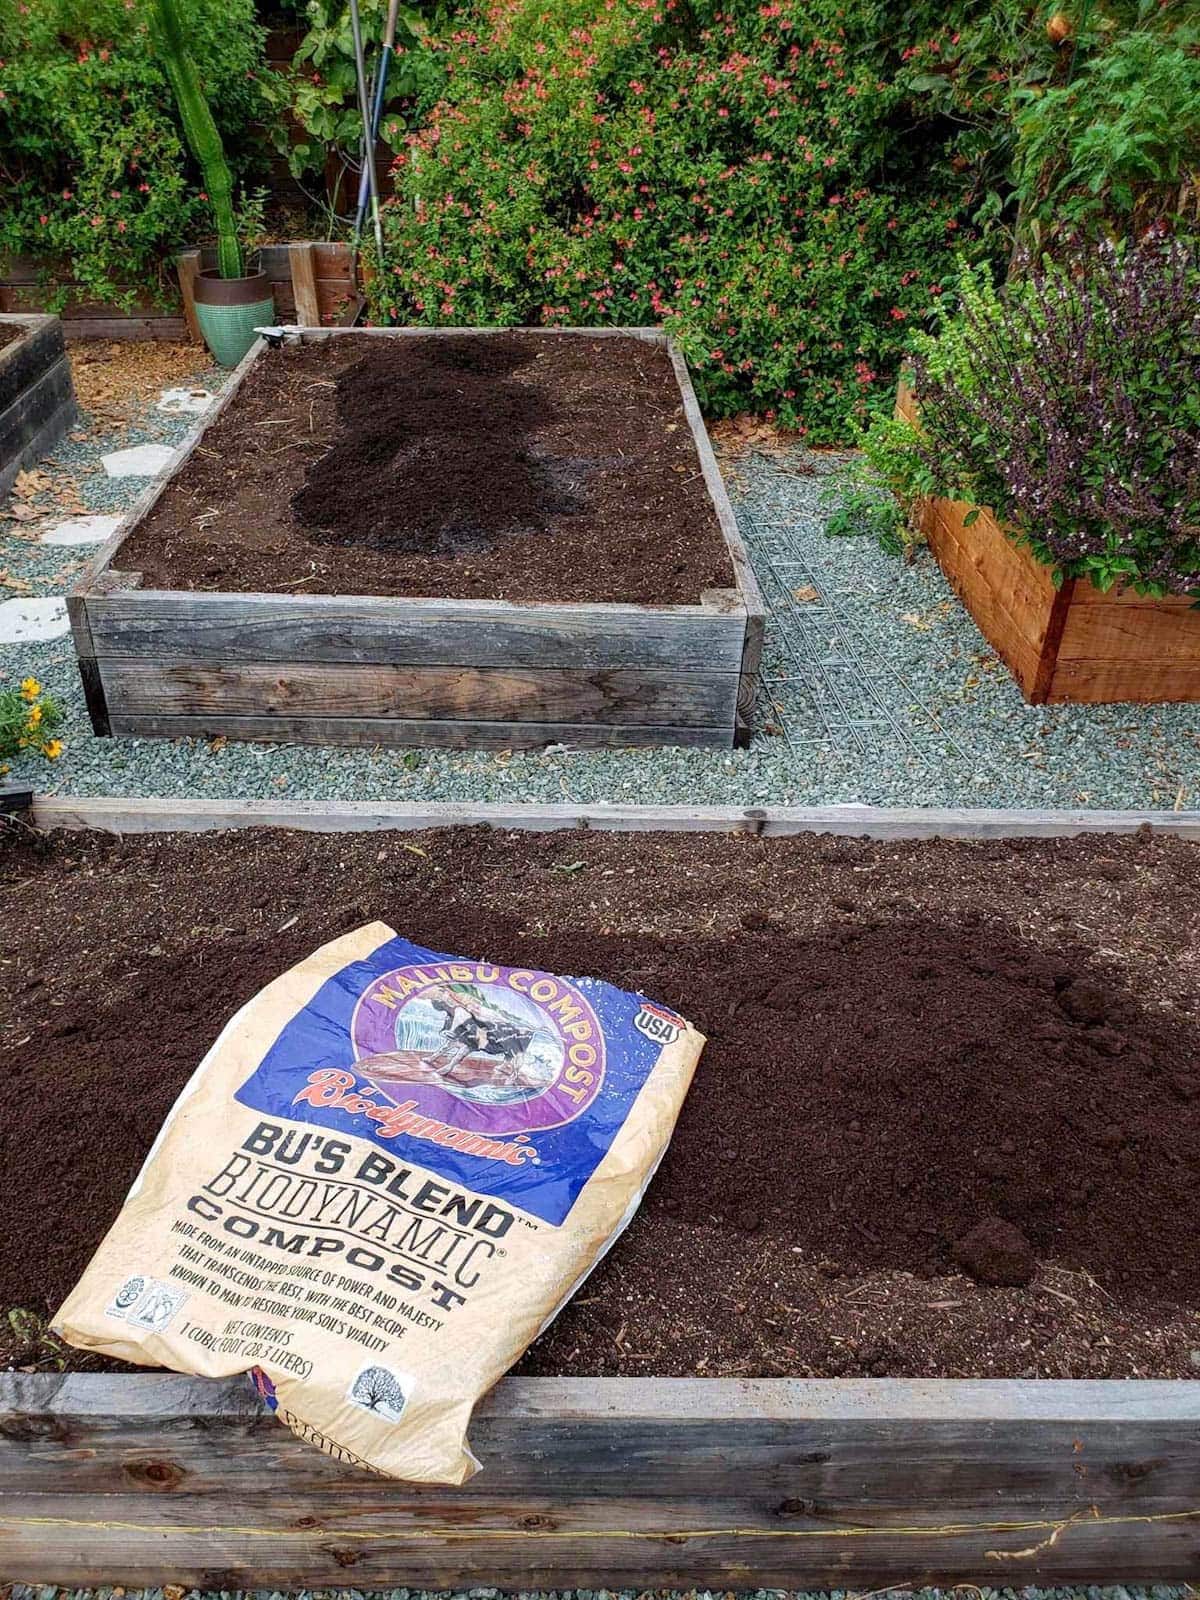
- Now, we top off our raised garden beds with 1 to 2 inches of well-aged compost, which also doubles as our mulch of choice.
- Finally, water the soil thoroughly to help the fertilizer seep in. It will continue to break down and release nutrients over time.
- Ideally, wait several days to a couple weeks before planting.
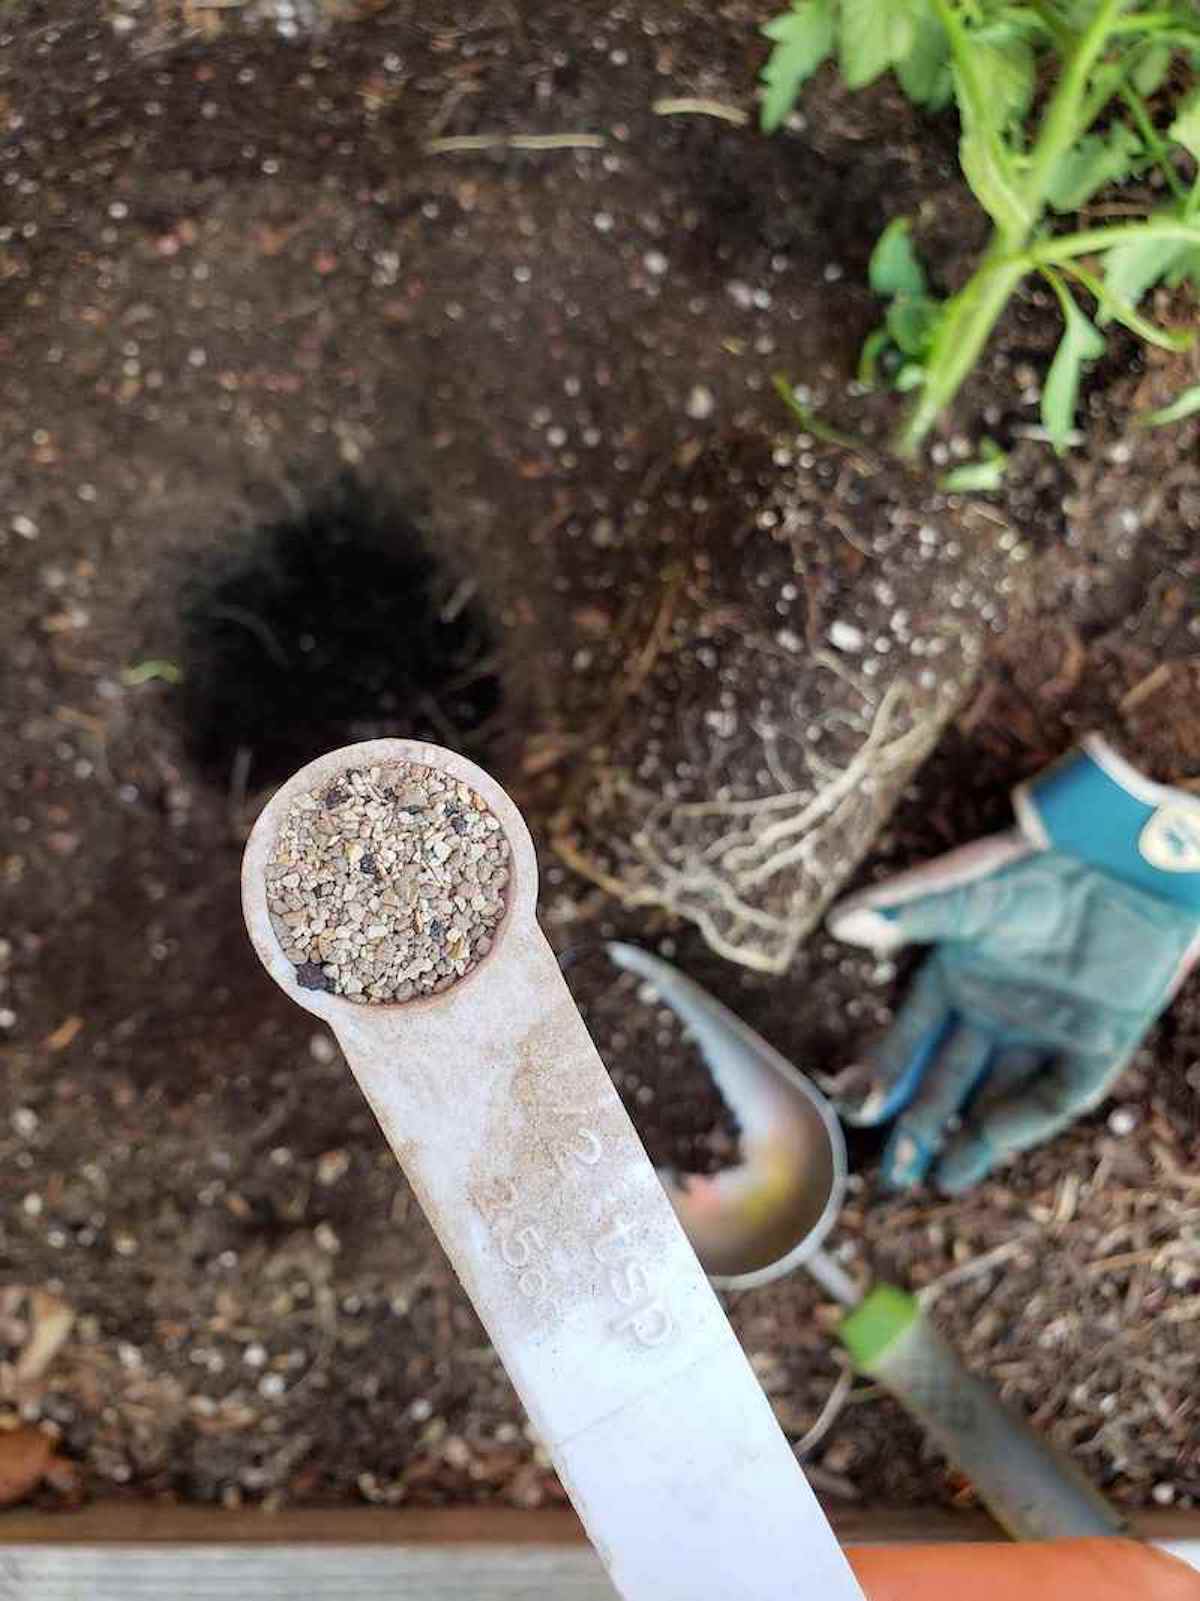
- We also incorporate a few additional soil amendments at planting time, such as adding worm castings and mycorrhizae sprinkled right in each planting hole. Both help to reduce transplant shock, increase nutrient uptake, and encourage fast healthy root development!
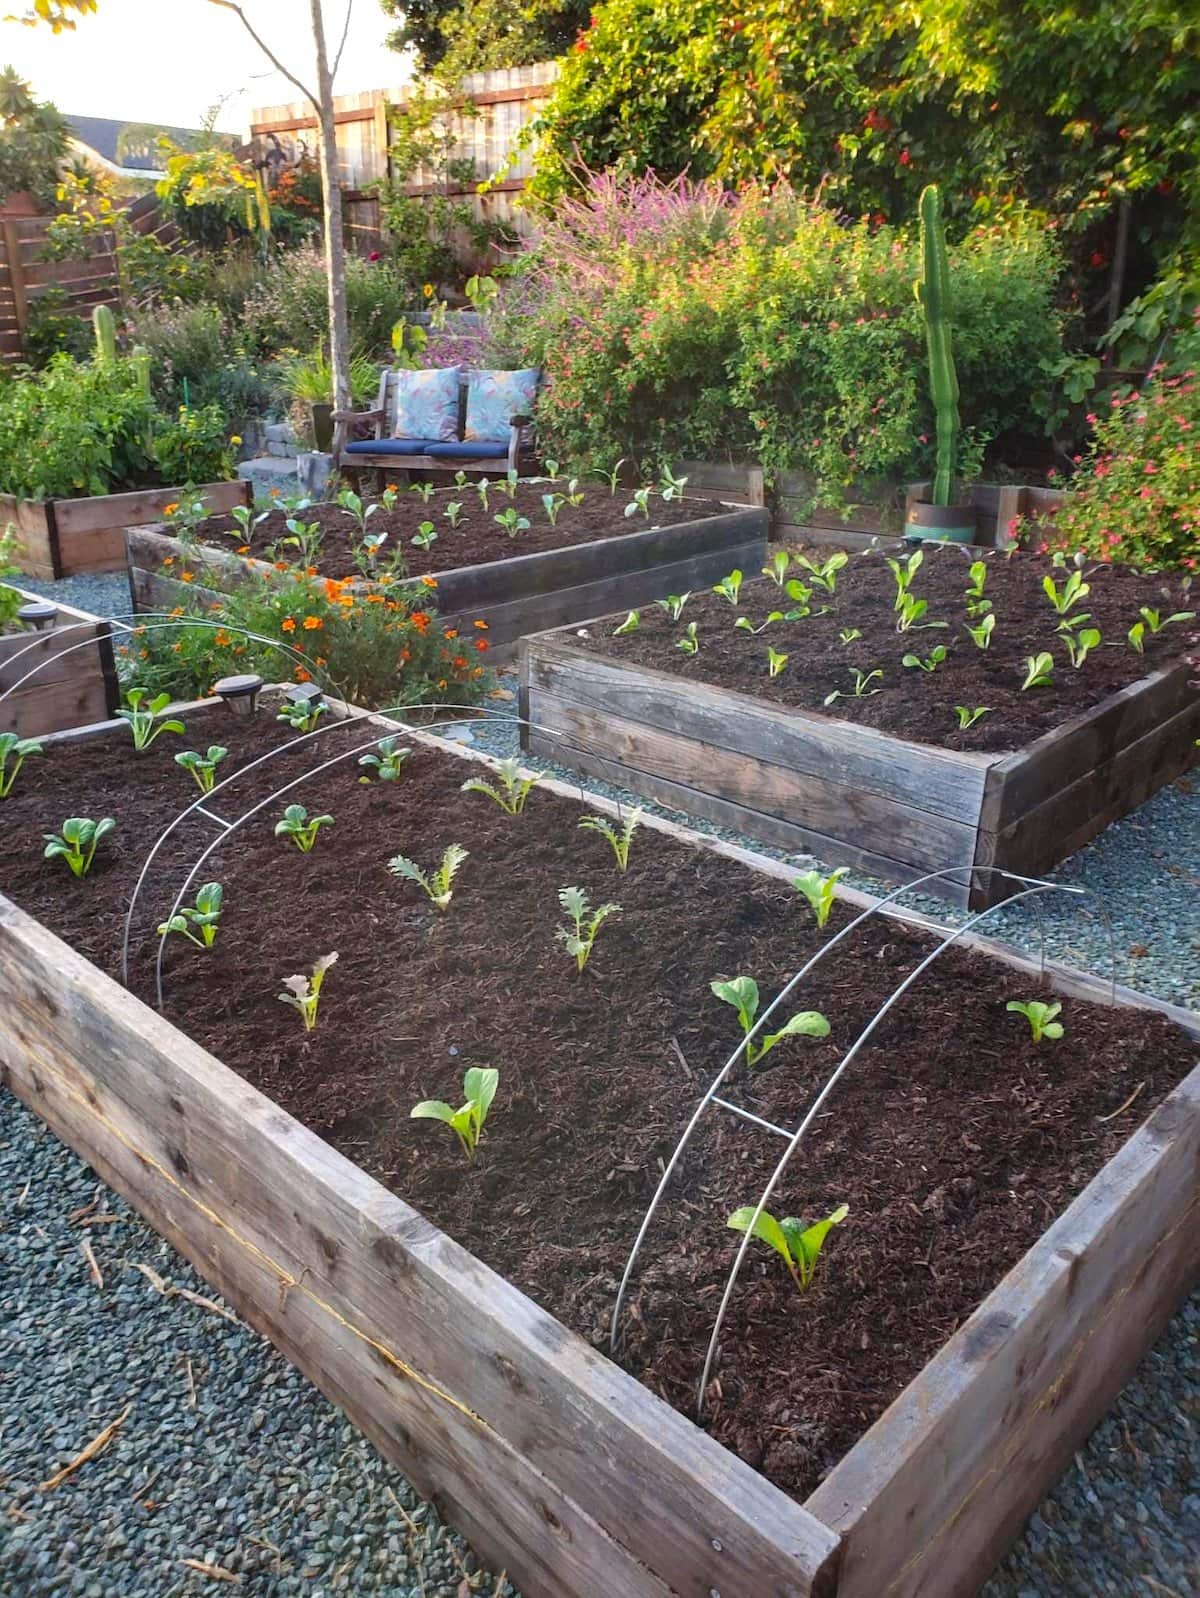
- After planting seedlings, be sure to mulch the top of your soil! Mulch helps soil retain even moisture levels, suppress weeds, and protect plant roots from temperature extremes. About 2 to 4 inches of mulch is (ideal depending on the type).
RELATED: Don’t miss our top tips for transplanting seedlings, or learn more about the pros and cons of 8 popular types of garden mulch here.
Fertilizer Options
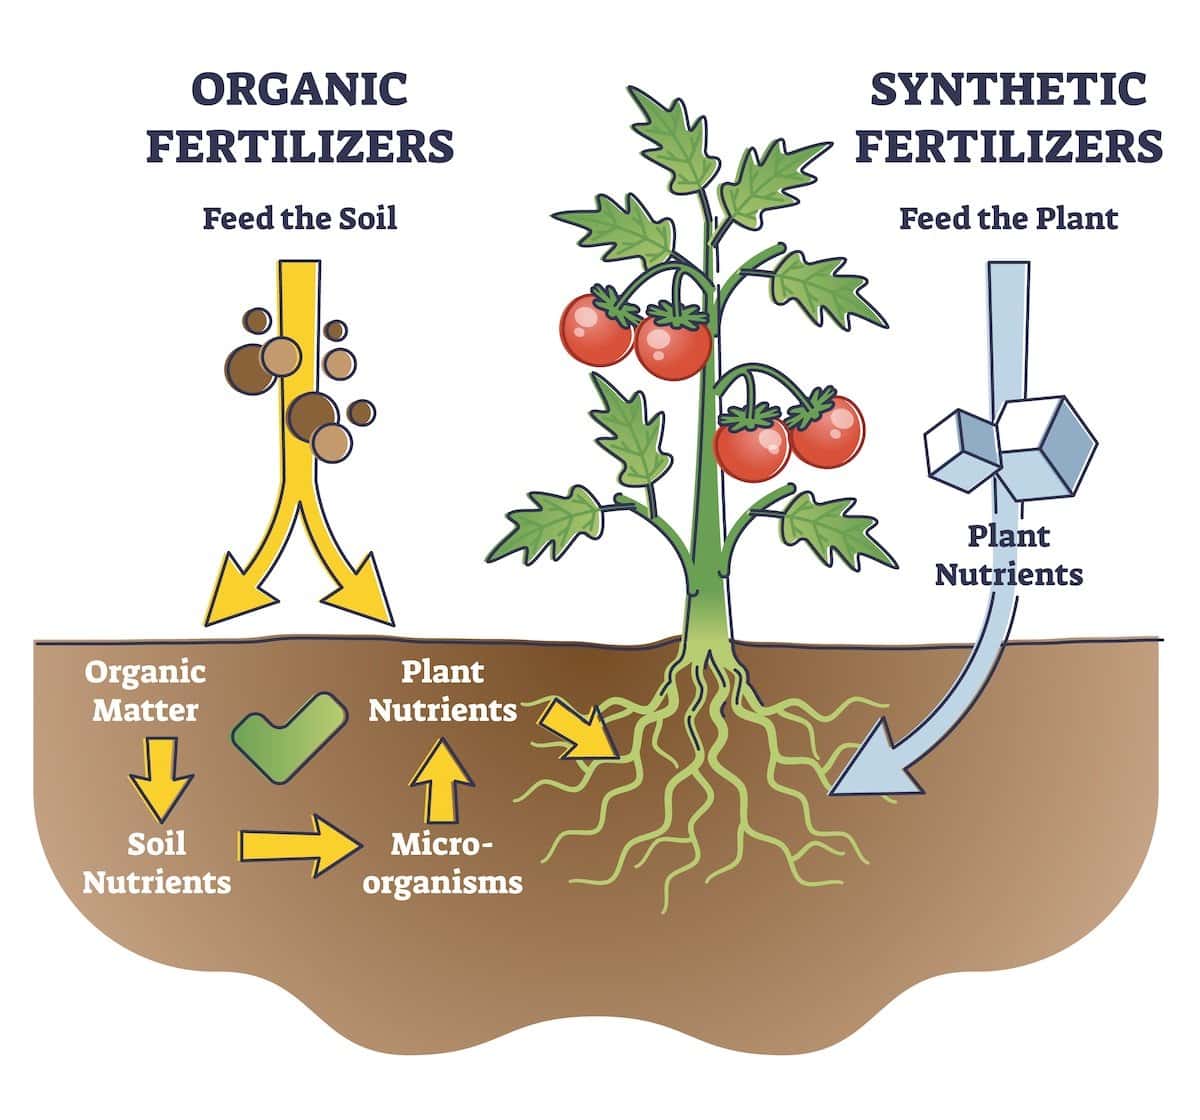
There a number of ways to fertilize garden soil, and every gardener has their preferences! We like to use natural amendments, compost, and gentle, slow-release, well-balanced organic fertilizer (e.g. 4-4-4) instead of stronger options like blood meal.
It’s better to go light than accidentally overdo it and “burn” or shock young sensitive plants! You can always add more, but it’s difficult to take excess away. Plus, fertilizer isn’t the only way we maintain soil health.
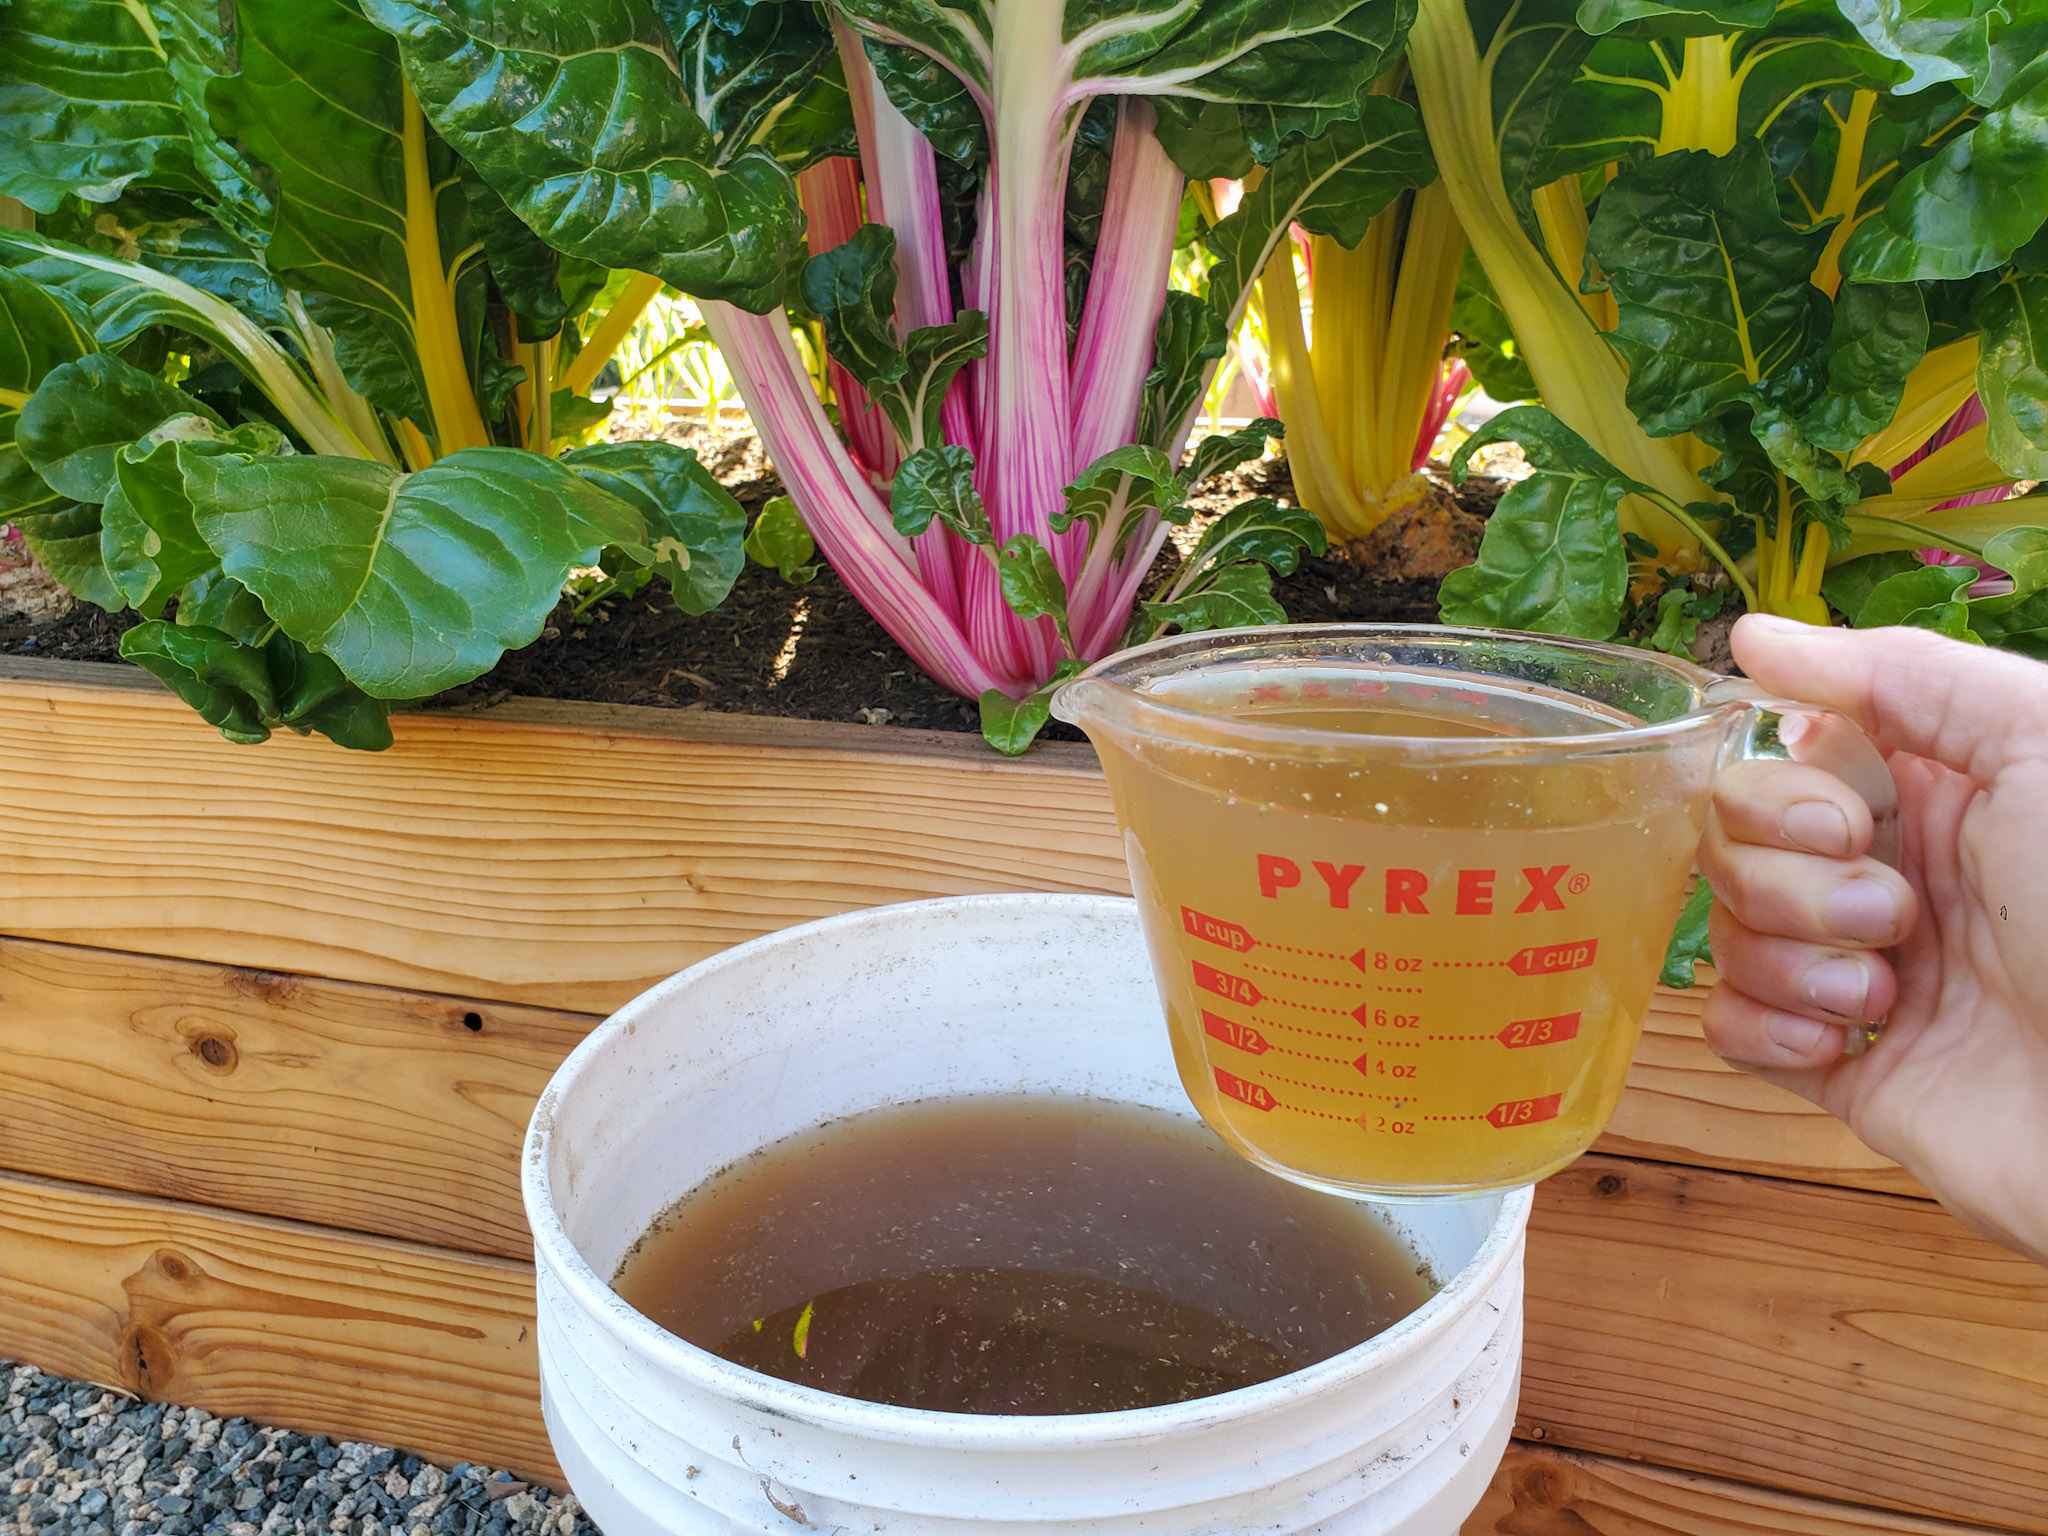
With our gentle fertilizing methods, we treat the soil in all of our raised beds the same from the start. Then, we provide heavy-feeding plants (e.g. tomatoes, corn, squash, melon, garlic) additional nutrients throughout the growing season as needed with homemade compost tea, dilute seaweed extract, alfalfa meal tea, or a side dressing of more slow-release dry fertilizer.
TIP: When looking at fertilizers, you’ll notice three numbers (such as 6-3-1). This is the NPK ratio, which shows the respective level of nitrogen, phosphorus, and potassium in the fertilizer.
Compost Options
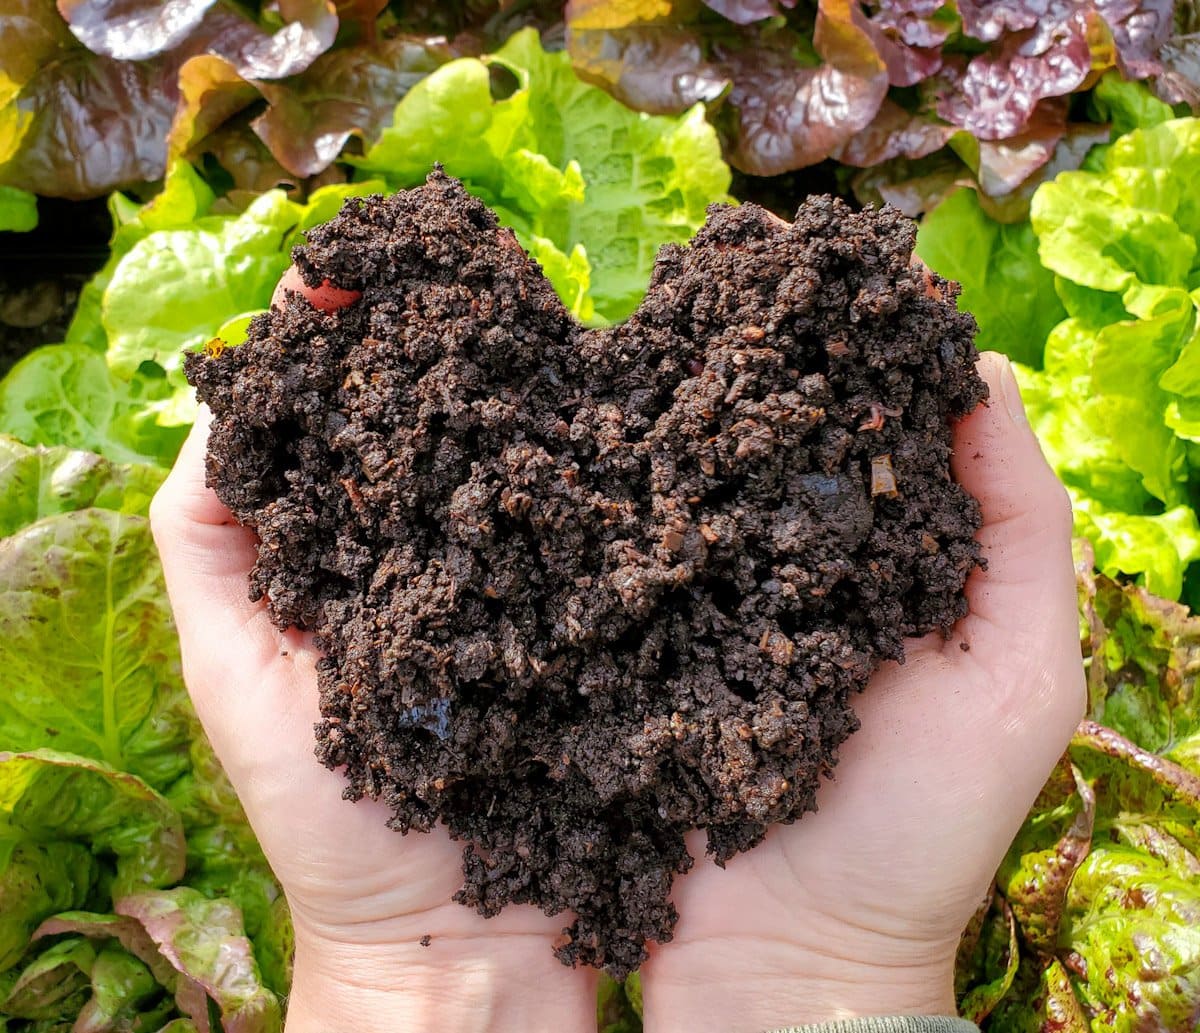
Compost is dark, crumbly, nutrient-rich material derived from decomposed organic matter such as food scraps, yard or garden waste, leaves, straw, cardboard, or certain animal manures. When added to soil, compost improves soil structure, fertility, moisture retention, and promotes healthy plant growth. We’ve used a wide variety of compost options over the years: bagged, bulk, homemade, worming castings, and more.
Worm castings (aka “black gold”) is a top favorite, which you can make at home with an easy DIY worm bin or purchase in bags. A little goes a long way! If you add worm castings to amend garden beds, you’ll only need a light sprinkle over the soil (not inches deep like other compost). Or, simply add a little handful to each planting hole like we do. It’s best to use worm castings in addition to other forms of compost, not as the sole amendment.
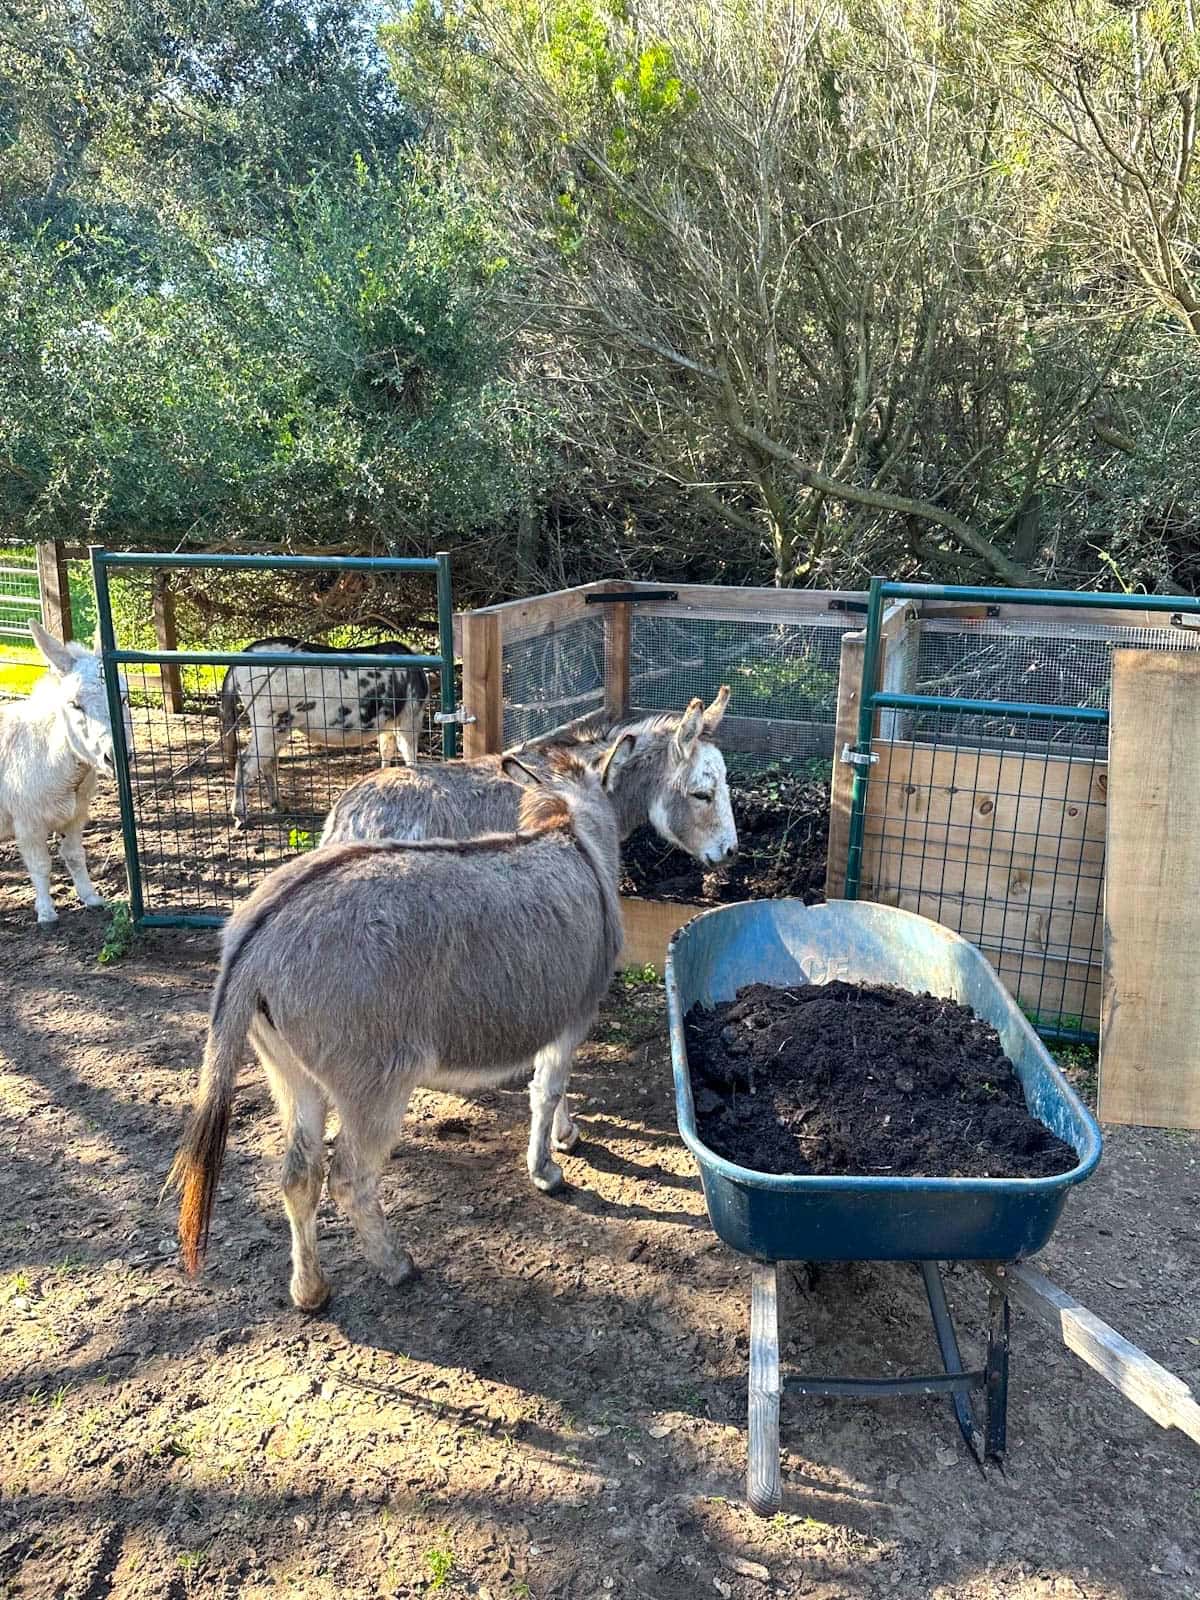
In addition to our worm bin, our current main source of homemade compost is well-rotted manure from our mini donkeys, mixed with some garden waste and chicken manure. It all sits to decompose in our DIY compost bin for over a year. If you do choose an animal manure-based compost, make sure that it is thoroughly aged! Many types of fresh animal manure can burn your plants.
If you can’t make your own, you should be able to find some good compost locally – either in bags or bulk. Often available through local landscape supply companies, bulk is most affordable for large projects. For bagged, I generally prefer the quality compost options at local nurseries or “grow shops” over big box stores.
Our favorite bagged compost is California-based Malibu’s Compost, made from certified organic dairy cow manure and biodynamic plants. (Yet it’s fairly spendy so we’ll usually add just a bag or two per bed in addition to another compost option.) Coast of Maine is a similar premium option for the east coast.
RELATED: Learn composting basics along with six different ways to compost at home here, including compost tumblers, worm bins, hot or passive piles, and more!
And that is how we turn over our garden beds and amend soil between seasons.
I hope you found this article useful and learned something new! Always feel free to reach out in the comments with questions, feedback, or just to say hi. Thanks for tuning in, and happy planting!
You may also enjoy:
- How to Plant Tomatoes: When, How Deep, Fertilizer, Pots & More
- Garden Companion Planting Chart, Plans, and Benefits
- Vermicomposting 101: How to Make a Simple Worm Compost Bin
- How to Practice Crop Rotation (Garden Benefits Explained)
- How to Build a DIY Compost Bin: Step-by-Step Guide with Photos


107 Comments
Christy
Thanks! Exactly the info I needed…happy Spring!
Aaron (Mr. DeannaCat)
So great to hear Christy, have fun growing!
Dani
Working on turning over my beds this weekend! I will definitely be focusing on doing a better job mulching this year because I grow primarily in raised beds and containers and last year was rough.
Aaron (Mr. DeannaCat)
Hi Dani, mulch does an amazing job at retaining soil moisture levels and adding organic matter to your soil. Good luck and have fun growing!
Donna Manthey
I just had my soil tested for pH and it is a bit high (7.9). What would you suggest for lowering the pH? It is said to add element soil sulfur in the fall. I also heard peat moss might be a quick fix for this year. Any suggestions would be greatly appreciated.
Thank-you!
Aaron (Mr. DeannaCat)
Hi Donna, according to University of Wisconsin Horticulture, soil pH that is higher than 7.5 may not be able to be reduced by amendments or fertilizers due to possible “free” calcium carbonate in the soil. I am assuming you have an in-ground garden? If so, it may be difficult to reduce the soil pH overall. Switching to a raised bed garden may be the better alternative long term as it will give you full control over the makeup of your soil.
You can try adding peat moss to your garden plot in hopes of it lowering soil pH but I believe it is something that takes time and isn’t a quick fix, same goes for adding garden sulfur. Maybe adding a good amount of peat moss in and around your plants during planting will help offset some of the high pH soil that you have to work with. Again, long term, it may be best to start gardening in raised beds where you won’t have to fight against too high of a pH. Hope that helps and reach out if you have any other questions, good luck!
Terry Burton
So helpful, thanks! I have four established raised beds and will be starting two new ones, so I’m glad you covered both situations. Question: I’ve added compost to loosened garden soil; planted seeds at proper depth; and then it’s okay to add more compost depth without the seeds being too deeply buried?
Aaron (Mr. DeannaCat)
Hi Terry, if you are direct sowing seeds, we would typically wait to add more compost/mulch until the seedlings have emerged and grown to a decent size so you can easily add more compost in an around the seedlings without damaging them. Hope that helps and have fun growing!
Wanda
Thank you for your information on fertilizing. I totally agree on all natural fertilizers. I see that I was fertilizing too early. Again….thank you.
Aaron (Mr. DeannaCat)
So great to hear Wanda, have fun growing!
Vanessa
Very helpful article. Question I have is about tomatoes. I grow tomatoes in large pots (with a lot of success). In the past, I have removed last year’s soil and added all new soil. I’m running out of places to put the old soil and want to try amending soil in the pot to replant tomatoes. Do you think this will work? I have heard you shouldn’t plant tomatoes in the same soil year after year.
Aaron (Mr. DeannaCat)
Hi Vanessa, yes you should be able to reuse your old soil without much issues. I think the main reason for not growing tomatoes in the same spot year after year is a crop rotation/pest issue like root knot nematodes or something along those lines. The thing with reusing older soil from containers is you want to get the soil active a month or so before you even plant your tomatoes into it, by that I mean possibly adding good compost or watering with compost tea, adding your dry amendments, possibly planting some fava beans or cover crop to grow for a few weeks to a month before chopping it all down at the soil line, possibly saving some of the greens to use as mulch/green manure and then planting your tomatoes into the container. This will take a little more of your effort as you will have to keep the soil moist and watered as if it already had a tomato plant in it, however, you should have a lot of success with your tomatoes that way. Hope that helps and have fun growing!
Julie
I am starting a raised bed for blue berry bushes. What recommendations do you have for a blueberry soil mix? My plan is 1-1-1 ratio of good local compost, aeration mix of sand with pumice and Peat moss.
I would also add some basalt for minerals. What are your thoughts and recommendations? Thank you
Aaron (Mr. DeannaCat)
Hi Julie, that sounds like a great idea for your blueberries, while they do like more acidic soil, I would just add around 1/4 cup of soil acidifying amendment (in addition to a balanced garden amendment) around each plant during the spring and fall and they should do really well for you. Hope that helps and good luck!
Deborah
Thank you for all of the great information. Do you apply just one of the meal fertilizers on a raised bed, or do you make a mix of a combination of the different meals? If not, since they vary in their composition do you use specific meals for specific plantings?
Aaron (Mr. DeannaCat)
Hi Deborah, it is typically easiest and takes up a lot less space to just use a general all purpose meal fertilizer like a 4-4-4 garden or vegetable fertilizer which typically have a combination of a number of different amendments. We have been using a combination of Down to Earth Bio Live along with Perfect Blend Organics 4-4-4 and we amend our raised garden beds before our spring/summer plantings and once before our fall/winter plantings. Hope that helps and reach out if you have any other questions, good luck and have fun growing!
Deborah
Thank you!
Kim
This was so incredibly thorough and exactly what I needed, thank you so much!!!
Aaron (Mr. DeannaCat)
Hi Kim, glad to hear you found it so helpful, good luck and have fun growing!