

How to Make Sun Dried Tomatoes in a Dehydrator or Oven
Looking for new ways to preserve tomatoes? Come learn how to make easy sun dried tomatoes using a dehydrator or oven (with optional fresh herbs) along with tips on how to best store them. These chewy, savory dried tomatoes are packed with intense flavors of summer that you can literally bottle to enjoy for many months to come! We love to add them to homemade sourdough bread, egg dishes, pasta, pizza and more.
You may be wondering: what about the “sun” part? Unfortunately, it’s very challenging to properly dry tomatoes under the sun alone. Thick, juicy tomatoes readily mold if they don’t dry fully or fast enough. But guess what? Most store-bought “sun-dried” tomatoes are actually dried in commercial ovens or dehydrators too!
NOTE: This post was originally published in August 2019 but has since been significantly updated.
Would you like to save this?
RELATED: If you need more ideas to preserve tomatoes, don’t miss our easy roasted tomato sauce (can or freeze), homemade ketchup recipe, or this guide on freezing tomatoes whole.
Ingredients and Supplies
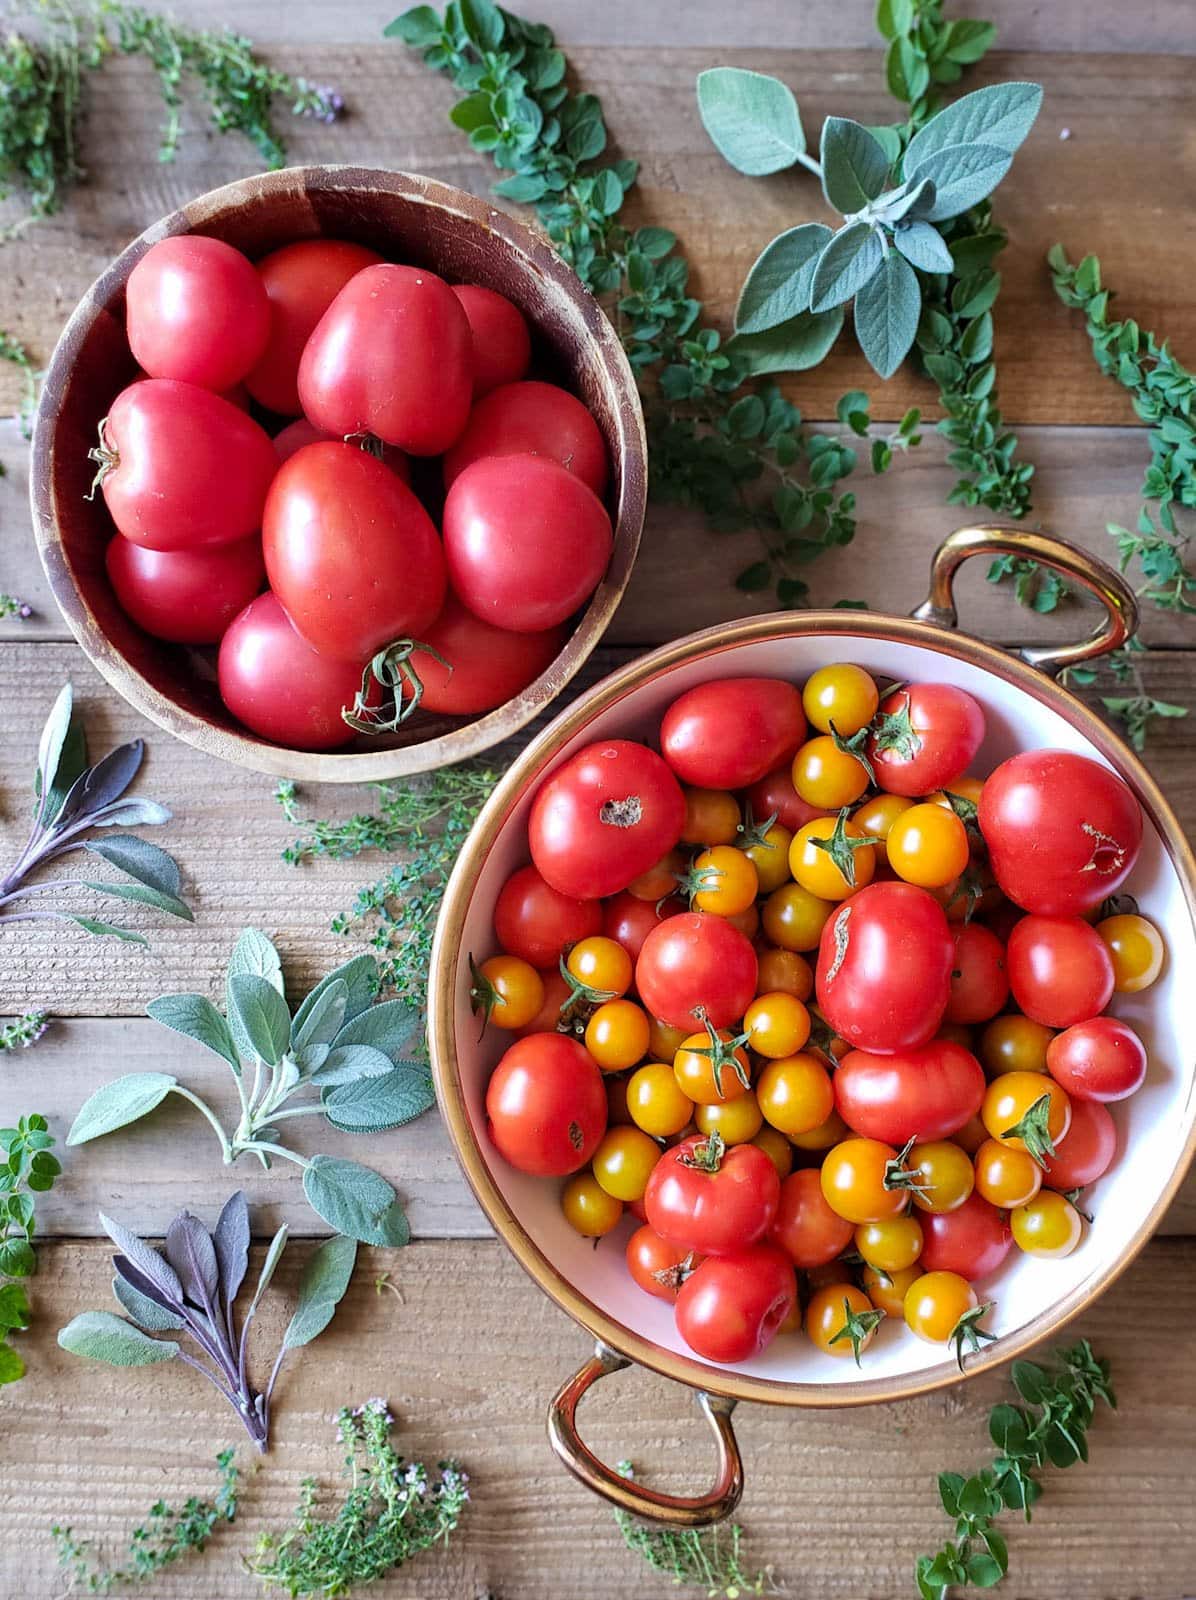
- Fresh tomatoes. You can dry any kind of tomatoes you have, including cherry tomatoes. The key will be cutting them into similar size pieces so they dry evenly.
- A food dehydrator or oven. (Be forewarned that drying tomatoes in the oven will take several hours.) We prefer to make sun dried tomatoes in our favorite food dehydrator since it effectively and fully dries the tomatoes without any risk of burning, and doesn’t require a watchful eye (or heating up the whole house) like the oven method does.
- Optional fresh herbs. We often use a combination of thyme, oregano, sage and/or basil from the garden. The addition of herbs make the sun dried tomatoes taste a lot like pizza!
Expected Yield
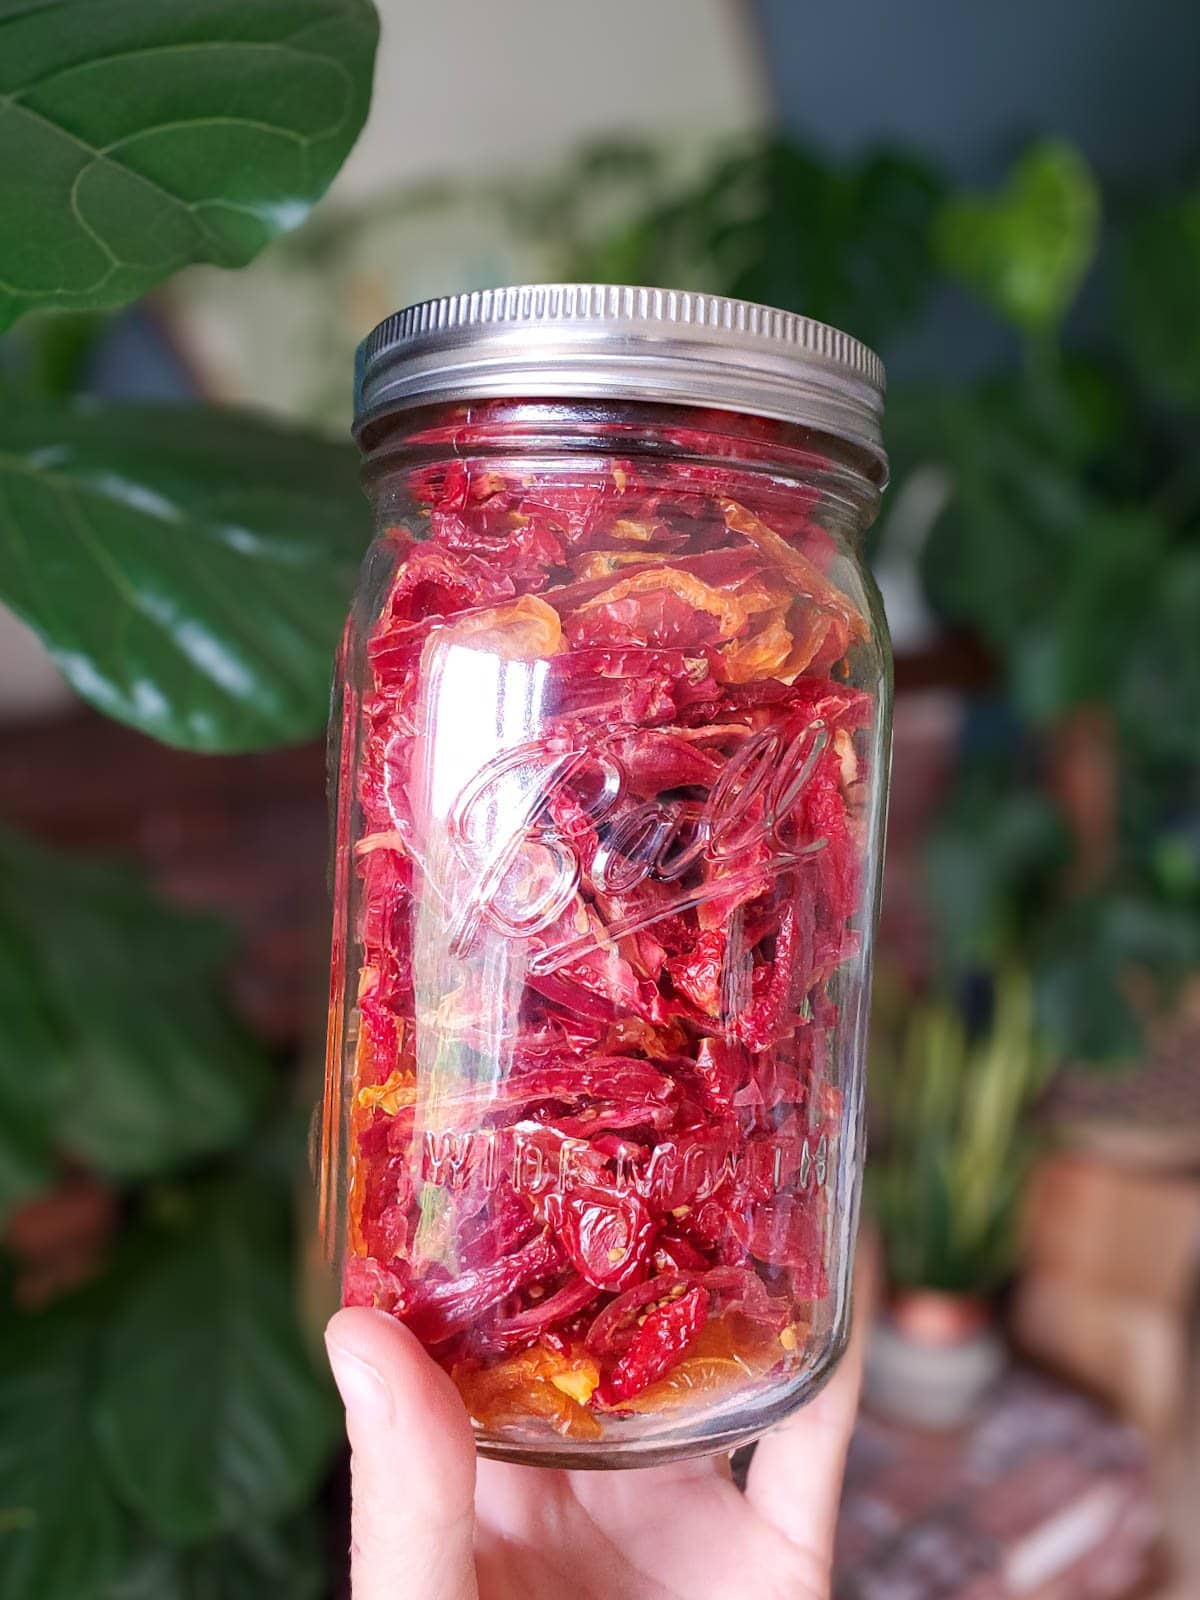
In this example, we started with about 4 pounds of fresh garden tomatoes and ended up with just under one quart of sun-dried tomatoes.
Drying tomatoes shrinks and condenses them significantly… but that’s not necessarily a bad thing! That’s something I actually love about dehydrating food as a preservation method: how little pantry space the finished product takes up. Plus, the tomato flavor becomes exponentially more rich and concentrated as they dry too.

Instructions
1) Prepare the Tomatoes
- Start by washing your tomatoes, and then gently pat them dry or allow them to air dry.
- Remove the stems and cut out the tough center core (if needed).
- Next, cut them into small even wedges such as quarters, sixths or eighths (depending on the size of your tomatoes). I find bite-size wedges dry best compared to wide flat slices. Cut cherry or grape tomatoes in half. A small serrated knife is the easiest for cutting tomatoes!
- The goal is to have most of the tomato pieces a similar thickness so they’ll dry evenly. The thinner you cut them, the faster they’ll dry – but also the more puny or brittle they can be. For thick chewy sun dried tomatoes, leave the pieces thicker (but no more than 1/2 inch thick).
2) Add Herbs (Optional)
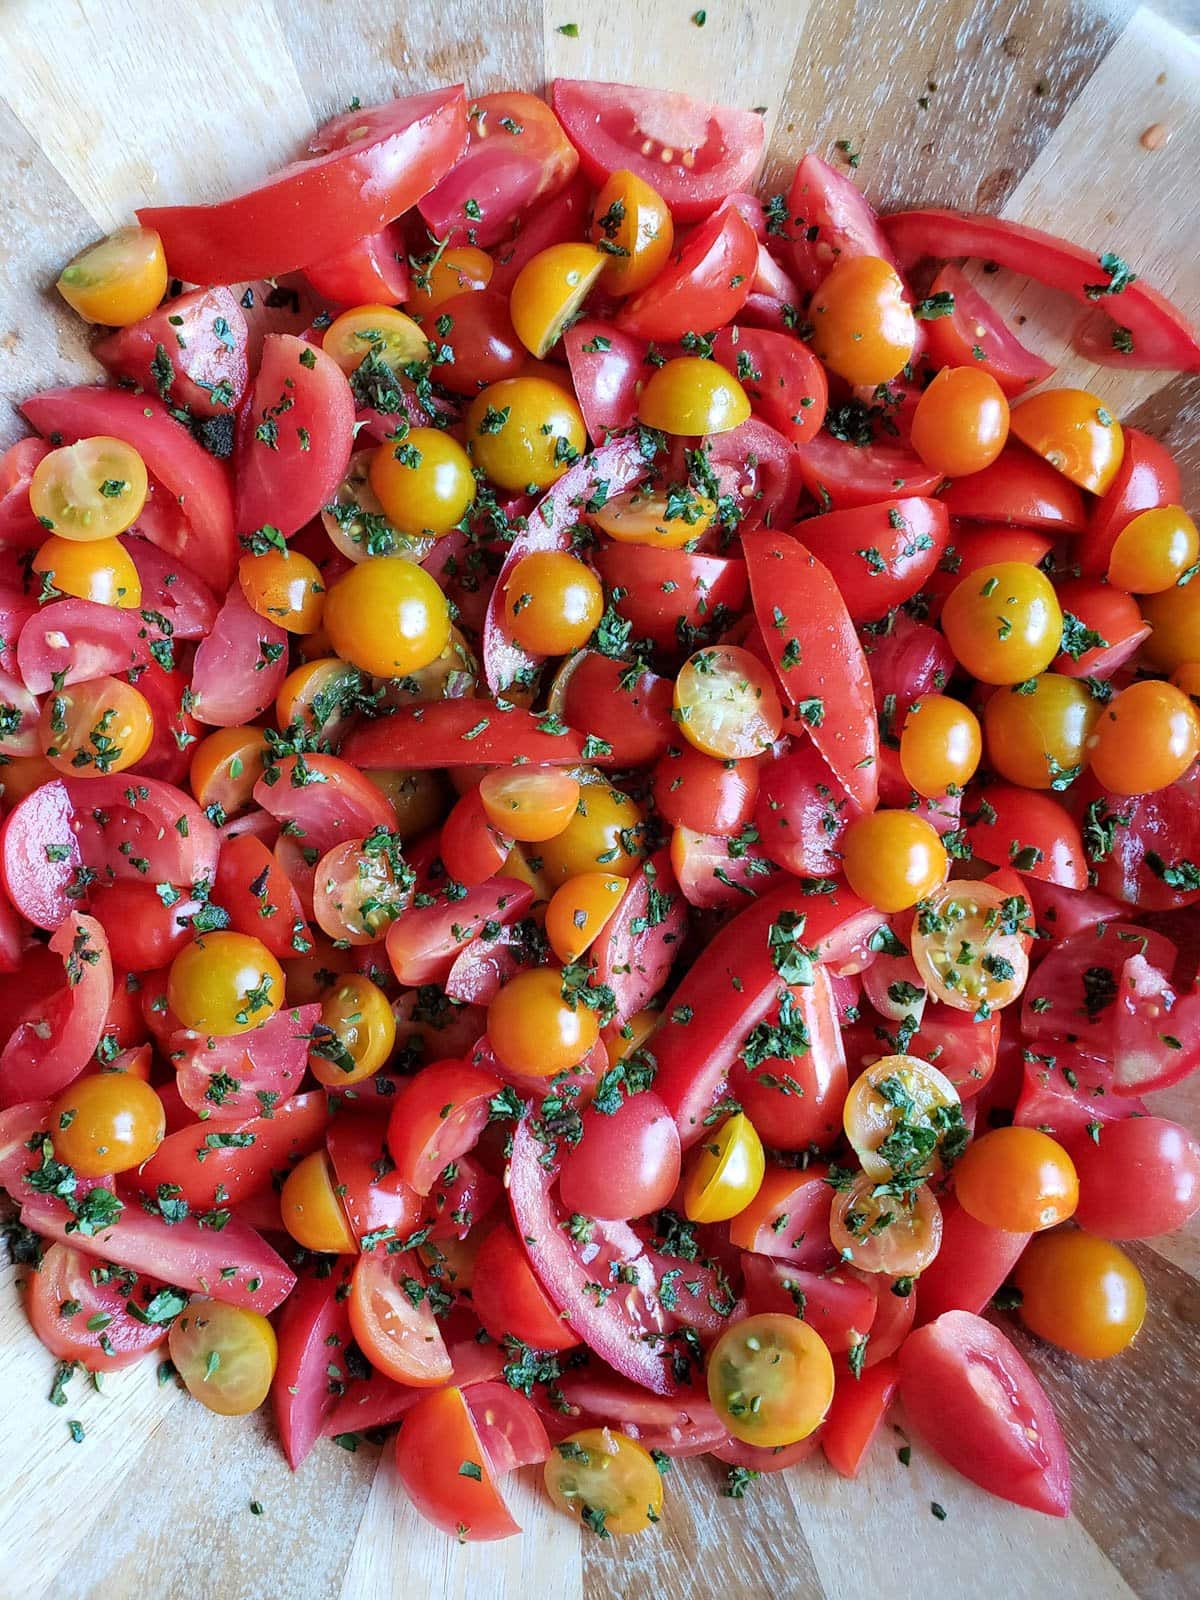
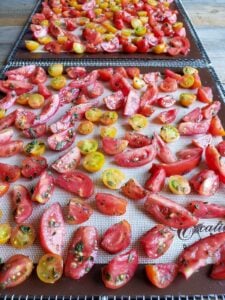
- If you’re going to add fresh herbs, first place the cut tomatoes in a wide shallow mixing bowl.
- Next, wash, gently dry and chop your herbs of choice into small bits. I love any combination of oregano, thyme, basil, and sage.
- Sprinkle the herbs over the tomatoes, gently tossing as you go to evenly mix and coat them. We don’t usually measure, but I think we use about 1 heaping tablespoon of herbs for every 2 pounds of tomatoes. (Or just eyeball it.)
3) Dry Tomatoes
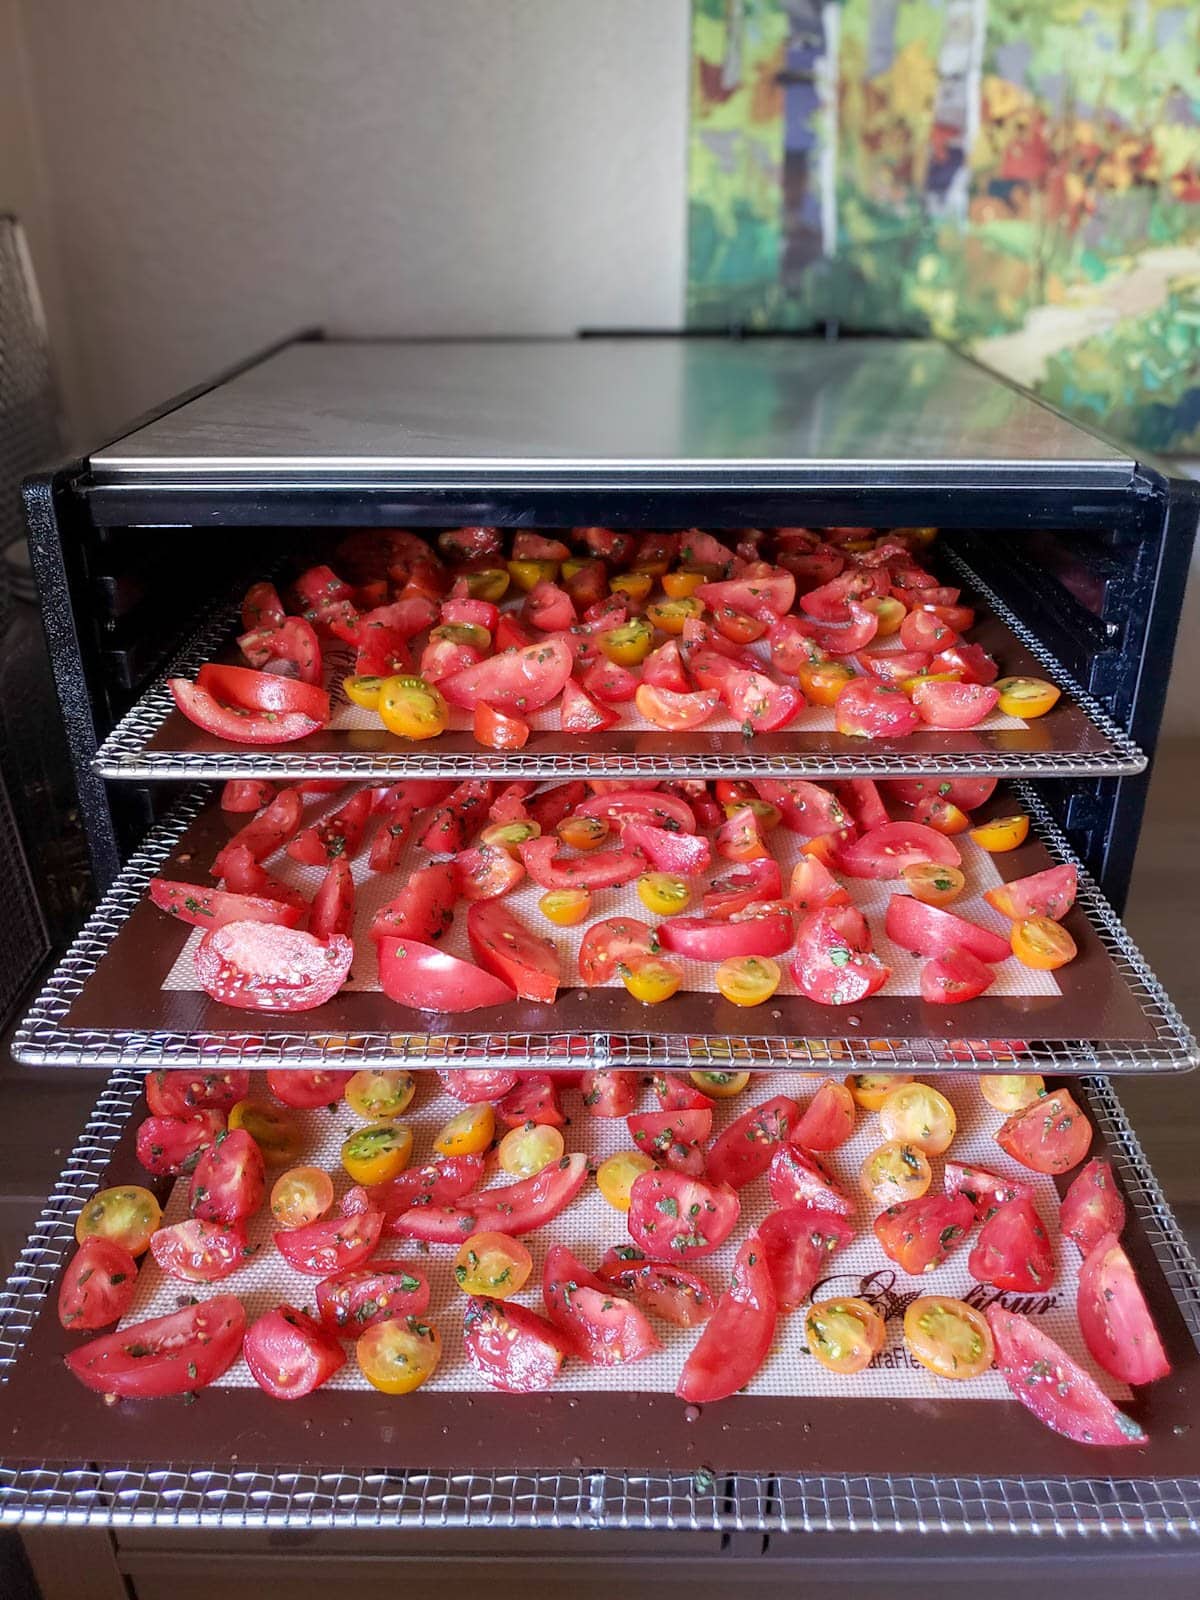
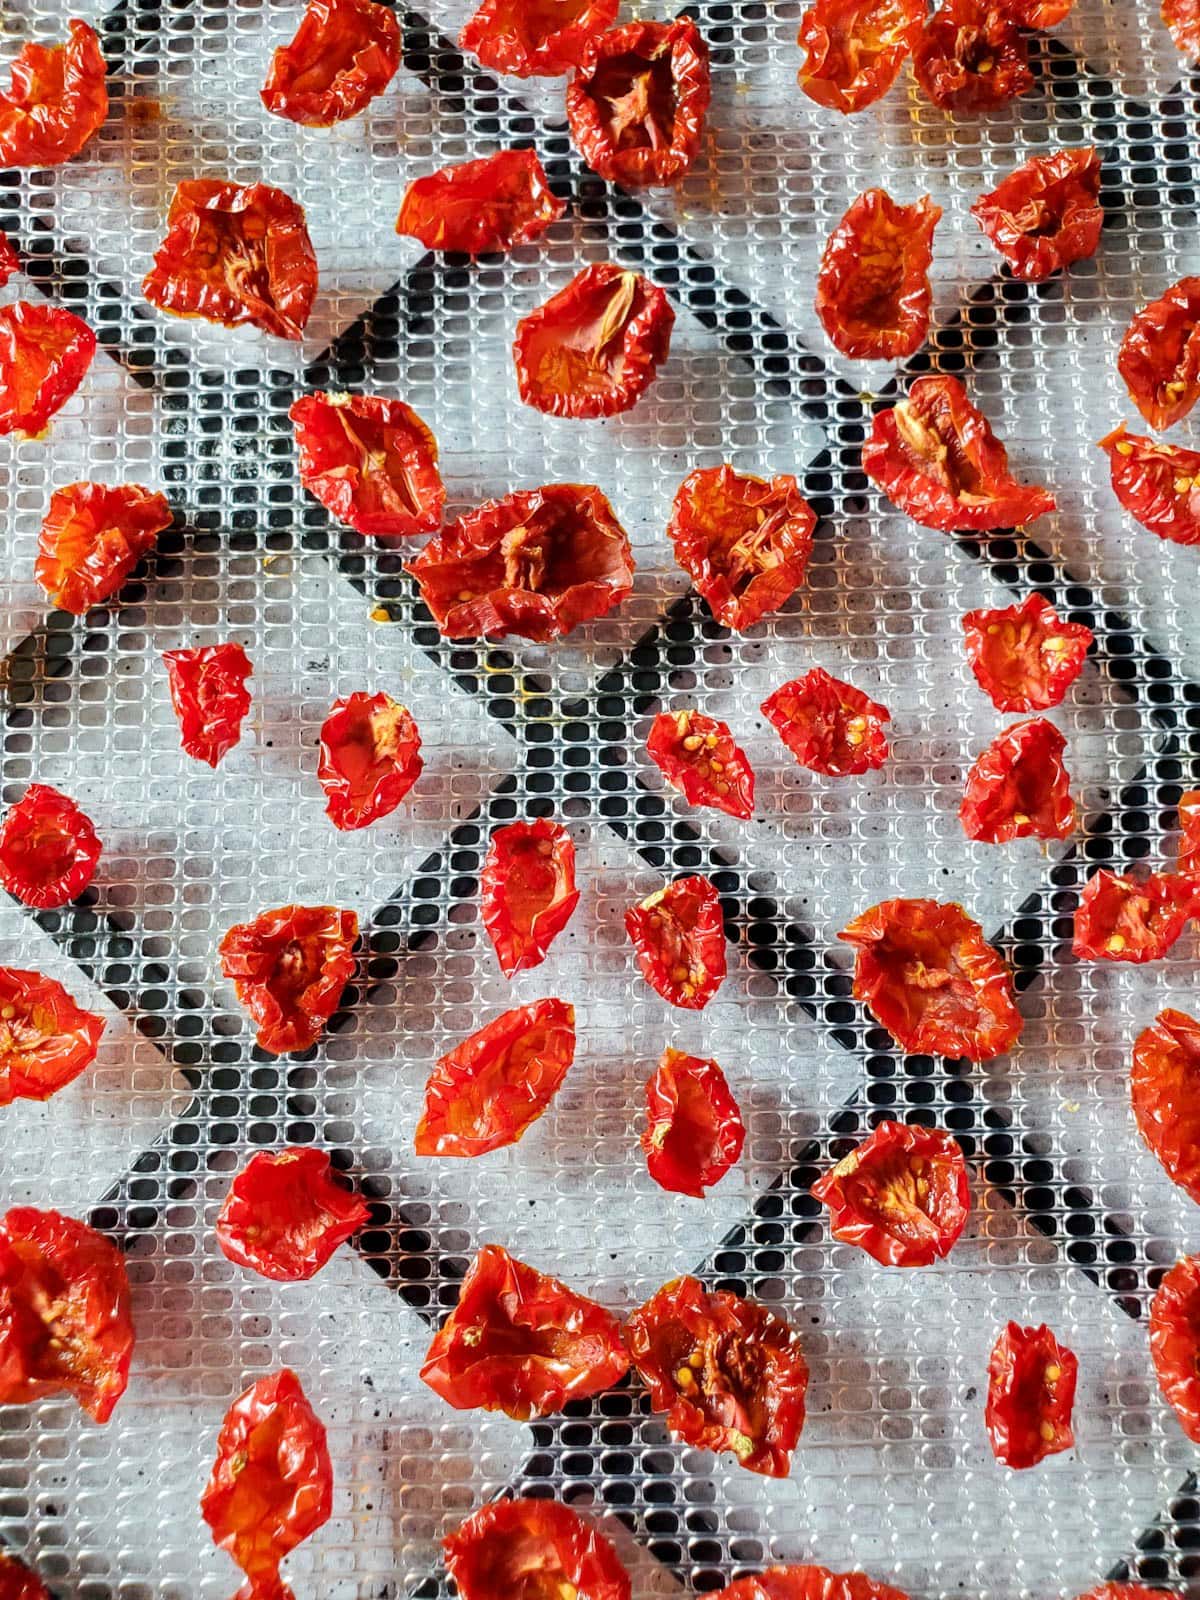
- Spread the cut tomatoes out on dehydrator trays or baking sheets lined with parchment paper in a single layer, not overlapping or touching. We don’t need any extra juices or seeds that may have come loose or collected on the cutting board (or mixing bowl) – leave those behind.
- Place the wedges with the skin-side down if possible, which tend to stick to the trays less than the fleshy parts. Since sun dried tomatoes can get sticky, we sometimes use our silicone dehydrator tray liners or parchment paper below them – though not necessary (and may increase drying time since it reduces airflow some).
- In a dehydrator, dry the tomatoes on 125 to 130°F. In the oven, set the temperature to 200 to 225°F. In the oven, it’s also recommended to rotate the trays or even flip the tomatoes halfway through.
- The time it takes depends on the method you use, moisture content and size of your tomatoes, ranging from 2 to 8 hours in the oven and up to 24 hours in a dehydrator (though the average is around 8 to 12 hours). See notes on how to tell when they’re “done” below.

4) Assess Doneness
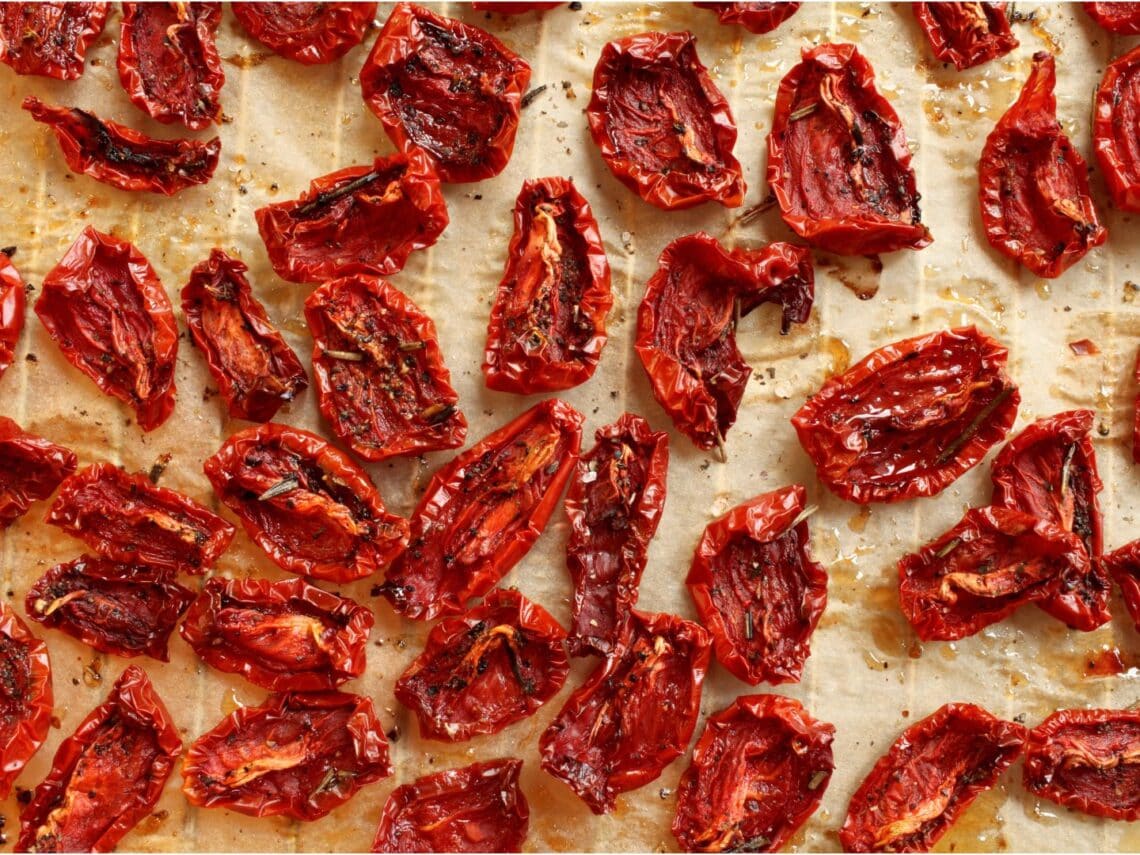
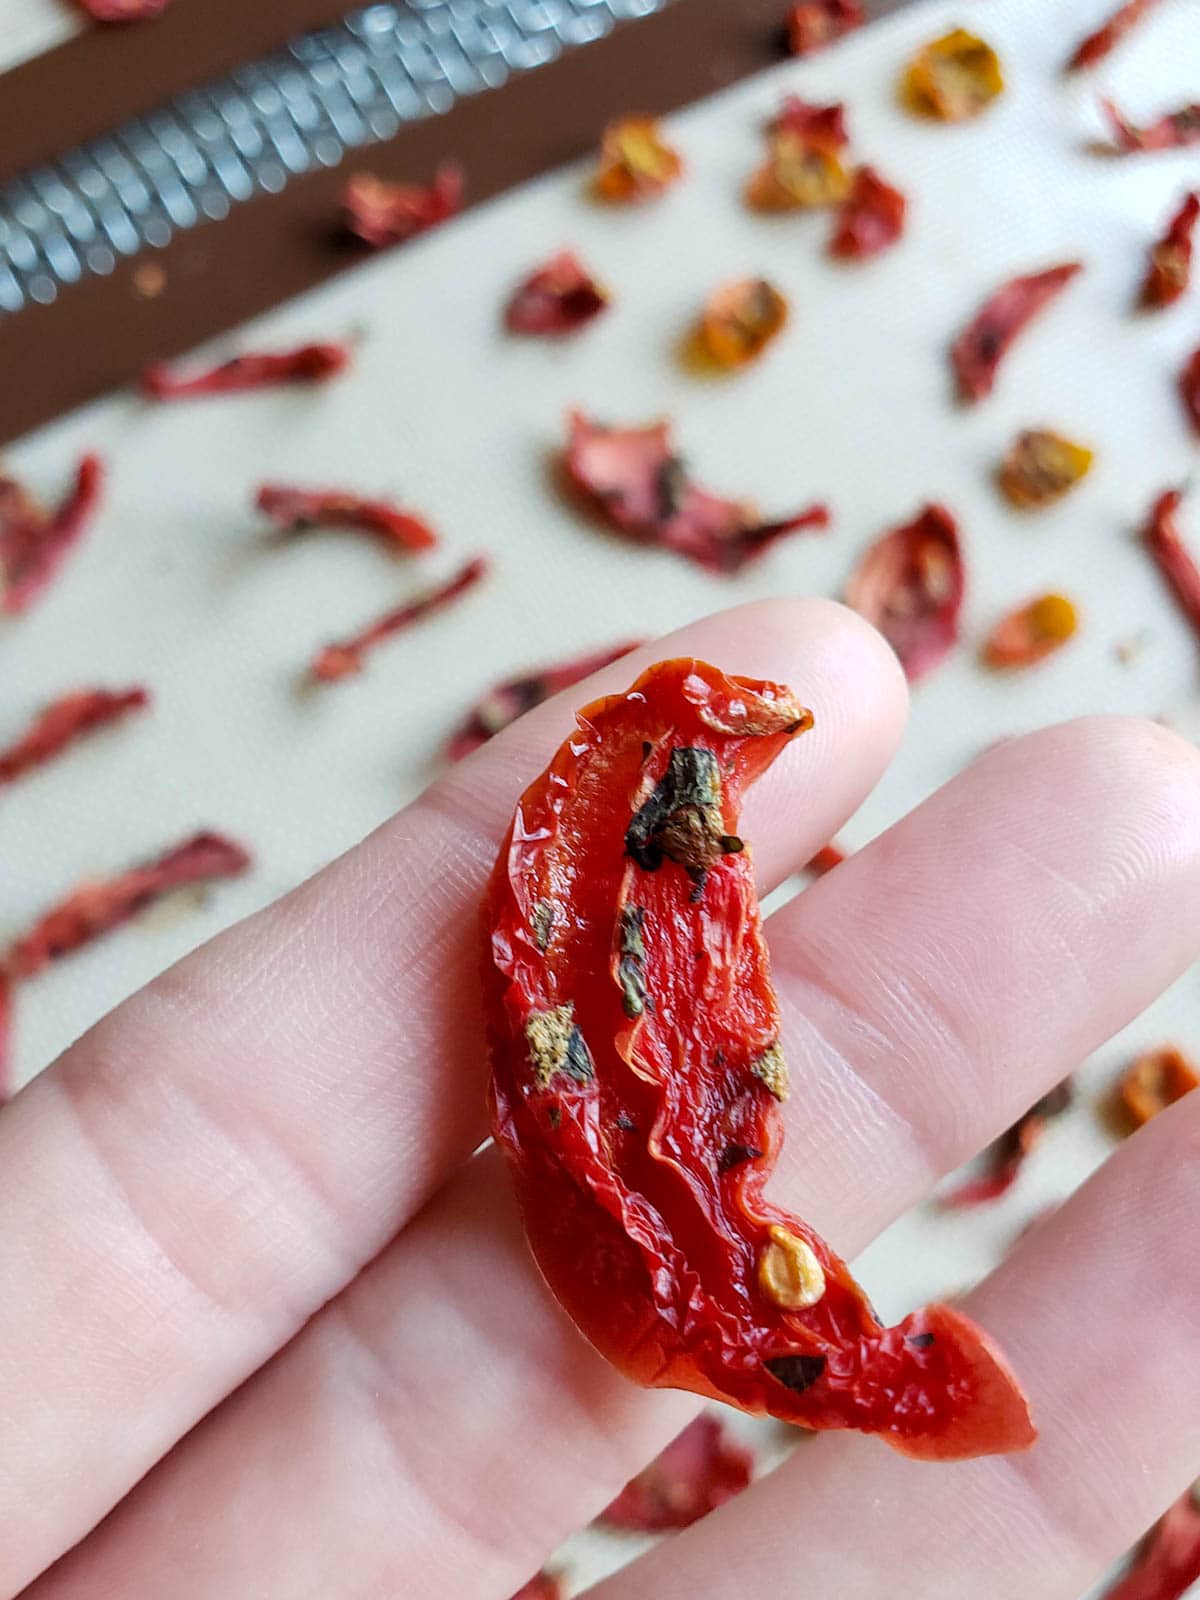
- Sun dried tomatoes are finished drying when they’re shriveled, dry to the touch (no longer wet or squishy), but are still chewy and pliable.
- The exact time or level of dryness depends on your personal preference for texture, which will also impact their shelf life potential.
- The longer you dry sun dried tomatoes (the more moisture that is removed), the longer they’ll last in storage. However, they’ll also get increasingly hard, crunchy and brittle. Shorter drying times will result in more supple, chewy sun dried tomatoes, though they could also go bad (mold) in storage faster if they’re too wet. It’s a bit of a goldilocks situation – trying to get them just right.
- When I check on the tomatoes as they’re drying, I usually find pieces that finish drying fasters than others – so I simply remove those from the dehydrator while the others continue to dry.
What if I dry the tomatoes too long?
If your tomatoes end up a little more crispy than you were expecting, don’t fret! Depending on how you use them, sun dried tomatoes do an excellent job at reabsorbing moisture and plumping back up later. For example, if you add them to sauces, bread dough, quiche, sautéed vegetables, or other meals that have some moisture to spare.
You can also put crunchy sun dried tomatoes in a small bowl of water or oil for a couple hours before use to re-soften them.

How to Store Dried Tomatoes
Transfer your homemade sun-dried tomatoes to an air-tight container for storage, such as a mason jar with a tight-fitting lid or glass container with a flip-top lid and gasket. We love these stainless steel storage lids with an internal silicone gasket, which provide a better seal than a traditional two piece mason jar lid.
Store sun-dried tomatoes in a cool, dark, dry location such as a pantry, root cellar, or cool cupboard. If thoroughly dried, they do not require refrigeration – though it can help extend their shelf life.
Proceed with caution. While it’s a popular method that many people enjoy, storing dried tomatoes in olive oil could create the perfect anaerobic environment for botulism to grow – especially if your tomatoes have any moisture left in them. The National Center for Home Preservation advises against it, stating that botulism can grow if just one droplet of water is present.
Shelf Life
Homemade sun dried tomatoes should stay good for several months or even up to a year. The exact shelf life depends on storage conditions and just how much they were dried.
We have stored dehydrated tomatoes at room temperature for well over 6 months without them molding or spoiling. However those were pretty dry, so if yours are more supple and chewy, you may want to store them in the refrigerator to better preserve them.

Ways to Use Sun Dried Tomatoes
Sun dried tomatoes add a wonderful bite of flavor and texture to a wide variety of meals, including pasta (or zoodles), sandwiches, pizza, and egg dishes like quiche, frittata, scrambled eggs or omelettes. They’re also fantastic in salads, including green salads or other cold salads like quinoa, rice, pasta, or potato salad.
We love to tuck sun dried tomatoes into homemade sourdough bread, simply by adding them to the dough during the first stretch and fold. They rehydrate and plump up nicely given the time to rest in the wet dough!

Enjoy!
Easy peasy. Now you have your very own homemade sun dried tomatoes to enjoy for months to come. Did I miss any of your favorite ways to use them? If you enjoyed this post, please consider leaving a review or comment below!
If you’re into dehydrating, you may also like:
- How to Make Homemade Garlic Powder
- Preserving Basil: How to Dry Basil in a Dehydrator or Oven
- Preserving Onions: How to Make Onion Powder
- How to Make Homemade Chili Powder in 4 Simple Steps
- Dehydrating Apples: How to Make Apple Chips in a Dehydrator, Oven or Air Fryer

How to Make Sun Dried Tomatoes (Oven or Dehydrator)
Equipment
- Food Dehydrator, or Oven
Ingredients
- Tomatoes, any variety of choice
- Optional: fresh herbs such as sage, oregano, thyme, basil and/or rosemary
Instructions
- Wash, core, and cut the tomatoes into small wedges – in halves, quarters, sixths, or even eighths depending on size of the tomatoes, aiming for similar thickness so the pieces dry evenly. Cut cherry or grape tomatoes in half.
- Optional: wash and finely chop the fresh herbs. We use approximately 1 heaping tablespoon of chopped herbs for every 2 pounds of prepped tomatoes, though you can simply eyeball it too.
- Add cut tomatoes and fresh herbs into a mixing bowl, and lightly mix to thoroughly combine the ingredients.

- Place cut tomatoes in a single layer (not overlapping) and skin side down on dehydrator drying racks, on a baking sheet lined with parchment paper. Leave any extra juices or seeds behind on the cutting board or mixing bowl.
- In a dehydrator, dry the tomatoes on 125 to 130°F. In the oven, set the temperature to 200 to 225°F. In the oven, it’s also recommended to rotate the trays or even flip the tomatoes halfway through.
- The time it takes depends on the method, size of tomatoes, and desired end texture – ranging from 2 to 8 hours in the oven and up to 24 hours in a dehydrator (though the average is around 8-12 hours).
- Sun dried tomatoes are finished drying when they’re shriveled, dry to the touch (no longer wet or squishy), but are still chewy and pliable. The longer they dry, the longer they'll last in storage – but also become increasingly crunchy and brittle. Shorter drying times will result in more supple, chewy sun dried tomatoes but can also reduce shelf life.
- Once dried to your liking, store in an airtight container with a lid in a cool, dry, dark location (or in the refrigerator for optimum freshness). They should last for several months to a year.


42 Comments
Donna Hein
I have been dehydrating tomatoes for years, in fact I have a dehydrator full of them right now. This year I decided to sprinkle them with my new favorite seasoning……Trader Joe’s Everything Bagel Seasoning. They are to die for!
Linda
I’m wondering if you have any suggestions or tricks for dehydrating tomatoes regarding the length of time it takes. I’ve done cherry tomatoes before and it takes about 12 hours. I don’t want to leave the dehydrator on overnight, nor get up in the middle of the night to check them. I try to start them early in the morning but sometimes that’s not convenient either. Wondering if you any tips. Thanks!
Aaron (Mr. DeannaCat)
Hi Linda, it really depends on the type of dehydrator you have and how warm of a setting you use to dry them. This batch we made had a variety of sizes and it took about 18 hours. The more flesh the tomato has, the longer it will take to dry. Hope that helps and enjoy!
Daniel Schulz
These things taste great as snacks – little tomato chips.
Paula
I will be using this recipe with the herbs and a dehydrator. I plan to fill each jar with high quality olive oil. The recipe says that they would last in the refrigerator for several months to a year. I will be making more jars than I have refrigerator space for. Can I water-can the jars for a longer shelf life? I’ve never water-canned jars filled with oil before. Thank you for any advice!
DeannaCat
Hi Paula – No, from what I understand it is not safe to home can oil-encased products like this. The oil and inadequate acidic content makes a perfect environment for botulism. Is there a reason you want to submerge them all in oil? We leave our dried tomatoes in a jar by themselves in the pantry and they do just fine there. Maybe you could do just a couple jars in oil for the fridge, and leave the rest plain out at room temp? Good luck!
Rachel
Has anyone made these with the instant pot dehydrator? If so, how long and what temp??
Riley Bianchi
Can’t wait for all my tomatoes to ripen so I can try this out! Seems so simple and delicious!
Krystie
I love these! Do you store them in oil? I have bought some in the store stored in olive oil
McKennae
Loveeee these! I had tomatoes flowing out of my ears so I decided to give this a try. I used purple sage, basil, and rosemary and the taste is incredible! My dehydrator is quite old and doesn’t have a setting for temp, but I just kept my eye on them and kept rotating the trays and they came out perfect. Going to use them in my bread this week 😍
DeannaCat
Awesome! And yes, make do with what you have! Perfect. I am glad they worked out so well for you. Enjoy that bread!
Sue
These sun dried tomatoes are delicious and so easy. Love the recipe so much I am trying another batch. Thank you for sharing!
Sarah
Ok, I tried both ways and here is my report:
First I tried the oven method it took a good 6-7 hrs and when done they look kind of burned. They aren’t “burned” but definitely heading to that side. It seemed to take forever before they were tacky and sun-dried like. They have a very deep, deep red color.
After that, I decided to finally take the plunge and buy a dehydrator. I bought a cheap $40 one- not wanting to break the bank on another appliance just yet. Plus, I’ve wanted one for years and I figure if I’m going to work hard to grow all this stuff, I need to find a way to preserve more of my harvests (thanks for ALL your tips by the way… I’m going to grow so much more next year just to make all your yummy stuff…)
Anyway- the dehydrator was the way to go. Not only were the same tomatoes done in less amount of time, they retained their beautiful red color and seem a lot ‘fresher.’ If I could attach a picture I would. The color difference is amazing.
So to anyone who is tempted to try, if it’s in your budget to get a dehydrator, I say that’s the way to go. Plus, there are so many other uses for it (Deanna has a lot of these recipes!) such as dried apples, onion powder, drying herbs, etc…. I really think it pays for itself. OR if you can’t/don’t want to buy one- borrow someone’s! Ask around, it’s one of those appliances that sit around and people only use every now and then.
Thank again Deanna!!
DeannaCat
Hey Sarah! Thanks for being the guinea pig to try both and compare, since that is really the only true way to tell the difference! And I certainly agree – a dehydrator is well worth the investment, for any gardener, or even anyone interested in eating with the seasons and preserving local food. I never want anyone to fell pressured into spending money or needing more “things”, so I always try to provide the oven alternative in this tutorials, but… let’s just say, they make food dehydrators for a reason 🙂 Thanks again for the feedback!