

Preserving Garlic: How to Make Homemade Garlic Powder

If you find yourself blessed with an excess amount of fresh garlic, whether from a homegrown harvest or a local farmer friend, I highly suggest making your own dried garlic powder! This is our favorite and most versatile way to preserve garlic. Garlic powder is easily incorporated into everyday meals, or other fun seasoning blends like garlic salt or pepper.
This simple guide will show you how to make garlic powder in a dehydrator or in the oven. It’s easy to do, and the flavor of homegrown garlic powder is unmatched! Really. It makes store-bought powder seem as tasty and interesting as chalk.

Would you like to save this?
Disclosure: Homestead and Chill is reader-supported. When you purchase through links on our site, we may earn an affiliate commission.
RELATED: Want more garlic tips? Learn how to grow garlic in this guide and get essential tips on when and how to harvest garlic (plus curing and storage best practices). Or see this post with five easy ways to preserve garlic, including our delicious fermented garlic honey recipe!
What kind of garlic should I use?
You can use any kind of garlic to make garlic powder! Yet if you’re growing your own, keep in mind that hardneck garlic varieties have a shorter shelf life than soft neck varieties. They’ll usually start to go soft or bad within a few months after harvest, whereas soft neck types can last up to 10 months if cured and stored properly. That said, we primarily use our hardneck garlic for preserving since it needs to be used quicker and keep our softneck garlic for fresh eating.
We also like to make garlic powder using green garlic (aka spring garlic) – immature or young garlic that does not otherwise last in dry storage like normal garlic bulbs do. You can even use the tender green garlic stems!

How to Make Garlic Powder
Supplies Needed
- Garlic
- A good blender, food processor, or coffee grinder. We use a Vitamix.
- Food dehydrator or oven – pros/cons of both explained below!
- Airtight storage containers, such as mason jars.
- Optional: garlic peeler, food processor, and/or gloves
Oven-Drying Vs Dehydrator
We choose to dry our garlic in a food dehydrator instead of the oven, but will include instructions for both ways below. Using a dehydrator, it’s so easy to simply “set it and forget it”. No stirring and fussing over the hot oven needed. There is also zero risk of burning it, and ensures even and consistent drying.
More importantly (for us), using a dehydrator allows us to dry garlic while also preserving its nutritional value. Garlic has stellar anti-bacterial, anti-fungal, immune-boosting properties, but when food is exposed to heat over 118°F, it will reduce beneficial nutritional properties, antioxidants, and active enzymes. Therefore, we dry our garlic around 100-110°F

INSTRUCTIONS
1) Peel the Garlic
Remove the individual cloves from the head of garlic. Next, remove the papery skins from each clove.
This can be tedious, and the garlic’s natural oils can also potentially burn your fingers, so use caution if you’re working with a large amount. I learned this the hard way! Consider wearing food prep gloves if you have sensitive skin. (Or if you don’t want your fingers to smell like garlic for days.)
One huge perk of working with green garlic is that there are no papery bits to worry about peeling. Simply slice and dry!
Tips to make peeling garlic easier:
- Use one of these silicone garlic peeling tube things. People swear by them!
- Peel them under running water
- Using 2 similar size bowls, put them together to make a dome around the garlic. Shake the heck out of the cloves to loosen their skins, and then peel. A large jar would also work for smaller amounts.
- Gently crush the cloves with the flat side of a wide knife before peeling them. However, note that if they become too smashed, it will be a bit more difficult to cut thin even slices.
2) Thinly Slice the Garlic
Once the garlic is all peeled, cut the cloves into thin slices. The thinner you go, the quicker they will dry. Furthermore, the more consistent the cuts, the more evenly they’ll finish drying together. We typically aim for about ⅛” thick, if I had to measure – which I don’t!
When working with green garlic, they can be cut a tad thicker since it is more tender and will usually dry faster. For green garlic stems, you can either cut them into rounds or long slender pieces.
As you go, lay the slices of garlic out evenly on your food dehydrator trays. You can pack a large amount on to each tray! The pieces can touch side to side, but make sure they aren’t overlapping or on top of each other. We need space for good air flow between them.

Alternative Method: Food Processor + Tray Liners
Thinly slicing all the cloves can be laborious and time-consuming. Over the years, we’ve switched to chopping our garlic in a food processor. Then use silicone dehydrator tray liners or parchment paper to line your dehydrator trays, dump the chopped garlic onto them, spread it into a single layer, and dry them that way.

3) Dehydrate the Garlic
Load up your food dehydrator with its trays full of garlic, and turn that puppy on! We choose to dry ours on about 100-110°F. Again, this is because we don’t want to overheat and essentially “cook” the garlic, denaturing its beneficial enzymes and antioxidants. If you aren’t overly concerned about that, you can use a warmer setting (around 130°F) to get it done much faster. It will taste just as good!
The time it takes to fully dry will vary. It depends on your dehydrator or oven, how you prepared and organized the garlic, and the temperature you use. When we used our old Nesco dehydrator, it took almost 3 days on 110°F to completely dry. Our newer Excalibur dries it in about half that time, and could easily do it in less than 12 hours on a higher heat setting.
Keep reading to know how to tell when it’s ready!

Drying Garlic in the Oven
To make garlic powder in the oven, follow the same prep steps outlined above – and then spread the garlic out in a thin layer on a baking pan covered with parchment paper. Bake at 140°F (or lower) until it is completely crunchy dry, stirring and re-spreading the garlic bits every 30 minutes as you go. It will take several hours hours.
4) Check Doneness
Before removing the garlic from the dehydrator or oven, check to make sure they are totally dry! If you try to break them, the thin dry slices should snap and crack crisply in half, and not bend or be malleable at all. The texture tells you if all the excess moisture has been removed. If they’re still bendy or soft instead of crunchy, keep on drying!
If any moisture is left, your powder will clump up later in the storage container.
You may find that some are done and some are not. In that case, you could either pull out the crispy ones and continue to dry the others, or just keep drying it all. We only separate them partway through like this when we’re making green garlic powder, because the stalks tend to dry much faster than the bulb portion.

5) Time to Grind
Next, it is time to grind your now-dry garlic into a fine powder. This can be done in a good blender, food processor, or coffee grinder. I say “good” blender, because some may not be able to work it into a fine powder very well. In a Vitamix, the result is a super fine, fluffy powder. Pulse and grind it until all chunks seem to be broken up.


6) Sift
Even the best machines may not be able to successfully grind every last hard bit of dried garlic. Our Vitamix leaves a few little garlic “rocks” behind sometimes. (I call them this because they can be damn hard, so I wouldn’t want to accidentally bite into those.) Therefore, we usually sift our garlic powder before putting it in its final storage container.
Position a fine-mesh strainer over a bowl. Next, gently pour your ground garlic powder into it, a little at a time if needed. Make sure to scrape and collect any powder that has collected in the lid or sides! That is valuable tasty stuff too. Shimmy and shake the sifter, separating out any leftover hard rocks.
I usually run the collected garlic rocks back through the Vitamix once or twice again, and get a surprising amount more powder out of very few of them! Sift and repeat until you’re satisfied. We skip this step for green garlic because it is so tender in the first place (shown in the photo above).
How to Store Garlic Powder
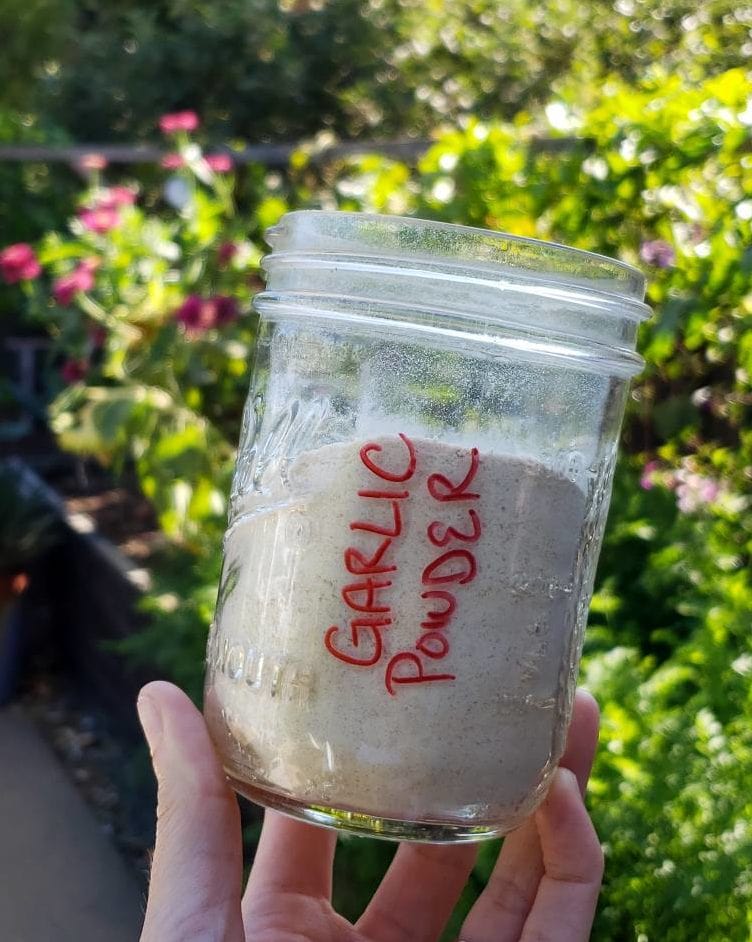
Finally, transfer the sifted garlic powder into an airtight storage container. We typically use mason jars, either half-pint or pint-sized, depending on how much we make. Repurposing old spice containers would work well too.
When stored in an airtight container in a moderately cool, dark location (e.g. a cupboard or pantry), homemade garlic powder is good for up to a year or longer. We’ve enjoyed ours after a year with no obvious degradation in quality or taste.
Enjoy!
I’m sure you can all figure out a million wonderful ways to use your homemade garlic powder. Add it to fresh salsa, guacamole, soups, sautéed veggies, in tomato and pasta sauce, curry lentils, hummus, salad dressing, egg dishes, sprinkled in with cooking rice or pasta, or added to homemade sourdough… The options are endless!
You can also use garlic powder to replace fresh garlic in any recipe. Approximately ⅛ of a teaspoon of garlic powder will provide the equivalent flavor of one clove of garlic.
Simple, right?
You have successfully made your own garlic powder! I hope you have enjoyed this article, and feel empowered and excited to go make your own. If you need tips on growing garlic, check out this article. Please feel free to ask questions, and spread the love by leaving a review below.
Don’t miss these related posts:
- Preserving Onions: How to Make Homemade Onion Powder
- How to Dry Fresh Herbs: 4 Easy Ways + Storage Tips
- How to Make Homemade Chili Powder
- How to Make Sun Dried Tomatoes with optional fresh herbs

How to Make Homemade Dried Garlic Powder
Equipment
- Food Dehydrator, or Oven
- Blender, Food Processor, or other appliance for grinding
- An air-tight glass storage container, such as a mason jar with lid
- Optional: a food processor and parchment paper
- Optional: a garlic peeler
Ingredients
- Fresh Garlic
Instructions
- Peel and thinly slice the garlic into ⅛ inch pieces.
- Alternately, you can use a food processor to finely chop the peeled garlic cloves into small pieces.
- Place garlic slices onto dehydrator trays in a single layer, or spread out finely chopped garlic on trays lined with parchment paper.
- Dry garlic in a food dehydrator from 100 to 130 degrees Fahrenheit, or in the oven on the lowest heat setting (140 or less) until they're 100% brittle and dry. They should snap crisply in half rather than bending. (Time varies depending on method used, see more details in article above)
- Once fully dried, place the garlic in a blender or food processor and blend until a fine powder is achieved.
- Use a fine mesh strainer to sift the blended powder before placing in storage container. If there are leftover hard bits remaining, return these to the blender or food processor and grind further into a powder.
- Store garlic powder in an airtight container with a lid and use within one year.
Notes


45 Comments
Susan Ottwell
My garlic-growing Moroccan landlord stuffed his garlic cloves (called “teeth” here) into a length of hose, then pressed and rolled the hose to loosen the skins. And I learned decades ago that you can rub a steel tool, like a tablespoon, under running water to get garlic odor off your hands; garlic reacts with metal and loses its odor and flavor.
Aaron (Mr. DeannaCat)
Thanks for sharing Susan!
Jeannie
OMG!! Why haven’t I done this sooner!
This method worked so well, I have never tasted garlic powder this good, this is hands down the best flavor!. Thank you so much
Aaron (Mr. DeannaCat)
So glad the recipe worked well for you Jeannie, enjoy your garlic powder!
Gina
This is my first year growing garlic and my family prefers garlic powder over minced/fresh garlic.
My question is – Do I need to cure hardneck garlic before I dehydrate to turn it into garlic powder or can I just harvest / process using a food processor / dehydrate (using a dehydrator)?
Thank you!
Aaron (Mr. DeannaCat)
Hi Gina, congratulations on your first garlic harvest! While you can dehydrate your garlic before it is cured, curing will improve the flavor of your garlic and the resulting flavor will be less sharp. Hope that helps and good luck!
Gina
I’ll get my garlic pulled tonight and get it curing! You guys are such a reliable resource and with your help I can at least “fake it until I make it”. :)) Thanks especially for the speedy response!!
Aaron (Mr. DeannaCat)
Thank you so much Gina and it looks like you already made it, growing and preserving your own food is a huge accomplishment!
Martha
Thanks for this! We couldn’t store our garlic harvest as usual, because the outer covering didn’t exist anymore, we think because our ground has been so wet for the last month or more. So, I was looking for other ways to preserve it. We haven’t tasted it yet, but we ended up with just under 1 cup of garlic powder. And it smells wonderful!
ScottieAnne
Hi, I am fairly new to dehydrating, curious how much garlic is needed to make a cup of powder?
So far only use my dehydrator for fruits and jerky so would like to try some other things.
Aaron (Mr. DeannaCat)
Hi ScottieAnne, it’s tough to say as we typically just dehydrate however much garlic we have on hand, I would just process however much you can handle and see how much powder you end up with, good luck!
Mark
Hah was looking for a random recipes and found this page – how delightful.
-Stache
Michael
how much garlic do you think you’d need to fill up a standard 7 or 8 oz size spice jar?
Aaron (Mr. DeannaCat)
Hi Michael, I would say that you would need to fill several dehydrator tray fulls but I don’t know exactly how many bulbs of garlic. We always just use what we have or what we want to process and see what we have at the end.
Martha
This may be a little late, but I just dehydrated and ground about 170 cloves of garlic, and ended up with a bit less than 1 cup of powder.
Alli
How do you prevent the garlic powder from clumping?
Aaron (Mr. DeannaCat)
Hi Alli, I have seen recommendations of storing garlic or onion powder in the refrigerator or freezer to help prevent clumping. Hope that helps and good luck!
Dawn
I haven’t tried this yet, but looking at the steps and process, it is doable and looks amazing. I was wondering if the garlic can be dried in an airfyer? If so, how long and what temperature?
Aaron (Mr. DeannaCat)
Hi Dawn, if your air fryer has trays that allow airflow from the top and bottom and can be set for around 130 degrees F, you should be able to use it to dehydrate your garlic. It may take around 5 hours or more but you will likely have to check the garlic slices to test their dryness. They should be crispy and snap if you are able to break a slice in two, hope that helps and good luck!
Willow W
When I first started dehydrating herbs & things, I used my oven instead of purchasing a unit (in case I didn’t like dehydrating).
But the best advice I got was:
Turn the oven LIGHT on but leave the oven temperature OFF.
Worked like a charm every time!😉
(I’ve since purchased a small Nesco, but I’ve used it SO much I’m now considering a larger unit, but haven’t investigated brands yet…)
Thank you so much for ALL the information you share with us!!!💝