

How to Harden Off Seedlings: Tips to Prevent Transplant Shock
Come learn why and how to harden off seedlings. It’s an easy but essential step to strengthen seedlings that were started indoors, in a greenhouse, or other protected location before they’re planted outdoors.
Hardening off seedlings helps prevent transplant shock, and ensure they make a smooth, successful transition to their new home – your garden. Think of it as a simple, free bit of insurance for your plants!
NOTE: This post was originally published in March 2019 but significantly updated since.
Would you like to save this?
What is Hardening Off?
Hardening off seedlings is the gradual process of preparing indoor-raised seedlings to be planted outside (usually over the period of a week or longer). The goal is to slowly acclimate them to outdoor conditions to reduce stress, help the seedlings become more strong and resilient, and thereby increase their success in the garden.
Why Harden Off Seedlings?
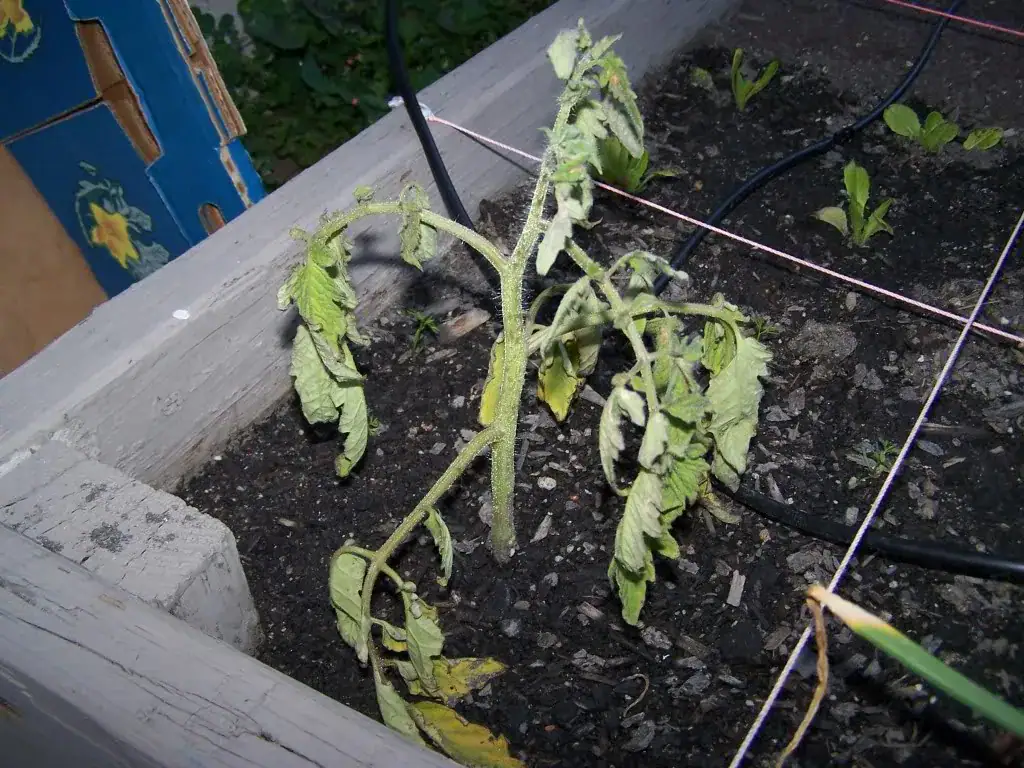
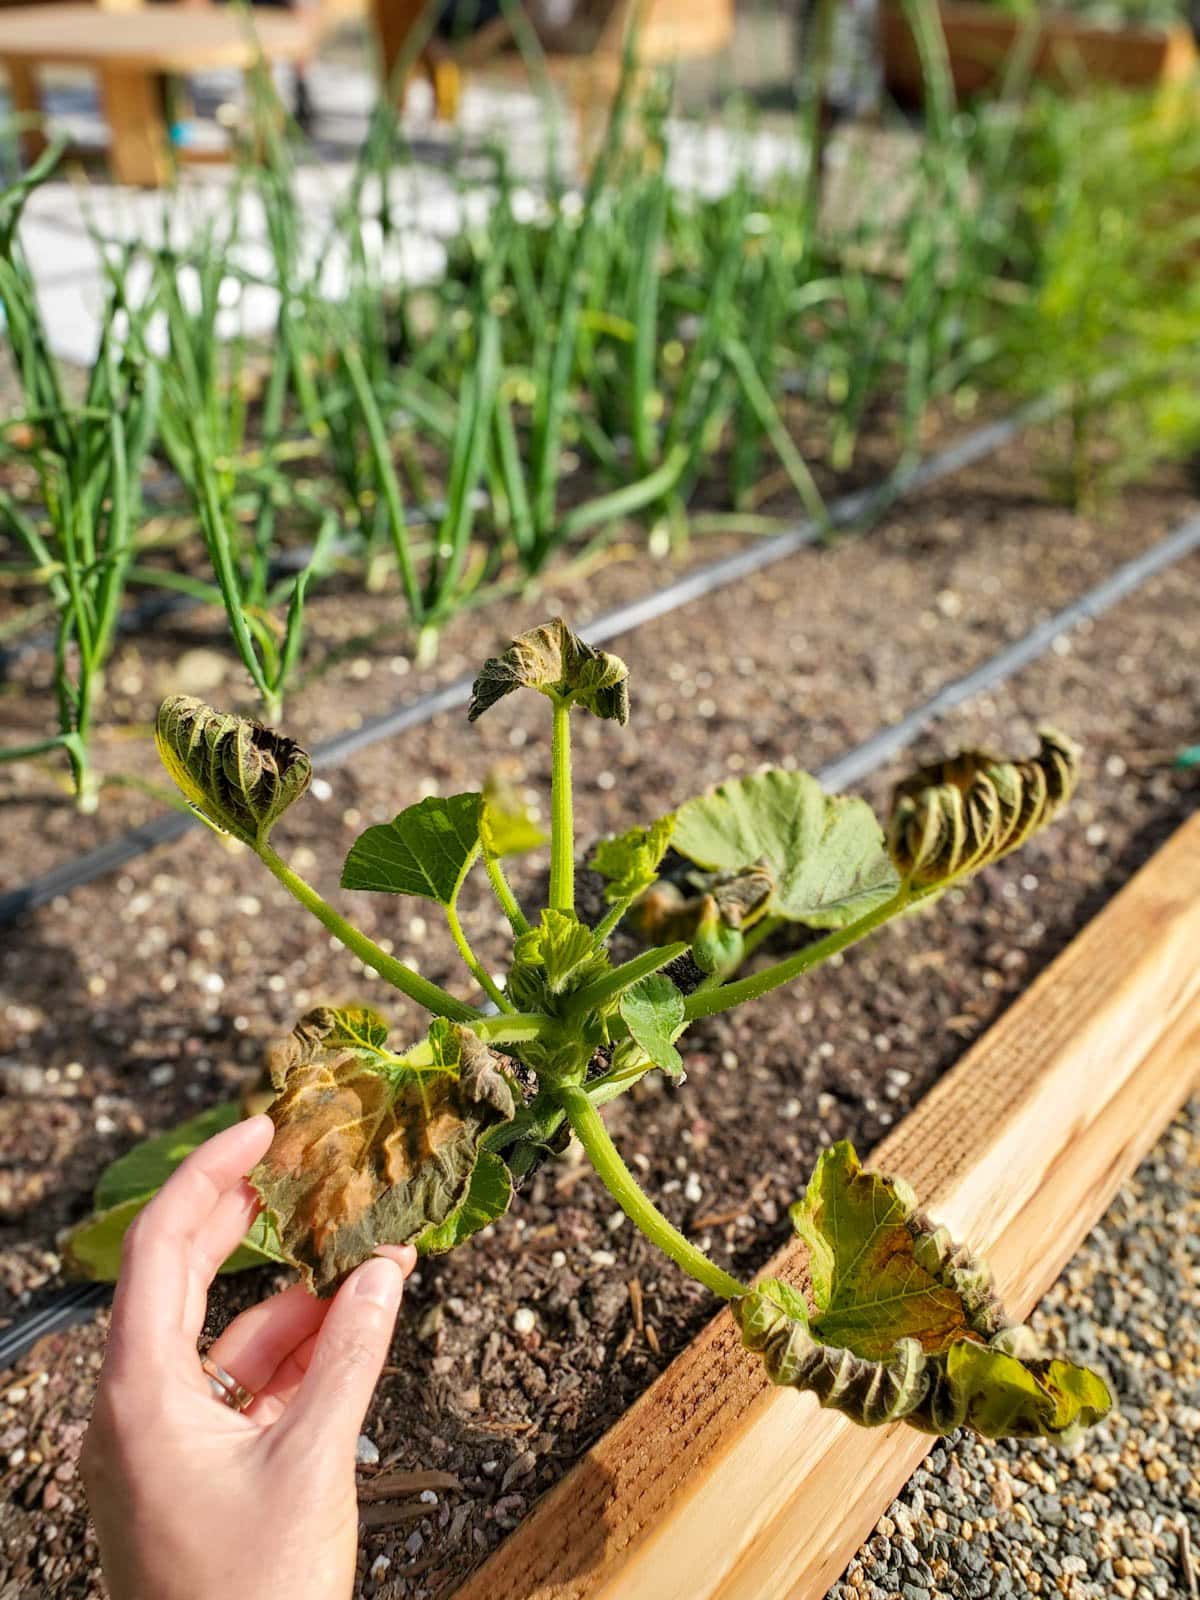
When started indoors, seedlings are very sheltered and protected. They likely haven’t been exposed to extreme temperature swings, strong winds, rain, or even direct sun. So, if they’re quickly moved from inside to outdoors without a proper transition period, they can easily get damaged (bend, break, wilt, etc) or experience transplant shock.
Transplant shock is a state of stress or trauma that a plant may experience after being transplanted. According to Purdue University, it can result in failure to root, slowed growth, permanent stunting, or even plant death.

RELATED: Potting up seedlings is an another essential step to prevent plants from becoming root bound and stunted. See our top tips for success in this Seed Starting 101 guide.
While Seedlings Are Still Inside
Many gardeners associate hardening off with the week or two before transplanting seedlings outside (when you gradually start taking them outside), yet there are a number of steps you can take even earlier to help strengthen your seedlings and prepare them for the transition too.
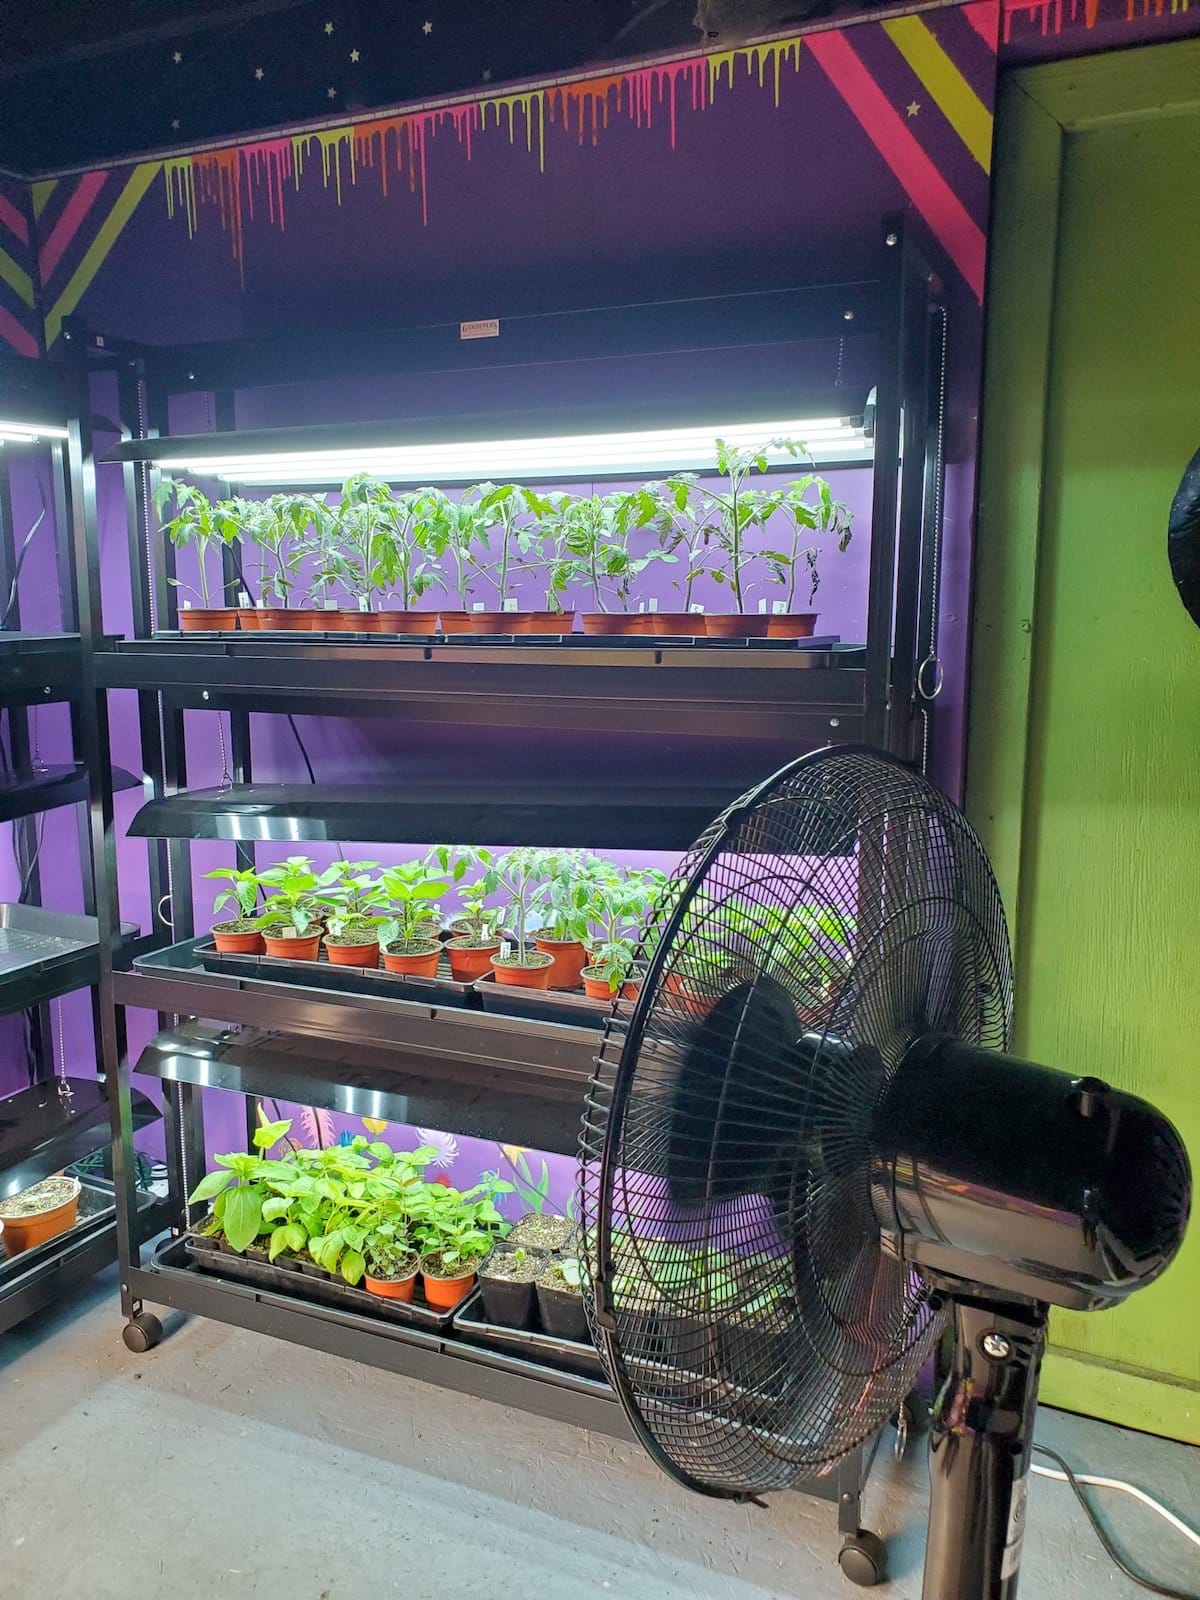
Use a Fan Indoors
Shortly after they sprout (about two weeks after germination), we start hardening off our indoor seedlings by using an oscillating fan on low to create a gentle wind. The airflow makes seedlings rapidly strengthen their stems in response to the movement, helping them get ready for natural wind outdoors.
PRO TIP: Place the fan close enough that it makes the seedlings wiggle and dance a bit, but not so strong that they totally bend over! We usually start using the fan for just a few hours at a time (this oscillating fan has a handy timer), and rotate the trays every few days so the seedlings get even airflow from all directions.
Reduce Heat
If you used a seedling heat mat, be sure to wean your seedlings off of heat at least a couple weeks before they go outside. I suggest using a heat mat with a thermostat control so you can slowly reduce the temperature over a couple weeks.
PRO TIP: We typically use heat mats during germination but remove them right after the seedlings sprout – unless extra heat is absolutely necessary (e.g. when we started seeds in a very cold greenhouse or shed during the winter).

How to Harden Off Seedlings
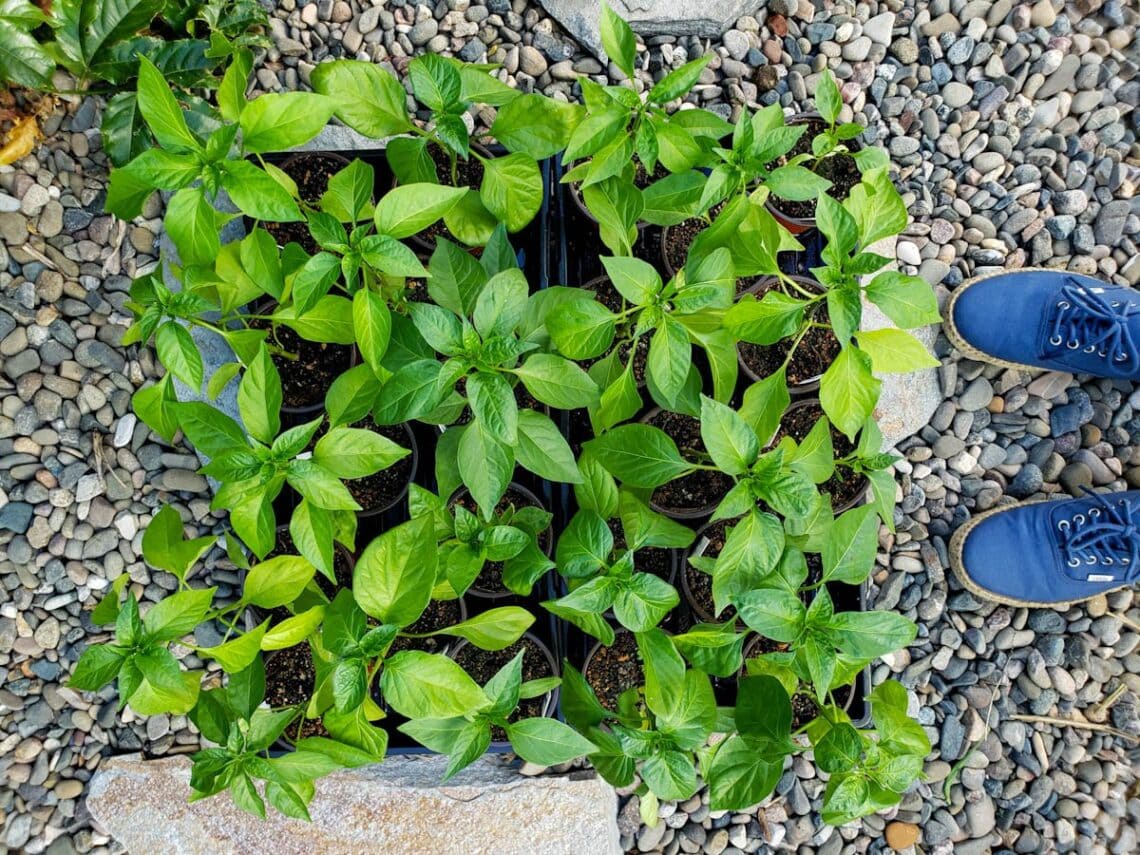
About 7 to 10 days before your area’s last frost date (or before you intend to plant seedlings outside) start bringing them on short field trips outside to gradually expose them to direct sun, wind, and temperature changes. Try to start on a day with mild, calm weather conditions.
Key Tips for Success:
- Gradual exposure: On the first day, set the seedlings outside in a shady, protected location for only a couple hours. Gradually increase the length of time and sun exposure each following day.
- Protect from sun and wind: Avoid direct sun or strong wind early on, which can damage or even kill tender seedlings. Introduce them to partial sun on day three or four.
- Protect from frost: Towards the end of the hardening off process, we start leaving our seedlings out into the evening hours so they can experience cooler temperatures too – but be sure to protect them from frost!
- Don’t forget to bring the seedlings back in overnight. I usually set an alarm on my phone as a reminder.
- Water: Seedlings will often dry out faster when outdoors compared to indoors, so keep an eye on the soil moisture level and provide water as needed.
- Watch out for animals, birds, or other pests. My friend forgot her seedlings were outside, let her chickens out, and they ate them ALL. Devastating! So, protect your seedlings with wire fencing, insect netting, or other means if necessary
- Once the seedlings can handle being in direct sun all day without wilting, they are ready for planting.
PRO TIP: The hardening off process doesn’t need to be perfect, especially if you’re away from home during the day. Just do your best! Some hardening off is better than none. It’s also okay to skip a day if the weather is particularly bad, or if life happens. Simply resume the next day.


Tips for Planting Day
Before transplanting seedlings, check the weather forecast for the coming week. Try to plant seedlings on a mild, calm day (preferably one with several days of good weather ahead). Be prepared to protect your seedlings during harsh conditions over the next couple of weeks.
For instance, we usually cover our raised beds with hoops and insect netting to protect small tender seedlings from the wild birds that love to eat them. Then, we can swap out the insect netting for shade cloth or frost cloth if needed too.
See our complete guide on transplanting seedlings here, including how we like to amend our soil first.

And that’s how to harden off seedlings.
Congratulations! With your love and care, your fragile baby seedlings have now blossomed into well-adjusted, strong teenagers – ready to take on the world.
I hope you found this post helpful. Please let me know if you have any questions in the comments below. Thanks for reading, and happy planting!
Don’t miss these related posts:
- How and When to Thin Seedlings: Tips for Fast Healthy Growth
- Garden Companion Planting Chart, Plans, and Benefits
- How to Build a DIY Raised Garden Bed: Step-by-Step Guide
- Potting Up Seedlings: What, Why, When & How


15 Comments
Wendy Taylor
Once again, one of the better and most enjoyable online articles and explanations of what it means to harden off and how to do it! Thank you for thoroughly covering so many aspects of gardening for newbies like me!
Stephanie Kelly
Thank you for this article. Just read through this carefully as I am so nervous to start bringing my precious babies outside!
Aaron (Mr. DeannaCat)
Good luck Stephanie, they are pretty resilient but they do enjoy a gradual hardening off process for continued strong growth before they are planted out for good. I am sure you and your seedlings will do a great job, good luck and have fun growing!
Laura Aronson
Thanks for sharing your garden journey! I would love to see how you fertilize and use worm castings. Your garden looks so great and I am on a mission to improve my soil!
Laura
Aaron (Mr. DeannaCat)
Hi Laura, check out our article on making compost tea as that is the way we typically use our castings in the garden. We will also add a pinch into the planting holes of new seedlings that we are planting out. Hope that helps and have fun growing!
Gabriel
I’m about to change my fisrt two cannabis plants to bigger vases, but I’m a little insecure. Any sugestions, tips ou guidelines? Thank you
Aaron (Mr. DeannaCat)
Hi Gabriel, they should be fairly sturdy and if you can see the roots coming out of the bottom of their pots, the root ball should be fairly well intact. I will usually just squeeze the outside of the container slightly, tip the plant at an angle downwards, and usually the root ball will start to slide out of the pot. As it comes out, just grab hold of the root ball and tip the plant right side up. Also, have your transplant hole already made in your new containers, even using their current pot to judge the depth and width of the hole. If you have your plants indoors and are going to move them outdoors, they likely should have already been hardened off hopefully. In all, it’s nothing that is too big of a deal so don’t worry about it too much, you should do just fine. Hope that helps and good luck!
Mariangela
I’m re-reading all this content because I’m getting serious this growing season! Are there any tabletop grow lights that you recommend? If I decide to start seeds indoors vs greenhouse I don’t have a way to suspend the lights and need an easy tabletop solution. Suggestions welcome!
DeannaCat
Hi Mariangela – Gardener’s Supply Co. has a wide selection of tabletop lights, and that is where we got our newest Sunlite grow light shelf – great quality! You can check them out here. I hope that helps, and happy growing! Thanks so much for reading.
Alexis
Just wanted to say you’re incredible and the most educated and helpful source! I feel so excited and confident about giving growing seeds indoors a try for the first time after reading your resources. Absolutely love your blog! Thank you so much!
Aaron (Mr. DeannaCat)
Thank you so much Alexis, congratulations on your seed starting adventures, you’ve got this!
Kymie May
Hi I’m new to the seed planting gardening world and this was all super helpful. Last year after my small greenhouse took off in the wind like dorothys house in the wizard of oz one sunning session I lost most of my seedlings and what I planted after that got leggy and died I was devastated, so all of your mistake guide and how to fix it plus the hardening process was so incredibly helpful and I look forward to more articles and advice! Maybe this year I’ll get it right!
Suzanne Phend
Hello! Follow all of your tips!! But, when hardening off do we put them back under grow lights when we bring them in (currently under grow lights) or stop the grow lights completely once they start going outside for an hour or two?
Aaron (Mr. DeannaCat)
Hello Suzanne, keep them under the grow lights as you would while they are inside. They just need to get used to the sun, wind, and conditions for a bit before they are out there full time. Good luck and thanks for reading!
Lacey Daniels
I was JUST telling my husband we need to get our seedlings hardened off so we can transplant them out! (Zone 9B). I wondered to myself if you had tips on making that happen — lo and behold, I opened Instagram shortly after that and saw your new post! Lol!
Thanks for the great advice and fantastically-written posts! Excited to get my plants out soon once this crazy rain we’re getting passes!