

How to Build a Raised Garden Bed on Concrete, Patio, or Hard Surface

Are you dreaming of homegrown veggies, herbs, and flowers – but the only space you have for a garden bed is on concrete, a patio, or other hard surface? Or perhaps you’re like us and have a good-sized yard, but want to maximize growing space by adding raised garden beds on your hardscape areas as well. Maybe your patio is simply the sunniest spot you have. No matter the reason, I fully support your effort to grow – wherever you can!
Read along to learn tips and best practices for building a raised garden bed on concrete or other hard impervious surfaces. In this example, I’ll show you how we prepped a new wood raised garden bed to go on top of our asphalt driveway. We’ll discuss important concerns such as drainage, soil retention, and soil quality.
Finally, we’ll also cover alternate options for putting planter boxes on hard surfaces – such as self-contained pots and beds. If you’re not up for building your own, check out this awesome selection of elevated raised garden bed kits from Gardener’s Supply.
Quick Summary of Tips
- Choose a sunny, level location for the raised bed.
- Keep in mind that installing a raised garden bed on top of a deck may cause staining or water damage, unless drainage is controlled. Discoloration on concrete should be easy to remove with a pressure washer if needed.
- Provide adequate drainage, bed depth, and high-quality soil for the plants to grow best.
- I don’t recommend placing the soil itself right on the concrete. Yet I don’t necessarily recommend adding a solid bottom on the bed either. Instead, we create a wire and fabric “basket” or bottom on our raised bed to both contain the soil but also promote drainage.
- If our example doesn’t suit your situation, read the “alternative options” for more ideas to add growing space to your patio, deck, or other hardscape area!

Would you like to save this?
Disclosure: Homestead and Chill is reader-supported. When you purchase through links on our site, we may earn an affiliate commission.
Getting Started: Evaluate Your Space
Before you go slapping together a raised bed and plopping it down on your patio, take a moment to think about your space. As with any garden space, an ideal location should receive full sun (or as much as possible). It should also be fairly level. Even more, building a raised garden bed on top of concrete or other hard impervious surfaces brings about a whole new set of considerations. What is the hard surface like? Can it handle the moisture and weight of a heavy raised garden bed?
For example, if you’re hoping to add raised garden beds on top of a nice wood deck, the style of bed I’m going to show you in this article may not be the best choice – which sits right on the ground and drains from the bottom. Instead, you’d likely want to protect your deck by using an elevated raised bed kit, or one that has a solid bottom and contained drainage system. In that case, See the “Alternative Options” section at the end of this article.
On the other hand, the steps we used to modify our newest driveway garden bed will work well on top of concrete, asphalt, pavers, or similar surfaces. If and when you ever decide to move the garden bed, it may have some discoloration below. Yet a pressure washer should be able to remove it!

Drainage & Water
All garden beds need good drainage, including raised garden beds installed on hard surfaces! Soggy soil and drowning roots lead to unhappy, unhealthy plants. Therefore, it is not a good idea to add a secure solid bottom on your bed. That is, unless there are plenty of drainage holes, an internal drainage system, or it otherwise has the ability to freely drain excess moisture from the soil. On the other hand, I don’t necessarily suggest putting soil directly on top of concrete. (You’ll see what I mean in our driveway bed example and “containing the soil” section below.)
There is a common misconception that putting a raised garden bed on concrete or other hard surfaces will prevent it from draining well. The opposite is actually true, as long as the bed is open on the bottom! A well-built raised garden bed on concrete will actually drain faster than one sitting snugly down within the soil of your yard. Therefore, you may even find the need to water a garden bed on concrete more often than others, like most container gardening. Especially since the surrounding concrete may slightly raise the soil temperature, increasing evaporation and drying as well.
But where does all that water drain to?
Well, excess runoff from your raised bed will run to wherever rain water usually collects on your hard surface. For example, if you have a drain system, a slight slope to direct water flow off the edges, or a depressed area where water usually collects – that is where the excess raised bed water will go too. However, that doesn’t necessarily mean a ton of water is going to be flowing out of your beds all the time!
With a combination of tailored watering practices (not too much!), quality soil (one with both adequate drainage but also good moisture retention), and the right bed height (taller is better!), your garden bed should be able to retain most of the water you provide it. When you water your new raised garden bed, provide enough water to keep the soil consistently damp. On the other hand, avoid watering so much that water comes pouring out from the bottom. You’ll find your groove.

Recommended Bed Depth
Most common vegetable plants need a minimum of 12 inches of soil to grow big and healthy. The more space for roots, soil, and nutrients – the better! In fact, many plants prefer 18 to 24 inches or deeper, including tomatoes, carrots, peppers, eggplant, and even kale. With a traditional in-ground garden or raised beds open to the soil below, roots can grow deep and uninhibited. In contrast, putting a raised garden bed on concrete is essentially like creating a large pot or container. The roots (and general plant health) are restricted to what space you provide it.
All that said, I suggest a minimum depth of 12 inches (preferably 18”) for any raised bed that will be put on a hard surface. In addition to increasing root space, providing ample depth and soil will reduce water runoff and keep the soil moist longer. The bed we built in the example below is 18 inches, or three 2×6” boards tall. Stacking four 2×6” boards to make a 22 to 24-inch deep bed is also great, but will take a lot more soil to fill.

Soil Choice
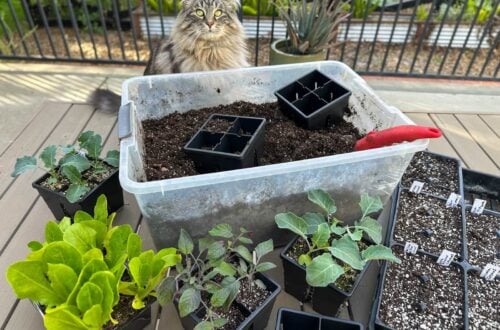
When it comes to filling a garden bed on concrete, invest in high-quality soil and compost to help compensate for the shallower root space. We filled the new driveway bed with the same soil and compost mixture we fill all of our raised beds with. You can learn about building the ideal organic soil in detail in this article. In a nutshell, we use a combination of high-quality bagged soils, bagged compost, and homemade compost. When filling many large beds at once, we also have bulk soil and compost delivered.
The ideal raised bed soil is rich in nutrients and organic matter. It should allow for adequate drainage, but also have good moisture retention properties. Do not use “potting soil” only. It is quite fluffy and will drain and dry out too fast. I suggest using a combination of some potting soil, some general planting or raised bed mix, and plenty of compost. Compost is key! Compost and worm castings will help greatly with moisture retention. You don’t want all the water and nutrients to run right out of the bottom of the bed! Mulching the soil surface also increases moisture retention and reduces your need to water as frequently.
Curious about compost? Learn composting basics (and 6 different ways to compost at home) in this article. Or check out our detailed vermicomposting 101 article to learn all about composting with worms!

Containing the Soil
It isn’t the best idea to add soil straight into a garden bed directly on top of concrete. Why? For one, some of the soil will seep and wash out from the bottom of the bed. That will make a huge mess around your bed surface. It will also slowly reduce the amount of soil in the bed entirely. Also, concrete is alkaline while most garden soil is neutral to mildly acidic. I have heard it may slightly increase the pH of your soil over time when in direct contact with concrete.
Consequently, the best way we have found to contain the soil within a raised garden bed on top of concrete is to create a sturdy “basket” for the soil within the wood frame of the bed. That is, in lieu of adding a solid bottom to the bed. We’ll also talk more about solid-bottom raised beds in the Alternative Options section near the end of this article.
Now, let me show you what I mean…
Building a Wood Raised Garden Bed to Install on Concrete
Step 1: Build or Obtain a Raised Garden Bed Frame
First, you need to build (or otherwise obtain) a wood raised garden bed frame for your space. If you need any pointers here, please check out our detailed “How to Design & Build a Raised Garden Bed” tutorial. There is even a step-by-step video included! For our new driveway raised bed, we simply used our standard bed design – but modified the bottom and installation. The dimensions in this example are 6 feet long, 20 inches wide and 18 inches tall. We needed to keep it quite narrow so I wouldn’t hit it with my car going in and out of the driveway!

Note that the following steps will work best as-described below with a wood bed frame that is about 2 or 3 feet wide. For beds wider than 3 feet, I suggest you consider adding a couple wood cross-beams along the bottom of the bed. They will help support the weight of the soil on top of the fencing and landscape fabric we’re going to add next. Sorry, I don’t have a photo but I did my best to draw what I mean! See below. Use a durable wood such as cedar or redwood 2×4” or 2×6” boards. Install them within the frame (flush or just up from the ground level) NOT attached to the outer bottom of the bed frame. That would inhibit your bed from sitting flat on the ground. Make sense?

Step 2: Line the Bottom with Hardware Cloth
Next, we are going to line the inside bottom of the raised bed frame with hardware cloth wire fencing material. The hardware cloth serves as a sturdy and durable bottom for the bed, which landscape fabric will lay on top of next. Without hardware cloth, landscape fabric alone would easily rip under the weight of the soil. It would also be easy to accidentally tear the fabric open on rough ground, such as when you’re setting the bed in place or if you ever move it.
For this step, I highly suggest using hardware cloth over something like chicken wire. Galvanized hardware cloth won’t rust, is extremely strong and long-lasting. In contrast, chicken wire sags, rusts, and breaks down over time. The gauge and hole size of the hardware cloth doesn’t matter all that much. We used this 2-foot wide 1/2” opening hardware cloth, though wider rolls are available too.
Truth be told, we put hardware cloth under all of our garden beds, including those in the soil. Gophers are a real problem here, and it stops them from getting in the beds and eating everything! It is also the material we use for predator-proofing our chicken coop and run.
Create a wire basket bottom
Using aviation snips or metal snips, cut the hardware cloth in a manner that gives you a few extra inches of slack hanging over every side of the bed. With the bed sitting right-side-up, place the hardware cloth on top of the bed. Bend up each side to follow the shape of the bed, and then press it down into the bed. Try to keep an even amount of slack on all sides. Then carefully form the hardware cloth wire bottom to fit the inside of the bed. The corners get a bit awkward. Just do your best to meld and bend the wire to be as flush as possible with the wood. Wear good poke-proof gloves! I’ve also found it helpful to stand inside the bed and step on the wire to press it into place.

Why don’t we just attach it to the bottom side of the bed frame, you ask? I mean, you certainly could. Yet in my experience, wire attached to the bottom edge pops loose more easily from the weight of the soil pushing down on it compared to wire attached on the inside walls of the bed. You know, physics. Also, a totally flat wire bottom doesn’t create the same type of “basket” we’re aiming for, and may not drain quite as well.
Attach the hardware cloth
Now, go around the perimeter of the hardware cloth and secure it to the lower inside walls of the bed every 6 inches or so. We used wide-head cabinet screws, positioned in a way that caught and pinched the hardware cloth in place. You could also use galvanized U-nails or poultry staples. Long staples may work too, but could also pop loose more easily.

Step 3: Add Durable Landscape Fabric
Once the bottom wire basket is in place, add a layer (or two) of commercial-duty landscape fabric on top of it. This is what will keep the soil inside your bed, but also allow for excellent drainage! I emphasize choosing commercial-duty or high-quality landscape fabric because there is a lot of cheap crap out there. And I don’t just mean “cheap” as inexpensive; I mean poorly made. The common thin stretchy black plastic-like stuff will rip into shreds over time and make a huge gross mess. Two I suggest are this one or this option.
Add the landscape fabric to the inside bottom of the bed in a similar manner as the hardware cloth. We had a roll of 4-foot wide landscape fabric, so we folded it in half to create a dual layer in the just-under 2 foot wide bed. It is important to leave the fabric very loose rather than taut, to provide give as it rests against the hardware cloth for support. The role of the fabric is to prevent soil from leaking from the bed, but it should not be responsible for bearing the weight of the soil. That is the hardware cloth’s job. Because there shouldn’t be much weight pulling down on the fabric, we simply used a staple gun to secure the cloth in place around the inner lower perimeter of the bed.


Step 4: Place & Fill Your Bed!
Ta-da! Your new raised bed is all prepped and ready to be installed in its new hardscape home. Set the bed in place, as level as possible. Make sure you like the location before filling it with soil! Now, add soil to the bed, taking care to keep the fabric flush against the inside of the bed as you go. Speaking of taking care… remember to be gentle and dig only lightly in this bed, now and in the future.
We are huge fans of no-till gardening here anyways, so we don’t intend on digging way down into the soil any time soon anyways. But if you do need to do any digging, use caution to not accidentally rip open your fabric bottom. It isn’t the end of the world if it gets a little tear. To learn more about ongoing soil care for your raised bed, check out this article about how we amend and fertilize our raised beds before planting (or between seasons) using a no-till method.

Alternate Options
If this style and example doesn’t work in your situation for whatever reason, there are still a TON of other options to garden on a patio, deck, balcony, driveway, or other hardscapes!
Raised Bed Kits
For instance, there are several quality elevated raised bed kits out there. Some have drainage holes that you could add drip pans underneath, effectively protecting the surface below. Others have a fully solid bottom and an internal drainage collection system, and you can direct runoff with a hose or valve. Check out the awesome selection of elevated raised bed kits from Gardener’s Supply here. Vegepods and Earthbox are additional examples of a fully-contained systems, and would be great on a deck or balcony.
Other DIY options
Kits aside, there are also many other DIY raised bed variations from what I shared here today. In fact, we have built our standard raised bed design and added a wood bottom on a few occasions! See the photos of our tree box below. The bottom is essentially solid, made of the same redwood 2×6” boards used for the rest of the box. We drilled several large half-inch drainage holes in the bottom, before lining the interior with landscape fabric and adding soil. We chose this style because we wanted to elevate the small beds on heavy-duty furniture dollies with wheels, making them mobile. Otherwise, we personally avoid adding wood bottoms since they do inevitably inhibit some drainage and are prone to rotting over time.


You could use the same design and idea as our solid-bottom rolling boxes, but prop the bed up on bricks instead. Then, a drip tray can slide under and in line with the drainage holes. However, keep in mind that some water will still leak from the seams in the boards. Yet it will be more concentrated from the large drainage holes.
I am leery to suggest adding legs to a raised bed, unless you design it very carefully. For example, using short 4×4” posts supported with metal braces. Do NOT underestimate the extreme weight of lumber and soil, especially once it is wet! The dollies we use for our rolling boxes are rated up to 1500 pounds. Plan to make beds that you wish to elevate on legs or dollies smaller than ones you’d put on the ground (either in depth, or width and length).
Containers & Pots
Finally, there is the whole wide world of container gardening out there. There is nothing wrong with growing things in pots. We heavily rely on fabric pots or grow bags to supplement our raised bed gardening space. Truthfully, we prefer the mobility and added benefits (such as “air pruning”) of grow bags over raised beds for many of our crops, including to grow potatoes. Heck, they even make raised beds out of grow bag materials! We also use half wine barrels as planting containers, with drainage holes added to the bottom. Essentially, any container with drainage can be used to grow food!

And that is how you build a raised garden bed to put on concrete.
Or perhaps I should say… how we like to do it! Clearly, there are many different ways you can garden on top of hard surfaces. With a little creativity, food can be grown in more places than most people imagine! I hope this article gave you plenty of new ideas for your space. Please let me know if you have any questions. Happy planning, building, and growing.
Don’t miss these awesome related articles:
- How to Design & Build a Raised Garden Bed
- How to Fill a Raised Garden Bed: Build the Perfect Organic Soil
- Composting 101: What, Why & How to Compost at Home
- How to Amend & Fertilize a Garden Bed Before Planting (or Between Seasons)
- Companion Planting 101, with Companion Planting Chart
- Seed Starting 101: How to Sow Seeds Indoors
- 12 Places to Buy Organic, Heirloom & Non-GMO Garden Seeds


121 Comments
Jenn D
I really enjoyed reading this; lots of good info and explained really well. I just have a quick question, though… something I read before I happened upon this (yours is much better) said that they put down landscape fabric first, then some type of gravel or small rock on top. I understand why you put down hardware cloth first and then landscape fabric, but my question is would small rock or gravel assist with the drainage or would it just be totally unnecessary?
Aaron (Mr. DeannaCat)
Hello Jenn, if your bed is open to the concrete below, the use of gravel would do nothing to help your bed with drainage. If you have a bed that contains a wooden bottom with drainage holes, a layer of gravel on the bottom can assist with drainage and preventing water logged soil. Many of our half wine barrels have an inch or so of gravel on the bottom, above the landscape fabric and below the soil. Hope that helps and good luck!
Nina
Hi Deanna,
I’m moving into my new home soon, which has a smallish, shady lawn area at the front and a good-sized concrete courtyard at the back that’s a real sun trap. I’m getting quite excited about the idea of turning the courtyard into a kitchen garden with raised beds. I’m still newish to gardening, and completely new to container gardening. Your site was the first one I stumbled across when looking into raised planters placed on concrete, and I think I need to look no further! Thank you for such a great resource.
I was wondering, however, if you need to occasionally completely replace the soil in the planters, or if you simply add compost or fertiliser to it. And if you do have to replace it, how often? And do you have any good ideas for what to do with the old soil? The front yard probably wouldn’t be able to take it all.
Thanks!
Aaron (Mr. DeannaCat)
Hello Nina, glad to hear you are going to be turning your concrete courtyard into a kitchen garden. We don’t replace our soil, we usually only add to it, the goal is to create soil that is rich in microbial life that is essential for optimal plant health. Usually after your first season of growing in a new container, the soil will compact and reduce in volume to a point where you need to add more soil for your next crop. We have a few articles on how to best go about filling a raised bed as well as how to amend it throughout and in between a season. Here are a few: How to Fill a Raised Garden Bed: Build the Perfect Organic Soil, and How to Amend & Fertilize Garden Bed Soil: Before Planting or Between Seasons to get you started. Let us know if you have any other questions and good luck!
Susan Rech
Thank you so much for this comprehensive guide to the best garden beds.
In my garden, I have raised beds that are about a foot tall and full of good soil. Before we added the beds, we dug down about 2 feet to make sure all the weeds were gone and then put the beds over the soil. I know you recommend that beds are between 18-24″. I wonder if that height is as important if the bed goes right into the earth, or if my 1′ beds are tall enough?
Thanks again for all you guys do!
Susan in Boise, ID
Aaron (Mr. DeannaCat)
Hello Susan, if your beds are open to the earth below then 1 foot tall is plenty high enough. Thanks for reading and happy gardening!
Earthmoving Contractors Auckland
Hi, thank you for such a brilliant post. I have been reading some blogs that gives me more knowledge about how he is using his talents to help worldwide during the build raised garden bed on concrete. I must say this is one of the best among them. You have done a great research for I feel, thanks for sharing.
Remo
We had a large concrete backyard for 5 years and have been dreaming of having a vegetable garden of own for a long time. Since the concrete was really layered thick the option of breaking the slabs and starting a garden was impossible because of community rules here , especially with elder people around us,it’s going to be noisy. So now we opted for raised bed garden. As mentioned in a comment above, it’s hard to find information online about raised bed garden over concrete floor. Finally I found it here and it feels so motivating. I have got my frame material and soil ready and going to follow instructions here. Thanks a lot for this post. Really helpful for people like us who doesn’t have access to direct soil ground for gardening.
Matilde
Thank you so much for this post. I have been waiting for a long time before building my own vege garden at home, due to this situation of having concrete. I looked everywhere for advice on how to build a growing bed with a base or “floor” and so far I had not found anything that convinced me. Thanks to you, I was encouraged to do mine, I followed each step as you said and I built a mini garden of 150 x 150 cm, that looks great. I have no problems of any kind with it. The water filters perfectly, the security cloth seems to support everything very well, and I’m very happy!! The only thing I added are some joints between each angle to give it more stability. Thank you so much from my heart!!
Aaron (Mr. DeannaCat)
That is awesome and great job! Enjoy your new growing space!
Sue G
Can I grow Asparagus in a container? My deck surrounds a tree stump that was cut down flat with the ground. The deck is about 5 ” above ground at that point and I plan on a 18″ high raised bed. Any suggestions?
DeannaCat
Hi Sue, since asparagus is a perennial vegetable that needs a few years to become established it is recommended to plant it in the ground in a permanent area of the garden although it can be planted in containers that can accommodate their extensive roots while also preferring consistently moist soil. The number of seasons in which the plant produces will also be fewer compared to those planted in ground. Hope that helps and good luck!
Joanne Hall
Hello Deannacat!
This comment is really a delayed expression of gratitude… I have been reading your gardening articles for the last few months, and have been inspired by the love, creativity, and dedication that you and your partner pour into your garden. Your photos are beautiful, and the articles incredibly helpful – particularly all of your “how to” instructions. My husband and I built raised beds in May 2020 by copying your design, filled them with truly incredible soil, and have been thrilled with the results. We live on Vancouver Island, and, over the last few months, have enjoyed heading to the garden for lettuce, kale, arugula, beans, carrots, cucumbers, eggplants, tomatoes, zucchini and delicata squash, nasturtiums, and herbs. I am about to pull all that is tired, dry, and non-productive, and put our beds to rest for the fall. We have other parts of the yard that need attention before the colder, wetter weather sets in.
Before I go, though, I want you to know that, when we started our gardening project, we decided to build our raised beds immediately beyond our front fence, where they would get the most sun. That land is city-owned, dusty, rocky, hard-packed dirt on which we’d been parking our cars. Driving up to our house always felt so disappointingly life-less to me. When we broke ground for the garden beds, neighbours were curious. They would walk by to see our progress and offer advice. I said to my husband, “I may not grow any vegetables, but I will certainly grow community!” In the end, I grew both. Thank you for being a significant influence and inspiration in the transformation that took place at our “homestead” this year. Xo, Joanne
DeannaCat
Hi Joanne – What a special story! Reading that just gave me goosebumps, literally! You are so kind, and that is wonderful that you’ve piqued your neighbors interest as well! It sounds like you’re growing a fantastic array of veggies too. I hope your neighbors will follow suit. Thank you so much for sharing, for being here and continuing to read our work, and for making my day with your sweet feedback!
Cameron Hird
Thank you.
Digger Hire
This article discusses about the build raised garden bed on concrete. I loved reading this article. Before hitting on the other blogs I would request all to give a try here to get the best available content here. The article is much informative regarding work as well.
Cameron Hird
Hello DeannaCat.
Really appreciate the efforts and time you have put into this DIY. I have read this article a number of times before i built up the courage enough to make my own planter boxes (above ground on a concrete slab). I have built 7 x planter boxes over our winter just gone (in Aust.) replicating what you have done here. I am now up to laying the weedmat down and have some questions…
– Which side of the weed-mat faces upwards (fury or smooth side)?
– How high above the wire mesh does the weed mat need to be stapled into the inner walls?
WRT to the wood construction –
– Do both side and end wood panels get screwed into corner posts? (I did this and always found it hard because the long screws would interfere with each other)
– If not, how do the side wood panels connect (if the end wood panels are screwed into the corner post)?
Cameron
Aaron (Mr. DeannaCat)
Hello Cameron, congratulations on building your raised garden beds! As far as your questions go:
1. We don’t worry too much about which side of the fabric faces upwards or downwards, I don’t think it really matters.
2. We staple the weed fabric just above the hardware cloth so it won’t accidentally get caught on or get ripped by the hardware cloth. Just give yourself enough soil depth so your plants would be happy growing in them.
3. The sides of the raised garden beds do connect to the end panels that 4×4 lumber in the corners, we have actually never noticed the screws interfering with each other though you would imagine it would happen.
For a more in depth look on how we construct our garden beds, check out How to Design & Build a Raised Garden Bed. Best of luck!
Cameron Hird
Thanks for your reply.
I have opened up and read that link you provided. It shows the hardware cloth attached to very bottom of the planter box and not on the inside frame like what is shown in your other link.
Which method of hardware cloth attachment is best (inside or on very bottom)?
Cameron
Aaron (Mr. DeannaCat)
Hello Cameron, we prefer to attach the hardware cloth to the side of the raised beds when we are going to place the bed on concrete or other hard surface. This is mainly due to physics, as in a screw inserted horizontally is less likely to give way under the pressure of heavy soil pulling on it than a screw inserted vertically to the bottom of the bed where the pressure is being applied in the same direction the screw is inserted. Anyway, that is how we figured it made sense. Good luck.