

Our Homestead
Oh my, how far she’s come! When we first bought this home back in the summer of 2013, she was a blank slate. A couple of mature trees, a few useless mismatched shrubs in odd locations, a front and back yard full of crabgrass “lawn”, and side yards with bare dirt.
We were essentially blank slates ourselves too. I have an education in sustainability and environmental studies, and we’d casually puttered with a couple small raised garden beds in rental homes in the past, but aside from that – we had little to no knowledge or experience with building, landscaping, or homesteading! I don’t think either of us even knew what that concept was when we started this journey. Nor did we intentionally set out to do it.
Yet with minds full of ideas, (home)bodies that don’t like to sit still, and a passion for being outside, we consequently have poured most of our free time, energy, love, and very modest disposable income in to transforming all of our outdoor spaces, little by little, from lifeless “yards” into flourishing and purposeful edible and medicinal gardens…
…an urban food forest, I like to call it.
Before we knew it, our home had become a homestead – a living thing that feeds not only our bodies, but our minds and souls too. Here, we grow and preserve about 85% of the produce we consume, raise chickens (as dear friends who happen to also provide eggs!), and pursue sustainable living practices like rain water capture and several methods of composting. We share our indoor space with 33 house plants and 3 kitties – Quincy, Dalai, and Bodhi Moon.
We dream, sweat, collaborate, compromise, relax, laugh, and love here. Most times, there is no where we’d rather be. In essence, we have created our own paradise, and it’s a paradise for local wildlife too! In 2018, our property became an official Monarch Waystation as well as a Certified Wildlife Habitat. You can find a full video of the property to follow.
Located just about halfway between San Francisco and Los Angeles, we reside in a small beach town in San Luis Obispo County on the Central Coast of California. Known as “SLO Cal”, not SoCal. There is big difference between here and there! This area is fairly rural, with a handful of modest-sized towns surrounded by vineyards, beaches, farmland, and open rolling hills.
We are right on the border of USDA gardening zone 9b and 10a. But unlike most similarly-numbered zones, it is very temperate and doesn’t get hot here often. This area is considered a Mediterranean climate, though being only one mile inland from the ocean, our summers are quite foggy. We actually struggle (or don’t even attempt!) to grow certain heat-loving crops like corn, melons, or fat heirloom tomatoes. Frost and freezing is also very rare here. I know, I know… we are spoiled rotten. Though an ideal climate sure does help, it is not necessary to have a thriving garden!
The gardens aren’t the only thing that makes our homestead special. Our town isn’t quite “urban”, and we definitely are not in suburbia, but we are surrounded by neighbors. However, our property is tucked back away from the street, located behind another property and only accessed by a long private driveway – leading to our little secret garden. A decent yard was a MUST when we were house shopping. You can image how absolutely giddy and blessed we felt when we came across this property that virtually had two private yards, the front yard doubling like a second backyard. With a very tight budget in an extremely competitive market, this was a shining diamond in the rough for us! I knew where I wanted the chicken coop right away, and the rest transpired and evolved with time.

Fun side story: When I was a little girl, I spent a week running around my neighborhood, uprooting (errhm… stealing) bulb flowers and small plants from other yards, re-planting them within a grove of bushes in our front yard ~ my first secret garden. Yes, I got in trouble.
Before you go getting too heart-eyed, overwhelmed, or green with envy (please, don’t!) over photos of our garden, remember to keep scrolling and take a peek at the collection of before and after photos at the very bottom of this page also! These are some of my favorite things to share on Instagram; they help people to see how – with a little time, energy, and love – a perfectly average, even boring space can be completely transformed into something magical. Also keep in mind that this did NOT happen overnight! We have tackled one or two large projects per year, over the last five years. Anything is possible when you put your mind to it! If you haven’t yet started creating your dream garden, you may enjoy this read ~ “How to Start a Garden: 101”
If you desire to, you can do this too! I believe in you.
Homestead Specs:
Our property itself is a modest .2 acres – approximately 9,000 square feet – but that number also includes our long driveway. The house itself is fairly small, at just under 1300 square feet, and that’s perfectly okay for us. Less house means more outdoor space! We had never really measured and taken inventory of our individual yard spaces, so we just popped outside to do so! Here is the verdict:
The front yard garden is 2,430 square feet. A couple hundred square feet of planting space was just added here in the fall of 2018, when we removed a portion of the driveway, and a whole mountain of useless pest-infested ice plant, expanding the yard into its place. In terms of edibles, the current residents of the front yard include: two avocado trees, a fuyu persimmon tree, two pineapple guavas, a strawberry and lemon guava, a dwarf weeping mulberry tree, four fig trees, a loquat tree, three passionfruit vines, two blueberry bushes, and various rotating veggie crops amongst the five raised beds and handful of wine barrels used for planting. That doesn’t include the plethora of other perennials, herbs, and annuals – some for medicinal purposes, some for the pollinators, a few simply there for the pretty. A 140-gallon rain barrel is hooked up on the front porch to collect a small portion of our captured rain water, with the monarch enclosure nearby.


The L-shaped backyard garden is 1,780 sq feet. Here resides the patio garden: our concrete patio that is now surrounded by five raised beds, fully enclosed with trellises attached to the yard-side of the beds designed to keep the otherwise free-ranging chickens excluded from this space. The archway leading to the rest of the back yard is covered with evergreen passionfruit vines, creating even more of a verdant courtyard vibe. On the patio, we use dozens of containers to grow everything from cacti to pineapple guava to cannabis and a dwarf Fuji espalier apple tree.

Heading out through the passionfruit arch, you find yourself in the “chicken yard”. Basically, the spoiled-you-know-what chickens get free range of the backyard all day, while instead we strategically fence off and protect certain areas of it, like the stone raised pollinator island. We call it “Stoney Island”.
In this backyard area, we were fortunate enough to have several mature fruit trees in place when we moved in: a Meyer lemon, an Anna apple, a mandarin orange, and a pomelo – like a white grapefruit. We have also added a fig, lime, kumquat, finger lime, and second meyer lemon tree to this space.


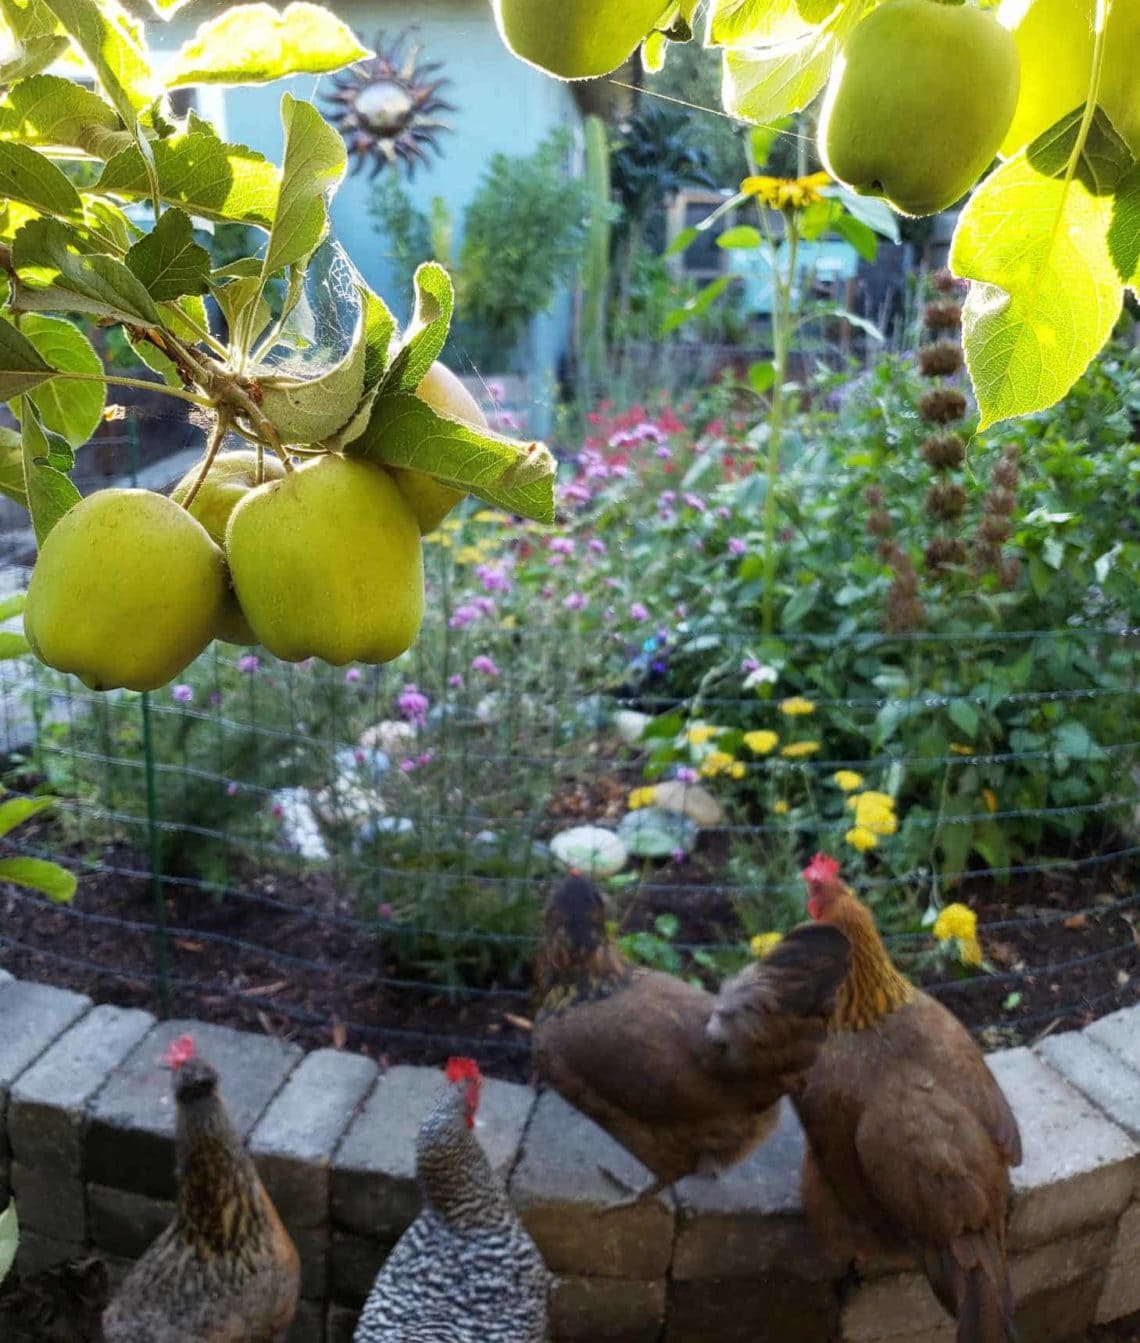
Right: Peeking through some stunner sunflowers to the chicken coop and coop garden beyond.
Turning left from the pollinator island into the next section of the L-shape backyard, you’ll find what we call the “coop garden” area – four large raised beds near our chicken coop. As you can see, it is also strategically fenced to prevent access from the winged monsters, err… I mean sweet dear beloved chickens. This garden space is along a south-facing wall – maximizing sun exposure along with radiant heat – an ideal orientation for gardening if you live in the Northern Hemisphere like we do.


Beyond the chicken coop to the left is a long, narrow, 550 square foot side yard. This once all-dirt barren space now houses so many productive and important things: the chicken run, a 6×8’ greenhouse in which we start all of our garden seedlings in, a milkweed nursery to support our monarch butterfly fostering passion, a large compost bin that can be used passively or turned into an active hot pile, a massive passionfruit vine that doubles as a privacy screen, and two large 530-gallon slimline rain capture tanks, bringing our total rainwater capacity to 1200 gallons!

On the opposite side of the house, there is another smaller side yard where a few homestead essentials are stored – a couple modest storage sheds, a homemade potting bench, and the small-but-mighty worm bin.
So, as you can probably gather, we try to make good use of every single inch! Every space, no matter how small, holds unlimited potential ~ you just need to look past what is already there and think outside the box.
One day we hope to have a larger property and even more space to grow and play – I want goats, and bees! And a yurt for you all to come visit! A place to hold workshops! – but for now, we are more than fulfilled… and plenty busy!
Welcome to our home!
Quick overview video tour via Instagram
Full video tour via YouTube
Before and After Photos
*I will work on writing posts about the details of all of these projects, including the steps we took, materials used, and lessons learned!
The Evolution of the Front Yard Garden


Then in the fall of 2015, we corrected our mistake, shown in the bottom half of the photo. We pulled out the beds (yes, the soil too), removed all the grass and roots from that half of the yard, put down commercial duty weed block landscape fabric below, then put down the beds and gravel.


Bottom: Spring of 2018, with the new pollinator paradise in full bloom.


Bottom half: Fall 2018. Note the new corner addition, terracing, and fence we built! Instead of weedy pest-laden ice plant, the corner now houses 5 fruit trees and dozens of perennials.

Bottom: December 2018. A whole new world, full of life.
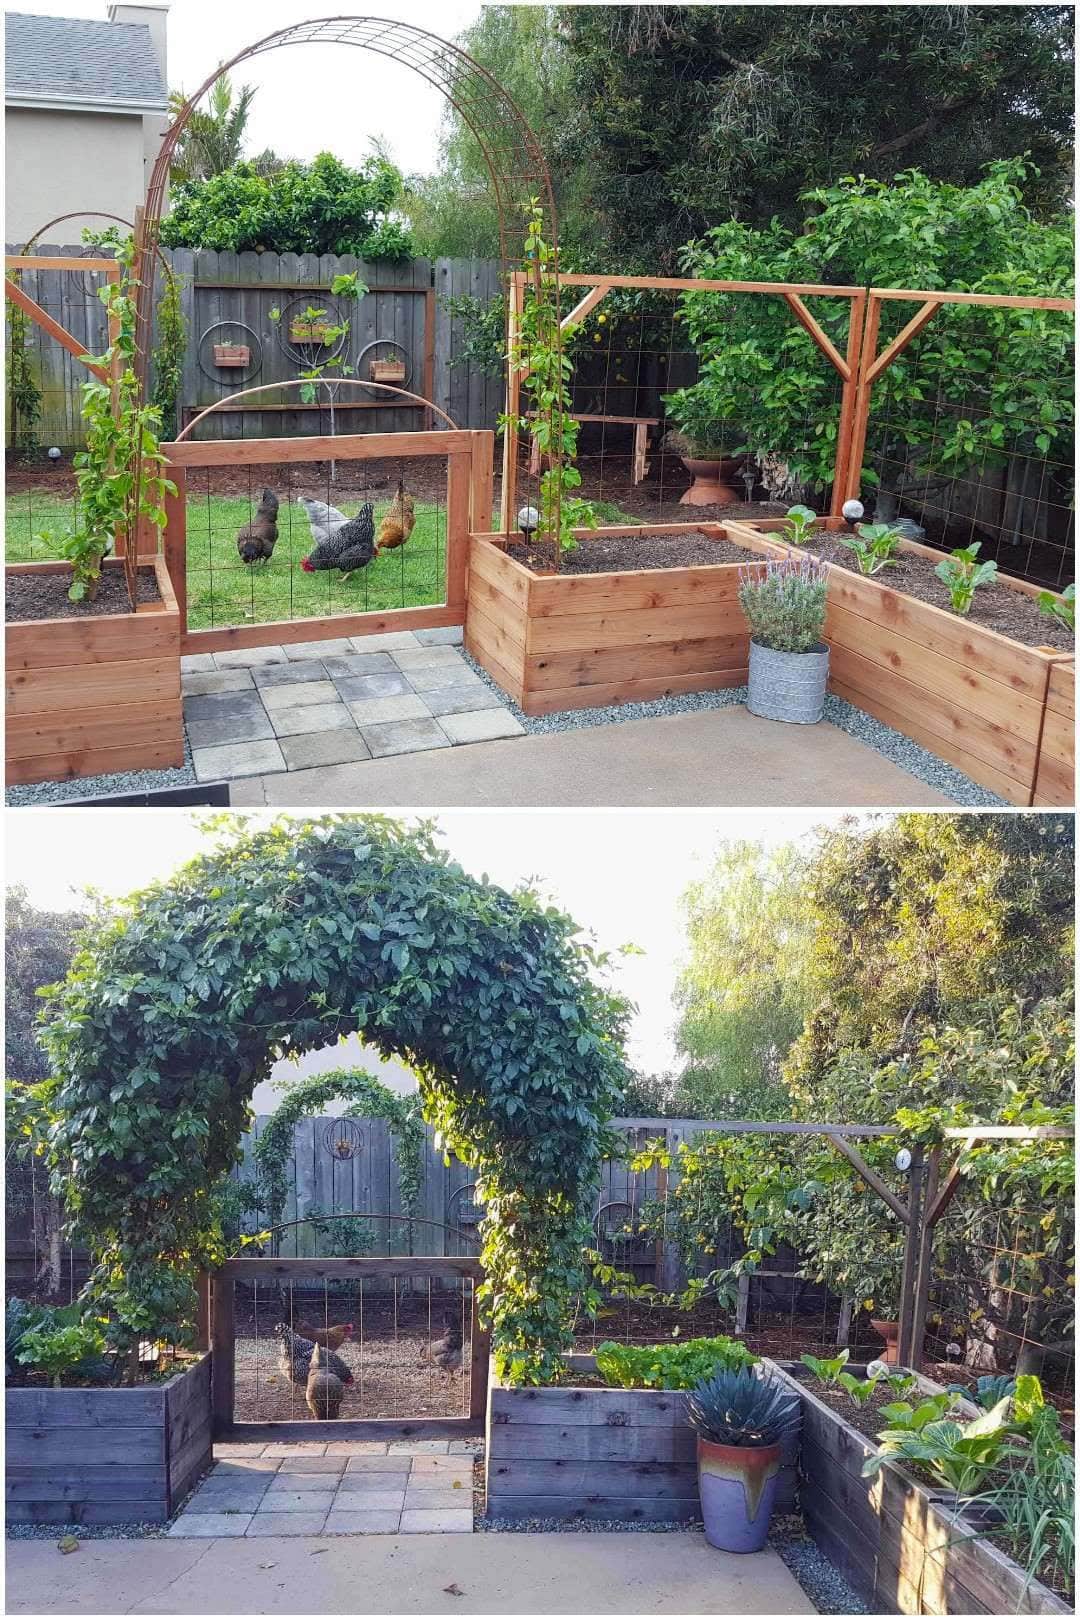
The Evolution of the Backyard Garden

Bottom: The patio garden in fall of 2018. The chickens free range the back yard on the other side of the raised beds.

Bottom half: Just after we finished enclosing the patio in early 2015. With raised garden beds, trellises and gates added to not only to create more space to grow food, but also exclude the chickens from this area. The patio garden is born!

Bottom half: February 2018, when we completed the new stone pollinator island. We left this area grass for a long time, for the chickens sake. And then they ate it all. So…

Bottom half: Summer 2018, a few months after the “pollinator island” was built, and starting to fill in nicely! The fencing keeps the chickens out.

Bottom: Summer 2018 ~ the summer of kale trees.

Bottom: Summer 2018. The passionfruit arch is a focal point, and also excellent privacy feature from the neighbor behind us!

Bottom: Winter 2018. I can tell it’s winter because Zoey is molting, hard.
66 Comments
Cathy Z
I just stumbled upon your site and LOVE it! Your home transformation is absolutely inspiring! Keep up the great work!
Sandra Dostalik
Hello! This is amazing! I’m using your raised bed plans to revamp my own at the end of this season! My bf and I are wanting to build a wooden fence like yours on our property; what type of lumber did you use for it?
DeannaCat
Hi there! Some of our fences are redwood, and some are cedar – both are great options, so it just depends on what is most readily available and affordable in your area. Thanks for being here!
Emily Journagan
I have seen in your garden small wire trellis-type things you bend over the bed (maybe to hold a row cover of sorts). What is that? Did you cut something or buy it that size?
Stacey
What is the color of your house! I love it 😍
DeannaCat
Hi Stacey! It is called “Cloud Burst” by Behr. Thank you!
Allison Hartley
She has a link to the hoops on one of the articles. Super hoops I think. They will probably show up in a search of her site.
Crissy
Wow! You sound just like my husband and I when we first bought our home (almost 23 years ago!!) How we worked every chance we got on our home, yard and gardens long into the evenings until we just couldn’t see anymore. And through the years how we watched it grow and evolve- so rewarding!! We have pulled out beds, changed the layouts, downsized a few beds (during the time of having two young children) and then changing things a bit more- it’s just a constant rewarding and fulfilling thing to place your time in.
Most all of my gardening friends were nearly double (and many more than that) of my age when I began my never ending journey of learning all I could about flower and vegetable gardening, canning, seed starting, greenhouses, composting (actually that bin that I was determined to make is what led me to my husband!) Such a fun journey that continues to grow with us.
My husband built our home on a 2 acre lot of land in Virginia which was farm land (and oh so full of crab grass- which we STILL to this day contend with). We have tried all the tricks of the trade and for many years thought we conquered, but alas, its truly evil crabbiness starting resurfacing! UGH!! Nonetheless, never give up- dig it all up and do it again and enjoy the spoils for a few additional years!
It is always such a great feeling when we drive back home and pull in to our home, look around and know- WE did this!! Awesome!
I hope you and your hubby enjoy your journey together and always remember that Rome wasn’t built in a day- enjoy that time and effort everything takes as it is so worth it! You have a beautiful home and lovely gardens and your hard work shows!!
Happy gardening! (sorry, but I’m not a short, sweet and to the point kinda gal!)
Candy Mersai
Loving learning from you as I am pretty much new at veggie gardening. I have had a few plots and currently renting one in the Brighton Avenue Community Garden…. we are in the same climate and zone so learning from you is going to be extremely helpful. Thank you for all your wonderful posts, tips, photos and encouraging words!! It’s awesome!
Dr. Mark
VERY nice yard and a great Blog.
Way to go WildCat!
DeannaCat
Hey Dr. Mark! Thanks for stopping by and taking a look. Funny timing too, since I am currently sitting here typing up notes for a gardening book feature interview thing I am doing later this week, and a question is about how and when I started my first very garden 🙂 Thank you for all your help and inspiration!
Amanda
Hi Deanna! I’ve been following you for about a year on IG and am always so inspired by y’all’s space! I hope to start making some changes to my new home soon too! In the backyard areas where you do not have pebbles/gravel, is it just brown mulch down on the ground? It doesn’t appear to be just dirt, but I can’t tell. Thanks! 🙂
DeannaCat
Hi Amanda! Yes, the backyard has mulch over the soil. We use a combination of shredded redwood bark and small redwood bark, which works well with the chickens. They churn it up and it breaks down (with their poop too, free fruit tree fertilizer!) and then we add more fresh stuff every year. Small-medium bark will take longer to break down and need less frequent replacing than the shredded stuff. I hope that helps! Cedar mulch is also awesome, but not good for chickens.
Tracy
CONGRATULATIONS and HAPPY 6 months to the blog! THANK YOU for sharing your knowledge, your passions, and your experiences with us. Thank you for inspiring me! Thank you for your transparency, vulnerability, and willingness to give what you know! It is appreciated ❤️. And tell Aaron we thank him for sharing YOU! Y’all make a great team! Thank you!!
Beverly
I love your garden! Question: how did you remove the lawn? Thanks!
DeannaCat
Hey there! We manually removed it with shovels, and edging/cutting shovels too. Once we just dug out about 2×2 ft squares at a time, getting sever inches deep, below roots. Another time we solarized it first (as we removed it in stages). Solarizing is the process of covering it in plastic for several weeks during the hottest time of year to kill it first, which is supposed to make it easier to remove and also kills seeds. Some people solarize, then lay cardboard on top, then mulch, and don’t bother removing it at all. Ours was very invasive weedy crabgrass, so we wanted that stuff GONE. We also laid sheets of rolled painters paper and commercial duty weedblock fabric down under the beds and pathways. There are some other sod removing machines that may be quicker and easier, but a) we couldn’t afford one b) we were worried about how deep the cut – might hit irrigation lines. I hope that helps!
Christina Lawson
I’m so happy to have found your blog. This is my first year of converting my Urban space to a homesteading version and I love it. I have Quail and call ducks now too. I am very inspired by your before and after garden pictures.
Jennifer
Your yard makes me smile! Great job.
Bianca
Thank you for sharing and in such wonderful detail. I love that you have achieved all of this on a modest sized block of land. You are going me some fantastic ideas for my own little patch.
Thank you!