
How to Make a DIY Rice Heating Pad
Learn how to make a natural DIY rice heating pad (or cold pack) in this easy step-by-step tutorial. It's easy, fun, inexpensive, and eco-friendly! Heat it in the microwave or oven.
Equipment
- Sewing machine
- Measuring Tape
- Sharp scissors
Ingredients
- 8-10 cups organic rice (raw, dry, uncooked. I like using Jasmine rice)
- a clean old or new pillowcase (or other durable 100% cotton fabric)
- sturdy 100% cotton thread
- lavender essential oil or other oil of choice (optional)
Instructions
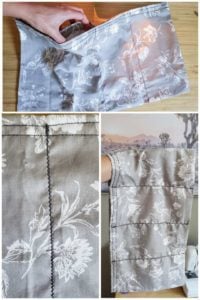
Create an "Envelope"
- Turn the pillowcase inside out, measure and mark a line 12 inches from the bottom closed-end of the pillowcase. (*See notes below if you're using other fabric, not a pillowcase)
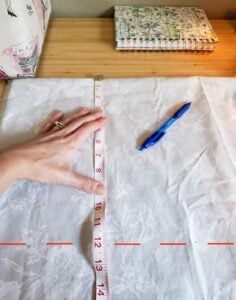
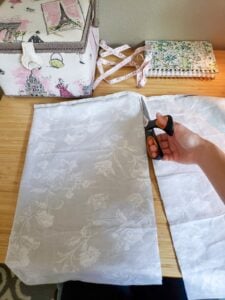
- Now cut along that line. You should now have a rectangle that is 12” wide and 20” long - that is open on top but still sewn shut across the long bottom and two sides (creating an “envelope” shape).
Hem the Edges
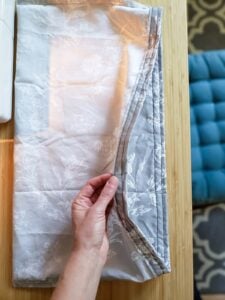
- Hem or finish the freshly cut top edges of fabric. Keeping the envelope inside out, roll the top perimeter of fabric down and out by 1 inch. Use straight pins to hold the folded edge in place.
- Using a straight stitch on the sewing machine, sew around the top border, but don't accidentally sew the sack shut! Add one or two rows of stitching.
Create Rice Pockets
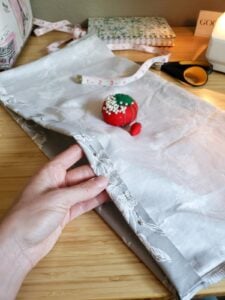
- Next, turn the fabric envelope right-side-out.
- Measure the heating pad length and mark three evenly-spaced lines to divide the sack into four equal pockets to hold rice. Mark the lines with pins. (I find it's easiest to first measure and find the halfway point, and then divide each remaining side in half to create four even sections.)

- Using the sewing machine, add a straight stitch down each of the three lines you created. Add a backstitch at the start and finish of each. I then follow over each straight stitch with a zigzag stitch, for a little extra support and flair.
- NOTE: My rice pockets were about 5 inches each in this example. It’s fine if your dimensions vary slightly from mine, but I find 4 to 5 inches is the ideal pocket size for the rice. If too much larger, the rice will move around too freely and create an uneven, lumpy rice heating pad to use. Furthermore, if the pockets are too small (e.g. 3 inches or less) the rice pack becomes overly stiff and less comfortable to use, and more difficult to fill with rice.
Mix Rice and Essential Oils (optional)
- Add the rice to a large mixing bowl. (For this size heating pad, I used just under 10 cups of rice.)
- Sprinkle the rice with essential oils of choice. I start by adding 15 to 20 drops (about 1/4 tsp) of lavender essential oil,I stir the rice to distribute the oils and coat it well, give it a sniff, and may add another 10 to 15 drops more.
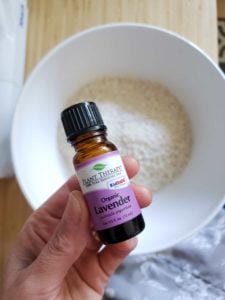
- Ensure that the oils and rice are thoroughly mixed. Let them sit and soak together in for a couple of minutes.
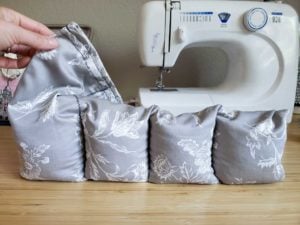
Fill with Rice
- In this example, I used 2 ¼ cup of rice per 5”x 11” pocket, but previously never measured and went by feel instead. Do not overfill or the pack will be too stiff, and difficult to sew closed.
- Carefully add the rice to each pocket. I find it easiest to place the sack inside the bowl to catch any spills. Start by filling one pocket.

- To assess how full it will be once sewn shut, pinch the top of the compartment closed, lay the pack flat on the table, and spread the rice out evenly inside. Our packs are usually about 1/2 to 3/4-inch thick once completed and laying flat on a table.
- Once you have one filled to your liking, pin the top closed and continue the same process for the following pockets. Check if the sections are evenly full by standing the heat pack on its bottom, pocket openings facing up, and compare the levels of rice in each one.
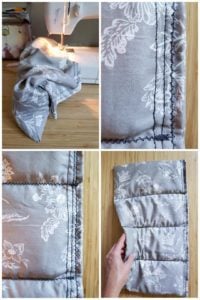
Sew It Closed
- It can be a little tricky to work around the rice, but you should be able to keep the end full of rice to the left, sitting alongside your sewing machine on the table, with enough empty fabric space to reach over to your needle.
- To sew the rice heating pad closed, I ran one straight stitch between the two existing hem seams we previously created in Step 2. Then, I add an additional zigzag stitch, tracing over the straight stitch closest to the top edge.
Microwave Instructions
- Heat it in the microwave for 2.5 to 3.5 minutes. Every microwave varies so experiment. I have found 3 minutes to be the sweet spot in ours.
- Try 2.5 minutes maximum first, and to never heat it more than four minutes at a time. If heated too long, the rice can actually burn in the microwave, which will make the heading pad smell like burnt rice!
- WARNING: Due to the freshness of the rice and essential oils, you may find your pack to be quite steamy at first - which can cause burns more easily than heat alone. Use caution against bare skin and let the pack cool down as needed.
Heating in the Oven
- Place the rice heating pad in inside a glass baking dish and warm it in the oven on 200°F or approximately 15 minutes.
Using as a Cold Pack
- Place your rice heating pad inside the freezer for several hours to create a soothing cold pack.
Notes
*If you are using fabric other than a pillowcase, cut two pieces of fabric to 12-13 inches wide and 21-22 inches long, giving yourself that little extra buffer to finish the edges. Keeping the fabric inside out, sew the two shorter edges and one long edge together, creating the same envelope the pillowcase accomplished for us. Or, you could cut one piece at 24” by 21-22”, fold it in half “hamburger style” and sew it up the two short sides. That way, the bottom of the envelope is one contiguous piece instead of an additional seam.
Tried this recipe?Let us know how it was!