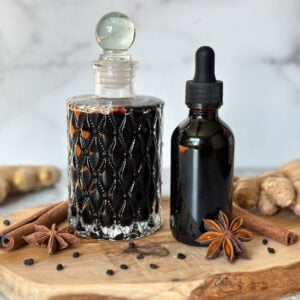
Homemade Elderberry Tincture Recipe (Dried or Fresh Berries)
An easy homemade elderberry tincture recipe for natural immune support. For potency and safety, it's best to use dried berries but I've also included tips on how to safely use fresh elderberries (including frozen raw) as well as optional ingredients to enhance the flavor or medicinal benefits.
Equipment
- 1 Glass jar with a tight leak-proof lid. You can use any size jar to make as little or as much as you desire. The yield of finished tincture will be about about half the volume of the jar (e.g. I get about 8 ounces of tincture when using a 16-oz pint jar)
- Fine mesh strainer and/or organic cheesecloth. I like to use cheesecloth so I can squeeze out every last drop!
- Final storage containers such as one or two-ounce amber dropper bottles
Ingredients
Key Ingredients
- Dried elderberries (preferred for potency, safety, and shelf life) though you can also use frozen or fresh elderberries if they’re cooked or dried first. See cooking and safety tips below. You’ll need enough berries to fill your chosen jar about halfway to two-thirds full. We love these organic dried elderberries and use about 1 cup for a pint-sized batch of tincture.
- Alcohol – neutral, unflavored spirit (such as vodka or grain alcohol) that’s at least 80-proof or 40% alcohol minimum, up to 100 proof like Everclear or 200-proof food grade organic ethyl alcohol for even better extraction. (*See notes at the end for non-alcoholic alternatives)
Optional ingredients
- Ginger - I like to add a few slices of fresh ginger to the jar, though you could also use 1/2 to 1 tsp of ground ginger powder per pint jar.
- Cinnamon - 1 to 2 whole cinnamon sticks or up to 1 tsp ground powder per pint jar.
- Echinacea - simply swap a portion of the elderberries with dried echinacea root, still only filling the jar about halfway full in total (or just over).
- Whole star anise - one or two per pint jar. Keep in mind it tastes like black licorice!
- You can add any combination of dried, edible, medicinal herbs such as dried rose hips, astragalus, reishi mushroom and more.
Instructions
Fill Jar
- Fill a clean jar about halfway to two-thirds full of dried elderberries.
- If you’re using fresh berries, I highly recommend cooking or drying them first (see instructions below) and ensure you remove all stems and leaves. If you chose to cook your fresh berries on the stovetop, only fill the jar halfway or just under.
- Add other optional ingredients such as cinnamon sticks, ginger, or other dried edible herbs or spices of choice.
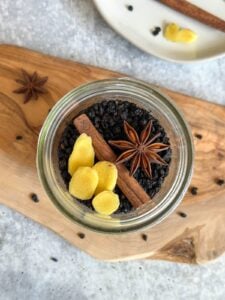
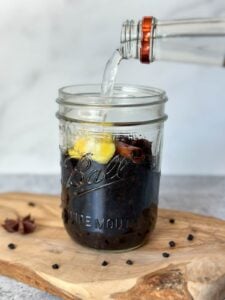
- Pour the alcohol over the elderberries until the jar is nearly full, leaving about 1/2 to 1 inch of headspace on top.
Infuse
- Add a tight-fitting lid and shake to mix the contents of the jar. If you’re using a standard metal mason jar lid, I recommend placing a piece of parchment paper or wax paper below the lid to prevent corrosion.
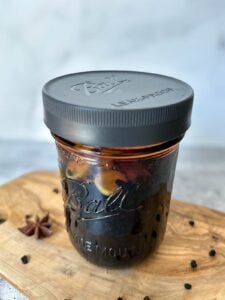
- Set the jar in a dark location such as kitchen cupboard or pantry to infuse for at least 4 to 6 weeks, up to several months.
- If possible, try to remember to gently shake the jar every few days to help it mix and infuse – especially during the first week or two.
Strain and Bottle
- Place a fine mesh strainer over a bowl or large measuring cup. I like to line the strainer with organic cheesecloth for extra filtration, and so I can better squeeze all of the liquid out of the elderberries.
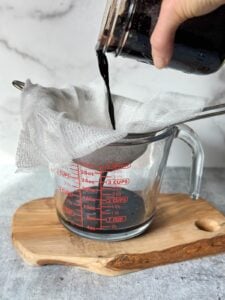
- Dump the contents of the jar into the strainer and/or cheesecloth, and allow it to drip drain for a couple minutes. Then firmly press and squeeze the elderberries to extract as much liquid as possible. (You may want to wear gloves as elderberries can stain your hands)
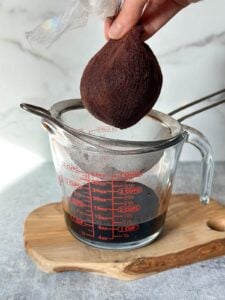
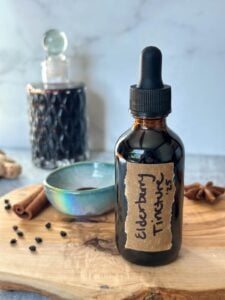
- Finally, use a small funnel to help transfer the finished elderberry tincture into final storage bottles (I fill at least one dropper bottle and then store extras in a glass jar)

- Add a date and label
Storage and Shelf Life
- Store your homemade elderberry tincture in a cool, dark place away from direct sunlight. A properly made alcohol-based tincture will stay good for several years .
- A tincture made with cooked elderberries (stovetop) will contain more fruit juice, which dilutes the alcohol and will likely shorten the shelf life.
- Watch for signs of spoilage including mold or off flavor/odors. Refrigeration can help extend the shelf life.
Dosing and Use
- A common recommended serving size for adults is about 10 drops of elderberry tincture (1/2 mL or 1/2 a dropper full) for maintenance or preventative measures, and up to 20 drops or 1 dropper full (1 mL) when experiencing cold or flu symptoms. Repeat up to four times per day as needed.
- Children over 5 years old should take half the adult serving. Alcohol-based elderberry tincture is not recommended for babies or toddlers.
- I recommend diluting the tincture with a little water or juice to make the taste more palatable if needed.
To Use Fresh Berries (Cook or Dry First)
- Raw elderberries, stems, and leaves contain cyanogenic glycosides that release toxic cyanide and can cause severe gastrointestinal issues - so it's best to fully dehydrate or cook fresh berries (raw or frozen) first.
- On the stovetop: place fresh elderberries in a saucepan with a tiny splash of water (just enough to prevent scorching) and simmer for 20 to 30 minutes over medium heat. However, the added moisture can dilute your tincture and reduce the shelf life.
- Recommended: dry or bake them in the oven or in a food dehydrator at 135 to 140F or greater until completely dry. This neutralizes the toxins and is better for making tincture since it doesn’t add extra moisture.
- Once they’re dried or cooked, you can follow the steps above.
Notes
*NOTE: We prefer to make our elderberry tincture recipe with alcohol since it's the most efficient and effective for extraction, resulting in the most potent tincture possible. However, you can also make tincture using a vegetable glycerin or vinegar base - though they aren't as strong and have a shorter shelf life.
Tried this recipe?Let us know how it was!