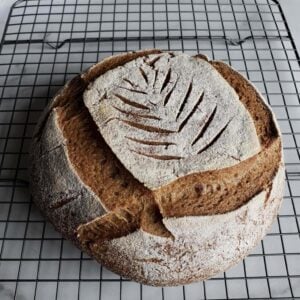
Easy Gluten-Free Sourdough Bread
No gluten? No problem. Come learn how to make gluten-free sourdough bread at home. Without kneading or "stretch and folds", this recipe is even easier to make than wheat sourdough! This recipe creates a wholesome homemade GF loaf that is soft and spongy in texture, full of small air bubbles, slices beautifully, and toasts to superb crunch.
Equipment
- Large mixing bowl
- Kitchen scale
- Measuring cups
- Cast iron combo cooker or dutch oven (you can also use a regular bread loaf pan)
- Lined banneton bread basket, for shaping and proofing dough (not required if baking in a classic bread pan)
- Bread lame for scoring optional)
Ingredients
- 110 grams active gluten-free sourdough starter
- 450 grams total GF flour - we use 175 grams of organic brown rice flour, 150 grams of millet flour, 100 grams of sorghum flour, and 25 grams of buckwheat flour
- 3 tbsp psyllium husk
- 10 grams salt - sea salt, kosher salt, or Himalayan salt is preferred over iodized table salt
- 1.5 to 2 cups filtered water, room temperature and filtered/non-chlorinated (*see water notes below)
- 1 tbsp honey (optional)
Instructions
- Several hours before making the dough, feed your starter and allow it to reach peak activity level.
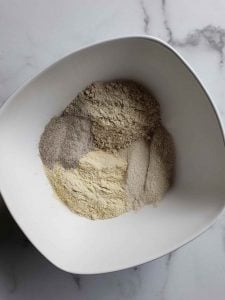
- Combine all dry ingredients (flours, salt and psyllium husk) in a mixing bowl.
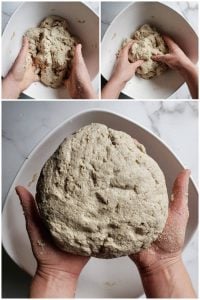
- Add wet ingredients (starter, water, and optional honey). Mix with a utensil first, and then you may want to use clean hands to thoroughly mix further. Or, use a stand mixer.
- Form the dough into a fairly smooth ball, and set it in the bottom of a bowl. (You don't need to knead the dough, or perform "stretch and folds" as you would with gluten-based sourdough.)
- Cover the bowl with a damp cloth. Set it aside in a location that is as close to 75F as possible to "bulk ferment" for 3-5 hours.
- After an average of 4 hours of bulk fermentation at room temperature, gently transfer the dough into a flour-dusted banneton proofing basket. (Or if you're not baking in a Dutch oven, transfer the dough into a parchment-lined or greased bread loaf pan at this time.)
- Cover the banneton (or pan) with a damp lint-free towel. You can leave it at room temperature for another hour (optional) and then move it to the refrigerator, or just refrigerate immediately after transfer.
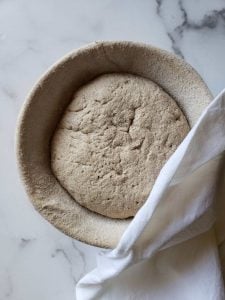
- Allow the dough to cold-proof the dough overnight (7 to 12 hours). Leave it in the fridge until immediately before transferring to hot pre-heated baking pan.
- Preheat the oven to 475 degrees F. If you’re using a dutch oven or combo cooker, place it in the oven to preheat for one hour as well.
- After an hour of preheating the baking pan, use the cutting board trick (see Note 2 below) to carefully transfer the cold dough out of the banneton and into the hot combo cooker or dutch oven. Score the top of the loaf with a bread lame if desired.
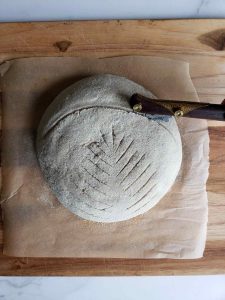
- Bake the loaf covered for 55-60 minutes, and then remove the lid and bake for an additional 5-10 minutes uncovered. (See Note 3 below)
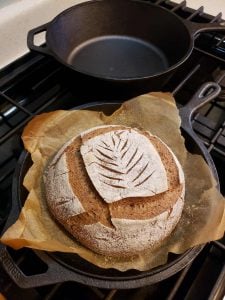
- After baking, immediately transfer to a wire rack to cool.
- Let the sourdough bread loaf cool at room temperature for several hours before cutting. If it's cut while still hot, moisture (steam) will escape and can make the bread more gummy, dry out, and get stale faster.
- Store the finished gluten-free sourdough bread wrapped in a dry lint-free cloth towel, and then inside a brown paper bag for up to a week. Toasting or lightly broiling the bread helps revive stale bread. Freeze some while still fresh (the first day) if you think you won't be able to finish the loaf within 3-4 days.
Notes
- WATER RANGE: 2 cups of water works well for the brands and types of flour we used, and for our climate. However, some people have commented that the dough was too wet. Start on the lower end of the called-for water and work your way up as necessary to achieve the desired consistency.
- To get the dough out of the proofing basket, place a piece of parchment paper (cut just larger than the basket) and a cutting board on top. Holding it all together, quickly flip the banneton and cutting board upside down. The dough should now be sitting on top of the cutting board and parchment paper. Gently lift the basket away.
- If the bottom of your loaf seems to brown more than you'd like, try adding an empty baking or cookie sheet to the empty oven rack directly below your combo cooker or dutch oven. It deflects some of the heat away from the bottom of the loaf, reducing burning or browning.
Tried this recipe?Let us know how it was!