

How to Ferment Chicken Feed For Healthier Hens and Eggs
Come learn how to ferment chicken feed, plus with why fermented feed is so great for your chickens’ health! It’s quick and easy to make, and can actually help save money. Then, you’ll reap the rewards with more nutritious eggs too!
We’ve been making fermented feed for our chickens for years, and I have yet to meet a bird that doesn’t prefer fermented grains to plain old dry food. Your flock will love it!
Would you like to save this?
Disclosure: Homestead and Chill is reader-supported. When you purchase through links on our site, we may earn an affiliate commission.
RELATED: If you’re new to raising backyard chickens, come learn what can chickens eat (and can’t eat) – including healthy treat ideas, boredom busters, our DIY flock block recipe, and toxic foods or plants to avoid.
What is fermented chicken feed?
Fermented chicken feed is simply regular chicken feed that has been allowed to ferment by soaking in water for a few days under the right conditions. During that time, beneficial lactobacillus bacteria naturally found in the environment (including on chicken feed) converts starch and sugar into lactic acid bacteria (LAB). This encourages the formation of gut-healthy probiotics while also lowering the pH to prevent growth of harmful bacteria – much like making homemade sauerkraut.
Fermented can be offered as a primary food source or as an occasional treat. When our chickens are molting or otherwise under the weather, we keep the fermented feed in ample supply! They need all the extra nutritional support they can get during those times.

4 Benefits of Fermenting Chicken Feed
1) Improved Digestion and Nutrient Absorption
Fermented chicken feed is easier to digest and increases nutrient absorption. In addition to being soft and gentle on their digestive system, soaking grains reduces phytic acid, an “anti-nutrient” naturally present that can interfere with the absorption of nutrients and minerals. Fermentation has also been shown to enhance the content of certain vitamins in foods, such as Vitamin B.
2) Added Probiotics and Immune Health
The ample probiotics found in fermented chicken feed are stellar for digestion, immunity, and improved gut health – which is directly tied to total body health. Research show that animals who receive a steady intake of probiotics through fermented feed have a more robust immune system than those on a standard dry feed diet.
For instance, this study found that the lactic acid bacteria in fermented chicken feeds lowers the pH of chickens intestines enough to ward off acid-sensitive bacteria like E.Coli and Salmonella. Meaning, chickens consuming fermented feed are less likely to develop infections and other diseases, and live longer, less complicated lives. For you, that means less stress and vet bills, and healthier eggs!
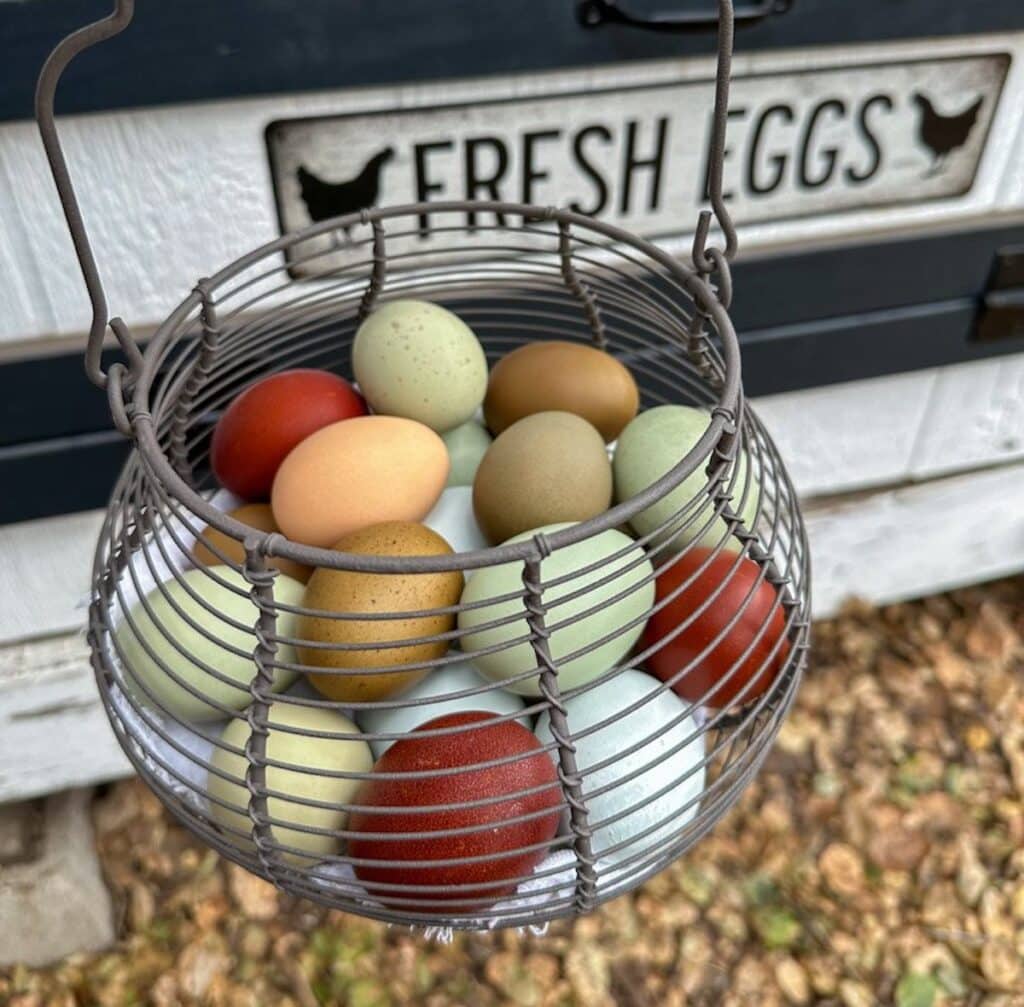
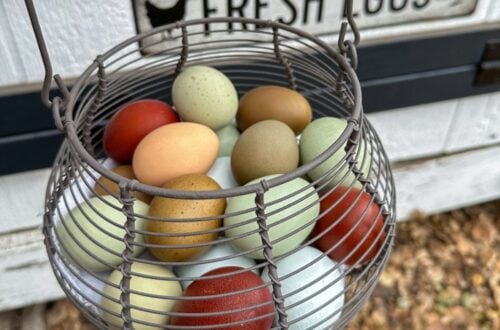
3) Better Quality Eggs
You know the saying “you are what you eat“? When your chickens receive superior nourishment, the eggs they lay for you are supremely nutrient-dense in return.
According to a study published in the Journal of British Poultry science, chickens that were fed fermented chicken feed showed increased egg weight, shell thickness, and shell stiffness over chickens on dry food. When chickens have nice firm eggshells, they’re far less likely to have issues with laying soft-shell eggs or becoming egg-bound; both of which can be life-threatening.
4) Save Feed and Money
Last but not least, making fermented chicken feed makes their food (and your dollar) stretch further! As the feed soaks, it expands in volume so your birds get full faster. At the same time, they digest more nutrients than ever! So, fermenting chicken feed is an inexpensive way to improve the nutritional value of basic dry feed while also consuming less of it.
Supplies Needed
- A container to ferment chicken feed in, such as a large glass jar, bowl or bucket. It should be large enough to hold a day or two worth of feed for your flock, plus extra room for water, stirring, and expansion. A quart or half-gallon mason jar worked well when we had just a handful of chickens. Now we ferment chicken feed in a 2-gallon bucket for our flock of 13.
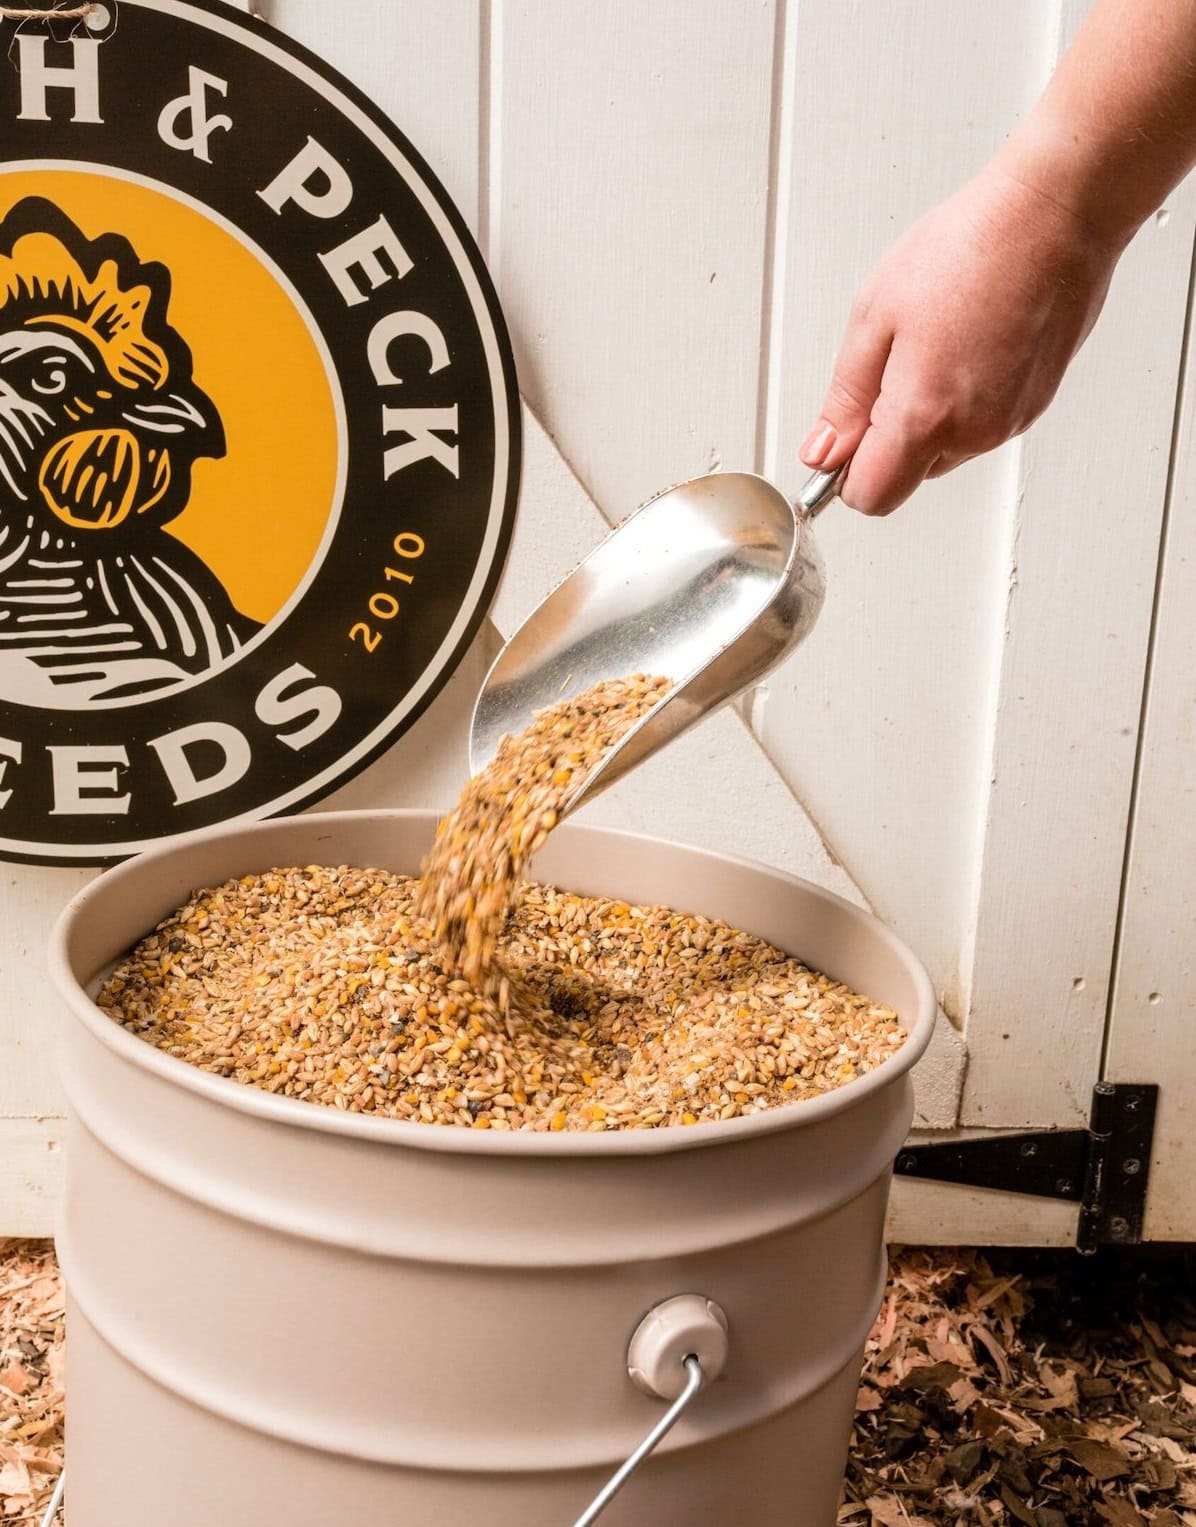
- Chicken feed. You can ferment crumble, pellets, or whole grain chicken feed – including chick starter! We’ve found that whole grain feed holds up the best, as the others get more mushy as they expand. We use our long-time favorite organic layer feed from Scratch and Peck. You can even ferment scratch as a treat, though it shouldn’t replace their layer feed.

How to Ferment Chicken Feed
1) Mix Feed and Water
First, add enough dry chicken feed to the container for one or two daily servings for your flock. For reference, the average adult chicken will consume about 1/4 to 1/2 pound of food per day. For our Scratch and Peck mash grain feed, that equates to about 1/2 cup of food per chicken per day (weighed dry). We typically ferment enough to serve over the course of two days.
Next, pour water over the top so that the feed is fully submerged, plus a couple inches of room on top to expand.
How much feed should I ferment?
If you plan to offer fermented feed as their primary food source, do your best to estimate a day or two worth of feed for your flock size. To offer it regularly, you’ll need to start staggered batches every few days (date the containers) in order to have a finished batch available at all times. Or, to offer fermented feed as an occasional treat (with dry food still available), simply make one batch at a time; the amount doesn’t need to be exact.
2) Cover and Ferment
Cover the top of the container with a loose-fitting lid, plate, or other makeshift lid. It doesn’t need to be air tight! The goal is to prevent drifting mold spores from floating in, but allow fermentation gasses to escape.
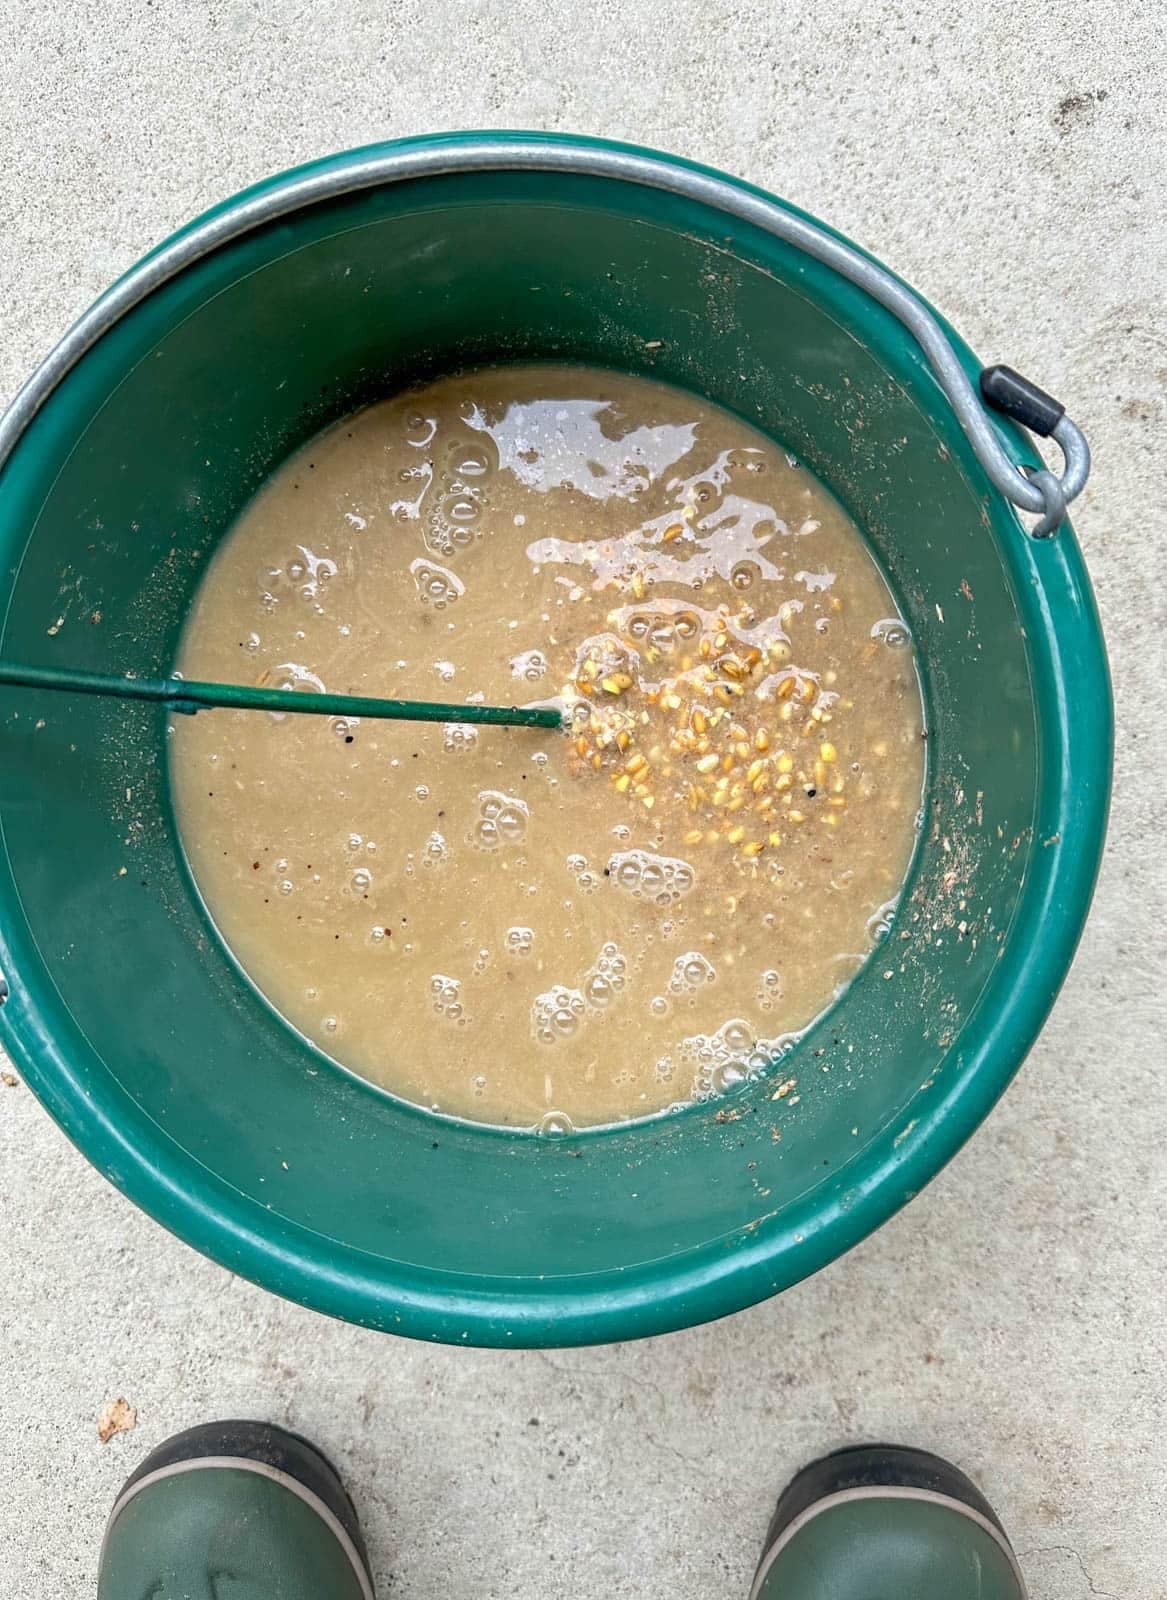
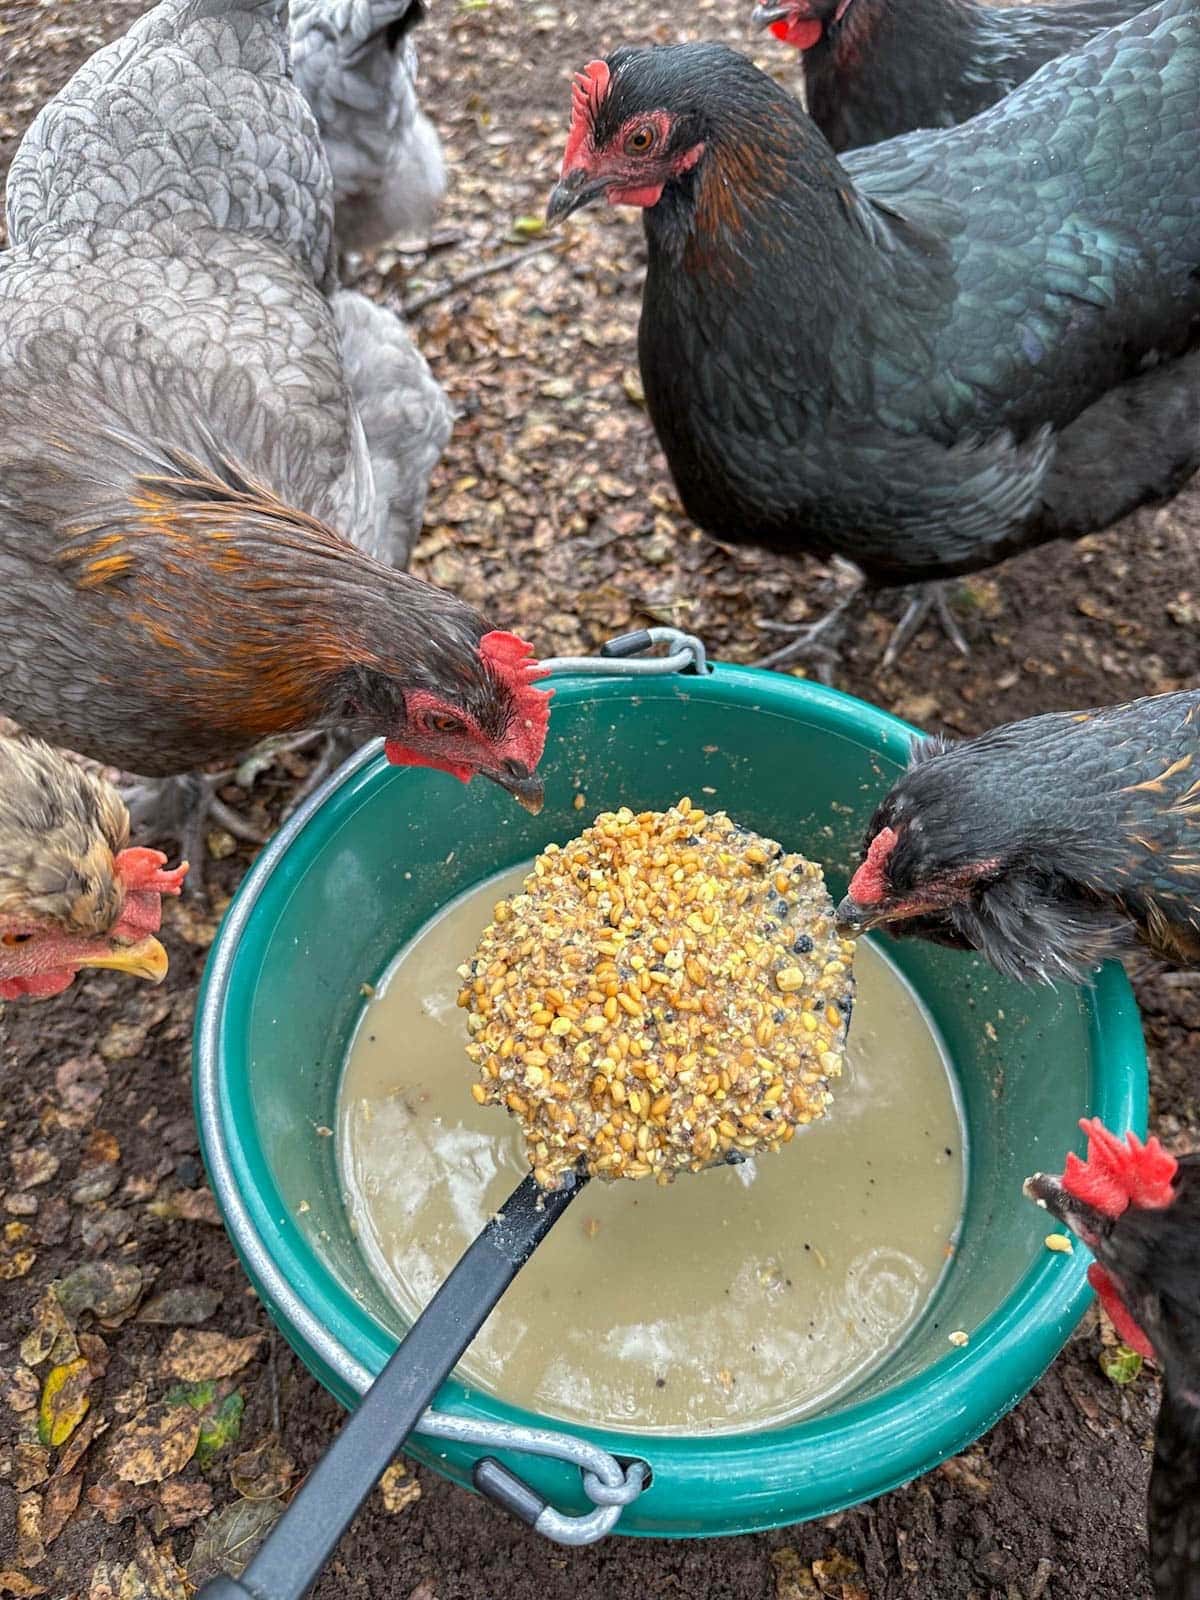
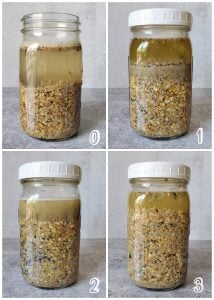
Set the container in a location with moderate temperatures and out of direct sunlight for three to four days to ferment. Check and stir it each day. Add additional water if the feed has absorbed it all and is no longer submerged. Floating or exposed feed may mold!
By day or two or three, you should see small bubbles on the surface and/or within the feed mixture. It should smell slightly tangy, sour, and sweet – similar to yogurt or yeast. (Ours smells a tad fishy since the feed contains kelp meal.) The liquid will also get increasingly cloudy. If the fermented chicken feed develops mold or putrid odors, do not feed it to them!
While fermented chicken feed is safe to consume beyond day three or four, it gets increasingly sour and may become less palatable for your spoiled chicken’s taste buds.

3) Drain
If the fermented chicken feed hasn’t absorbed all of the water by serving time, you can either drain off the excess or reserve the liquid to jump start a new batch. Soaking fresh feed in already-fermented brine will actually put the next batch about a day ahead of schedule! However, I wouldn’t continue to use the same brine more than a couple times or it will become too sour.
However, the feed will spoil faster when it’s no longer submerged in its liquid “bath”. So if you plan to feed over the course of two days, simply scoop out half on day three and then drain/use the rest on day four.
TIP: If you have a large flock and would like to regularly make fermented feed, consider making a DIY self-draining bucket system! Drill many small holes in the bottom of one 5-gallon bucket, nestle it inside another 5-gallon bucket, and then fill with food and water to ferment. Once it’s done, simply lift the top bucket and the liquid will drain away into the lower bucket.
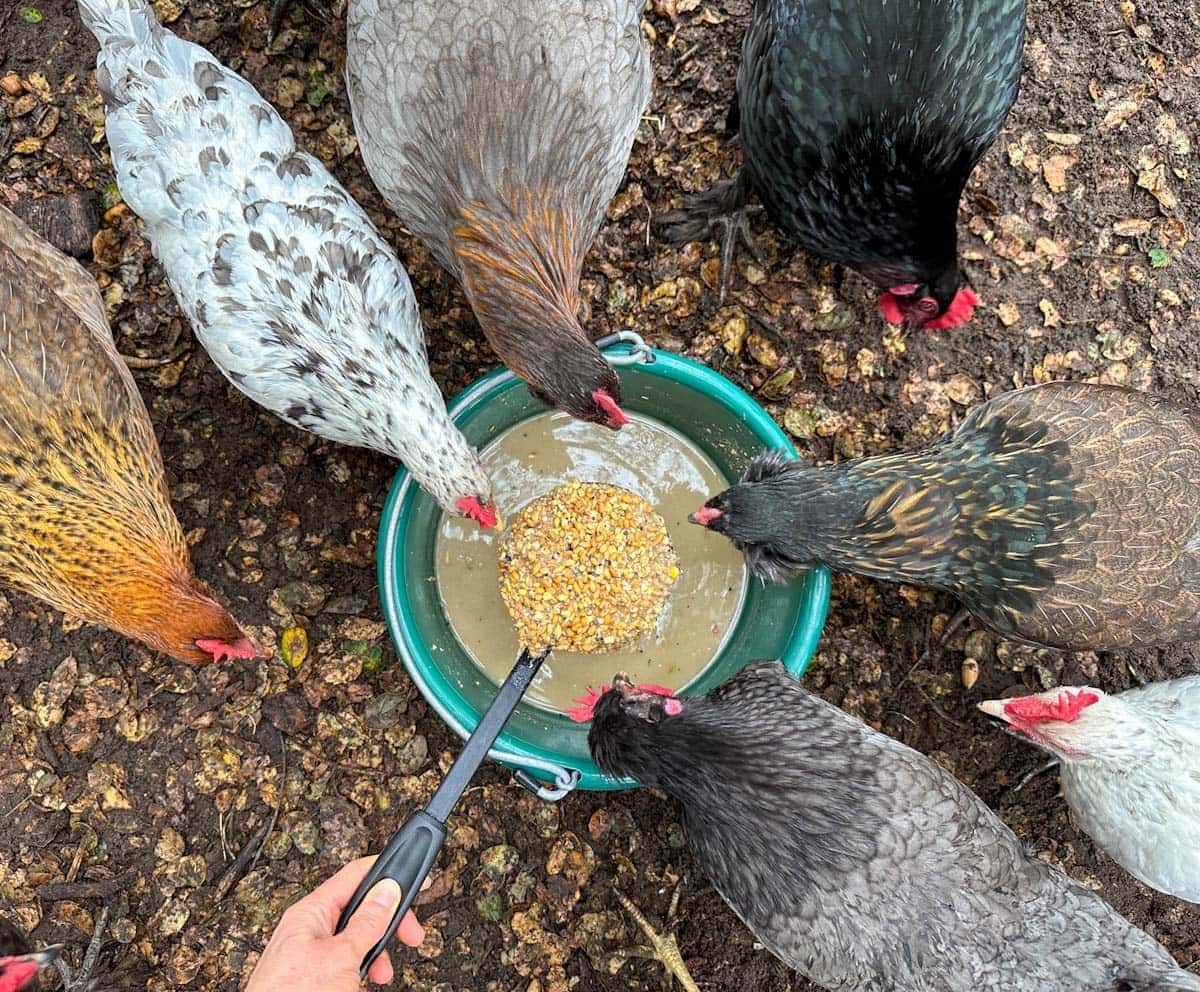
4) Feed
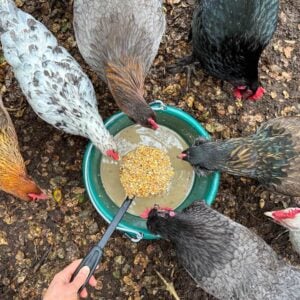
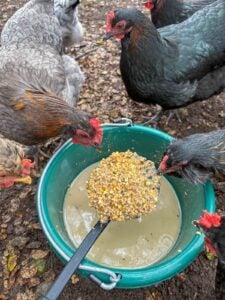
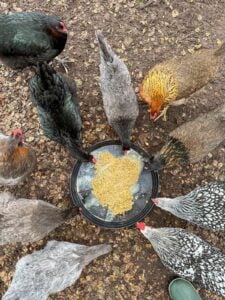
Now for the best part! Serve the fermented feed in a tray or dish that all of your chickens can eat from. For our current flock of 13, we usually spread it out between two wide shallow repurposed plant saucers so everyone has room to gather round and enjoy. I love listening to their happy little peck-peck-pecks on the tray!

Simple, effective, and worthwhile!
In short, making fermented chicken feed is an easy and inexpensive way to give your girls a boost! It can lead to healthier chickens, better quality eggs, and potentially lower feed costs. What’s not to love about all that? I hope you found this article helpful and interesting. If so, please spread the love by leaving a review below! Above all, I hope your chickens enjoy their new feed!
You may enjoy these related articles:
- Sprouted Seeds: A Health Treat for Backyard Chickens
- Top 10 Chicken Coop Supplies That Will Make Your Life Easier
- 10 Ways to Keep Chickens Cool During Hot Summer Weather or Heat Waves
- Tips on Caring for Chickens During Cold Winter Weather
- Feeding Chickens Eggshells or Oyster Shells for Essential Calcium
- Best Practices for Storing & Washing Fresh Backyard Chicken Eggs
- When Do Chickens Start Laying Eggs? 5 Telltale Signs It’s Soon!
- Top 18 Chicken Breeds for Your Backyard Flock
How to Make Fermented Chicken Feed
Equipment
- Large glass jar, mixing bowl, bucket, or other container (BPA-free preferred)
Ingredients
- 1-2 servings chicken feed of choice (for the whole flock) including whole grain feed, pellets or crumbles
Instructions
- Check the serving recommendations for your chicken feed (e.g. 1/4-1/2 cup per chicken per day). Then, choose a large enough container to fit one or two daily servings of feed for your flock, plus some extra room for water, expansion, and stirring.
- Add enough chicken feed to the container for one or two days servings for your flock. We usually ferment enough to serve over two days.
- Pour water over the top of the feed. Add enough so that the feed is fully submerged and has a couple inches of room to expand.

- Cover the top of the container with a loose-fitting lid, plate, or other makeshift lid. It doesn’t need to be air tight.
- Set the container in a location with moderate temperatures for three to four days to ferment (such as out on the counter, in the garage, etc).
- Check and stir it each day. Add additional water if the feed has absorbed it all.

- After 3 to 4 days (our chickens prefer day 3) give them the fermented feed. If it hasn’t absorbed all of the water, you can either drain it off and discard, or reserve the liquid to jump start a new batch of fermented feed.
- However, the feed will spoil faster when it's no longer submerged in its liquid "bath". So if you plan to feed over the course of two days, simply scoop out half on day three and then drain/use the rest on day four.

- Repeat as desired, and develop a schedule. Since it takes a few days to ferment, some folks start staggered batches every couple of days (date the containers) in order to have a finished batch of fermented feed available at all times.


124 Comments
Robert Lipstreu
This is incredibly helpful! What about using beer trub instead of water?
Aaron (Mr. DeannaCat)
Hi Robert, so glad you found the article helpful! You can likely use beer trub although I am not sure how much of trub is made up of liquid versus spent grains or hops? The chicken feed will soak up quite a bit of liquid so you may need to add some water anyways. Hope that helps and good luck!
Brandy
Using your recommendations above, we have been fermenting feed as a free-choice option for our birds for a few weeks now and they love it. The process is so easy and you lay it out so clearly. We have been using fermented feed for both our laying hens and our chicks and both groups prefer it to their dry feed.
Thank you for all the work and time you put into each of your posts. I have been a following along for years and am always impressed with how clear, well written, and helpful your content is. It is clear you love sharing what you have learned and we all can happily glean from your experience. Thank you 💛
Aaron (Mr. DeannaCat)
Hi Brandy, thank you so much for the kind words and we are so glad your chickens enjoy their fermented feed! Thanks for sharing your experience and for your support of Homestead and Chill!
Linda
Now that it’s getting colder here in Indiana do I still feed my girls fermented food? It seems to me it would freeze before they eat it all. I put sunflower seeds in maybe some sort of fruit or even oatmeal in what I hope helps them. Ps they are molting and need the sunflower for calcium correct. Thank you. Linda
Aaron (Mr. DeannaCat)
Hi Linda, if you are experiencing freezing weather, chances are you cannot offer your chickens fermented feed as their sole food source. Yet, you can still augment their diet by offering them smaller amounts at a time where they can eat it all at once more or less. Chickens need free choice calcium to form solid shells when they lay eggs but when they are molting, they need more protein. Offering them sunflower seeds and meal worms as a snack is a great way to get your hens the extra protein they need while molting. Hope that helps and good luck!
Kathy
I actually have a question about fermenting crumbles and pellets. Does it break down to far.
Aaron (Mr. DeannaCat)
Hi Kathy, we found the crumble/pellets to break down into a mushy porridge type and the aroma was a tad off putting to us but your chickens likely won’t mind. Good luck!
Marilyn
How many times can I strain and reuse the same liquid as a starter? My chickens appear to be benefiting from eating the fermented feed, made according to your recipe, a couple times a week. I am glad you’re out there teaching us so many wonderful things. Thank you.
Aaron (Mr. DeannaCat)
Hi Marilyn, you can use a small amount of the previous ferment liquid to help jump start your next ferment but it’s a good idea to use some fresh water as well. In fermenting, whether fermenting food for ourselves or food for chickens, it is typically recommended to not use all of the brine from a previous ferment as that may make your next ferment, skip a couple stages in the fermentation process. Hope that helps and it’s great to hear your chickens are benefiting from the fermented feed!
Brenna
Thank you for describing the process! I tried this with crumbles and after 2 days it smelled awful; by day 3 it smelled like straight up vomit and was black on the bottom. I obviously didn’t feed it to the chickens but do you have any thoughts as to what happened? I watered, stirred, etc. Any insight would be appreciated!
Aaron (Mr. DeannaCat)
Hi Brenna, the fermented chicken feed will have a slight smell to it but the crumble or pellet likely has even more of a smell to it than whole grain feeds when fermented. In all, it could have still fermented just fine, it just really depends on what is in the crumble feed itself regarding the black stuff on the bottom. Hope that helps.